Manage Availability Page Overview
On the Manage Availability page, you can control when items and modifiers are available across different branches, as well as set availability times for integrated channels. Below is a quick overview of the main elements on this screen and how to use them to configure availability settings.
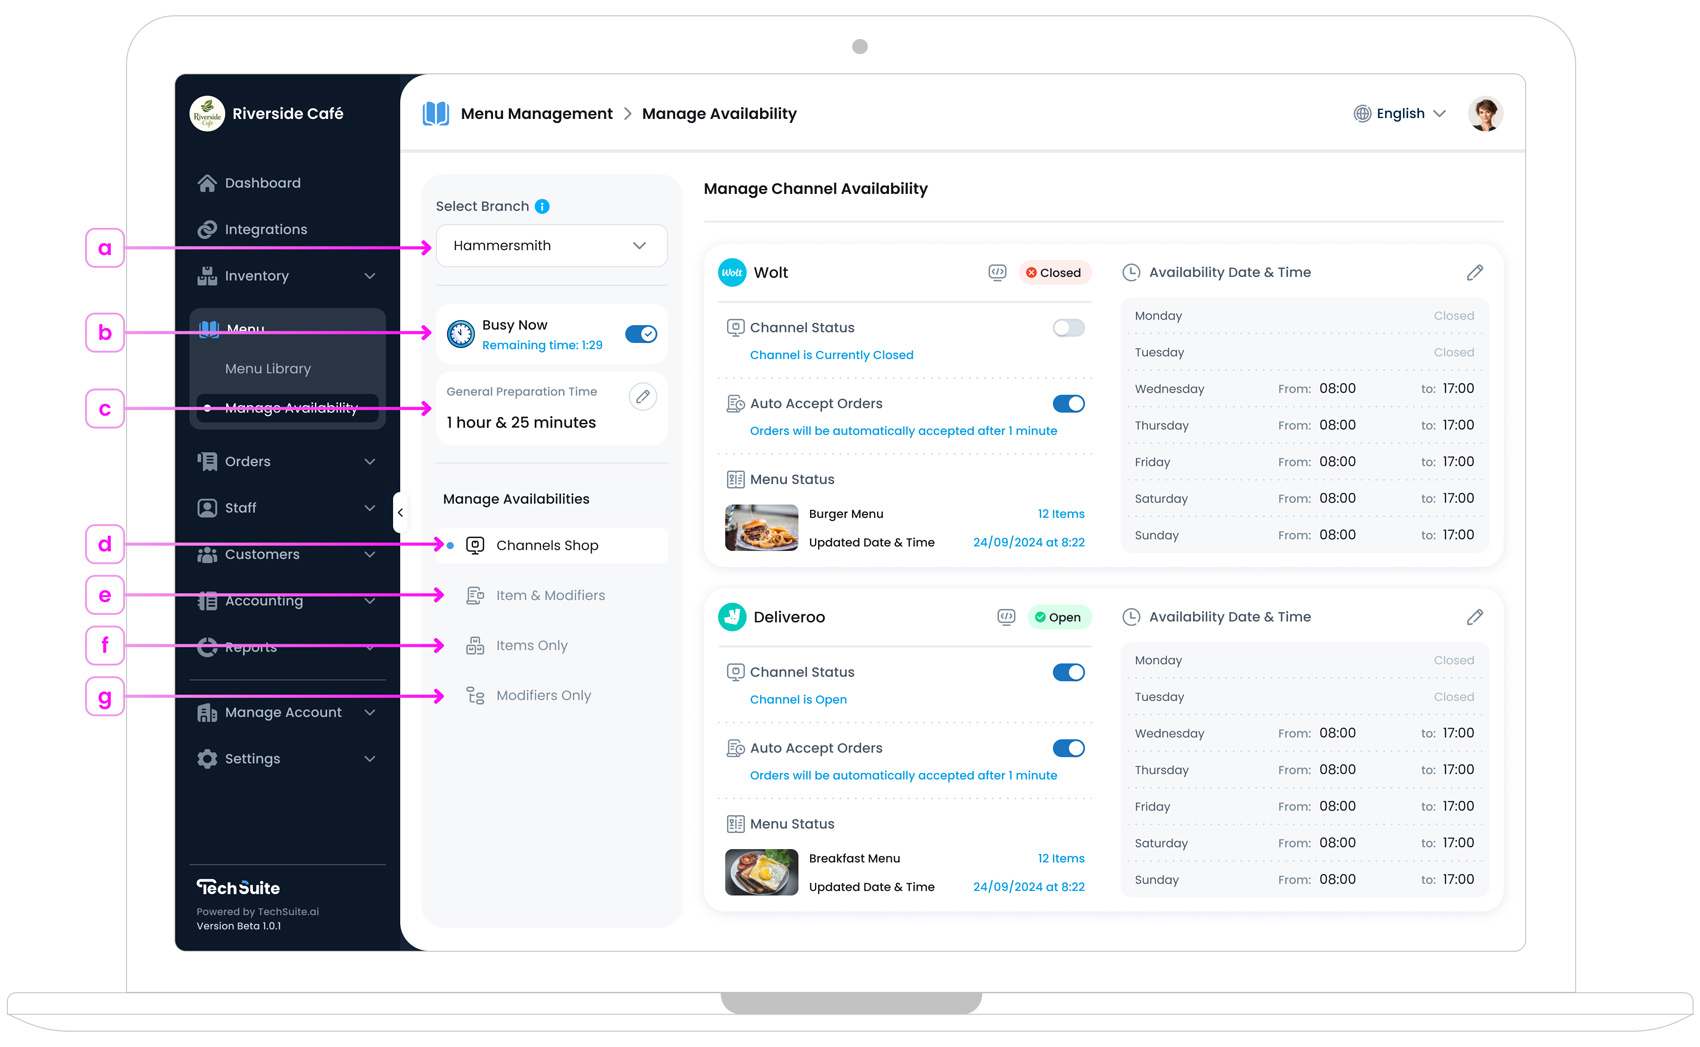
a. Select Branch
If your business operates multiple locations, you’ll see a Select Branch dropdown at the top of the page. Choose the branch (e.g., Hammersmith or Soho) for which you want to adjust availability. This ensures you’re only modifying the availability settings relevant to that specific branch.
If you have only one branch, it is already selected by default, and you won’t see additional branch options.
b. Busy Mode Settings
If your branch is experiencing high demand, you can toggle Busy Now on. After setting the duration, a Remaining Time counter appears, showing how long this busy mode remains active. During this period, certain order channels might experience delayed, depending on your time settings. For more details, see How to Use Busy Mode.
c. General Preparation Time
Below Busy Now, you’ll find General Preparation Time. This represents a base time (e.g., “1 hour & 25 minutes”) added to new orders for the selected branch, giving customers an estimate of how long their order may take to prepare.
Using this can help to manage order expectations during peak hours. For more details, see How to Set General Preparation Time.
d. Manage Channel Availability
This tab shows the availability status of integrated online ordering channels (such as Deliveroo or UberEats), where you can open or close them for selected branches, manage order auto-accept settings, and configure opening schedules. For more detailed guidance, see Manage Channel Availability.
e. Manage Items & Modifiers Availability
If you prefer to manage the availability of both items and modifiers in one place, go to the Items & Modifiers tab. This view consolidates all products and modifier options into a single table, allowing you to adjust availability in one streamlined view. It’s especially useful for large menus or highly customised offerings, as it helps you quickly identify cases where a modifier is active while its main item is disabled, or the other way around.
f. Manage Items Only Availability
Go to the Items Only tab to view a list of items assigned to this branch, along with their statuses or any Sync Issues. Use this view to temporarily pause specific items, for example, if you run out of an ingredient, you can mark the item as unavailable for a set period. For more information, see Manage Item Availability.
g. Manage Modifiers Only Availability
This tab operates similarly to Items Only, but focuses on modifiers only. If a modifier is unavailable or not allowed to be sold at certain times, you can temporarily pause it here. For more info, see Manage Modifier Availability.
Where to Start?
If you’re new to availability management, start with Channels Availability. It guides you through opening and closing channels, configuring auto-accept settings, and setting up advanced scheduling for both in-store and online services.