Item Library Page Overview
The Item Library section is your central hub for managing every product in your inventory, from names and prices to units and ingredients. This intuitive system helps you maintain a clear, consistent menu, organise items into categories, and assign sales types.
Each item can include options for multiple images, description, and tags for categorisation. You can group items into categories and sub-categories, such as (Drinks, Snacks, or Main Dishes), making it easy to filter and manage large inventories. Whether you’re updating prices, adding new items, or reorganising product types, the Item Library keeps everything at your fingertips.
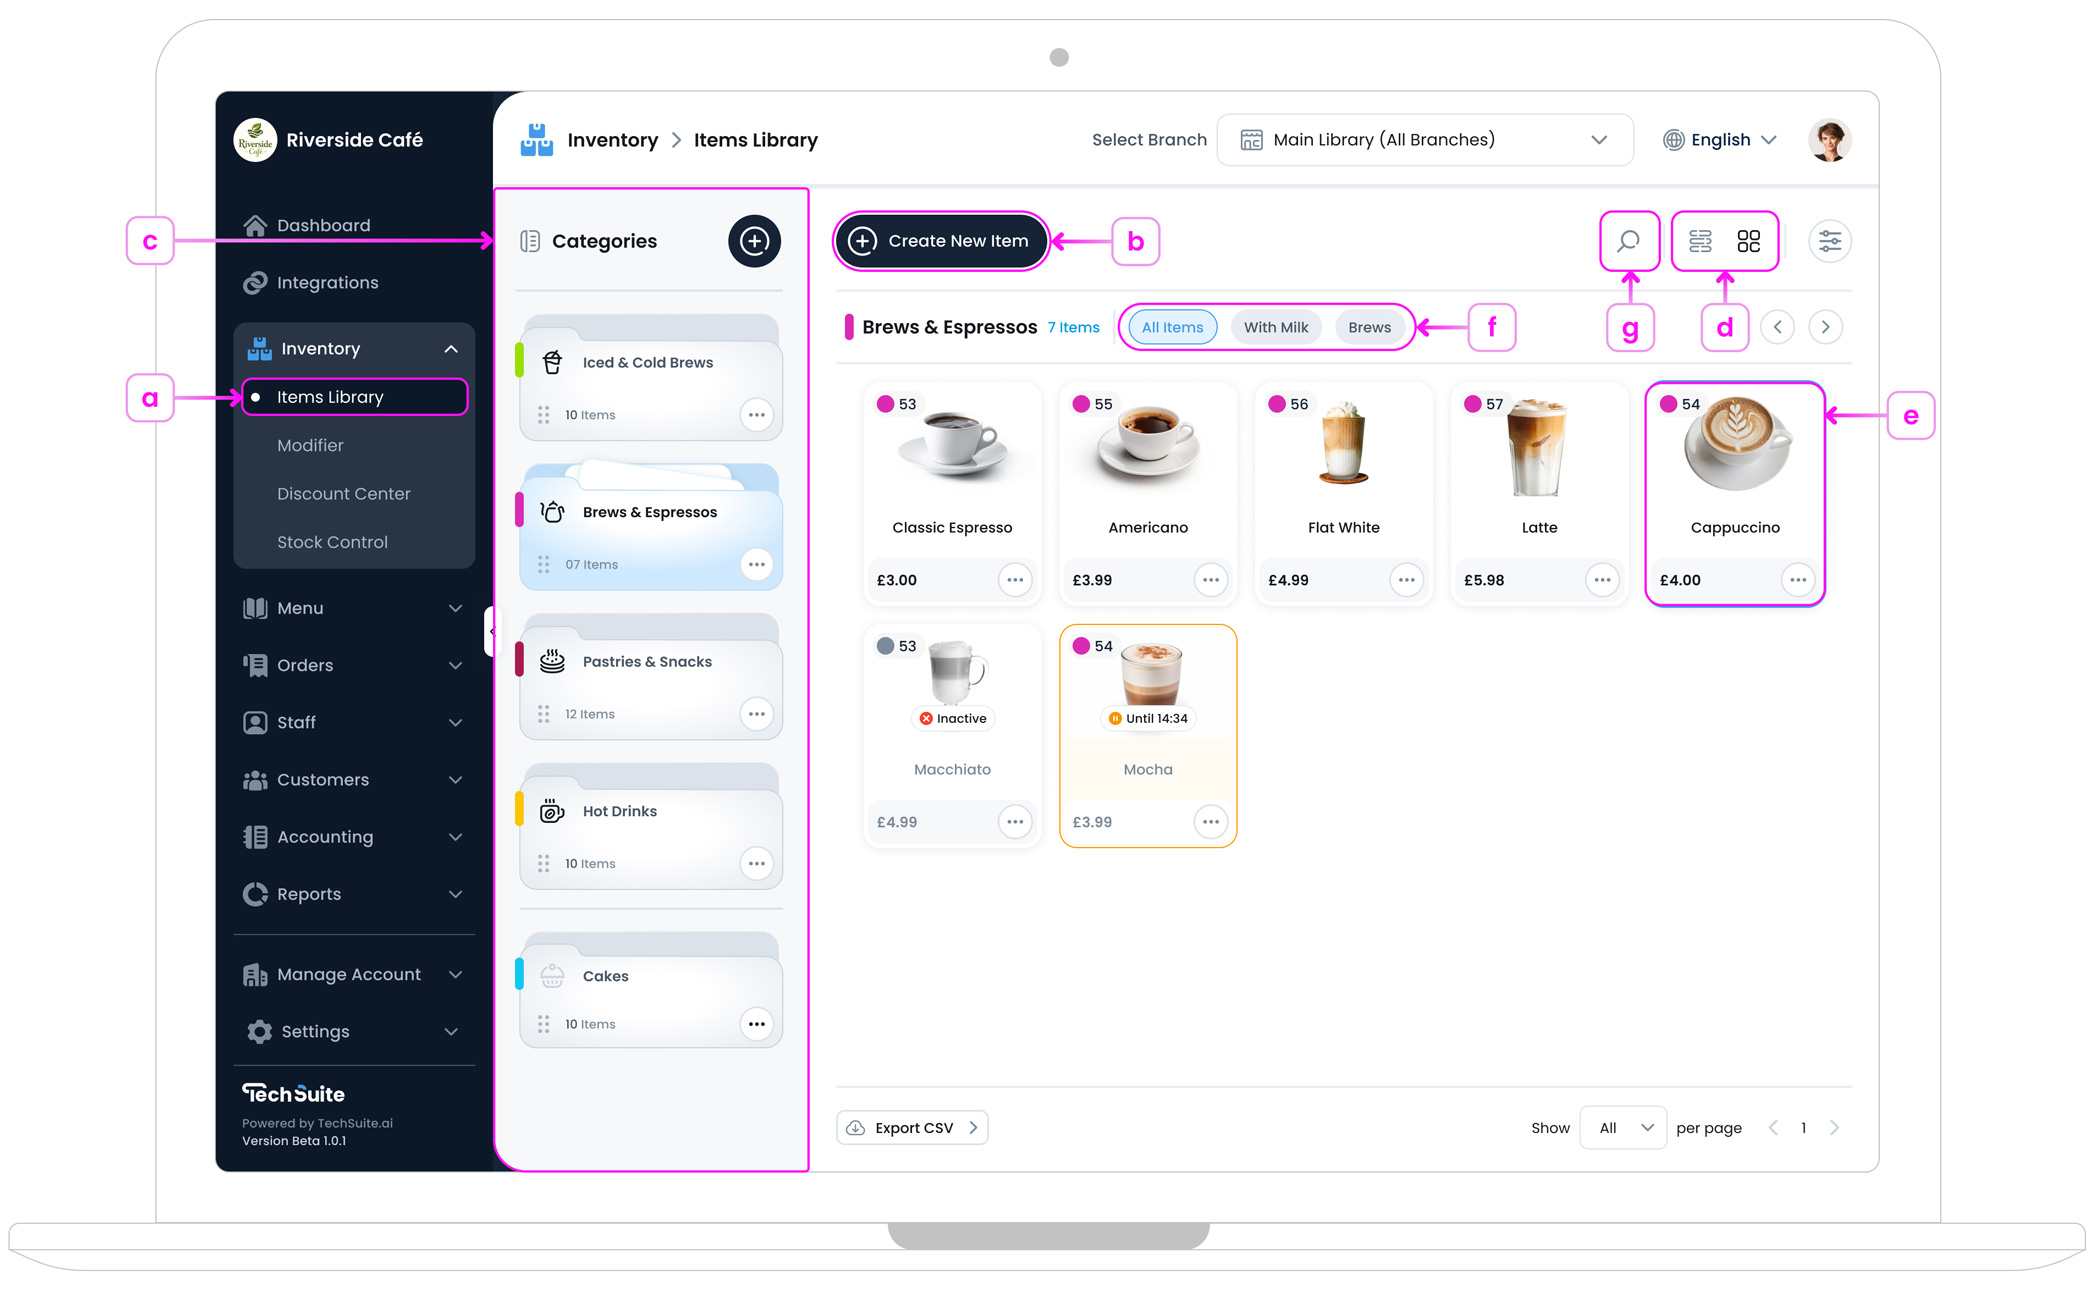
a. Accessing the Item Library
Go to the TechSuite Management Portal, and from the left sidebar, select Inventory > Item Library. You can access this page if you are an account admin or have been granted permission by an admin. The Item Library page displays all available items, along with their images, names, prices, and quick indicators for status and the category each item belongs to. You can view items in either Card or List view, depending on your preference. If no items have been created yet, you’ll be prompted to create your first one.
b. Create New Item Button
In the top‐left corner, tap on the “Create New Item” button.  You’ll be guided through the New item Setup page, where you can name the item, upload an image, set the price, choose availability, tags, dietary info, etc... For a full walkthrough, see Create a New Inventory Item
c. Categories Section
On the left side of the page, you’ll find a section that displays all created categories. Categories allow you to organise your inventory by grouping similar items, making it easier to manage and navigate.
You can create new categories and name them based on your business needs by clicking then plus icon button![]() in the top corner. Each category can be managed through the three-dot button,
in the top corner. Each category can be managed through the three-dot button, ![]() where you can edit its information and settings, add or modify sub-categories, or archive it if it’s no longer needed. Using categories helps keep your Item Library clean, structured, and scalable as your inventory grows.
where you can edit its information and settings, add or modify sub-categories, or archive it if it’s no longer needed. Using categories helps keep your Item Library clean, structured, and scalable as your inventory grows.
d. Switching Between Card and List Views
The Item Library gives you two flexible ways to view your items: Card View and List View. You can switch between them anytime, depending on your preference or workflow.
- Card View presents each item visually, showing the image, name, price, item ID, and colour code. This layout is great for quickly identifying items by appearance.
- List View offers a more compact, text-based layout. It includes more detailed information such as item type and partner name, ideal for reviewing and managing larger inventories.
Clicking on any item in either view will open a detailed panel on the right, where you can see and update all item-related information in one place.
e. Item Details Side Panel
Clicking on any item opens the Item Details panel on the right side of the screen. This quick-view panel provides an overview of the item’s key information, allowing you to review important settings at a glance. To make changes, simply click the Edit button in the top-right corner to open the full editor.
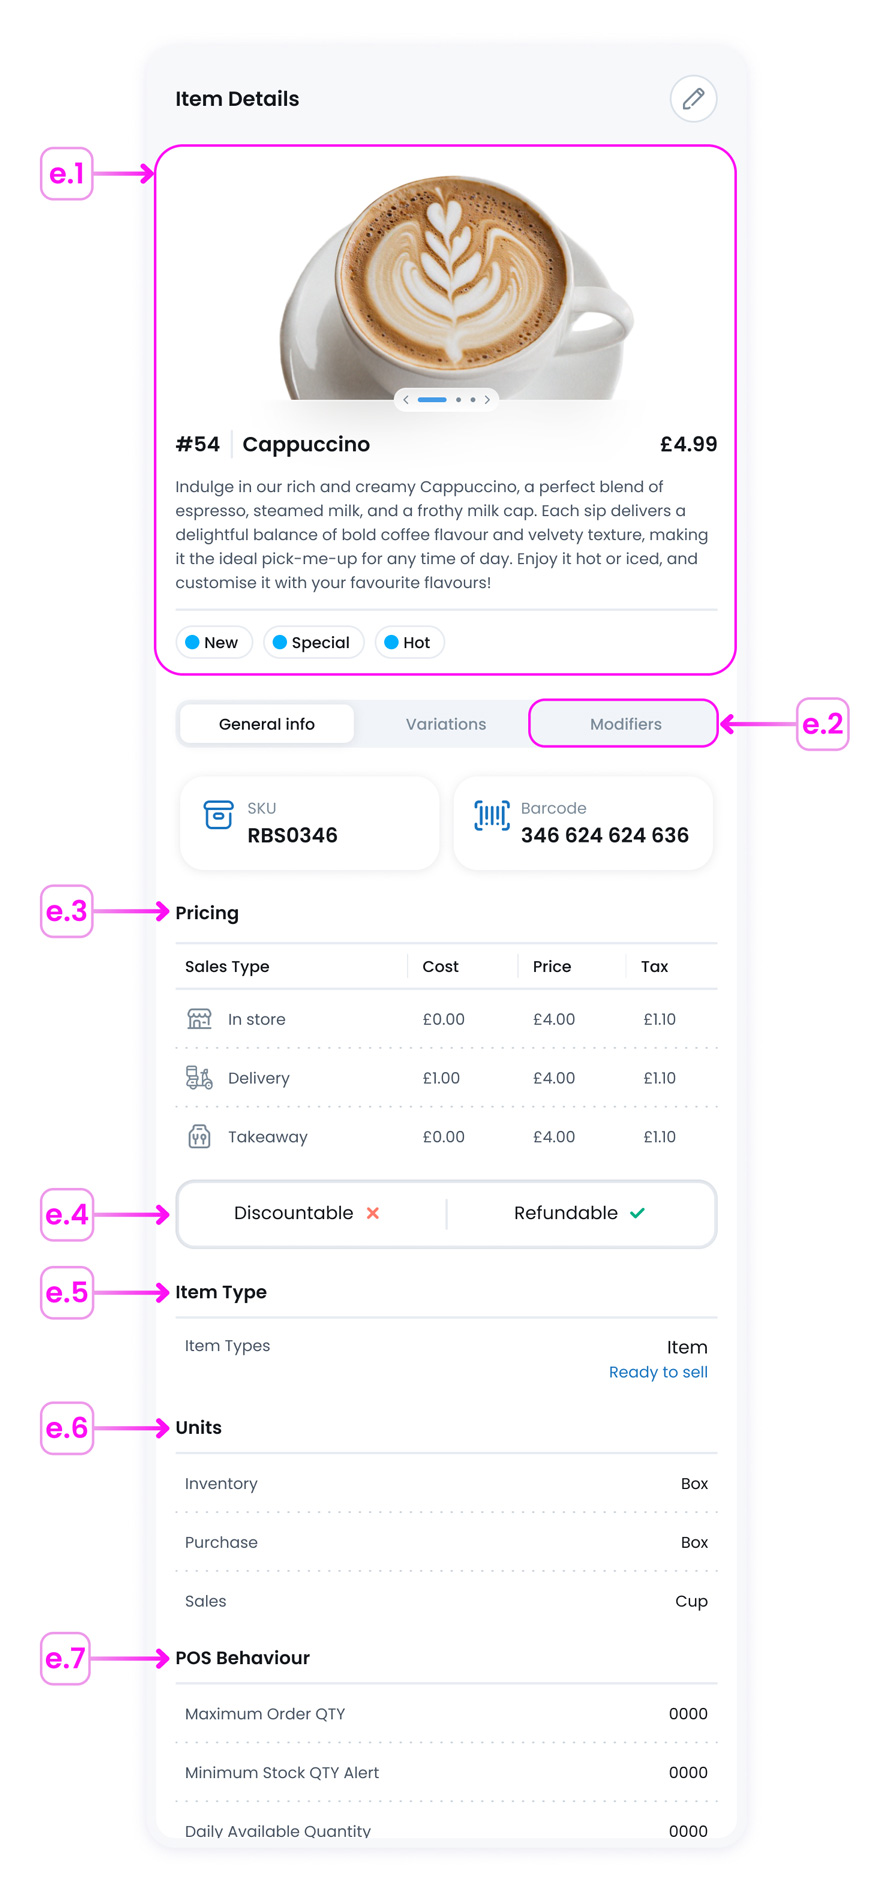
Here’s what you’ll find:
- e.1. Image(s), Name, and Tags: At the top, you’ll see the item’s image(s), name, description, main price, and all preset item tags.
- e.2. Modifiers Tab: This shows any connected modifier groups, such as size options or add-ons.
- e.3. Pricing: Displays the cost and price based on different sales types (if available).
- e.4. Discountable/Refundable: Shows if the item is allowed to be discounted or refunded during checkout.
- e.5. Item Type: Indicates what type of item it is (like Menu Item, Supplies, or Services) along with its condition (e.g. Wet, Dry).
- e.6. Units: Lists the units used for inventory, purchase, and sales tracking.
- e.7. POS Behaviour:This section lets you view and manage quantity-related settings for the item, including the Maximum Order Quantity, Minimum Stock Quantity Alert, and Daily Available Quantity. These controls help ensure proper inventory handling and availability at the point of sale.
This panel gives you a fast way to monitor or verify item details, perfect for day-to-day inventory checks.
f. Sub-categories View
You can create sub-categories while setting up a main category, allowing you to organise items into more specific groups. This helps keep your Item Library structured and easy to navigate. Once created, sub-categories appear at the top of the items panel within each category, making it simple to filter and view items by their assigned subcategory.
g. Searching in Item Library
If you have many items, use the Search icon in the top-right corner to quickly find an item by name or keyword.
Where to Start?
If you’re new to Inventory Item Library and looking for a simple first step, we suggest starting with Create a New Category. This guide walks you through naming your category, adding an optional image, and defining optional sub-categories.