Active Order Details Panel
Whether you’re in Card View or List View, tapping on an order opens the Order Details panel, where you can access everything you need to fulfil and manage that order properly. In Card View, the details appear in a pop-up, while in List View, the same information appears on the right panel of the page, no need to leave the screen.

At the top of every order panel, you’ll see a clear summary of the order, just like what you see on the order cards. This includes:
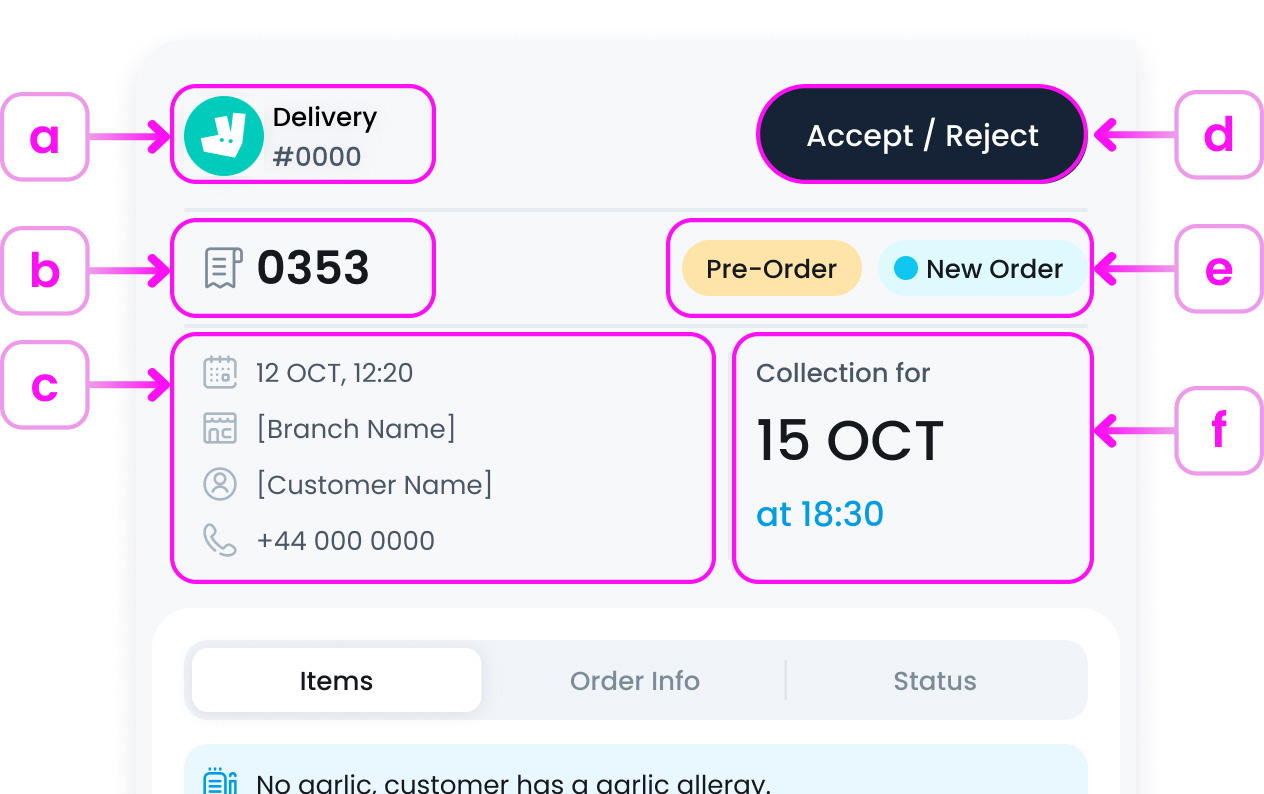
a. Order Type and cChannel (e.g., Delivery via Uber Eats)
Displays the order method and source (e.g., Delivery via Uber Eats). This helps staff know how the order is arriving and which platform it came through. The small icon and label give quick visual context.
b. Order Number
Shows the system-generated order number used for internal tracking. This helps staff match receipts, monitor status, and resolve issues quickly.
c. Order Date, Branch Name, Customer Name and Phone Number
Provides key information for identifying the order: when it was placed, where it’s being fulfilled, who placed it, and how to contact them. This section is especially useful for resolving delivery questions or confirming pre-orders.
d. The main Accept / Reject action buttons (if applicable)
These buttons allow staff to manually accept or reject an order. This is most commonly used for orders that require approval (like third-party delivery platforms or high-value transactions). Accepting sends the order to production, while Rejecting will cancel it.
e. Tags such as Instant, Pre-Order, or New Order
These visual tags give extra context about the order’s timing or status:
- Pre-Order Scheduled for later collection
- New Order Recently placed and not yet accepted
- Instant Meant for immediate preparation (shown in other cases)
These tags help prioritise prep flow and kitchen timing.
f. Order Collection Time
Shows exactly when the order is scheduled to be ready for collection (e.g., 15 OCT at 18:30). This is especially important for pre-orders, allowing staff to plan cooking times and ensure orders are ready at the right moment.
Order Details
Below the order summary, you’ll find the Order Details panel, which is divided into three tabs: Items, Order Info & Status
Items Tab
This is where you can see what the customer ordered and any special notes. You’ll find:

- a. A list of items, including customisations or modifiers (like extra syrup)
- b. Subtotal, discounts, tax, and service charges
- c. The total amount paid by the customer
- d. Allergy alerts or special notes (e.g., “No garlic”)
- e. If the order was cancelled, a red Order Cancelled banner will appear at the top
Order Info Tab
This tab provides all the customer and delivery information, such as:
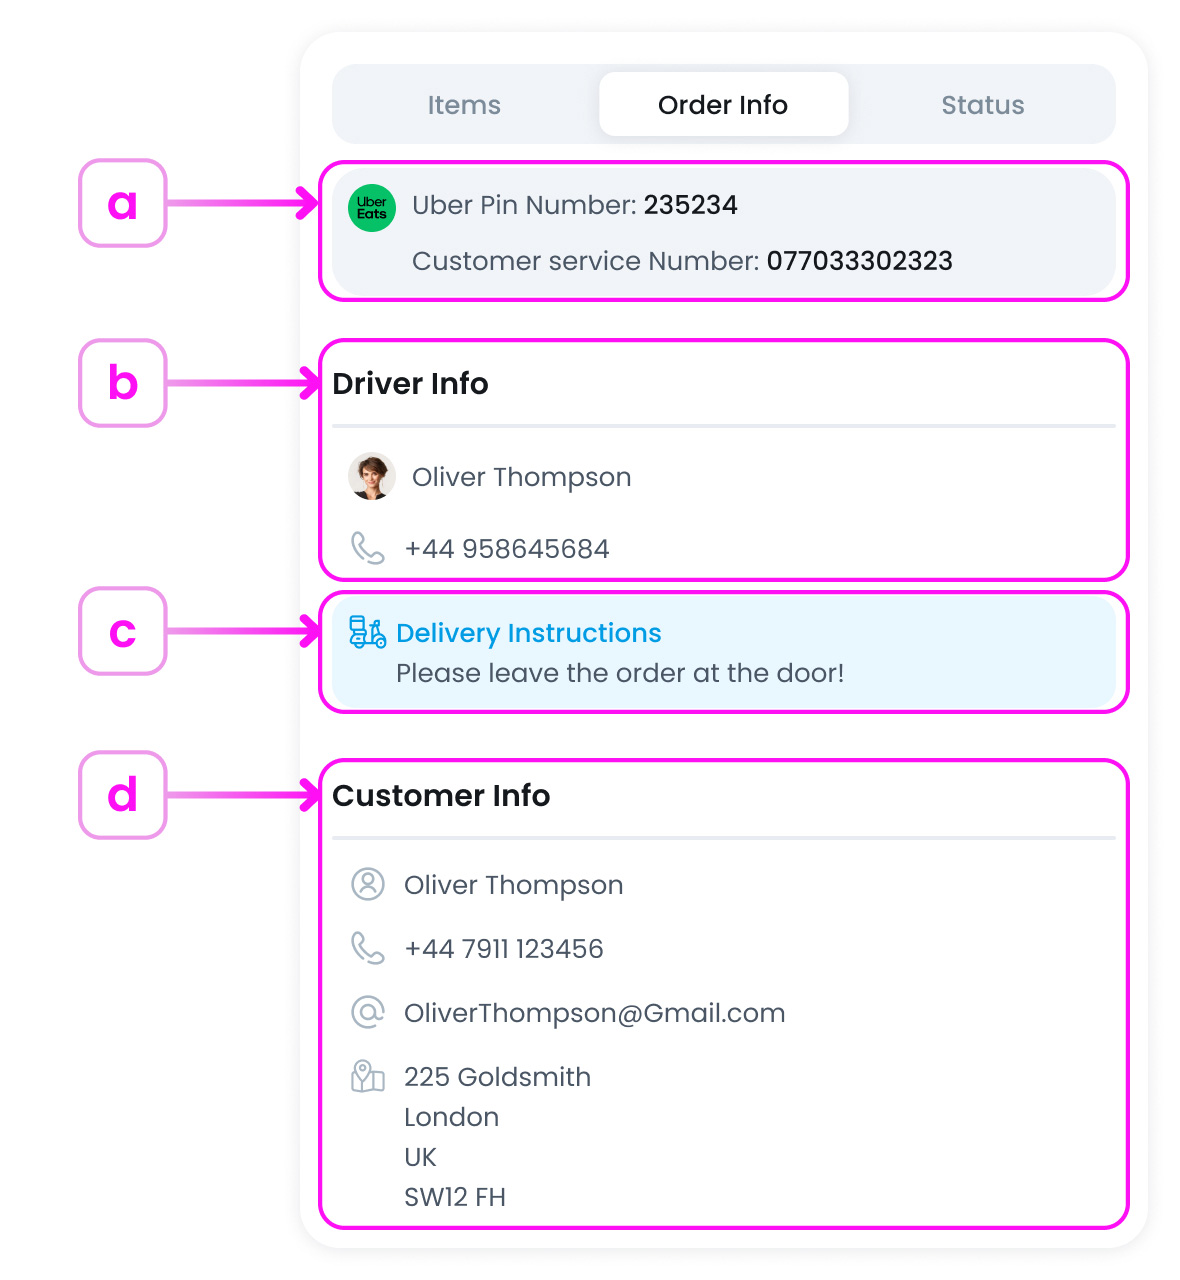
- a. Delivery channel (e.g., Uber Eats) and reference numbers (like Uber PIN)
- b. Driver details: name, phone number, and instructions (if provided)
- c. Any additional delivery instructions (e.g., “Leave at the door”)
- d. Customer name, phone, email, and delivery address
Status Tab
The Status tab tracks the entire order journey in a step-by-step format. You’ll see time-stamped updates such as:
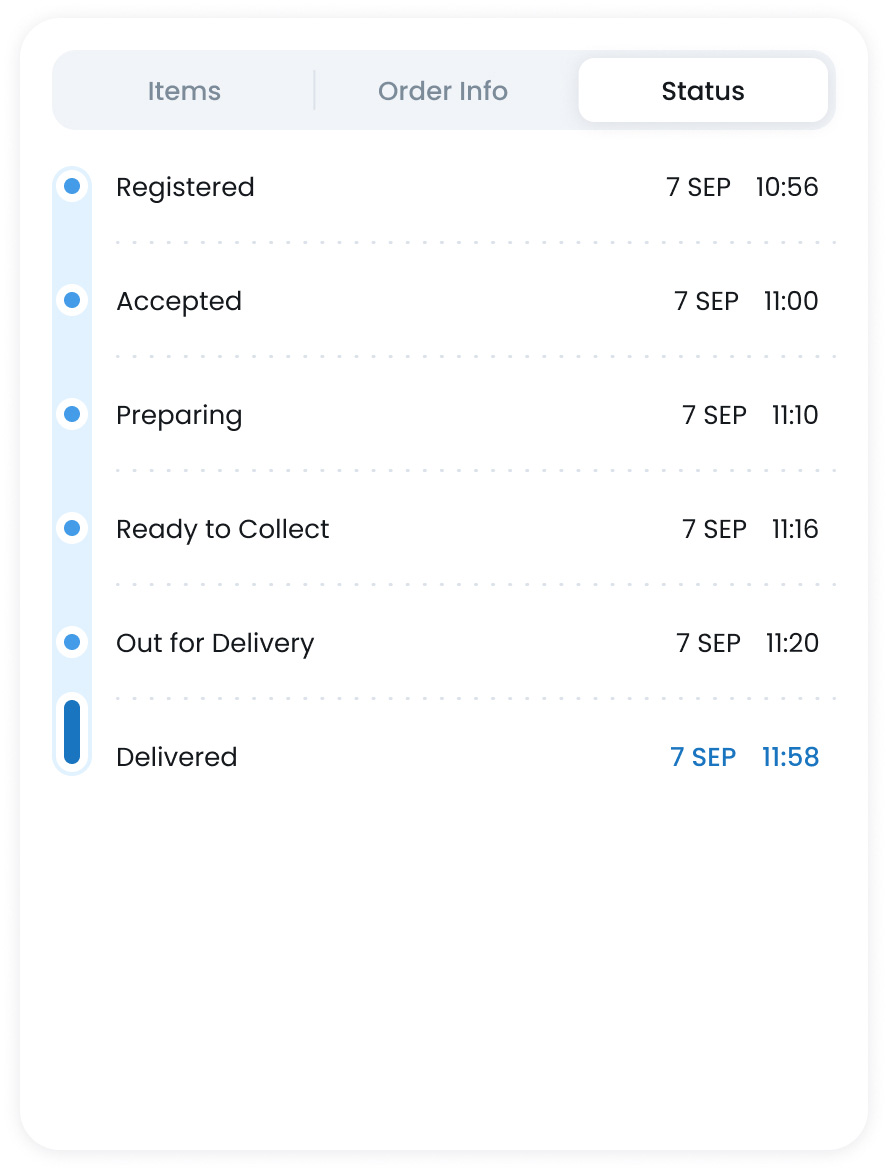
- Registered: The customer has successfully submitted their order through a channel (POS, kiosk, online, etc.). This is the starting point in the order timeline.
- Accepted: Your team has reviewed and accepted the order. It’s now confirmed and ready to move into preparation.
- Rejected (if applicable): The order has been declined, either manually by staff or automatically due to an issue (e.g., stock not available, integration failure). Rejected orders will no longer proceed through the fulfilment process.
- Preparing: The order is actively being made by kitchen or staff. This status helps teams monitor what’s in progress and manage kitchen workflow.
- Ready to Collect: The order has been prepared and is now waiting for the customer or delivery driver to pick it up. This status signals that no further kitchen action is needed, and the order is simply awaiting collection.
- Out for Delivery: The driver has picked up the order and it is currently en route to the customer.
- Completed: The order has been fulfilled, either delivered successfully or collected in-store. This marks the end of the order lifecycle.
What’s Next?
Now that you understand how to view and interpret order details, the next step is learning how to Accept or Reject a New Order. We’ll also walk through the action buttons that appear after an order is accepted, including how to mark it as Ready to Collect or Collected, so you can manage your workflow smoothly from start to finish.