Edit or Archive a Customer
In the TechSuite portal, you can keep your customer database clean and up to date by editing customer details or archiving customer profiles. Archiving allows you to retain customer records without permanently deleting them, ideal for inactive or one-time customers.
Edit a Customer Profile
You can update a customer’s information at any time, such as their name, contact details, or group assignment.
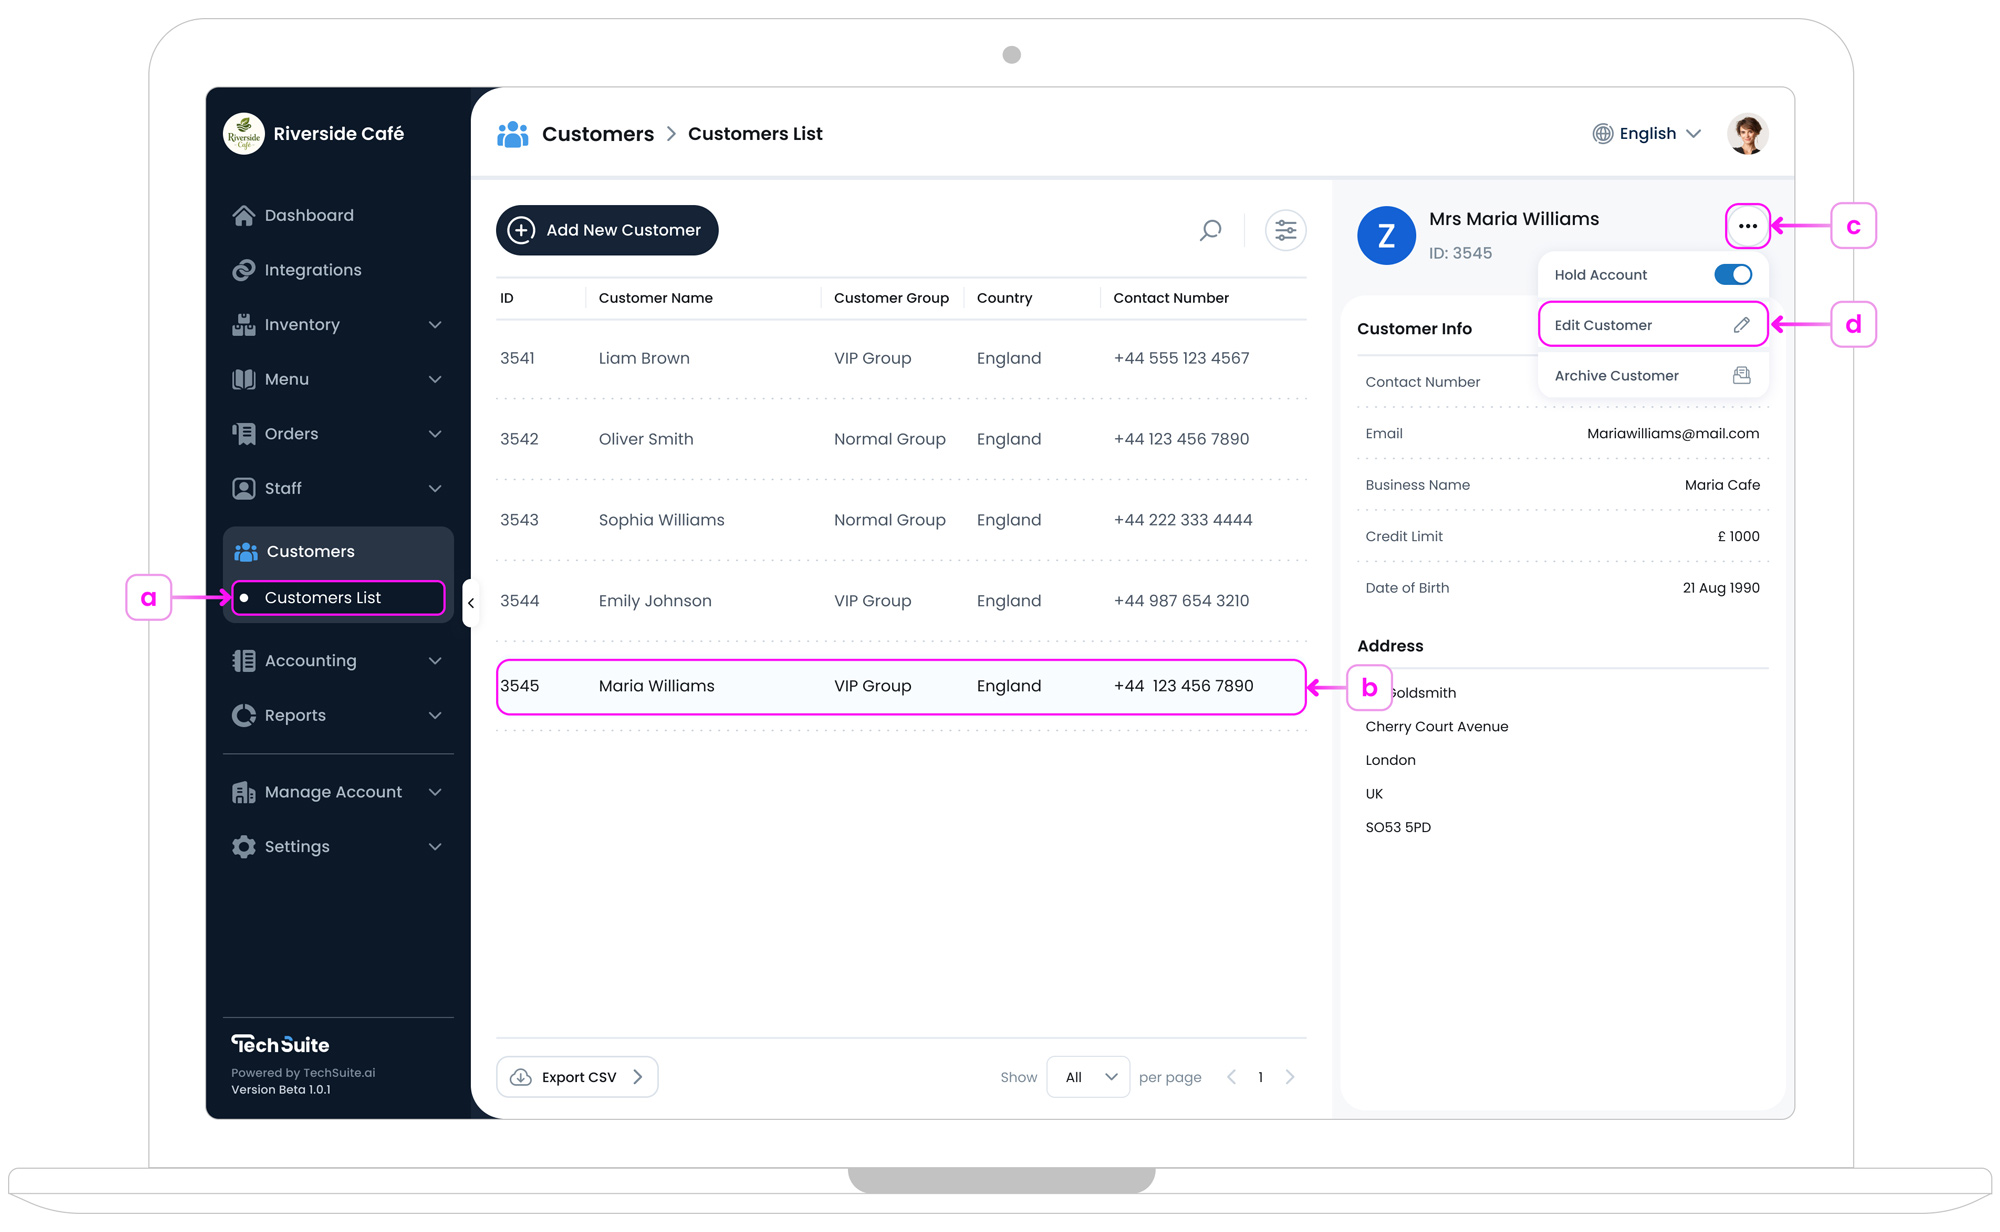
- a. In your TechSuite portal, go to Customer Management > Customer List.
- b. In the Customer List page, find the customer you want to edit.
-
c. Click the three-dot button
 at the right end of the customer’s row, or use the three-dot button located in the top-right corner of the information panel on the right side of the page.
- d. Select the “Edit Customer” option.
-
Make your changes and click the “Update” button.

Archive a Customer Profile
Archiving removes the customer from your list, but their profile will remain saved. This is useful for managing a large customer base without losing important historical records.
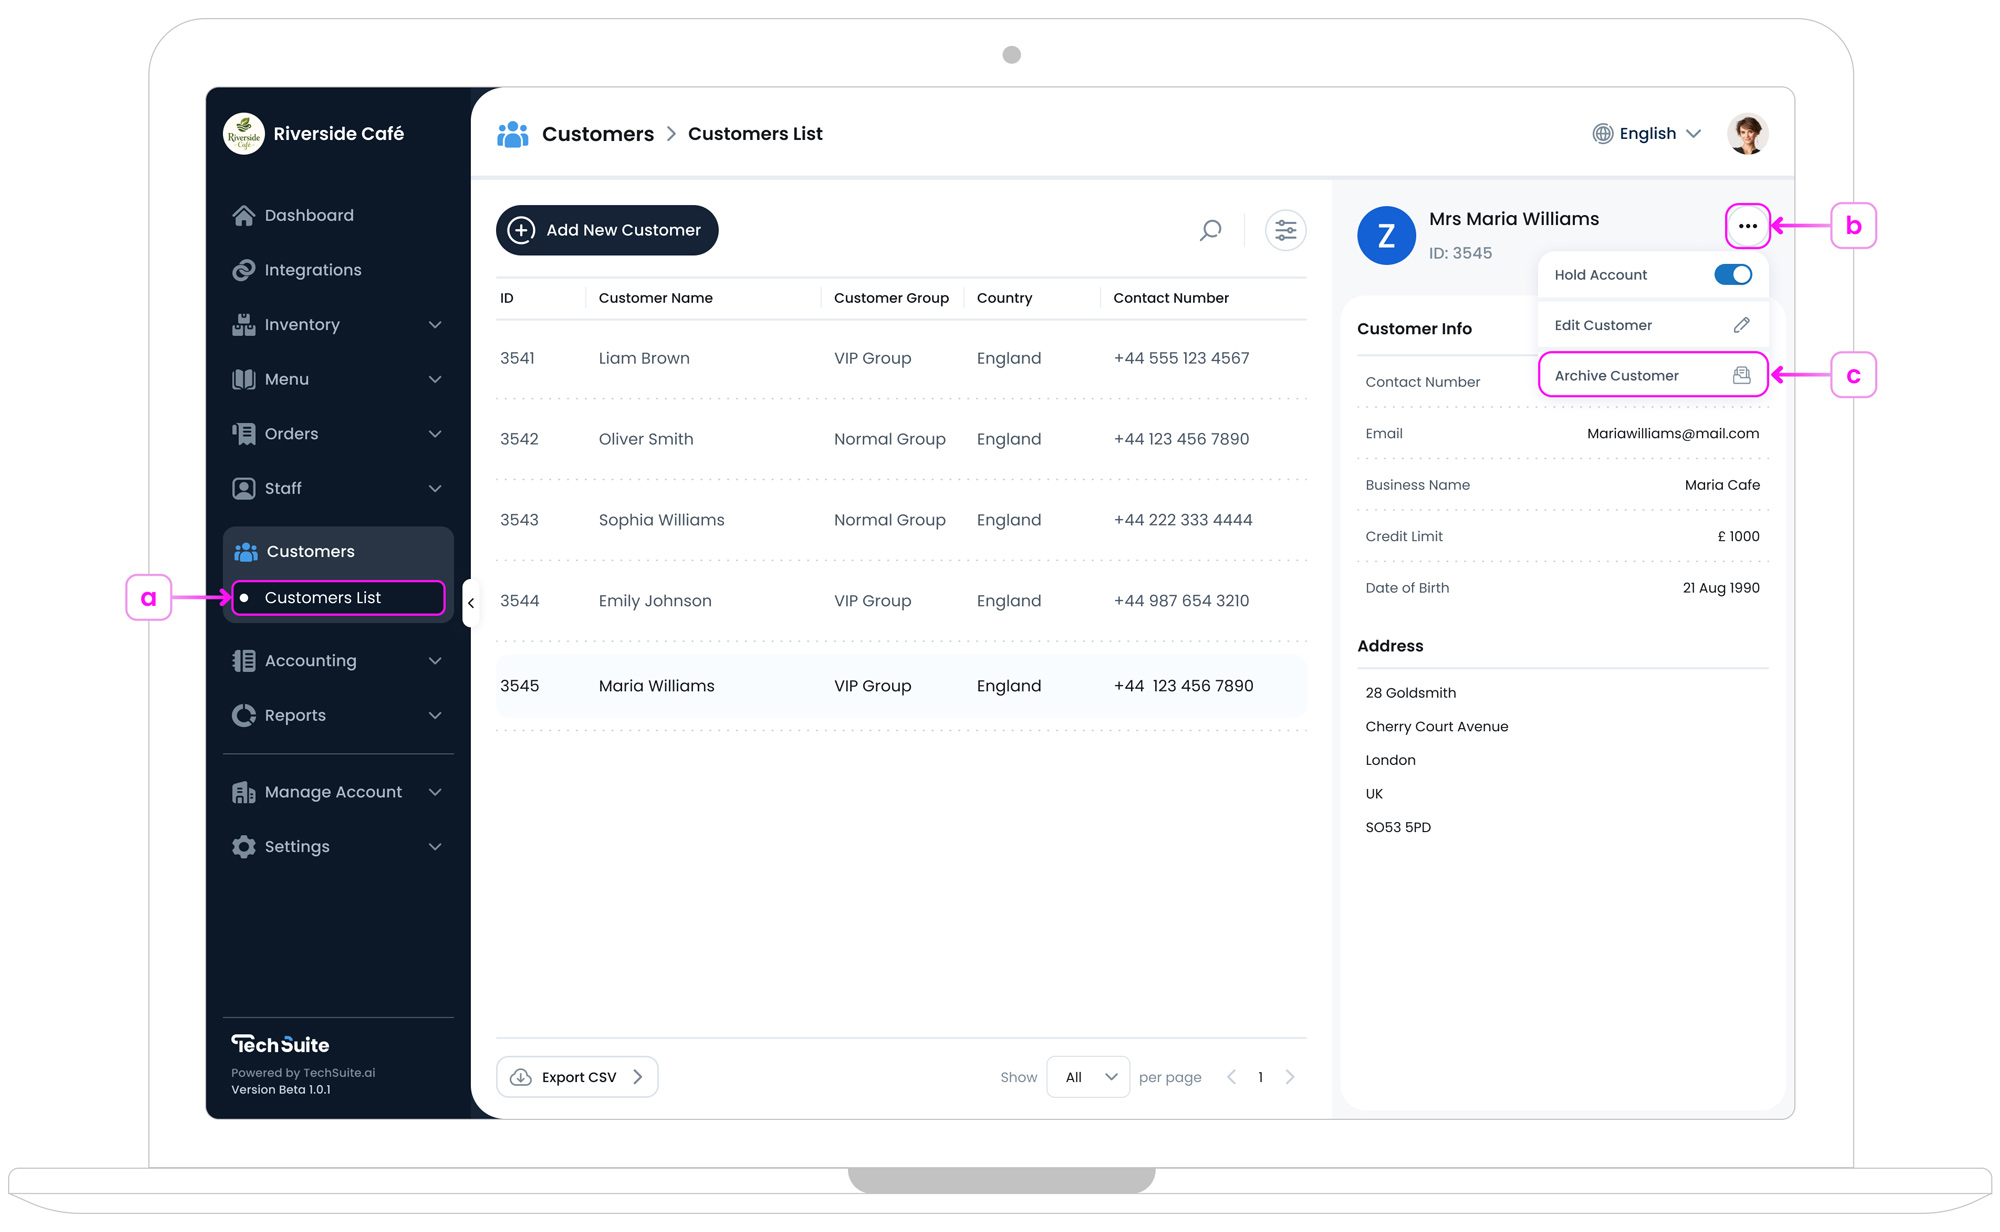
- a. In your TechSuite portal, go to Customer Management > Customer List.
- b. Click the three-dot button at the right end of the customer’s row, or use the three-dot button located in the top-right corner of the information panel on the right side of the page.
- c. Select “Archive Customer”
- When you archive a customer, a confirmation pop-up will appear with a warning that this action is temporary and reversible. Archiving removes the customer from the active list without deleting their data. Click “Archive” to confirm, or “Cancel” to go back. You can unarchive a customer anytime from the ‘Archived Customers’ section in the Settings menu.
Restore Archived Customer
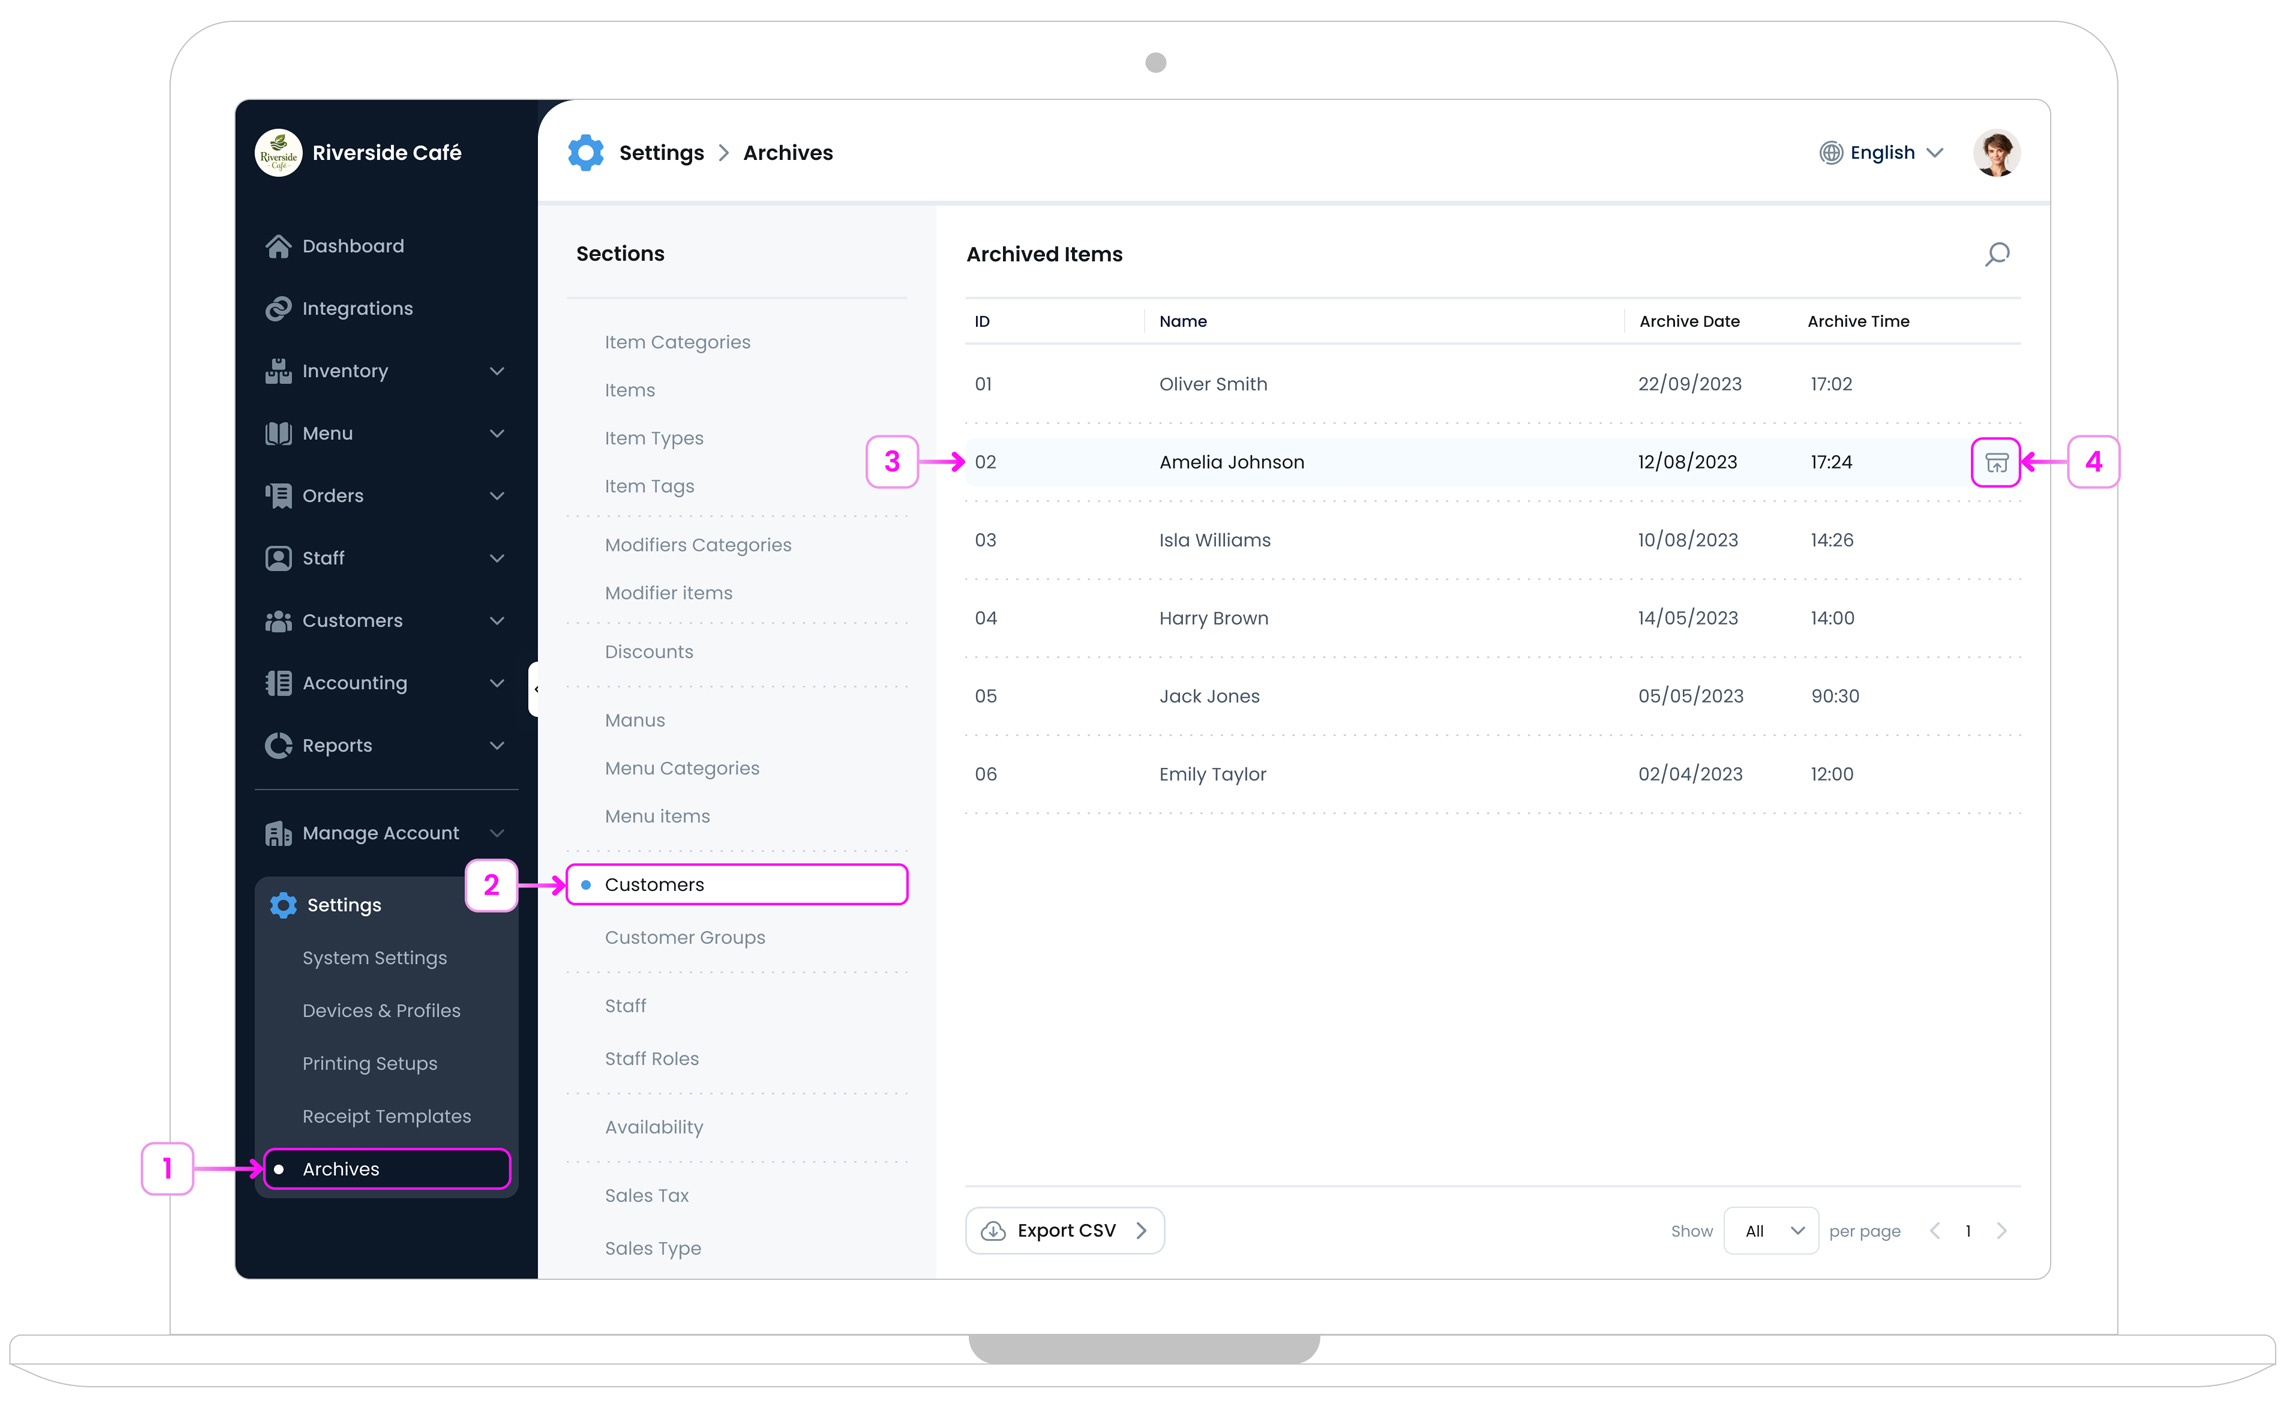
Archived items and categories are stored under Settings > Archives.
To restore:
- In TechSuite portal, go to Settings > Archives from the sidebar
- Select Customers from the Sections panel.
- Find the customer you wish to restore.
- Click the
Unarchive
 icon.
icon.
What’s Next?
Now that you’re comfortable managing customers, head to Settings to configure device preferences, review licence details, connect printers or payment terminals, and adjust profile-specific options so your POS runs exactly the way your site needs.