Customer List Page Overview
The Customer List page helps you manage every customer your business has, all in one organised view. Whether you’re offering loyalty perks, managing credit, or handling regular orders, this is where it all starts.
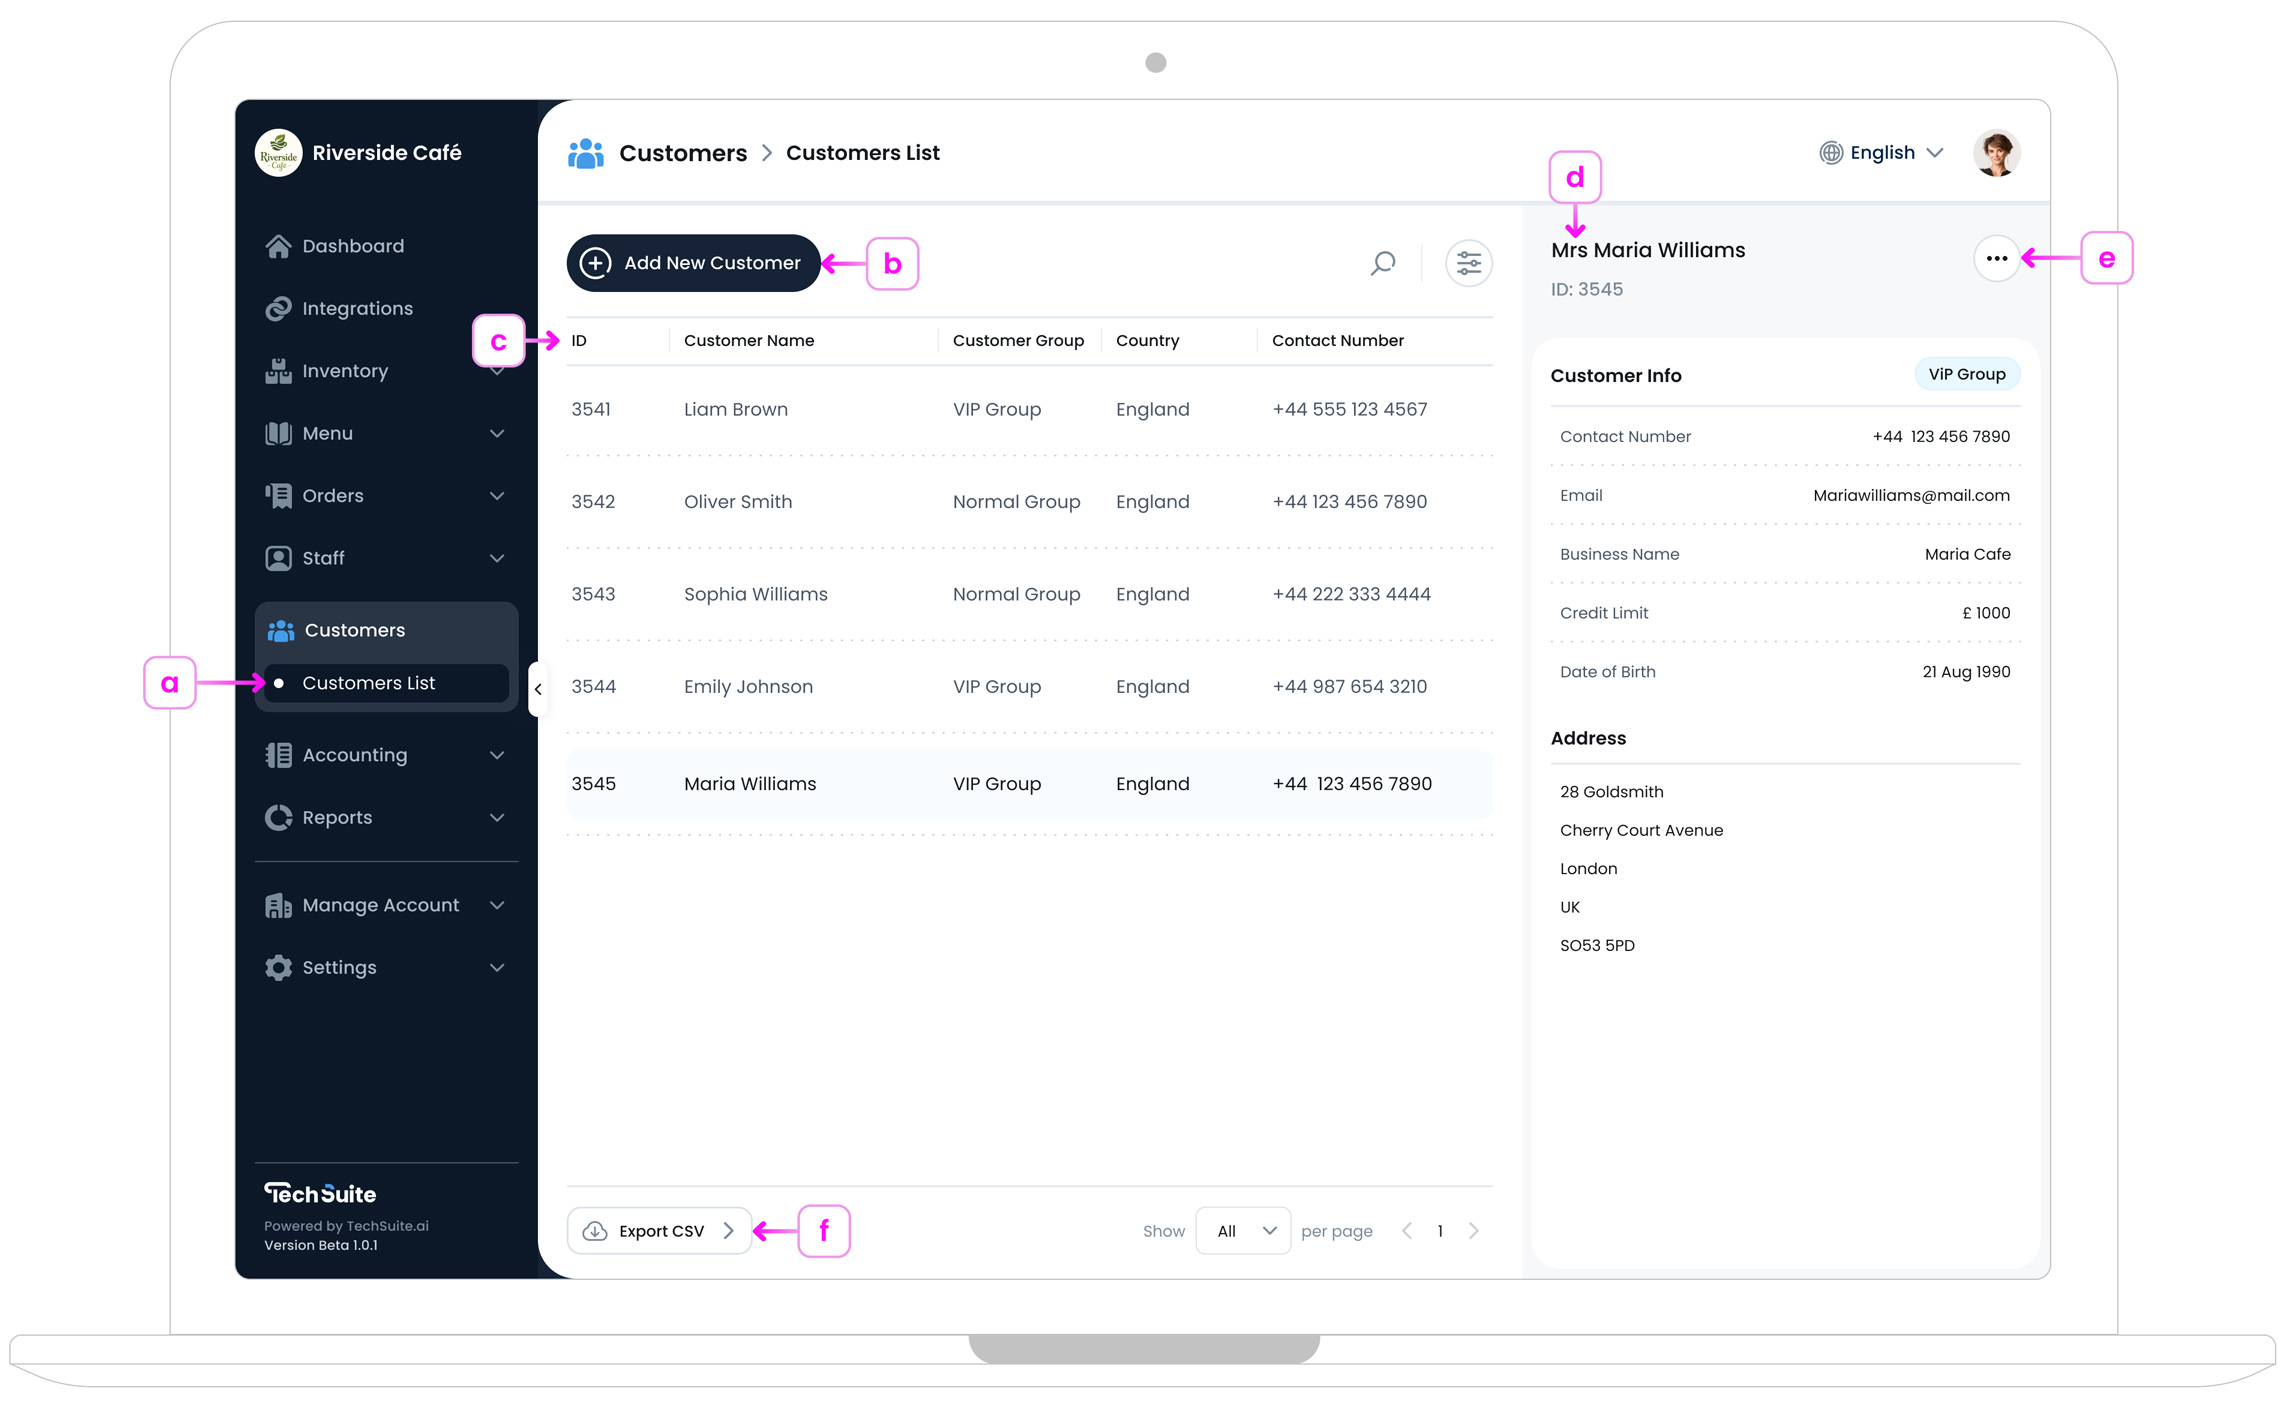
a. Accessing Customer List Page
To access your customer list, log in to the TechSuite portal. From the sidebar, go to Customer Management > Customer List. This opens the full customer list, where you can view, edit, or archive customer profiles.
b. Add New Customer Button
In the top-left corner, tap the ’Add New Customer’ button to register a new customer. You’ll be able to enter basic details such as name, contact information, customer group (e.g., General Customer or VIP), and credit preferences.
c. Customer List Table
The Customer List provides a table view of all registered customers, displaying their ID Number, Name, Contact Information, and current status (e.g., Active). This layout makes it easy to quickly review your customer base, check their details, and monitor their engagement status.
d. Customer Profile Panel
Clicking on a customer in the table opens their full profile on the right side of the screen. This panel displays key details such as their group badge (e.g., “General Customer”), contact information, business name, credit limit, address, and date of birth (if provided). It allows your team to quickly review or confirm customer information without navigating away from the page.
e. Actions Button
In the top-right corner of the customer profile panel, click the three-dot button ![]() to open a dropdown for profile actions for the selected customer.
to open a dropdown for profile actions for the selected customer.
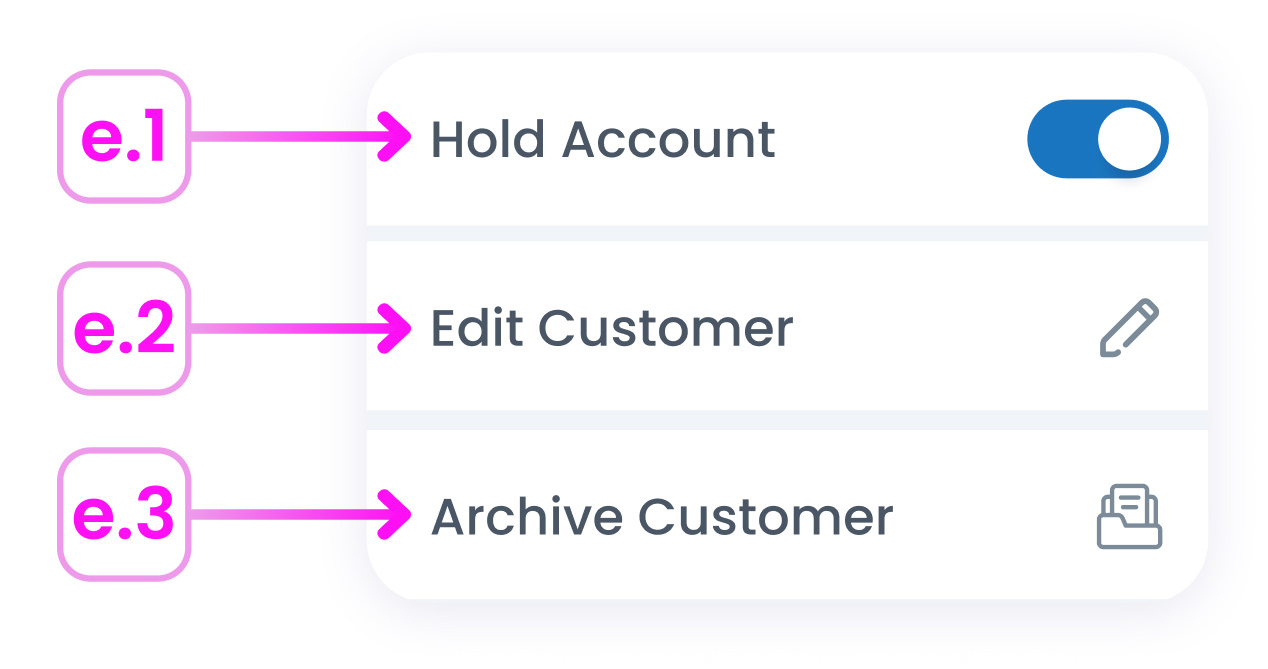
This menu includes:
- e.1. Active toggle: Use the toggle to activate or deactivate the customer profile. When deactivated, the customer will appear with an “On Hold” badge in the profile panel but will remain searchable in the list.
- e.2. Edit customer: Opens the customer’s profile for editing their details.
- e.3. Archive customer: Move a customer to the archive to remove them from the active list without deleting their record.
These tools make it easy to manage customer statuses while keeping records safe for future use.
f. Export CSV Button
At the bottom left of the page, use the Export CSV button to download your full customer list. This is useful for backups, audits, or importing into external marketing platforms.
Where to Start?
If you’re just getting started with Customer Management, begin with our guide to Adding a New Customer. It walks you through capturing key details and setting up your customer database, helping you deliver better service and build loyalty right away.