Create a New Menu
In this article, we walk you through how to add a new menu to your menu library. You can customise each menu with a unique name, image, and description, set its availability across multiple branches (if applicable), and organise it with the categories and items you want to sell.
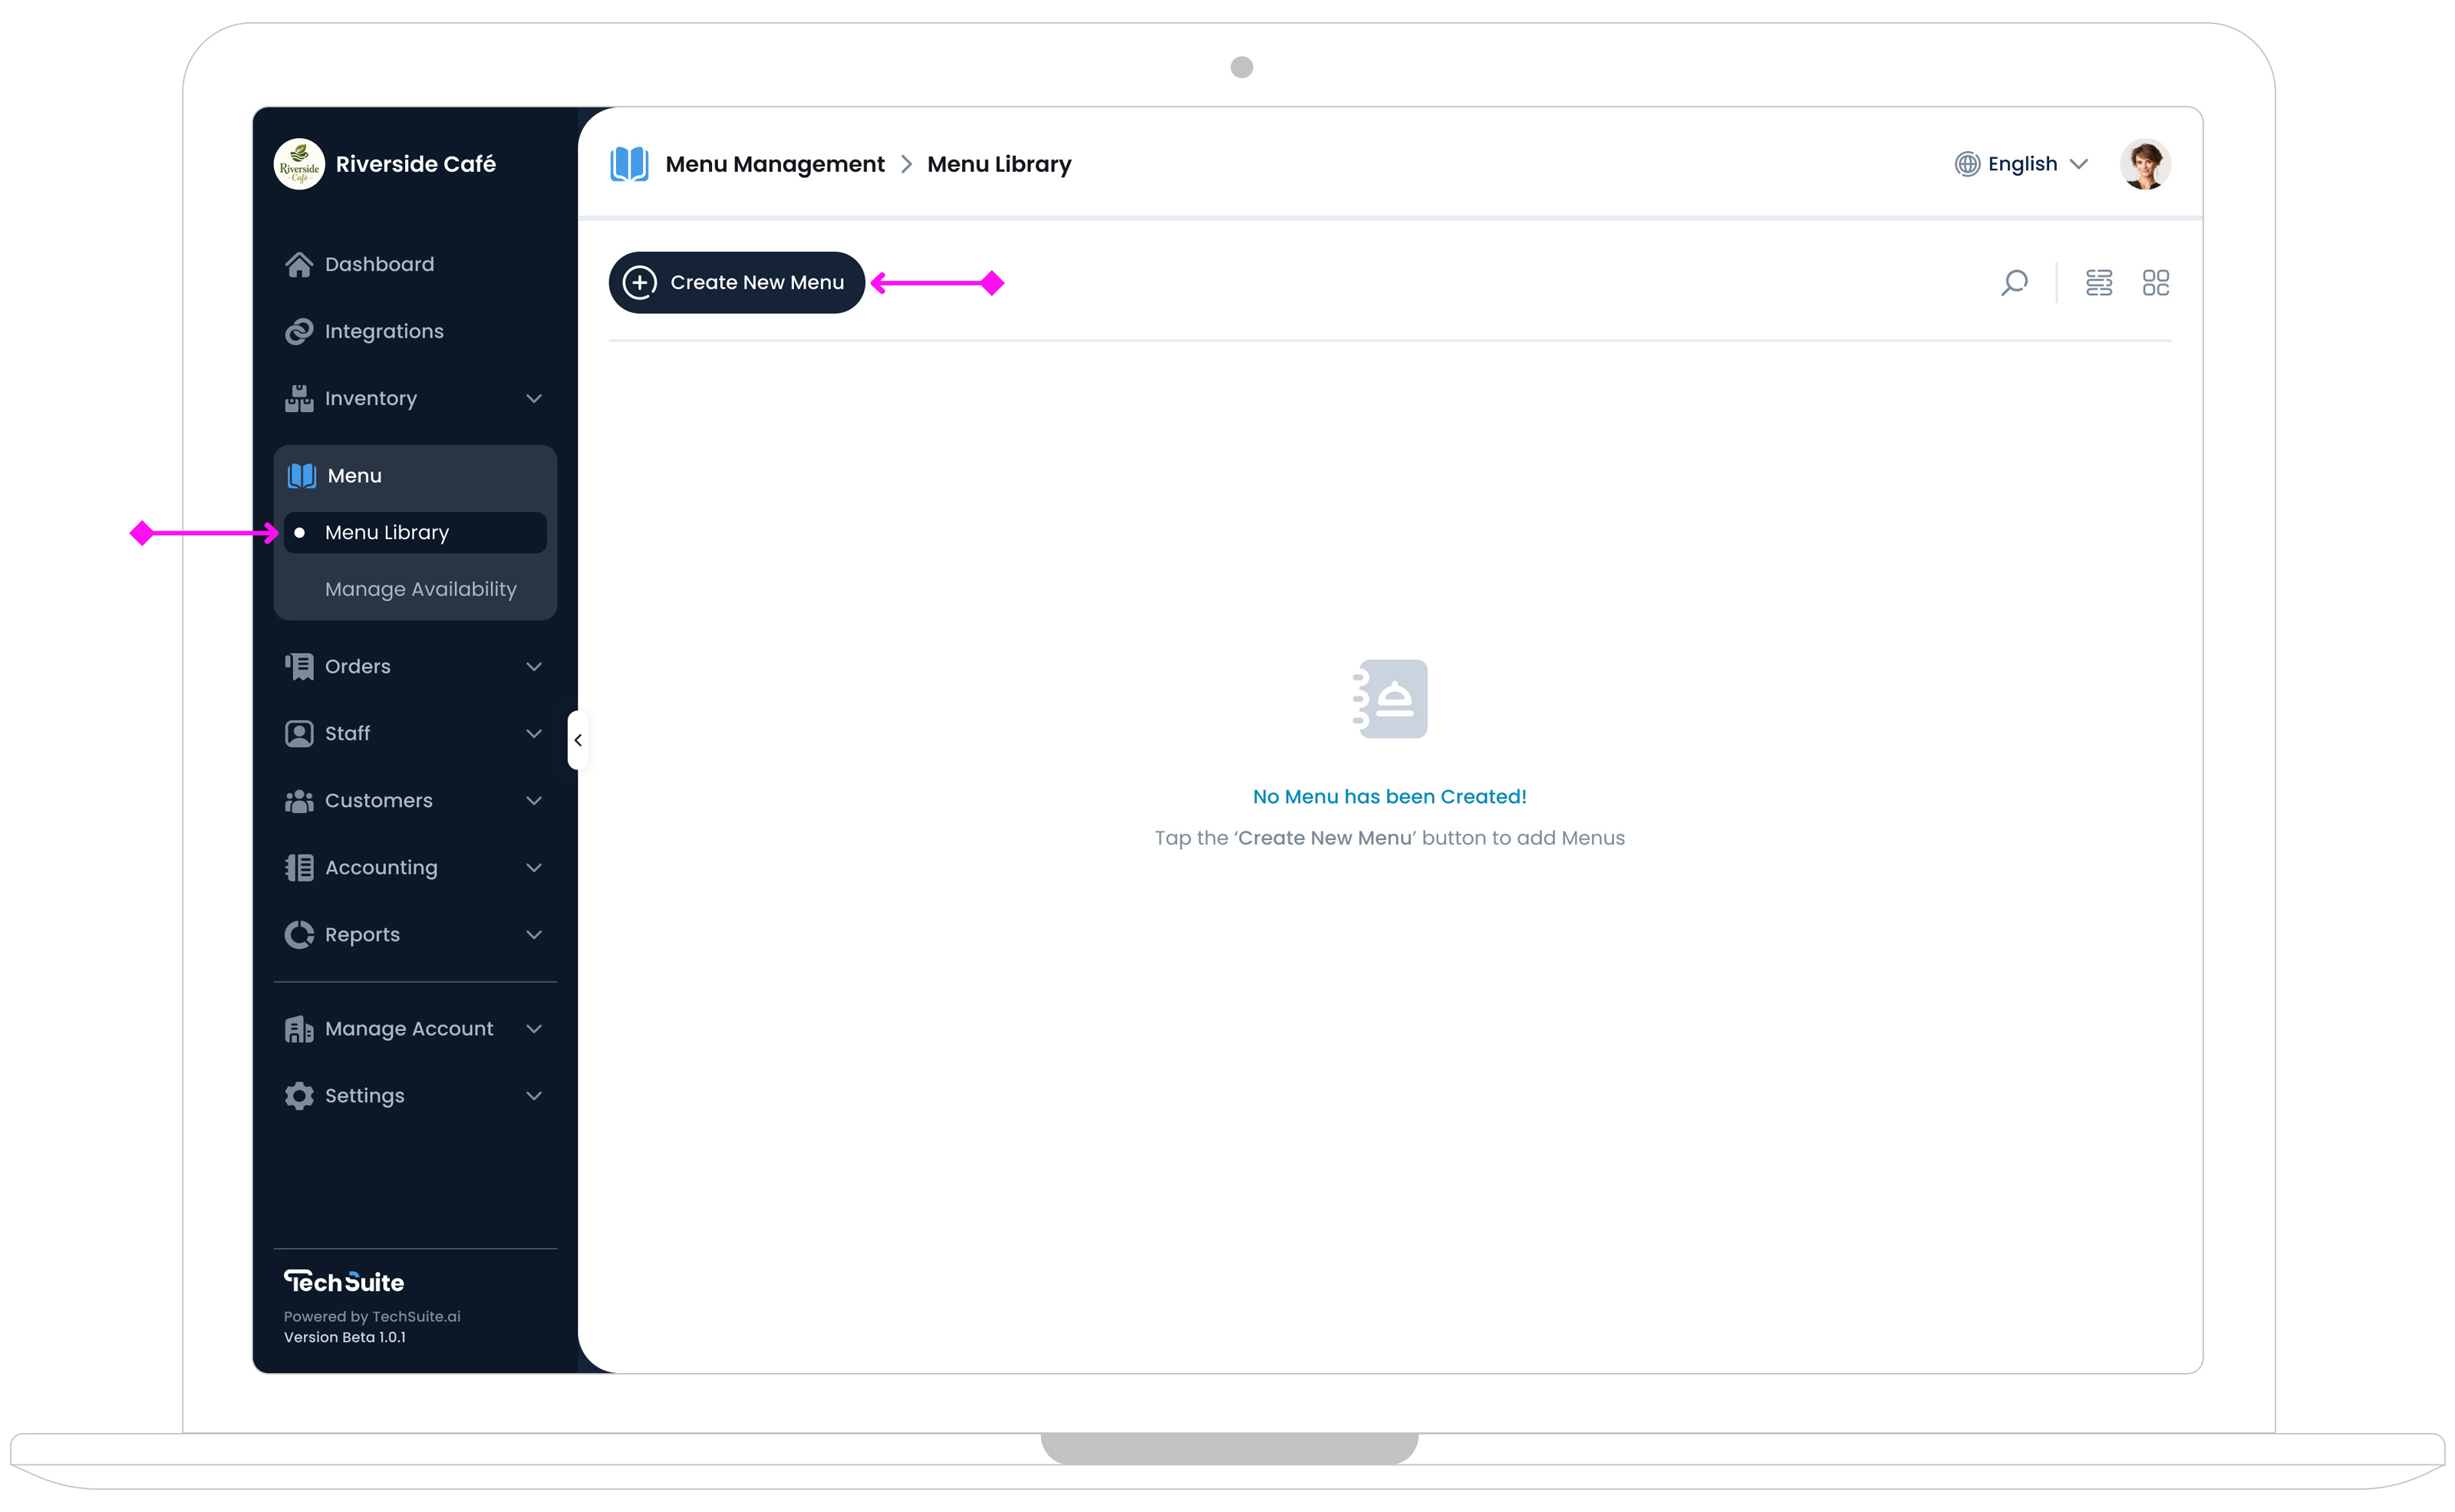
To Get Started
To create a new menu, log in to the TechSuite portal and navigate to Menu > Menu Library from the sidebar. Then, click the “Create New Menu” button
 . This will take you to the Set Up New Menu page, where you can define the menu’s name, image, and other key settings.
Step 1: Set Menu Info
After clicking the “Create New Menu” button, you’ll be taken to the New Menu Setup form. On the left side, you can configure key details for the new menu, including:
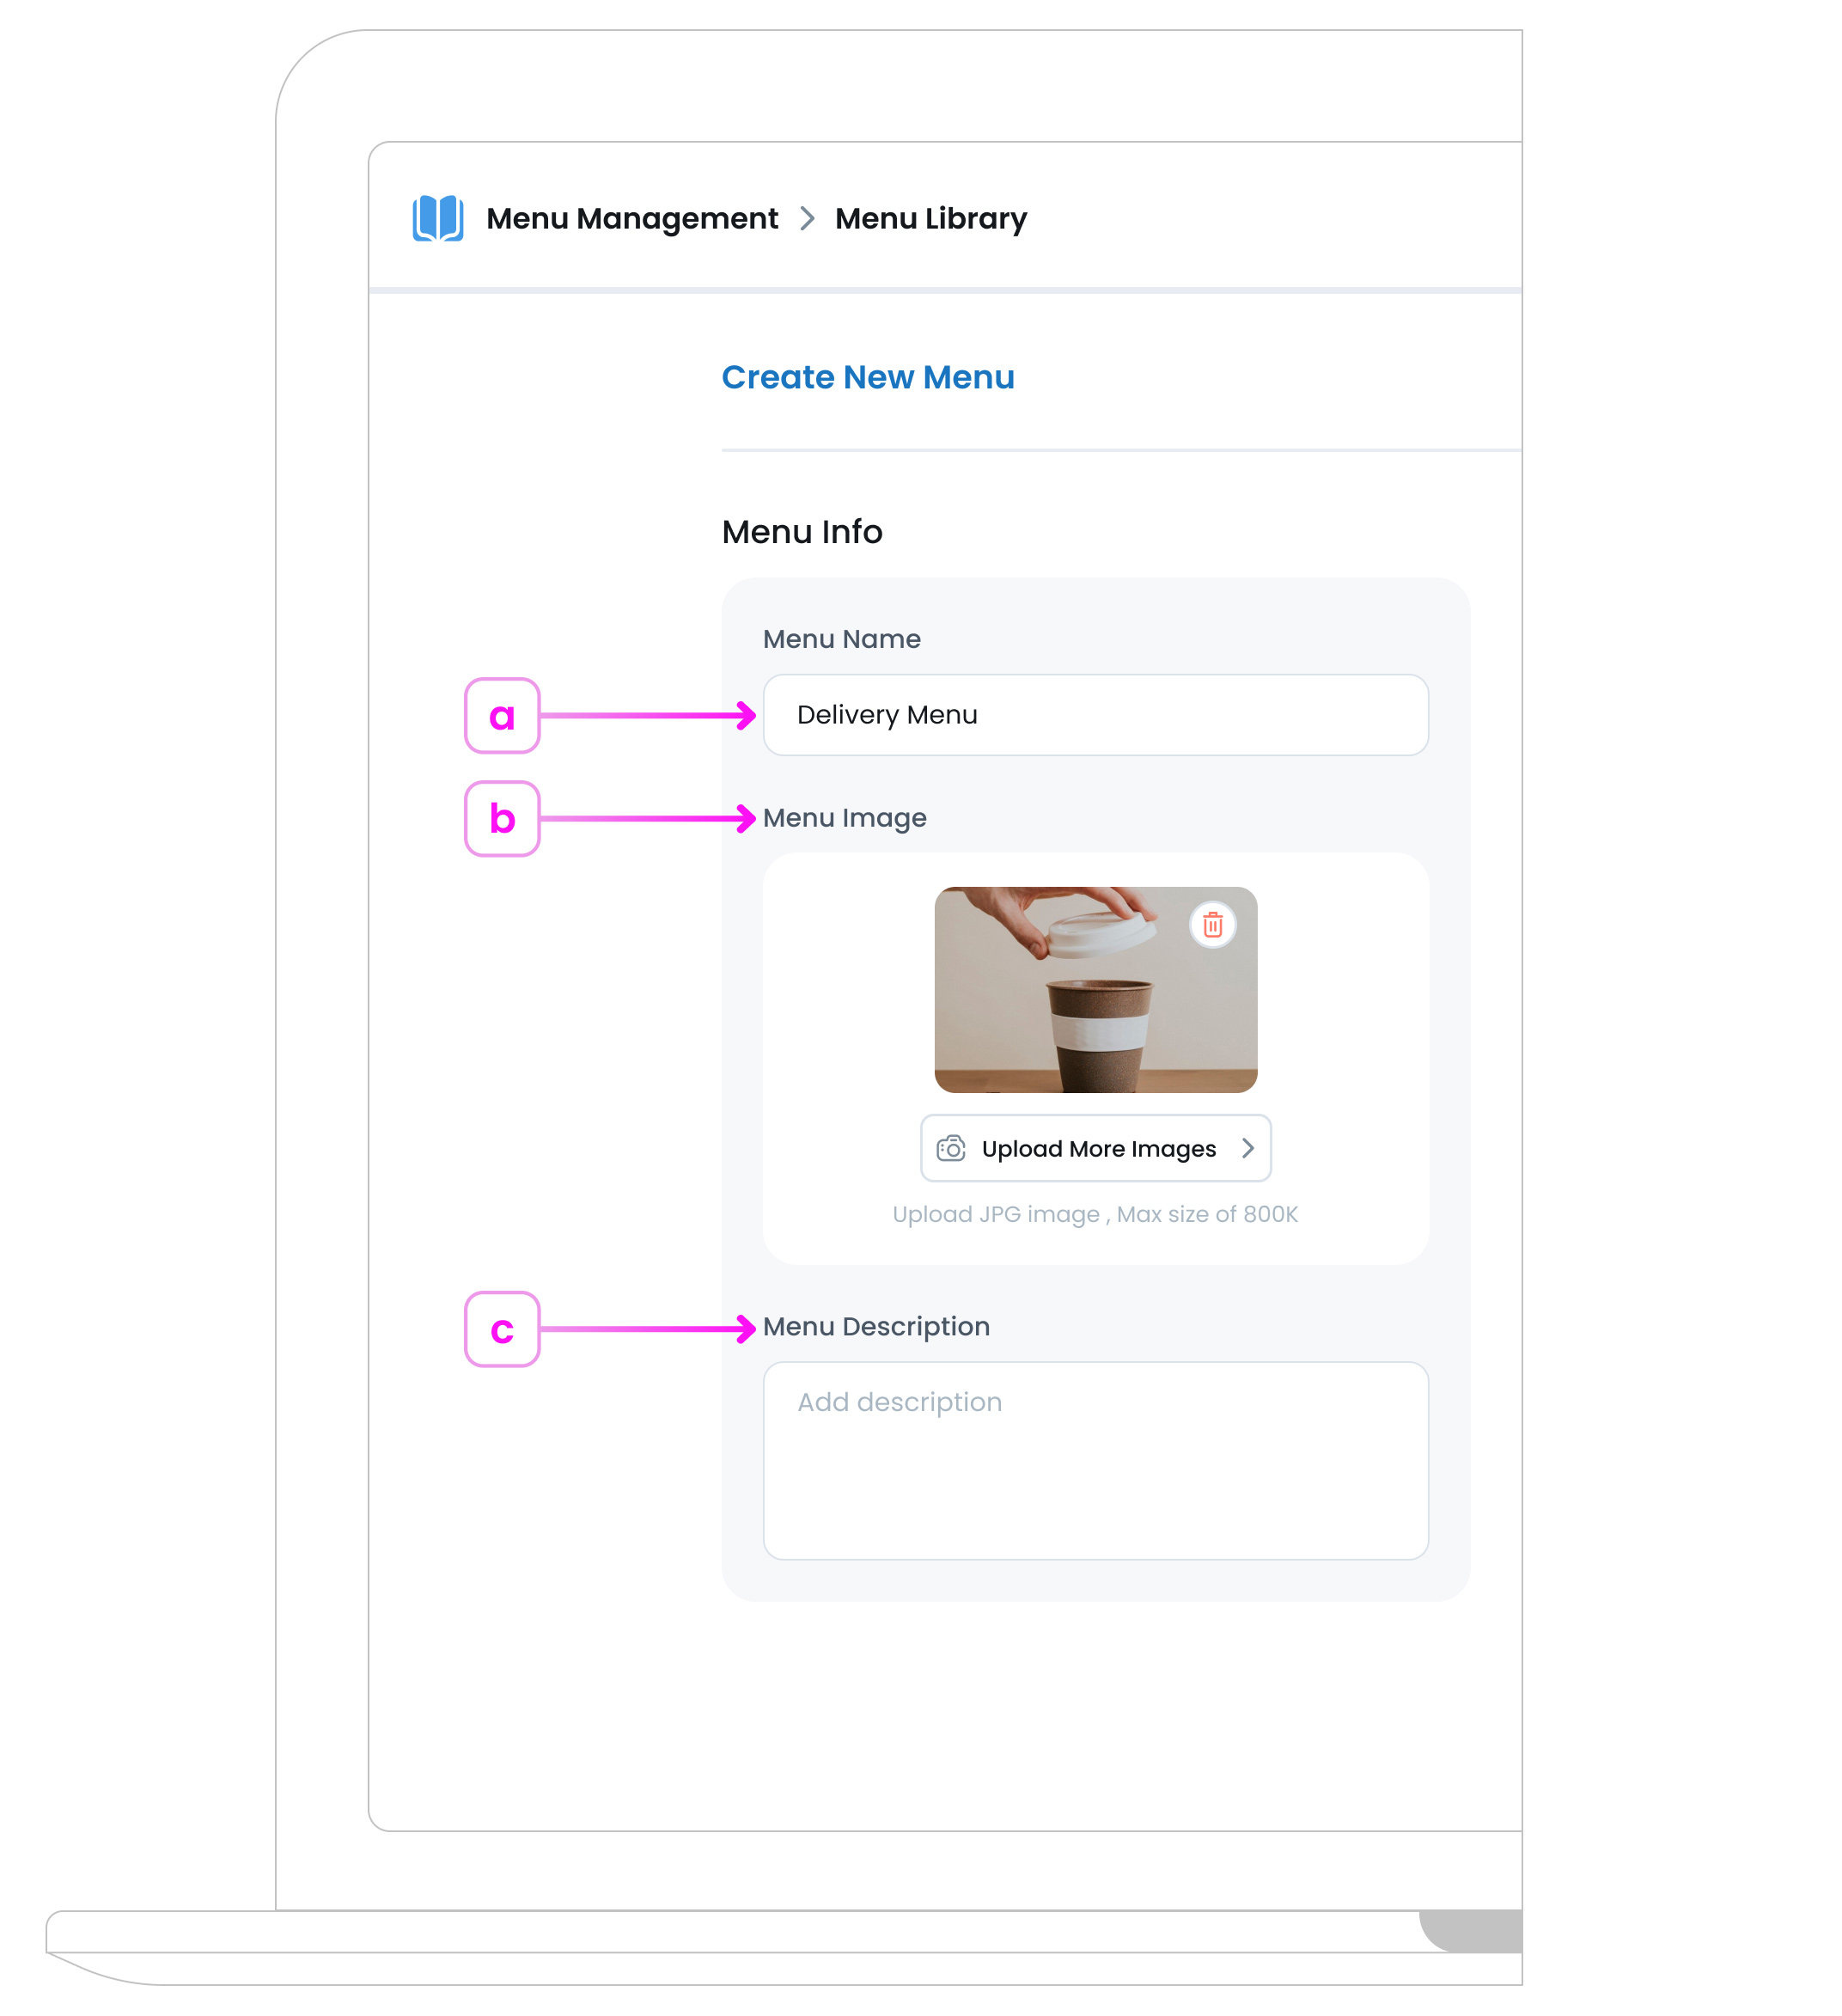
a. Menu Name
Choose a clear, concise title that instantly identifies the theme or purpose of this menu (for example, “Lunch Specials” or “Late Night Bites”). Thoughtful naming makes it easier for your team and customers to recognise what this menu contains, especially if you manage multiple menus across different times or events.
b. Menu Image
Upload an image for your menu to display on the menu’s “card” in the Menu Library and in any customer‐facing areas where the menu is showcased.
Pick a clear, inviting image that conveys the mood or style of this menu (e.g., a mouthwatering dish if it’s a Breakfast menu).
Images must be JPG, up to 800 KB. You can resize or compress files if needed. Once uploaded, you’ll see it previewed on the menu’s card layout.
Image Guidelines and Pro Tips
-
Make it visually appealing
Choose an image that clearly shows the item, looks fresh, and sparks interest at a glance.
-
Avoid poor lighting or blur
Low-resolution or unclear photos can negatively affect how your menu is perceived.
-
Keep it consistent:
For a more professional and polished menu, aim to use images with similar lighting, angles, and backgrounds across your items.
-
Upload the Right Image Size
Use rectangle images sized 1200×800 or 1600×1000 pixels (landscape), in JPG format for best compatibility. Keep file size under 800KB to ensure fast loading. Large images can slow performance, while small ones may appear blurry. Always preview your image to confirm it displays well across POS, kiosk, mobile, and online ordering. For resizing tips, see our Image Resizing Guide.
c. Menu Description (Optional)
Provide a brief overview or key highlights(e.g., “Freshly made brunch specials”). This helps customers quickly understand the menu’s focus when viewing it in any customer-facing app.
Step 2: Menu Settings
After entering your menu information, you’ll see additional fields on the right side of the page, such as Menu Availability for each branch. You can select a predefined availability (“e.g., Lunch Hours”) or create a custom schedule based on each branch’s operating hours.
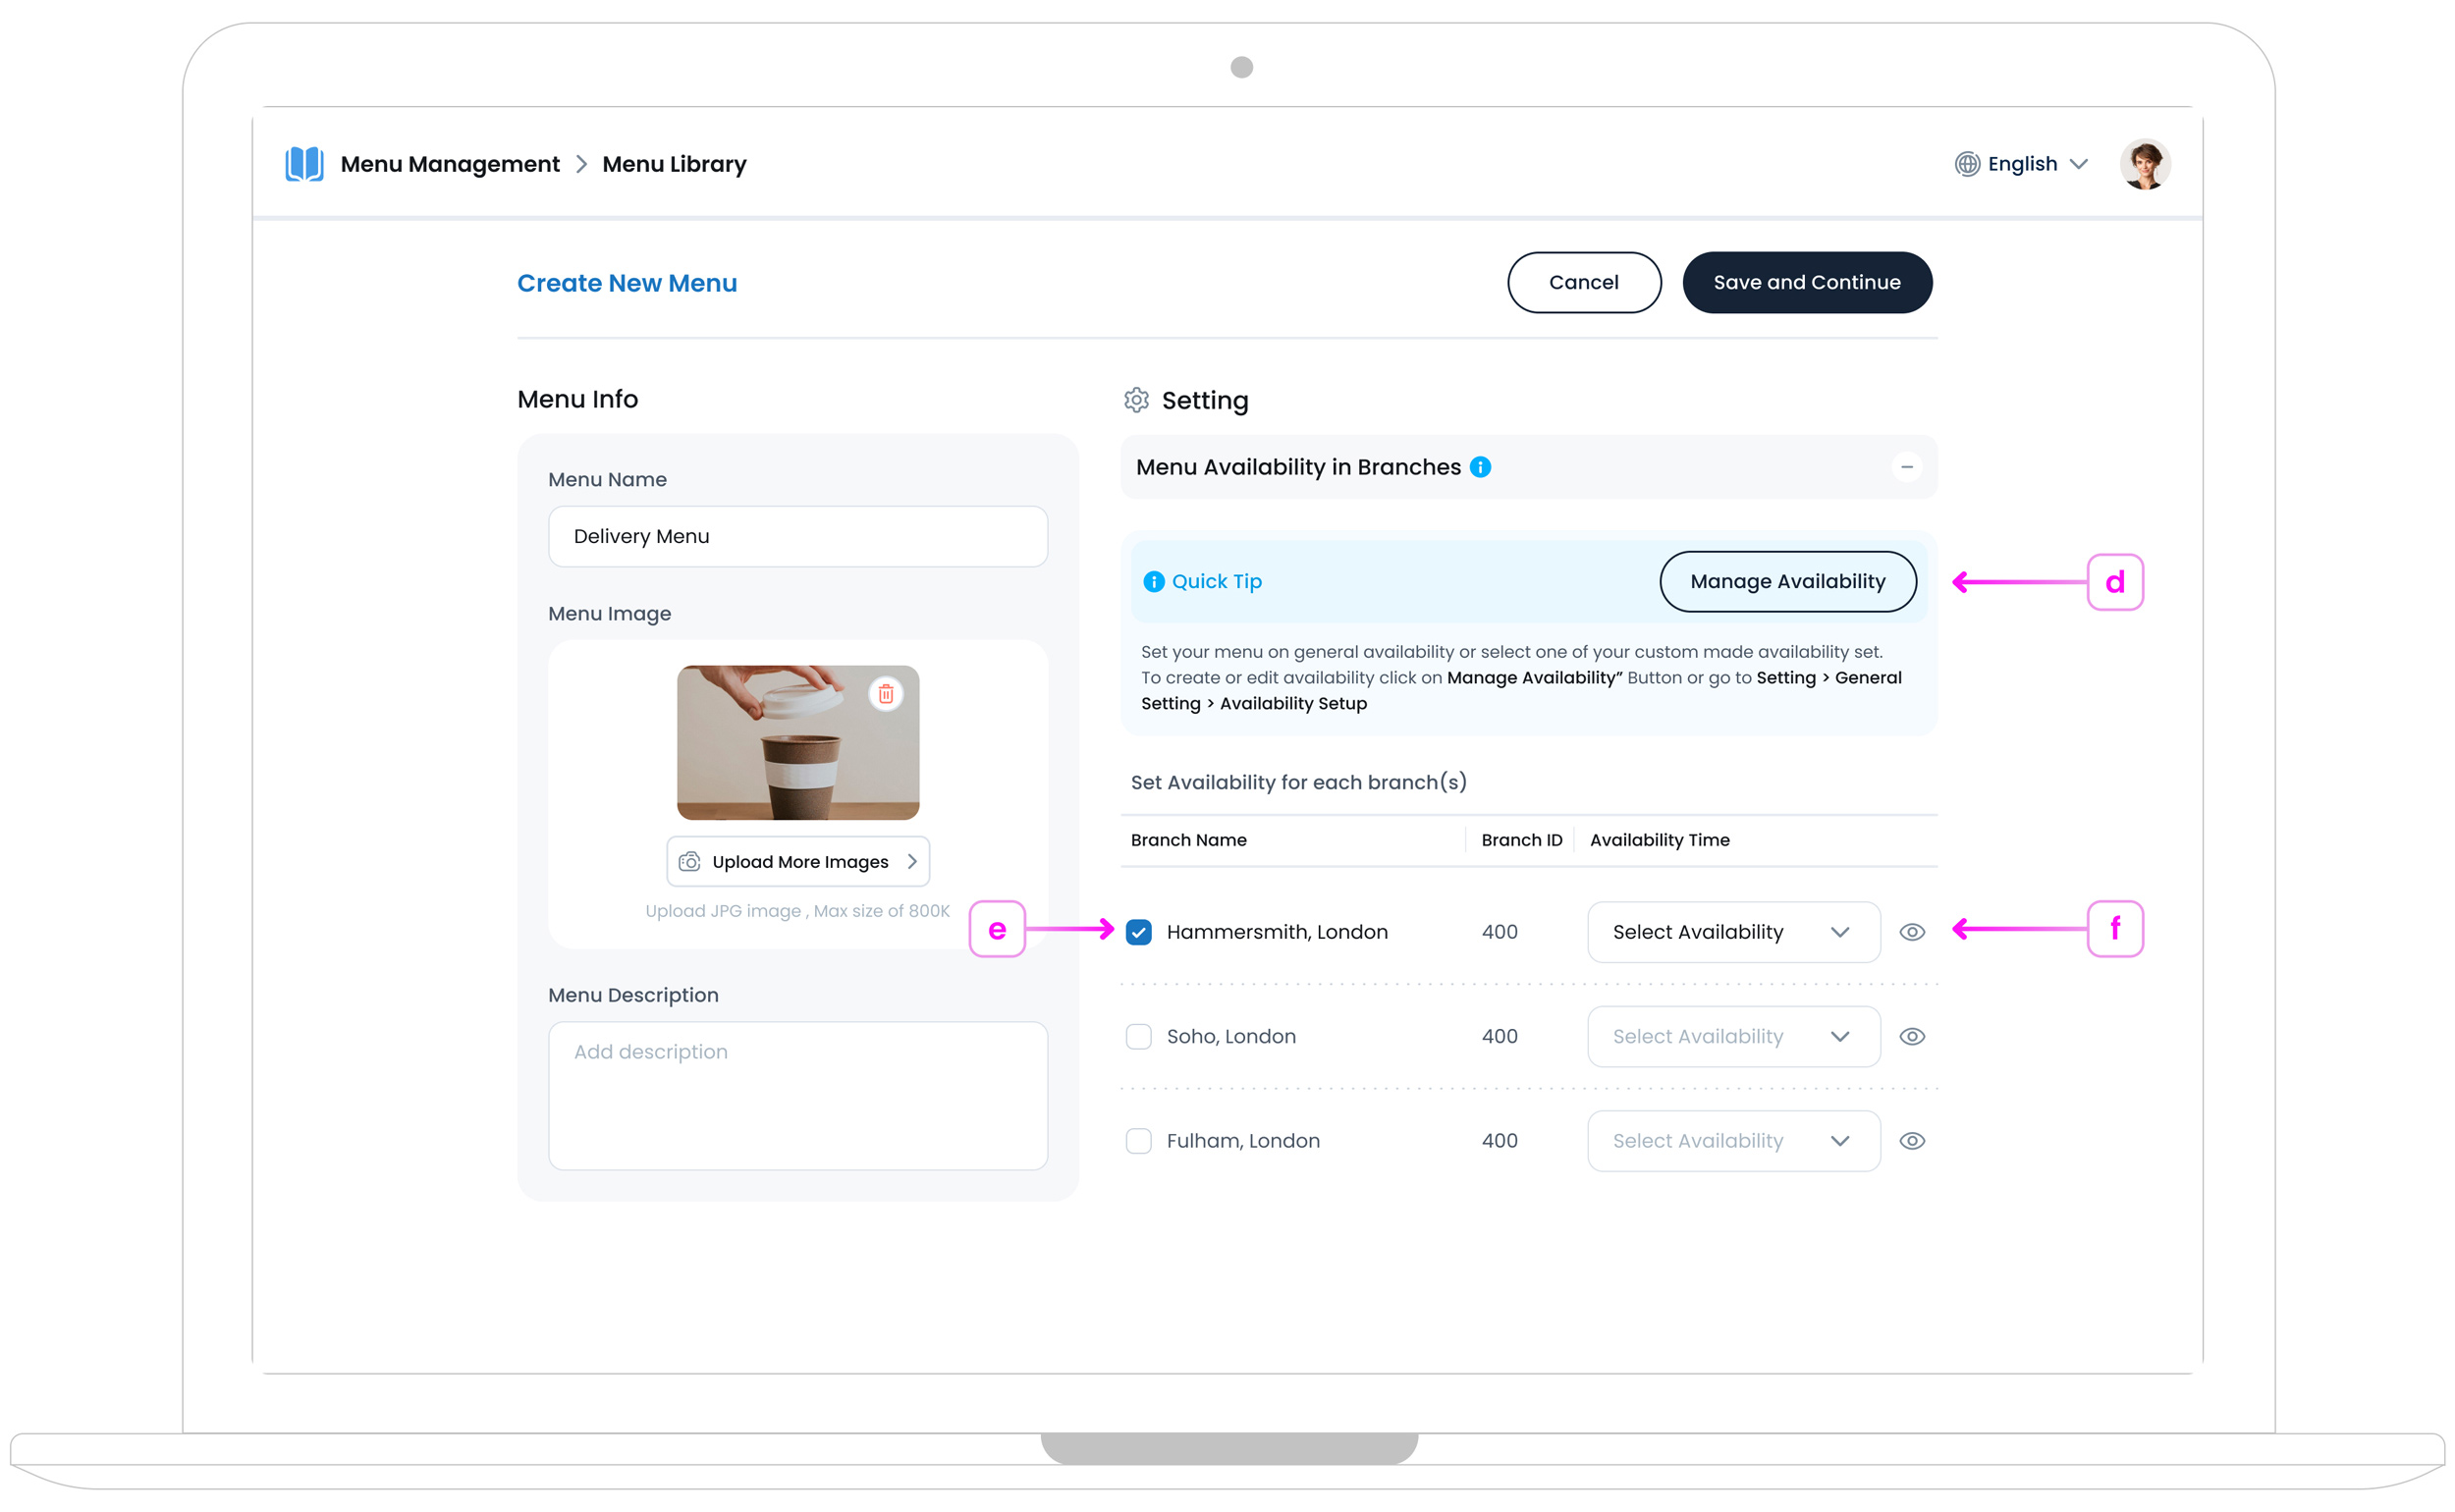
d. Manage Availability Button
This button navigates you to the main Availability Setup page, where you can define time‐based schedules and then return here to assign them to the selected branches. Whether it’s breakfast hours, lunch windows, or weekend specials, you’ll have full control over when this menu is available.
e. Set Availability for Branches
If you’re a multi-branch business, you’ll need to select which branches should be linked to the new menu. Simply check or uncheck each branch that will offer it. If you only have a single branch, it will be selected by default. Once you’ve selected the branches, choose an appropriate availability schedule such as (“Lunch Hours” or “Happy Hour”) from the dropdown menu.
f. View Availability Details Popup
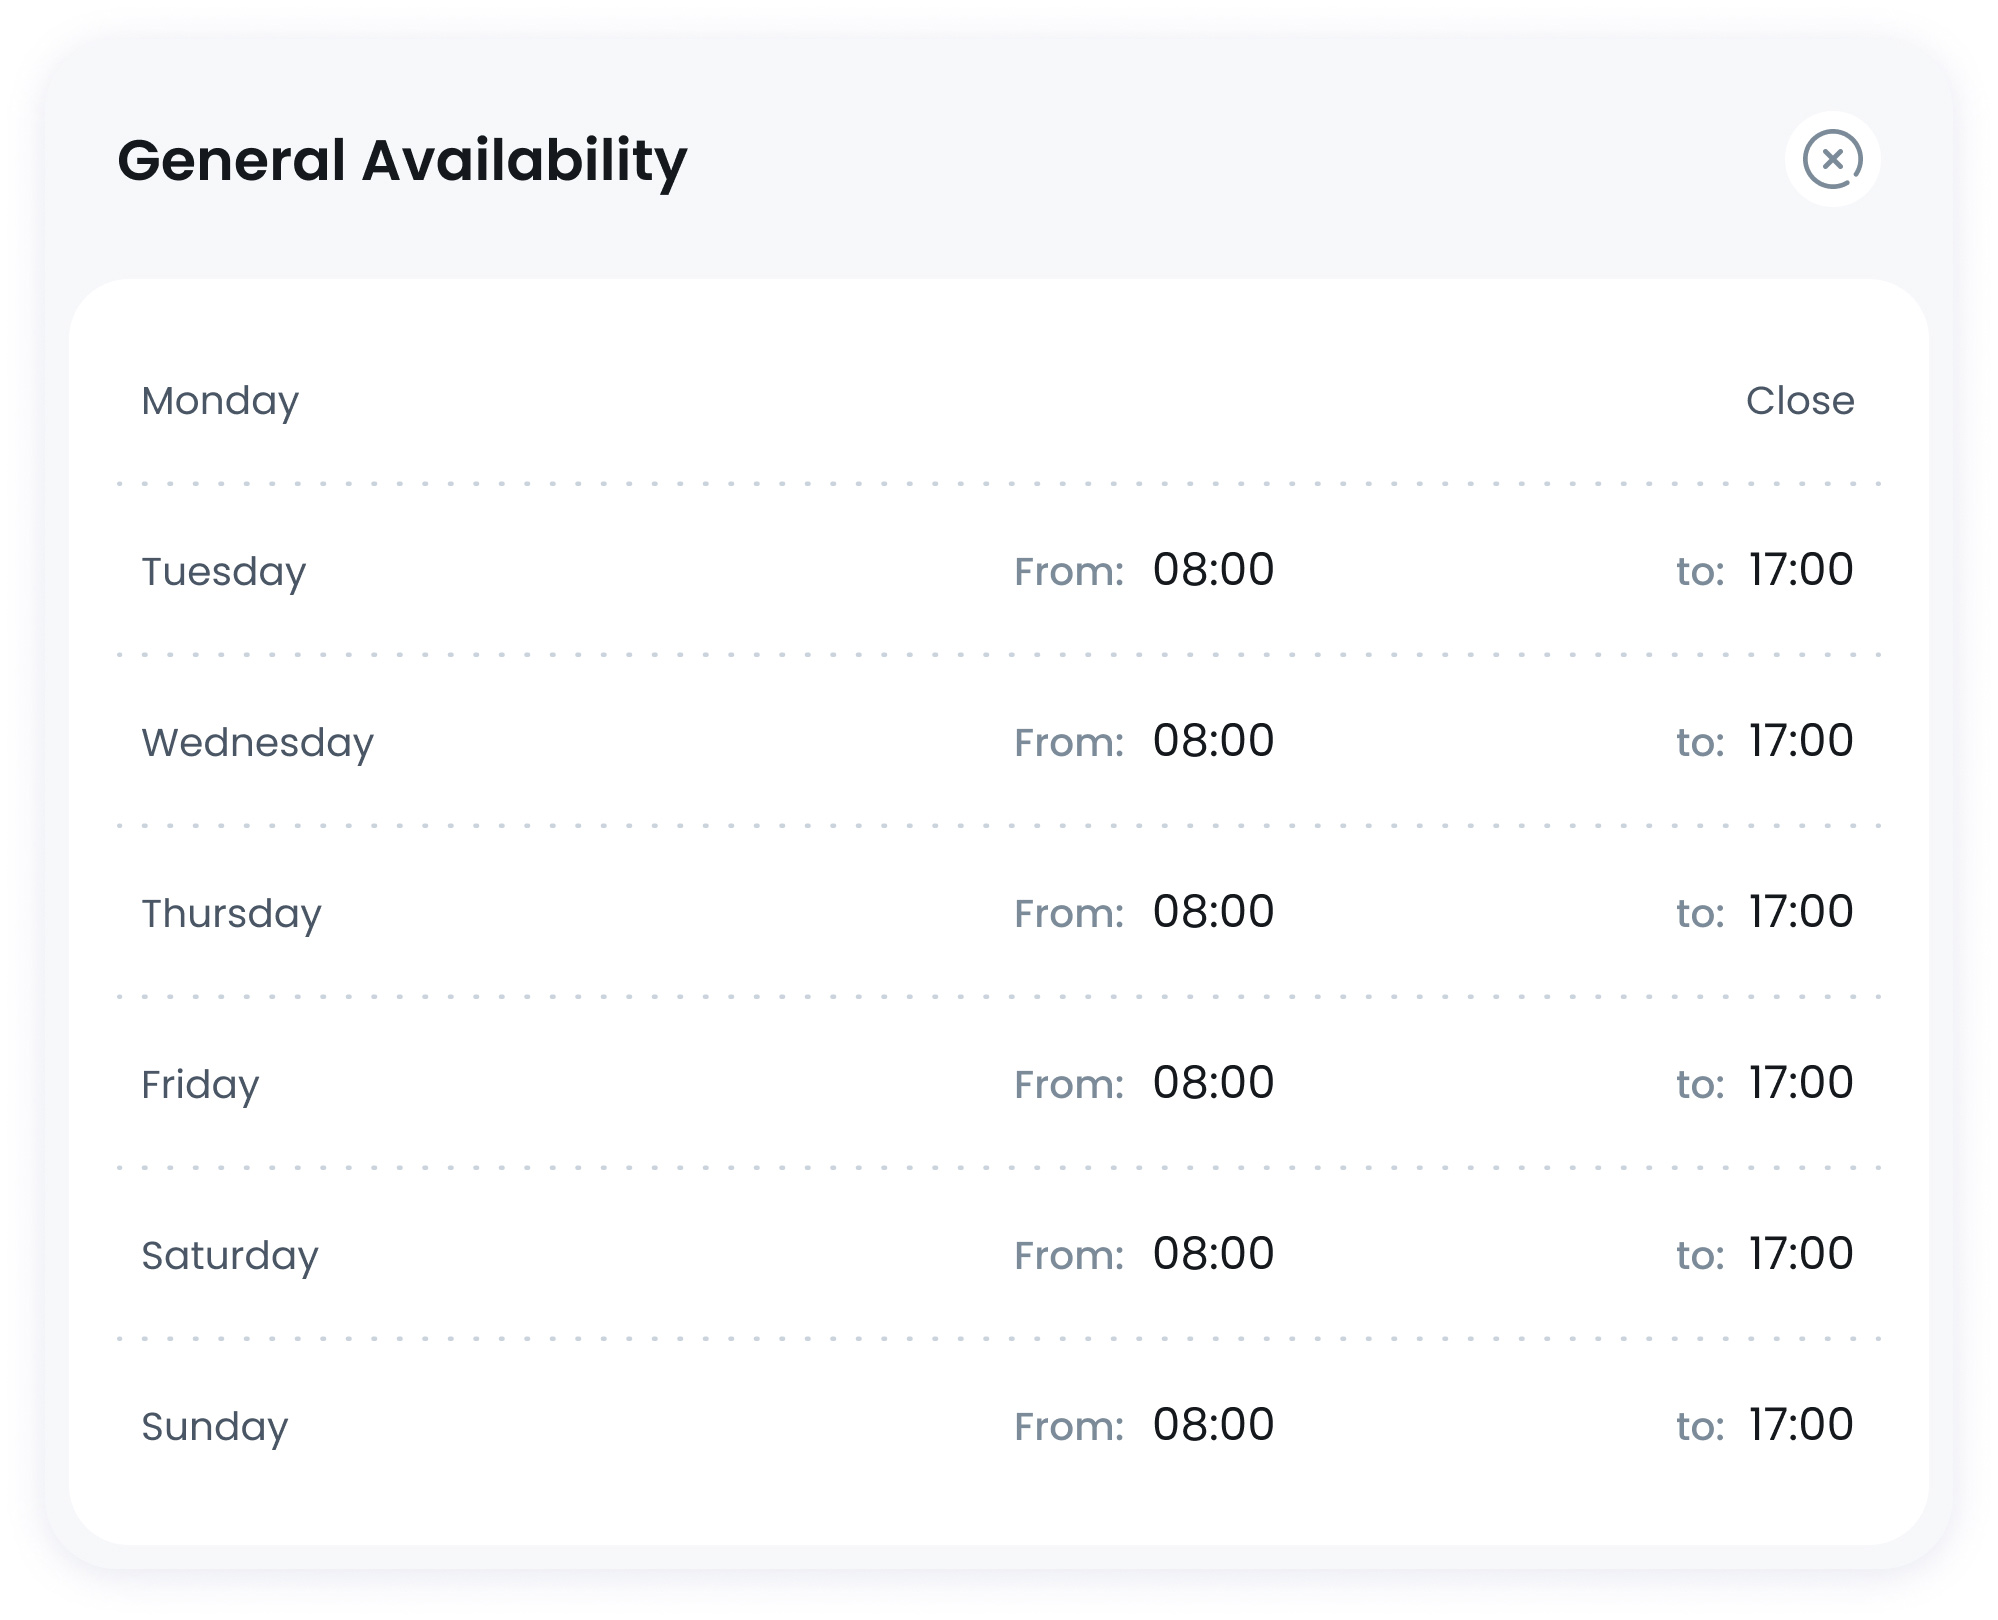
To confirm exactly when each branch can serve this menu, click on the view ![]() icon, next to each availability set. You’ll see a quick a summary of weekdays and times, when this menu is active.
icon, next to each availability set. You’ll see a quick a summary of weekdays and times, when this menu is active.
If you need to modify those hours or create new time slots entirely, visit Manage Availability in your main settings.
Step 3: Save and Continue
Once you’ve selected each branch and assigned a suitable availability, click on "Save and Continue" button  and in the top-right corner, to save your menu.
Frequently Asked Questions
No, adding a picture is optional. You can leave the menu card text‐only if you prefer. If you’d like more detail on how images display, see section b: Menu Image.
Yes, that’s the idea behind selecting availability per branch. For guidance on choosing which branches to serve (and when), see section e: Set Availability for Branches.
Click the small eye icon to open the View Availability Details Popup. Section f explains how to quickly review any special schedules restrictions.
What’s Next?
After saving your menu, you’ll be automatically taken to a new page where you can add items and categories. You can organise your menu right away by creating categories and assigning items to each one, or you can come back later to complete this step.