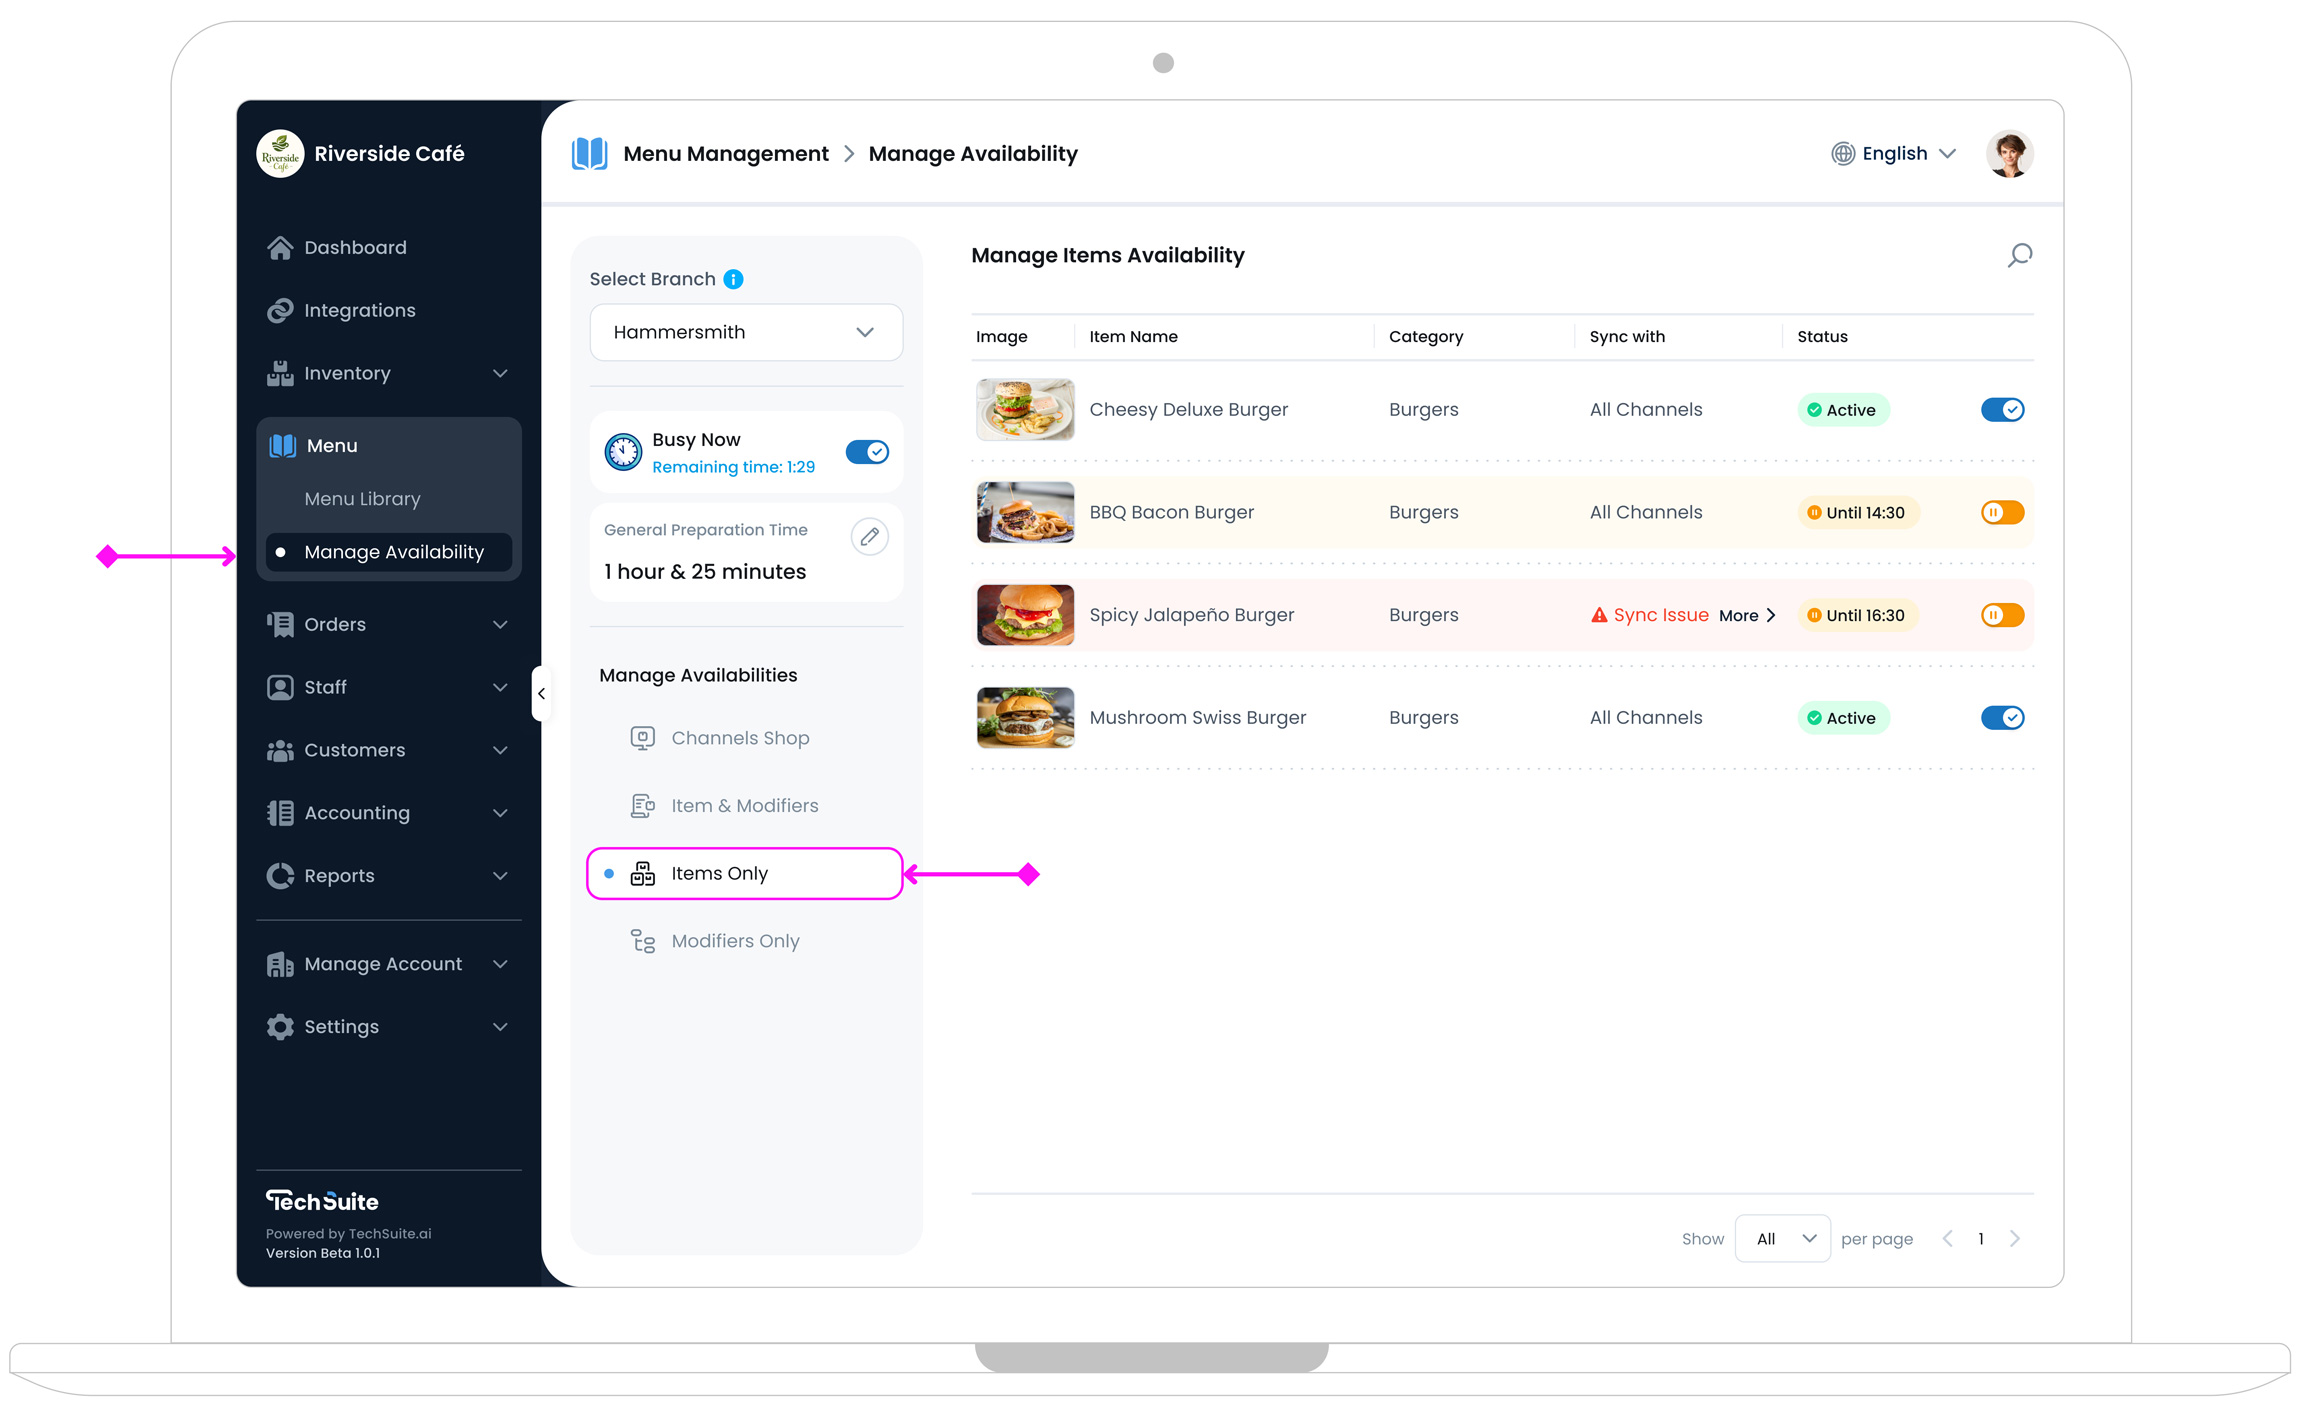
Manage Item Availability
On the Manage Item Availability page, you can view each item’s status, check if it’s synced across channels, and toggle its availability using a convenient pause control. For advanced date ranges or bulk actions, this page offers a complete overview of item statuses per branch.
Get Started
To access this page, open the TechSuite portal, go to Manage Availability, and select the Items Only tab. Choose the branch you want to manage. A table will display all items currently available for sale at that branch.
Items Row Details
Each row includes details and actions that help you monitor and control an item’s availability status. You can quickly check whether an item is synced across multiple channels, and toggle items on or off to control their availability across all connected sales channels.
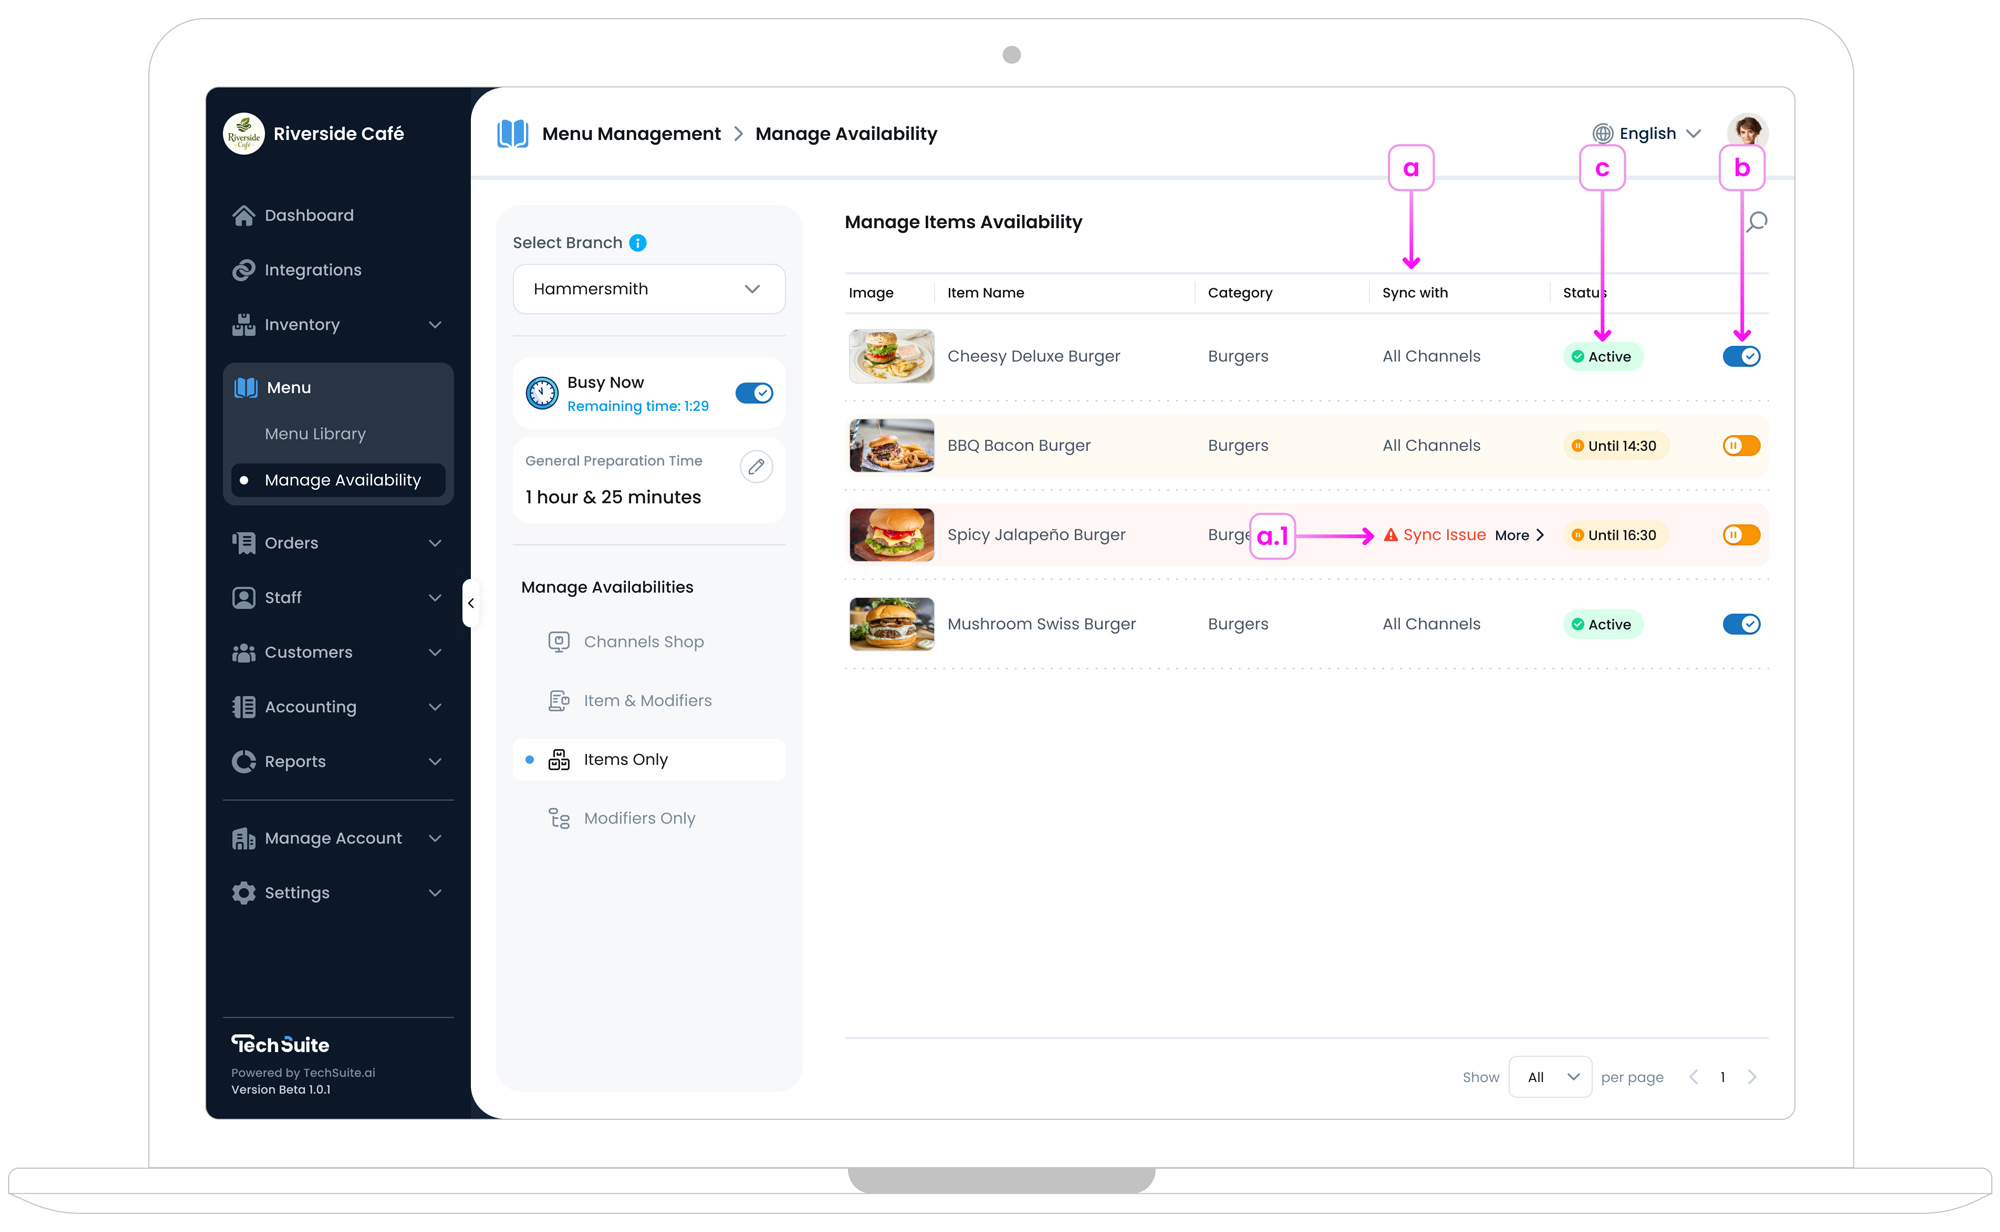
a. Sync Data Status
In the table, the "Sync With" column shows which channels each item is linked to. This indicates whether the item’s availability data is synced with your channels. If it shows "All Channels", the item has been successfully synced with every channel connected through your Publish Menu flow. If a Sync Issue appears, it means one or more channels encountered errors during syncing.
a.1. Handling Channel Sync Issues
When you see Sync Issue in the Sync With column, click on More arrow to open a popup window. This popup displays which channels failed to sync data (e.g., missing required fields, insufficient image resolution) and the server‐provided messages explaining why. Correct these issues in Inventory (such as adding a valid image or adjusting item details), then retry syncing to update all connected channels.
Note:
The exact channels for each item depend on how you’ve published your menu. One item could sync to three channels, while another might sync to just one, based on the choices you made during menu publishing.
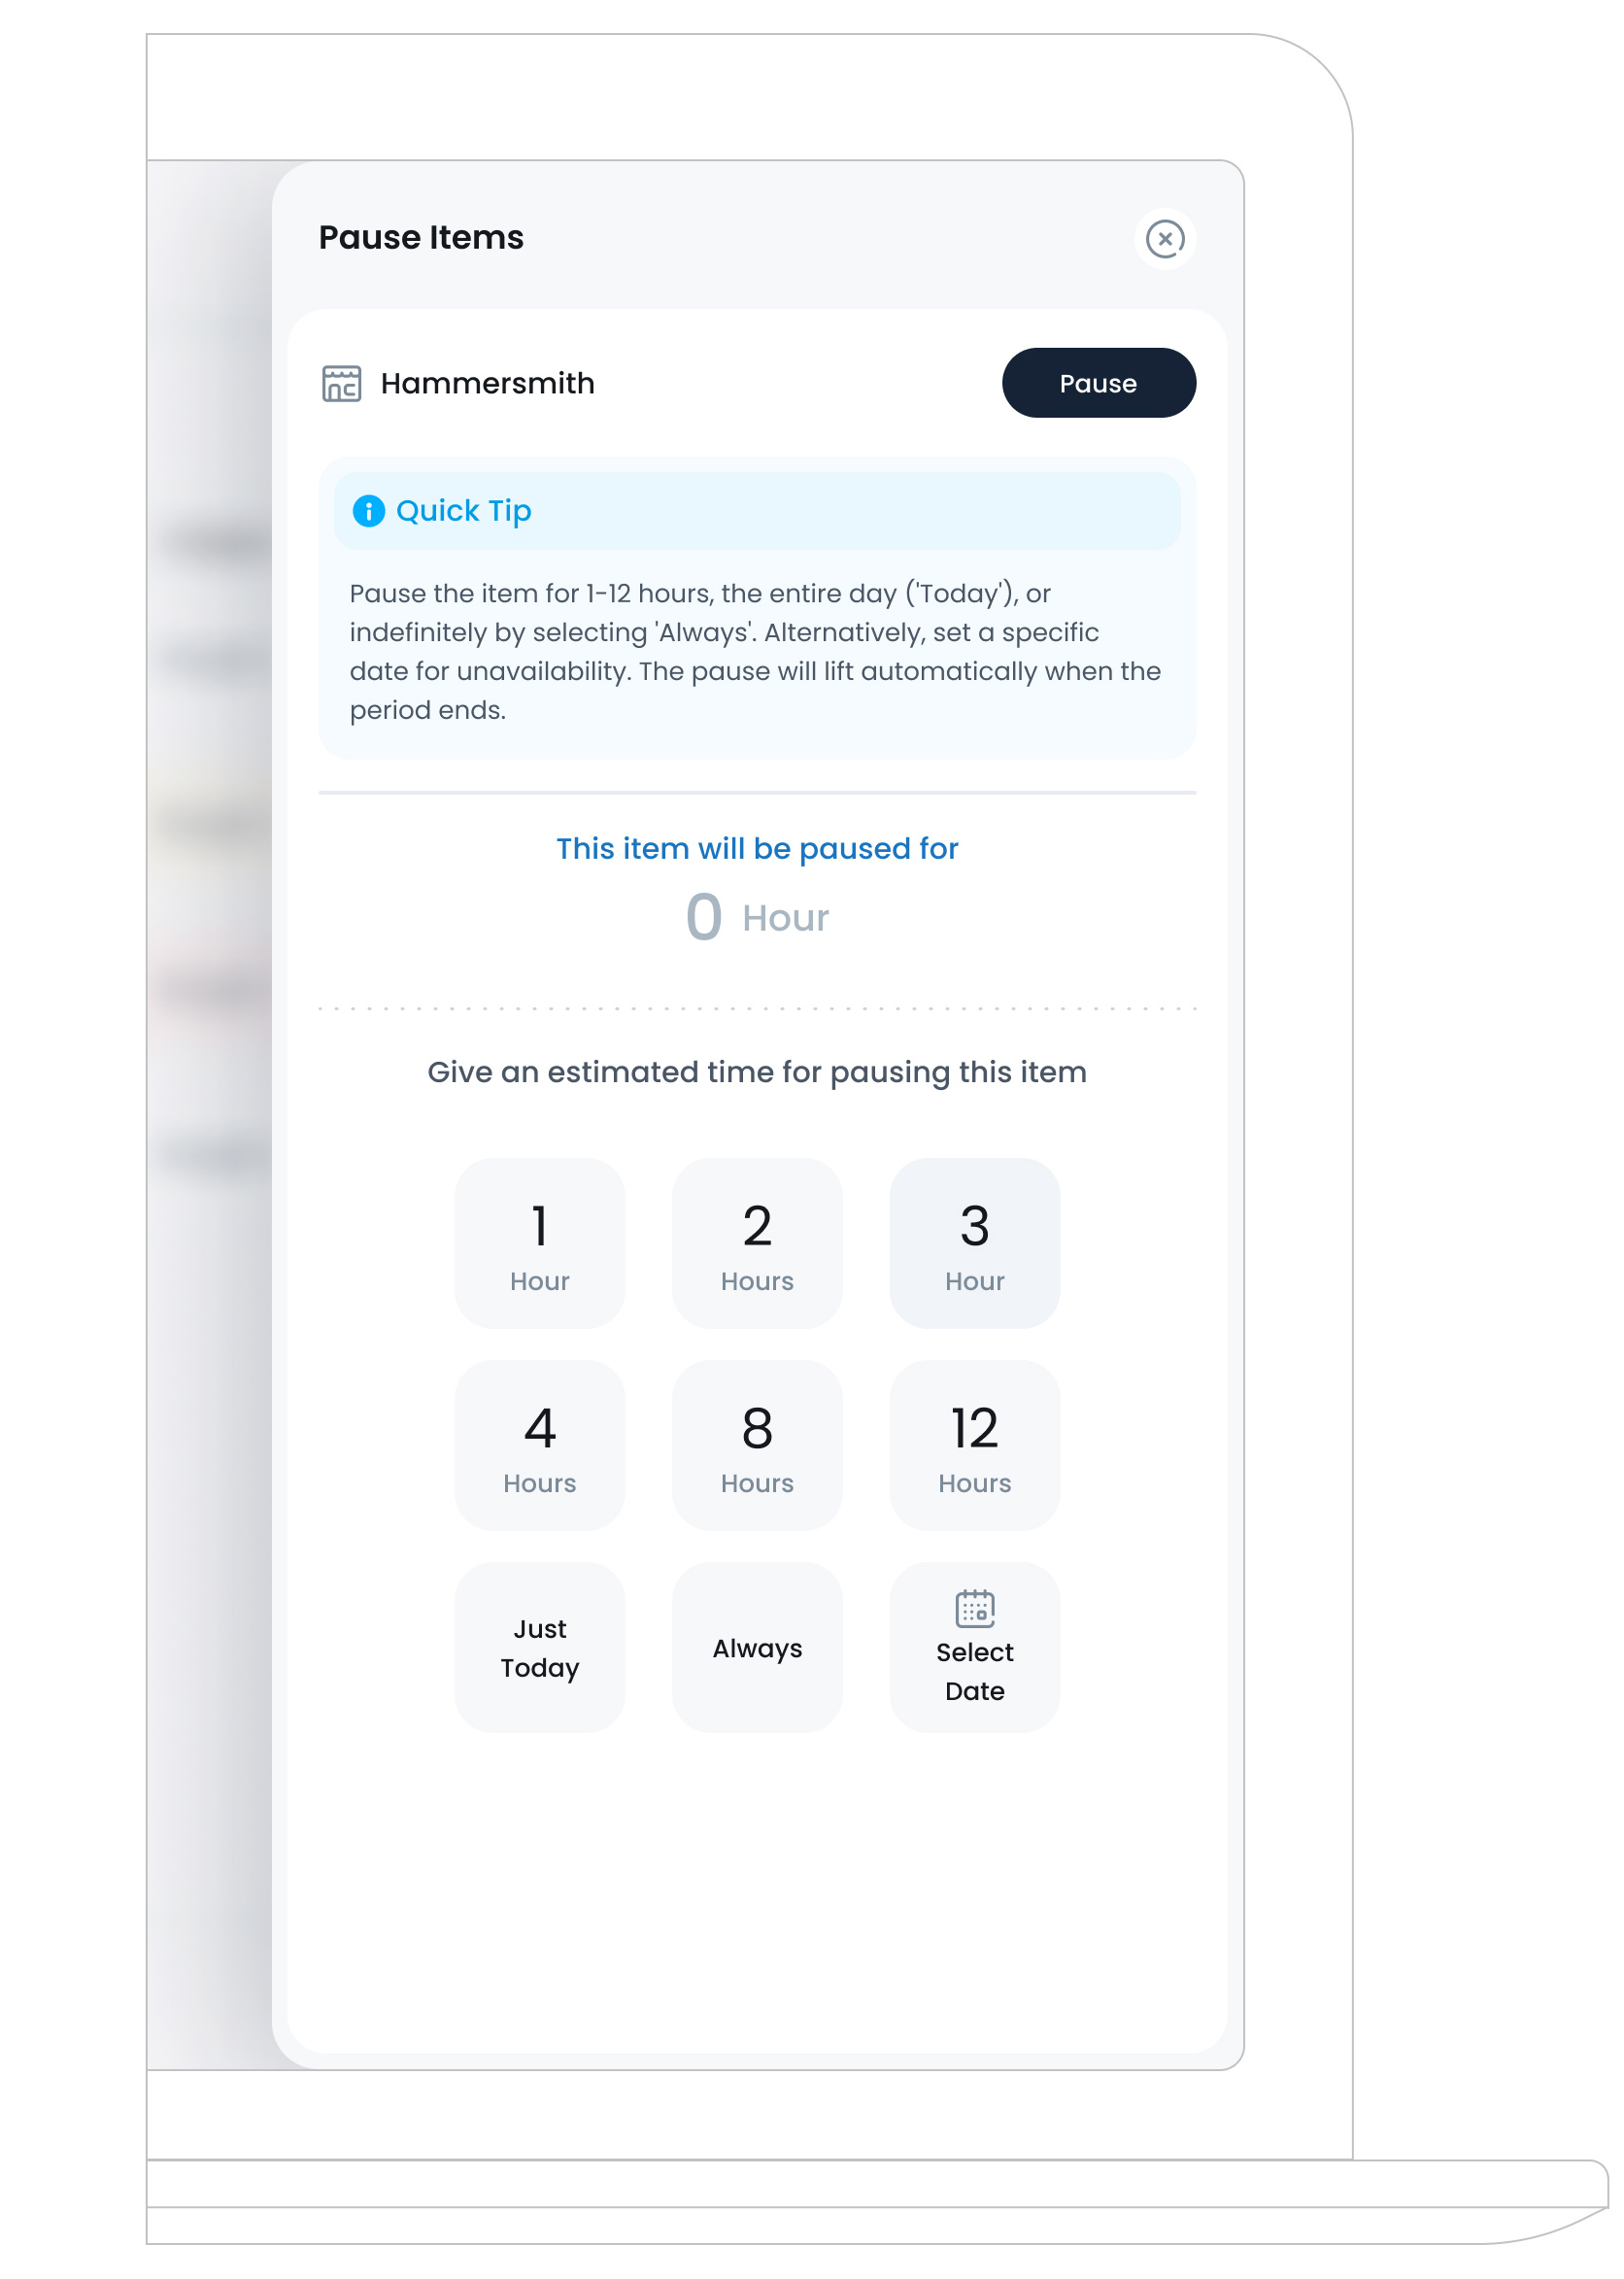
b. Item Availability Toggle
In each item row, on the right side, you’ll find a toggle that lets you change the item’s availability status toActive or Paused. If you switch it to Paused, a Pause Item popup will appear, allowing you to choose how long the item should remain unavailable. You can select from the following pause durations:
- 1 to 12 Hours: short-term pauses
- Just Today: pauses until end of current business day
- Always: keeps the item paused indefinitely
- Select Date: choose a custom pause range
This pause automatically lifts once the chosen period expires. If you select Always, the item stays off until you manually reactivate it.
c. Item Status
In the Status column, you can see whether an item is marked as Active or Paused for a specific duration. Some items display a time limit, such as Until 16:30. An orange toggle next to the status means the item is paused click it to reactivate the item.

What’s Next?
After adjusting item availability here, consider reviewing Manage Modifiers Availability for the items that set with custom add‐ons or modifiers options. Keeping items and modifiers in sync ensures a smooth, consistent ordering experience across all channels.