Availability Setup
Availability Setup lets you control when items or services can be purchased, whether by time of day, day of the week, or specific date ranges. It’s especially useful for managing seasonal menus, limited-time offers, or aligning with store hours across POS, kiosk, and online channels.
You can create Availability Sets and assign them to items, menus, or Sales Types to show the right things at the right time.
Understanding Availability
Availability in TechSuite controls when items or services can be sold, based on time, day, or date range. By creating Availability Sets, you can show or hide products during specific times, helping you manage menus and operations more effectively.
This is especially useful for:
- Time-specific menus (e.g., Lunch Specials)
- Seasonal or event-based offers (e.g., Valentine’s Week Menu)
- Store hours that vary by day or sales type (e.g., In-Store vs. Delivery).
Availability Sets can be applied to:
- Sales Types (e.g., In-store, Delivery)
- Individual Items or Menus
This gives you flexibility to ensure your offerings are available at the right moment, across all ordering channels.
To Get Started
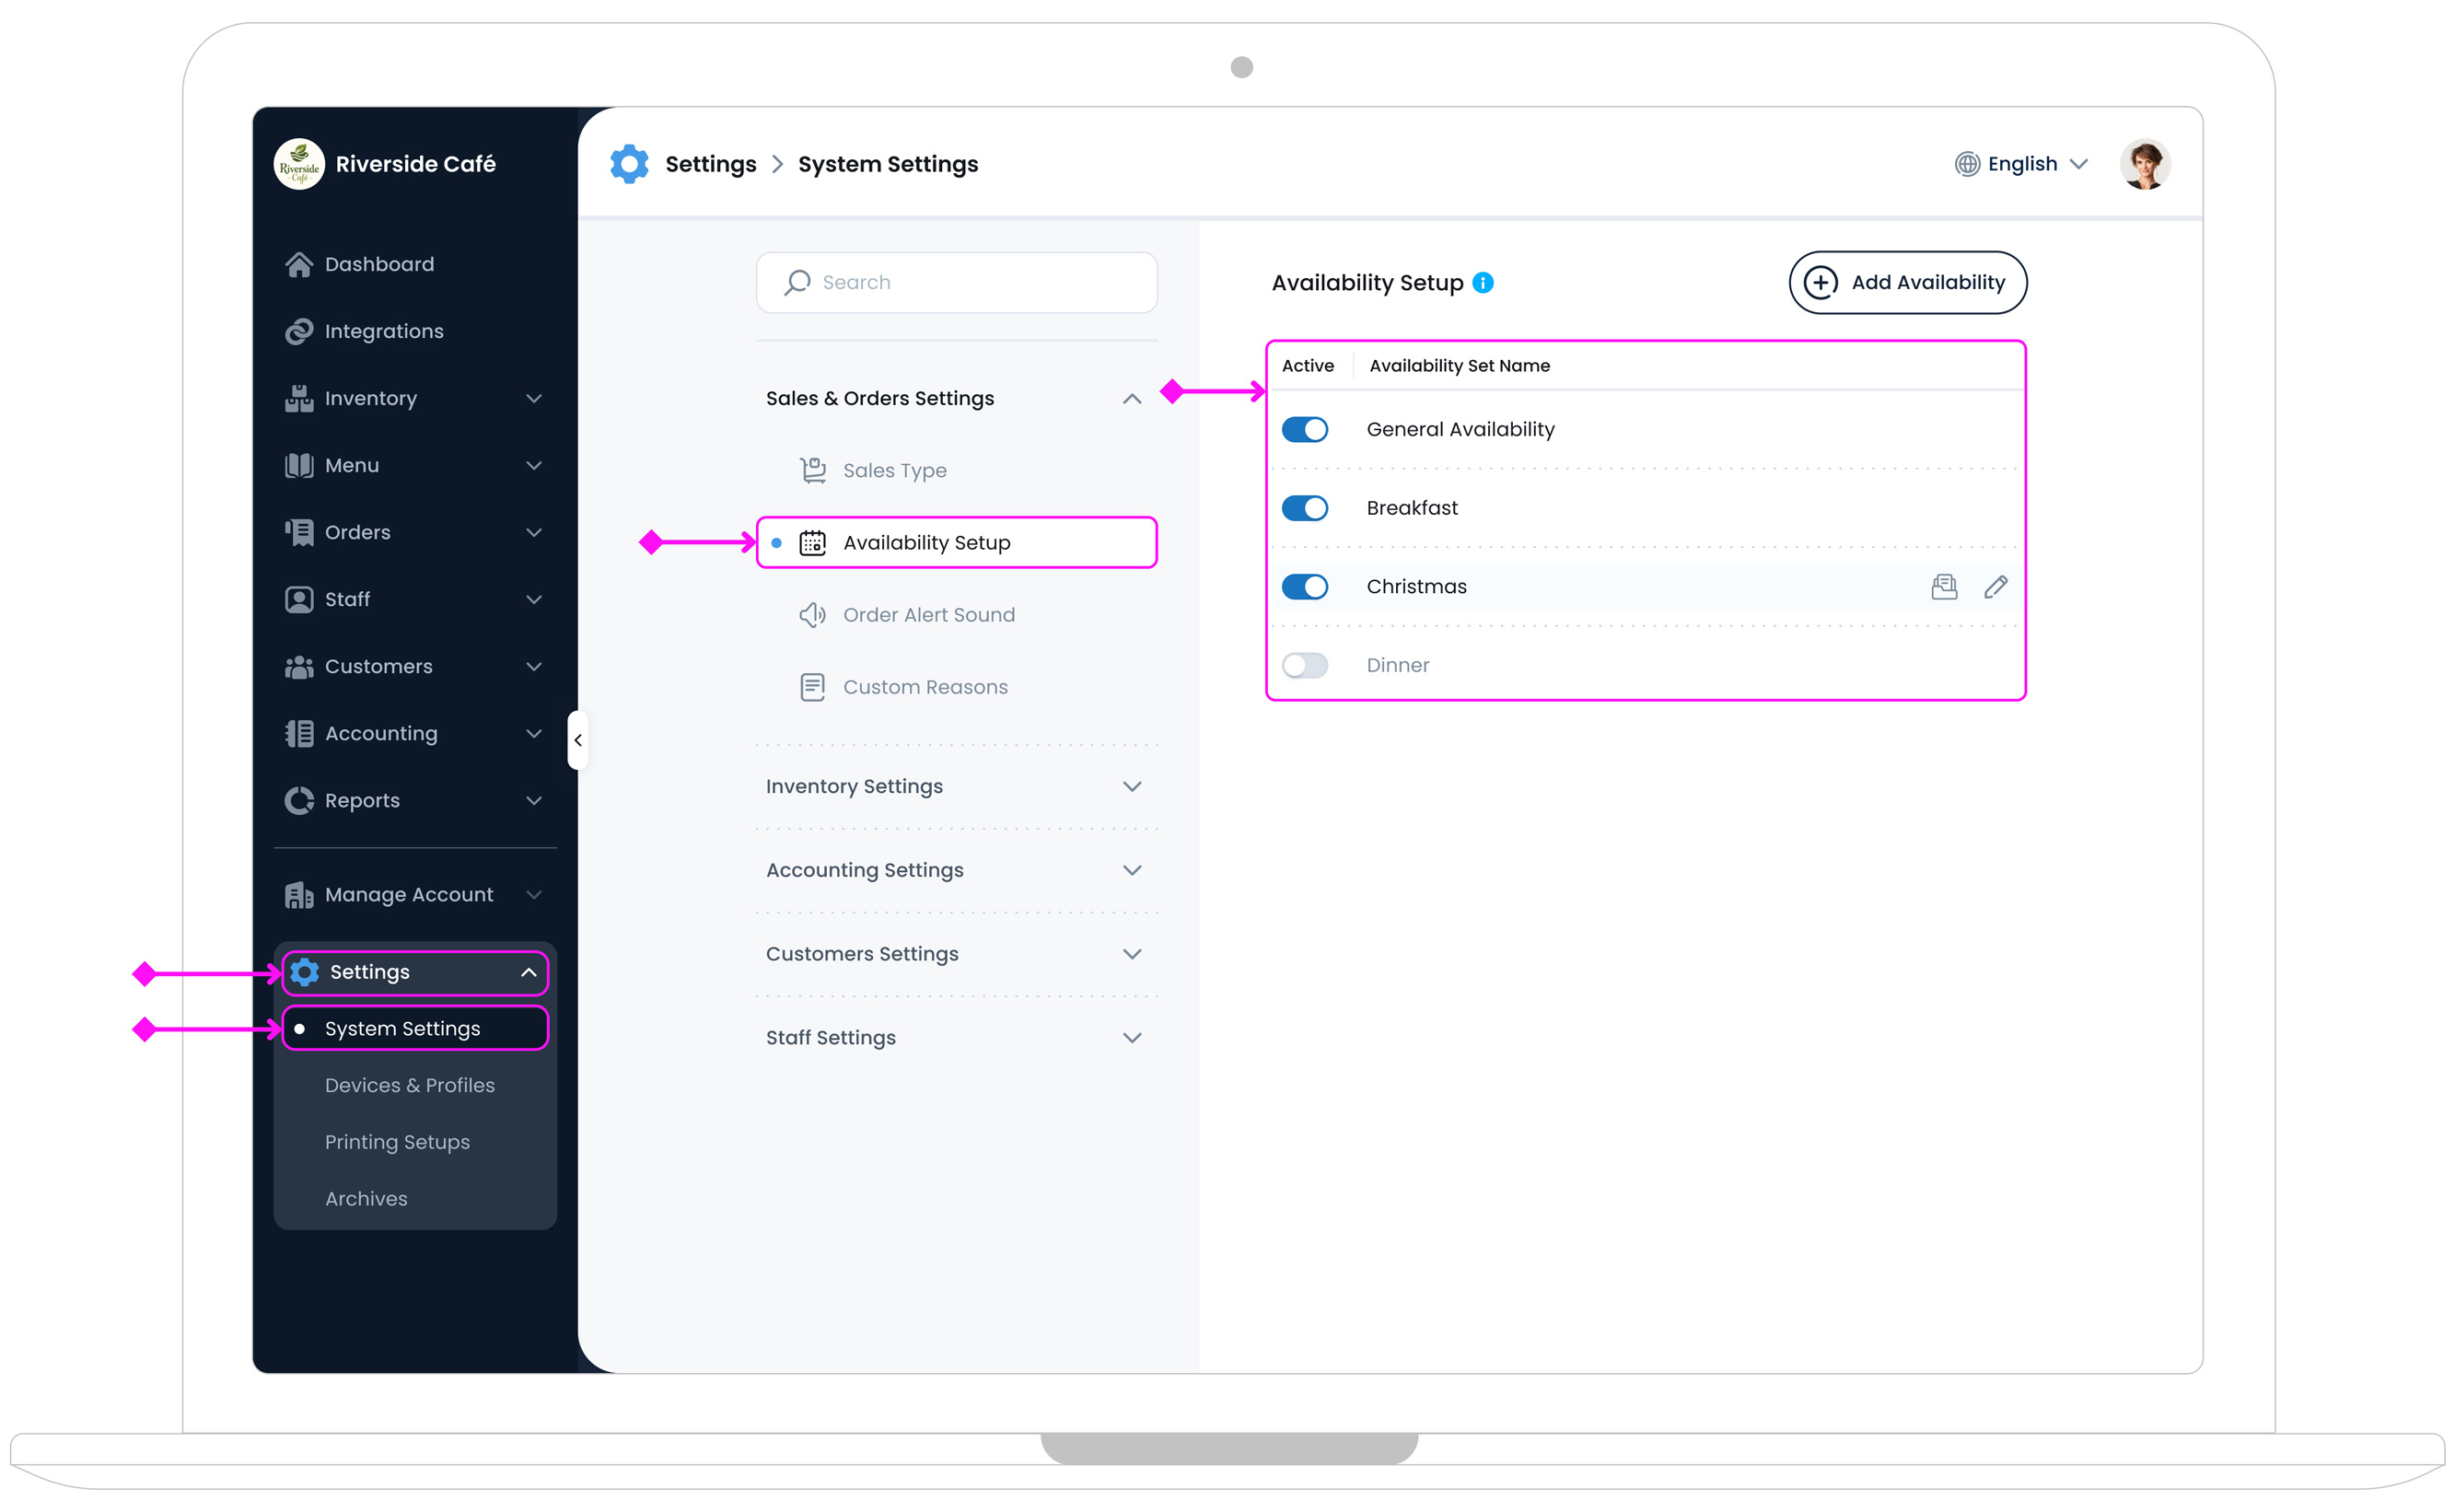
To access availability settings, log in to the TechSuite portal and go to Settings > System Settings from the sidebar. Next, under the Sales & Orders Settings section, click Availability Setup. This page lists all your current Availability Sets (like “General Availability” or “Breakfast Hours”) which you can edit or use as templates for new sets.
Adding a New Availability Set
To add a new availability set, go to the top-right corner of the Availability Setup page and click the Add Availability button  . This will open the panel where you can define the time-based rules for when items or menus should be available to customers.
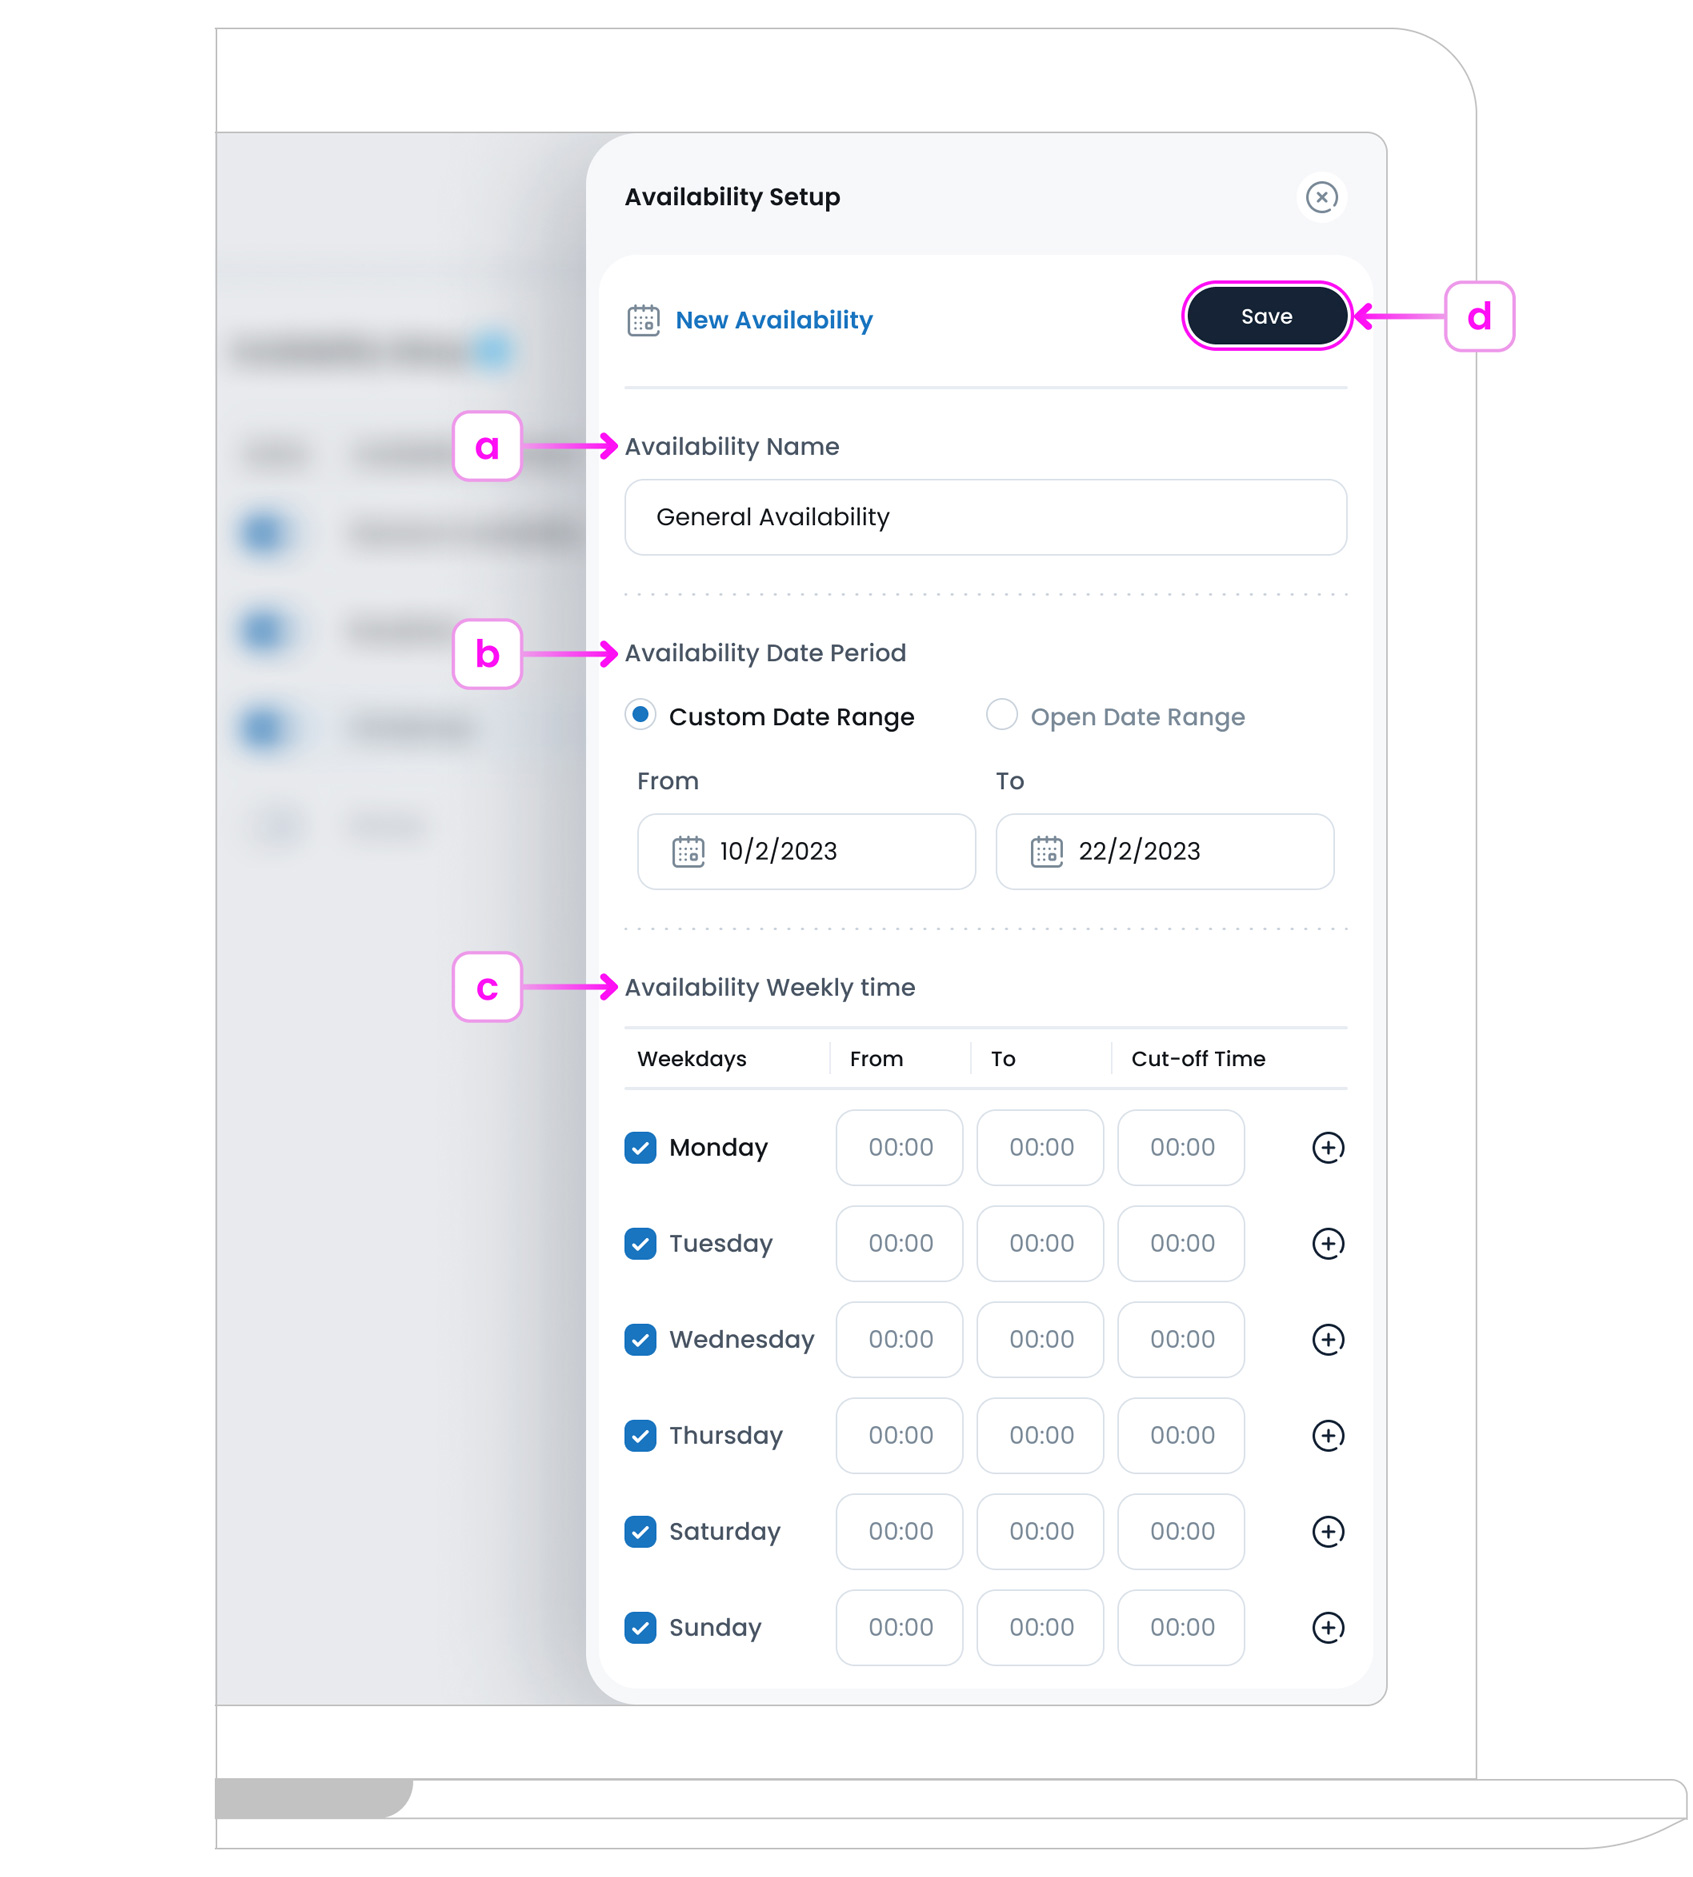
a. Availability Name
Give your availability set a clear and descriptive title. This name will appear when assigning availability to items or sales types, so choose something easy to recognise.
Examples:
“Lunch Hours,” “Weekend Specials,” or “Holiday Menu.”
b. Date Period Option
Choose whether this set is always active or limited to specific calendar dates.
- Open Date Range: The set will always be active on the selected days/times. Ideal for regular operating hours.
- Custom Date Range: Set a start and end date for seasonal menus, holiday campaigns, or short-term offers.
Examples:
Winter Specials from Dec 1 to Dec 31.
c. Weekly Time Slots
Define which times of day the set should be active for each day of the week.
For each active day, enter:
- From: Starting time (e.g., 09:00)
- To: End time (e.g., 23:00).
- Cut-off Time: Latest time an order can be placed for that day.
If your business is closed on certain days, simply uncheck the box next to that day to turn it off entirely. That day will be excluded from availability.
If your business has multiple active time periods in one day (like lunch and dinner), click the plus button ![]() to add an extra time slot. This flexible setup ensures you only offer items when you’re truly open for business.
to add an extra time slot. This flexible setup ensures you only offer items when you’re truly open for business.

d. Save Availability Set
Once all details are filled in, click the Save button  .
.
Pro Tip
Availability Sets are reusable. Instead of setting hours item by item, assign the same set (e.g., “General Availability”) to multiple items or sales types to keep things consistent.
Availability Page Overview
This page lists all your current Availability Sets used to control when items, menus, or sales types are available for purchase.
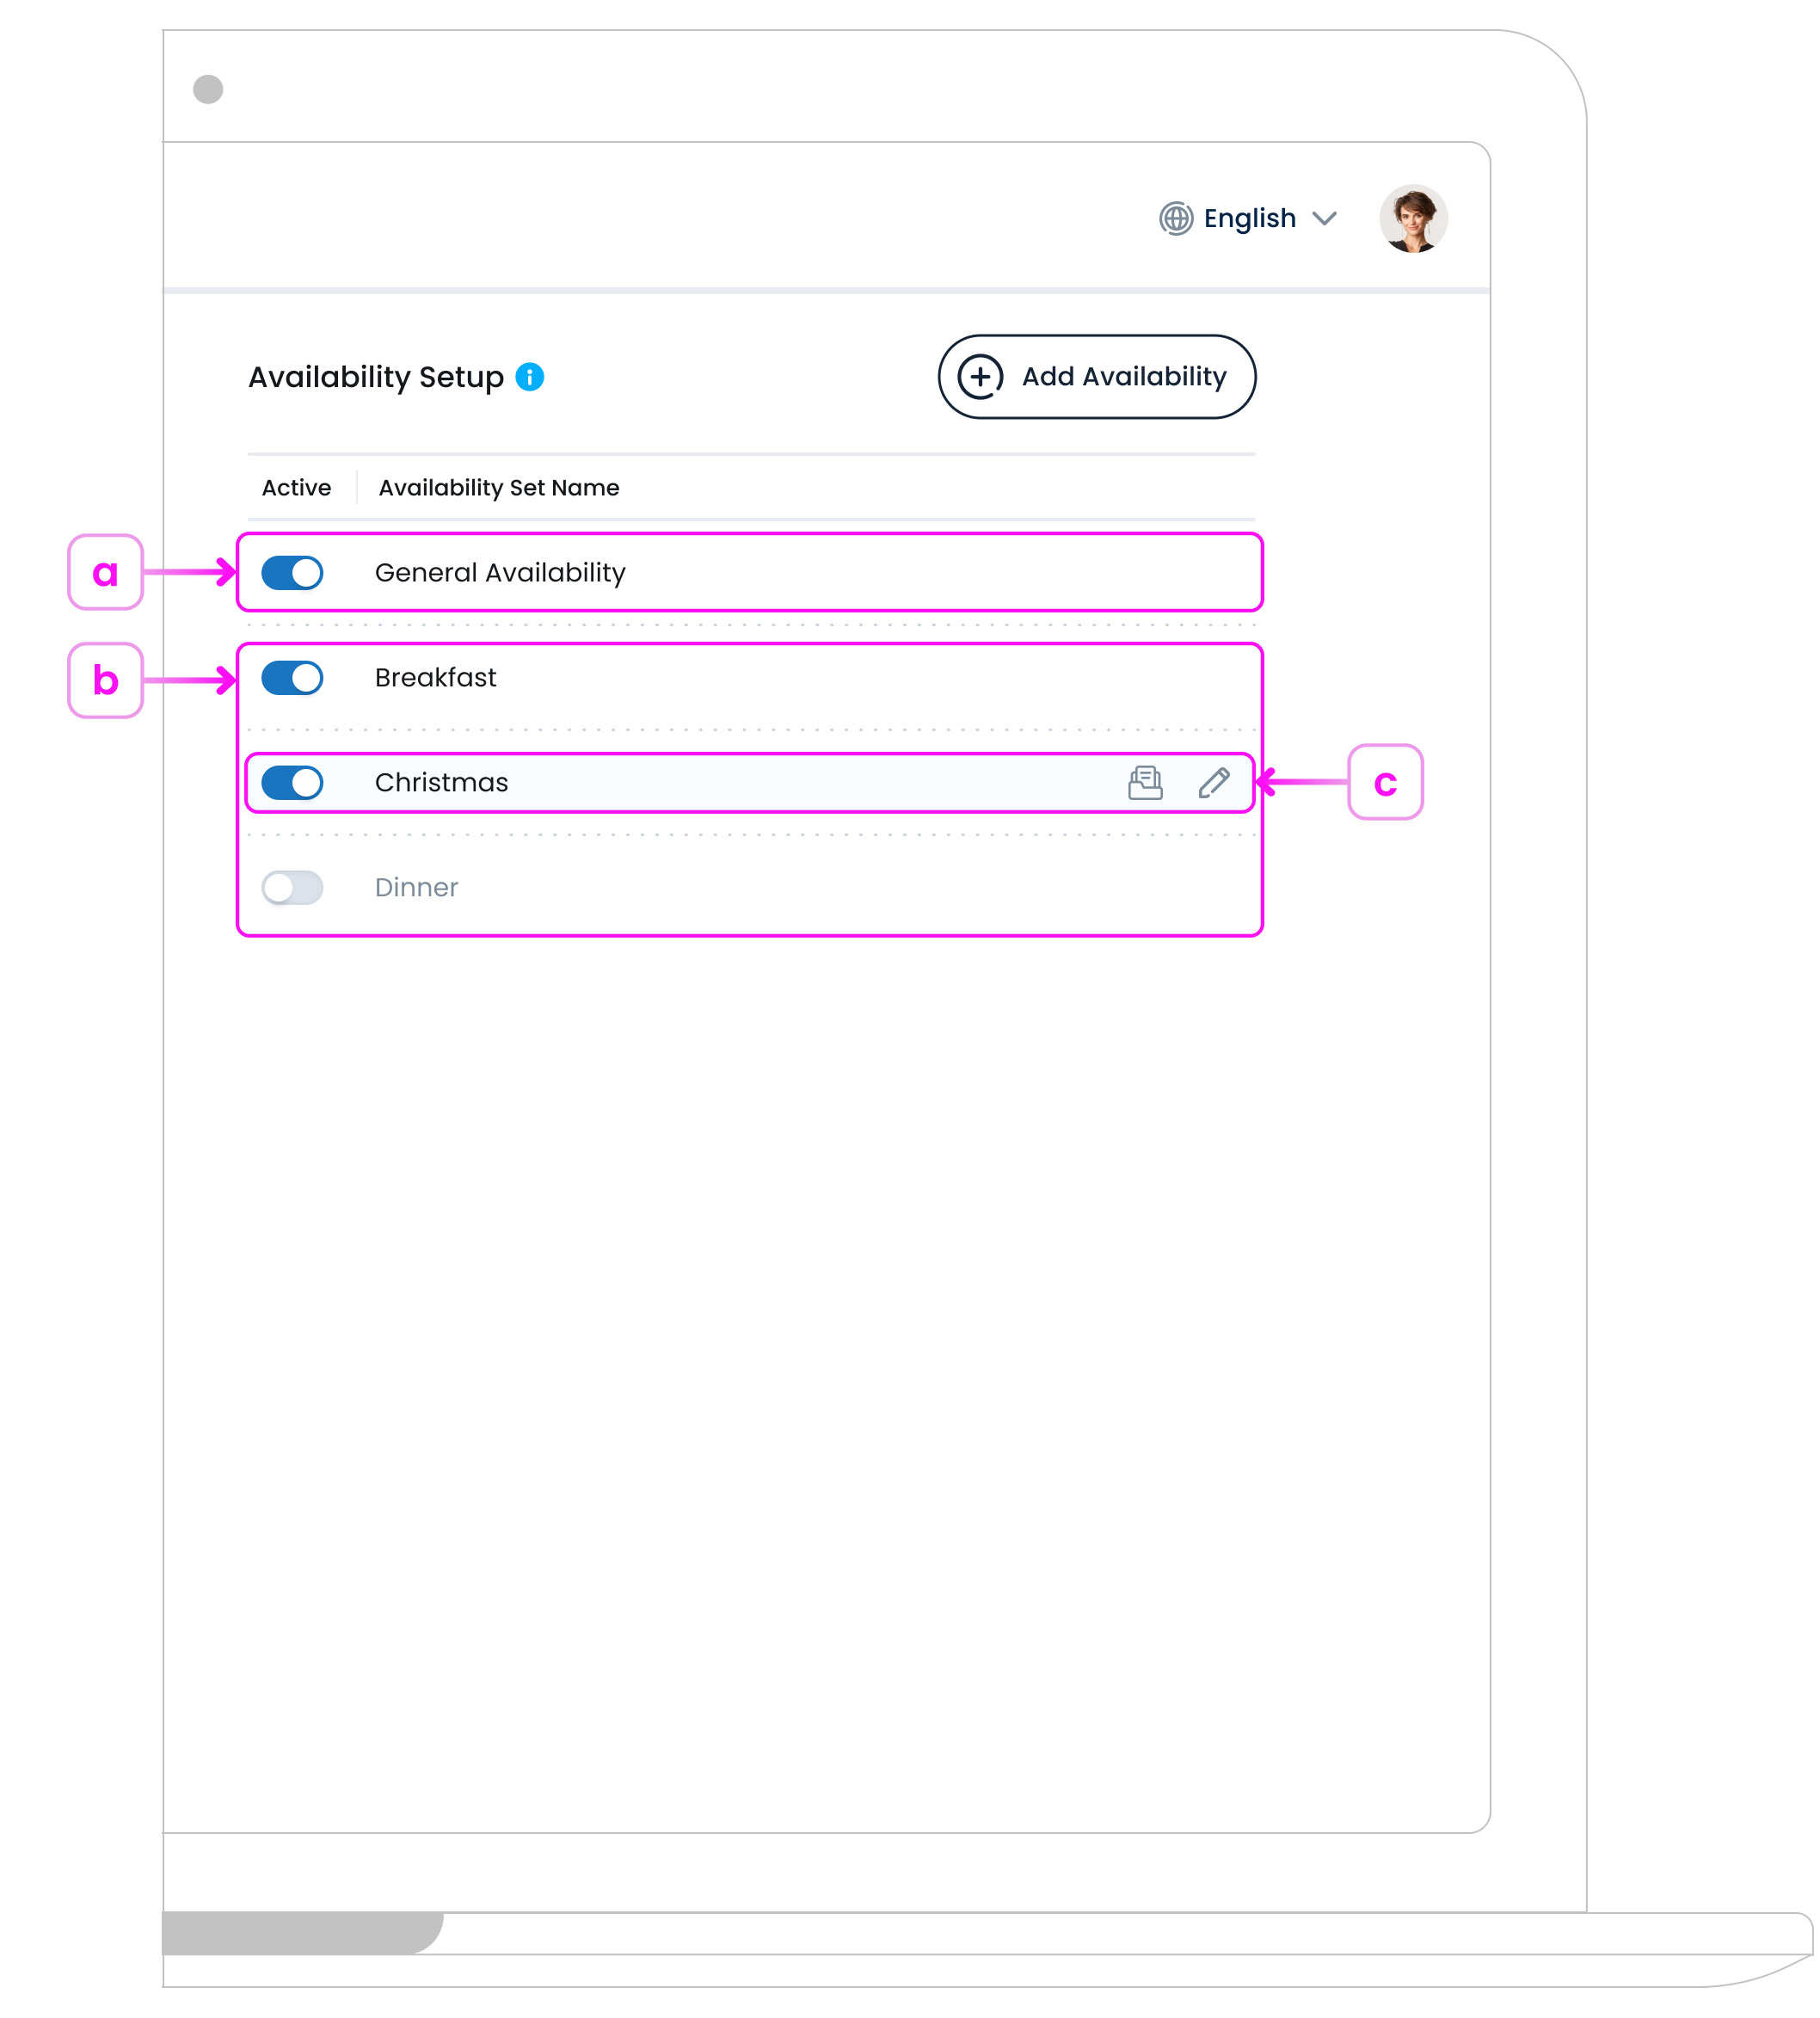
a. Default Availability Set
You’ll see a built-in General Availability set, which is active by default. This can be edited to adjust time slots or date ranges, but it cannot be archived.
b. Custom Availability Sets
Any additional sets you create will appear in the list below the default. These can be tailored for specific time windows (like Lunch Hours, Weekend Specials, or Holiday Menus), and archived when no longer needed.
c. Understanding Availability Rows
Each row shows how that availability behaves and includes these controls:

- Active Toggle: Turns the availability set on or off. When turned off, the set will no longer be selectable when assigning availability to items, menus, or sales types.
- Availability Set Name: Displays the name of the availability set (e.g., General Availability, Lunch Hours, Weekend Specials). Click the name to open and edit the set’s time configuration.
- Edit Availability Button: An edit icon appears when you hover over a row. Click it to open and update the availability name, date range, or time slot settings.
- Archive Availability Button: An archive icon appears when you hover over a row. Use this to archive/remove from active use list, while keeping a record of it in your system.
What’s Next?
Now that your Availability Sets are created, you can assign them to Sales Types, Menus, or individual Items. This ensures products only appear during the right times (like breakfast menus in the morning, or seasonal items during holidays).