Sales Tax
Sales Tax is the amount added to the cost of goods or services, typically required by local regulations. TechSuite allows you to define and manage your Sales Tax settings centrally, helping you stay compliant and maintain accurate pricing across your POS, kiosk, and online ordering channels.
Understanding Sales Tax
Sales Tax settings in TechSuite let you:
- Automatically apply taxes during checkout
- Include or exclude taxes from displayed item prices
- Ensure consistency on receipts and reports
- Set one or more tax rates and choose whether they apply by default
You can apply tax globally, or override it at the item or menu level if needed.
To Get Started
To access Sales Tax settings, log in to the TechSuite portal and go to Settings > System Settings from the sidebar. Next, under the Accounting Settings section, click Sales Tax. This page lets you add and manage all tax types used in your system.
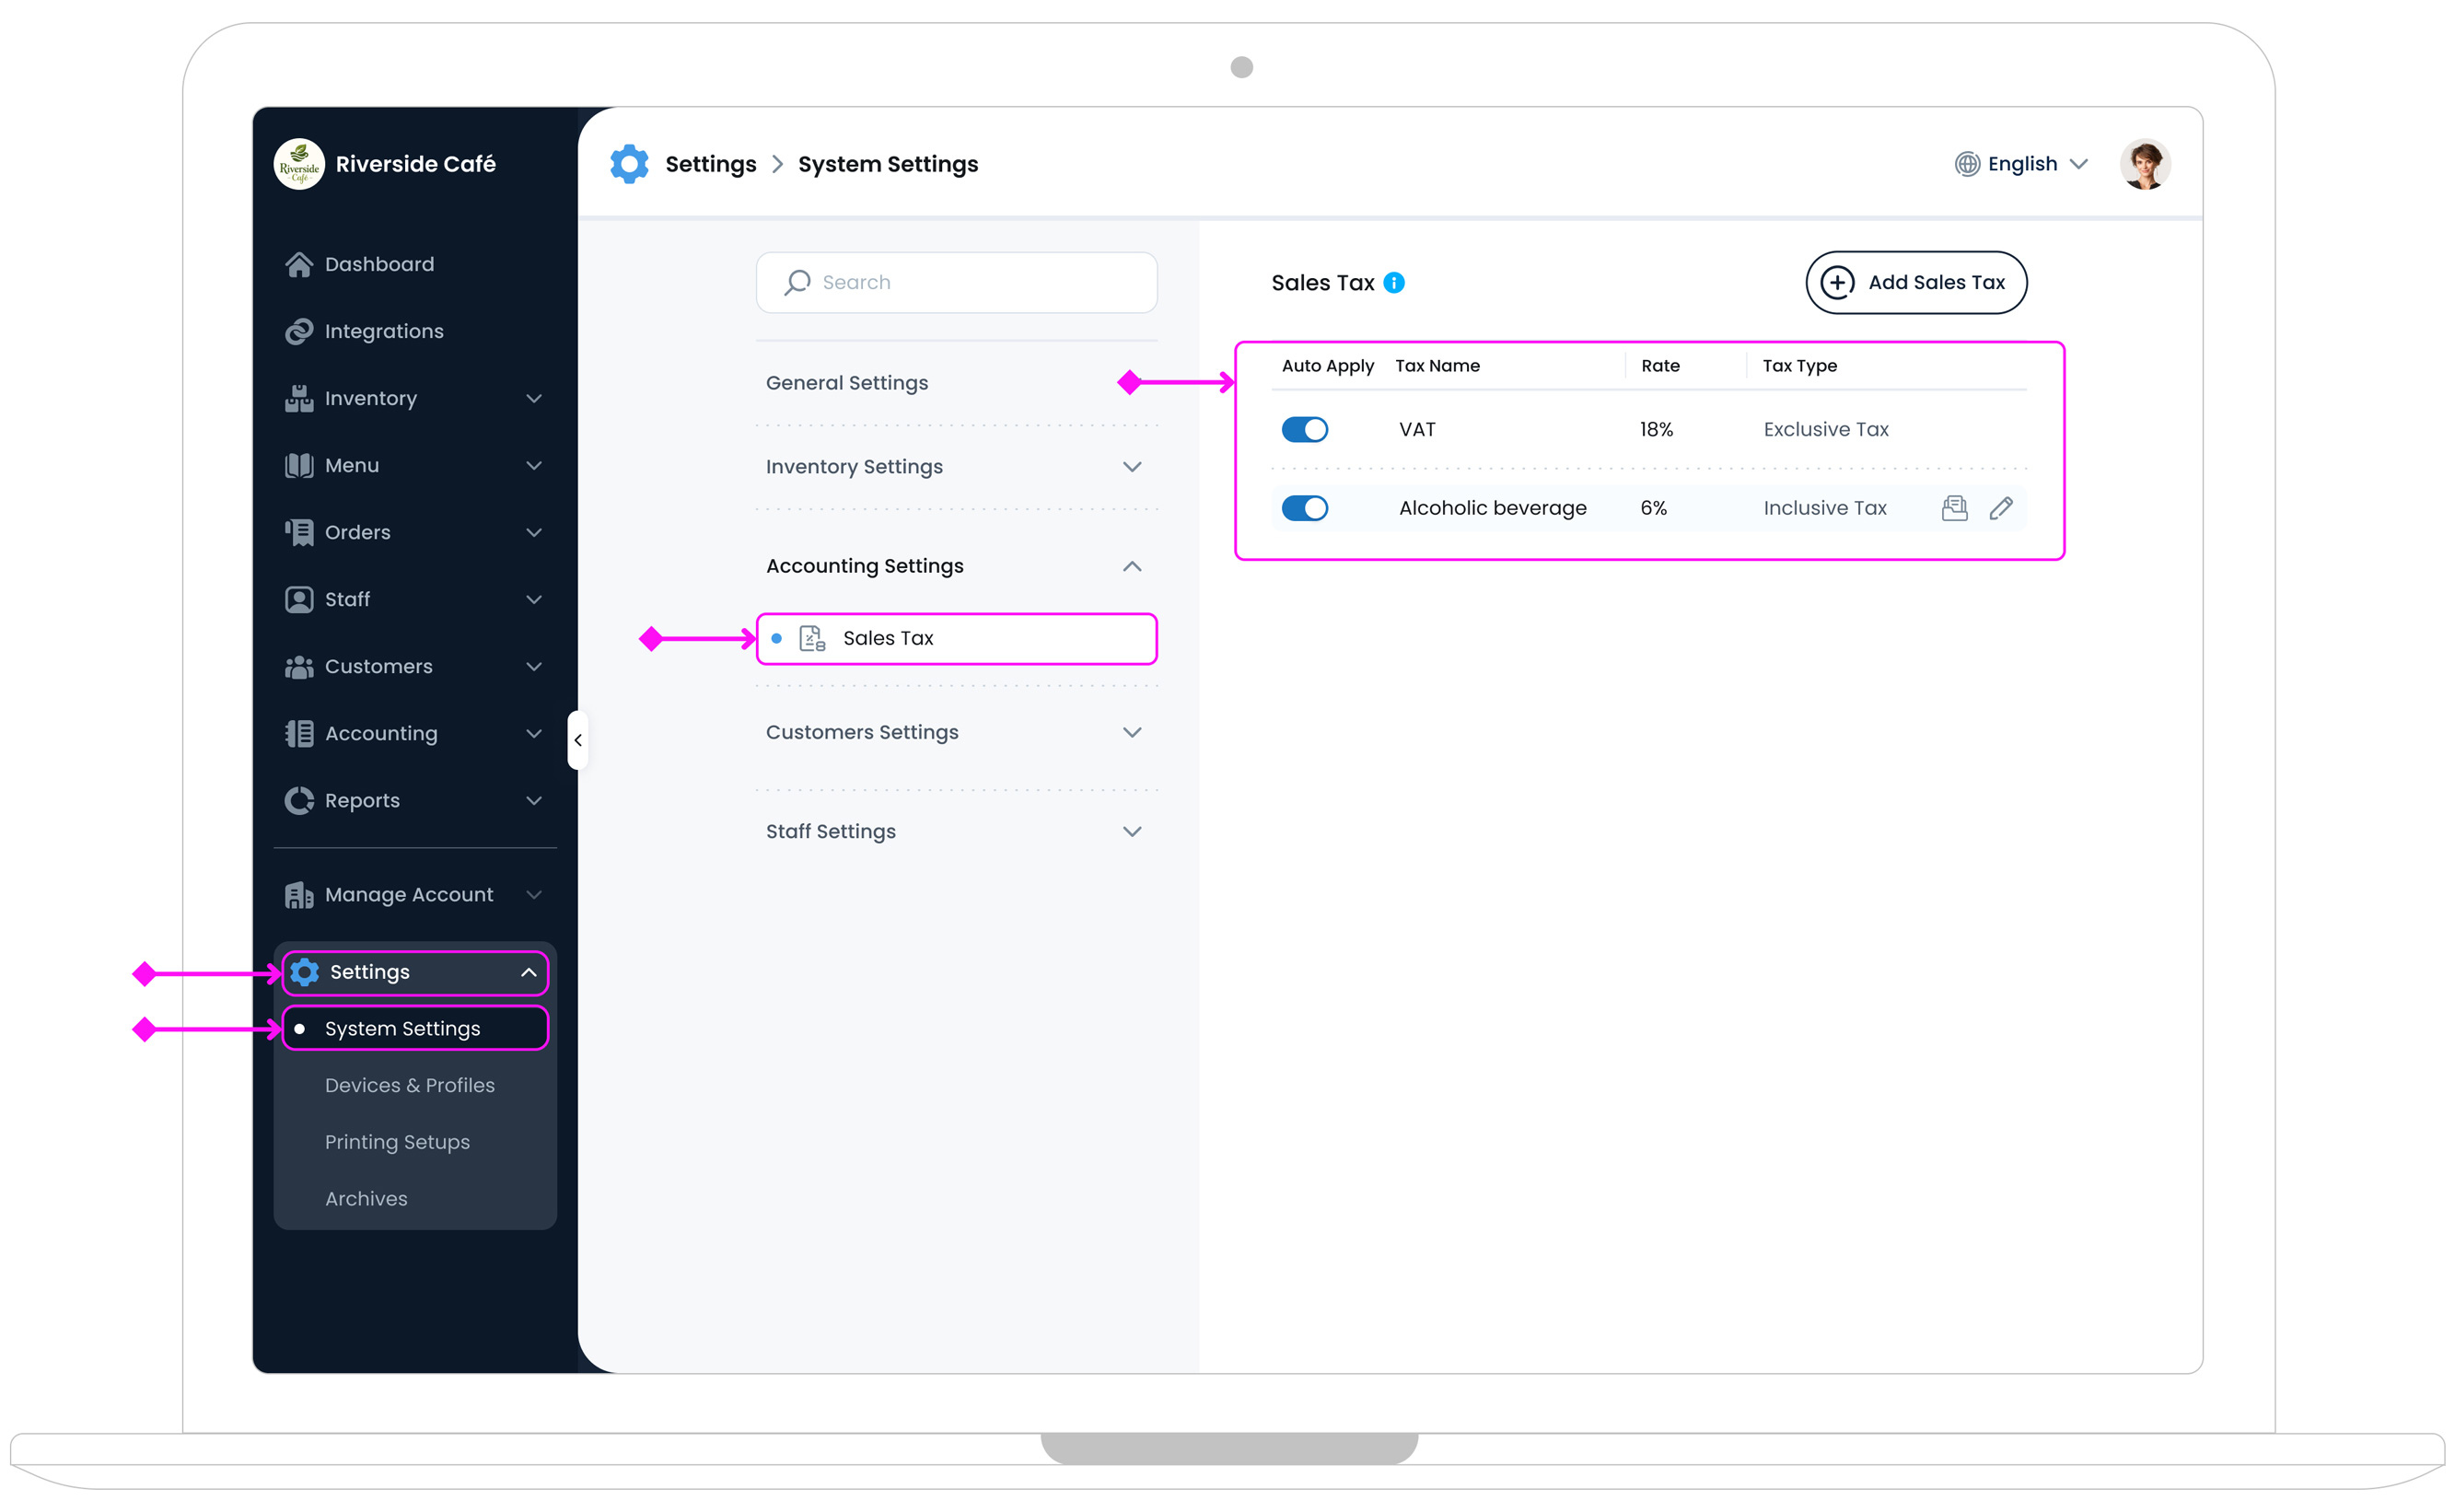
Adding a New Sales Tax
To add a new Sales Tax, click the Add Sales Tax button  in the top-right corner of the page. Then fill in the following field:
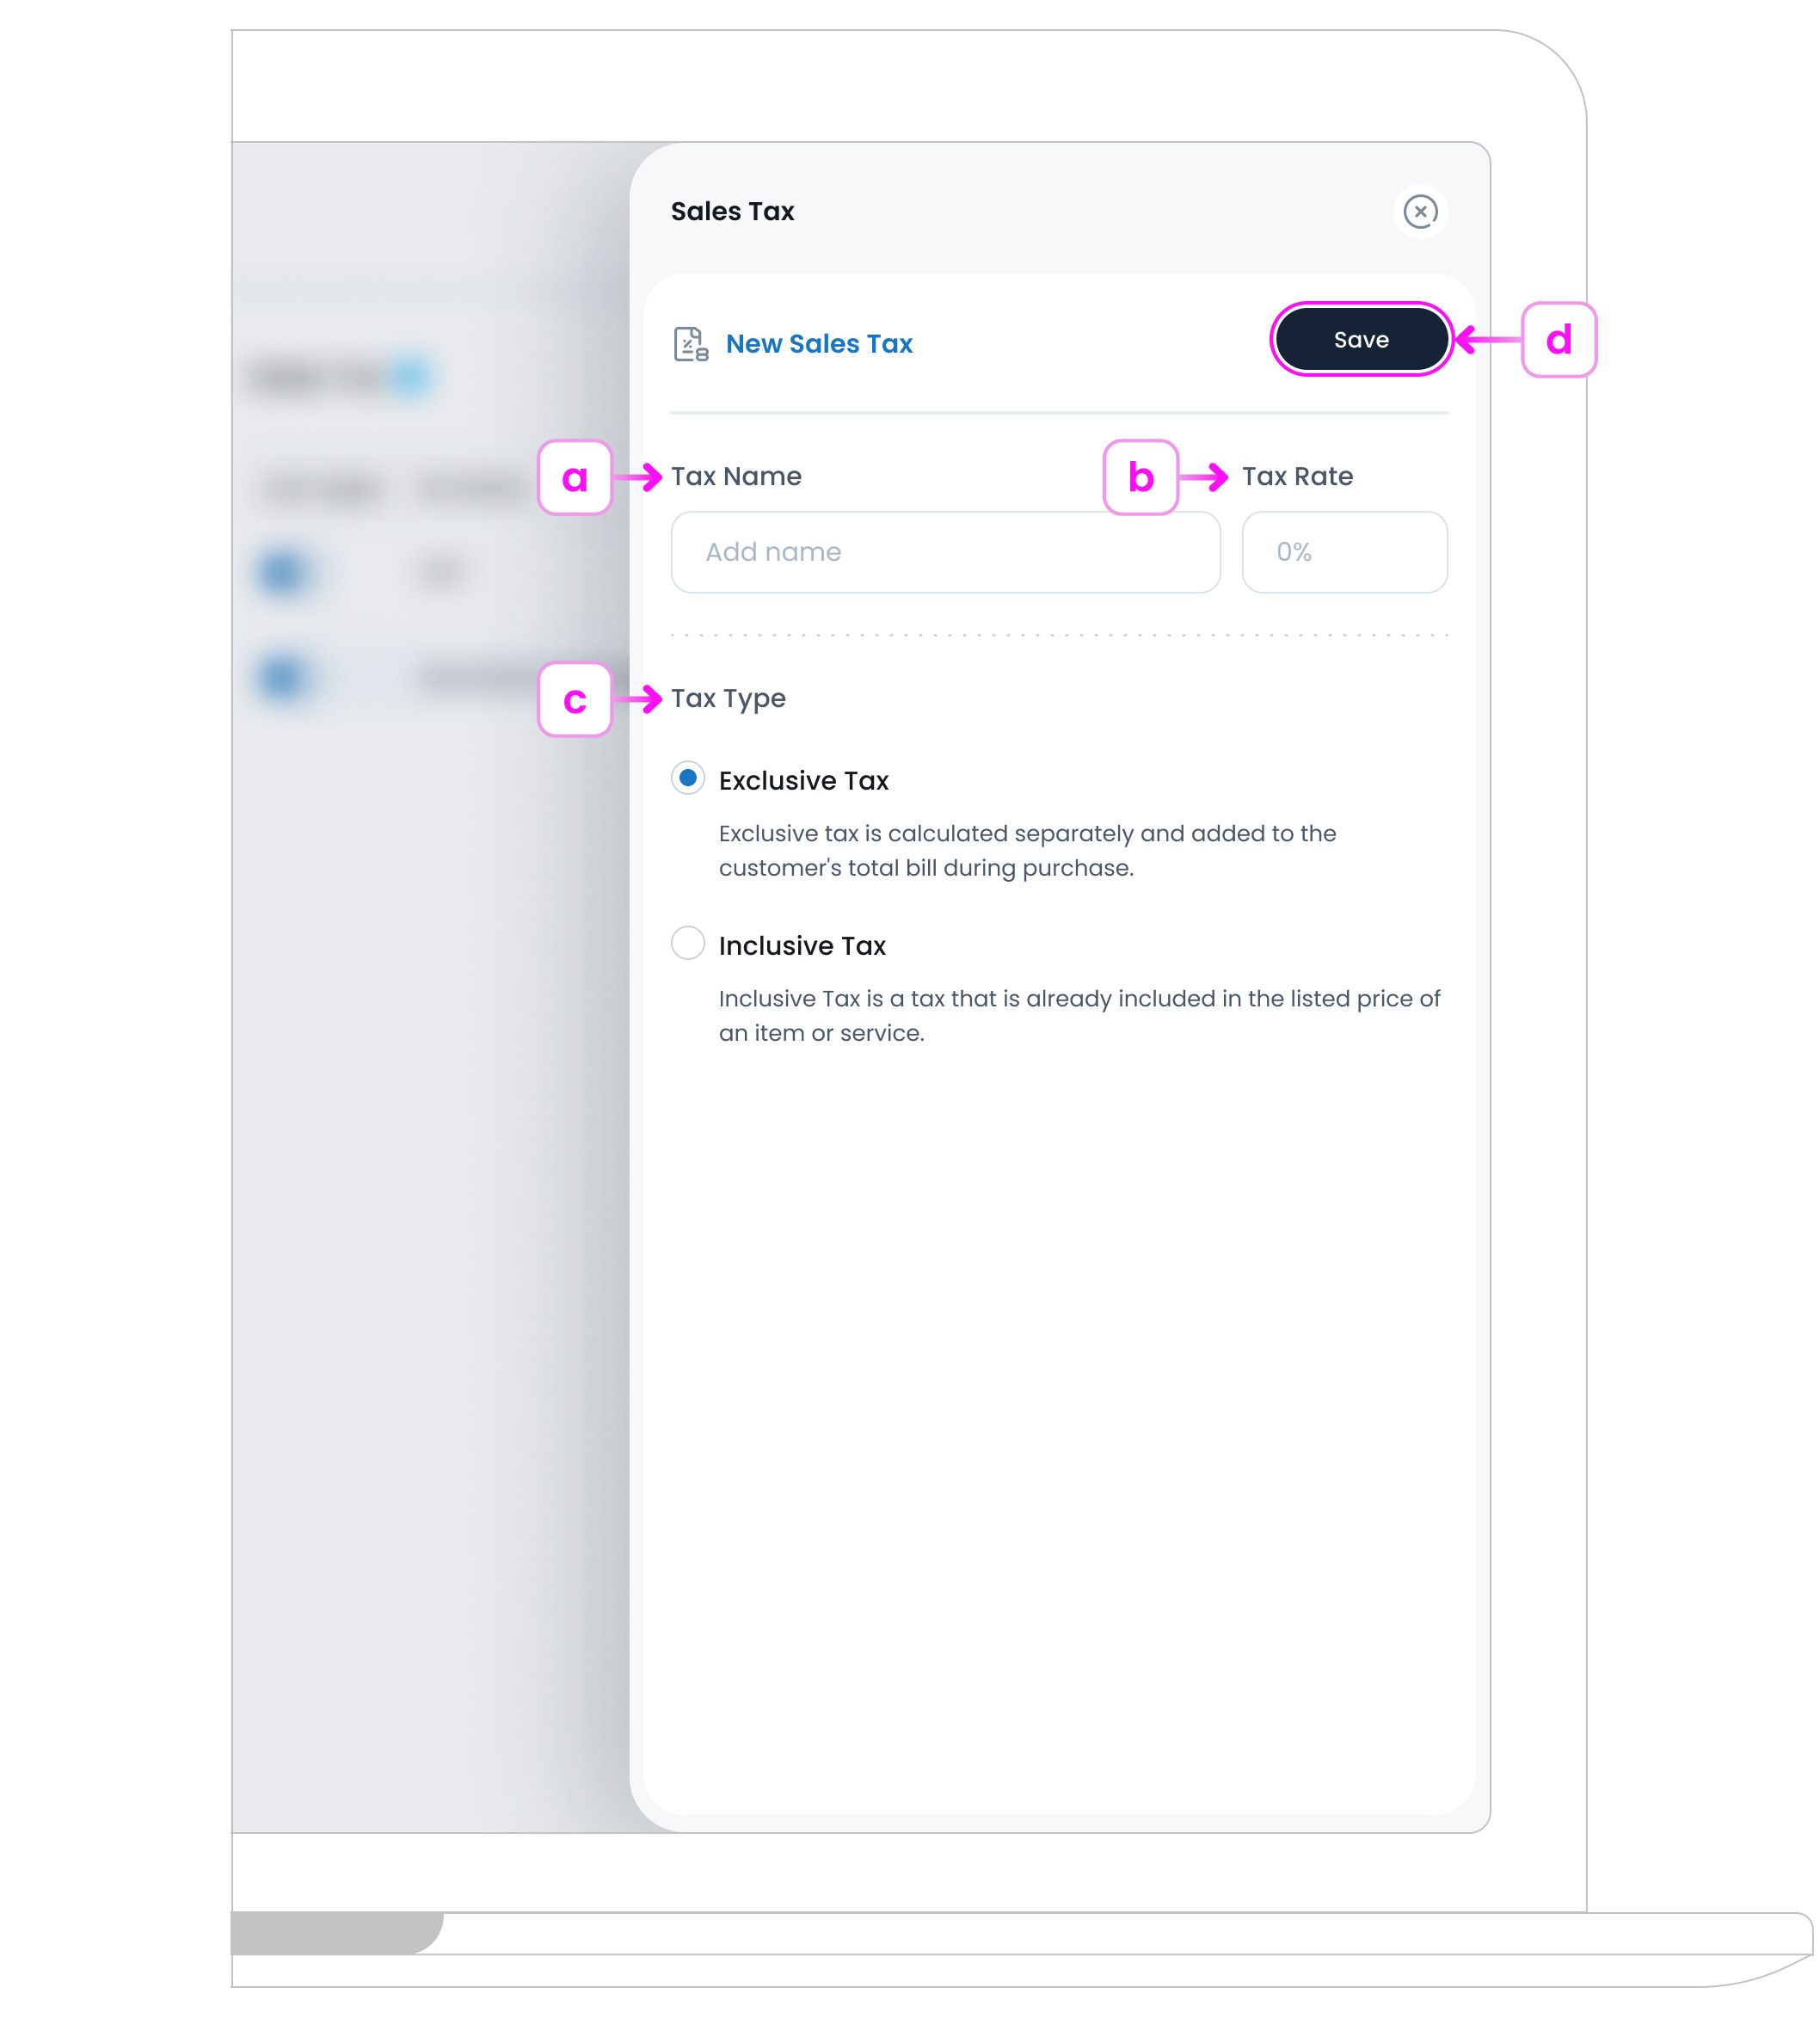
a. Tax Name
Enter a short, descriptive name for the tax (like VAT, City Tax, Service Fee).
b. Tax Rate
Enter the percentage to apply for this tax. This is the value that will be calculated and applied during checkout. Enter only the number do not include the percentage symbol. (e.g. Enter 20 for a 20% tax rate.).
c. Tax Type
Choose how the tax should be applied during checkout.
- Inclusive Tax: The item price already includes tax (e.g. £5.00 includes VAT)
- Exclusive Tax: The tax is added on top of the item price (e.g. £5.00 + VAT)
d. Save the Tax Rule
Click the Save button  to finalise the new tax setup. It will now be available to apply across items, menus, and receipts.
Sales Tax Page Overview
The Sales Tax page lets you define and manage tax rates used across your items, categories, and sales types. These settings determine how tax is applied during ordering and reporting.
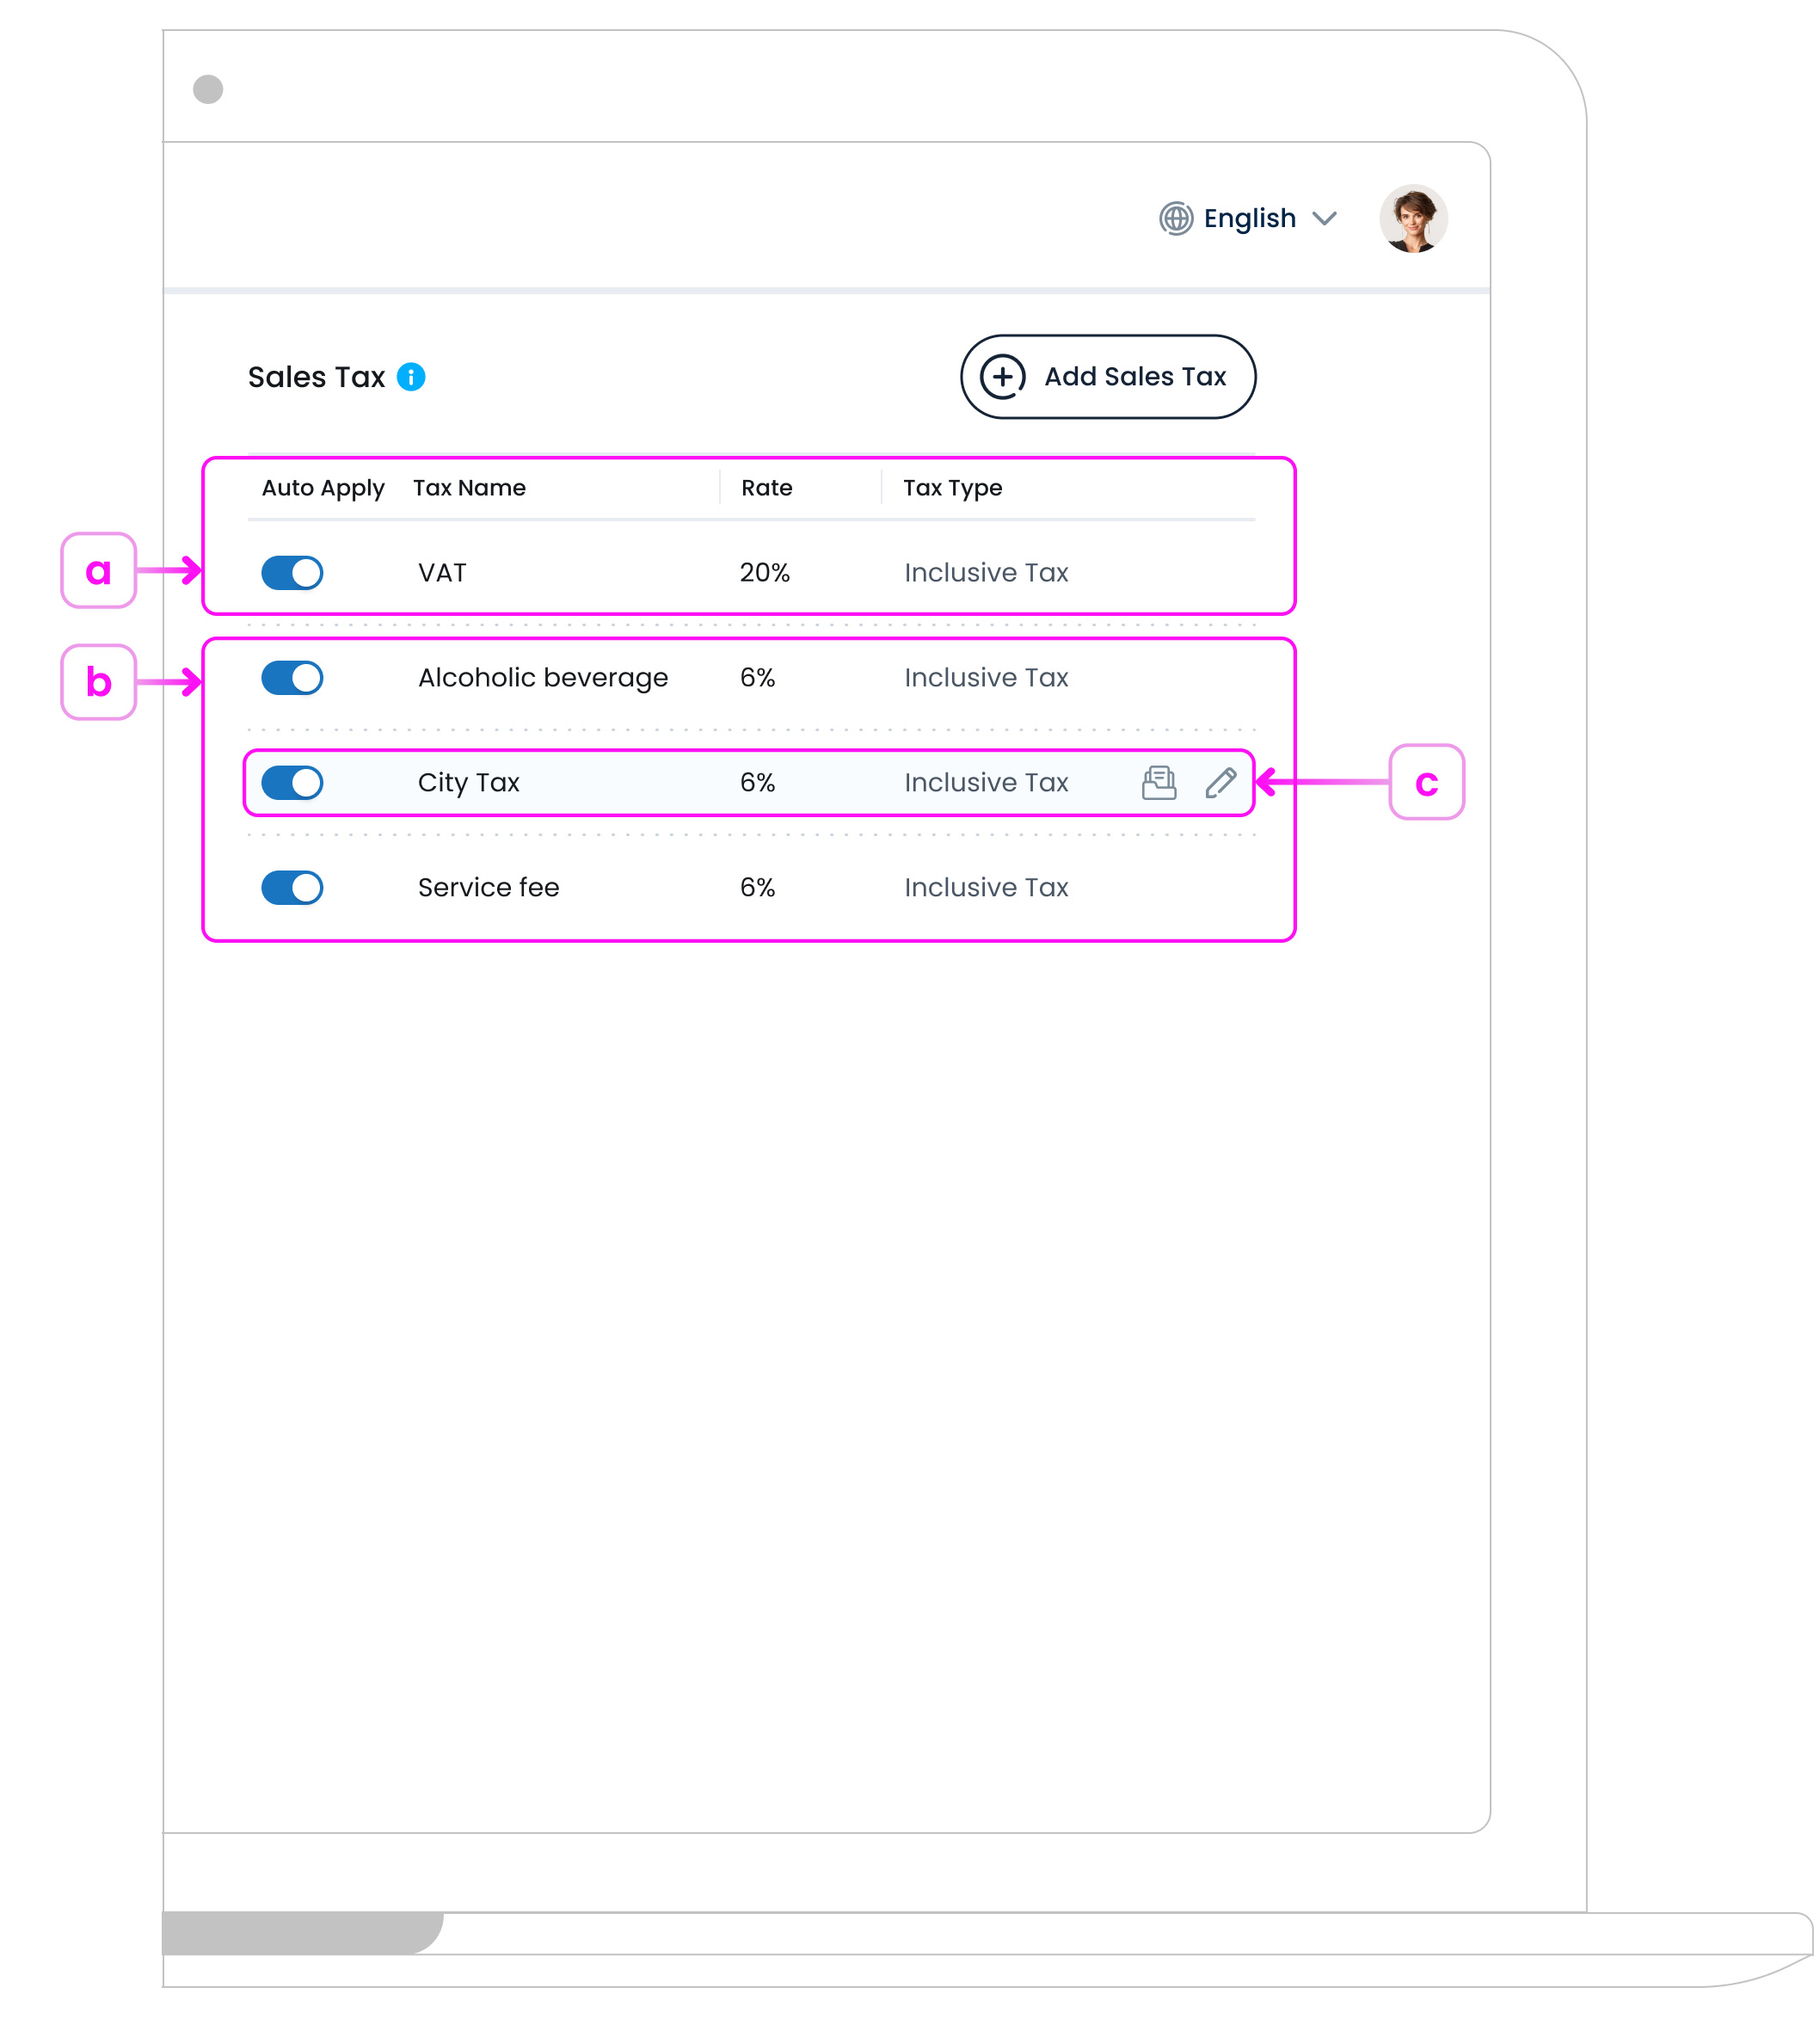
a. Default Tax
Your system starts with a default tax: VAT at a rate of 20%. This default can be edited to match your business’s local tax requirements, but it cannot be deleted.
b. Custom Taxes
You can create any number of custom tax rates to suit different regions, item types, or order scenarios. For example: “Reduced VAT (5%)” or “Non-Taxable”. You can assign these directly to items from the Item Library.
c. Understanding Sales Tax Rows
Each tax rate appears as a row in the list with the following details:
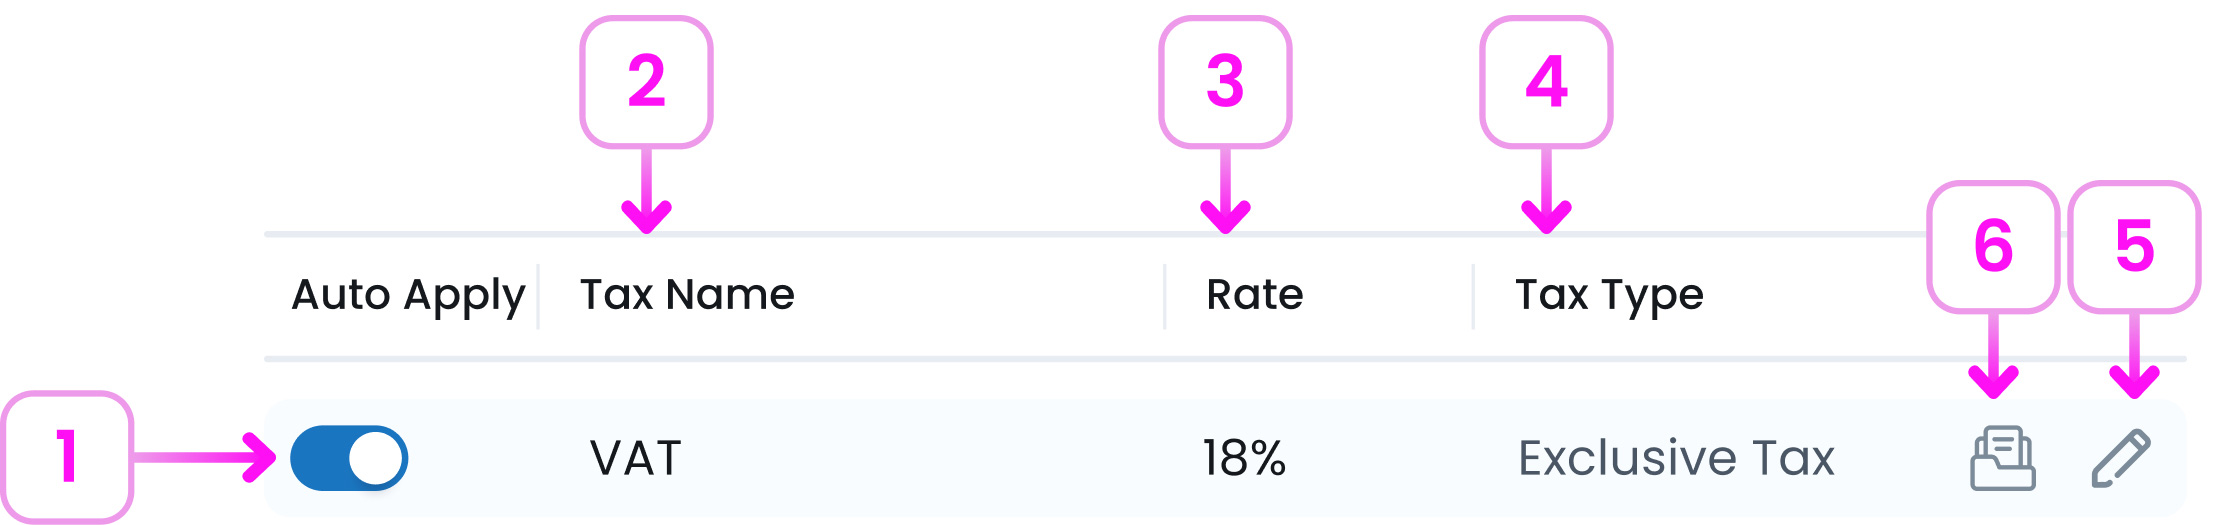
Here’s what each part of the row means:
- Auto Apply Toggle: Enables or disables this tax by default for new items. You can still manually override this in the item setup.
- Tax Name: Displays the name of the tax (e.g. VAT, Alcoholic Beverage).
- Tax Rate: Shows the percentage rate applied for the tax (e.g. 18%, 6%).
- Tax Type: Indicates whether the tax is Inclusive or Exclusive.
- Edit Sales Tax Button: An edit icon appears when you hover over a row. Click it to open and update the tax’s name, rate, or type.
- Archive Sales Tax Button: An archive icon appears when you hover over a row. Use this to delete the tax from the list while keeping a record of it in your system.
What’s Next?
After setting up your tax rules, you can apply them to new or existing items. This ensures tax is calculated correctly at checkout, keeping receipts and reporting compliant with local tax regulations.