Sign In & Activate the Kiosk App
After you’ve created your kiosk profile in the TechSuite portal and downloaded the TechSuite Kiosk app on your kiosk device, you’ll see the app’s login page, followed by setup steps where you can enter your licence code or scan a licence QR code.
Before You Begin
Make sure you’ve already set up your kiosk profile with the desired branding, order process, and checkout options. If you haven’t created a Kiosk Profile yet, complete that process first, then continue setting up your kiosk device.
Go to“TechSuite portal”, In your sidebar, navigate to the Settings > Devices & Profiles > Device Licences.
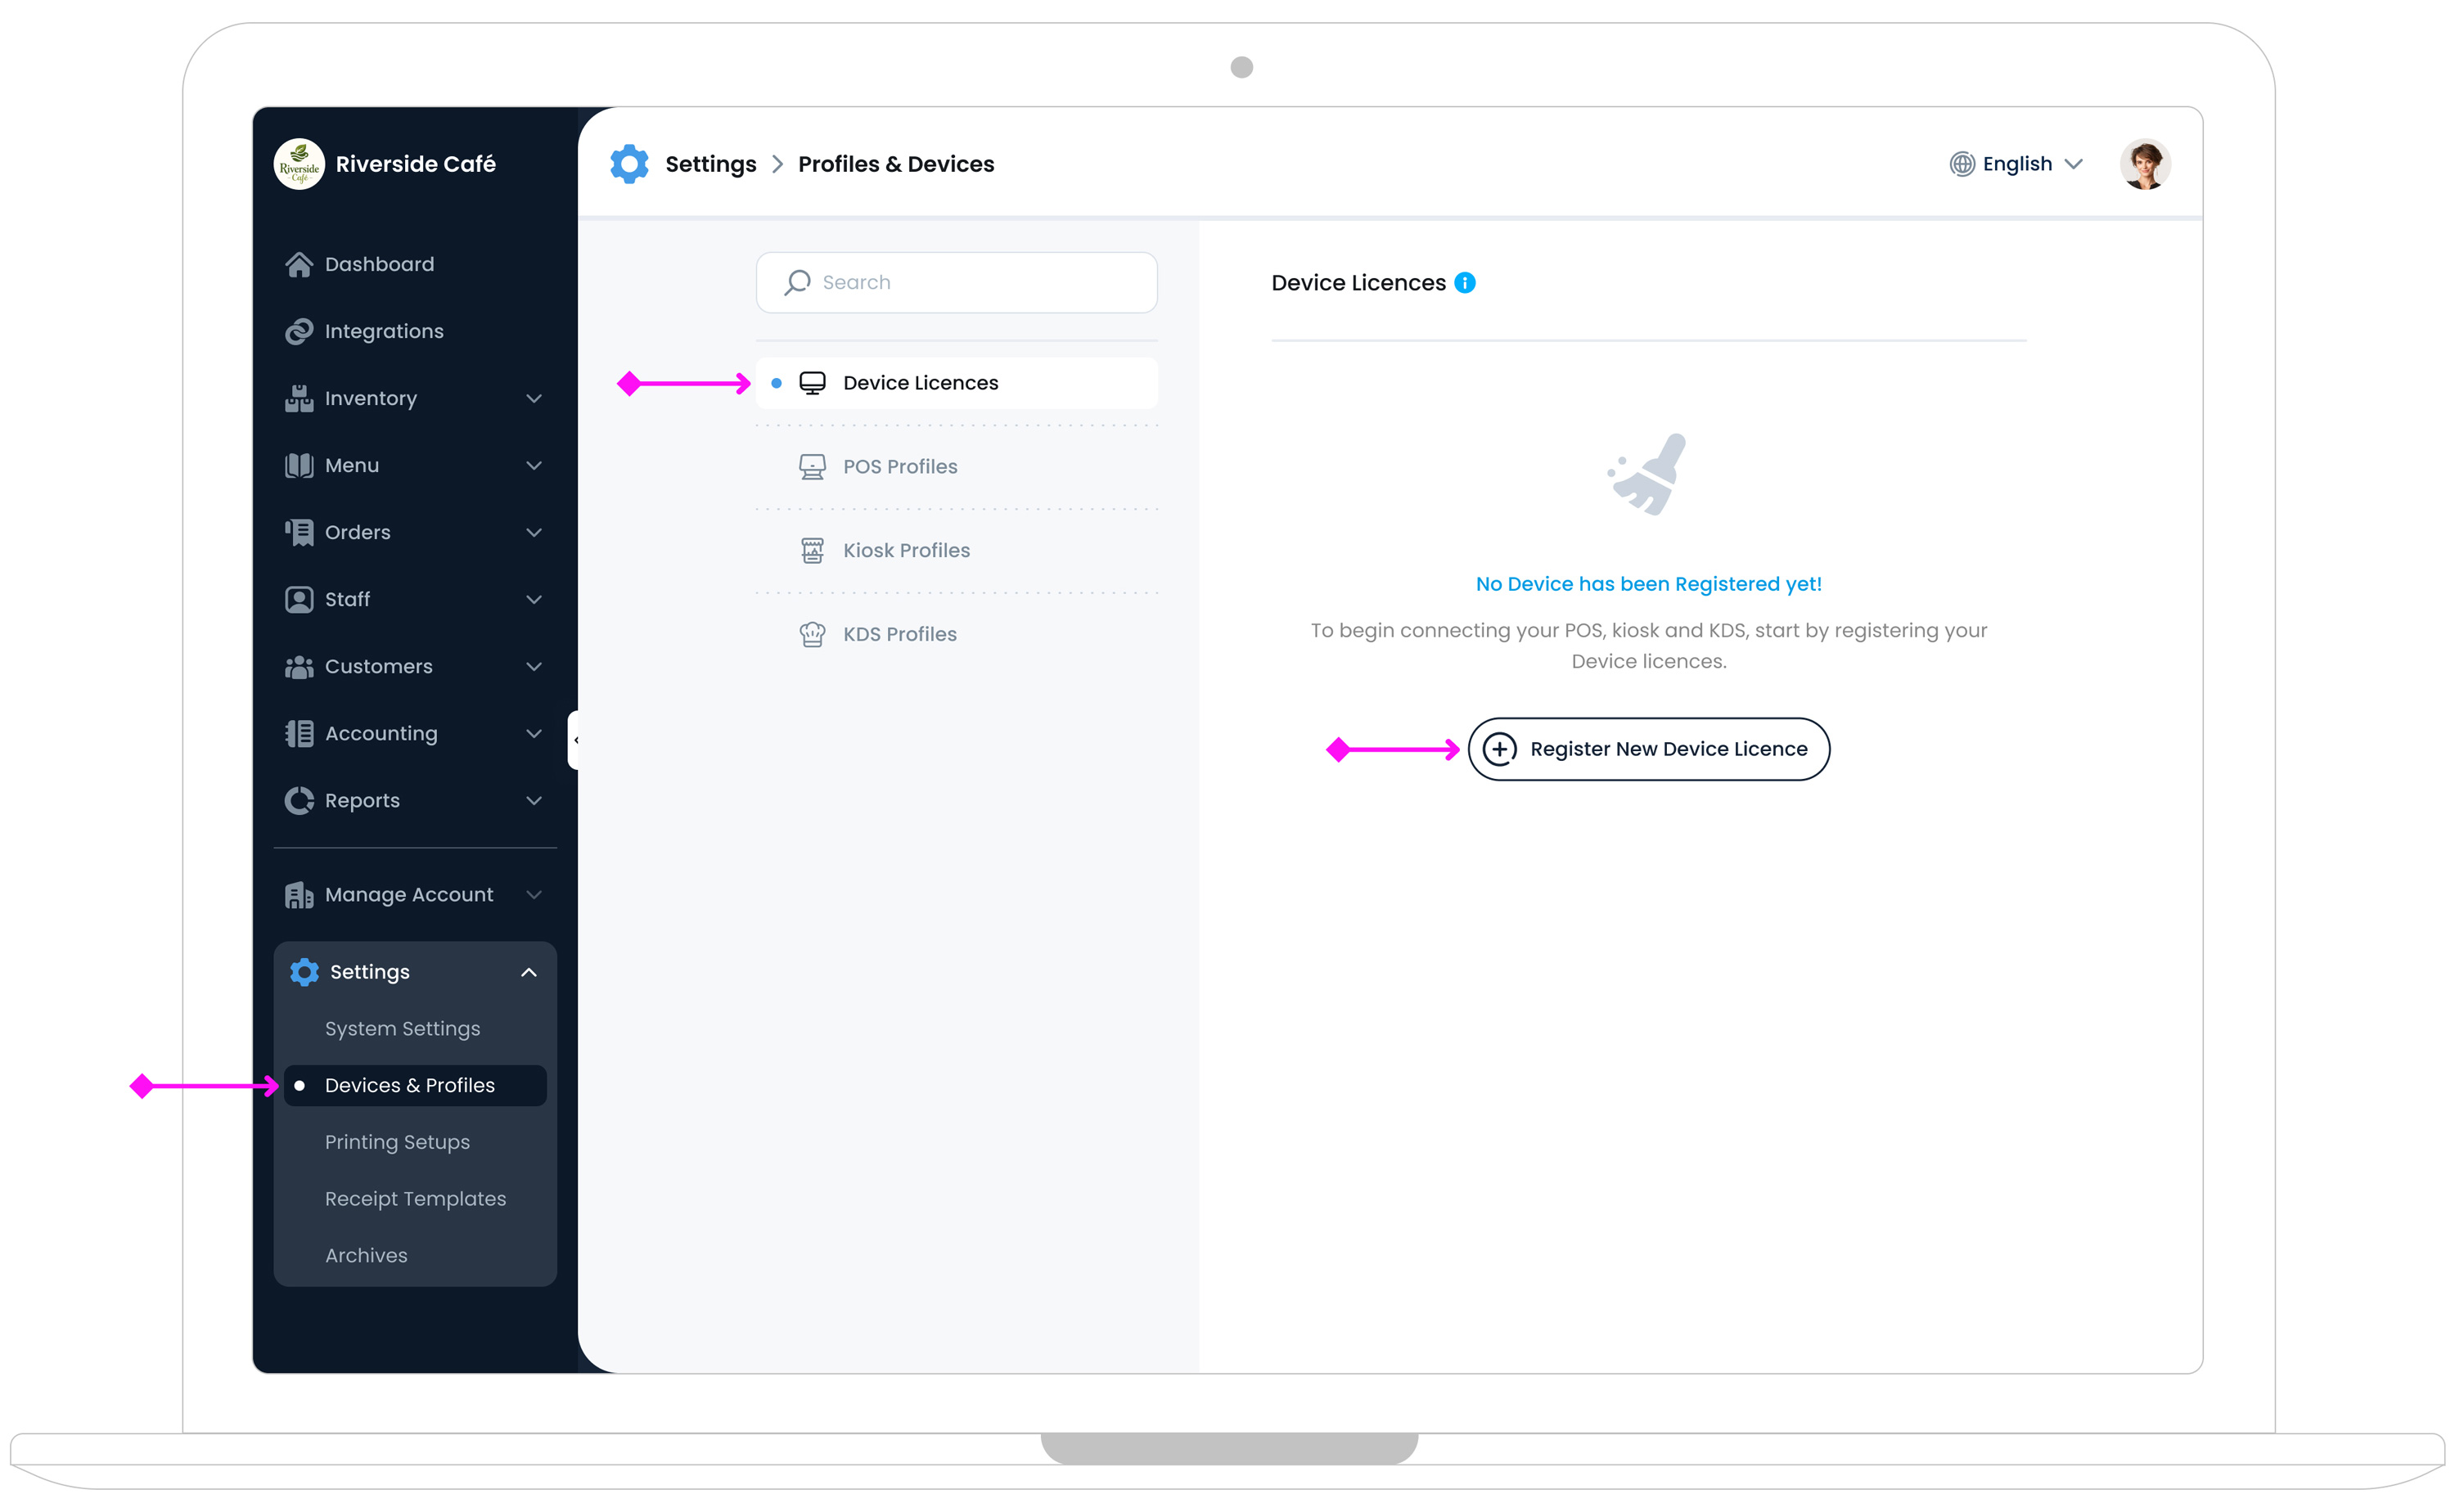
Step 1: Register a New Device Licence
On device licence page, click the “Register New Device Licence” button to open a modal with four key fields:
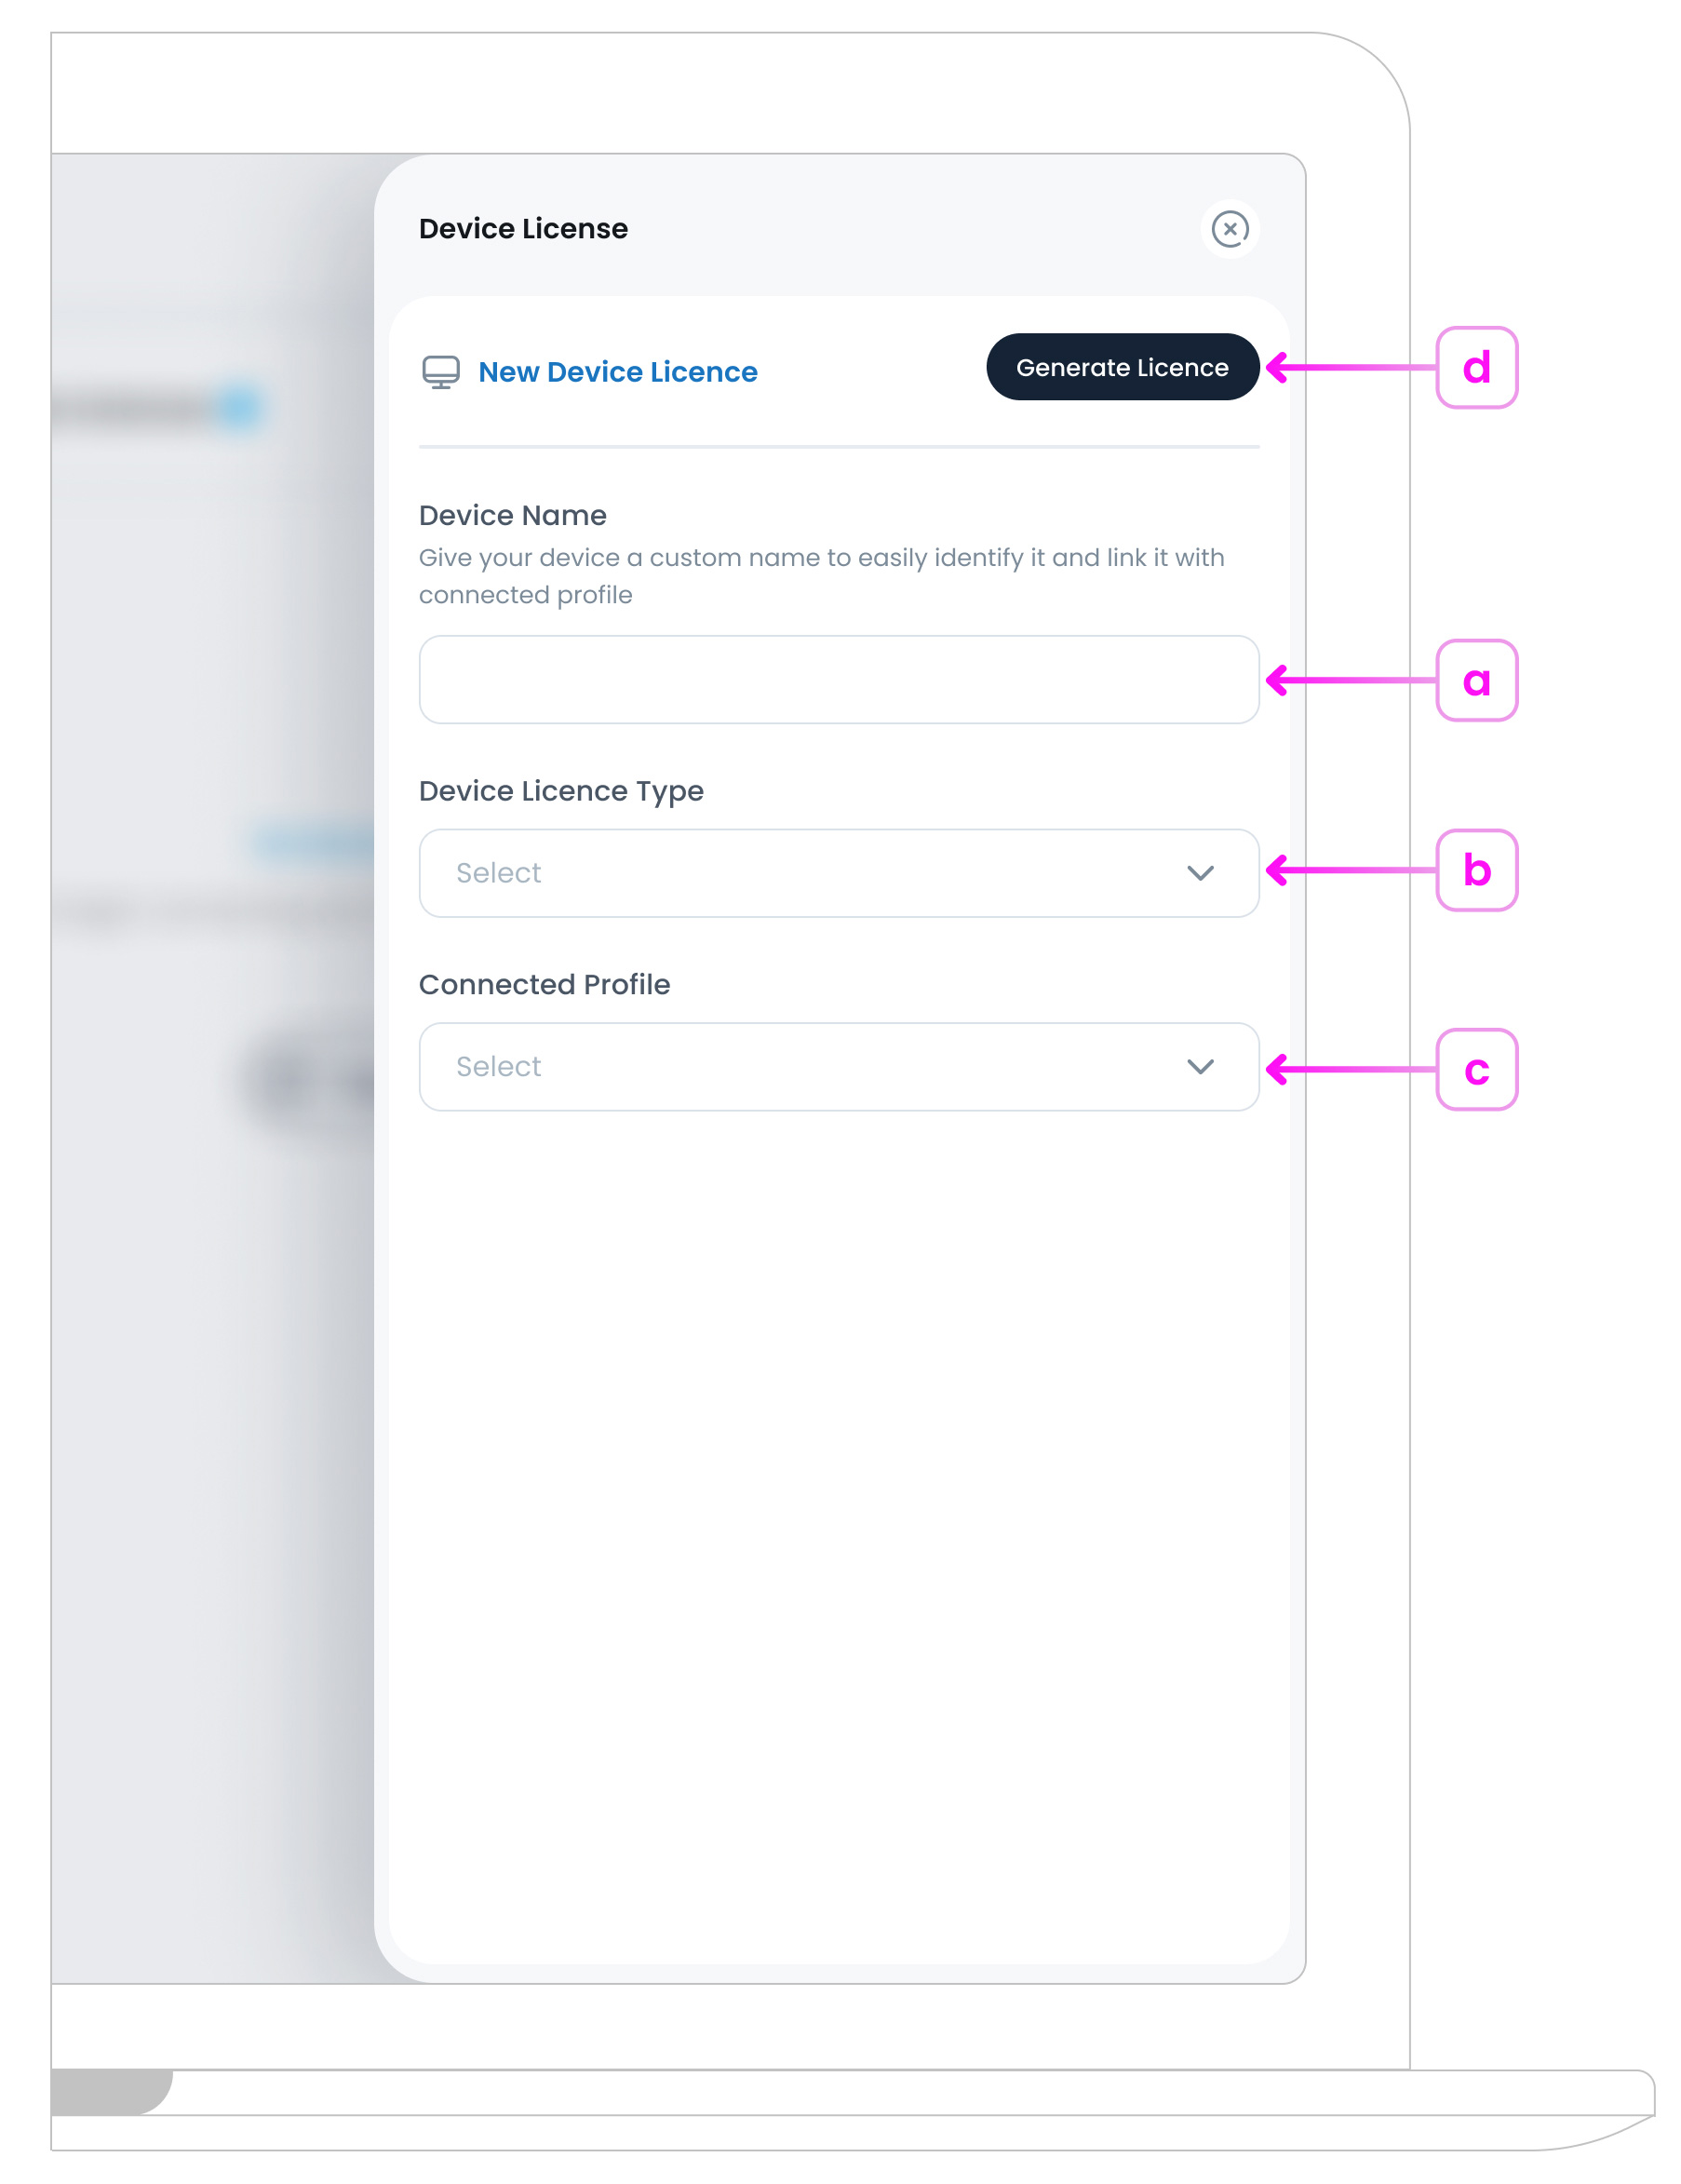
a. Device Name
Give your device a clear name (e.g., “Kiosk 1 Hammersmith”). This helps you identify it in the devices, profiles list and reports.
b. Device Licence Type
In the dropdown options, you can choose whether the device is a POS, Kiosk, or KDS (Kitchen Display System). For a self-ordering kiosk, select Kiosk.
c. Connected Profile
Select a Kiosk Profile you previously created to assign to this licence. This ensures the device uses the correct branding, menu flow, and payment settings.
d. Generate Licence
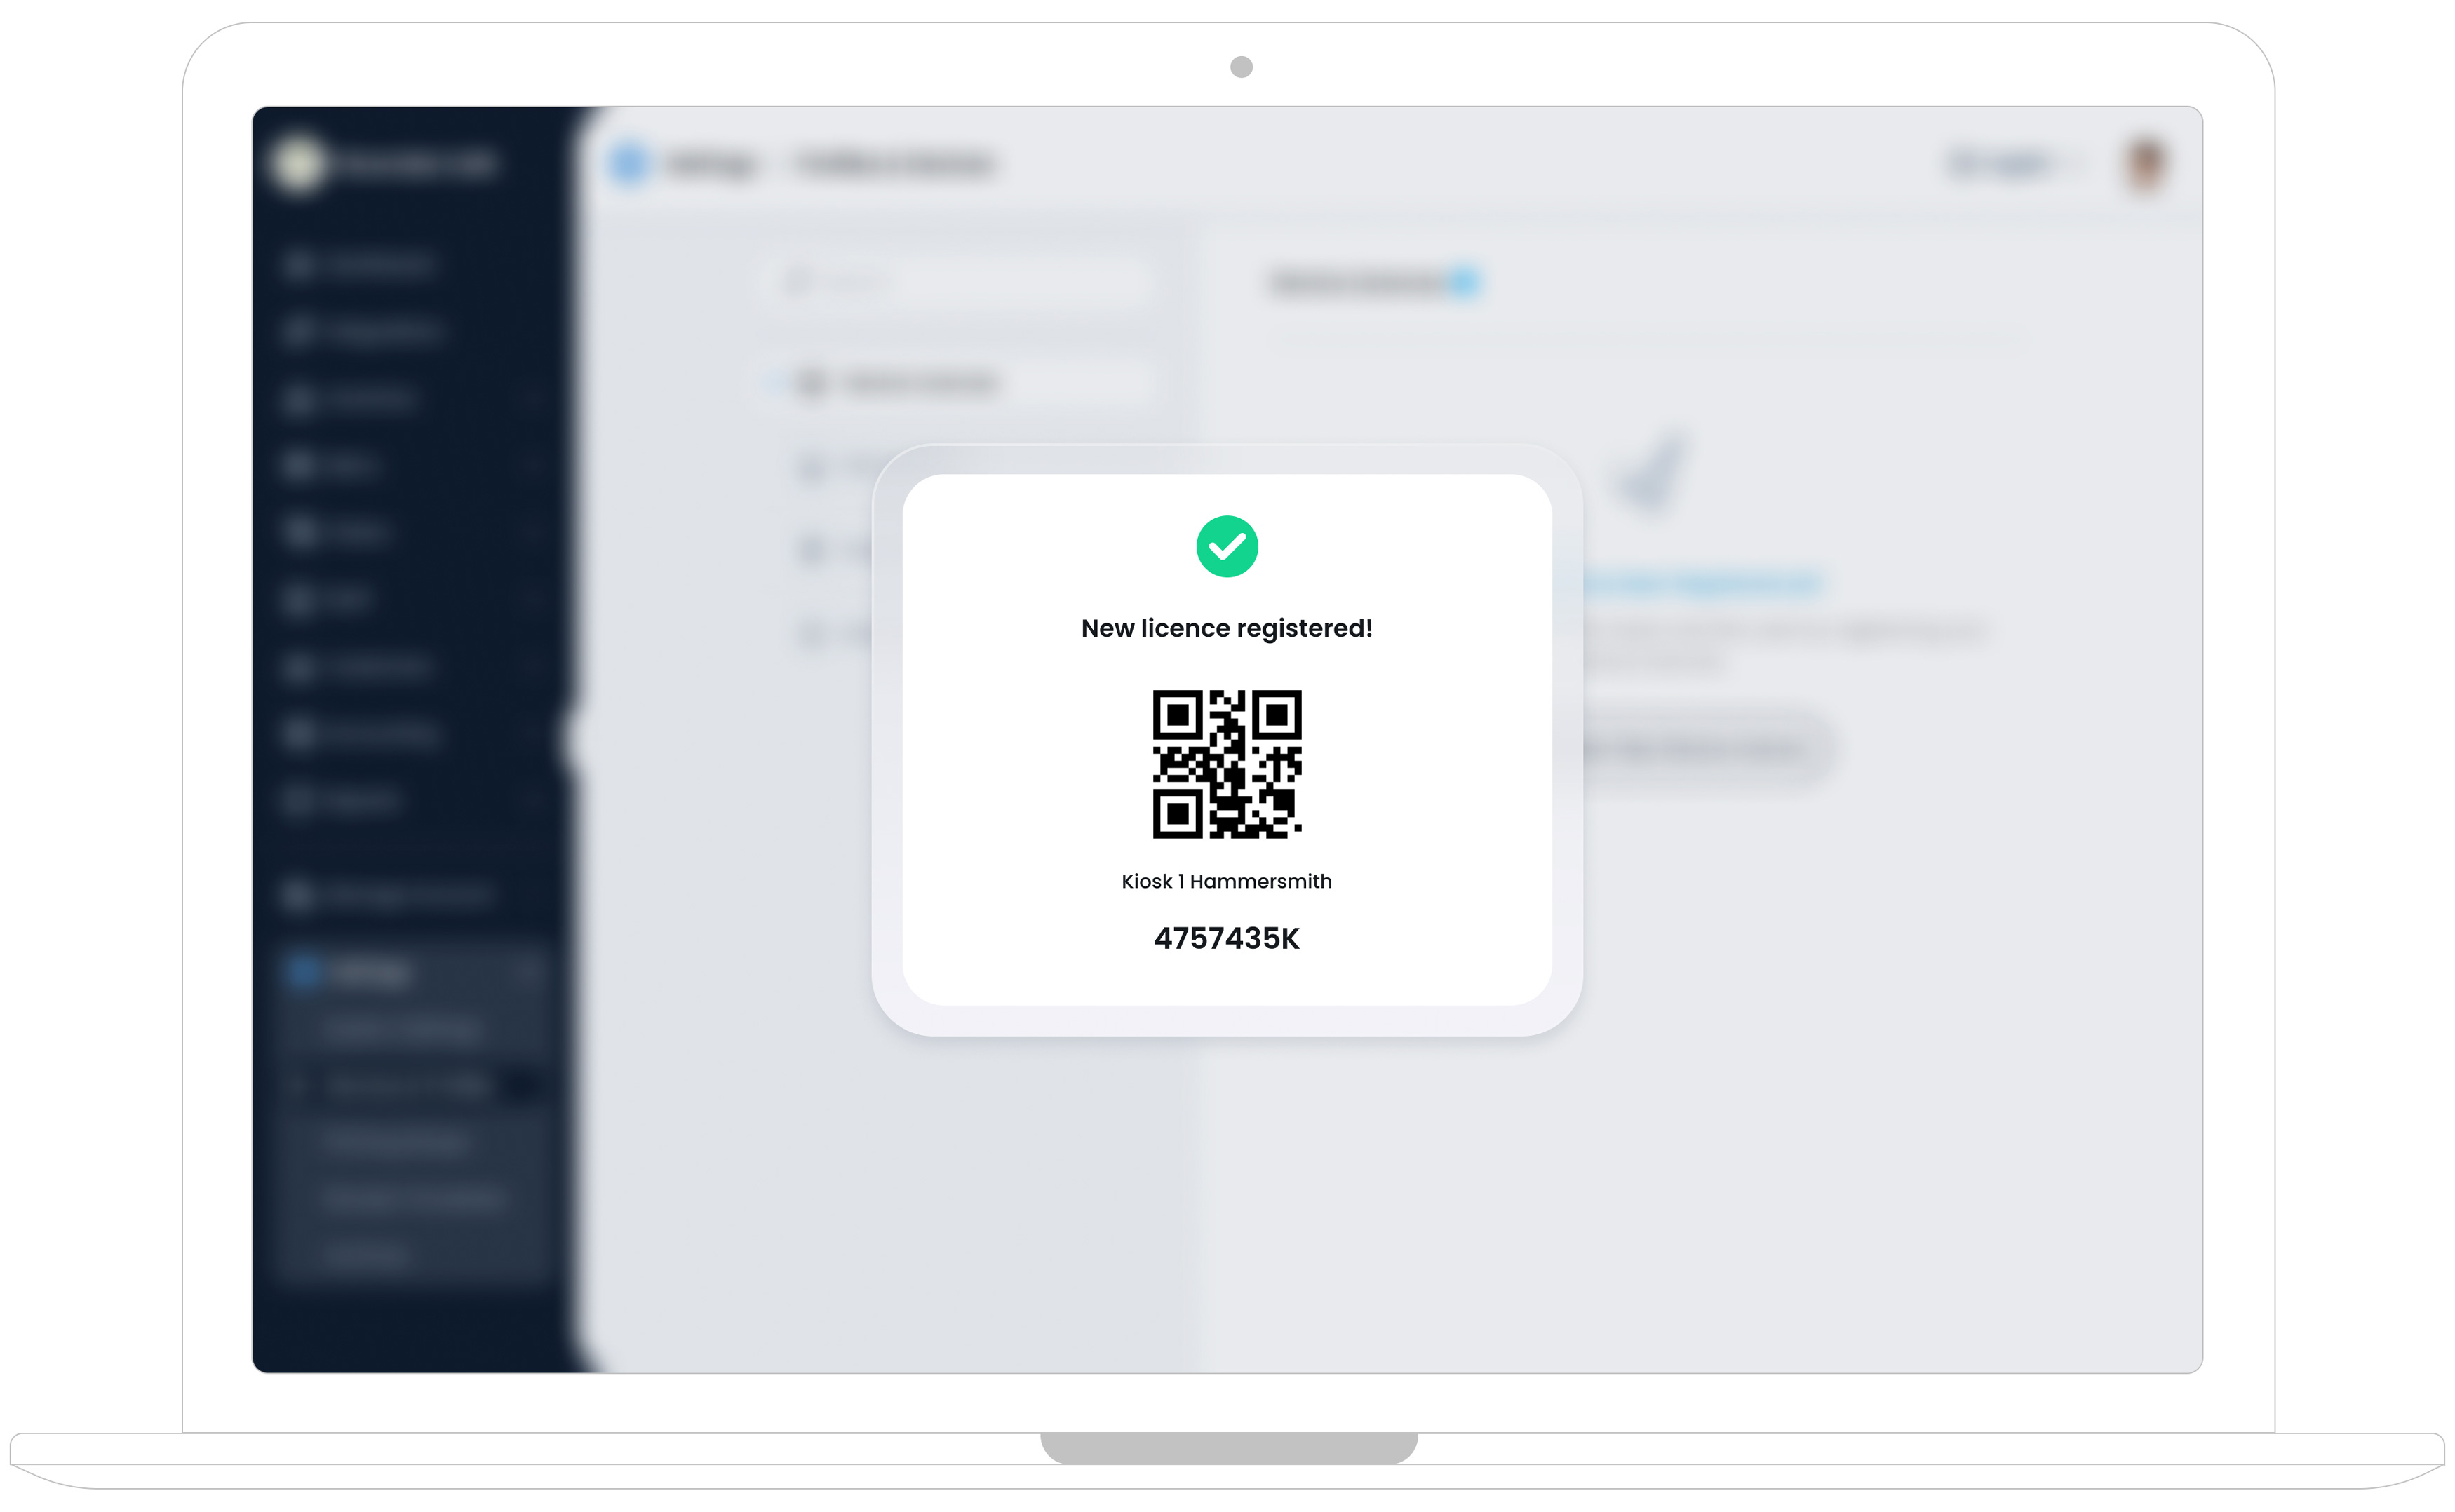
Finally, click the on “Generate Licence” button  to save and generate a unique code for your device. A confirmation popup will appear with a unique licence code and a licence QR code, which you’ll use when connecting the device.
You can scan the QR code using the device’s camera, or manually enter the code if scanning isn’t convenient or if the device doesn’t have a camera. This licence authenticates the device, allowing it to load your kiosk profile’s settings as soon as it’s connected.
Step 2: Sign in & Activate the Kiosk
After you’ve created your kiosk profile in the TechSuite portal and downloaded the TechSuite Kiosk app on your kiosk device, you’ll see the app’s login page, followed by setup steps where you can enter your licence code or scan a licence QR code
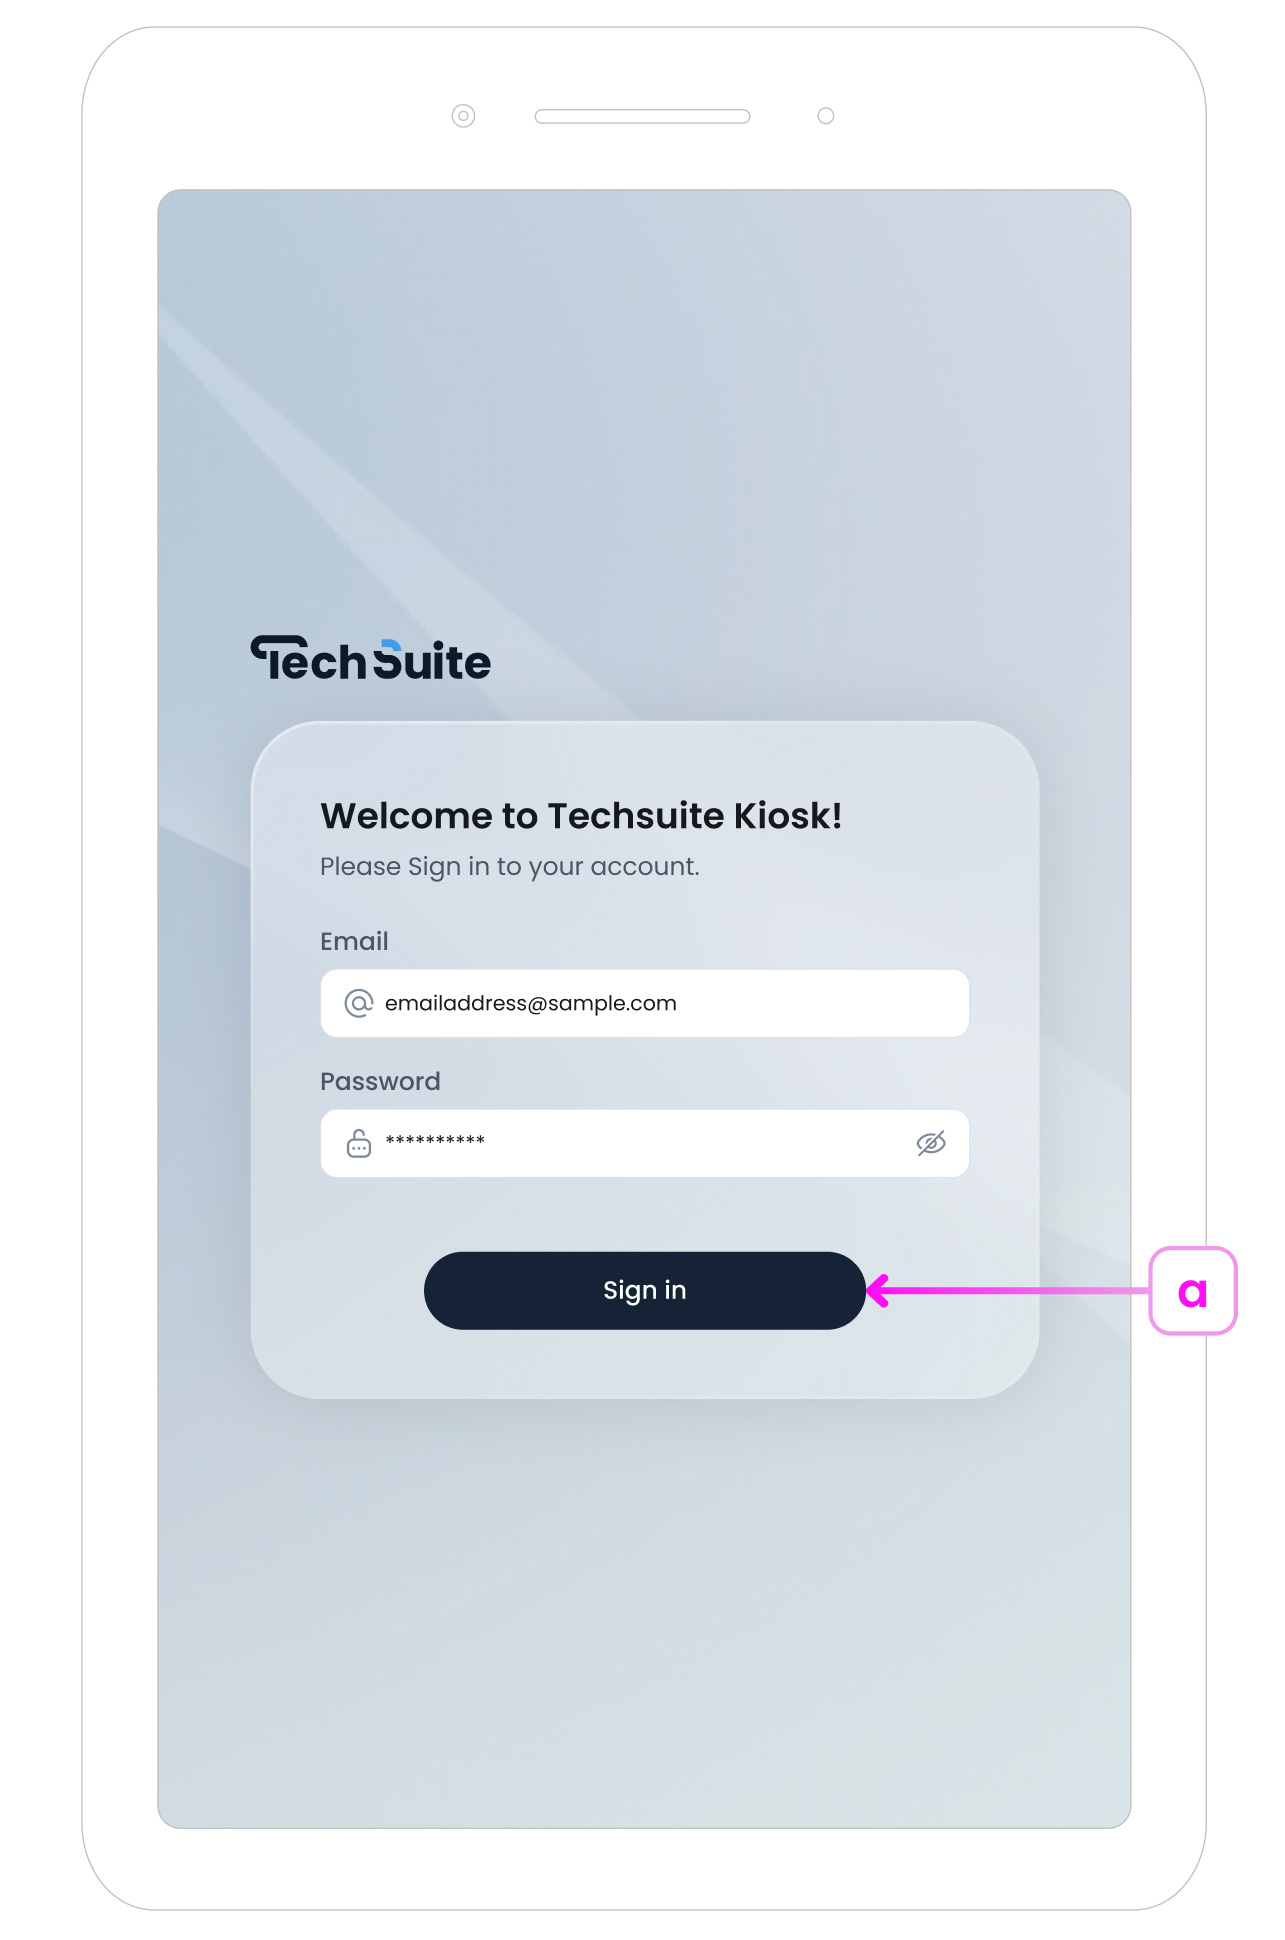
a. Sign In with Your Business Account
Enter the email and password for your TechSuite Business Account. This ensures that only authorised staff can configure the kiosk. Tap “Sign In” to continue.
b. Enter Licence Code & Kiosk Profile Name Manually
To set up your kiosk you need to enter licence code and kiosk profile name. If your device doesn’t have a camera or If you prefer you can, enter in the “Kiosk Profile Name” and “Licence Code” manually then tap “Get Started” button. The kiosk will load your profile if the details match.
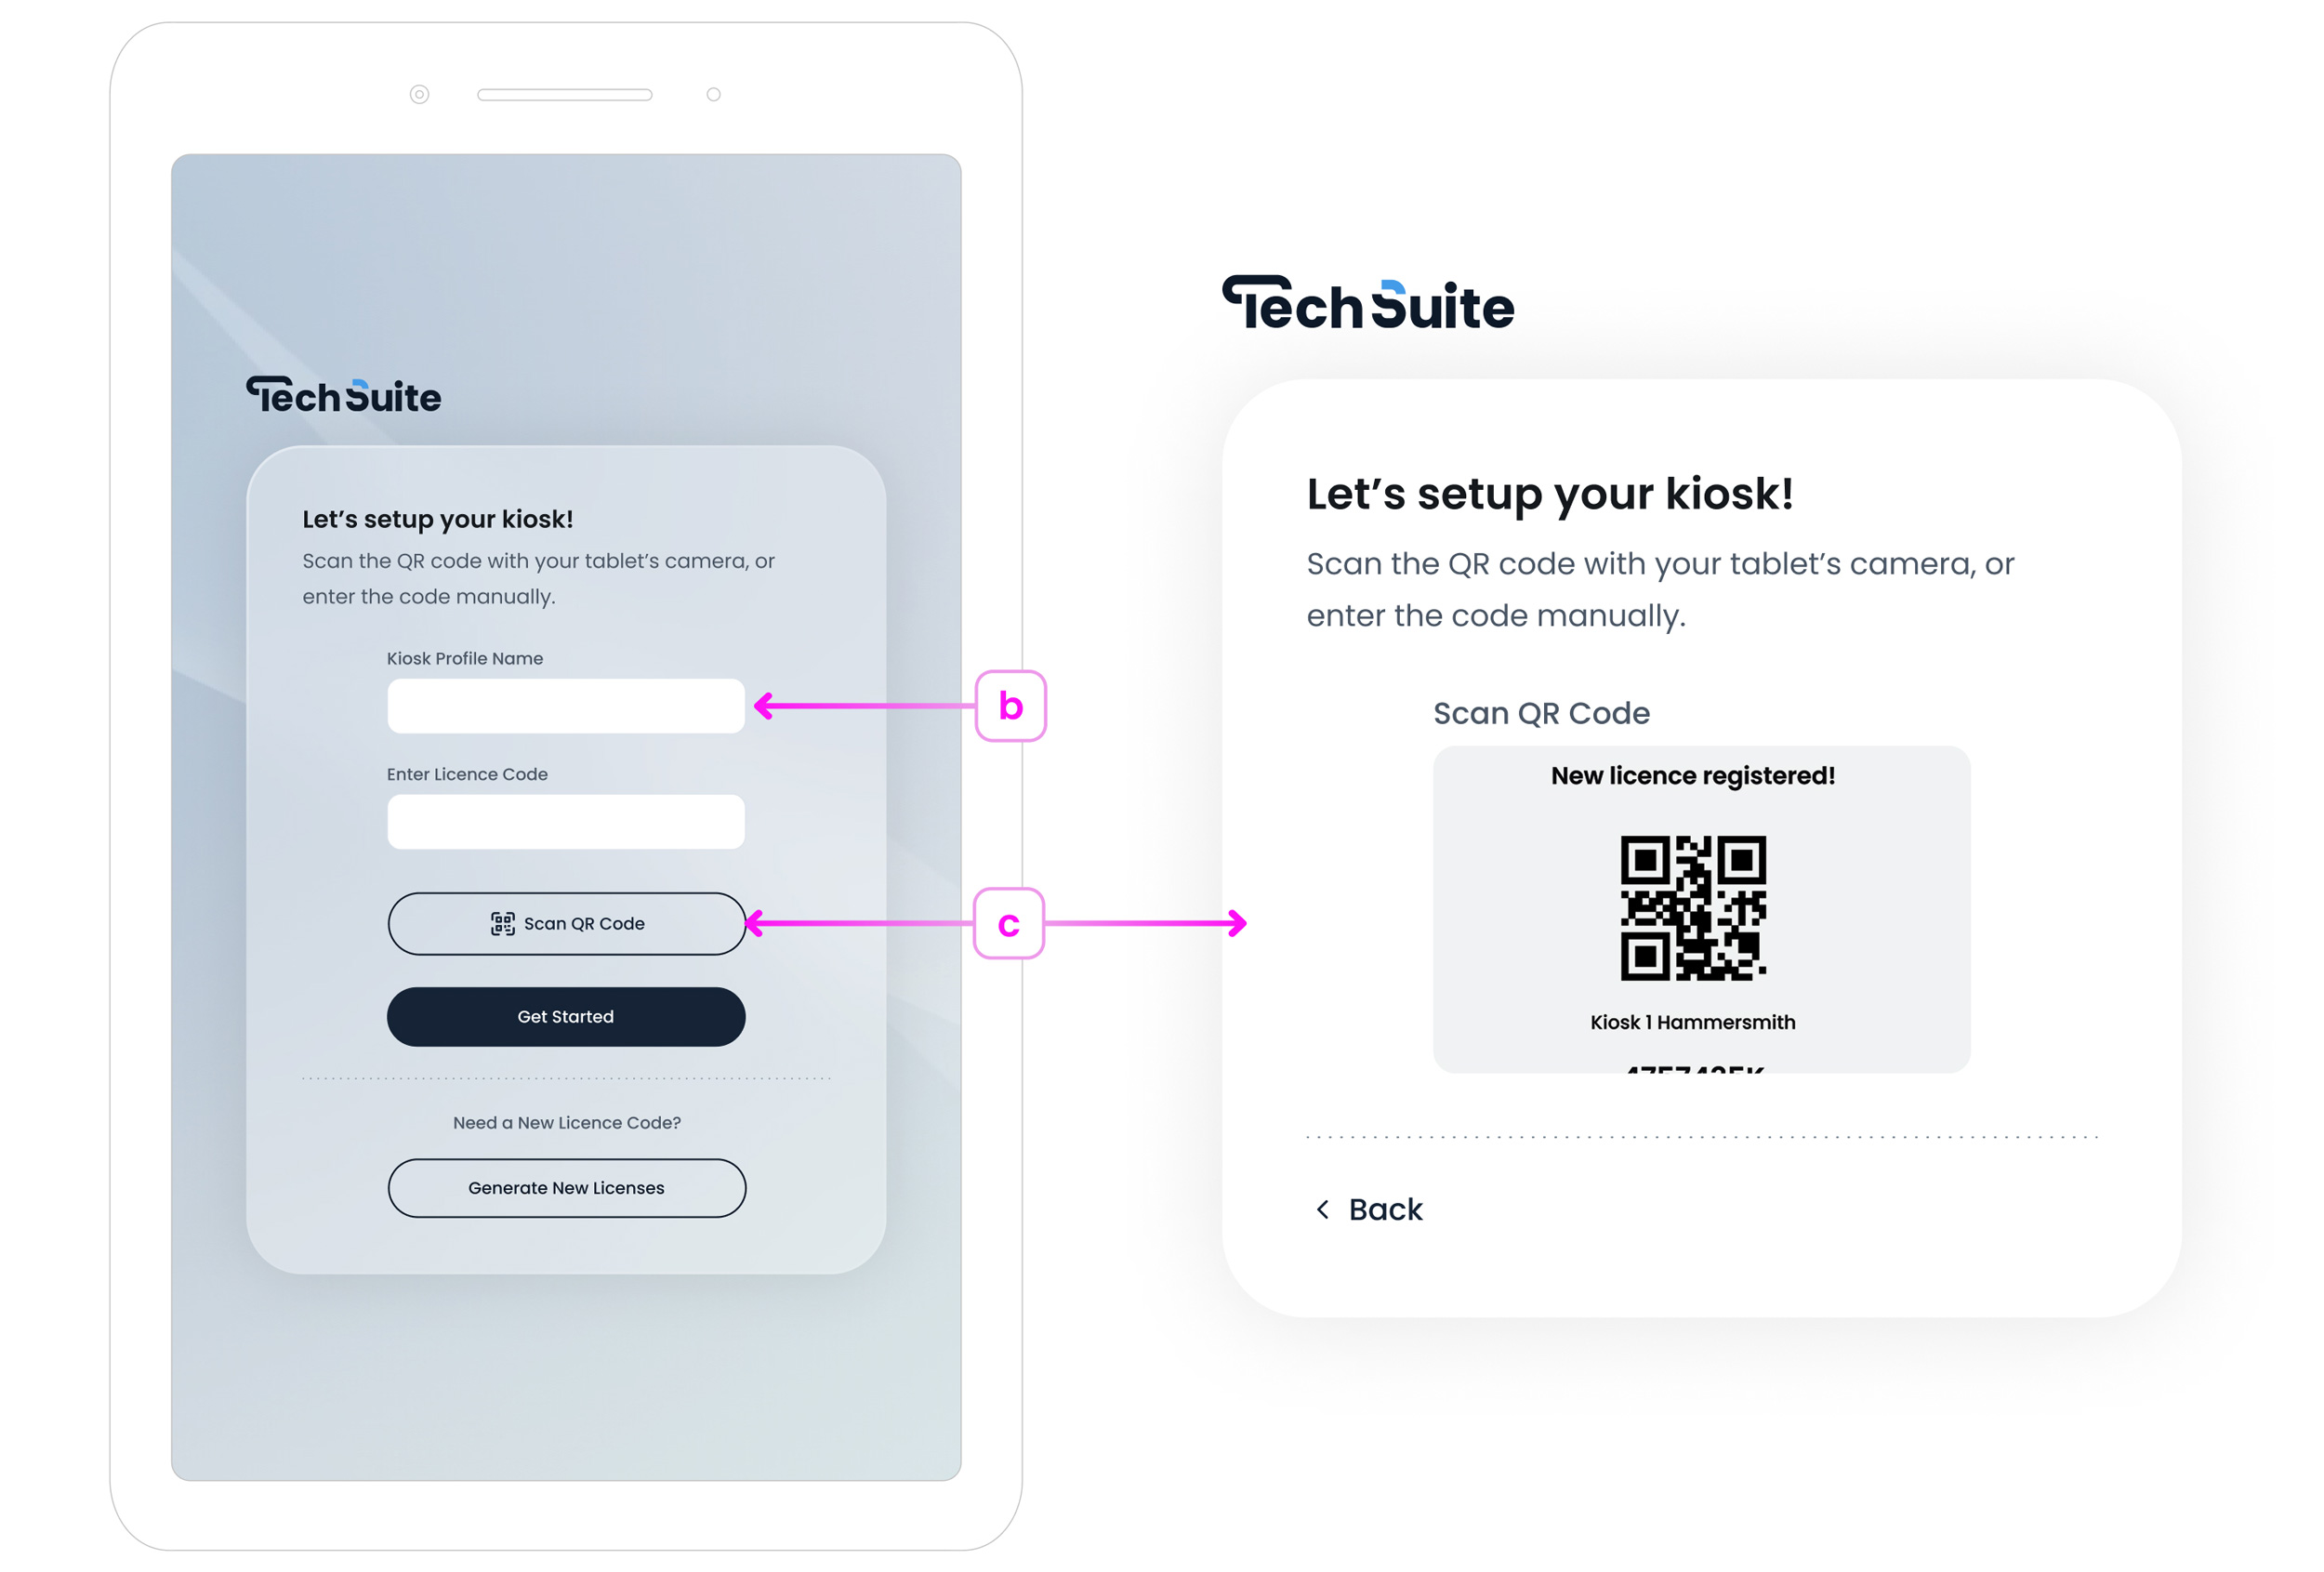
c. Scan QR Code
If your tablet has a camera, you’ll see a “Scan QR Code” button. Tap the button, and when the scan popup appears, point the camera at the code you generated earlier. The kiosk profile name and licence code will fill in automatically. Tap “Get Started” to continue to step 3.
d. Generate New Licences
This option allow you to generate a licence code from kiosk device.If you haven’t already created a licence in TechSuite portal, you can do so directly on the tablet. This is handy if you want to handle the entire setup from the kiosk device itself, without switching back and forth.
- Kiosk Licence Name (e): The name you want to assign to this device( “e.g. Kiosk 2”).
- Connect Kiosk Profile (f): Select the profile you created in the portal so the device knows which branding and menu settings to load.
- Select Branch (g): Choose which branch is requesting to generate a new licence.
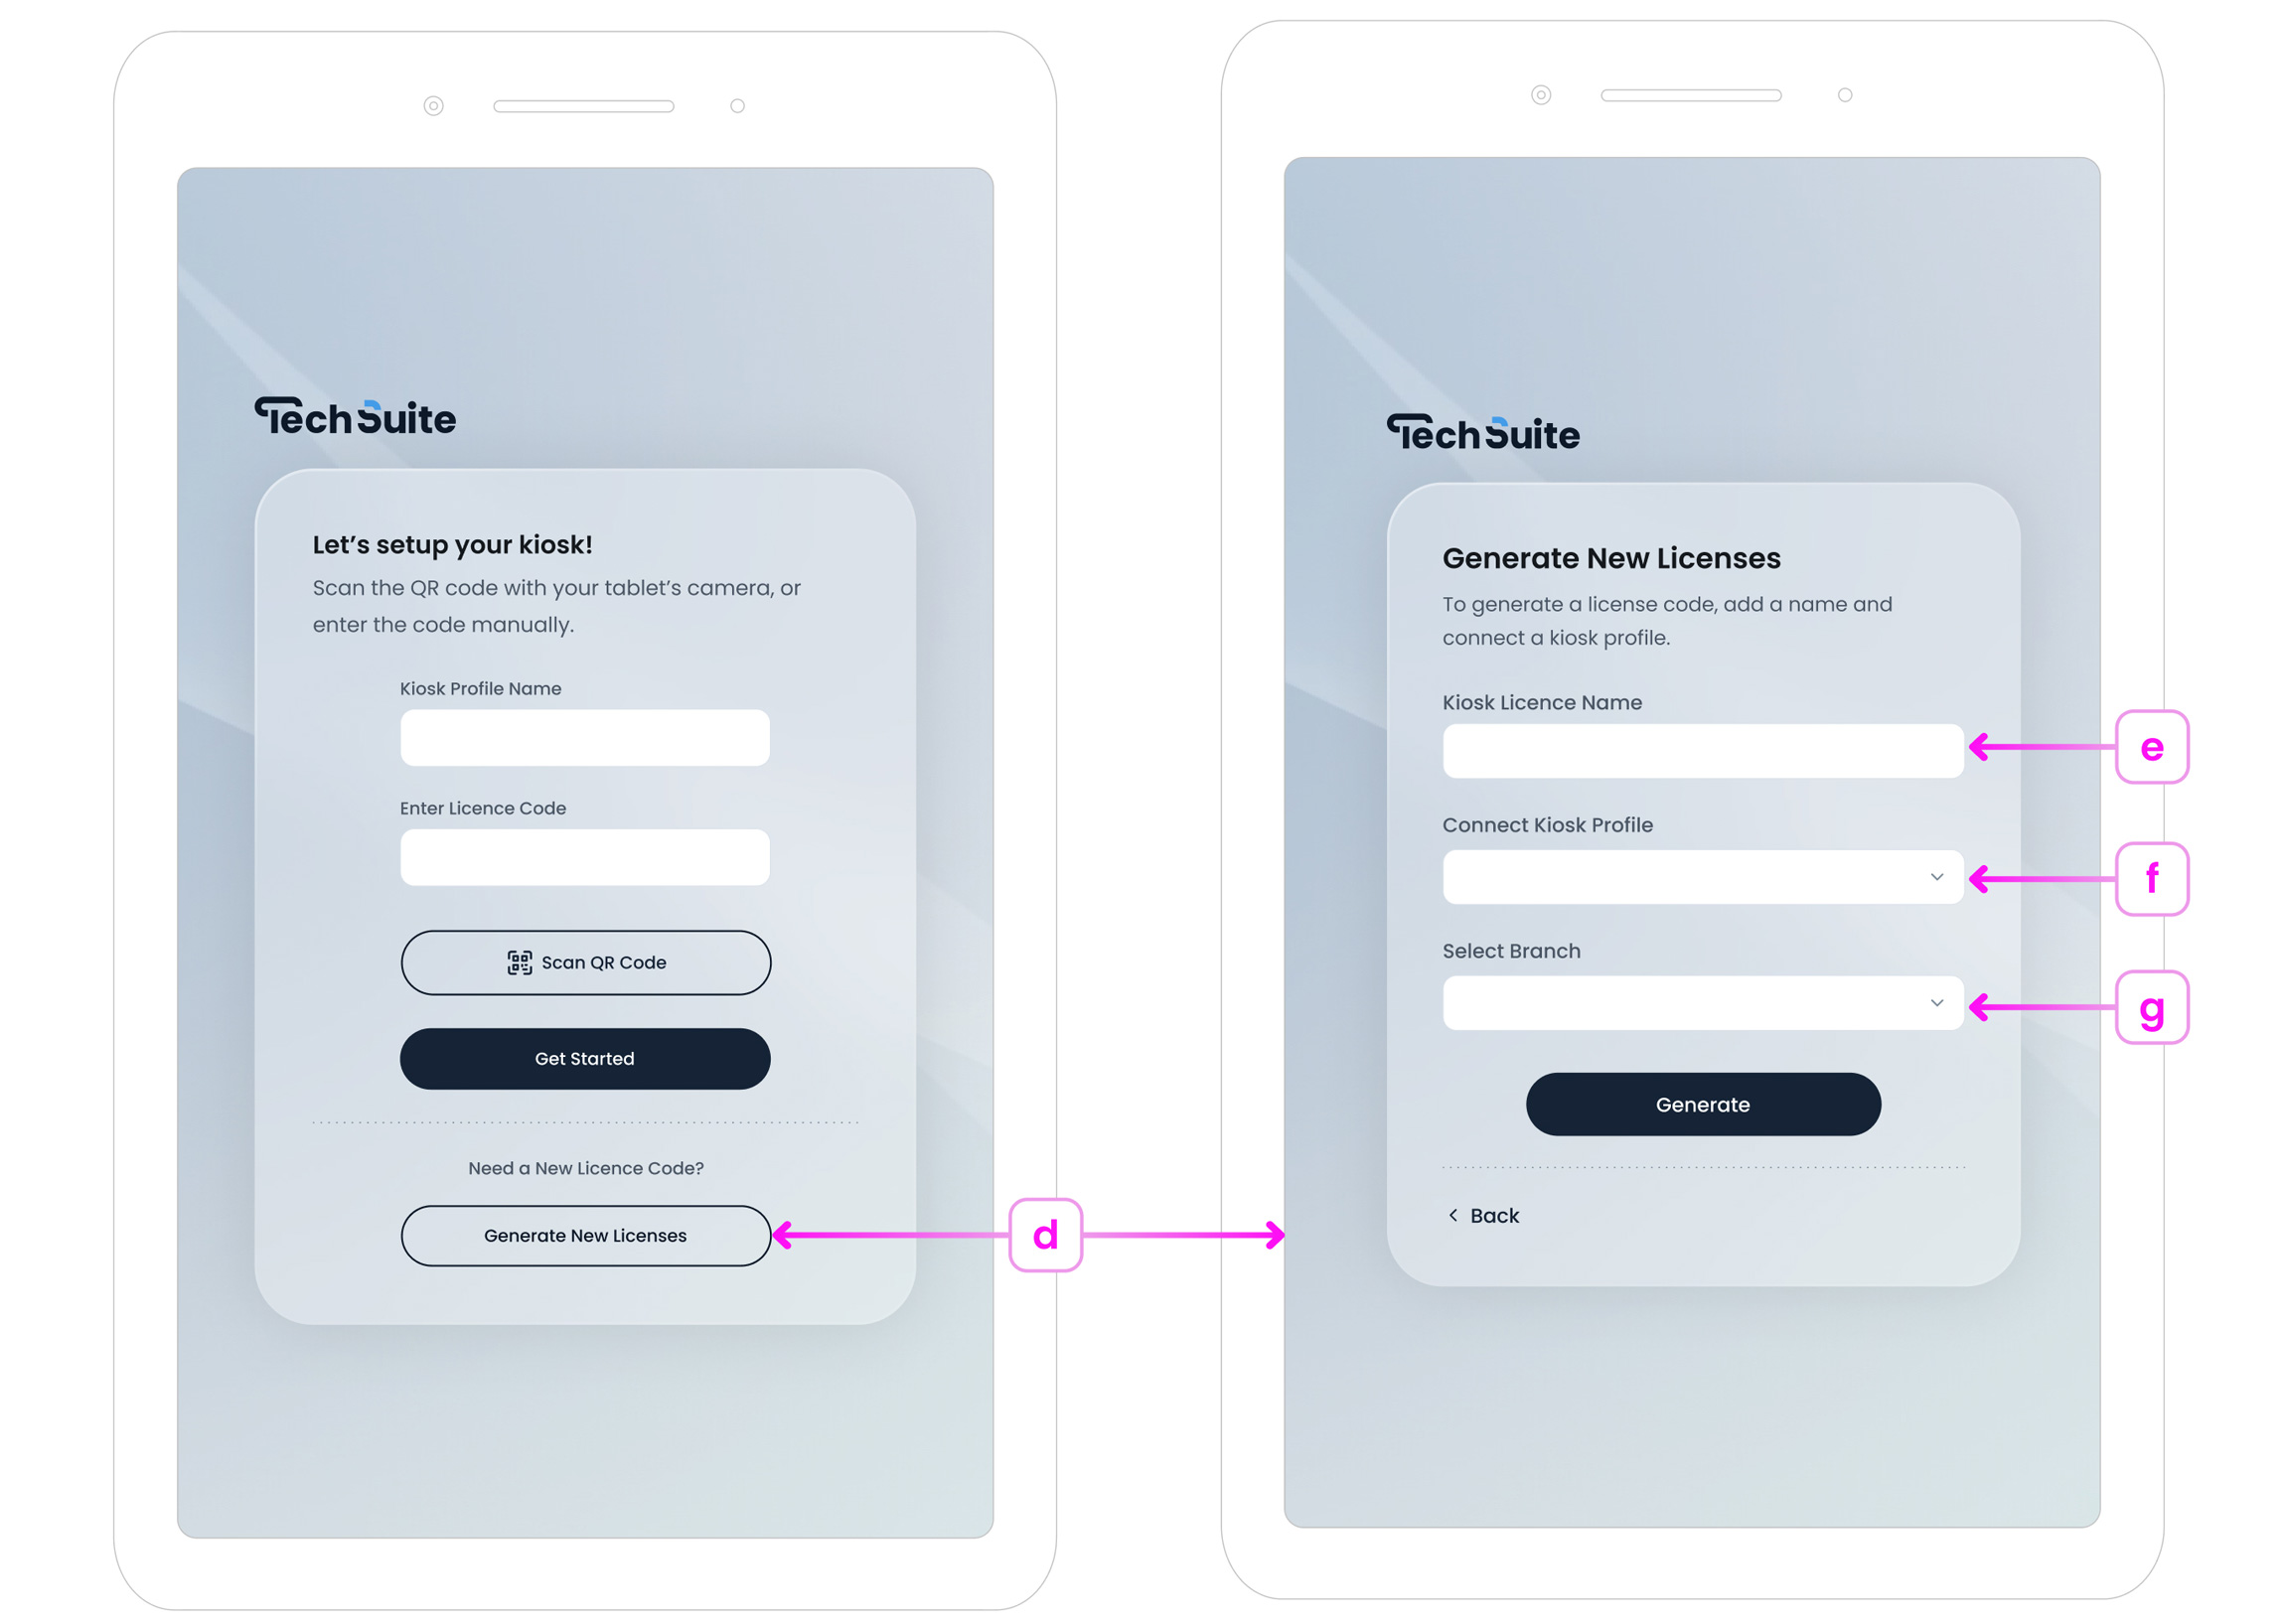
Tap “Generate”to produce a new licence code which register in your account directly in TechSuite portal.
Step 4: Kiosk Settings
If you need to make changes to your kiosk setup, such as updating the kiosk profile or modifying the payment connection, you’ll need to access the Settings page. Access is restricted to admins or users who have been granted permission by an admin.
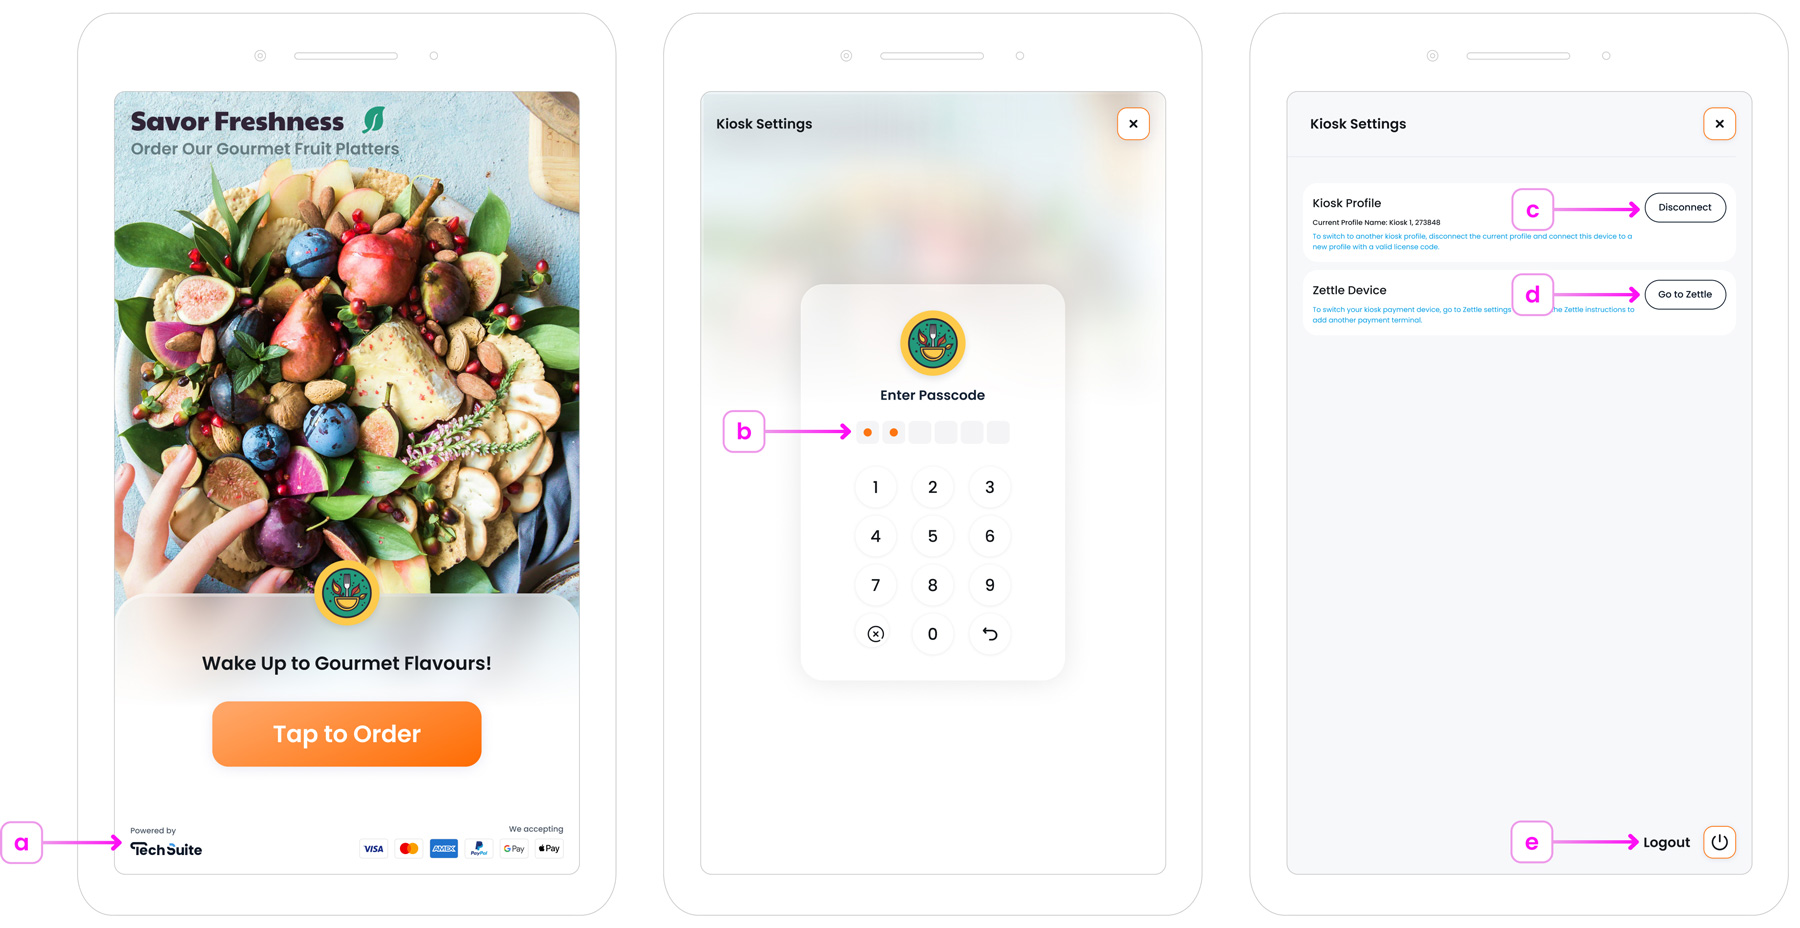
a. Accessing the Settings Page
Go to the standby page and tap the TechSuite logo located in the bottom left corner of the screen.
b. Entering Your Passcode
Enter your Six-Digit passcode passcode, which was created during your staff registration, to unlock the settings.
c. Switching Kiosk Profiles
On the Settings page, you can disconnect your current kiosk profile and connect a different one to the device.
d. Changing the Payment Terminal
To switch your kiosk payment device, go to Zettle Settings and follow the on-screen instructions to add a new payment terminal.
e. Logging Out of the Kiosk App
To log out of the kiosk app, tap the "Logout" button located in the bottom right corner of the screen.
What’s Next?
Now that you’ve connected your kiosk profile to a physical device, you can start to learn the Kiosk Ordering Flow and how users can interact with the self-ordering kiosk.