Menu Page Overview
The Menu Library is the central hub for managing menus, where you can create new menus, edit and organise categories and items for each menu set from items previously defined in Inventory management. When creating a new menu, you can specify a name, image, availability window, and select the branches where it will be available. This flexibility allows you to run the same menu across multiple locations seamlessly.
Once created, your menus can be used across various platforms, on the TechSuite POS through the Take Order page, or in the TechSuite Kiosk profile setup, or published to integrated online ordering channels and branches.
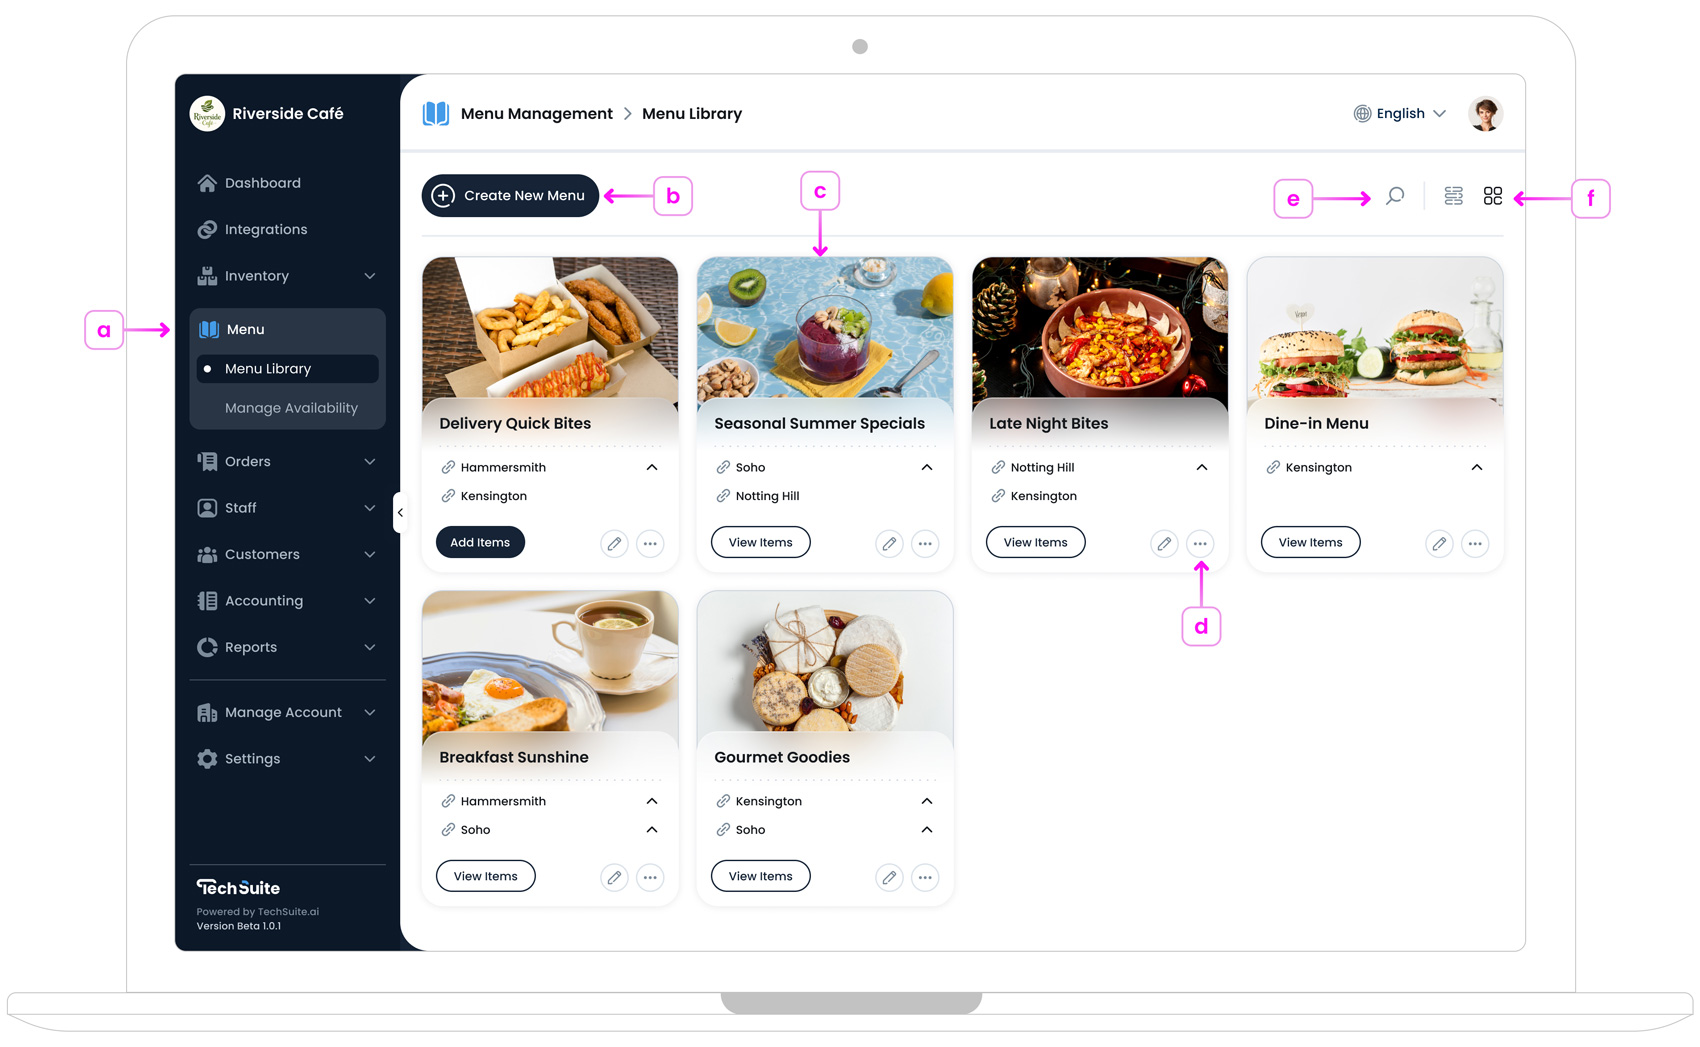
a. Accessing Menu Library
Go to the TechSuite Management Portal, and from the left sidebar, select Menu > Menu Library. You can access this page if you are an account admin or have been granted permission by an admin.
The Menu Library displays existing menus in two different views, Card or List . If no menus have been created yet, you’ll be prompted to create your first one.
b. Create New Menu Button
In the top‐left corner, tap on the “Create New Menu” button.  You’ll be guided through the New Menu Setup page, where you can name your menu, add an image, and set basic details. For a full walkthrough, see Creating a New Menu.
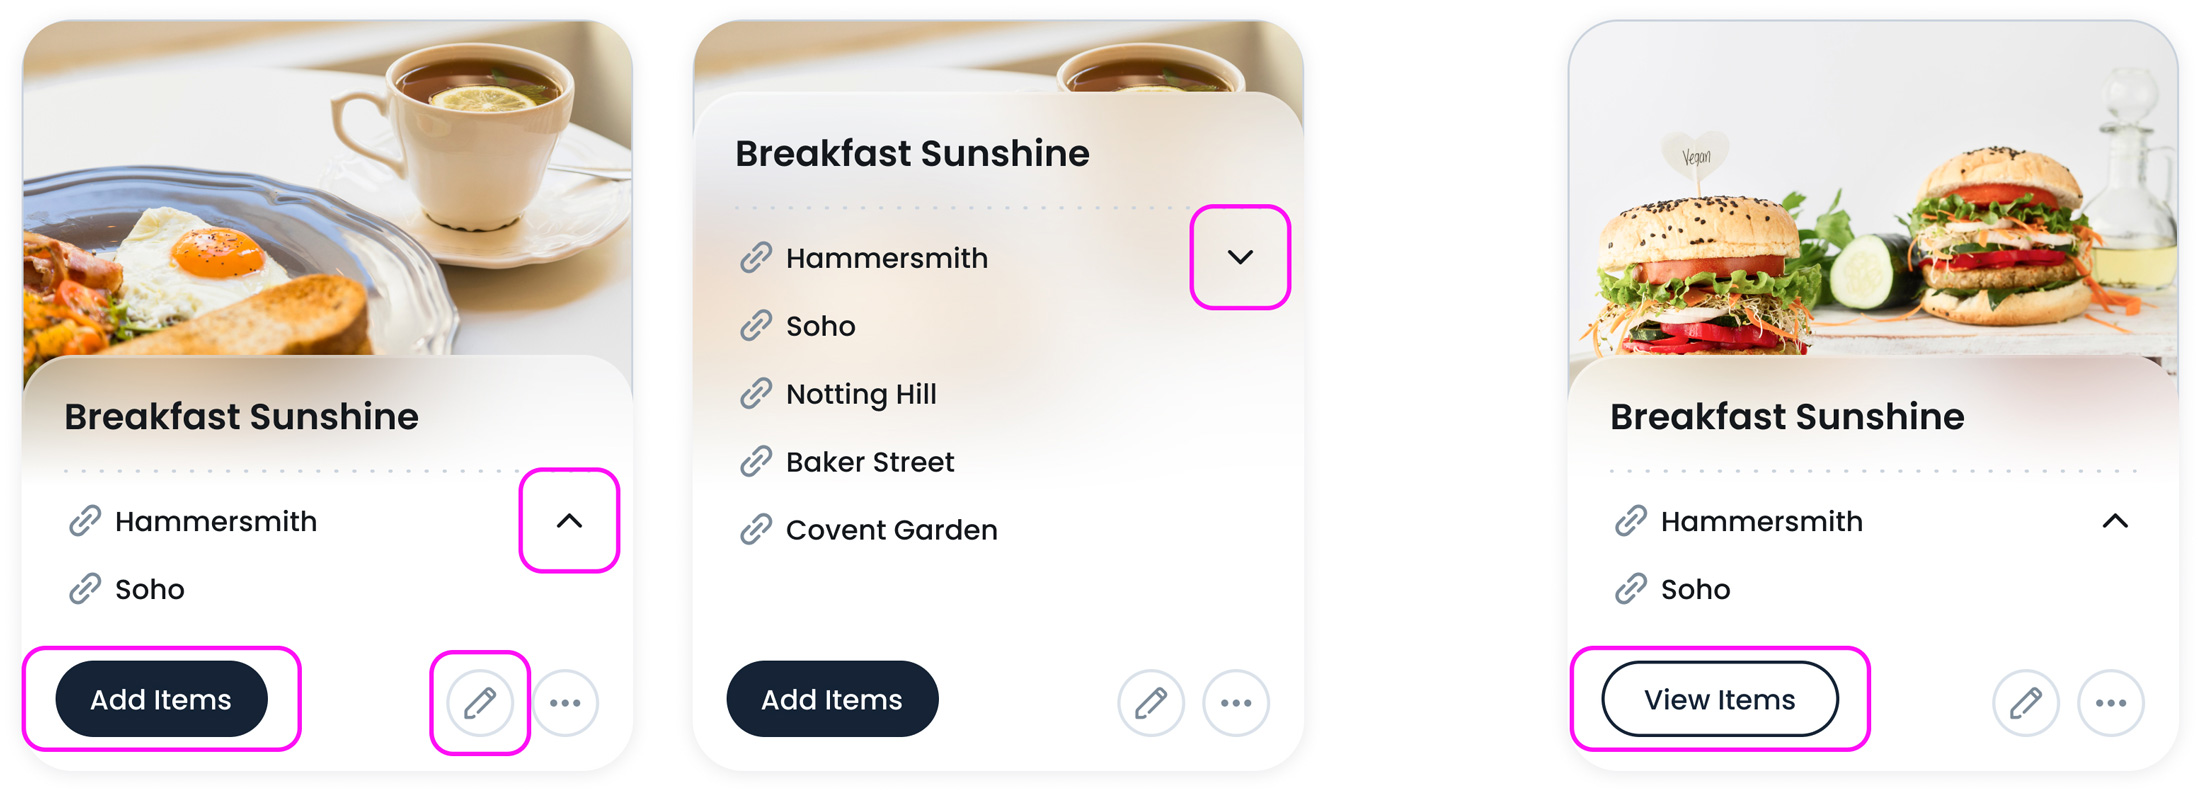
c. Menu Cards
Each menu is displayed as a card showing its name, image, and how many branches are connected. For example, you might see Breakfast Sunshine - Hammersmith with an arrow
![]() to reveal the full branch list.
to reveal the full branch list.
If a menu is empty, you’ll see an “Add Items” button.  . This button or the menu card itself takes you to the categories and items page. Or, if categories and items are already added to the menu, the button is “View Items”
  . The edit
![]() button lets you update the menu’s info ( e.g., name, image ).
button lets you update the menu’s info ( e.g., name, image ).
d. Menu Options
In the bottom-right corner of each menu card,
you’ll see a small options
![]() button. Clicking this reveals actions you can take on that specific menu,
such as Edit, Publish,
Check Compatibility, or
Duplicate.
button. Clicking this reveals actions you can take on that specific menu,
such as Edit, Publish,
Check Compatibility, or
Duplicate.

- d.1. Publish Menu If you have connected integrated channels (like Deliveroo or Embargo,...), you can publish this menu to go live on those channels. For a step‐by‐step guide, see Publishing Menus to Channels.
- d.2. Check Compatibility Ensure everything in your menu, such as items name and modifiers, meets the channel’s requirements. Some integrations need specific naming rules or image formats.
- d.3. Duplicate Menu If you want to quickly create a new menu based on an existing one, you can duplicate it and then edit only the parts you need. For detailed steps, see Duplicate an Existing Menu.
- d.4. Archive or Unarchive Menu You can remove a menu from your Menu Library when it’s no longer needed by using the Archive option. Archived menus can be restored at any time by unarchiving them from portal settings. For detailed instructions, see Archive or Restore a Menu.
e. Searching in Menus
If you have many menus, use the search icon in the top right corner to find a menu name quickly.
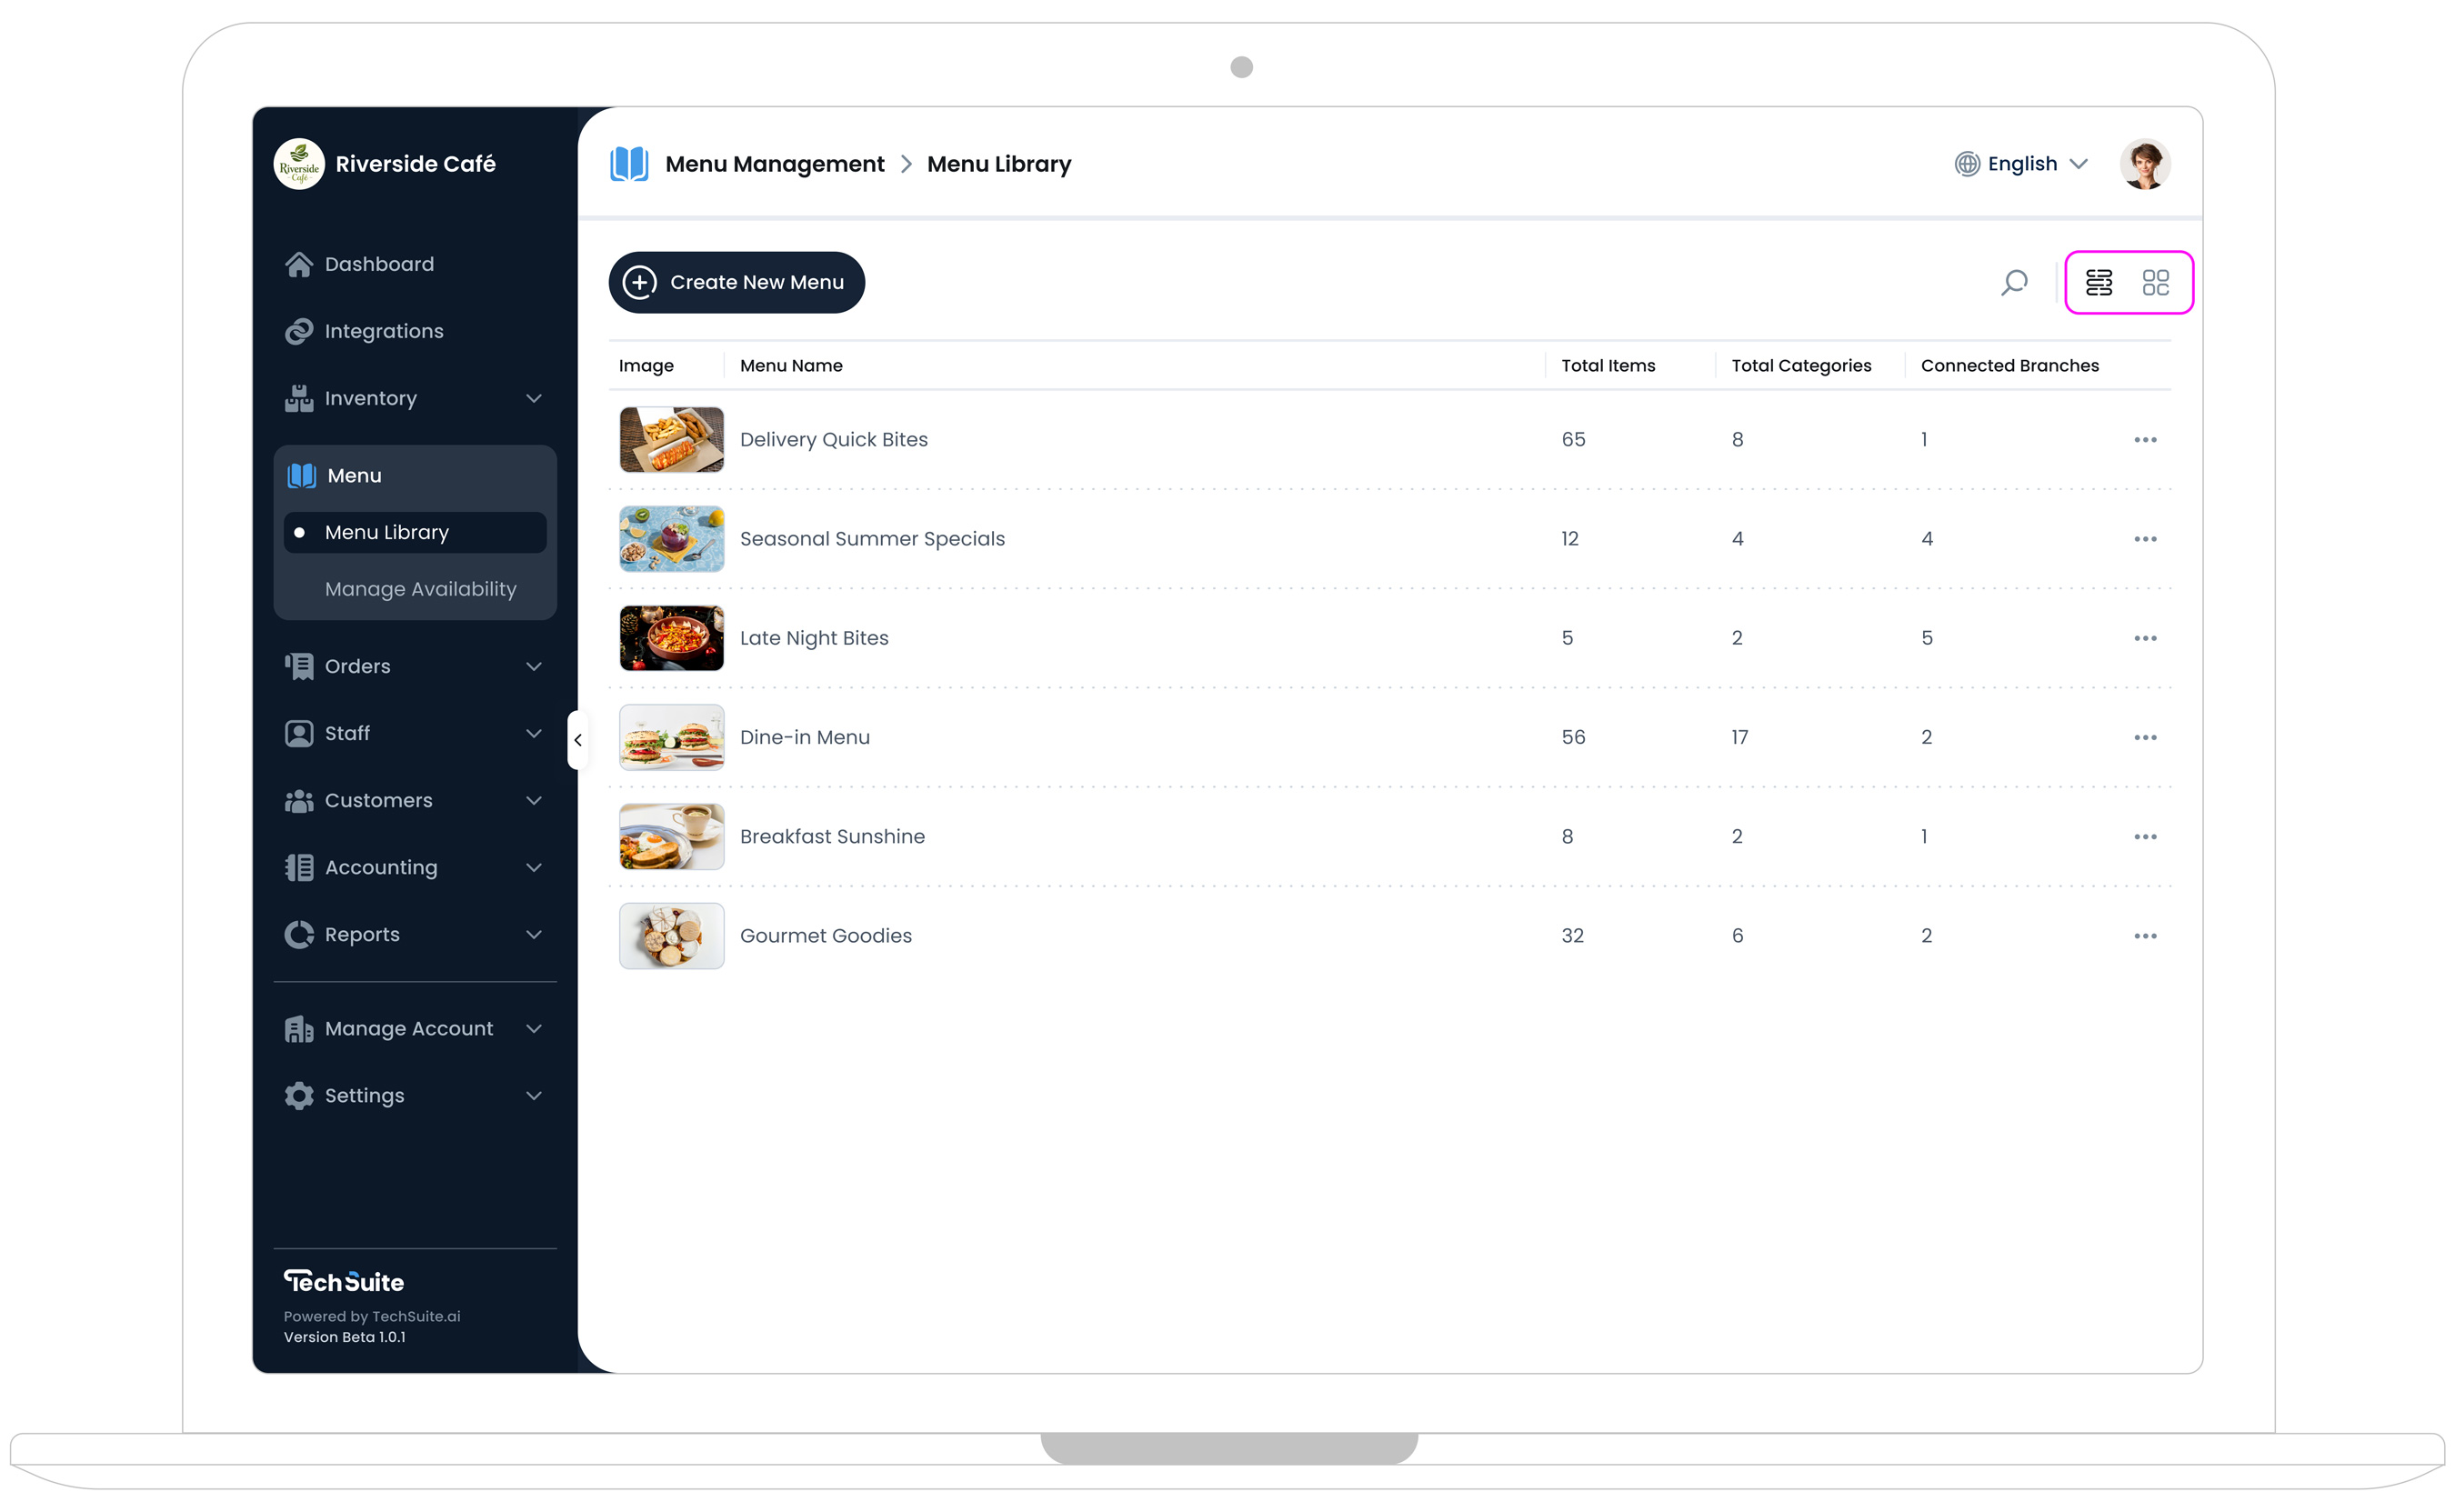
f. Switching Between Card and List Views
The Menu Library can display your menus in either a card view or a list view. The card view highlights images, connected branches, and quick options for each menu, making it easier to visually spot key details.
The list view, however, offers a more compact layout, showing extra information like item counts or statuses at a glance. You can switch views at any time, so choose whichever best suits your workflow.
Where to Start?
If you’re new to Menu Management and looking for a simple first step, we suggest starting with Create a New Menu. This guide walks you through naming your menu, adding an optional image, and defining basic availability, enough to get you up and running quickly.