Item Conditions
Item Conditions let you classify your inventory items based on their state, such as Wet, Dry, or Frozen. These labels are especially helpful for inventory tracking, preparation instructions, or stock handling preferences.
Understanding Item Conditions
Item Conditions are used internally to describe the state of an item, helping teams manage preparation and storage more effectively.
These tags improve clarity in inventory tracking and stock management but do not affect how items are sold or displayed to customers.
Examples:
- Wet: For items that require refrigeration or special storage
- Dry: For shelf-stable items or pre-packaged goods
- Frozen / Cooked / Fragile: Optional custom conditions you can define as needed
To Get Started
To access Item Conditions settings, log in to the TechSuite portal and go to Settings > System Settings from the sidebar. Next, under the Inventory Settings section, click Item Conditions. On this page, you’ll see a list of existing conditions like Wet and Dry, which you can edit or expand with your own labels.
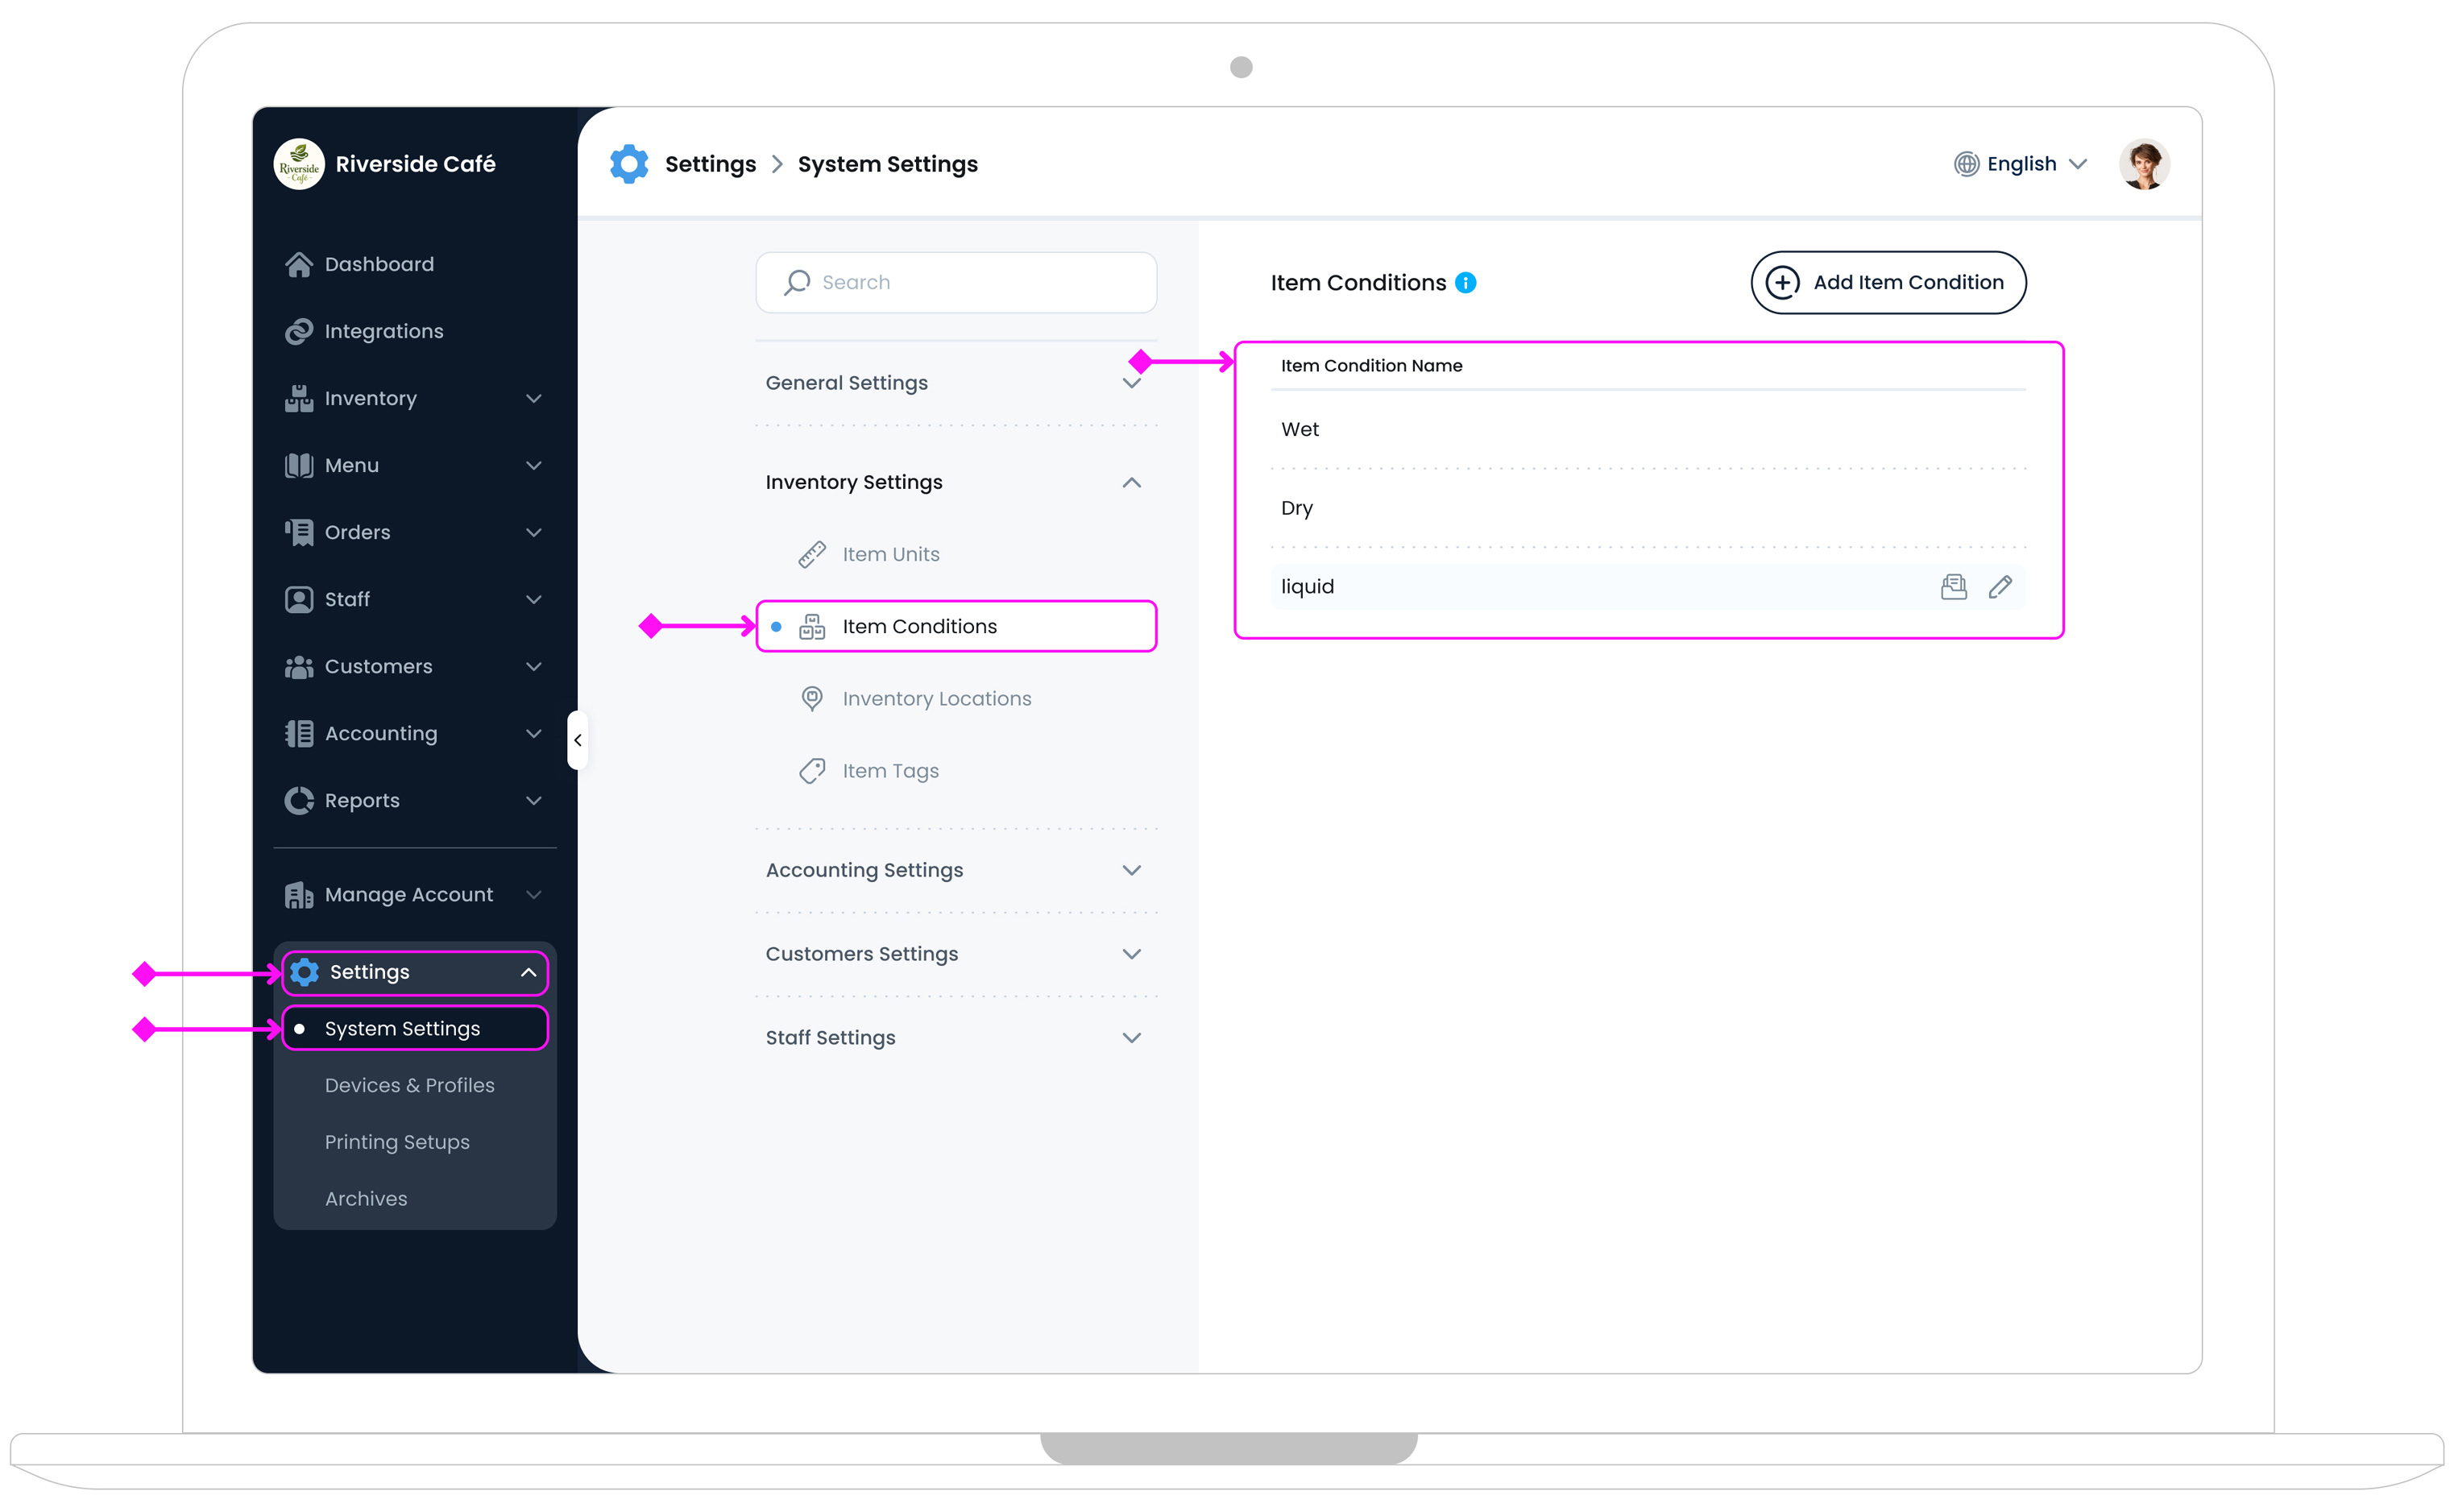
Adding a New Item Condition
To add a new item condition, click the Add Item Condition button  located at the top-right corner of the Item Conditions page. Then fill in the following field:
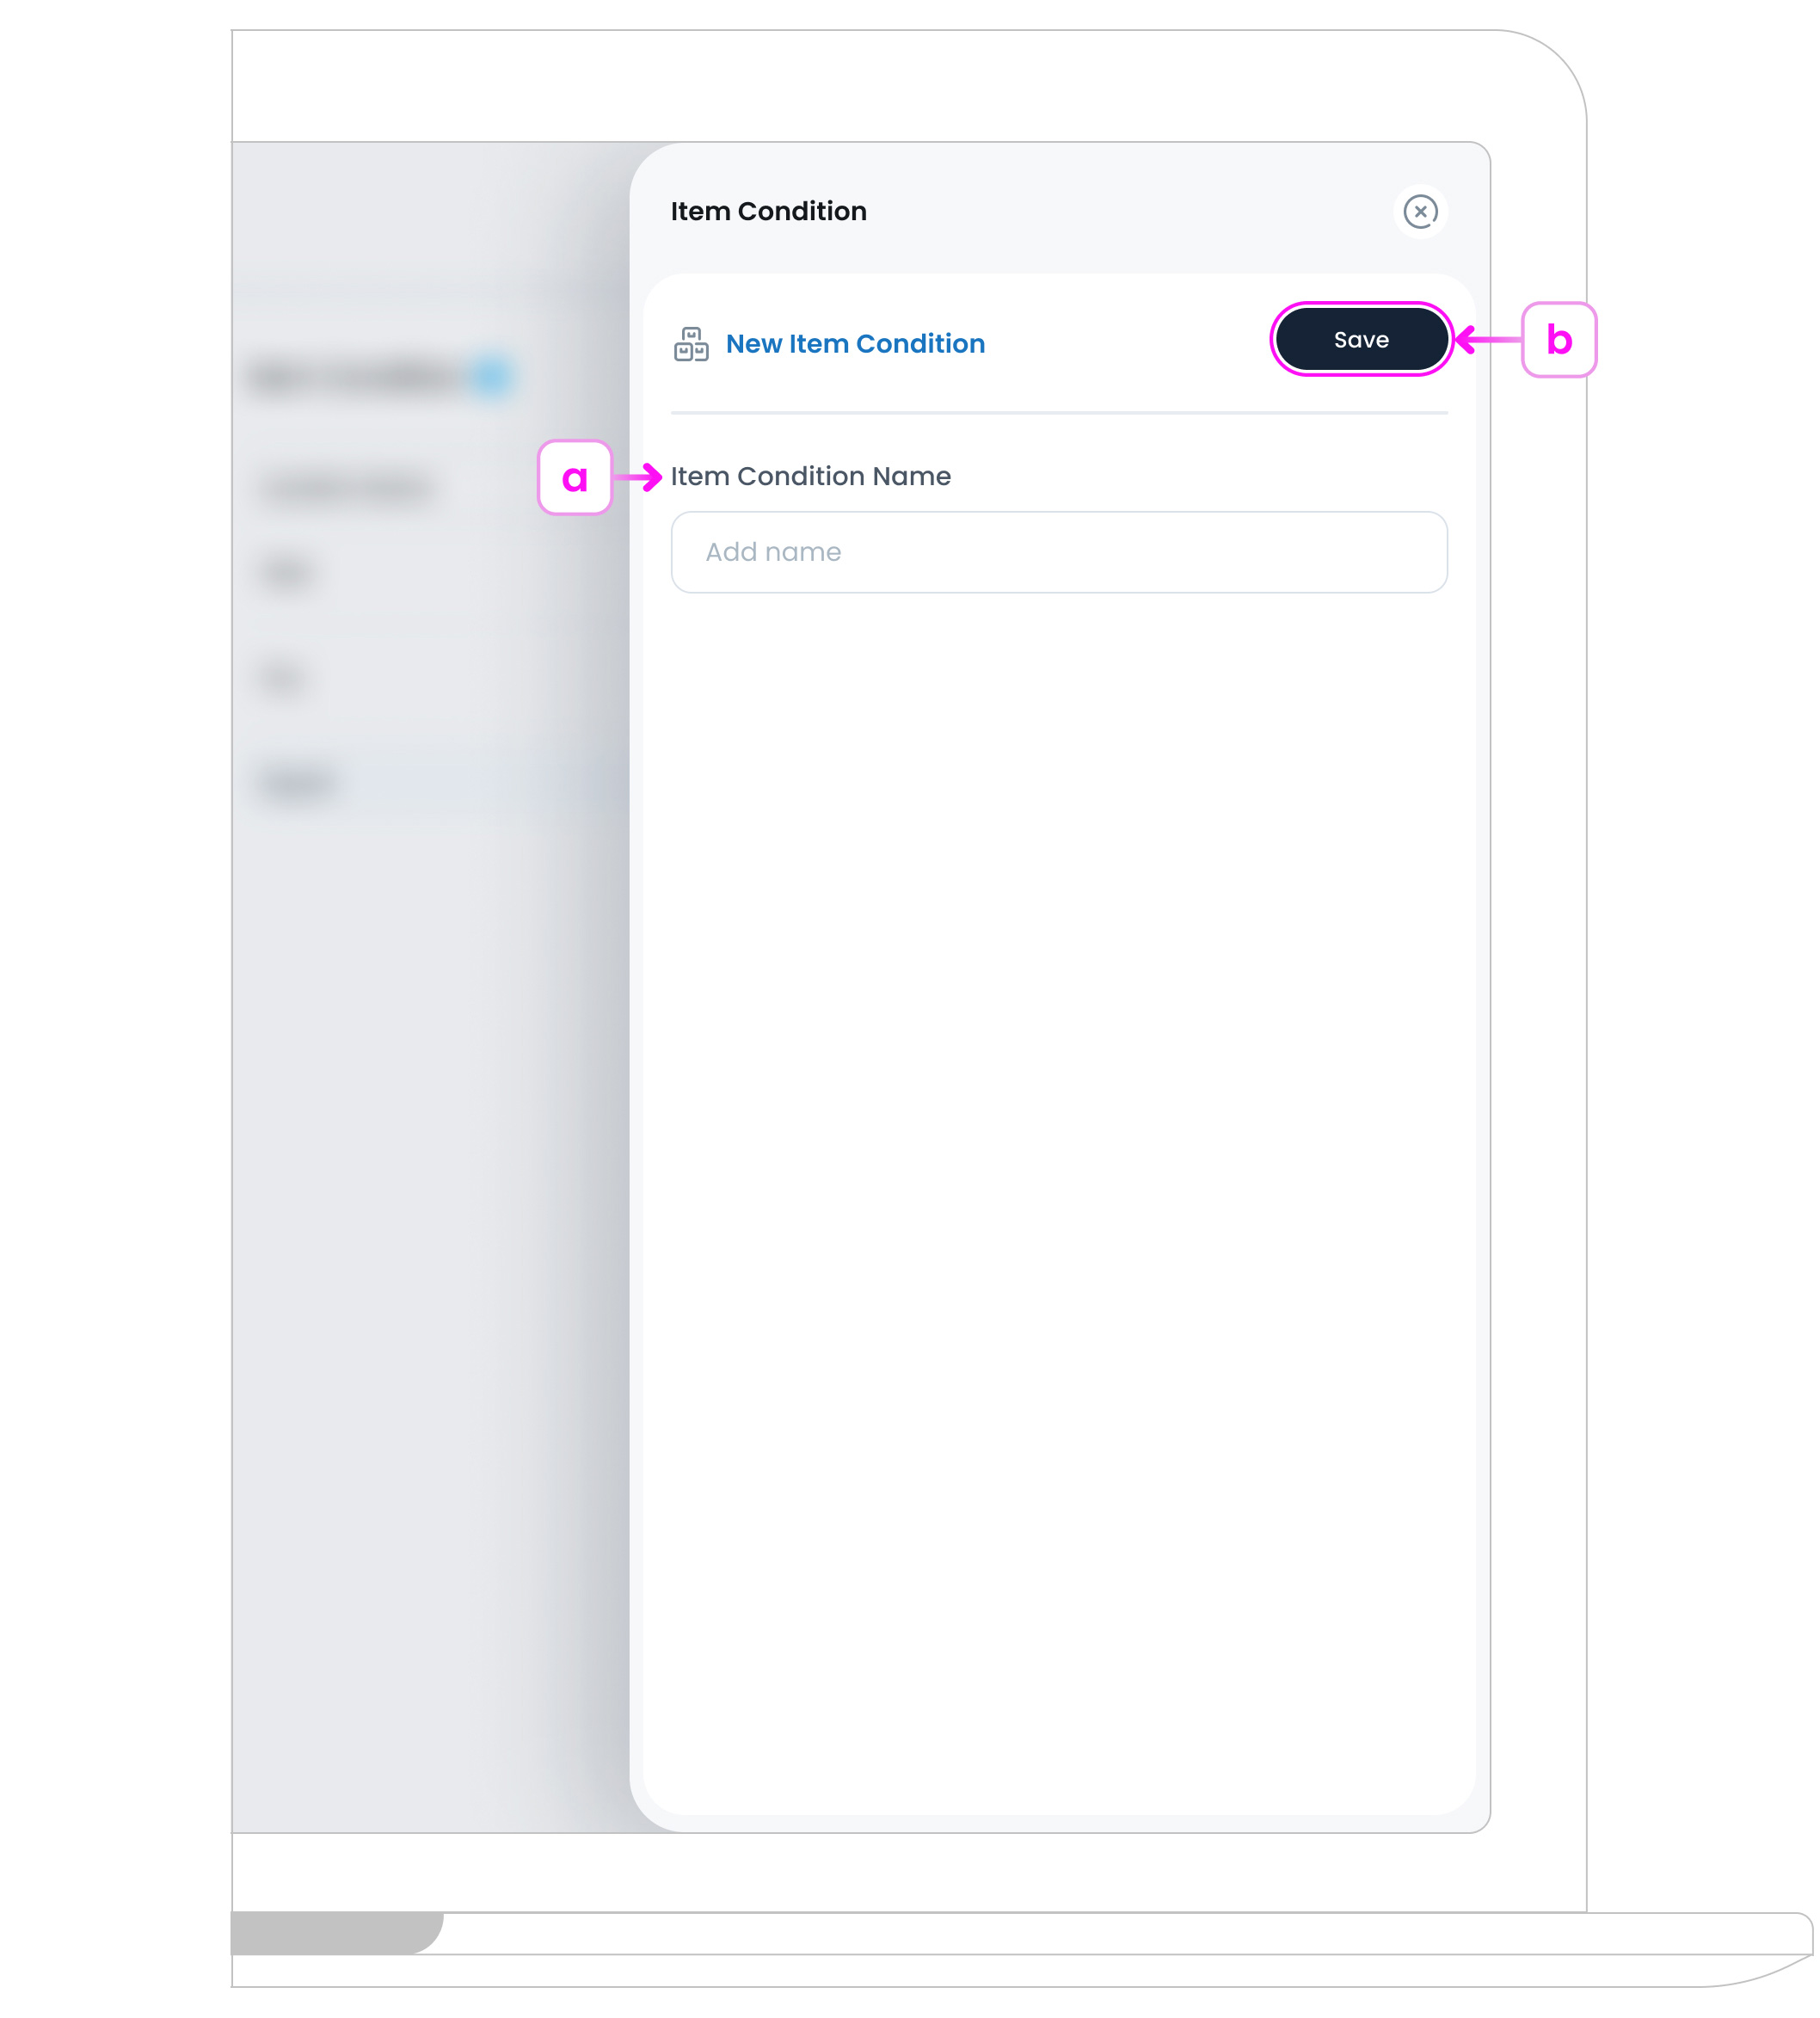
a. Item Condition Name
Enter the name that describes the item’s state or handling requirement (like Frozen, Hot-Held, Ambient).
b. Save the Condition
Click the Save button  to add it to your system.
The new condition will now appear in the list.
to add it to your system.
The new condition will now appear in the list.
Item Conditions Page Overview
This page allows you to manage condition labels for your inventory items, helping you better categorise and report on product types.
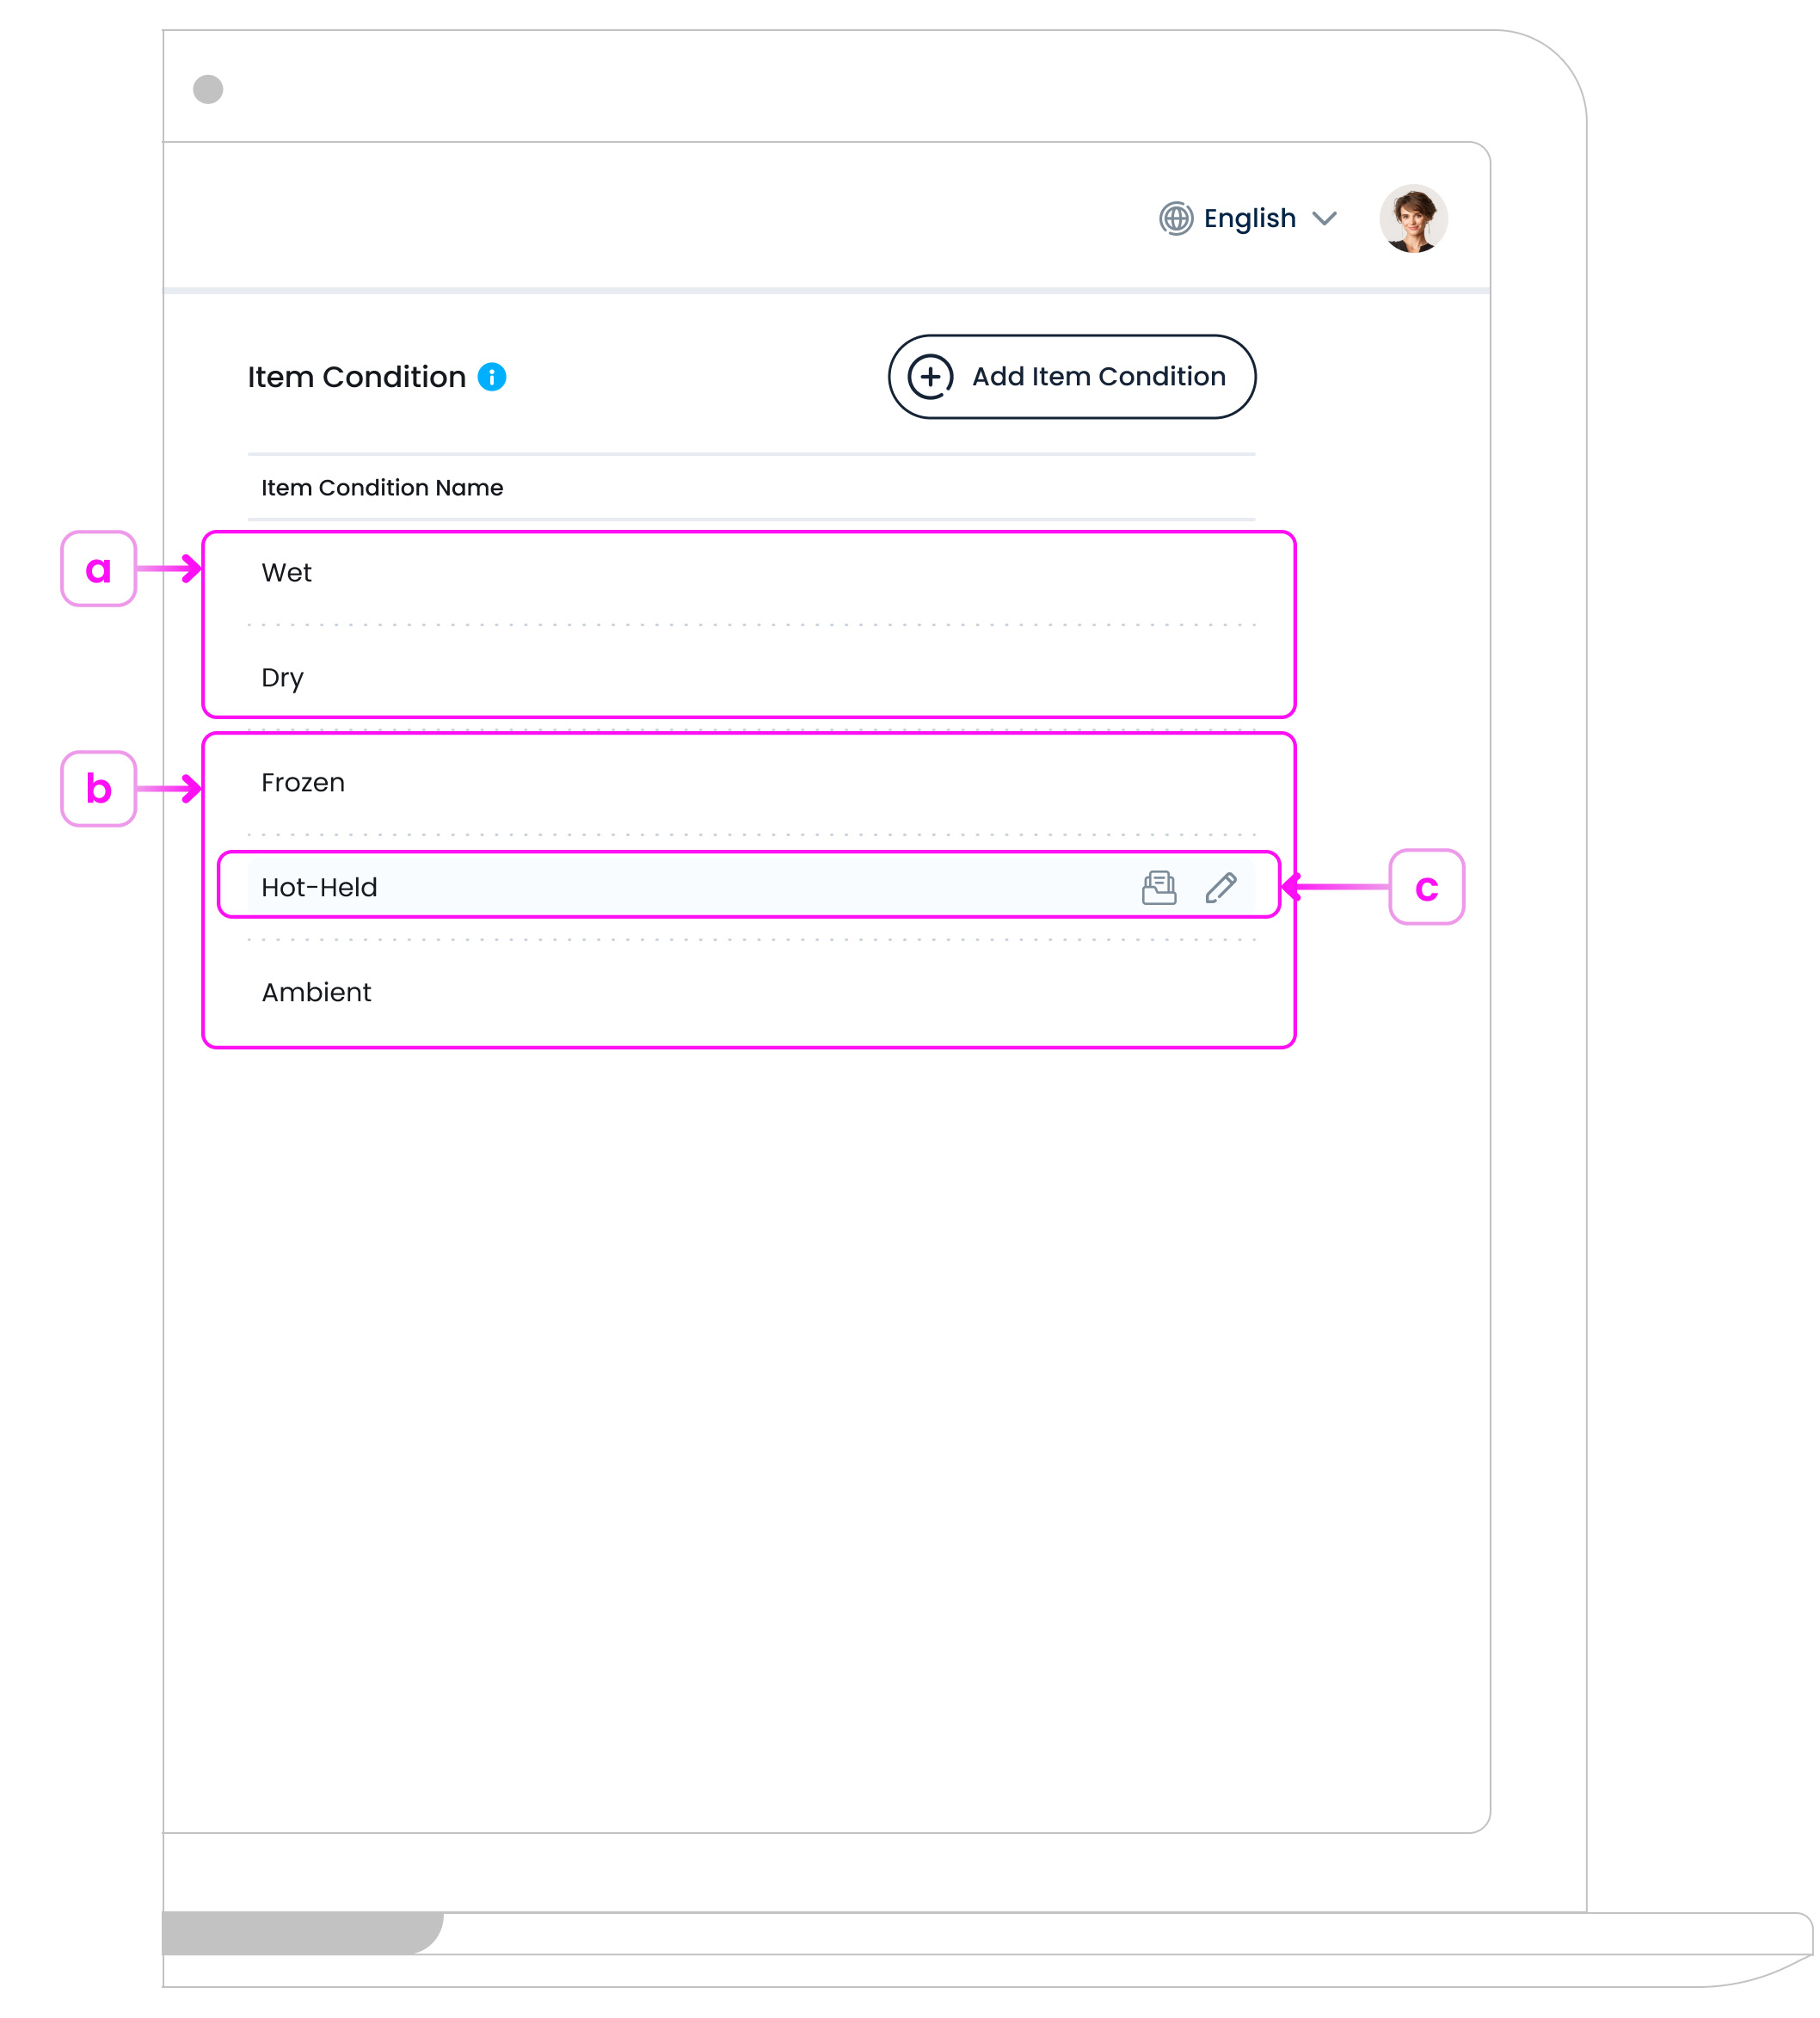
a. List of Built-in Conditions
By default, your system includes two predefined conditions:
- Wet
- Dry
These cannot be deleted or renamed, but can be used freely across all inventory items.
b. Custom Conditions
You can create your own condition types to reflect unique product attributes.
For example, you might create:
- Frozen
- Hot-Held
- Ambient
These custom conditions appear below the built-in ones and can be archived at any time.
c. Understanding Item Condition Rows
Each row displays the condition name. When you hover over a row, edit and archive buttons appear. Only custom conditions can be archived.

Here’s what each element does:
- Condition Name: Displays the name of the item condition (e.g. Wet, Dry, Frozen).
- Edit Condition Button:An edit icon appears when you hover over a row. Click it to open and update the condition’s name.
- Archive Condition Button: An archive icon appears when you hover over a row. Use this to delete the condition from the list while keeping a record of it in your system.
What’s Next?
Item Conditions can now be assigned to inventory items during setup or updates. These labels help staff understand how items should be handled or stored.