Edit, Duplicate, or Move Inventory Items
Once your items are created, managing them is simple and flexible. Whether you need to update details, create similar items, or reorganise your inventory, the Item Library gives you the tools to do it all in just a few clicks.
Edit an Item
You can update an item’s name, description, price, categories, modifiers, tax, sales types, and more, all from the full item setup page. This is especially useful when you need to correct a detail, update pricing, or revise availability across systems.
To edit an item:
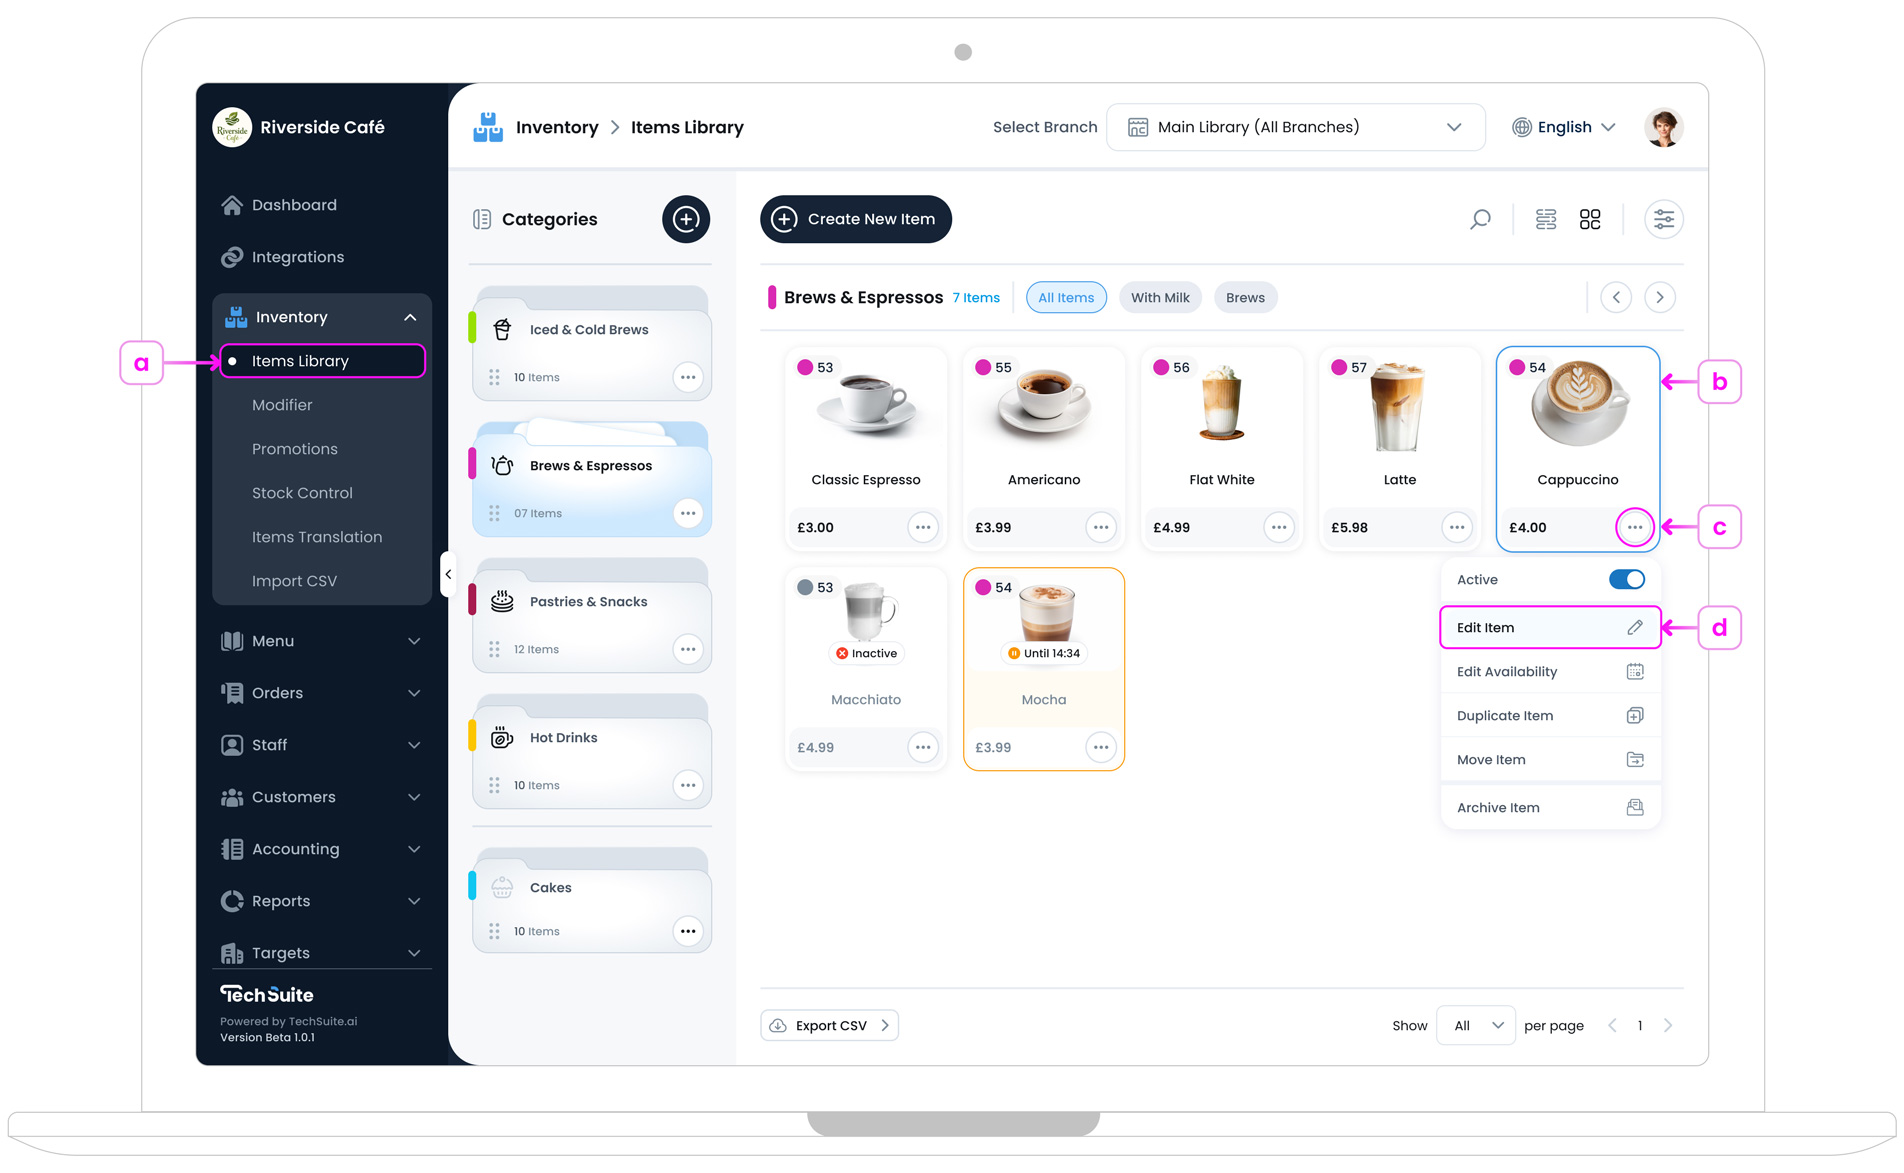
- a. In your TechSuite portal, go to Inventory > Item Library .
- b. Find the item you want to edit.
-
c. Click the three-dot button
 on its card.
- d. Select Edit Item from the dropdown.
-
The full setup page will open. Make your changes to any field, including name, tags, modifiers, availability, and more. Make your changes and click the “Update” button
 .
.
Duplicate an Item
Duplicating is a quick way to create a similar item without starting from scratch. All item settings (like price, modifiers, tax, and availability) will be copied, except the image, which must be added manually.

To duplicate an item:
- a. In your TechSuite portal, go to Inventory > Item Library .
- b. Find the item you want to duplicate.
-
c. Click the three-dot button
 on its card.
- d. Select Duplicate Item from the dropdown.
-
You’ll land on the item setup page for the duplicate. Make any final edits and click the “Save” button
 .
.
The duplicated item will now appear in your library as a separate entry.
Move an Item Between Categories
You can move items to a different category to keep your library clean and organised. This is useful when you’re restructuring your inventory or reassigning products to more accurate groups.
To move an item:
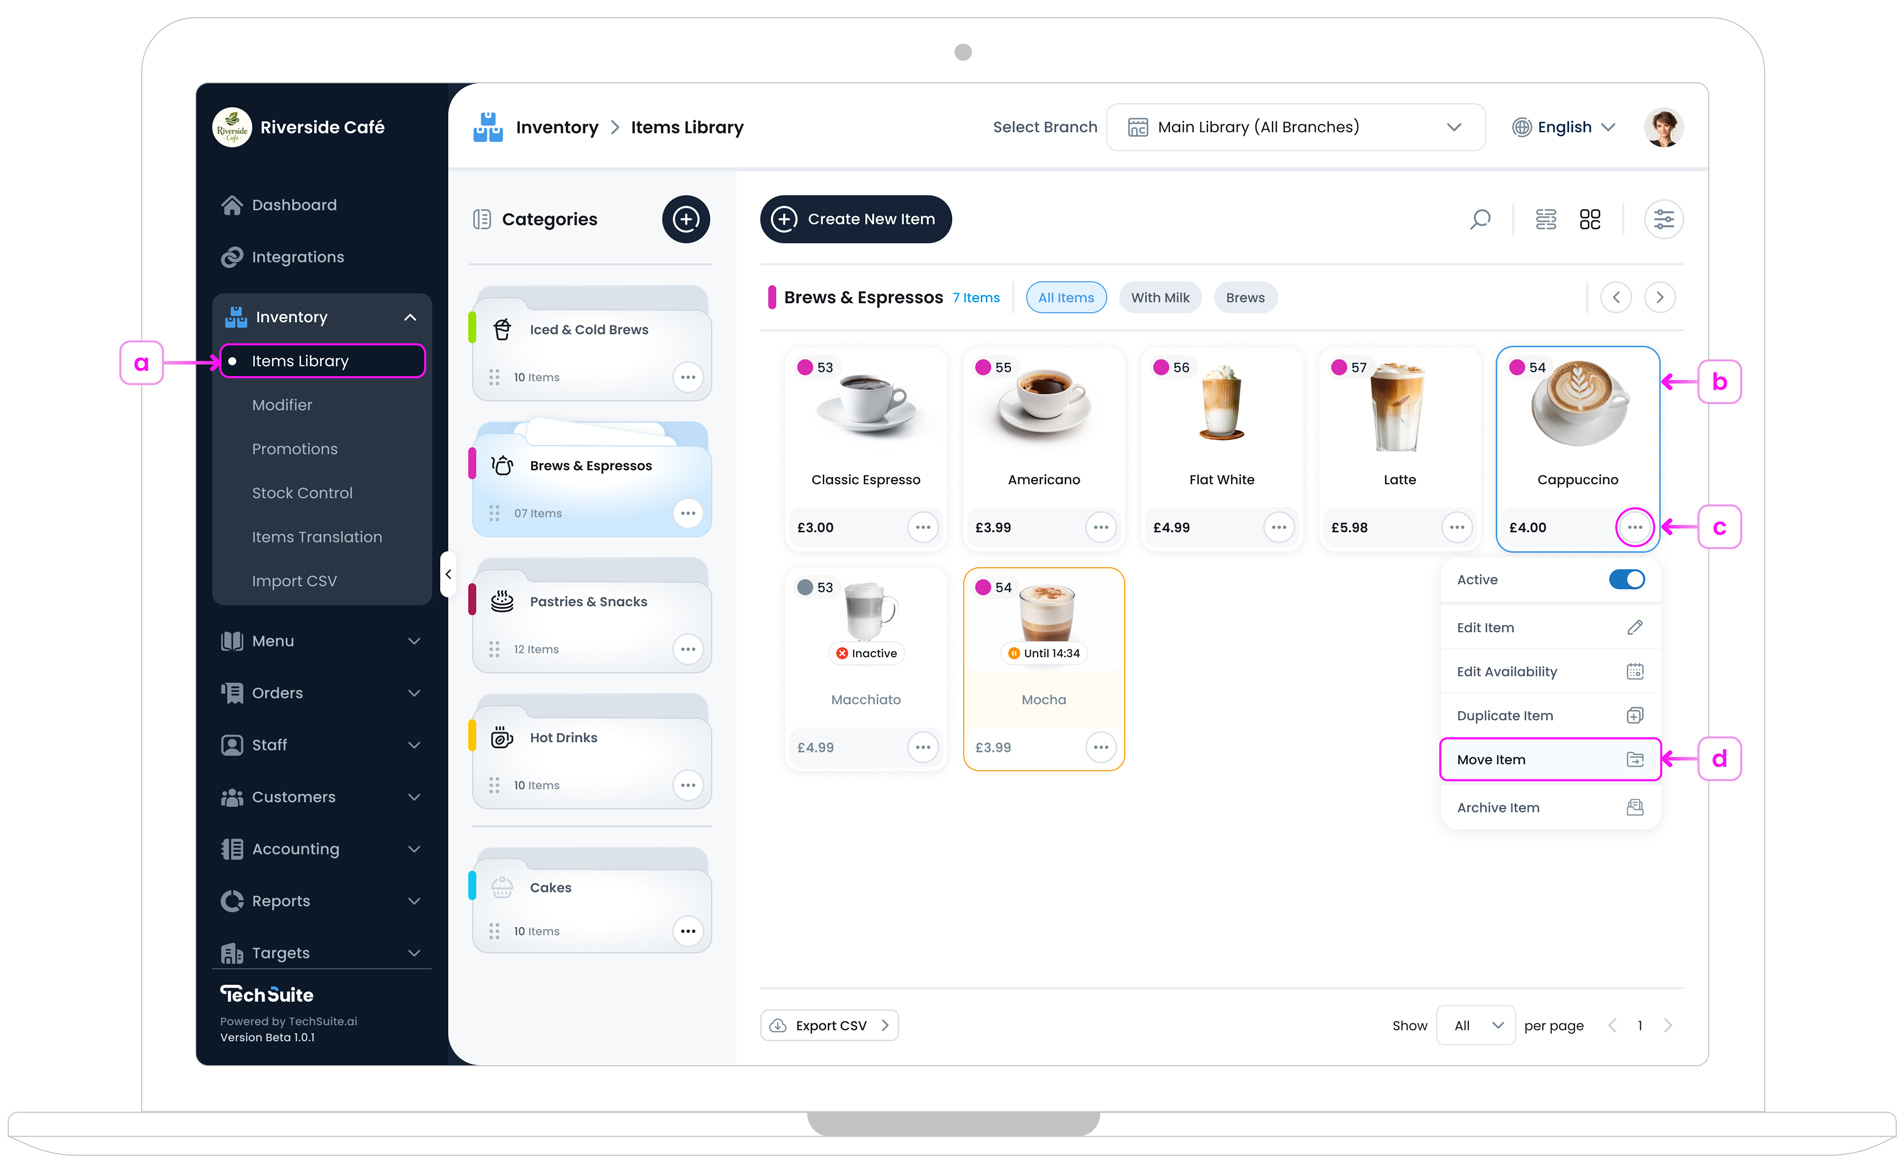
- a. In your TechSuite portal, go to Inventory > Item Library .
- b. Find the item you want to move.
-
c. Hover over the item and click the three-dot button on its card.
- d. Select Move Item from the dropdown.
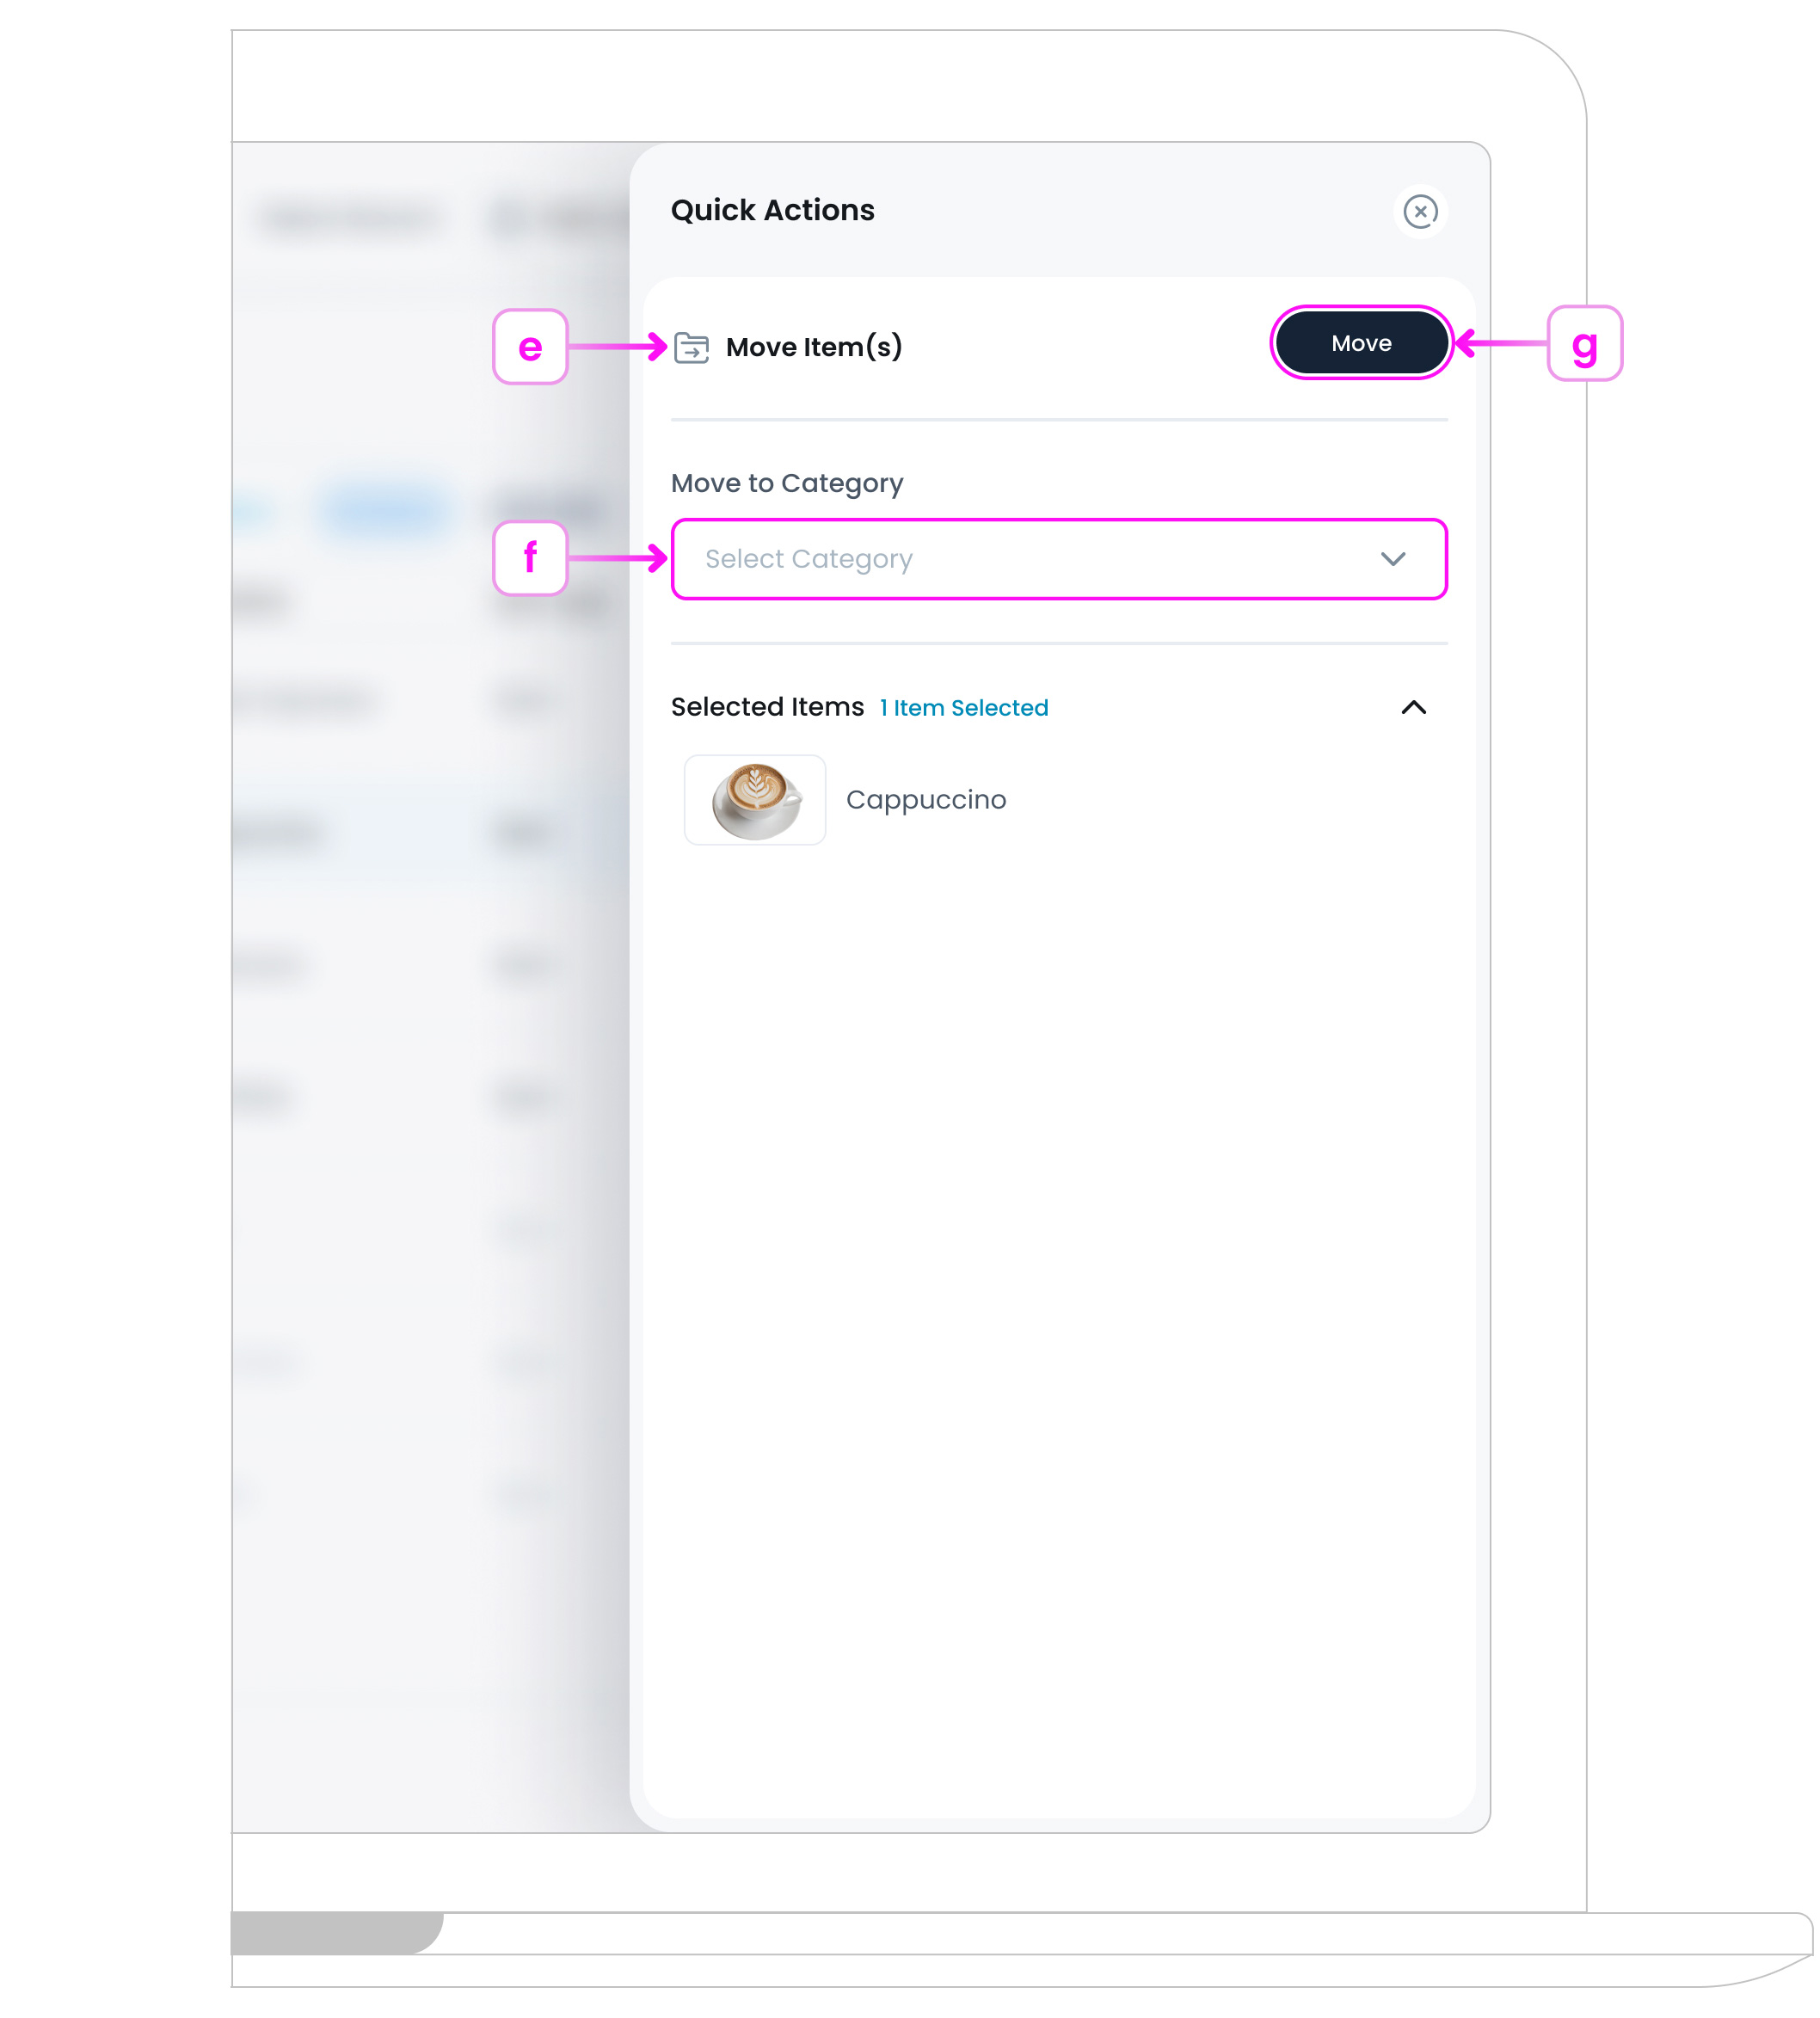
- e.The Quick Actions panel will open on the right side of the screen.
- f. In the Move to Category dropdown, select the new category.
-
g. Click the Move button
 at the top right of the panel.
The moved item will now appear in its new category.
Note
You can only move items between main categories , not into subcategories.
Bulk Move Items Between Categories
For larger inventories, the Bulk Move tool allows you to reassign multiple items at once, saving time and streamlining organisation.

To bulk move items:
- a. In your TechSuite portal, go to Inventory > Item Library .
- b. Switch to List View using the toggle in the top right.
- c. Select the checkboxes next to the items you want to move.
- d. Click the Bulk Actions button that appears above the list.
- e. Select Move Items from the dropdown.
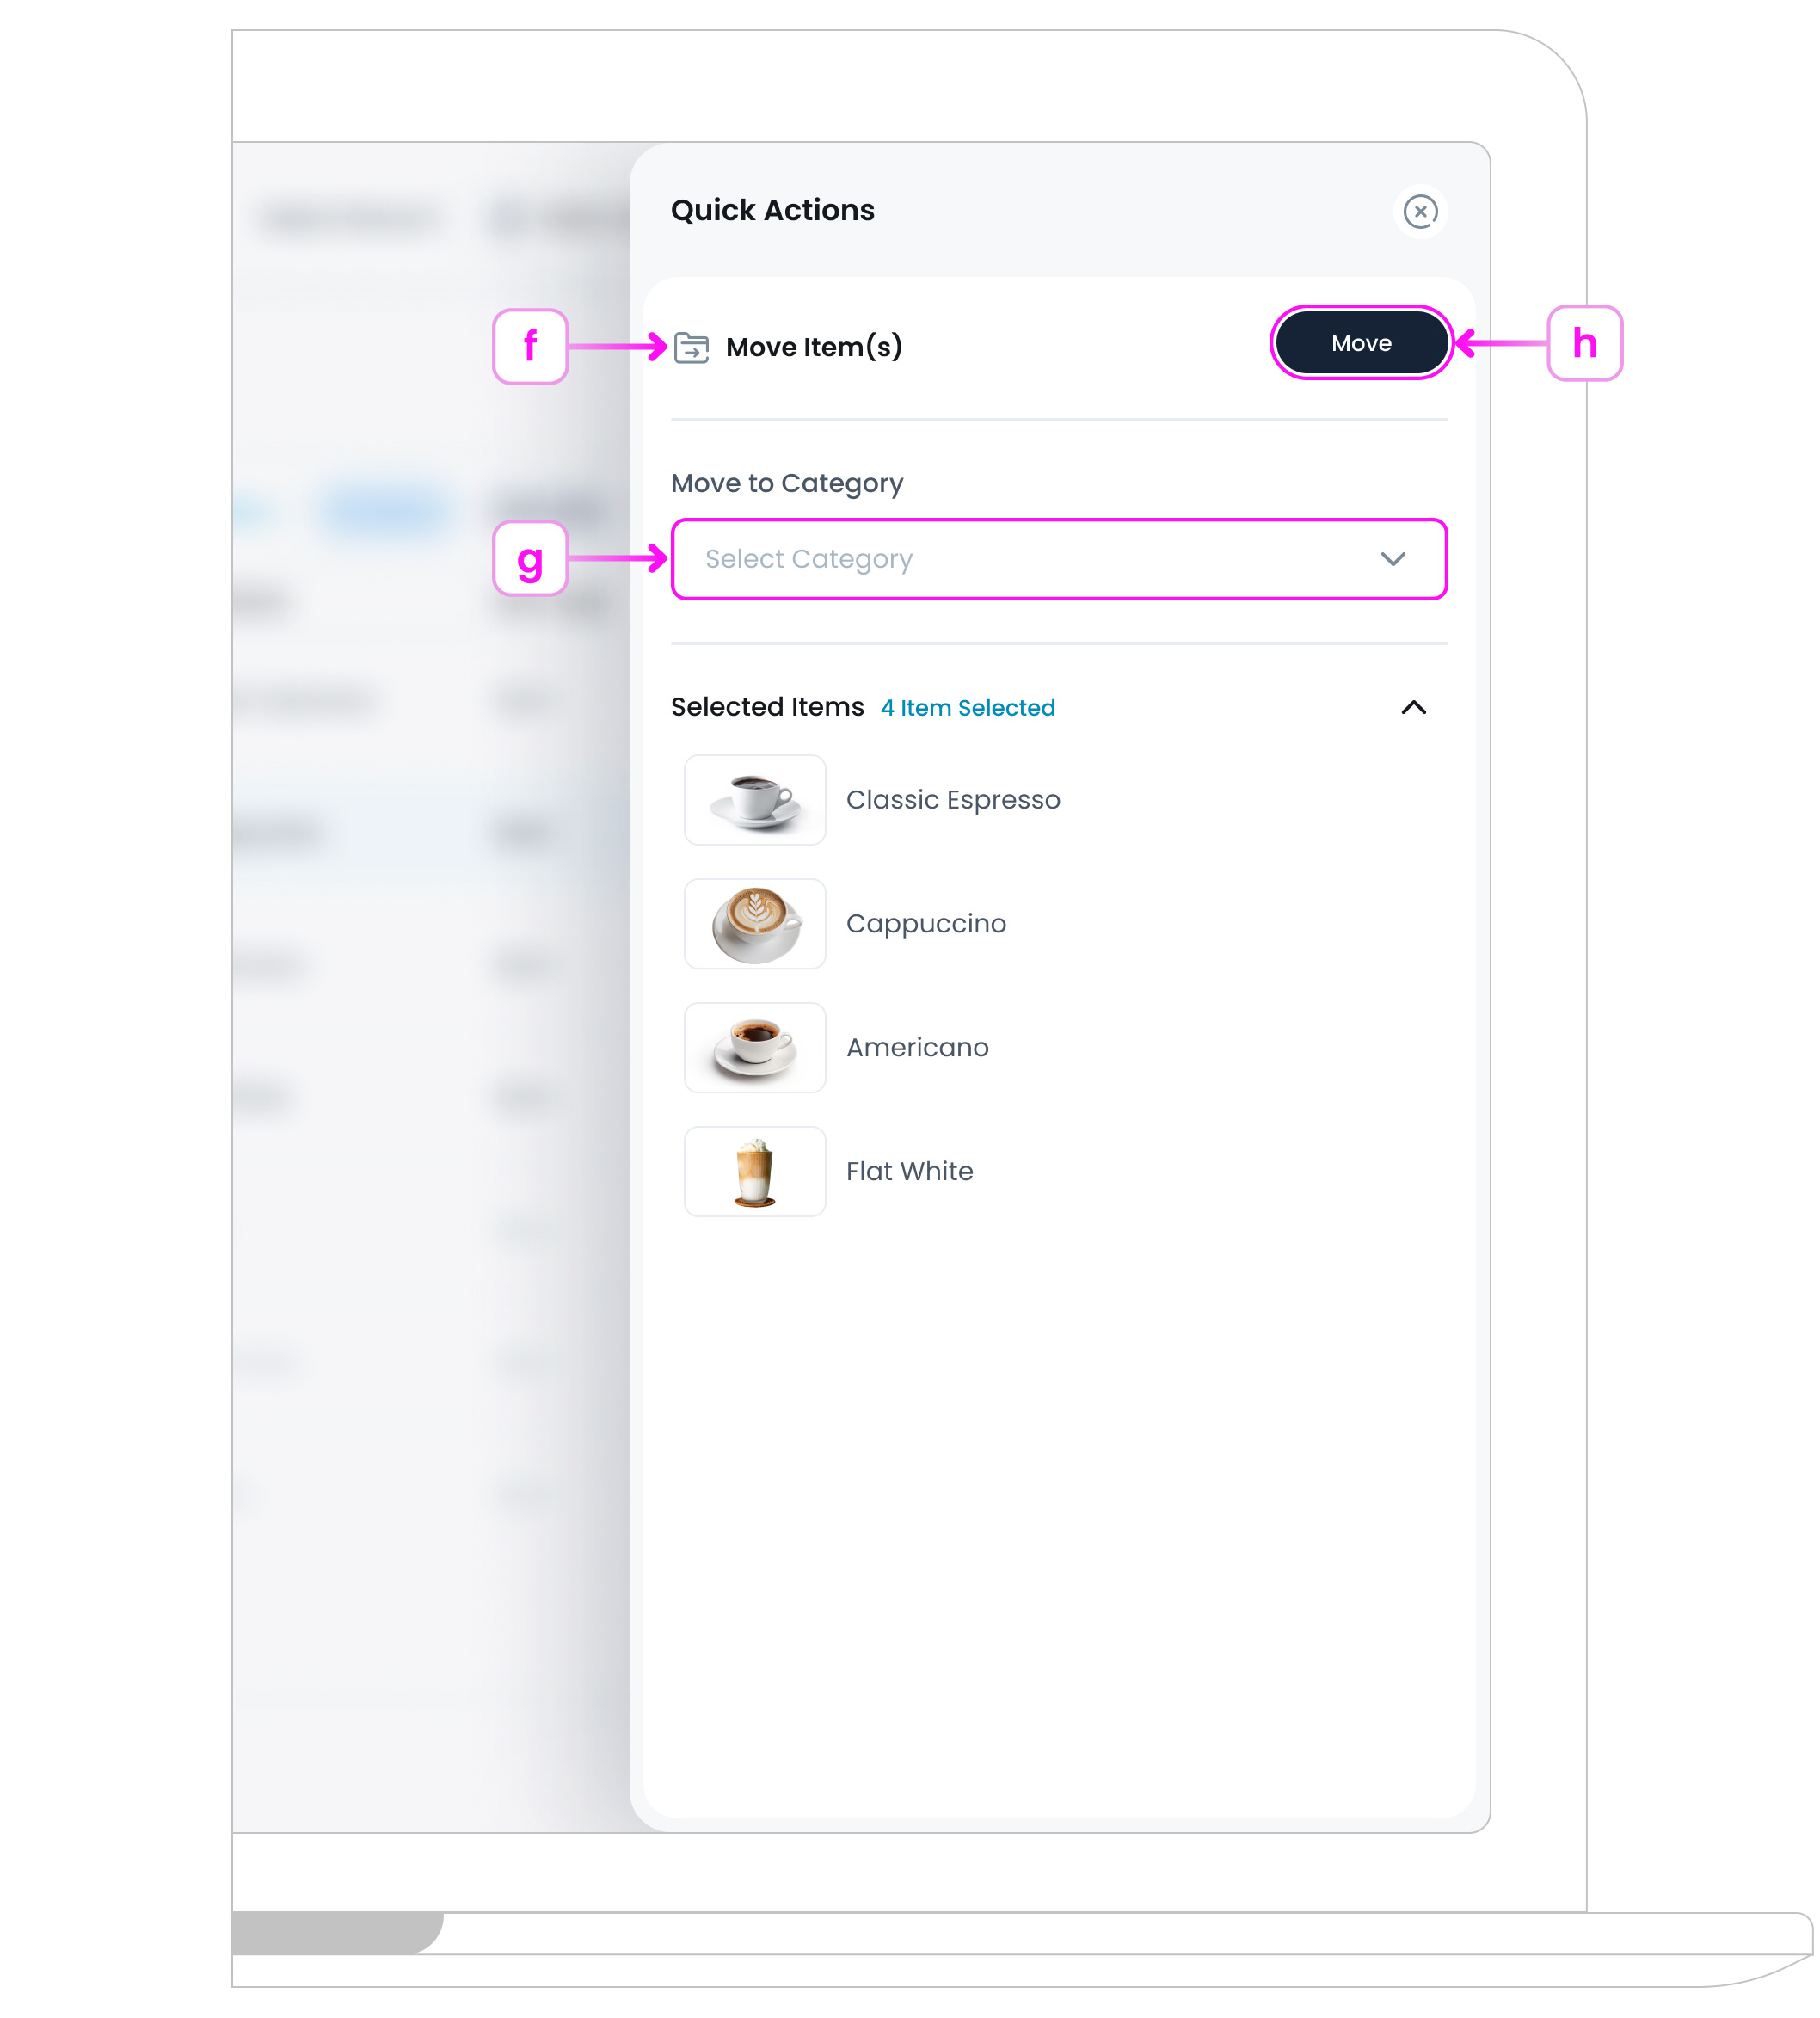
- f. The Quick Actions panel will open on the right side of the screen, showing all selected items.
- g. In the Move to Category dropdown, select the new category.
-
h. Click the Move button at the top right of the panel.
The moved items will now appear in its new category. This feature is ideal when reorganising your categories, updating item groups, or doing cleanup after a major menu change.
What’s Next?
Once your edits, duplicates, or moves are complete, changes will reflect instantly across your POS, kiosks, and online menus. To continue managing your inventory, check out How to Archive Items or Categories to temporarily remove products without deleting them.