How to Import a CSV File into Inventory
The Import CSV page helps you quickly upload multiple inventory items in bulk. Perfect for saving time during setup or large updates, great for new location setups or menu refreshes.
To Get Started
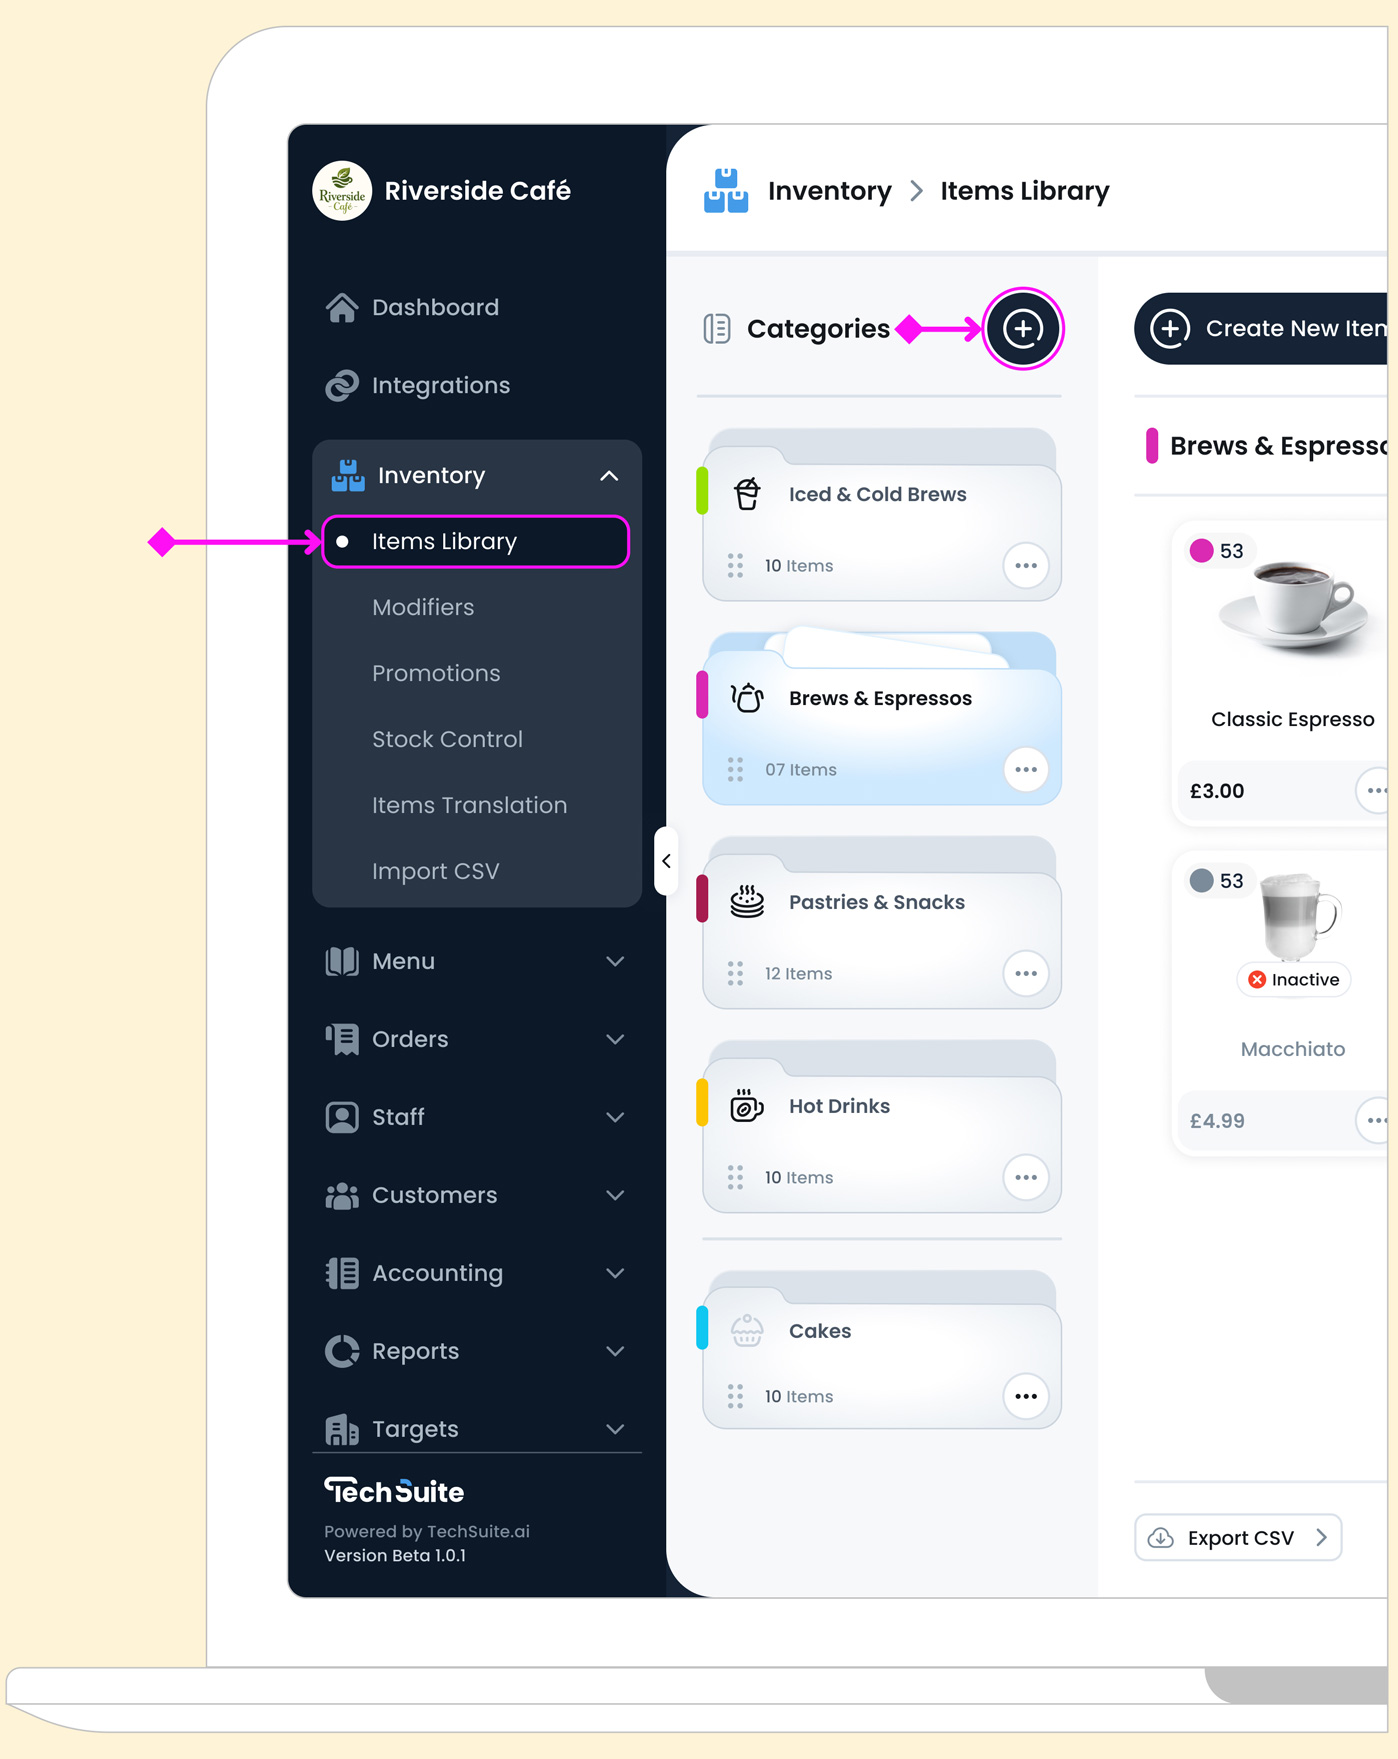
Log in to the TechSuite portal and navigate to Inventory > Import CSV from the left sidebar. From here, you can download the template, add your items, and import the file into your inventory system.
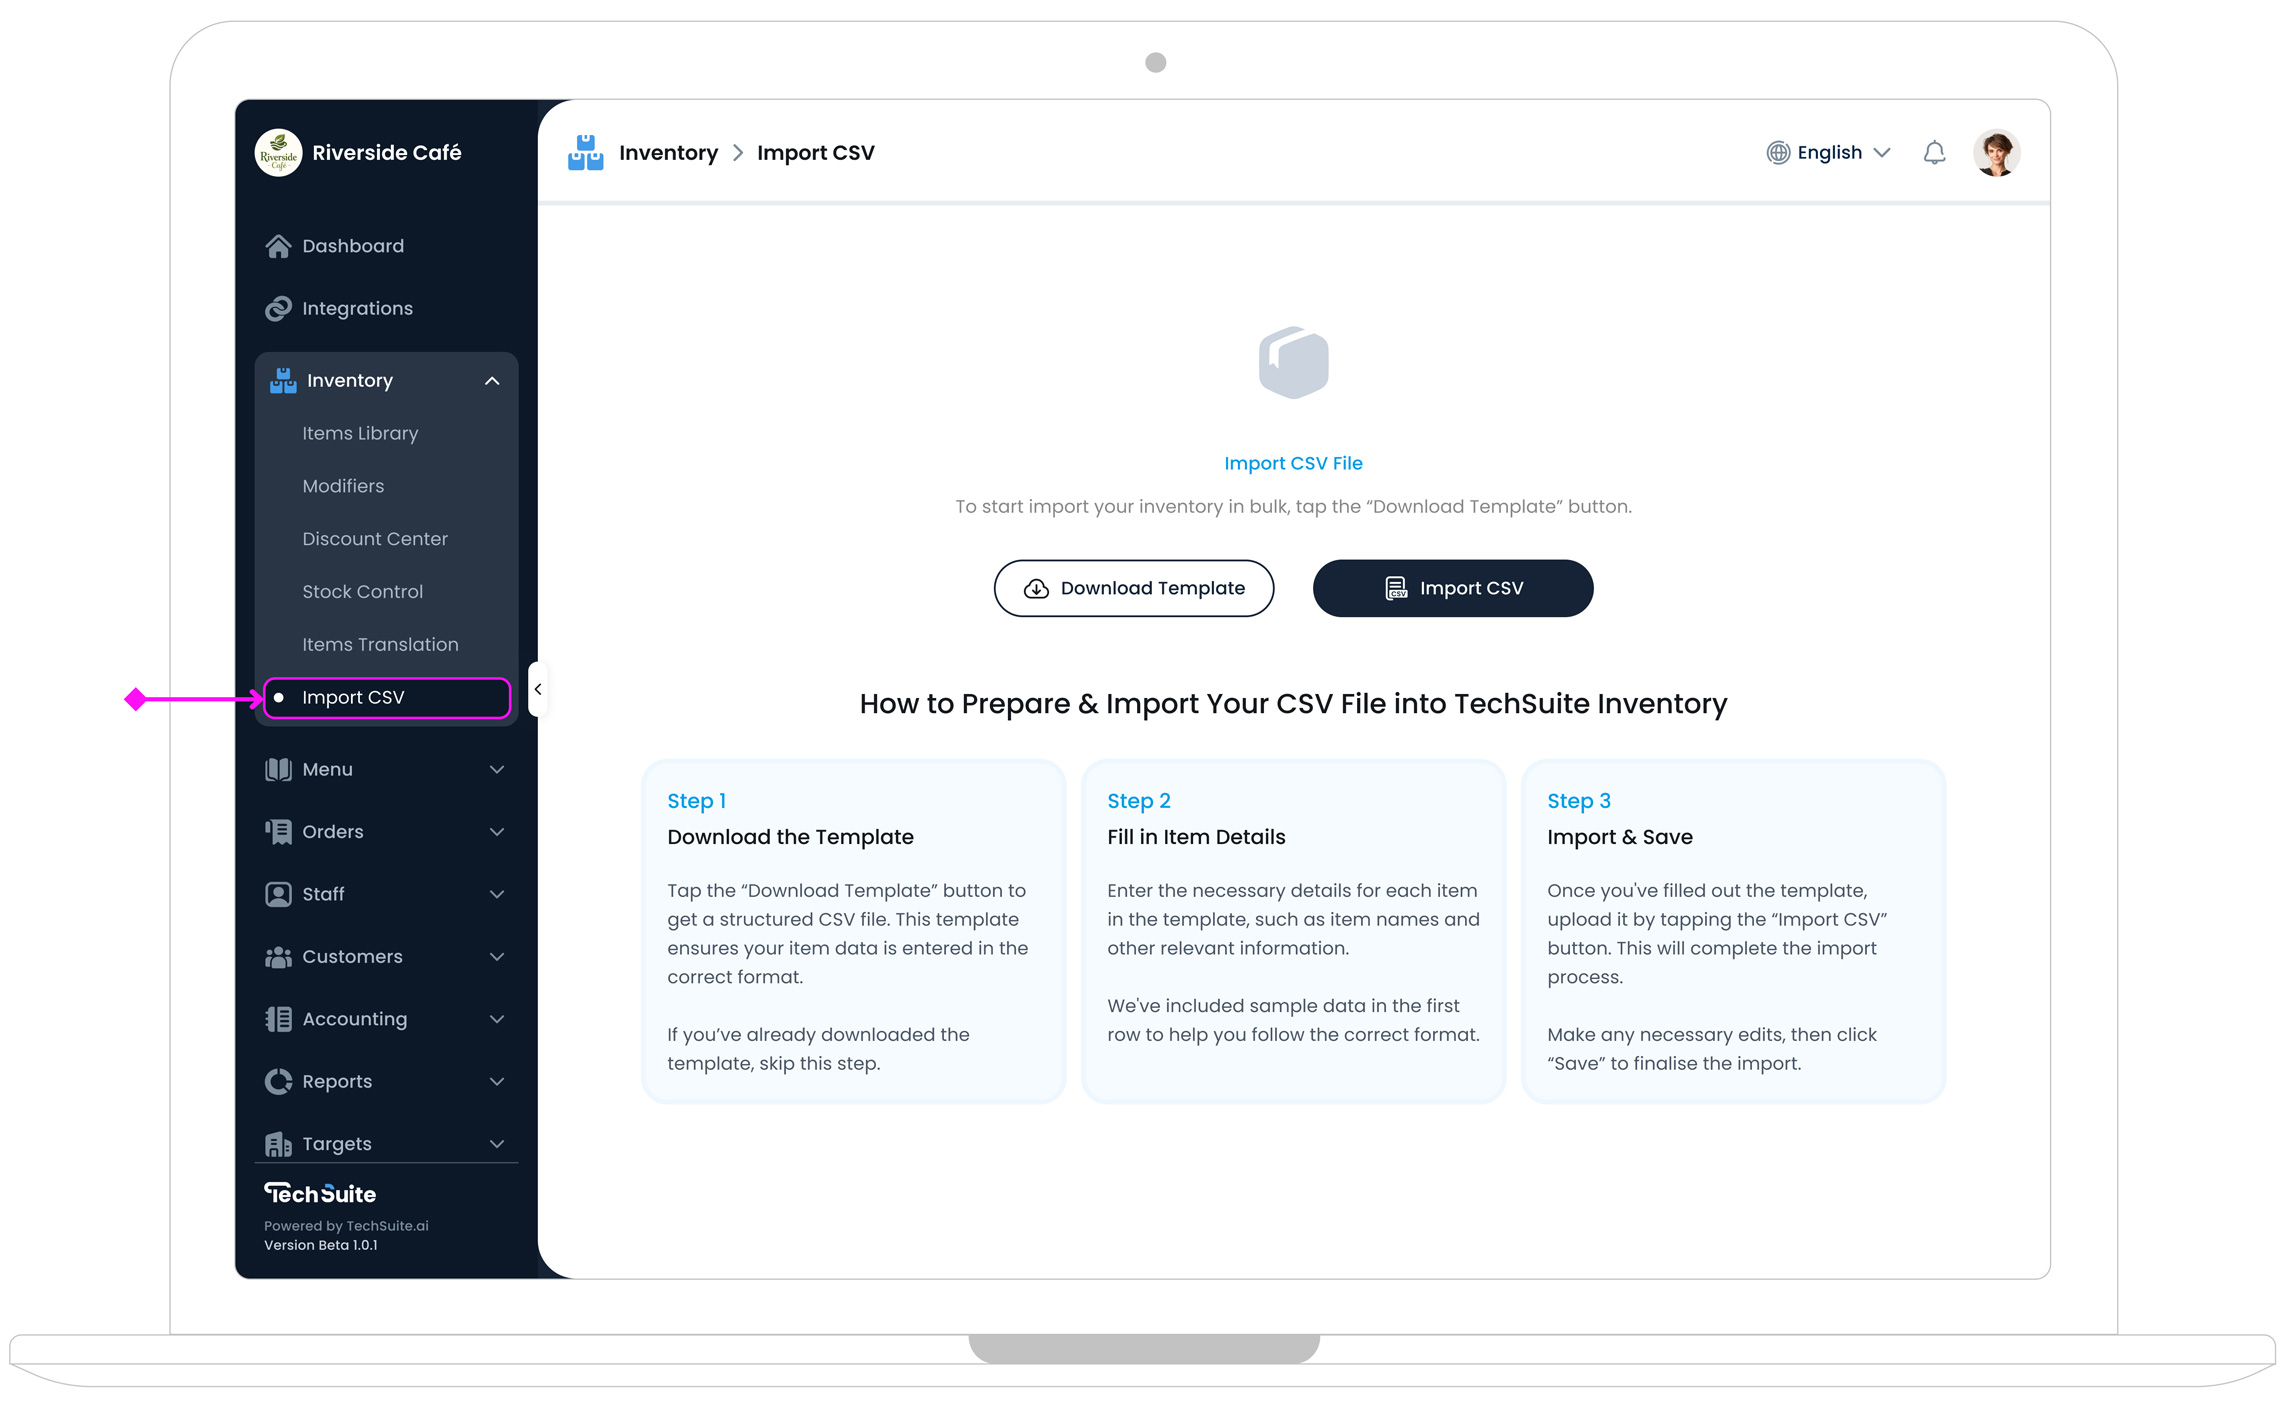
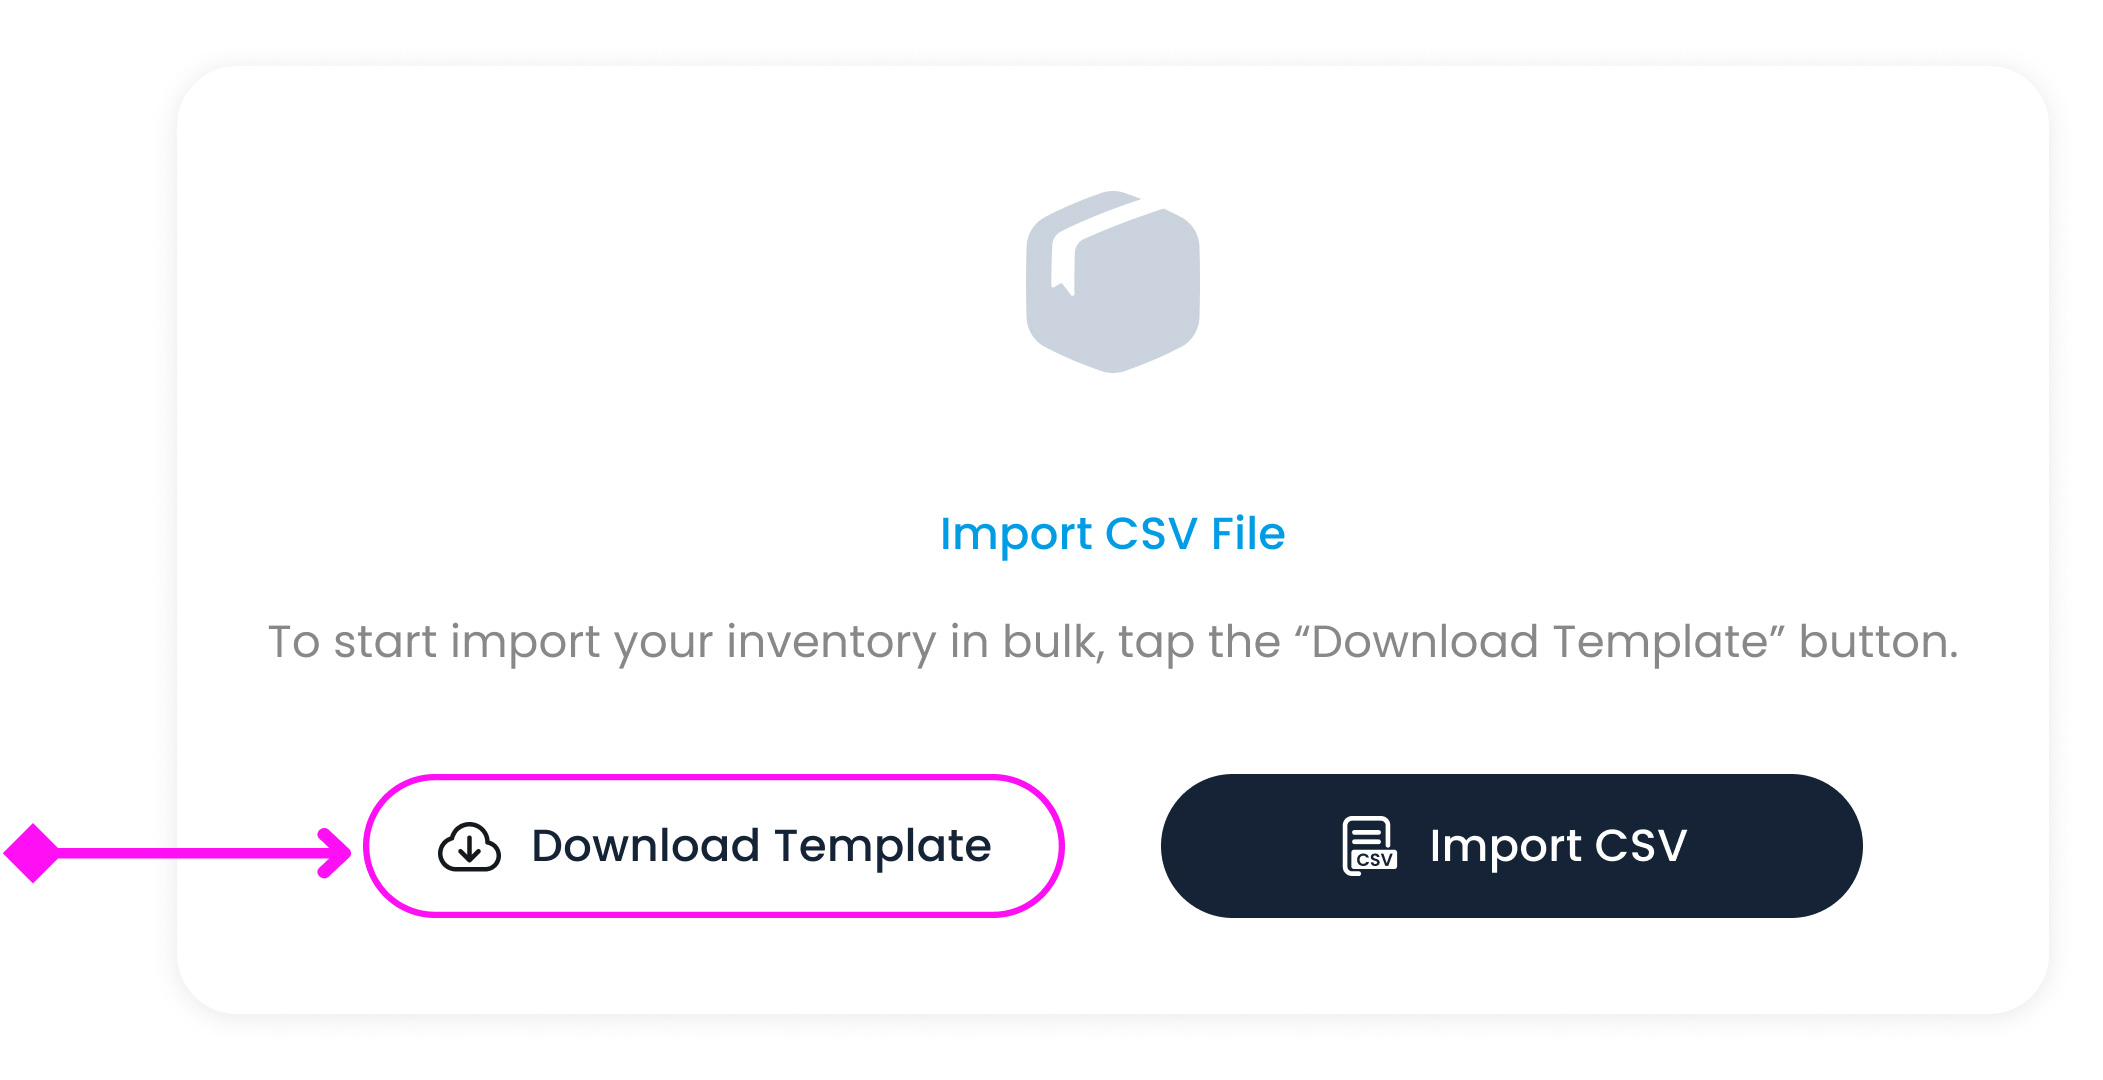
Step 1: Download the Template
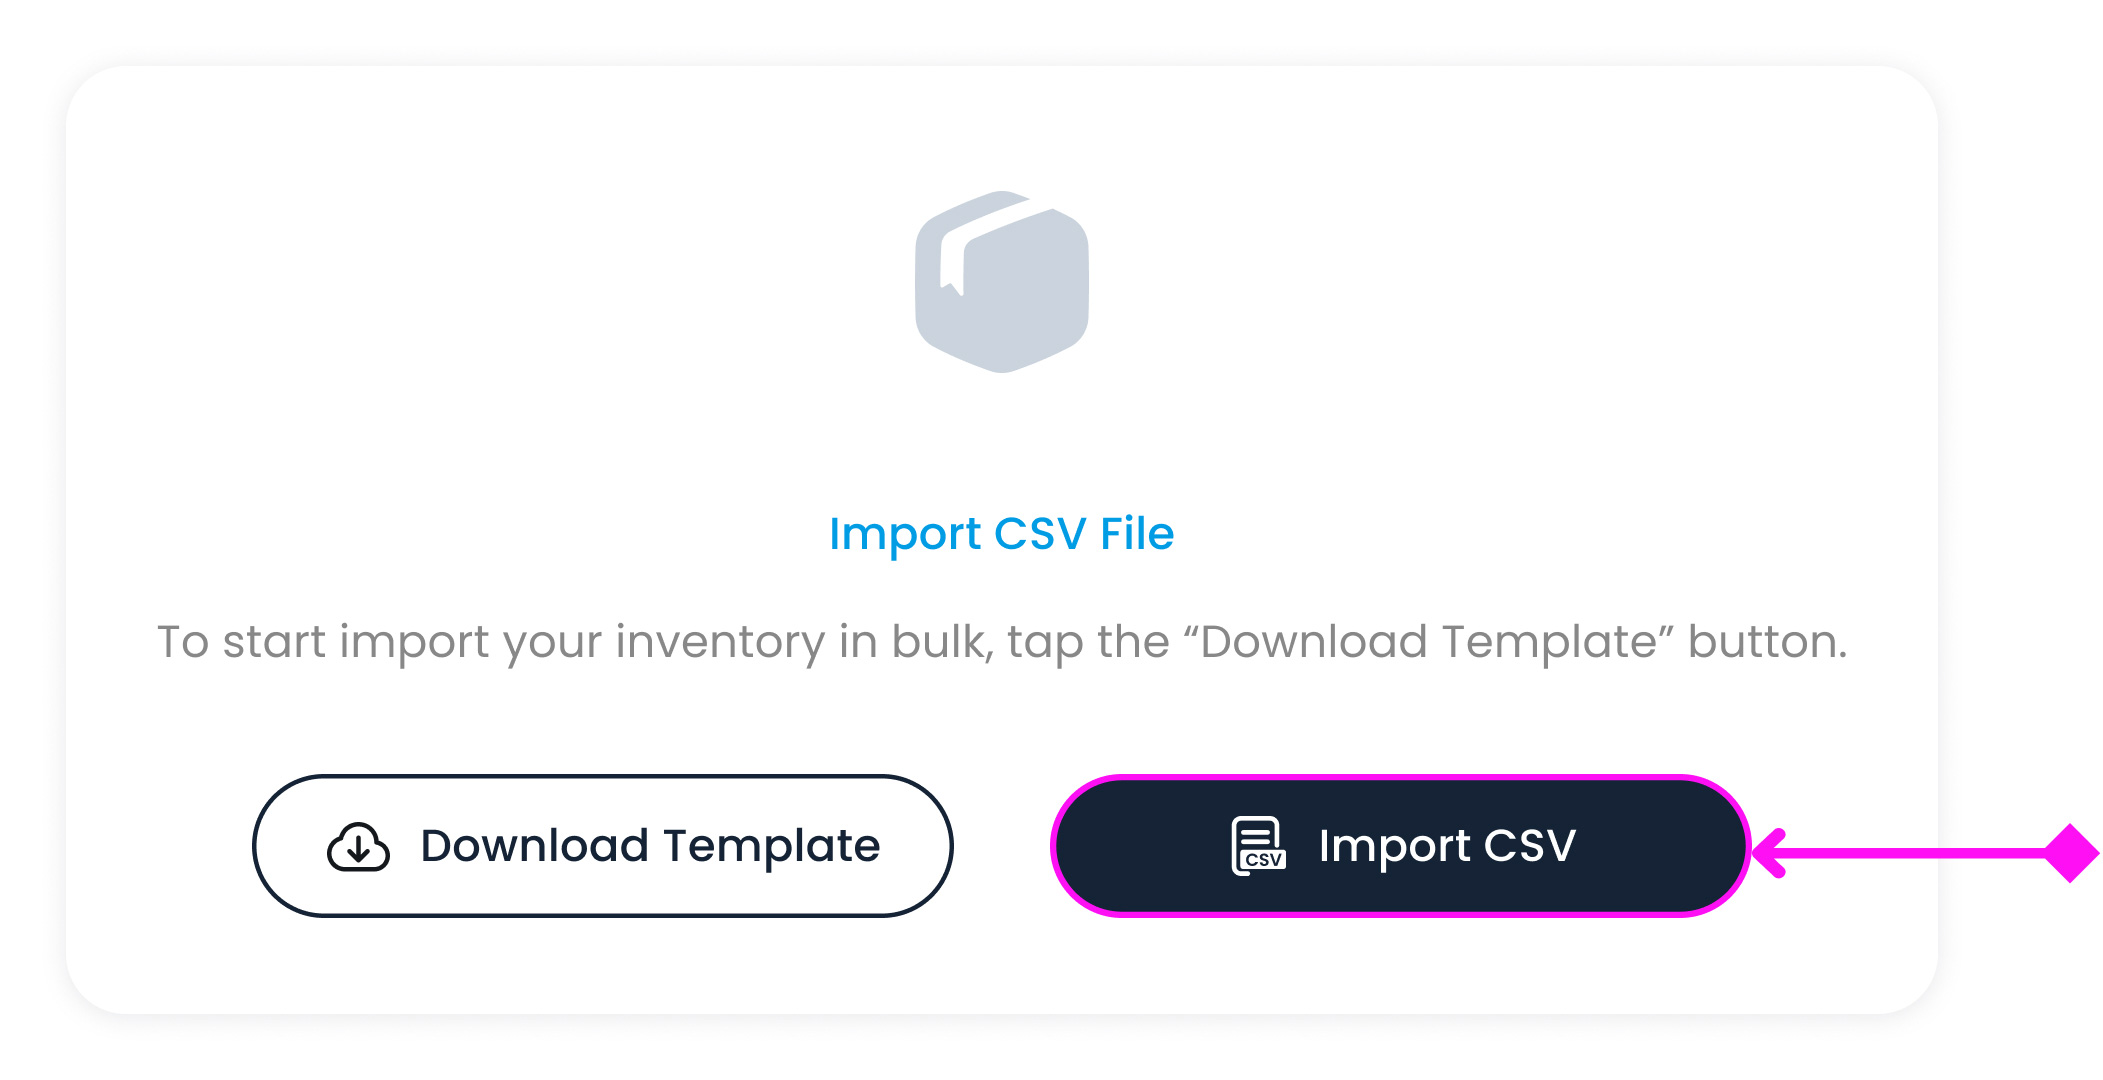
Click the Download Template button  to get a ready-made CSV file. This template is structured with all the required columns, so your data fits perfectly into TechSuite.
Step 2: Fill in Item Details
Open the downloaded CSV file using Excel or Google Sheets. Each row in the sheet represents one inventory item. Use the first row (sample data) as a guide.
Below is a quick overview of what each column means:
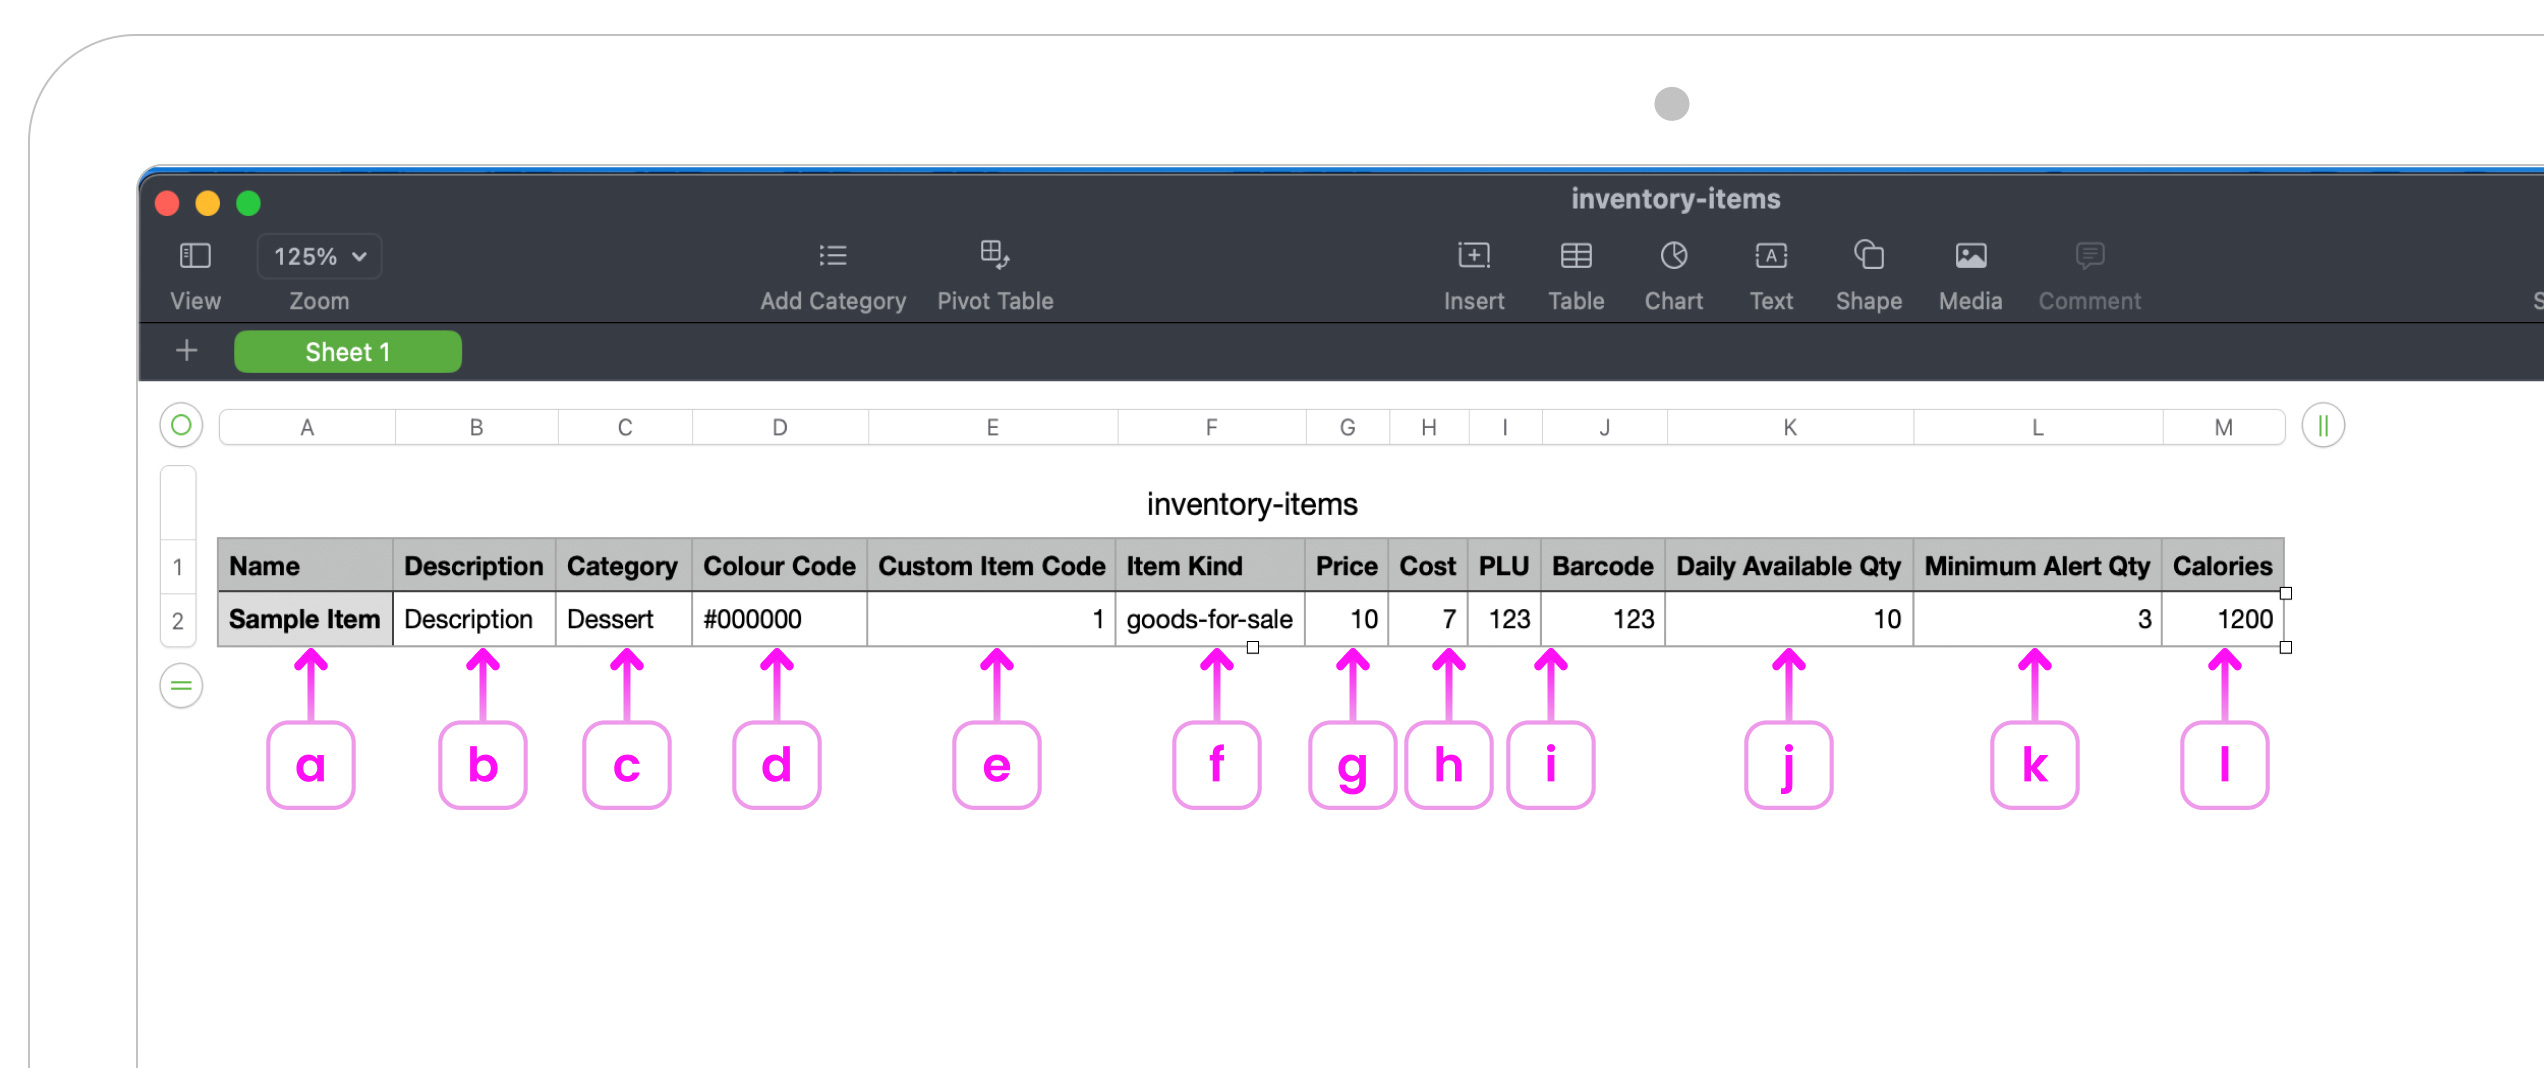
a. Name
The item’s name that customers and staff will see. (e.g. Americano, Caesar Salad, Reusable Bag)
b. Description (Optional)
A short summary that appears in kiosks, apps, or online ordering. Use this field to describe flavours, portion size, or special details.
c. Category
The main group this item belongs to (e.g. Drinks, Desserts, Retail)
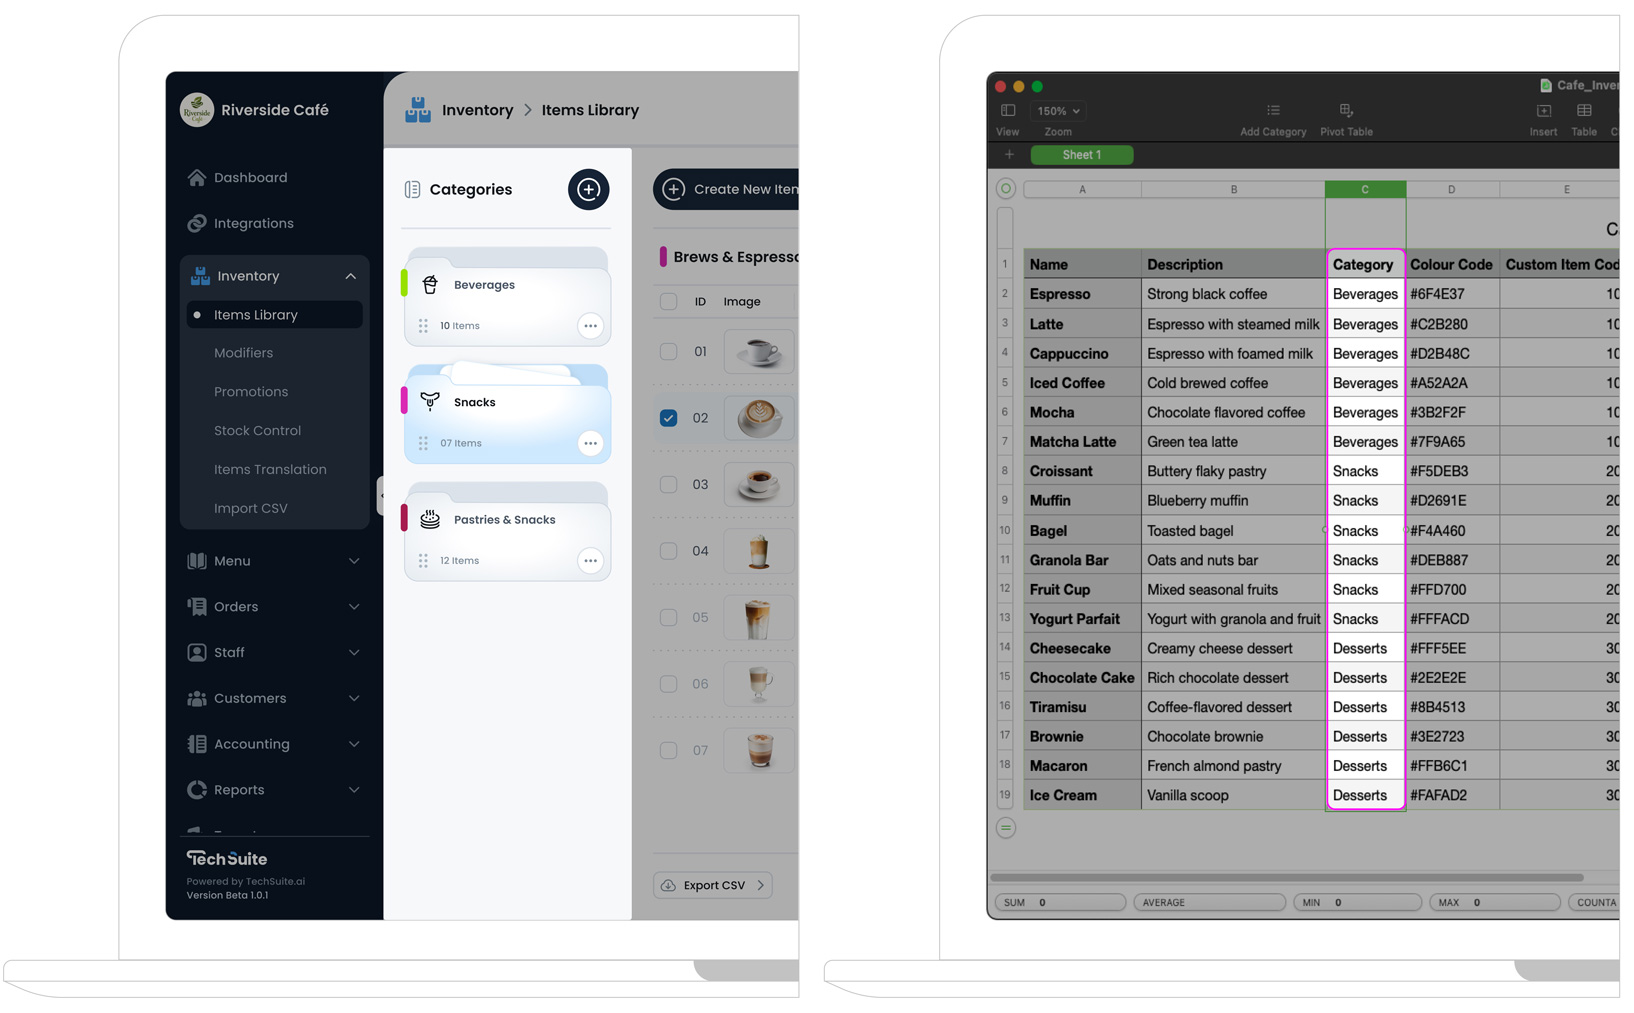
Category Requirements (CSV Import)
Before using the CSV import tool, make sure all item categories already exist in your inventory.
The CSV file does not create categories, it only assigns items to ones you’ve already created. In the Category column, simply write the exact name of the category you want the item to belong to.
d. Colour Code (Optional)
A colour label used for sorting or visual cues. Enter a hex code (e.g., FF5733) to mark the item.
e. Custom Item Code (Optional)
This is your own internal item code, a quick reference-number that makes searching and adding items faster during busy service.
Use any number you like (e.g. 101, 2003, 55). Staff can type this number into the POS to quickly find the item. It’s especially helpful during rush hours when time matters.
Important Note
Only numbers are allowed. No letters or symbols. Use a consistent, easy-to-remember numbering pattern.
f. Item Kind
This tells TechSuite how the item behaves and where it should appear in the system:
- Kind 1: Menu Item: For food or drinks shown on customer-facing menus (POS, kiosk, or online).
- Kind 2: Goods for Sale: For retail items like bottled drinks, packaged snacks, or merchandise.
- Kind 3: Supplies: For internal items not sold to customers (like ingredients or cleaning stock).
- Kind 4: Services: For non-physical items like delivery fees, repair services, or consulting charges.
g. Price (Optional)
The selling price shown to customers. (e.g., 3.0)
Note
Just enter the number, no need to add currency symbols. Decimal values like 3.5 or 7.00 are fully supported.
h. Cost (Optional)
Internal cost used to track margins. This value won’t appear to customers. (e.g., 2.0)
i. PLU / Barcode (Optional)
A product lookup or scan code (if applicable). Used for barcode scanners or integrations.

j. Daily Availability
Limit how many can be sold per day. Use numbers (e.g., 30) or 0 for no limit.
k. Minimum Availability
Set a minimum quantity before triggering low-stock alerts. Use 0 if no alerts are needed.
l. Calories (Optional)
Calories per unit, shown on kiosk and POS (e.g., 250 for 250 calories per item).
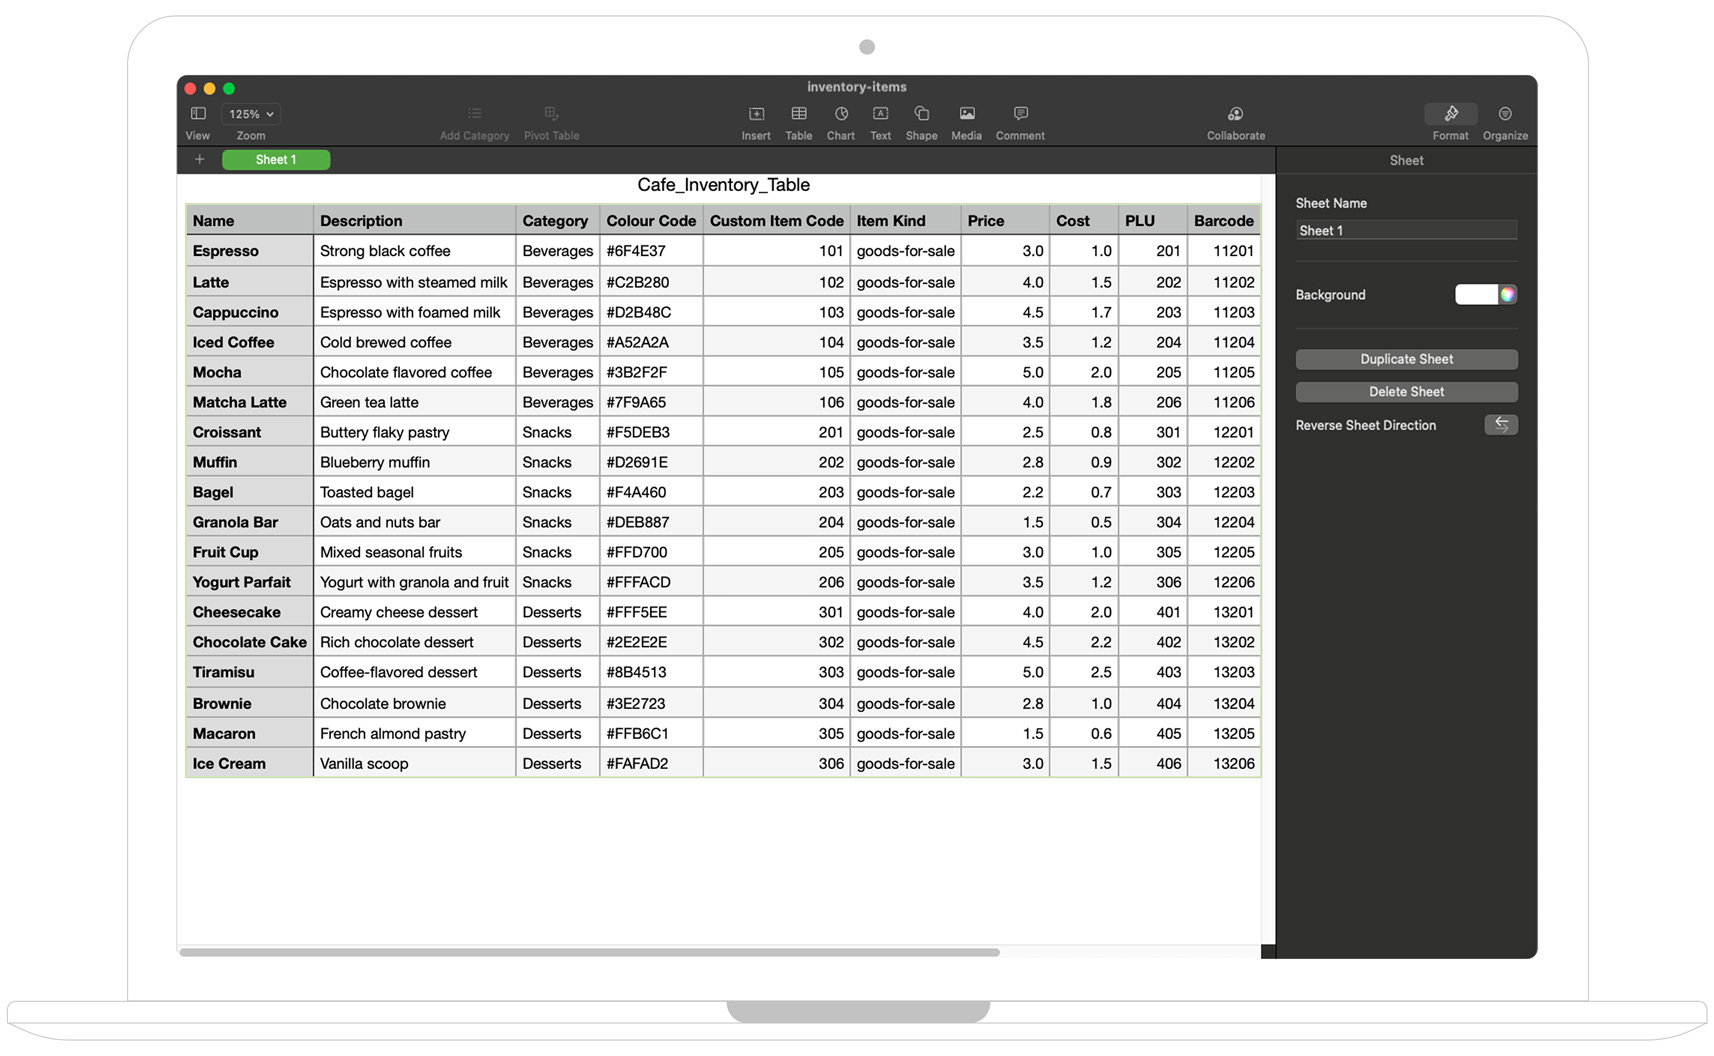
Example CSV in Action
Below is a sample of a properly filled CSV file. Each row represents a unique inventory item, with columns completed for name, description, category, colour code, item kind, pricing, and more. This gives you a clear visual reference of how your own file should look before importing it into TechSuite.
Step 3: Upload and Save
Click Import CSV and select your completed file.
Once uploaded, you can make changes directly in the system before saving. Click Save  to confirm and finalise the import.

Important Note
This import tool is for creating new items only. It doesn’t update or modify existing ones.
Modifiers, taxes, allergens, and tags are not handled through this import. These should be added after items are created.