Understanding the Kiosk Ordering Flow
The kiosk provides a self-service experience that allows customers to place orders efficiently. Depending on your business Kiosk Profile Settings, some steps may be enabled, disabled, or customised. This article guides you through the standard ordering process, highlighting key steps and configurable options.
Step 1: Starting an Order
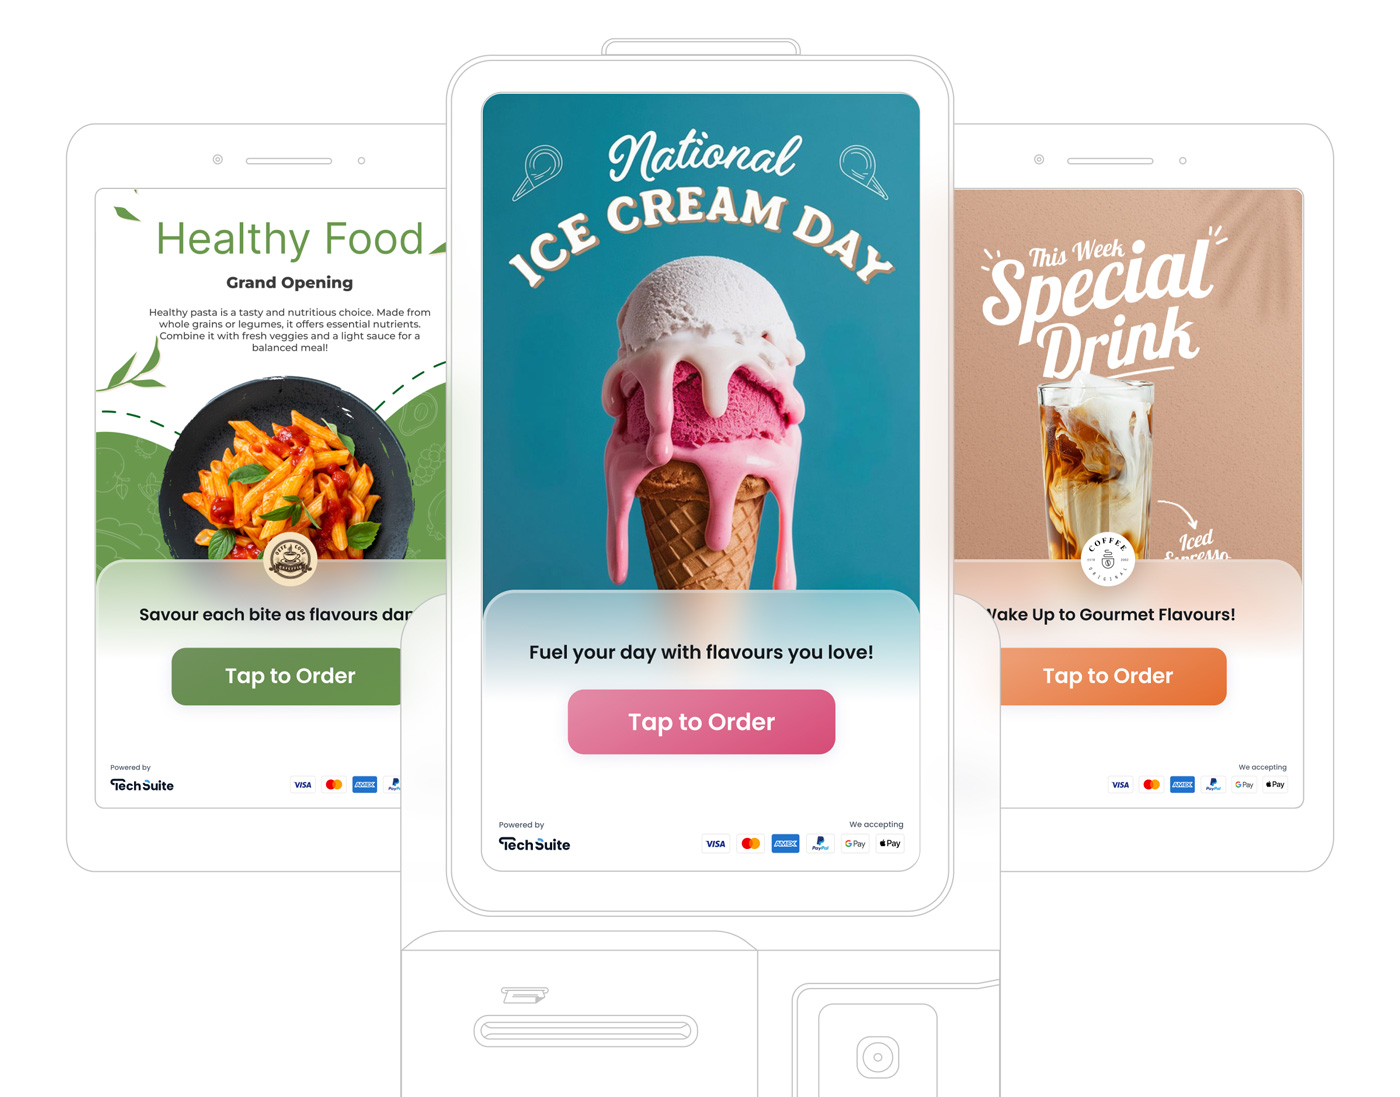
Customers begin by tapping on large main button calls "Tap to Order"
 on the kiosk screen. Depending on your Kiosk Settings, they may be prompted to select an
Order Type and/or preferring Kiosk
Language, before continuing.
on the kiosk screen. Depending on your Kiosk Settings, they may be prompted to select an
Order Type and/or preferring Kiosk
Language, before continuing.

a.Selecting Order Type
If you have set your kiosk profile to have more than one order type, customers can choose between Dine-in and Takeaway. Otherwise, the kiosk automatically applies a default order type and continues to the next step.
b.Choose a Language
One default language always set in your kiosk configuration. If you enable multi-language & support, customers see a prompt to pick their preferred language, currently supports 7 languages: English, Français, Español, العربیة, Português, Dutch, Deutsch and Polski. You can toggle additional languages on or off in Kiosk Profile.
c.Continue to the Menu
After making any required selections, customers tap on the “Continue” button to open the menu page to start browsing categories.
Did You Know?
You can personalise your kiosk’s standby page with images or even a video. This is a great way to showcase your brand identity, promote special offers, or simply welcome customers with a dynamic visual. Visit Kiosk Profile Customisation to learn more about adding custom media, adjusting button styles, and editing slogans or taglines.
Step 2: Browsing Categories & Items
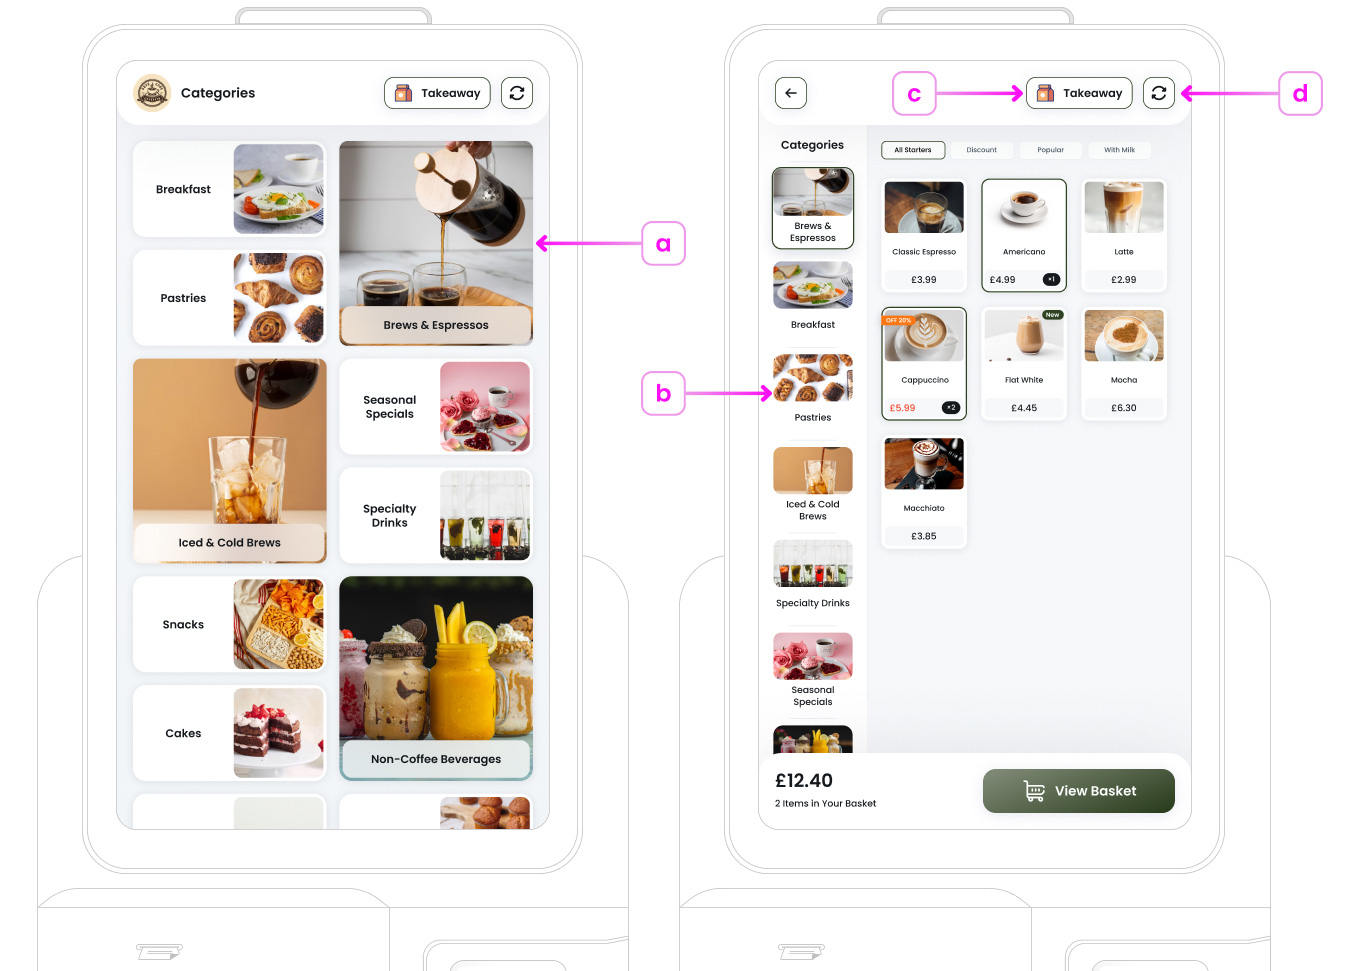
After selecting an order type and language (if enabled), customers land on the Categories page. Each category is presented as a visually appealing card (e.g., Starters, Soup, Bar), allowing quick, intuitive navigation.
a. Opening a Category to View Items
Tapping on any category takes the customer to that category’s dedicated Items page. Here, each product is shown with an image, name, and price. If subcategories exist (e.g., “Hot Soup,” “Cold Soup”), they appear so customers can refine their choices further.
b. Categories in the Left Panel
Customers can also switch the main categories from the left panel at any time. This makes it easy to jump between Starters, Drinks, and other sections without having to return to the home screen.
c. Switch Order Sales Type
If Sales Type selection is enabled in your kiosk
settings, users can still switch between Dine-in and Takeaway from the top
header. They simply tap
 to toggle between the two options, even after choosing a category.
d. Reset Order Button
The kiosk displays a
![]() that removes all items from the current basket. Tapping it instantly
clears the order and returns customers to the main Categories screen,
letting them start fresh whenever they want.
that removes all items from the current basket. Tapping it instantly
clears the order and returns customers to the main Categories screen,
letting them start fresh whenever they want.
Did You Know?
This category dashboard can be fully customised to match your branding. You may resize category cards, change their layout, or highlight certain sections if you want to draw attention to special menus.
Step 3: Selecting Items and Modifiers
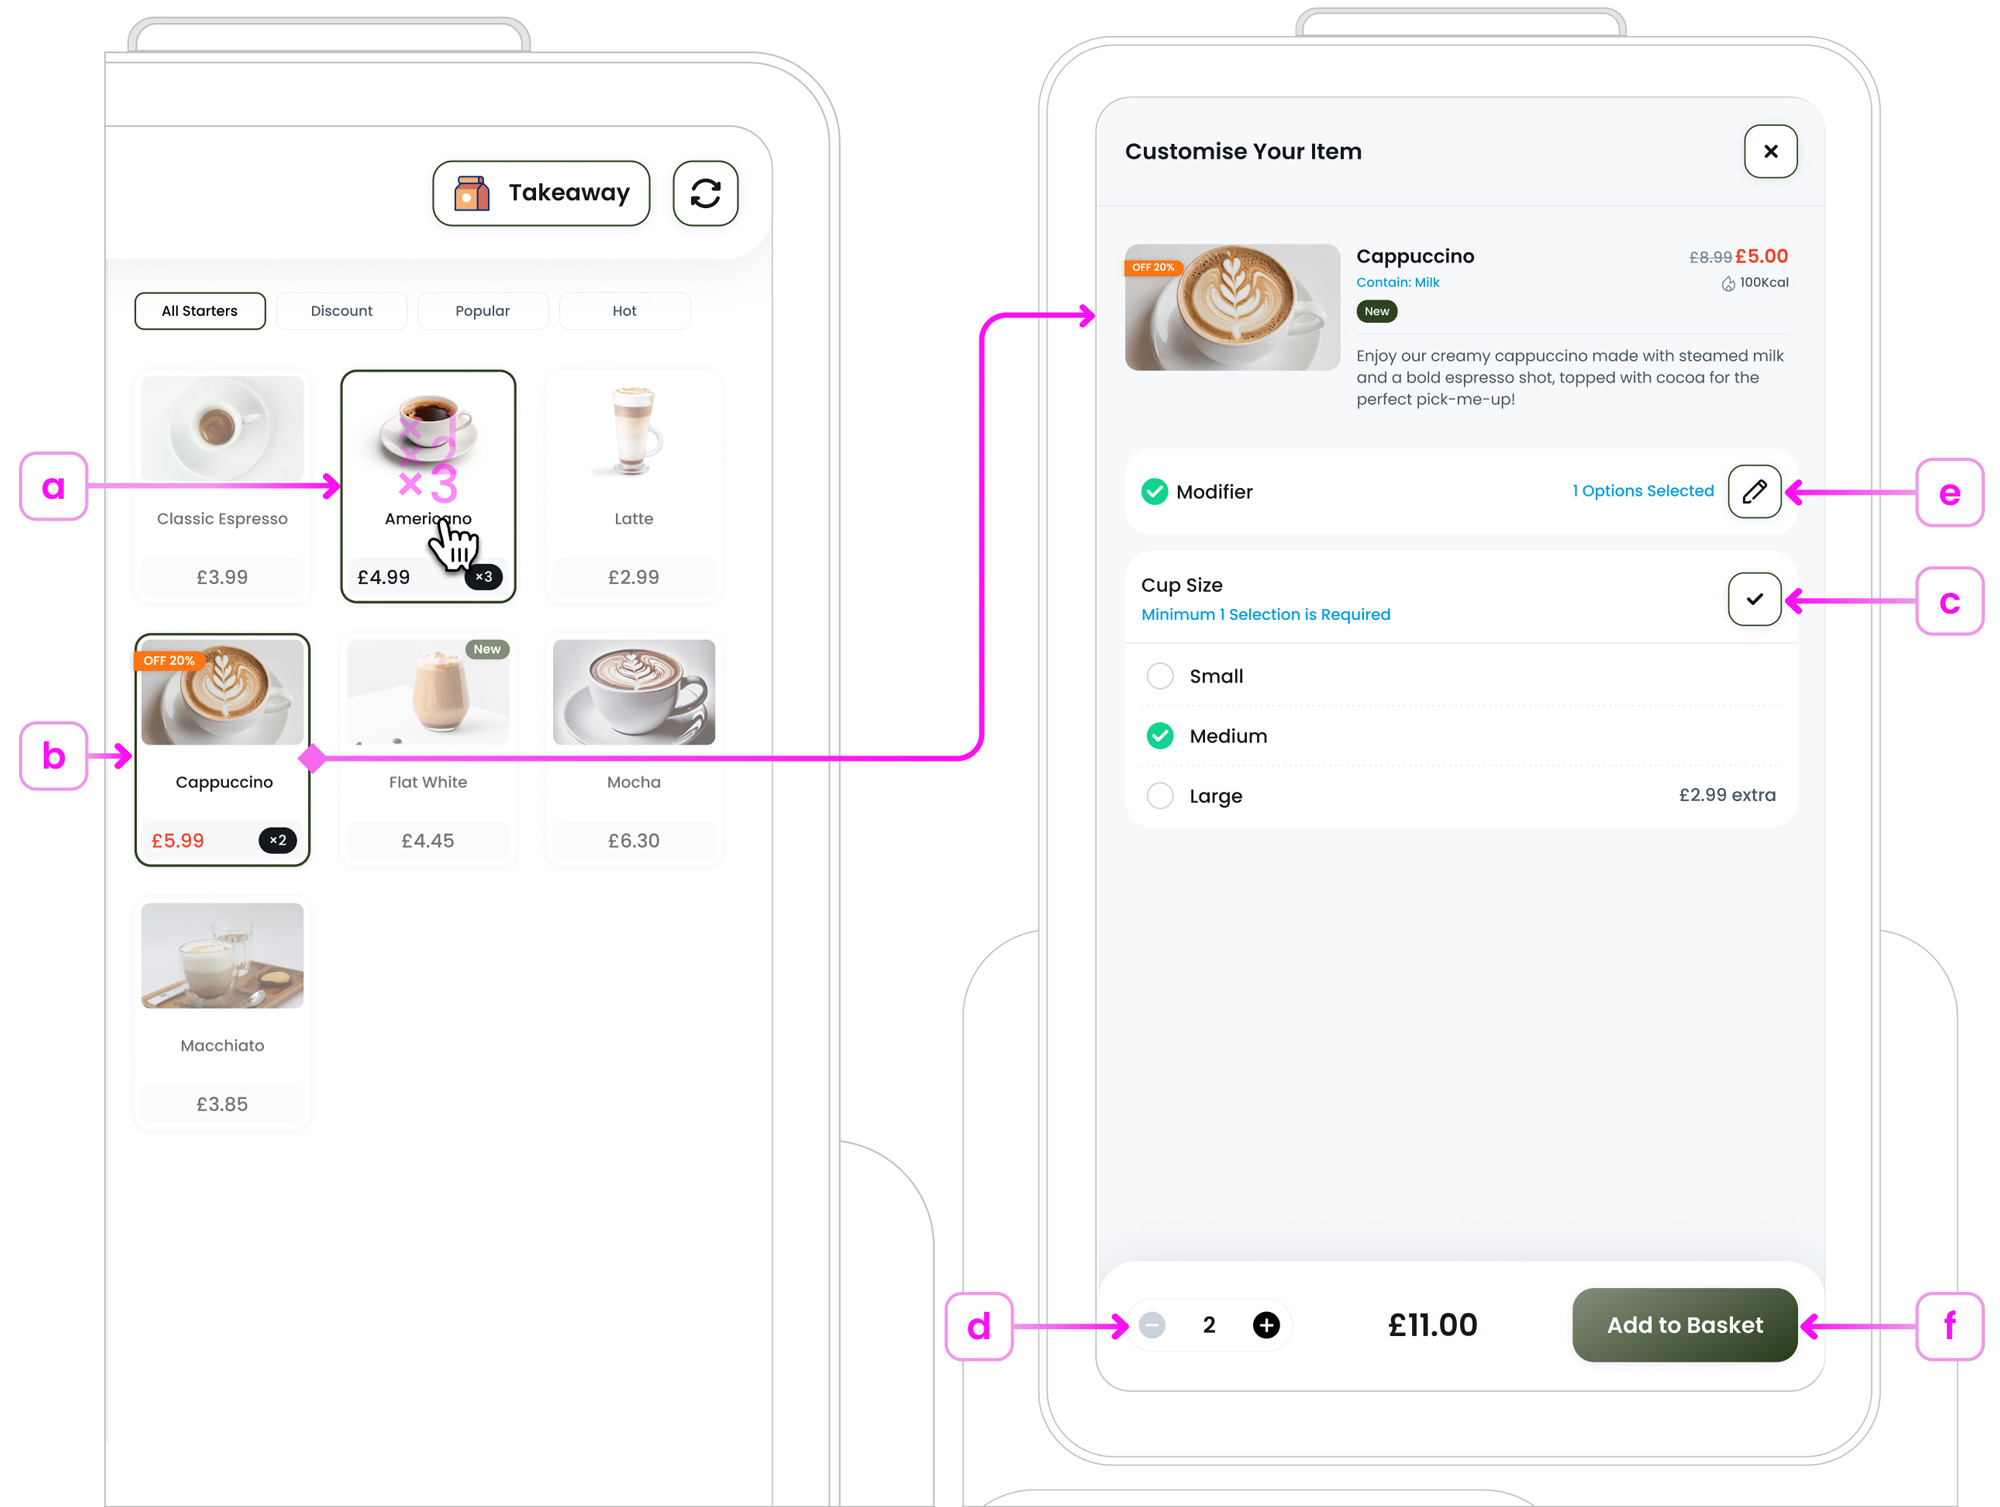
After browsing the categories, customers can tap an item to either add it directly to their basket or open a modifier page, depending on whether modifiers are configured.
a. Items Without Modifiers
If an item has no modifiers, tapping it once immediately adds one unit to the basket. Tapping again increases the quantity by one more. The bottom bar updates the quantity and total price with each tap, so customers can quickly adjust how many items they want.
b. Items with Modifiers
If an item does include modifiers (e.g. Size, Cooking Type, or Toppings), tapping on an item opens the “Customise Your Item” screen. This page shows the item’s name, price and all required or optional modifier groups.
c. Selecting & Saving Modifiers
Each modifier group may have minimum or maximum selection requirements. When a user selects an option (e.g., “Medium Cup”), they tap the ’Confirm’ button ![]() to proceed. The kiosk then moves to the next group, if applicable. In some cases, selecting certain modifiers may incur an additional fee (e.g., Large size is £2.99 more), and the bottom bar will update in real time to reflect the new price.
to proceed. The kiosk then moves to the next group, if applicable. In some cases, selecting certain modifiers may incur an additional fee (e.g., Large size is £2.99 more), and the bottom bar will update in real time to reflect the new price.
d. Selecting Item Quantity
In the modifier screen, customers can also
specify how many of this customised item they want. A quantity counter  near the bottom, allows customers to adjust the quantity without leaving the page.
The total price updates in real-time.
near the bottom, allows customers to adjust the quantity without leaving the page.
The total price updates in real-time.
e. Editing Previous Modifiers
If a customer wants to change a previously
chosen option, like switching from “Medium” to “Large”, they can tap the "Edit" button ![]() (shown next to each completed modifier group). This reopens that modifiers group,
allowing them to update their choice before finalising the order.
(shown next to each completed modifier group). This reopens that modifiers group,
allowing them to update their choice before finalising the order.
f. Add to Basket
After all required modifiers are set and the quantity is selected, customers tap the “Add to Basket” button
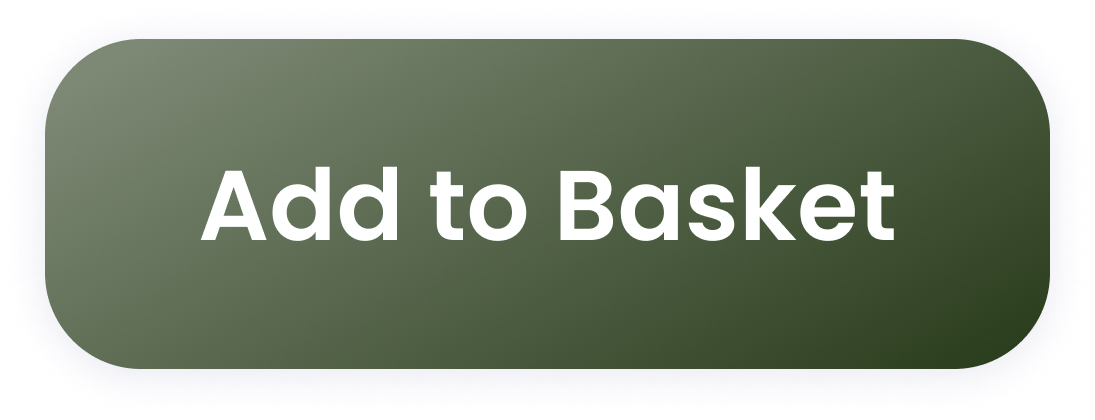 to place the item in their order. They’re then returned to the menu to
continue browsing, or they can proceed to checkout if they’re done.
to place the item in their order. They’re then returned to the menu to
continue browsing, or they can proceed to checkout if they’re done.
Step 4: Reviewing the Basket
After adding items (with or without modifiers), customers can open the basket to review and adjust their order. This helps them confirm item quantities, remove unwanted products, or return to the menu to add more before proceeding to payment.
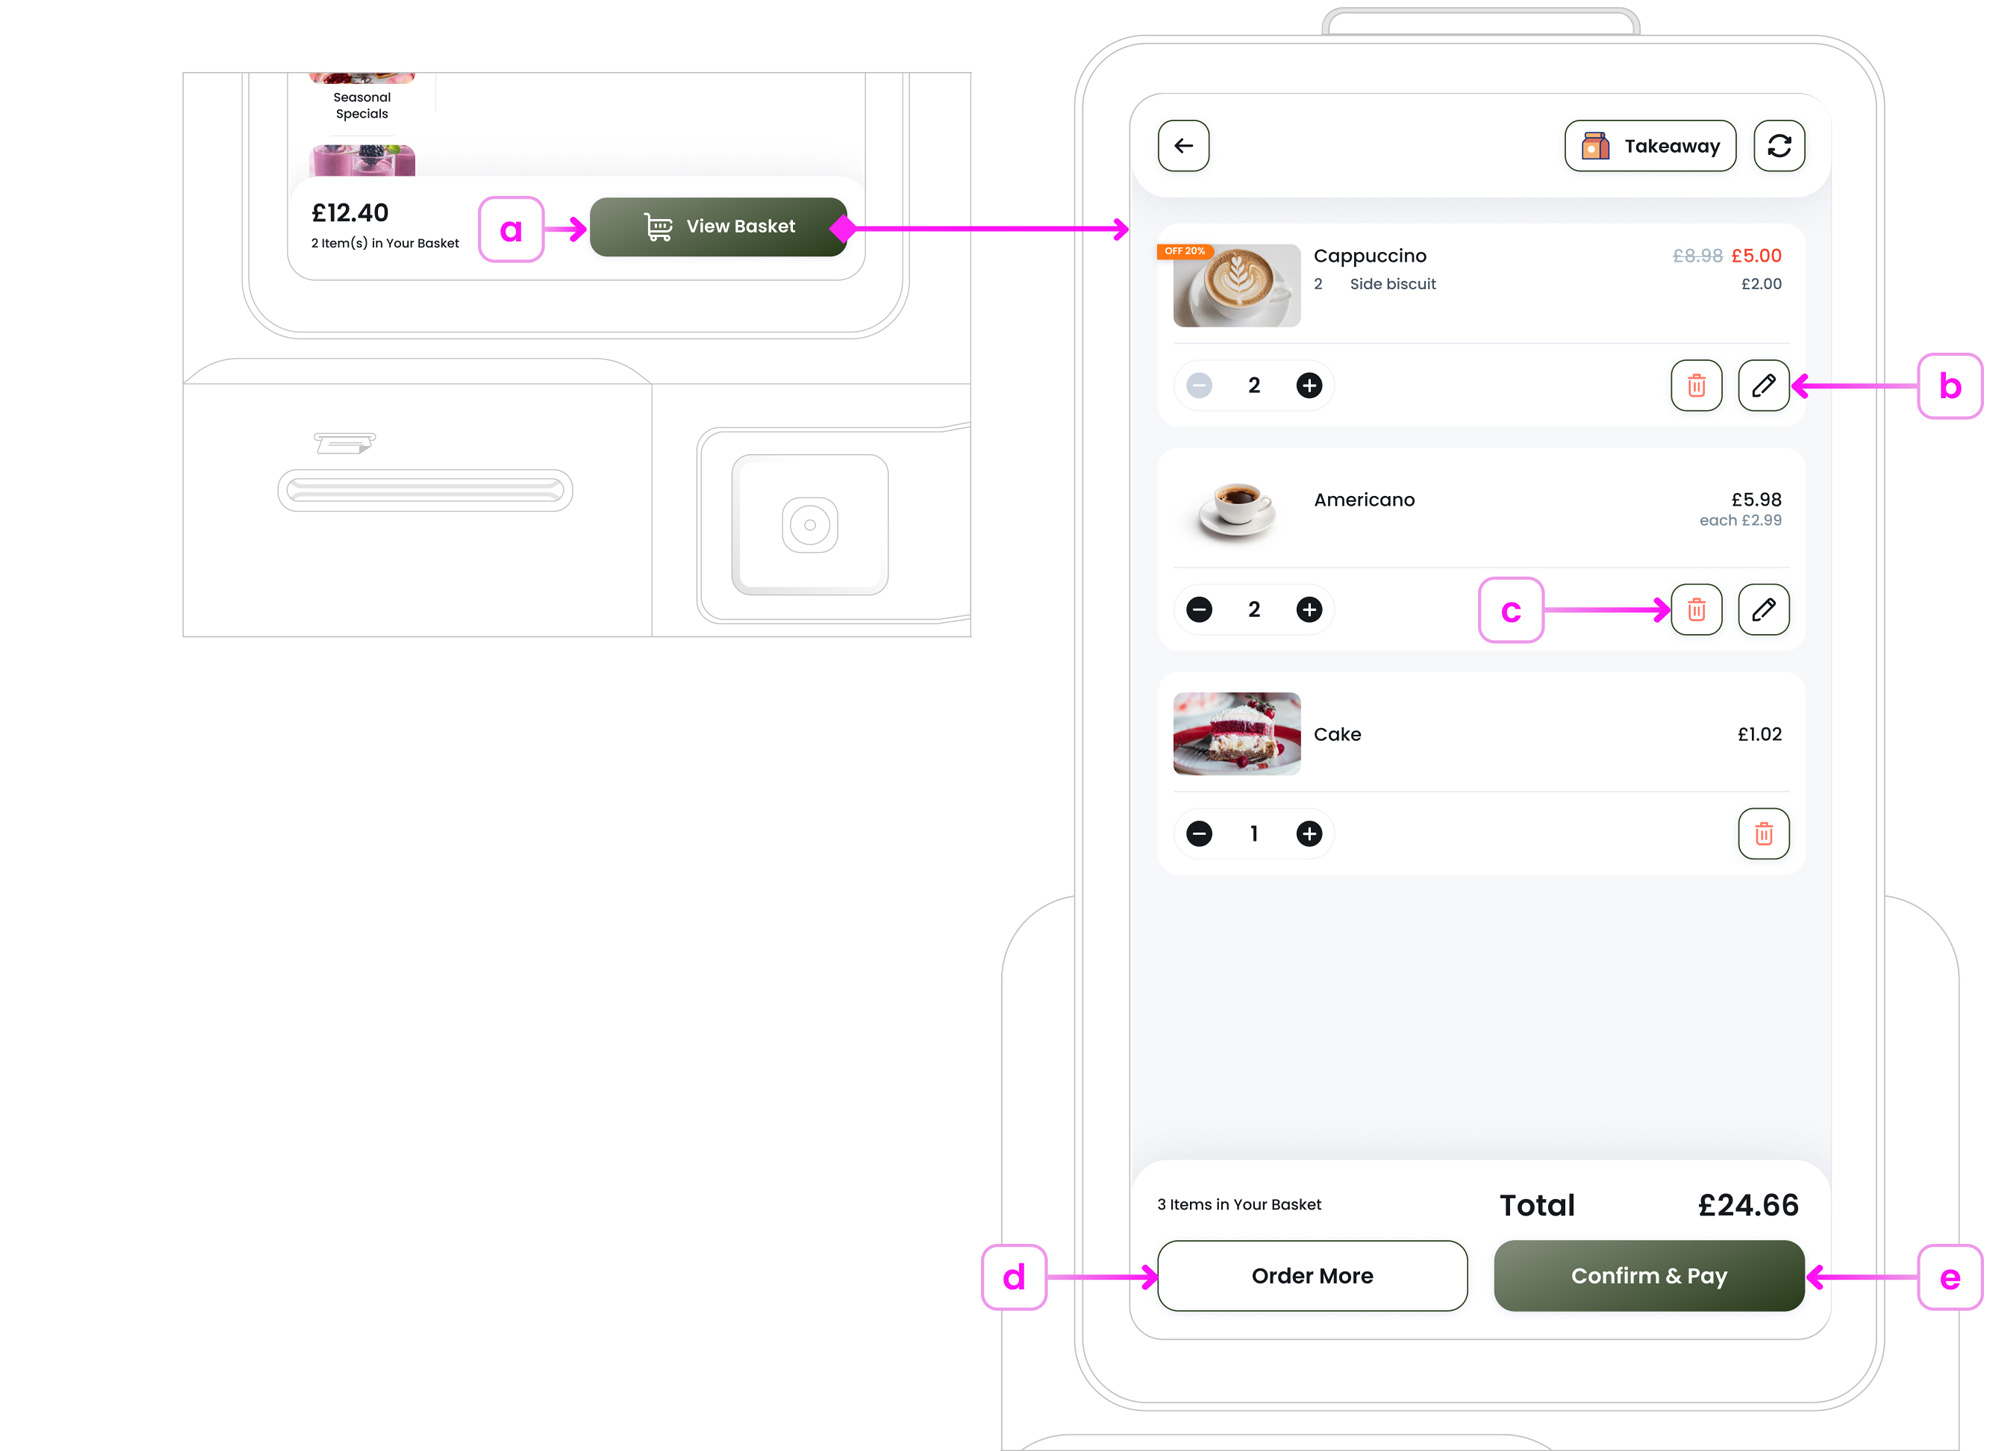
a. View Basket Button
Tapping “View Basket” button, 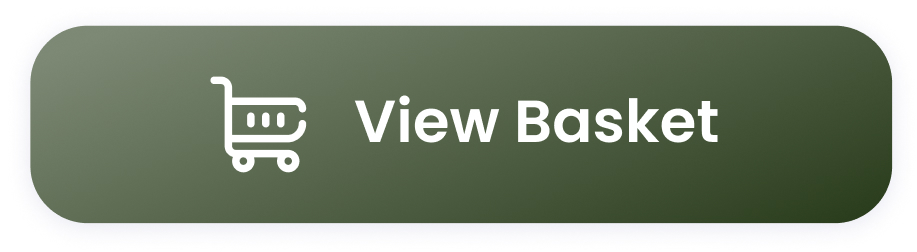 opens the order summary at the bottom of the kiosk screen. Here, customers
see each item (and modifiers), along with a subtotal.
opens the order summary at the bottom of the kiosk screen. Here, customers
see each item (and modifiers), along with a subtotal.
b. Editing Items & Quantities
If an item has modifiers, customers can tap
![]() to reopen the customisation screen and change their previous choices. They
can also use the quantity counter
to increase or decrease the item’s quantity, with the total price
adjusting automatically.
to reopen the customisation screen and change their previous choices. They
can also use the quantity counter
to increase or decrease the item’s quantity, with the total price
adjusting automatically.
c. Deleting Items
Each basket row shows a "Delete" button ![]() for deleting the item entirely. This immediately updates the total price
and item count, so customers only pay for what they intend to keep.
for deleting the item entirely. This immediately updates the total price
and item count, so customers only pay for what they intend to keep.
d. Order More
If customers decide to add additional items, perhaps they forgot a drink or
dessert, they can tap on "Order More" button 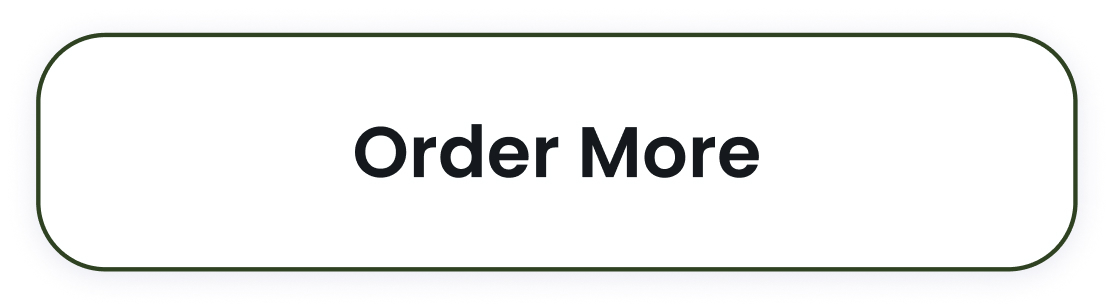 to return to the menu screen. The kiosk retains the current basket, so
users can keep browsing without losing any selections.
to return to the menu screen. The kiosk retains the current basket, so
users can keep browsing without losing any selections.
e. Confirm & Pay
Once the basket looks correct, the user taps the "Confirm & Pay" button  to proceed the payment. This leads to the final checkout steps, covered in
Step 5.
to proceed the payment. This leads to the final checkout steps, covered in
Step 5.
Step 5: Final Suggestions & Checkout
After customers review their basket in Step 4, they’re guided through a series of popups, some optional, depending on your Kiosk Settings. The sections below outlines how an order is typically completed.
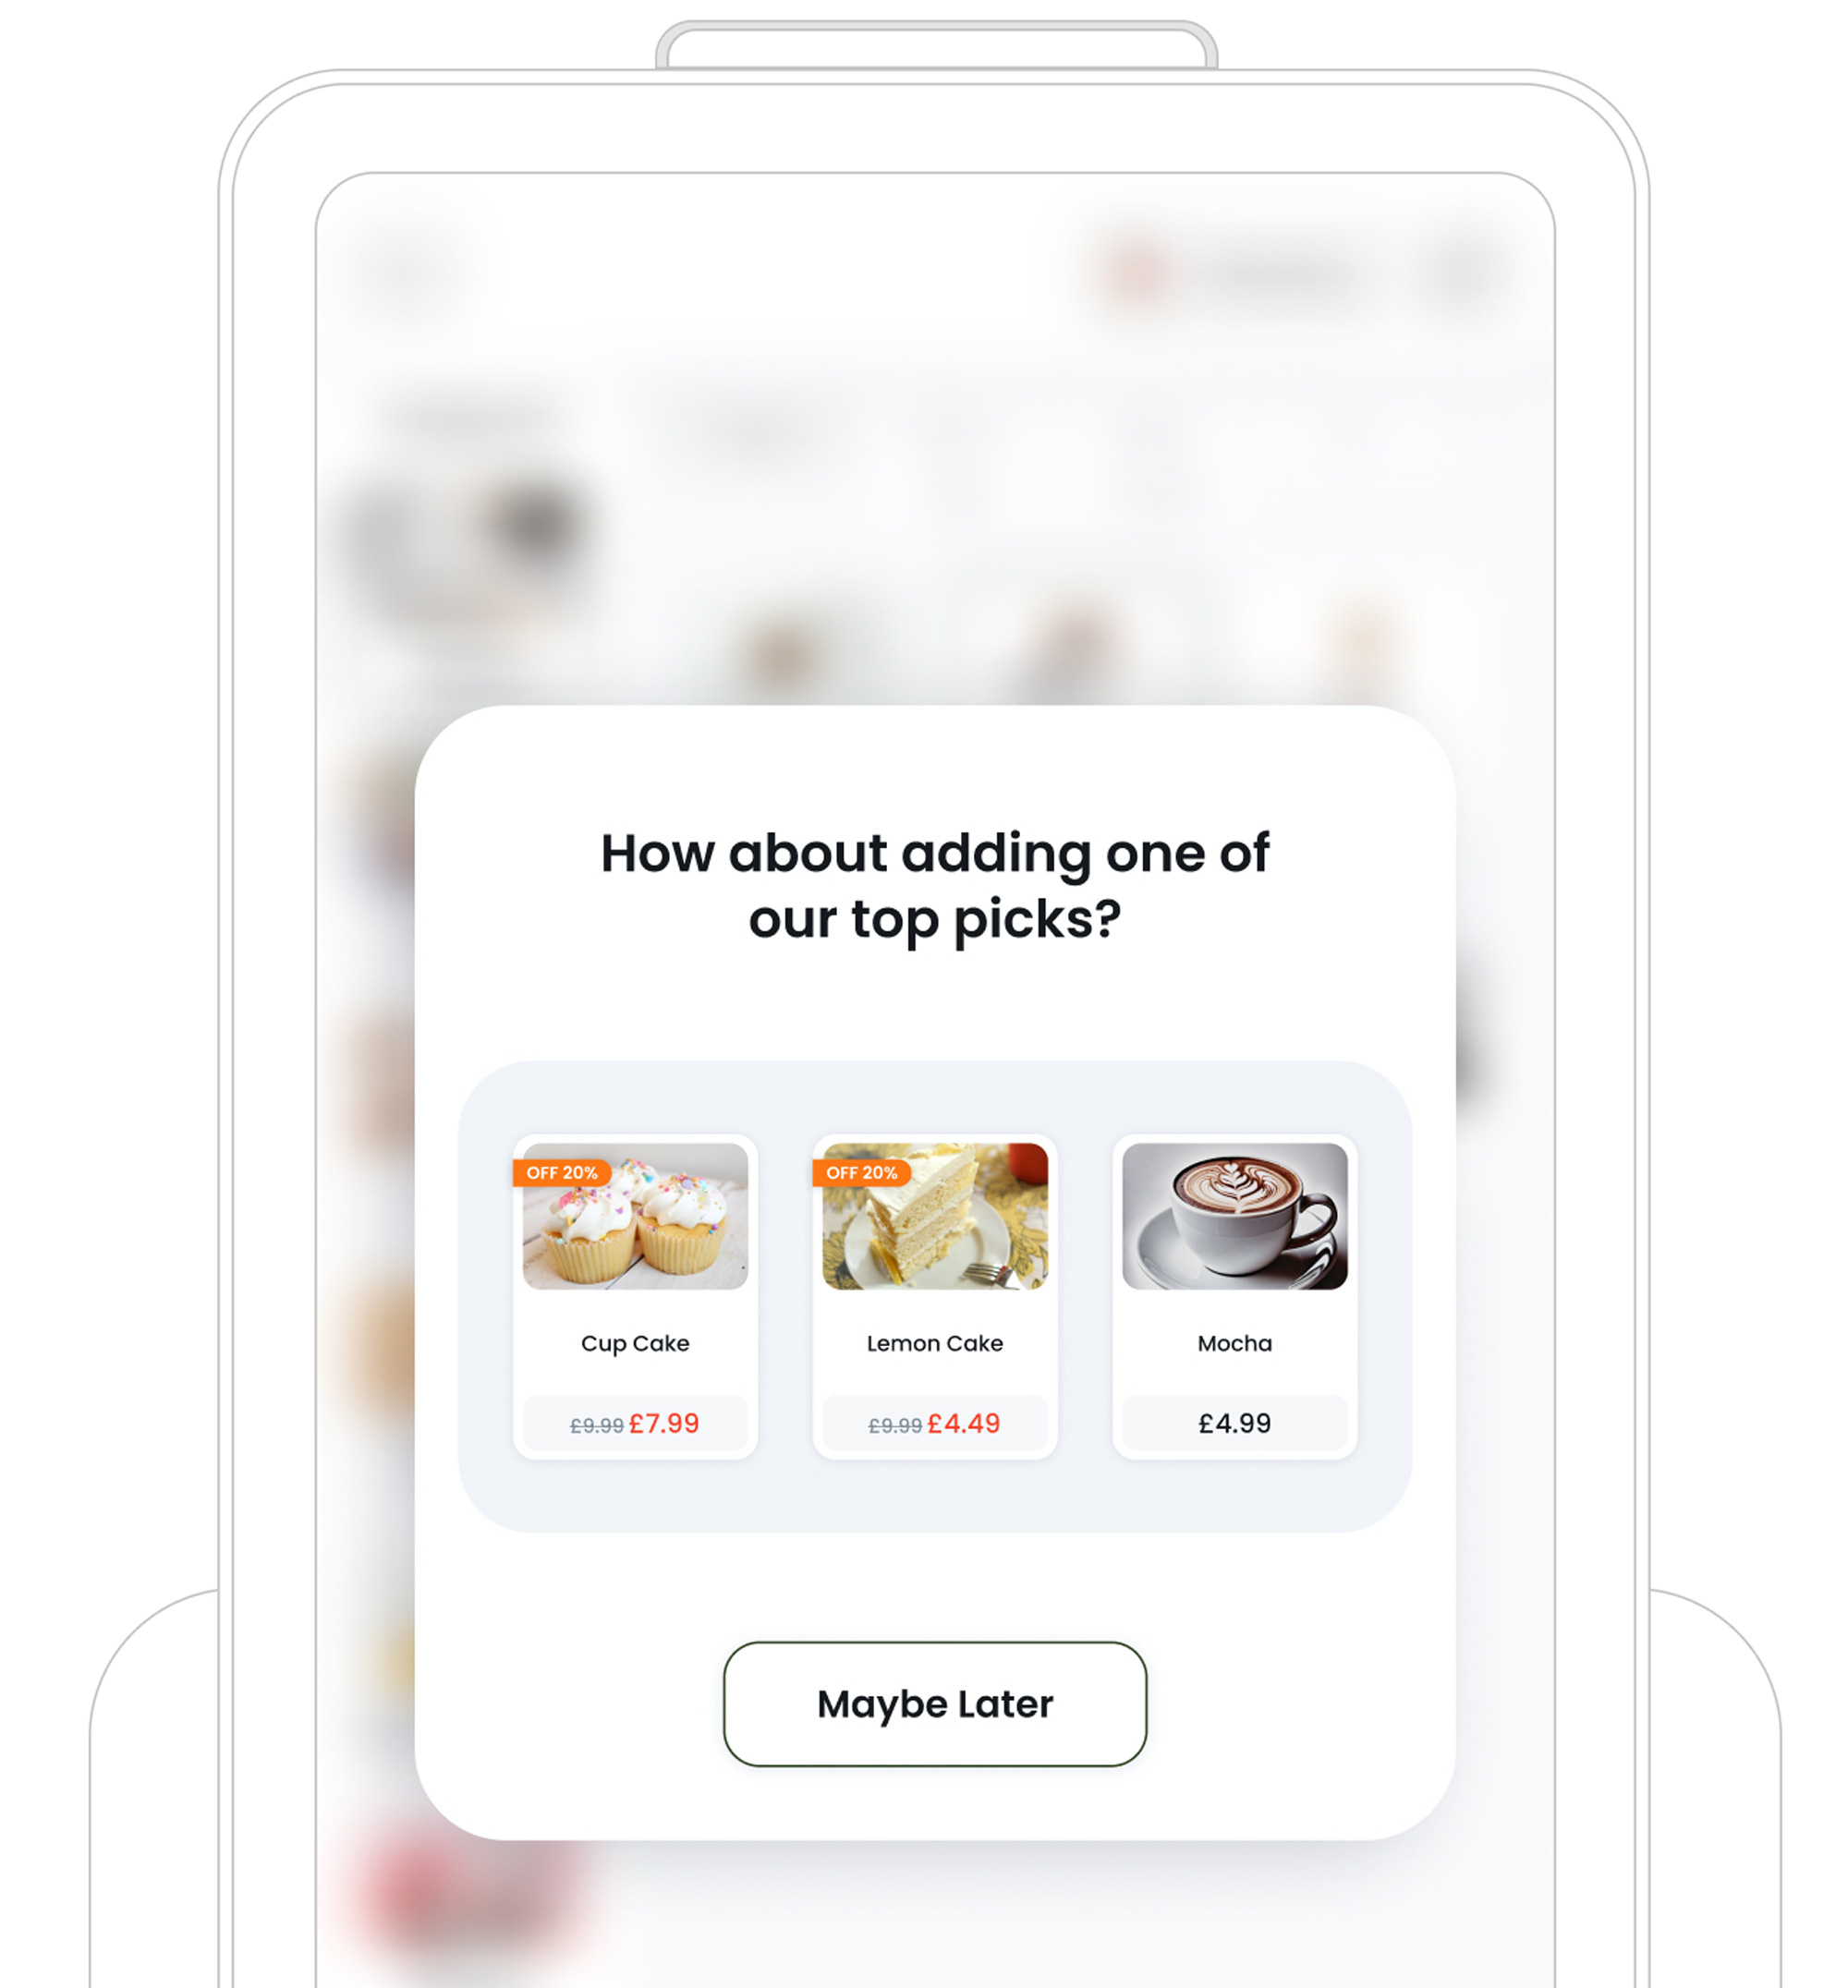
• Suggested Items (Optional)
If enabled this option in your Kiosk Profile, a suggestion popup appears before entering personal details. This offers extra items or promotions to help boost average order value. If not configured, the kiosk automatically continues to the next step.
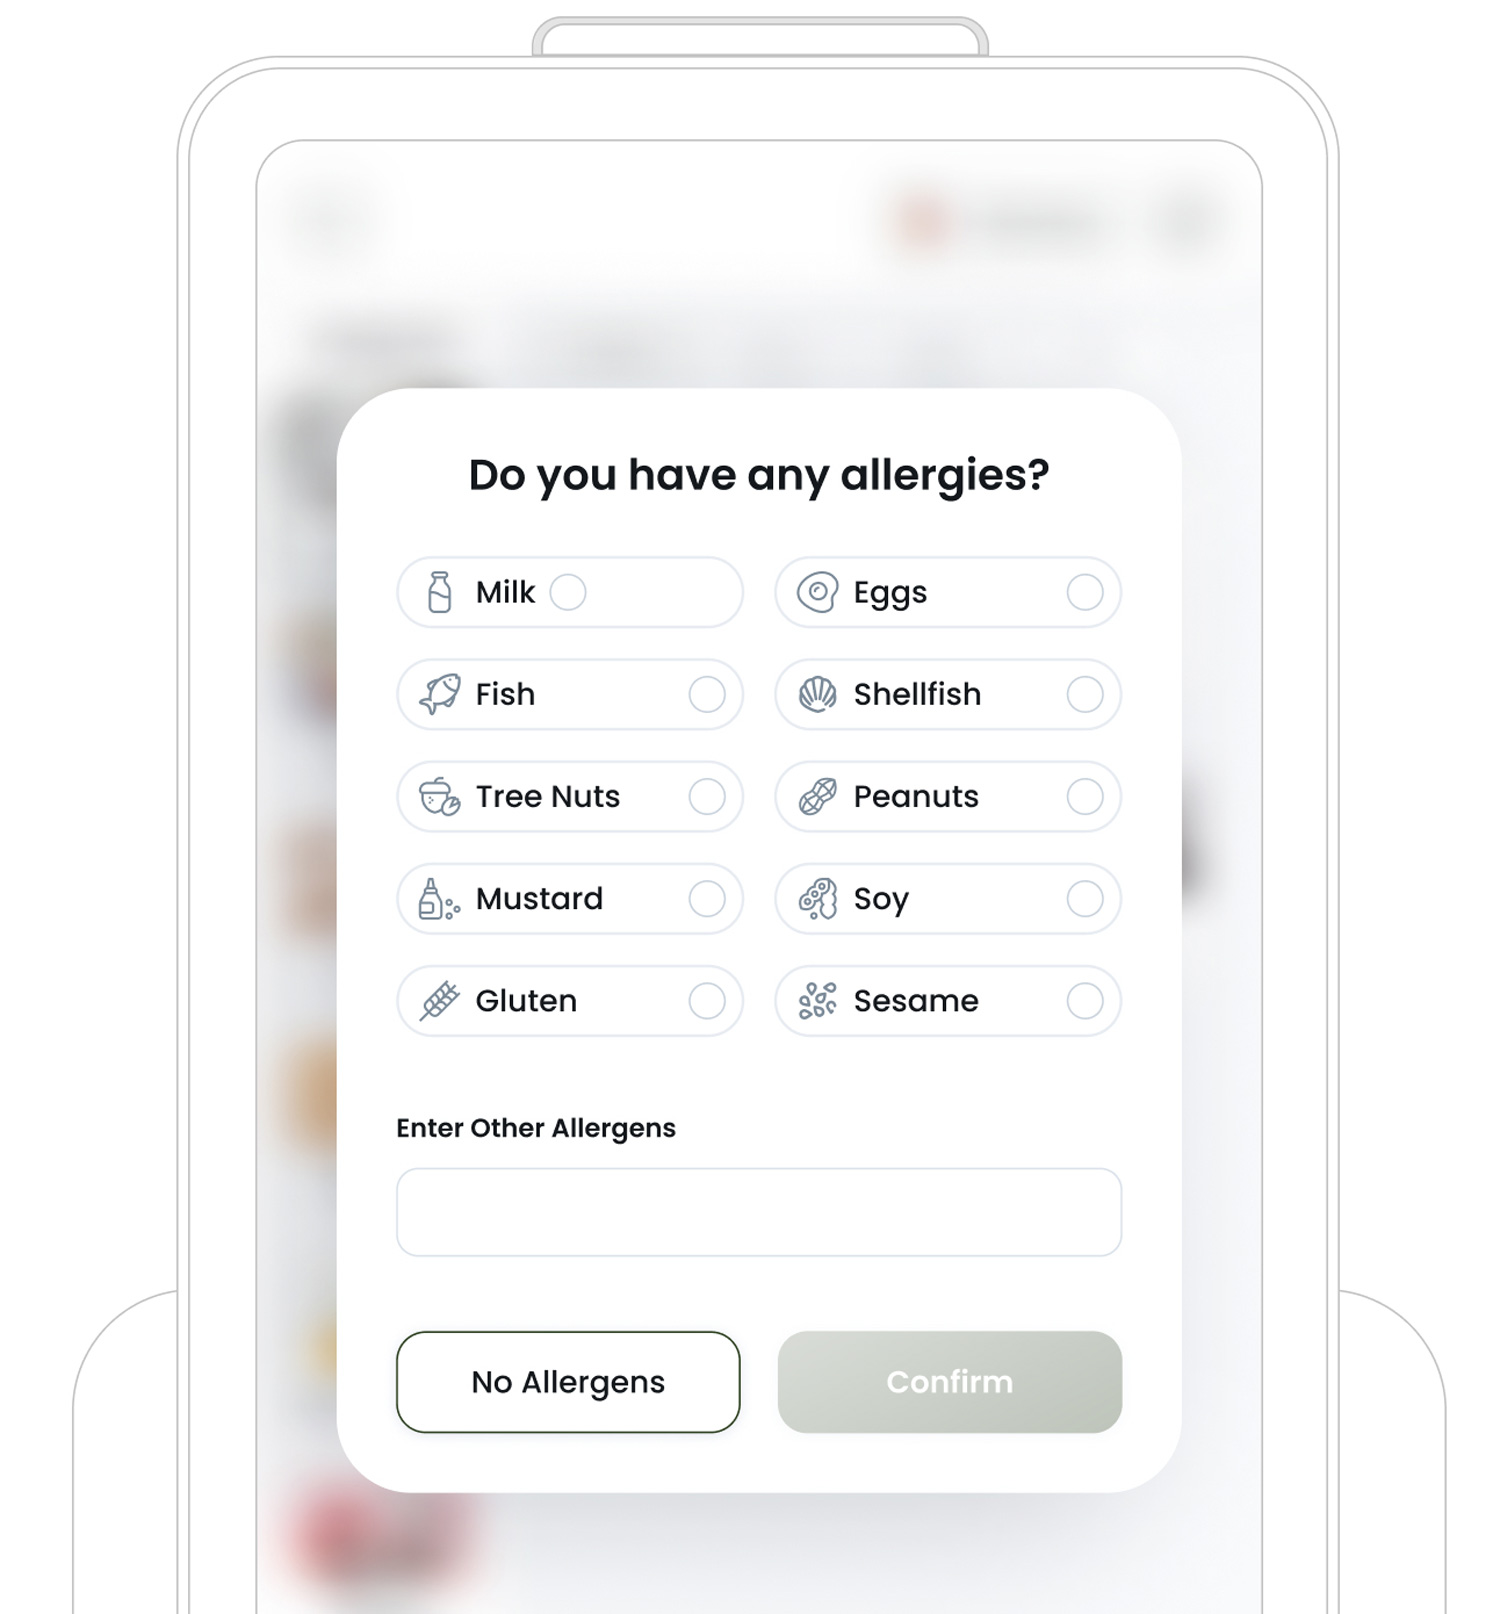
• Allergen Check (Optional)
If enabled in your Kiosk Profile, an Allergen Check popup appears after the suggestion. It prompts customers to indicate any allergies, milk, eggs, gluten, etc. and offers a field for additional allergens not listed. Tapping No Allergens or Confirm finalises their selection.
If disabled in your kiosk settings, the kiosk automatically skips this step and continues to the next screen.
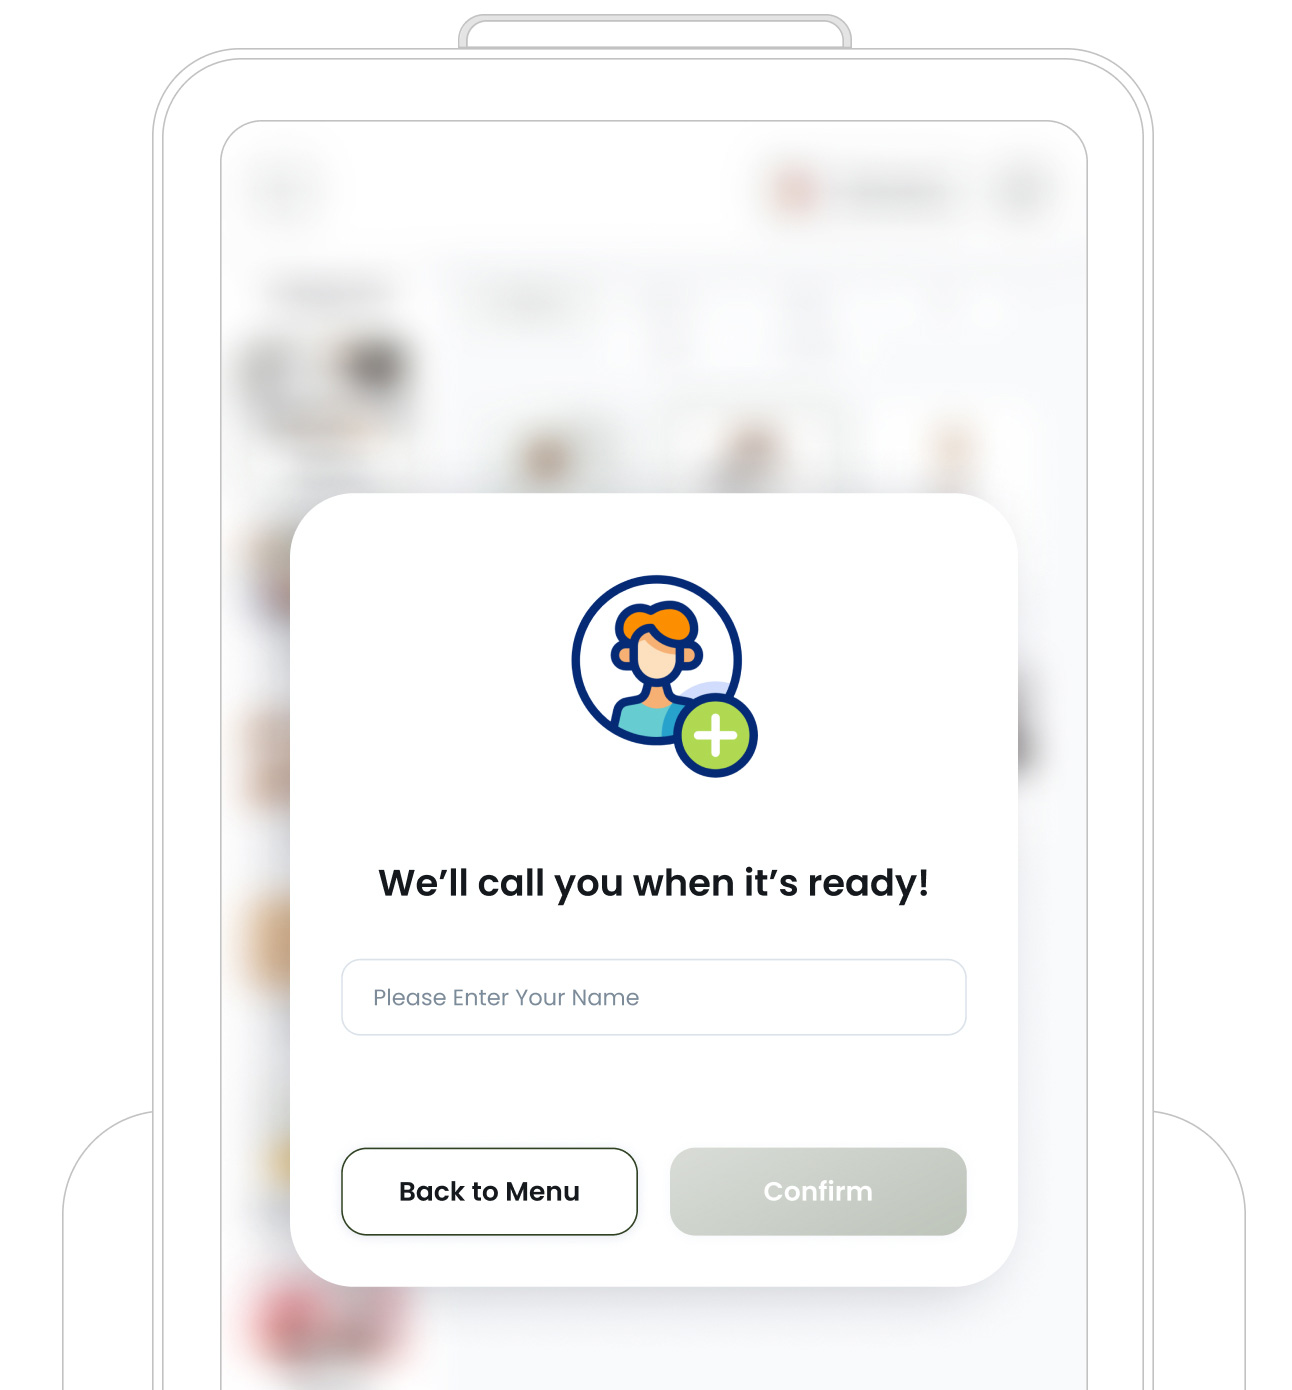
• Entering Customer Name (Optional)
If enabled in your Kiosk Profile, a name entry popup prompts the customer for their name before finalising the order. This is essential – when the order is ready, staff will call out the customer’s name to ensure they receive the correct order.
Including the name on receipts (emailed, print or displayed on-screen) adds a personal touch and supports marketing and loyalty programmes. It also appears on thekiosk’s confirmation screen , enhancing the overall customer experience.
If disabled, the kiosk automatically continues to the next step without requesting a name.
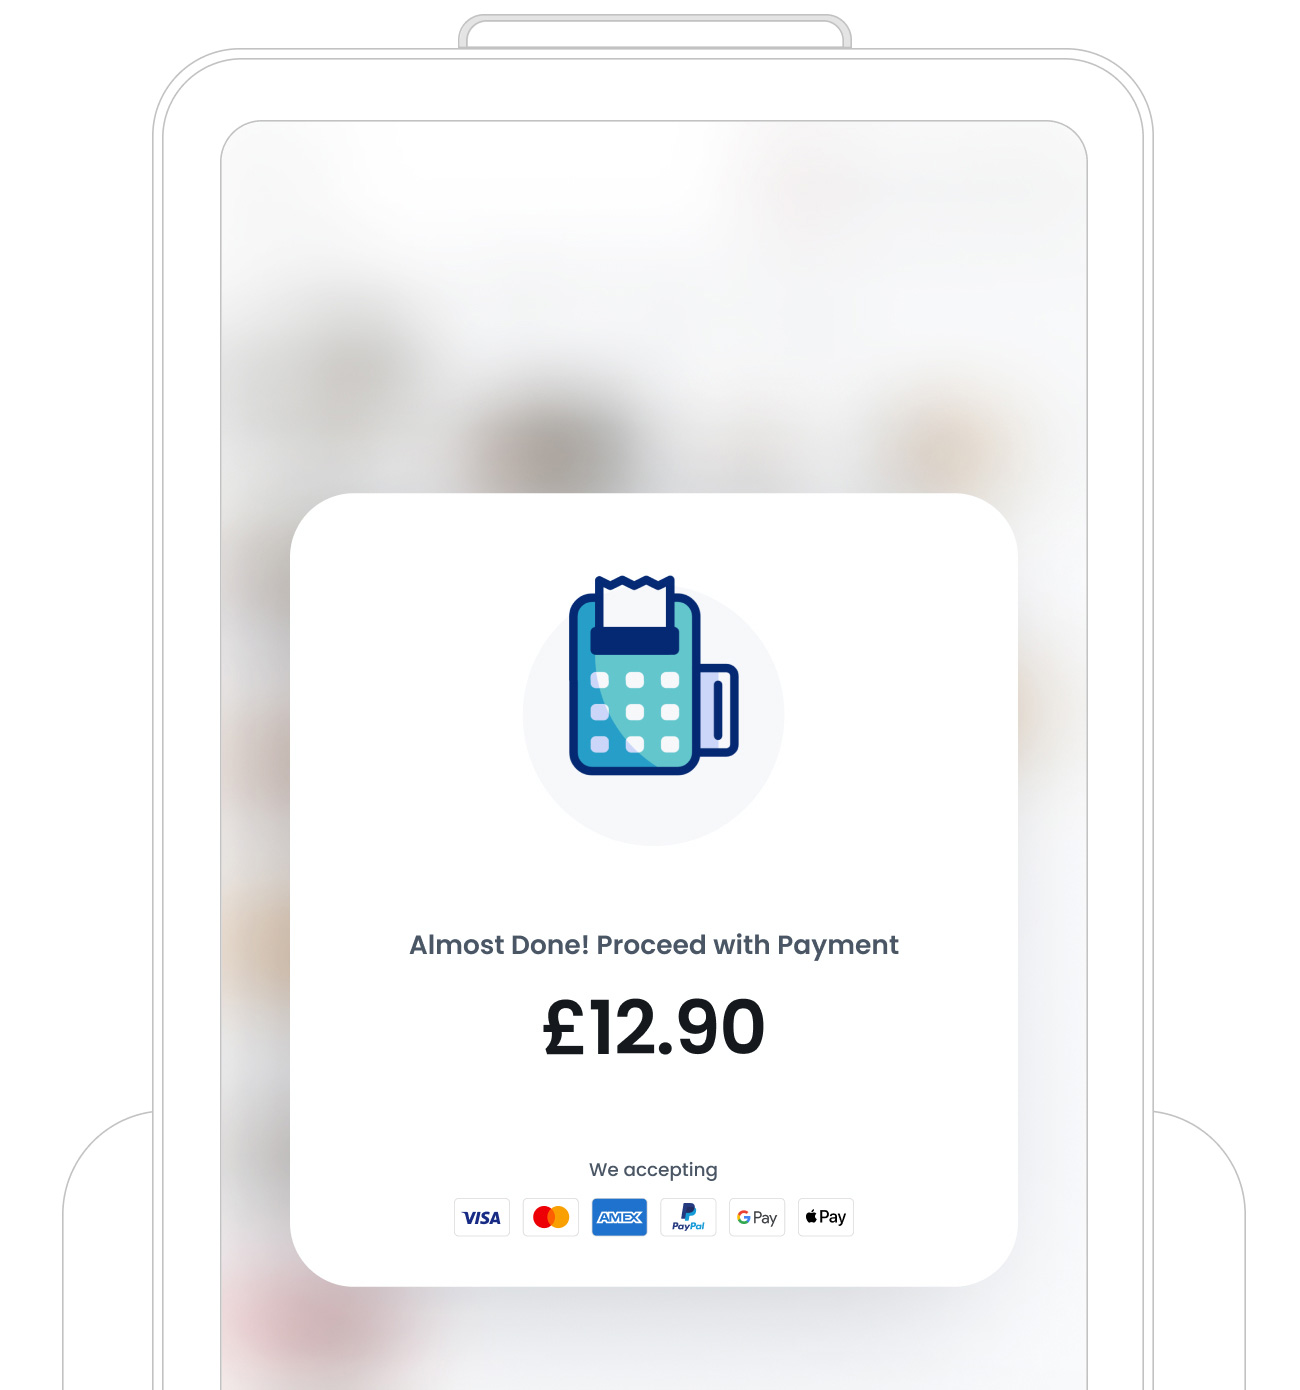
• Payment Process
After confirming their basket, customers see a “Proceed with Payment” popup showing the total amount due. The kiosk then waits for the customer to complete payment on the payment device. If the transaction is successful, the kiosk automatically takes customer to next popup.
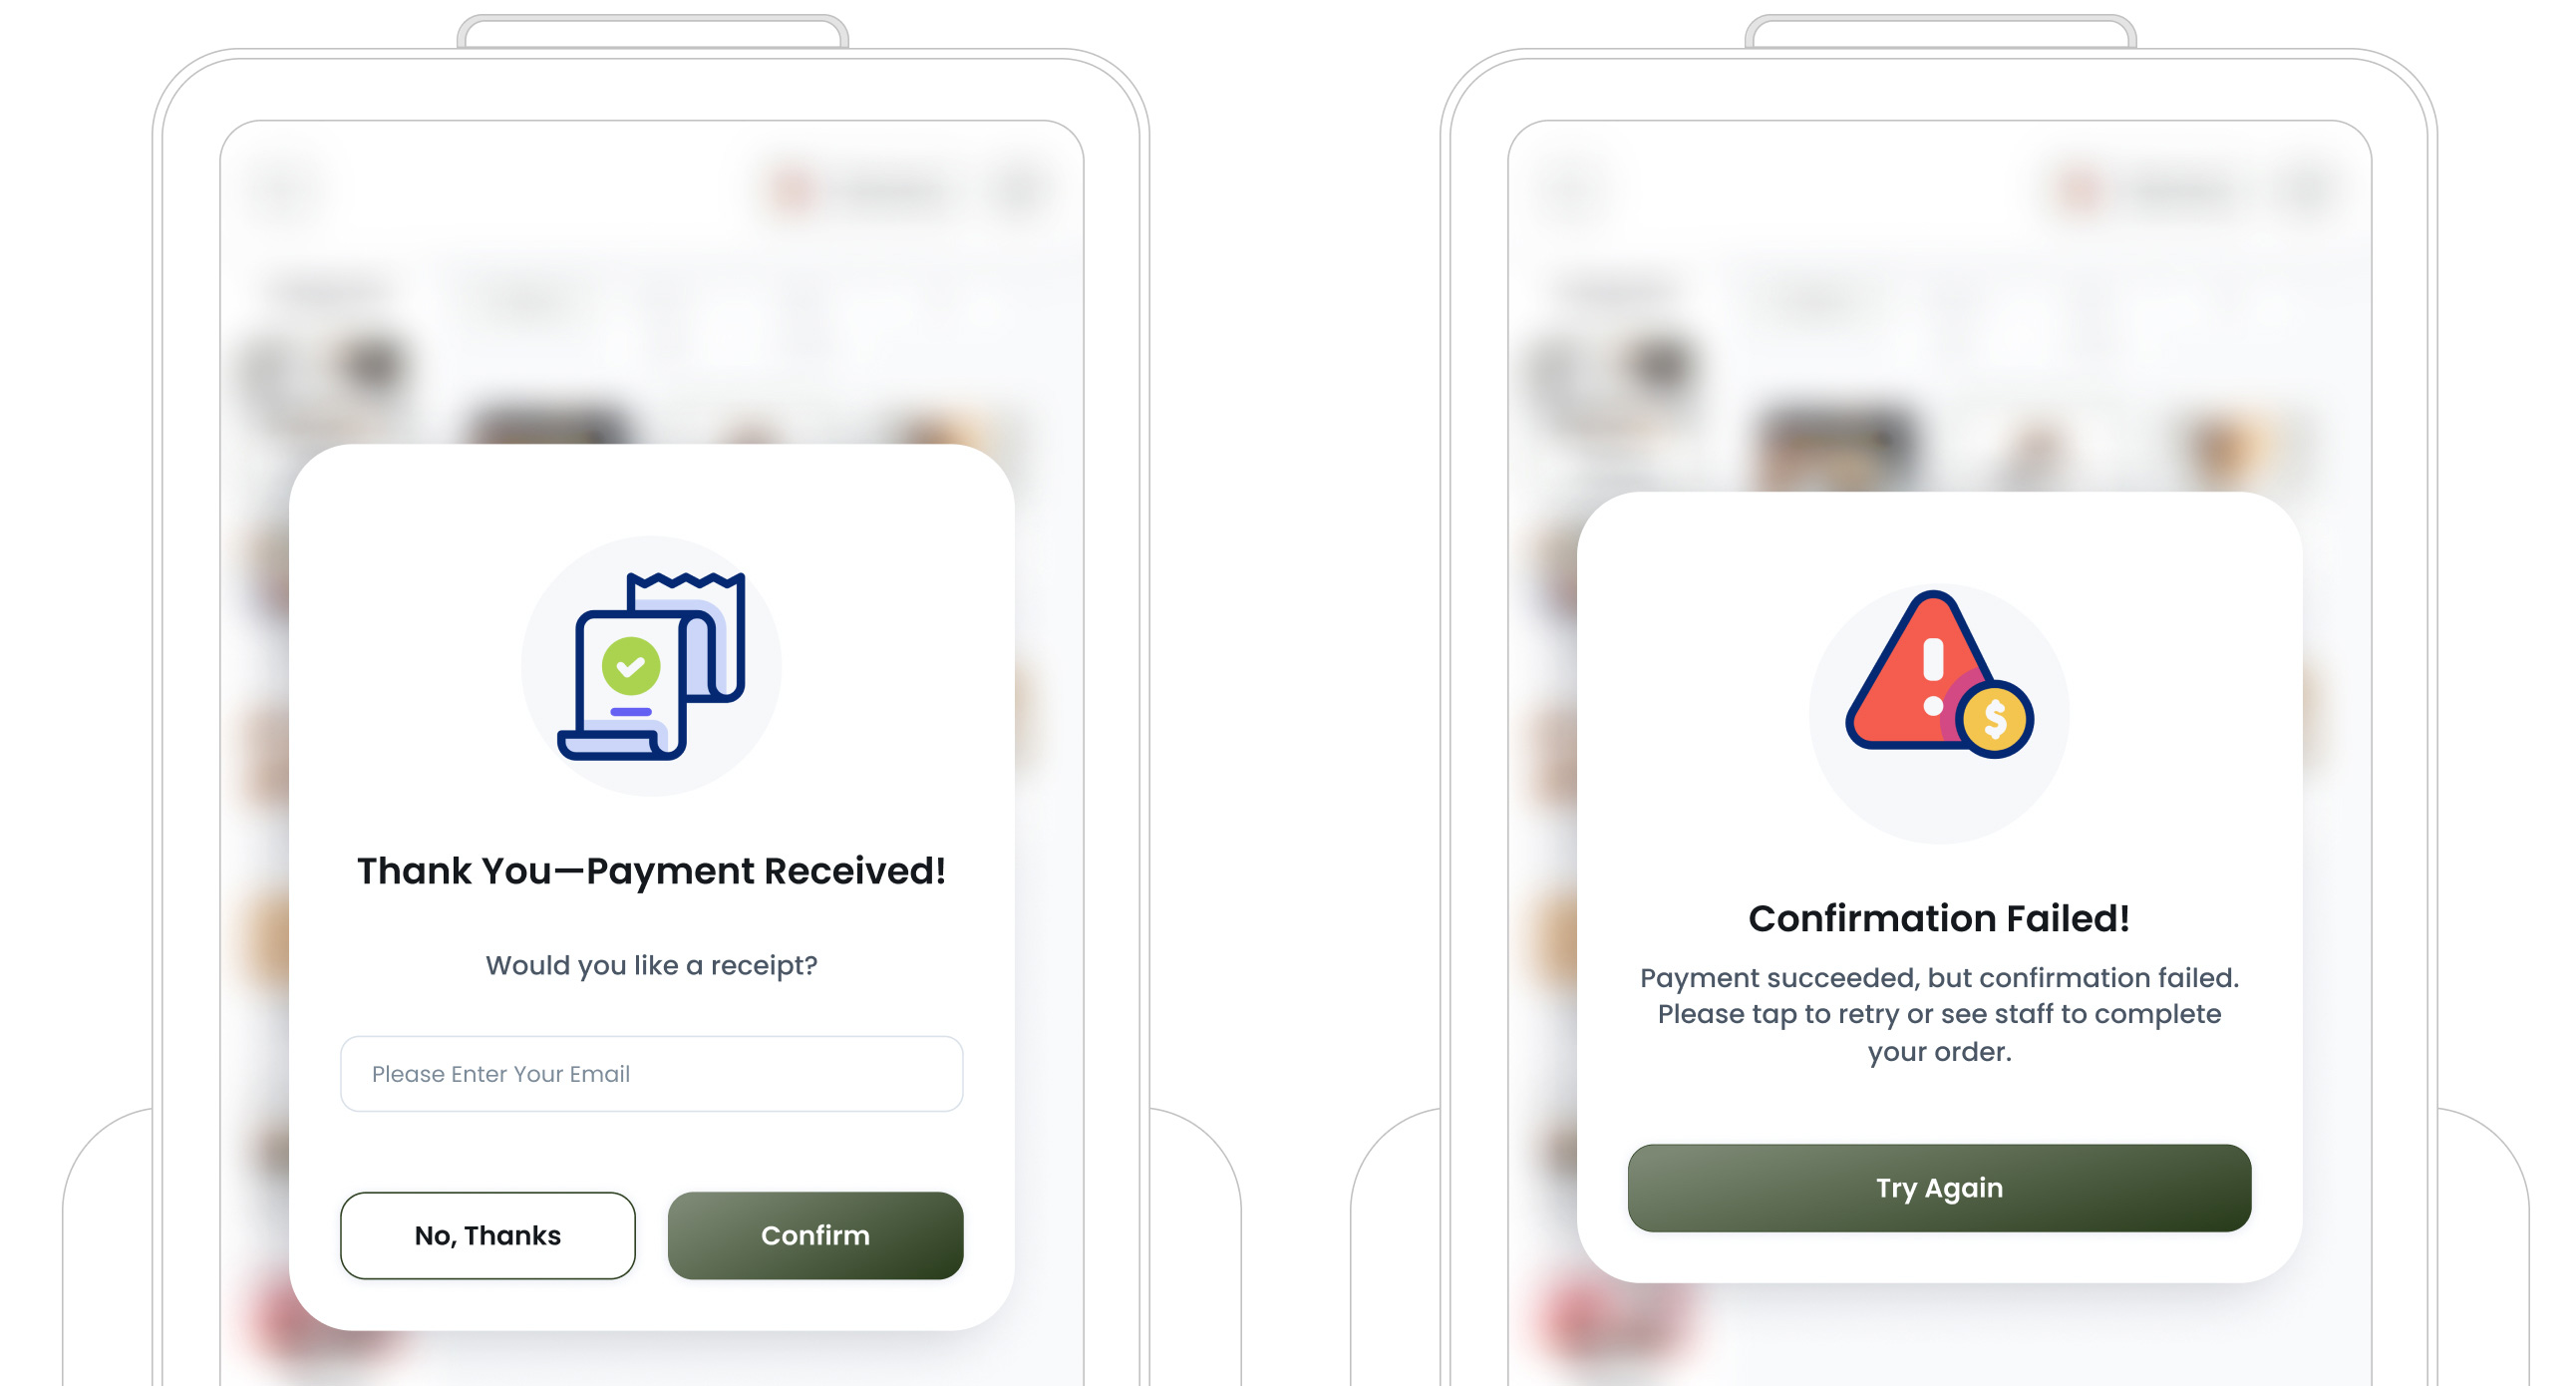
• Successful Payment and Email Receipt (Optional)
After a successful payment, a pop-up will appear displaying a success message and asking whether the customer would like to receive their receipt via email (if email receipts are enabled in your Kiosk Profile). Customers can tap the “No, Thanks” button to decline or the “Confirm” button to have the receipt sent directly to their email inbox.
In some cases, if the payment is processed but the system is unable to display a confirmation message due to connection issues, an error pop-up will appear. This allows the customer to either tap “Try Again” or seek assistance from a nearby staff member to complete their order.
Did You Know?
Tech Suite also provides Receipt Designs that let you customise the look and feel of emailed receipts. Add your logo, adjust fonts and colours, and include promotional banners to create a memorable post-purchase experience.
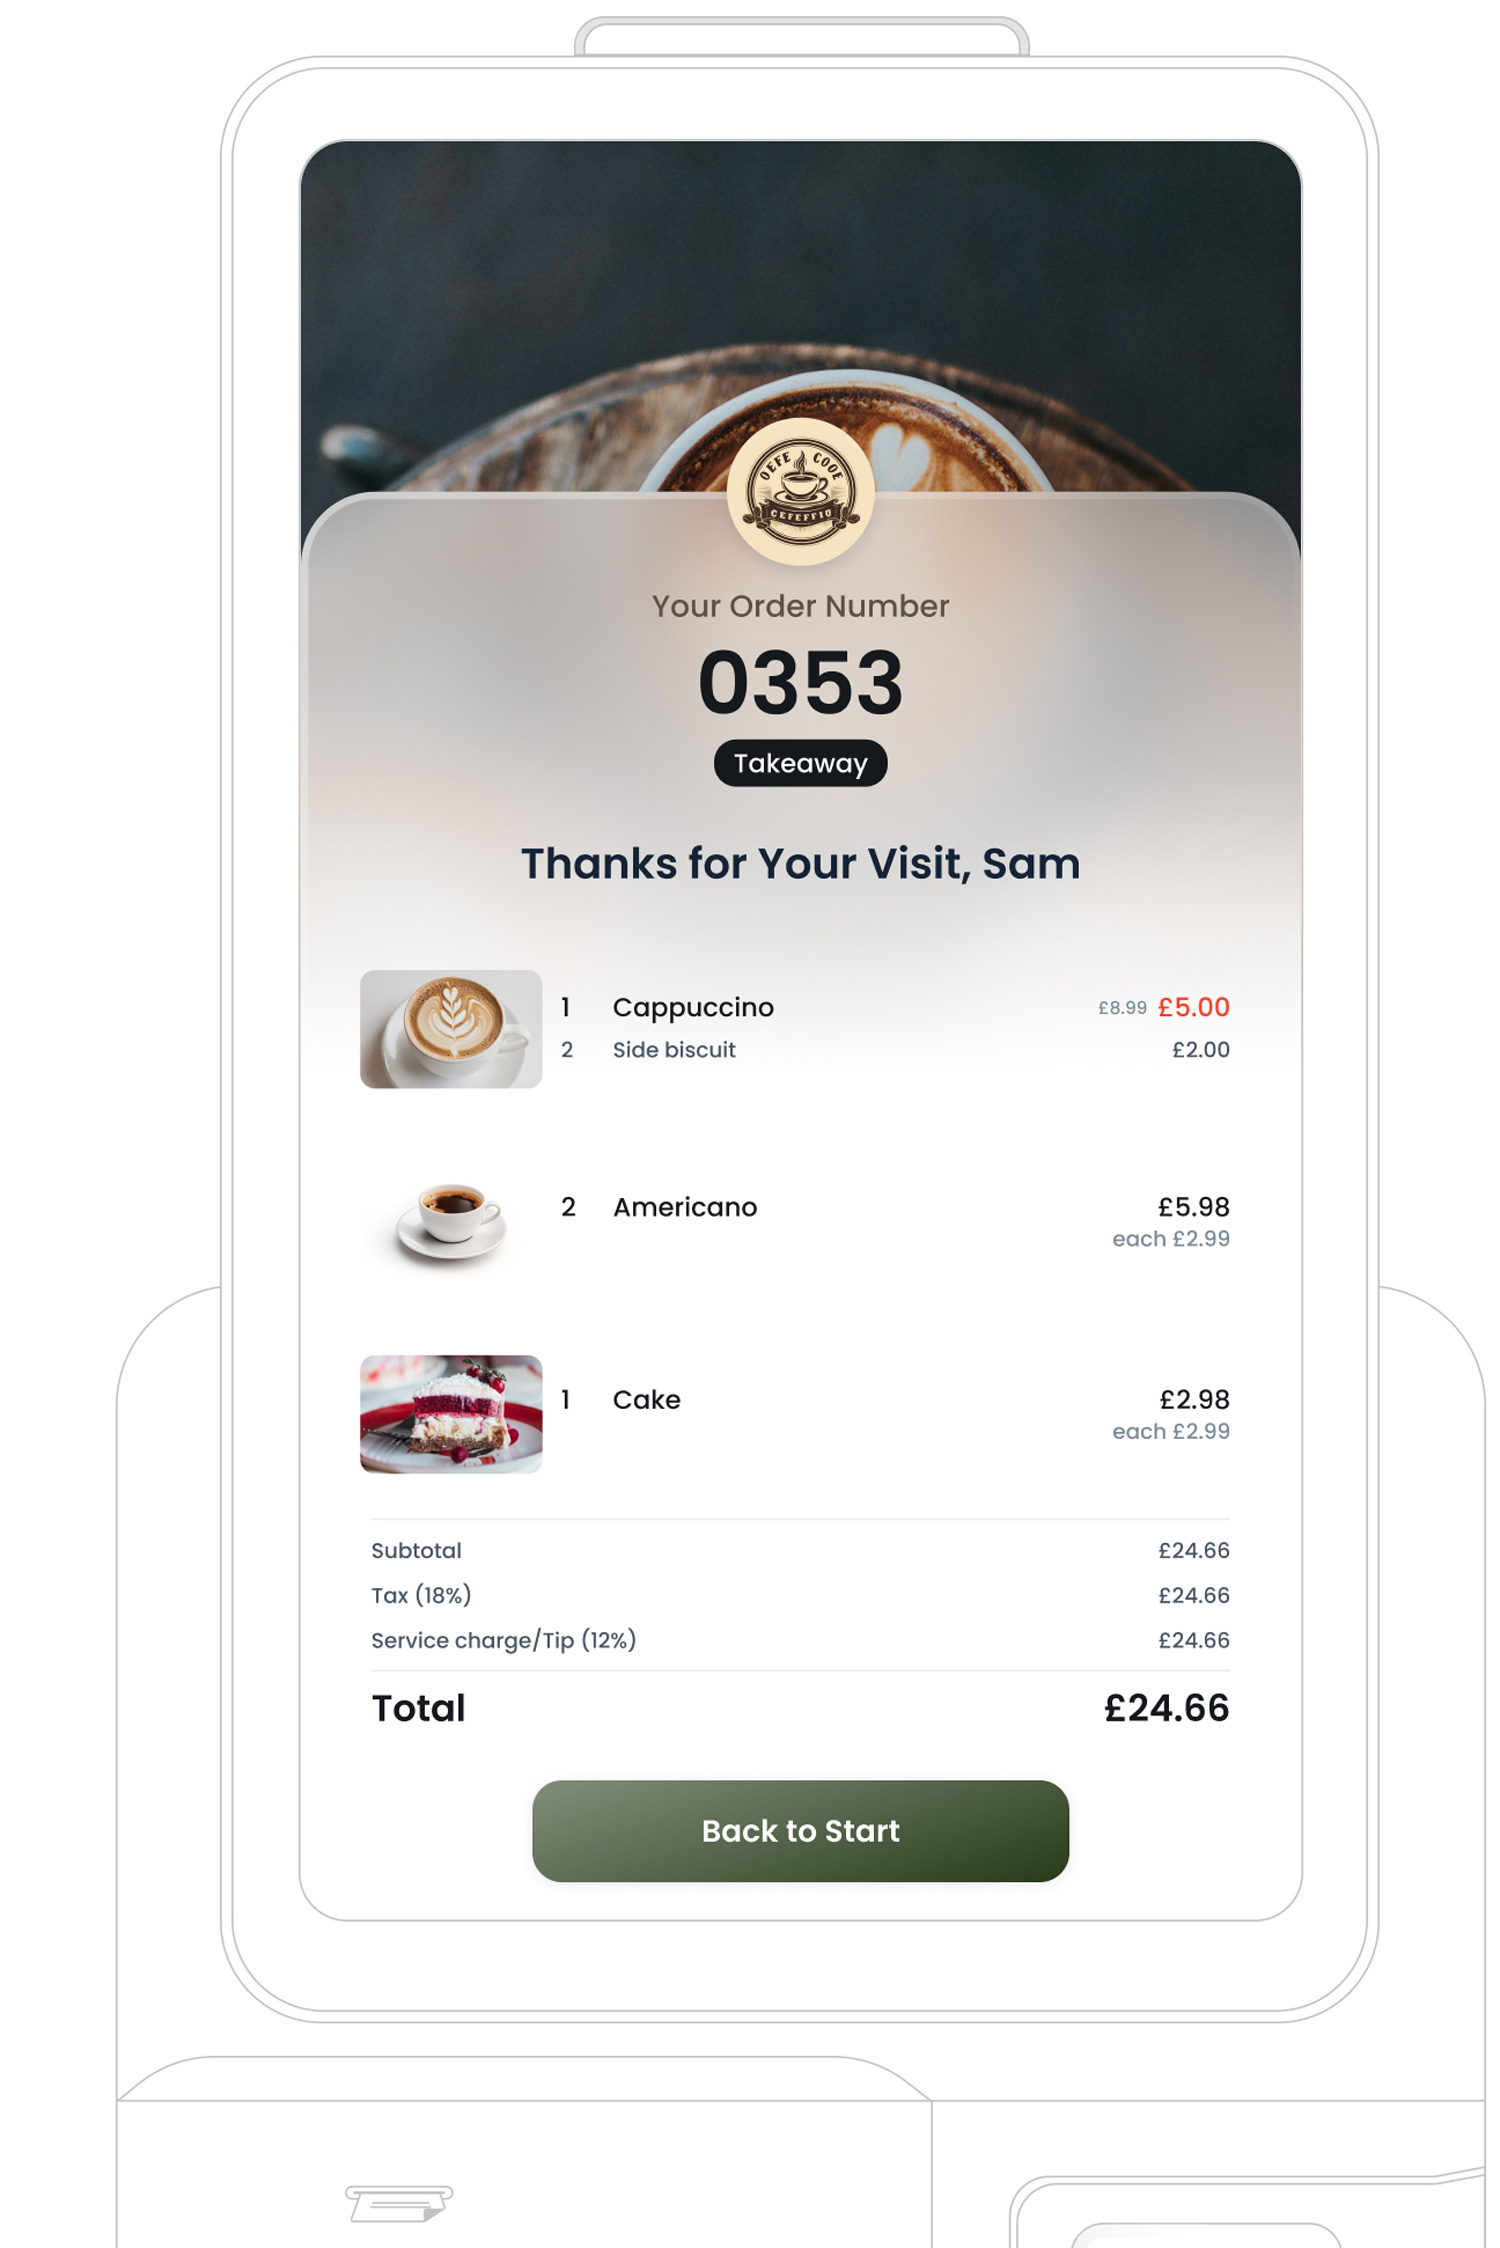
• Kiosk Receipt & Order Success
After the email step, the kiosk displays a
final receipt screen, confirming the order has
been placed successfully. This screen shows the
order number in large text, along with a summary
of all purchased items and relevant details. Tapping "back to Start" button, resets the kiosk for the next customer.
What’s Next?
Learn how to Edit your Kiosk Profile and integrate it with your new item.