How to Connect a New Printer
Connecting a new printer in TechSuite allows you to send orders and receipts directly to the correct device in your business. This setup ensures that printing is fast, reliable, and routed to the right location.
To Get Started
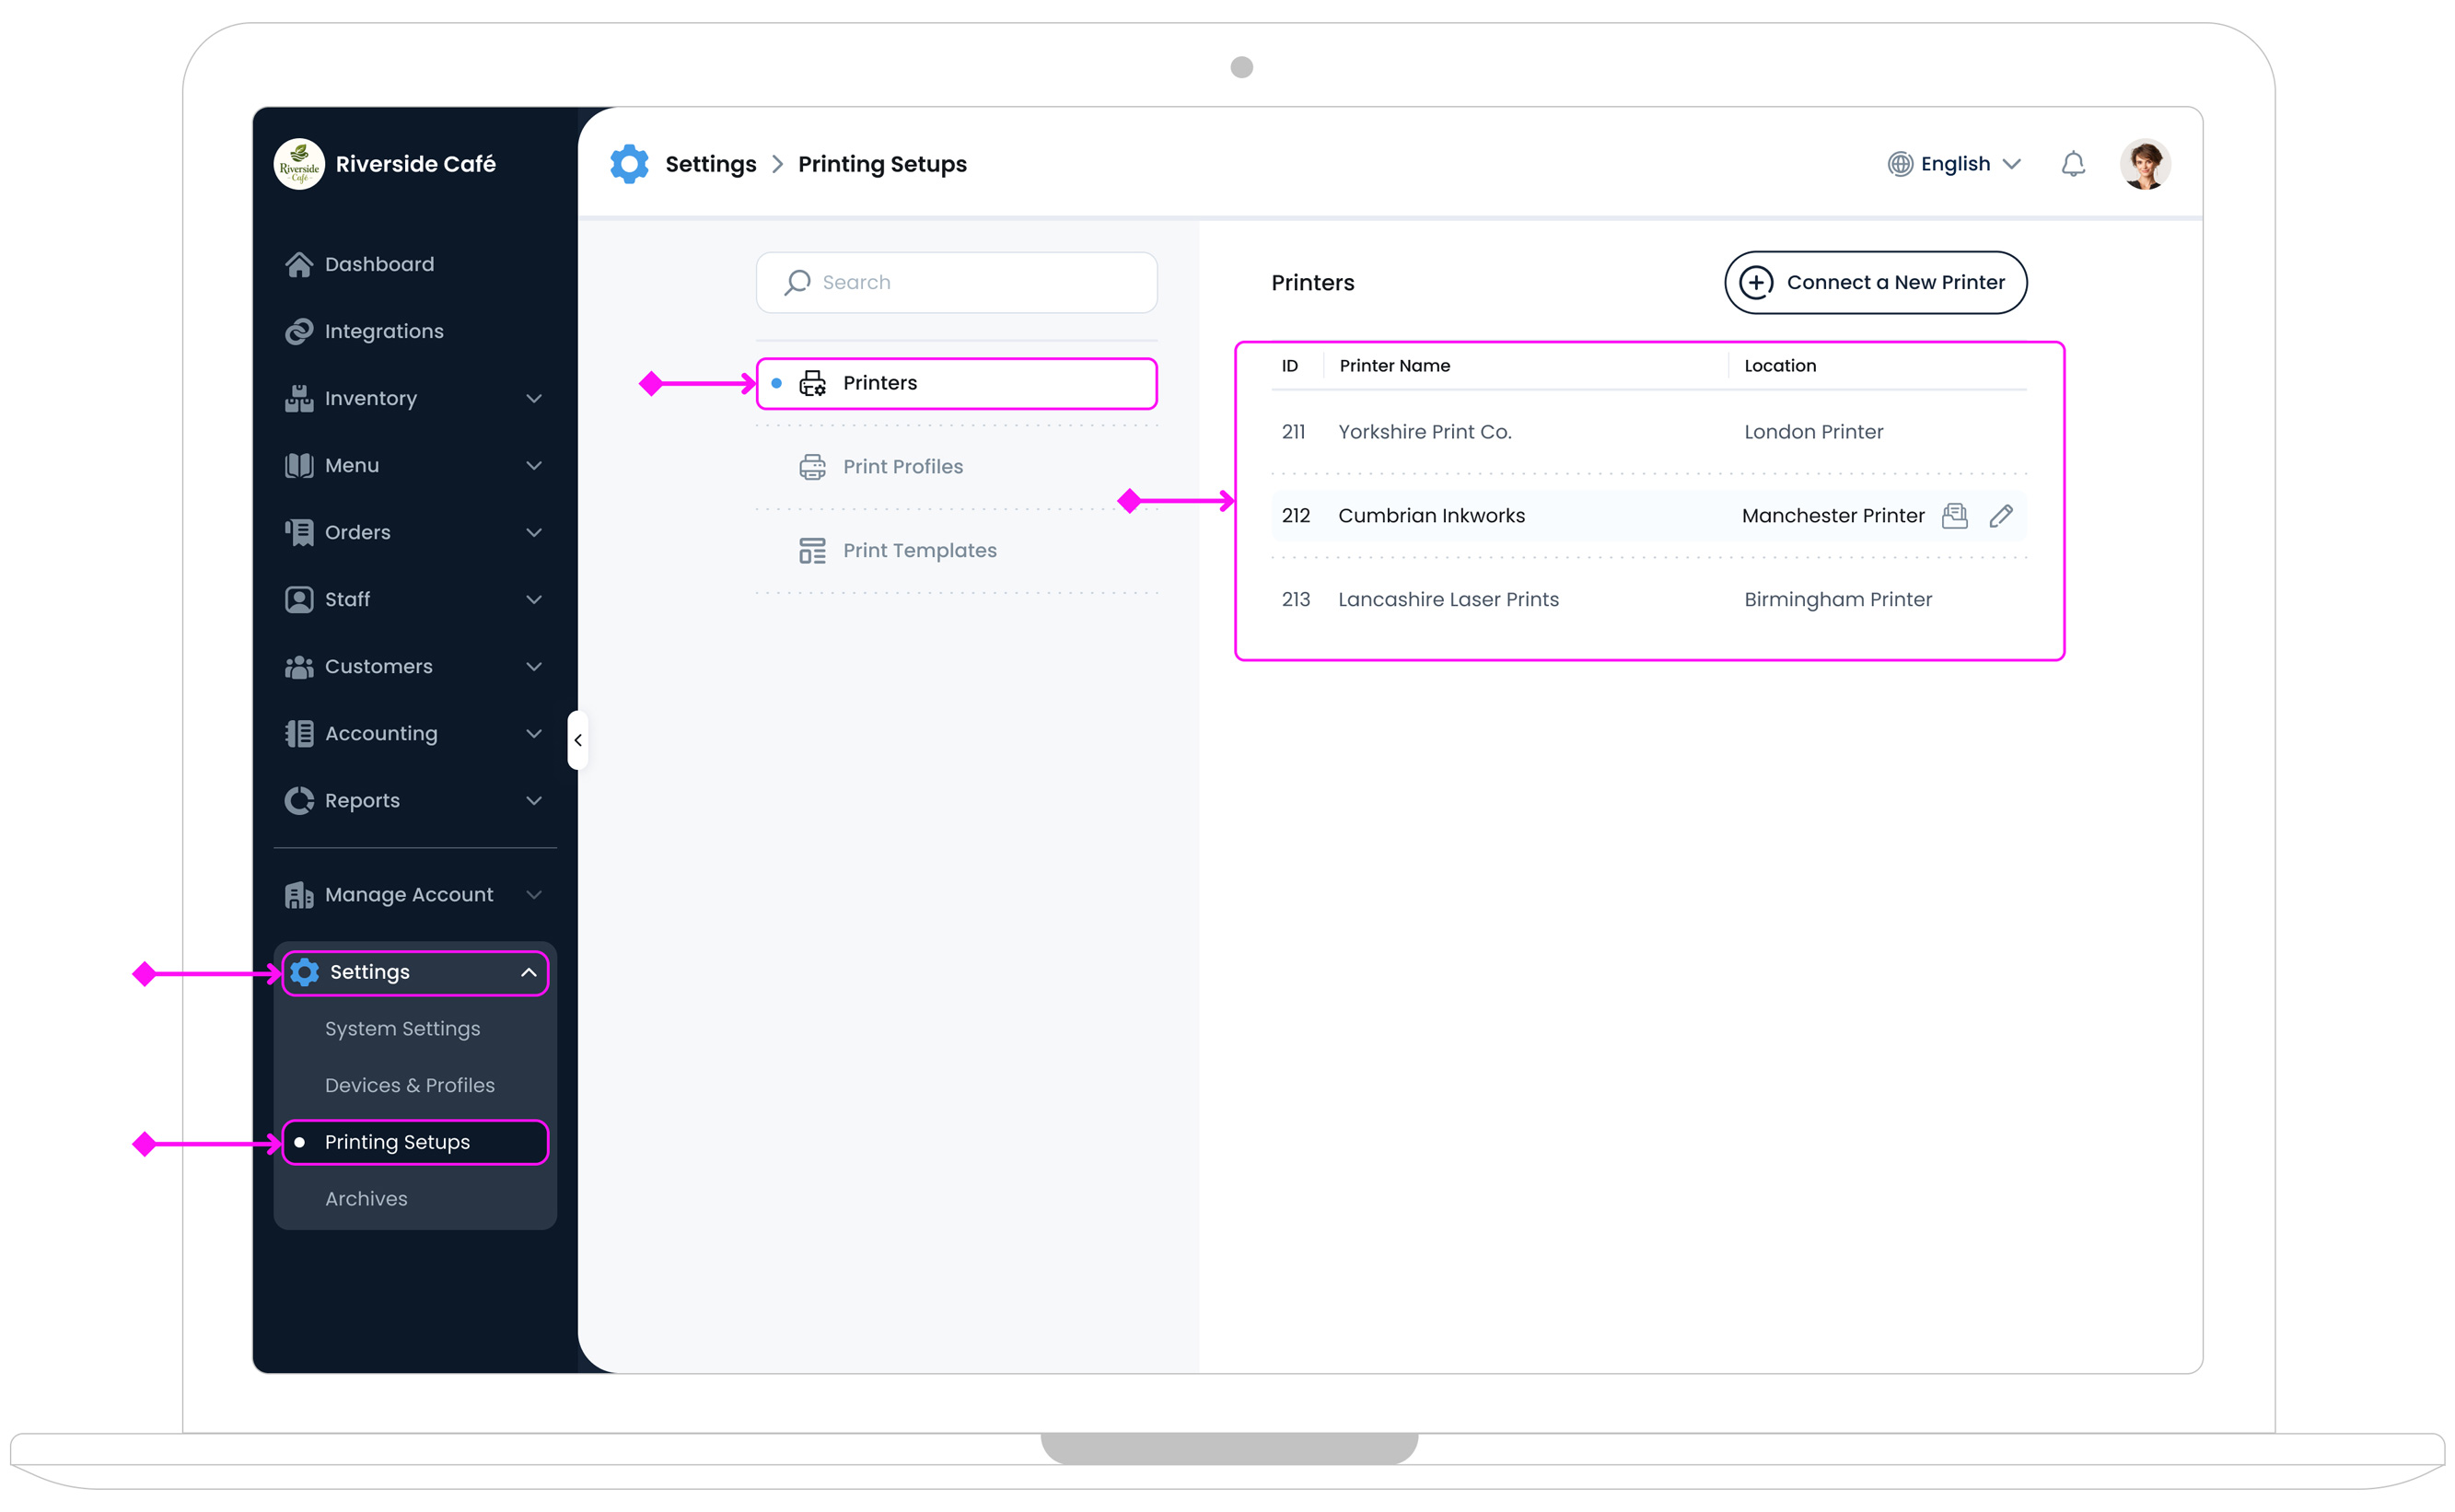
Open the TechSuite portal and go to Settings > Printing Setups > Printers. This page shows every printer already connected to your account. Click Connect New Printer to open the connection panel.
Step 1: Enter Printer Details
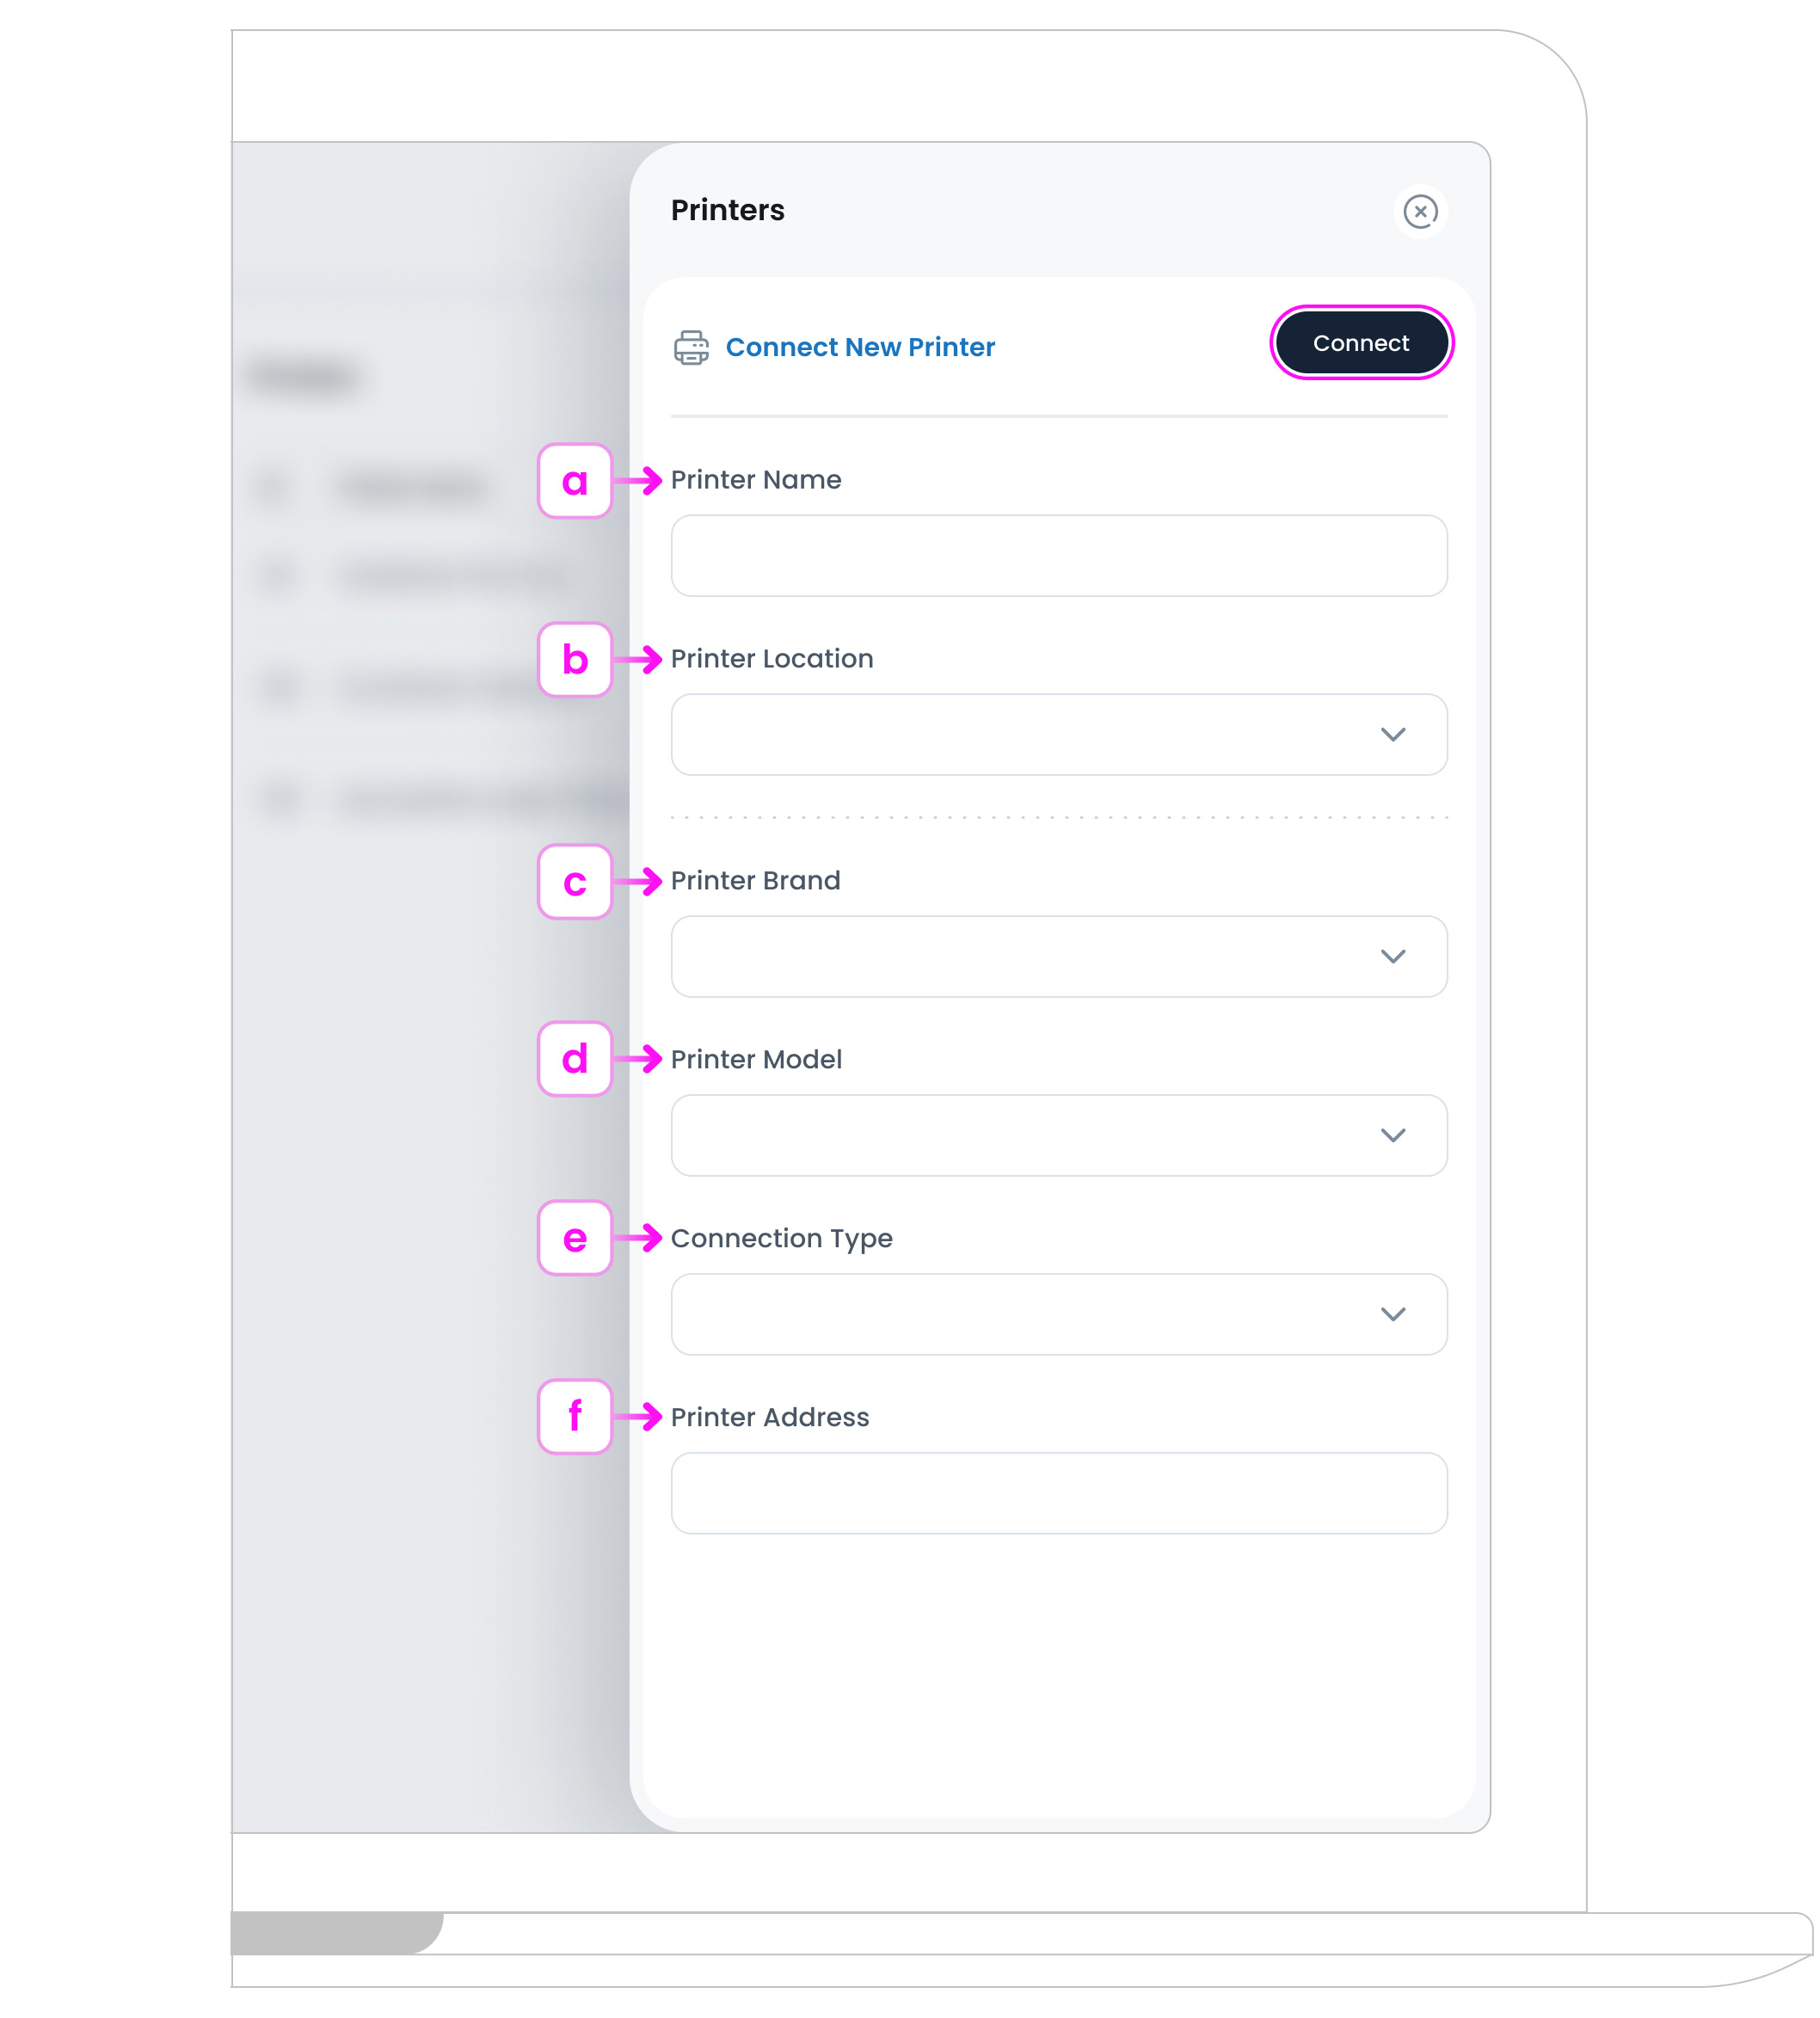
a. Printer Name
Give the printer a clear name your team will recognise (e.g., Kitchen Printer, Bar Receipt, Front Counter Till).
b. Printer Location
Choose the branch or site where this printer is physically installed.
c. Printer Brand
Select the manufacturer from the supported list (e.g., Star, Epson, Sunmi).
d. Printer Model
Pick the exact model. Using the correct model ensures the driver and commands match.
e. Connection Type
Choose how this printer will connect to TechSuite:
e.1. USB:
For a printer plugged directly into a computer or POS terminal. Use the original USB cable, plug into a powered USB port (or hub/dock), and make sure the device’s OS can see the printer (Printers & Scanners on desktop, or the vendor app on tablets). No IP address is required. If your brand needs a driver/companion app, install it first, then choose USB as the Connection Type and select the correct Brand and Model in the form.
e.2. Ethernet:
For a network printer connected by cable to your router/switch. Connect the Ethernet (RJ-45) cable, power on the printer, then get its IP address (print a “network config” report or check the printer’s screen/app). Make sure your POS/device is on the same network. Enter that IP in Printer Address, and consider reserving it in your router (DHCP reservation) so it doesn’t change.
e.3. Bluetooth:
For printers paired directly with your POS/tablet via Bluetooth. Pair the printer in the device’s Bluetooth settings first, keep it within short range (typically up to 10 m), and note that no IP address is required. Some brands may also need a companion app/driver to enable printing permissions.
e.4. Wi-Fi:
For a wireless network printer on the same Wi-Fi as your POS/device. Use the printer’s panel/app to join the correct SSID (many models require 2.4 GHz), then obtain its IP address. Ensure signal strength is good and that your POS is on the same network. Enter the IP in Printer Address and, if possible, reserve it on your router.
e.5. Cloud:
For cloud-enabled printers that receive jobs over the internet via the vendor’s cloud service. Create/sign in to the printer vendor’s cloud account, register the device there, and complete any required linking in TechSuite (if applicable). A stable internet connection is essential no local IP address is needed.
f. Printer Address (network printers only)
Enter the printer’s IP address (for example, 192.168.0.144).
Find Printer’s IP
To find a printer’s IP, print the “Network Configuration/Status” page from the printer (on many Star/Epson models, hold the Feed/Test button while powering on), check the printer’s on-device screen under Network/Status, or look in your router’s DHCP client list for the printer’s name/MAC address.
g. Save the Connection
Click Connect. The printer will be added to your list and ready to assign in your printing setup.
Tips & Best Practices
- Use simple, location-based names (Kitchen Printer, Bar Receipt) so staff pick the right one quickly.
- Make sure network printers (Ethernet/Wi-Fi) and the POS/device are on the same network segment.
- If you choose Cloud, you may need to sign in or link your vendor account during setup.
- Later, link each printer to a Print Profile to control what it prints (e.g., kitchen tickets vs. receipts).
What’s Next?
Create or update your Print Profiles so each printer receives the correct documents and categories. After connecting, run a quick test (self-test from the printer or a small test order) to confirm printing works as expected.