Customer Groups
Customer Groups allow you to categorise your customers under labels like General Customer, VIP, or any custom group that fits your business needs. Once created, these groups can be used to personalise pricing, create targeted offers, or organise your customer base more effectively.
Understanding Customer Groups
Customer Groups appear as a dropdown menu when creating or editing a customer profile. Assigning a group lets you:
- Personalise pricing or promotions
- Segment offers (e.g. loyalty discounts or member-only menus)
- Separate regular customers from VIPs, staff accounts, or wholesale buyers
They don’t affect customer visibility but help tailor the experience and track performance by group.
To Get Started
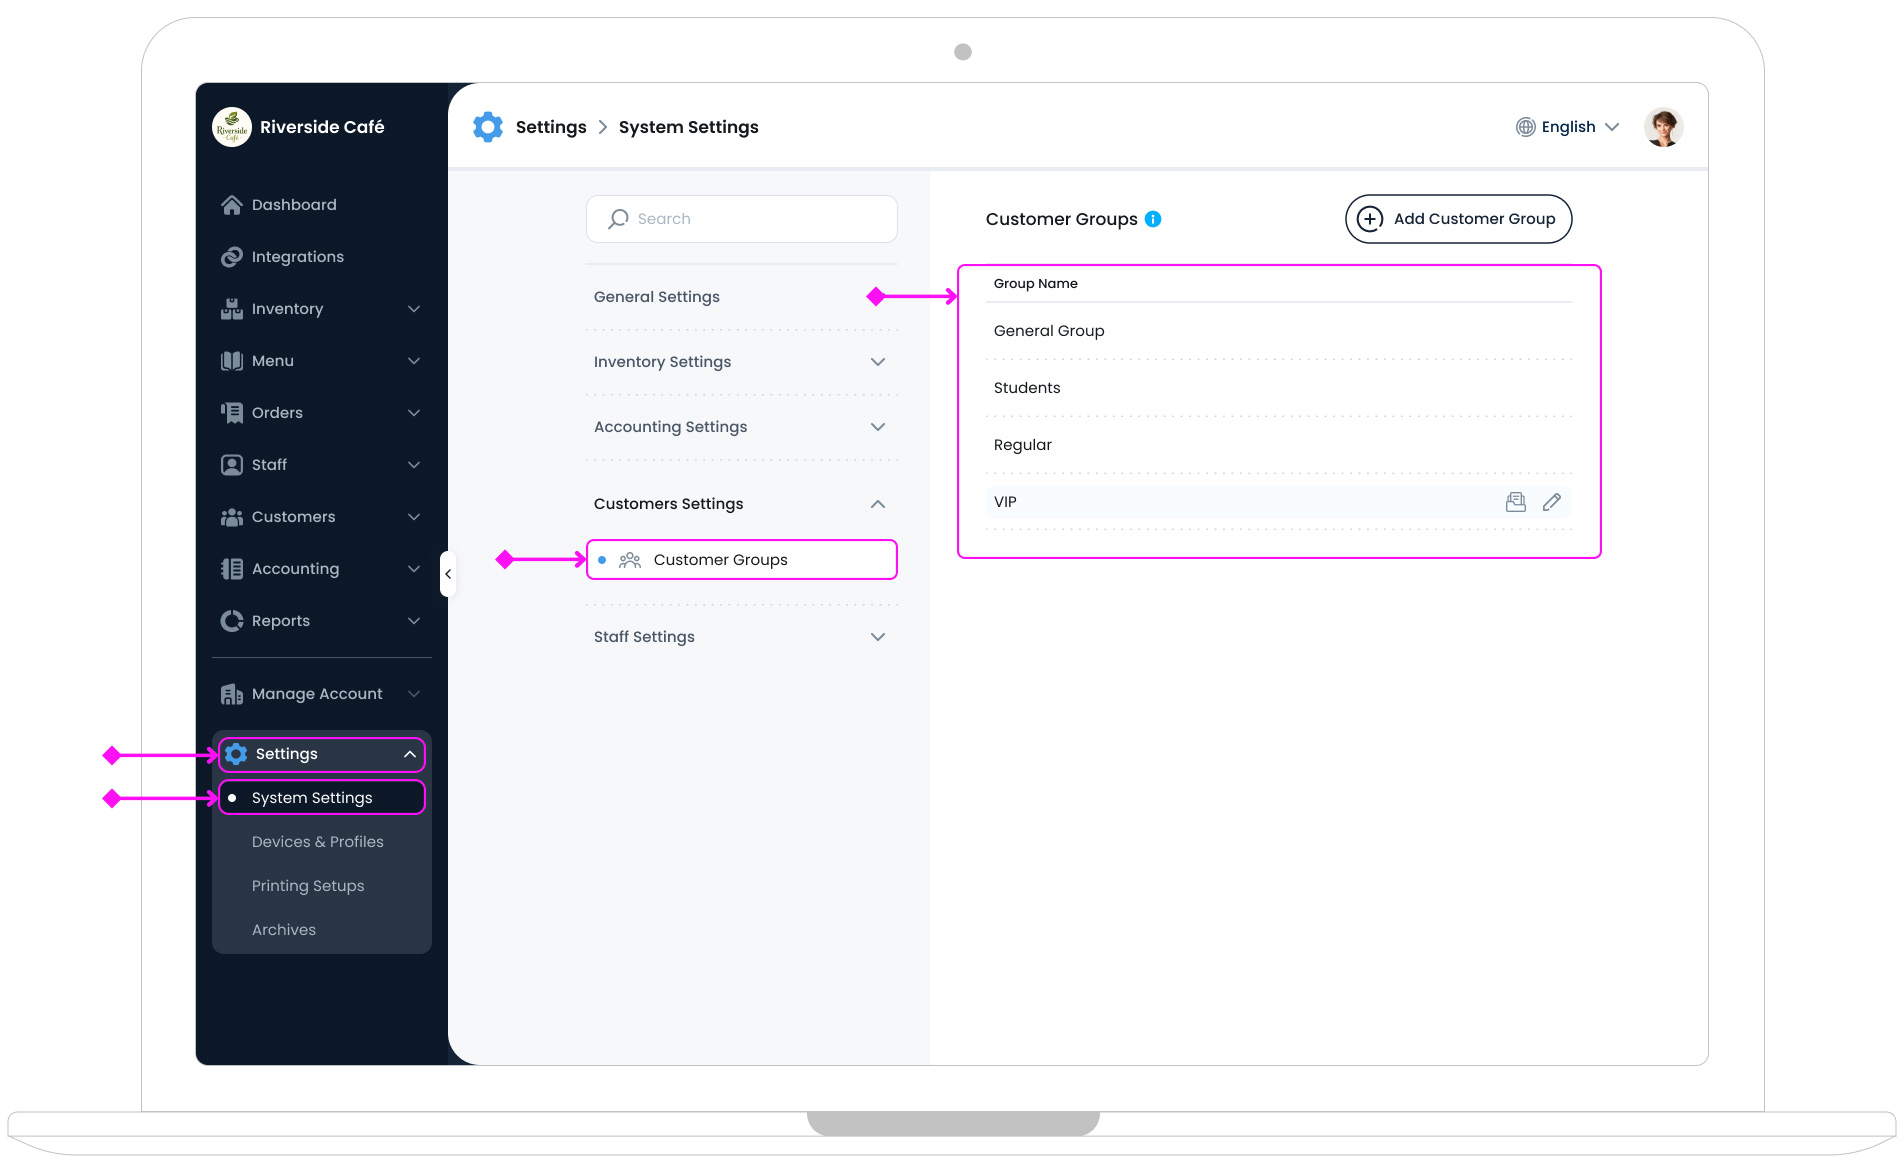
To access Customer Groups settings, log in to the TechSuite portal and go to Settings > System Settings from the sidebar. Next, under the Customer Settings section, click Customer Groups. On this page, you can create, view, and manage groups used across the system.
Adding a New Customer Group
To add a new customer group, click the Add Customer Group button  in the top-right corner of the page. Then fill in the following fields:
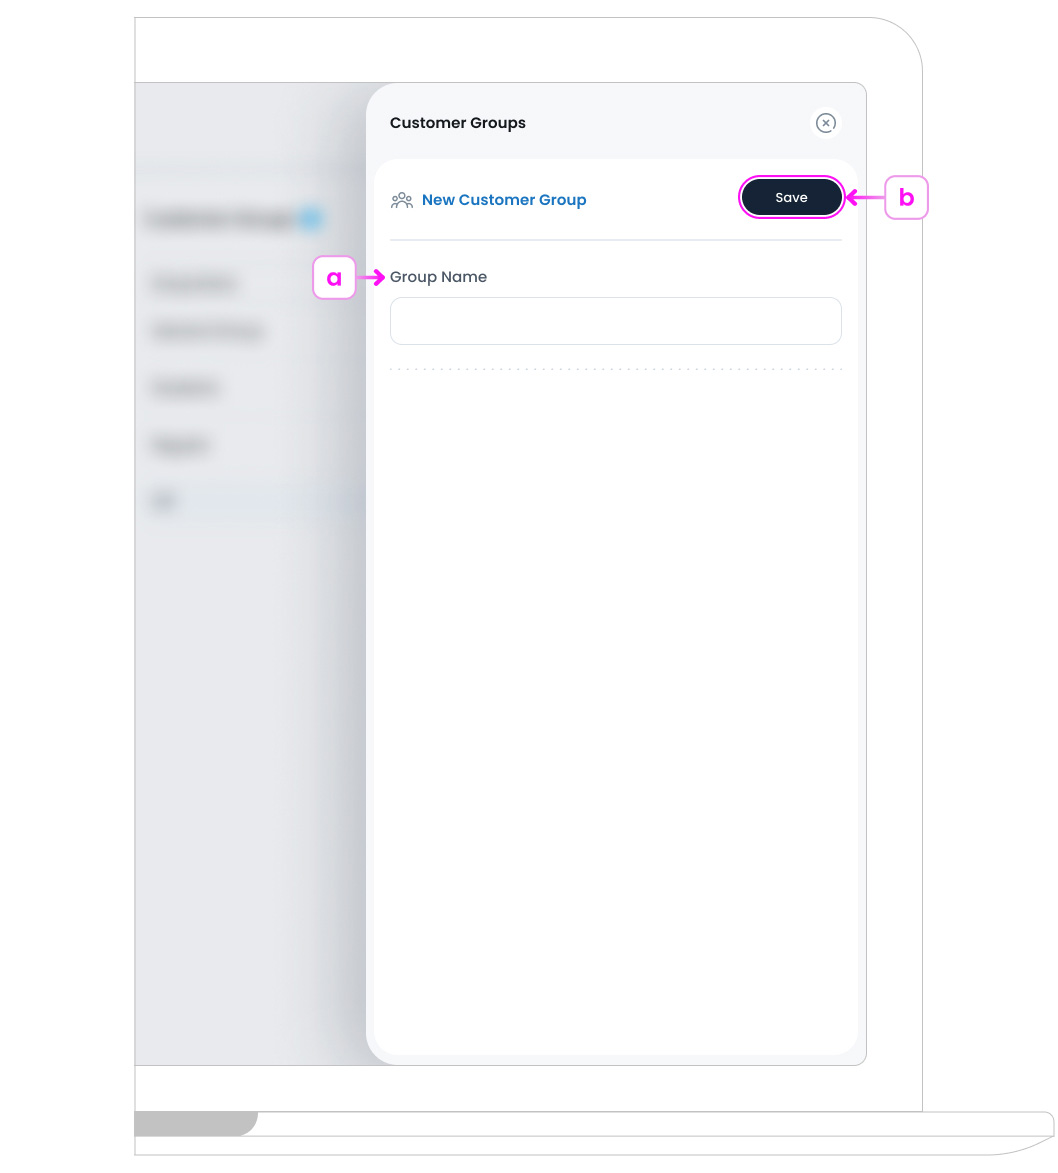
a. Group Name
Enter a name that clearly identifies the type of customer (like VIP, General Customer, Staff, Corporate Account).
b. Save the Group
Click the Save button  to add the group to your system. It will now appear as a selectable option when adding or updating customer profiles.
Customer Group Page Overview
The Customer Groups page allows you to organise your customer base into labelled segments, such as VIPs or general users. These groups can help personalise offers, manage loyalty rewards, or simplify reporting and user filtering.
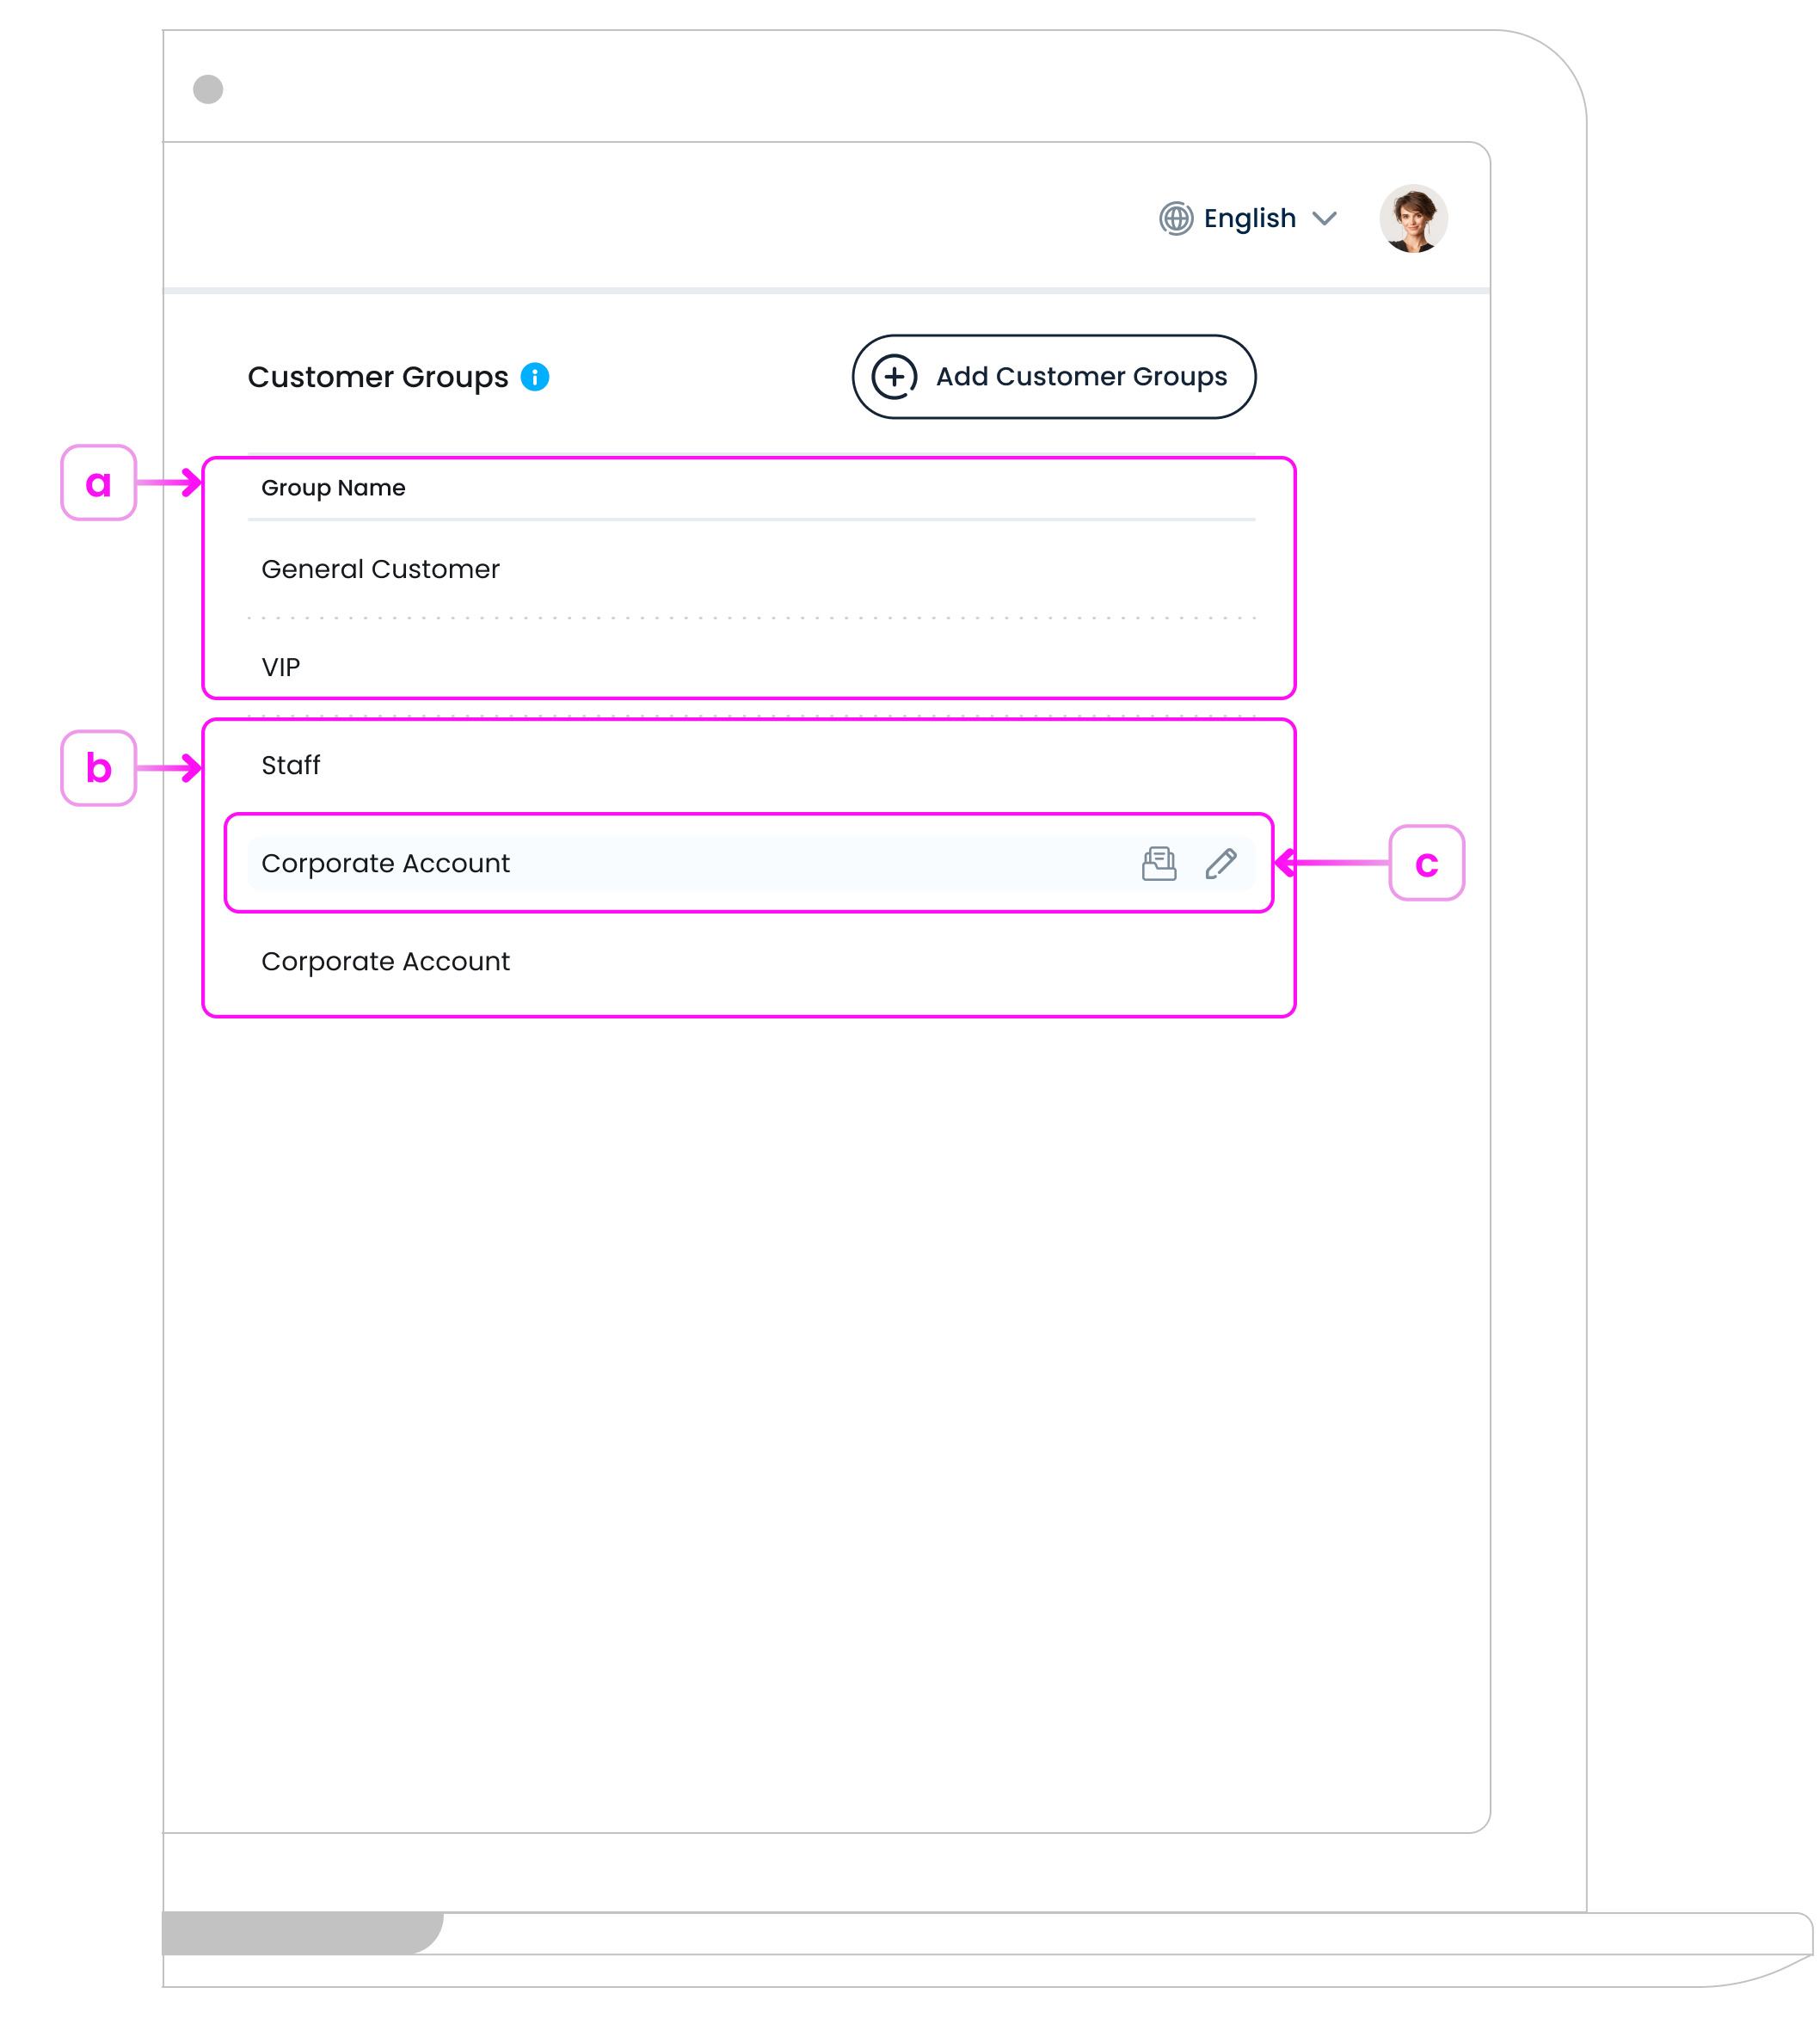
a. Built-in Groups
Your system includes two default groups: General Customer and VIP. These serve as default options for quickly assigning customers to standard or premium categories.
b. Custom Groups
You can add as many custom groups as needed, for example: “Wholesale Clients”, “Loyalty Program A”, or “Event Guests”. These custom groups help you organise different types of customers and apply targeted rules or communications.
c. Understanding Customer Group Rows
Each group appears as a row in the list and includes the following actions:

Here’s what each part of the row means:
- Group Name: Displays the label of the group (e.g. VIP, Staff, General Customer).
- Edit Customer Group Button: An edit icon appears when you hover over a row. Click it to open and update the group’s name.
- Archive Customer Group Button: An archive icon appears when you hover over a row. Use this to delete the group from the list while keeping a record of it in your system.
What’s Next?
You can now assign Customer Groups (like VIP or Kids) when adding a new customer profile.