Order History Page Overview
The Order History page allows you to view and manage all past orders across your business, whether completed, cancelled, or placed on hold. This page gives your team full visibility into historical order data and supports all order channels, including POS, Kiosk, Embargo, and Uber Eats. If you operate across multiple branches, Order History displays data from all location in one place.

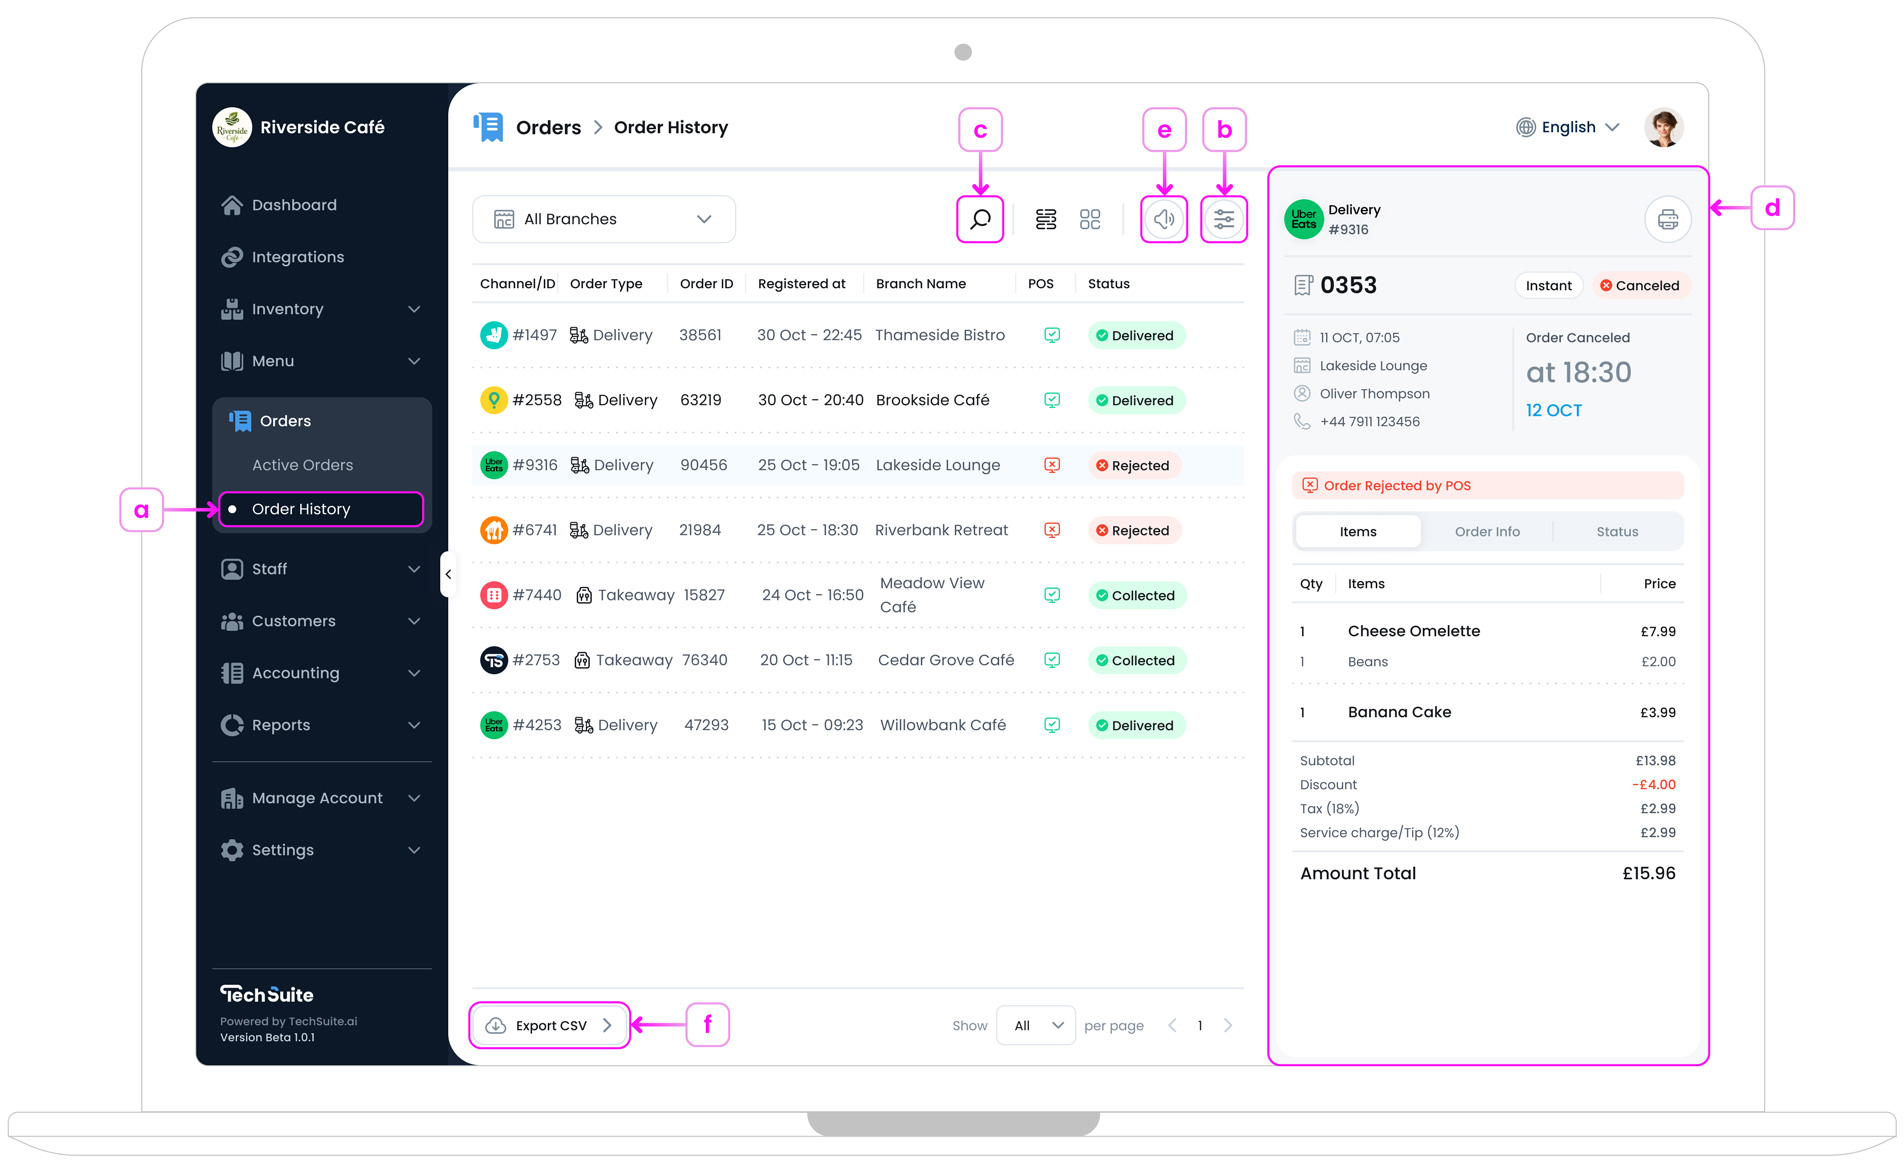
a. Accessing Order History Page
To access your order history list, log in to the TechSuite portal. From the sidebar, select Orders > Order History. The page displays a scrollable list of all past orders on the left. When you click on any entry, a detailed preview appears in the panel on the right, giving you a full breakdown of that order.
b. Filters
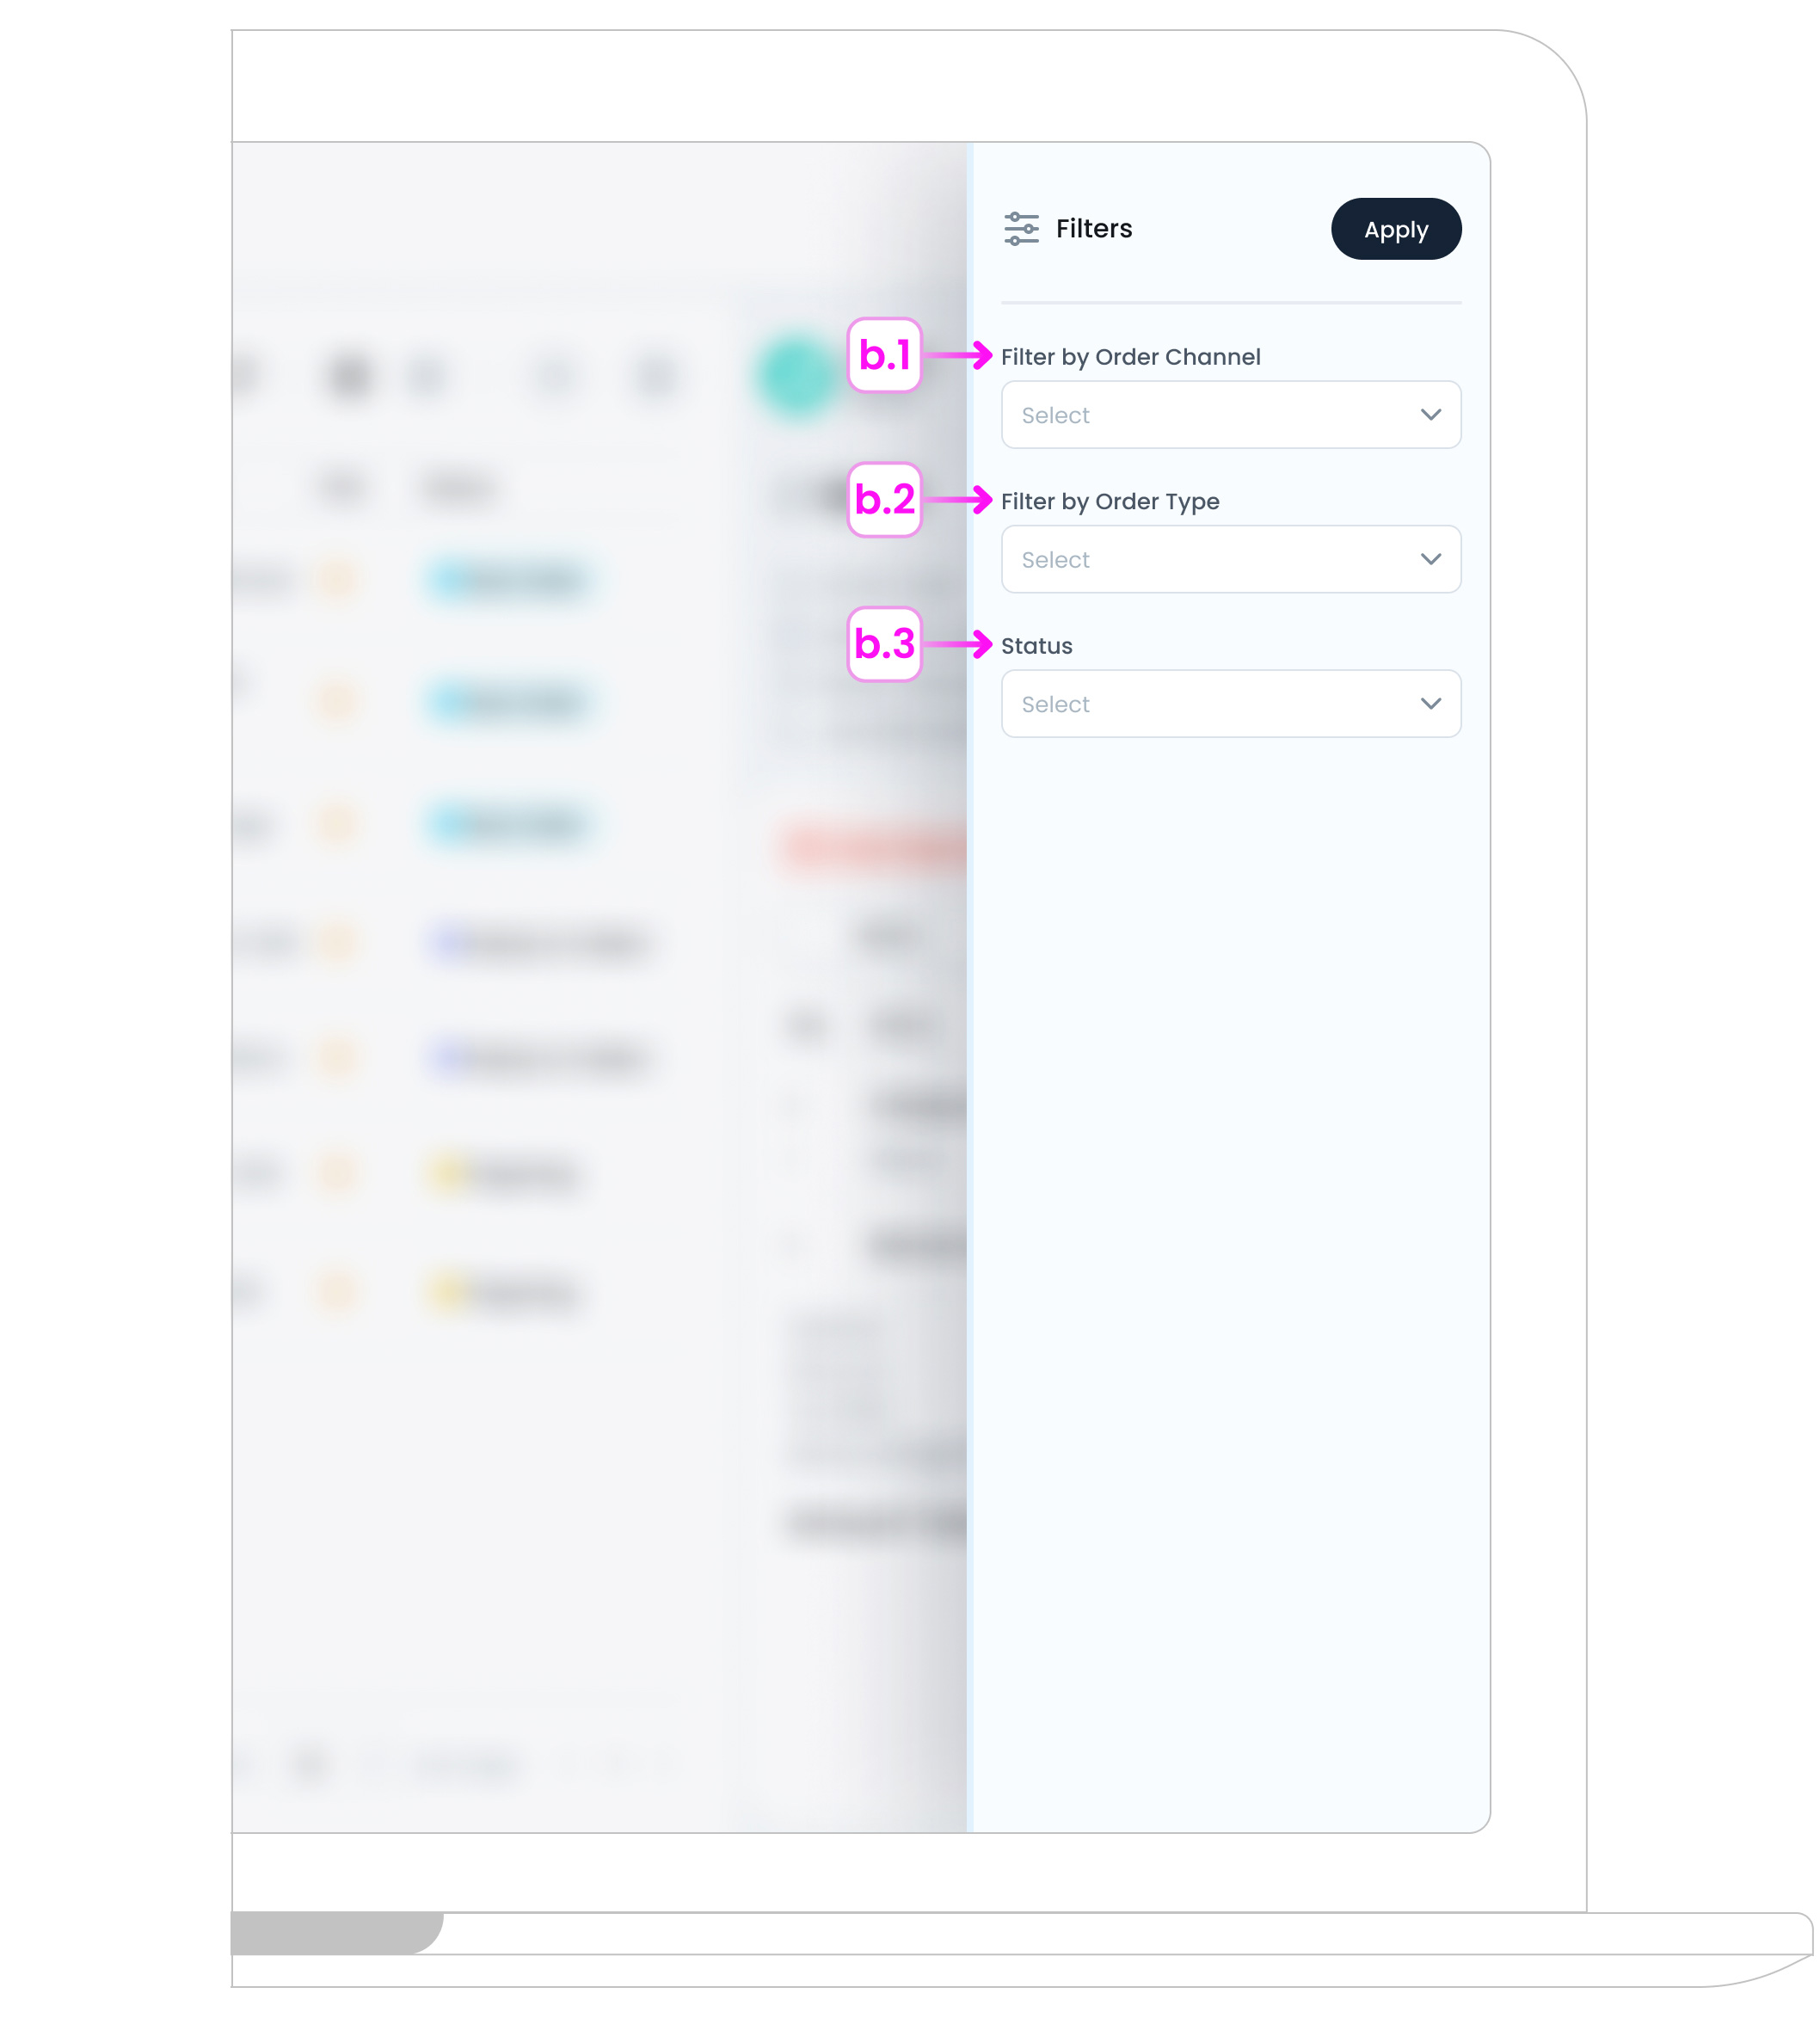
At the top of the page, you’ll find filter options to help you narrow down the list of orders.

You can filter by:
- b.1. Channel (e.g., POS, Embargo, Uber Eats)
- b.2. Order Type (e.g., Instant, Pre-Order)
- b.3. Order Status (e.g., POS, Completed, Cancelled, On Hold)
These filters make it easy to locate specific types of orders or isolate issues like rejected or paused orders.
c. Search
Use the search bar to find orders using any of the following details:
- Order ID
- Customer Information (e.g., Name or Email)
Search results update in real time, helping you quickly locate the order you’re looking for.
d. Order Details
Clicking on any order opens a quick-view panel on the right, showing key details like the order source, customer info, item list, and total amount. For full information, see Order History Details and Information.
e. Sound Setting
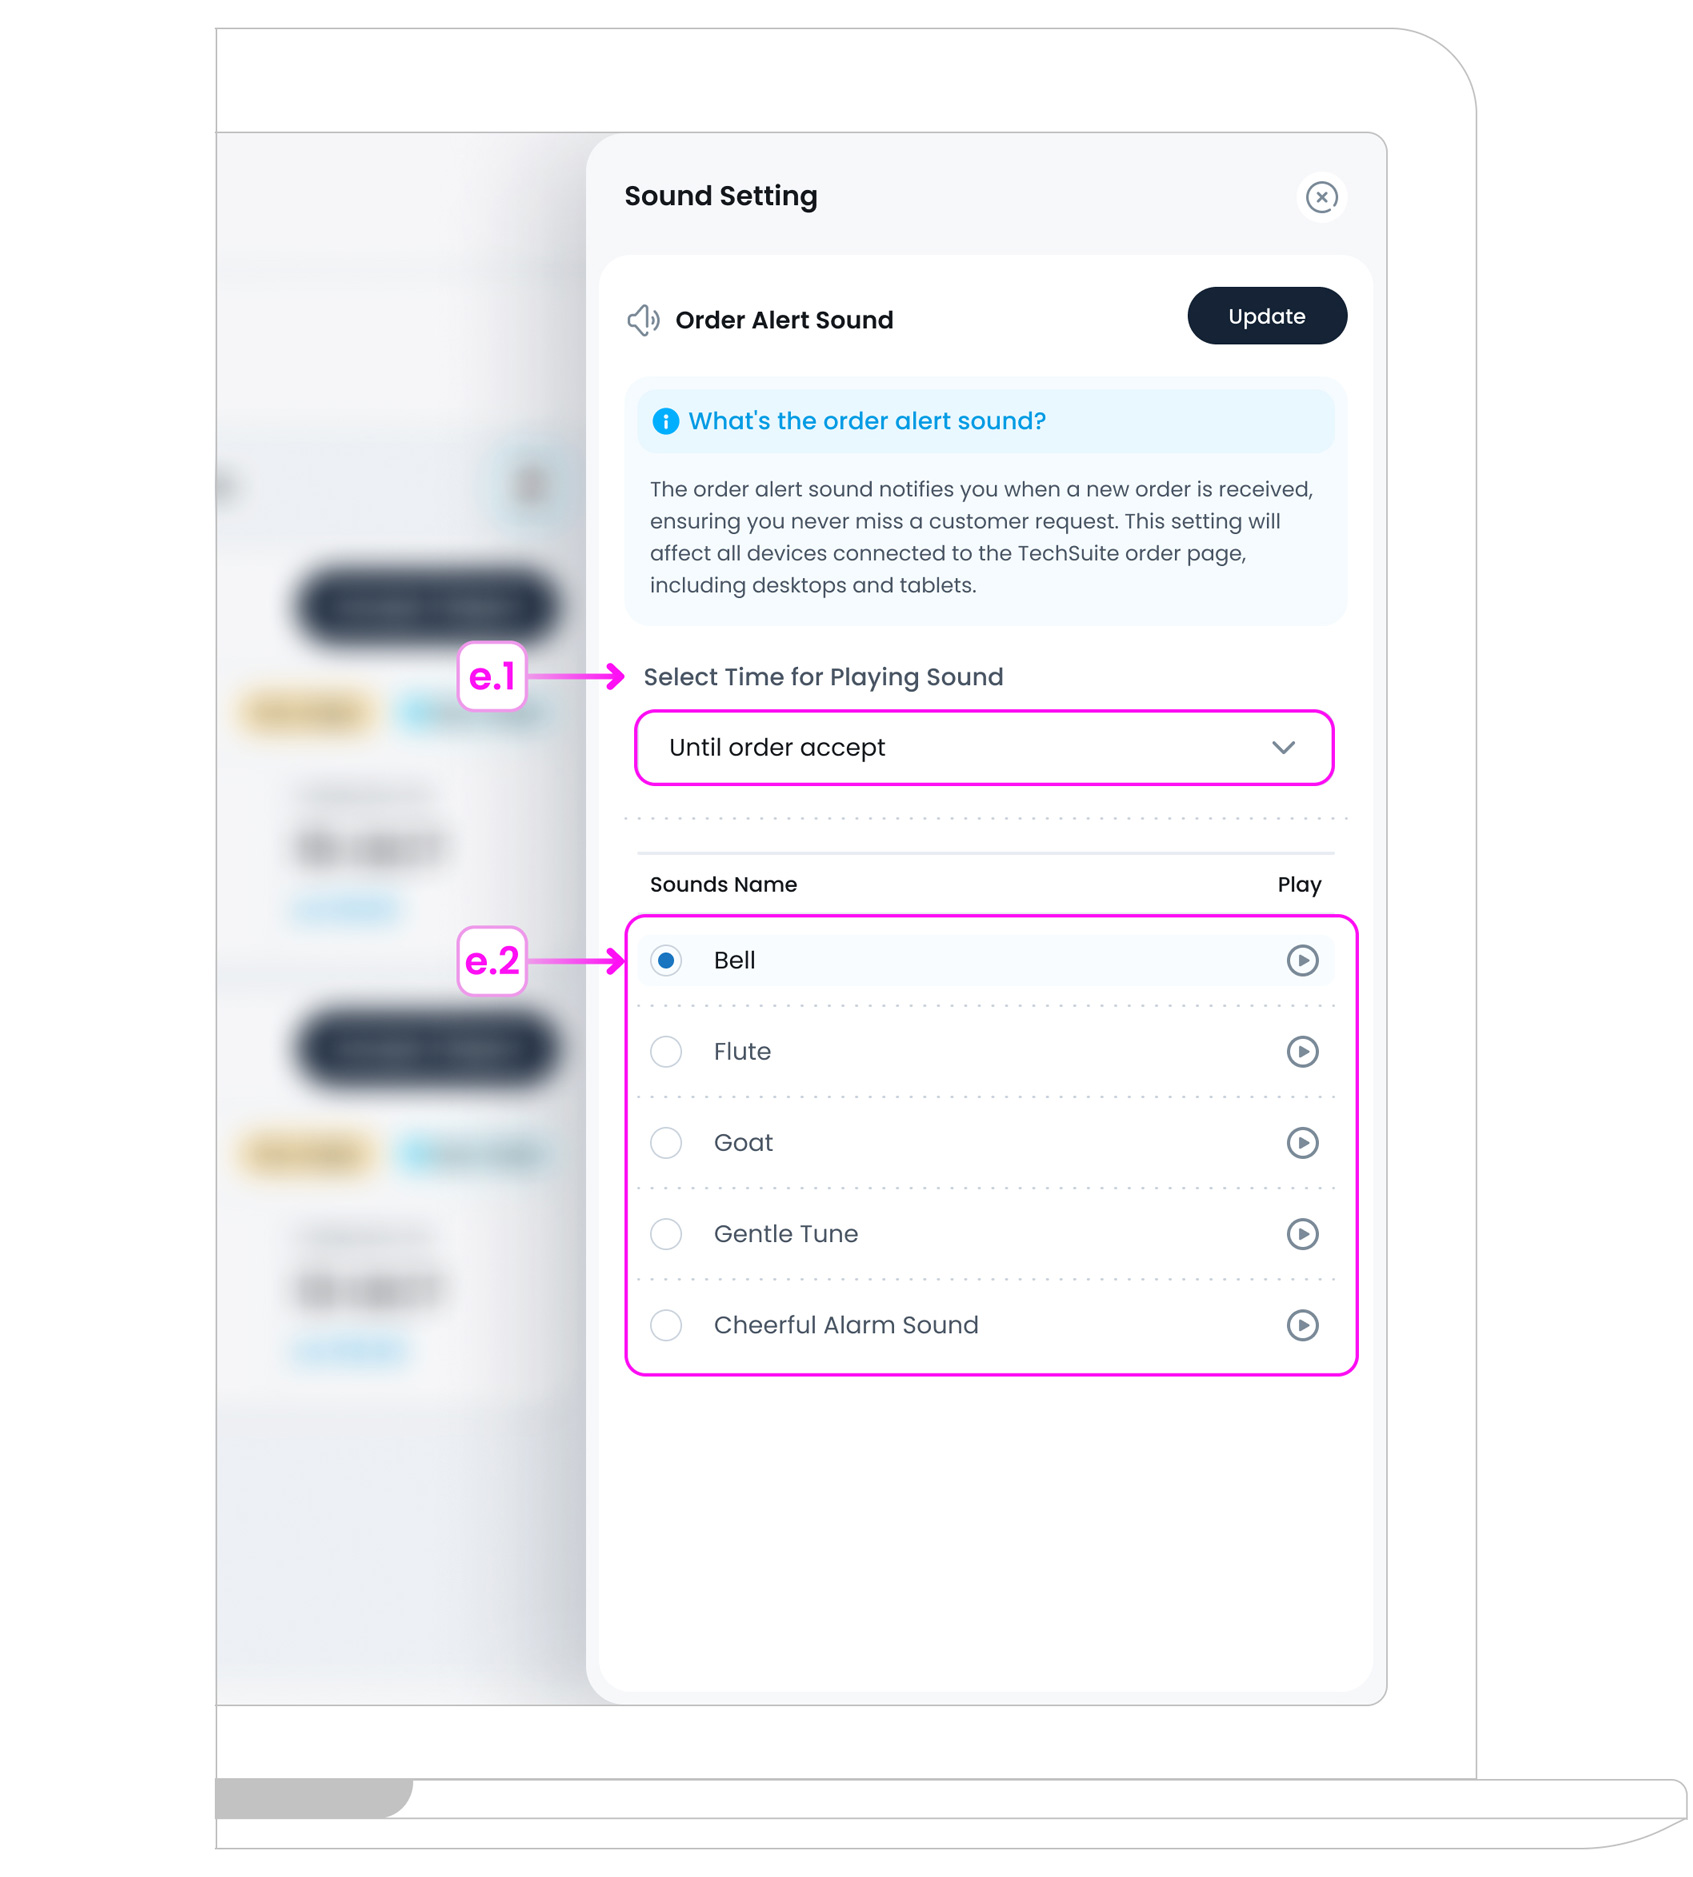
Order sound alerts are managed using the bell icon in the top-right corner of the screen. While sound settings only affect Active Orders, you can preview the available sounds from this page.

You can customise:
- e.1. Select Time for Playing Sound: Choose how long the alert sound should play when a new order arrives:
- Until the order is accepted: The sound will continue playing on loop until a staff member accepts the order. Ideal for busy environments where quick response is essential.
- Only once: The sound plays a single time when the order arrives. Best if your team is consistently monitoring the screen.
- No sound: Disables audio alerts entirely. Use this option if visual notifications are enough for your workflow.
- e.2. Sound Name: Pick from different sound options like Bell, Flute, Goat Sound. You can preview each one using the play icon.
This helps teams stay responsive during busy hours.
f. Exporting Order Data
Click the Export CSV Button at the bottom of the page to download a spreadsheet of your filtered order list. This is useful for:
- Accounting
- Performance reviews
- Operational audits
Exported files include fields such as:
- Order Type
- Order ID
- Time Registered
- Branch
- Order Status
Where to Start?
If you want to see the details of any past order, see Order History Details & Panel.