How to Accept a New Order
Accepting an order confirms you’re ready to prepare it. When you click Accept, the order status changes to Preparing and if your account includes the KDS module and you’ve connected a licensed KDS screen, it’s sent to the KDS for your kitchen team. You’ll continue to manage it in Active Orders while it’s in progress, and it’s also logged in Order History for full tracking.
Note
If you’ve enabled Auto-Accept in any third-party integration (e.g., delivery partners like Embargo), the Accept/Reject button will not appear. Those orders will be marked Preparing automatically and (if KDS is enabled) pushed to the KDS.
To Get Started
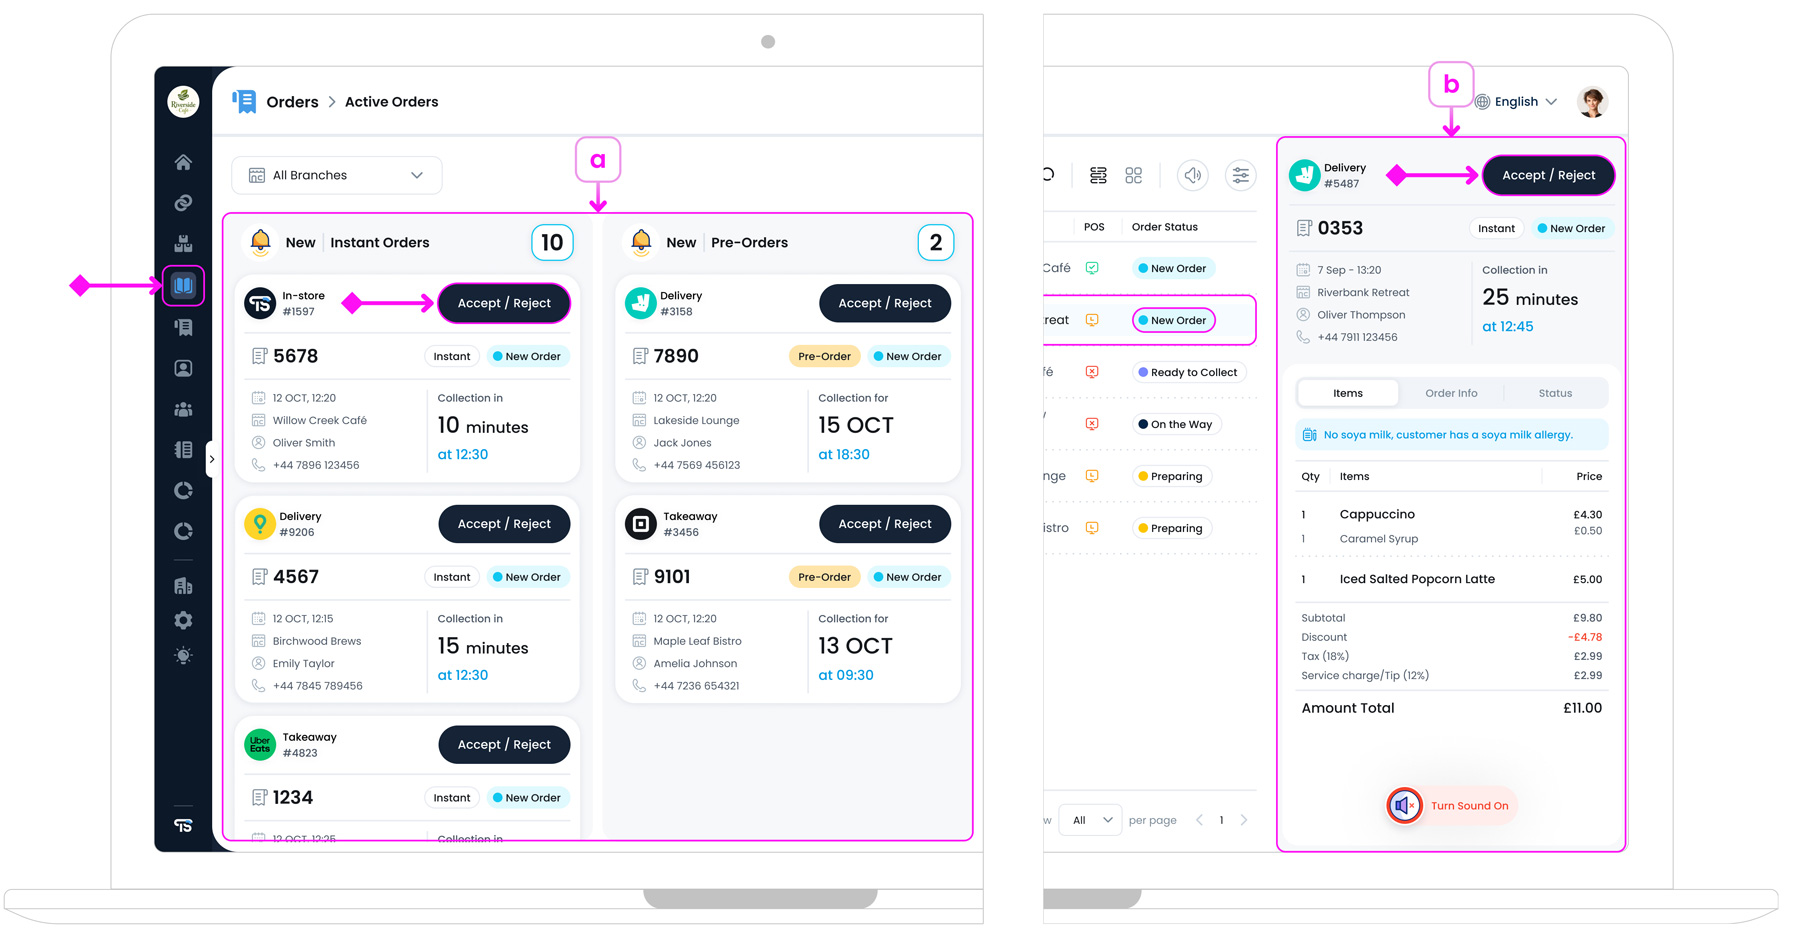
Log in to the TechSuite portal and go to Orders > Active Orders from the left sidebar. This opens your incoming orders.
- a. Card View: Look for the highlighted cards "New | Instant Orders" and (if pre-ordering is enabled) "New | Pre-orders". These cards surface new orders that need action.
- b. List View: New orders are marked with New Order tags. Click a row to open the Order Details panel on the right, at the top of this panel you’ll see the Accept/Reject buttons.
To open the Accept/Reject pop-up, click the Accept/Reject buttons on the order card (Card View) or in the row actions (List View). If Auto-Accept is enabled through a third-party integration, this pop-up may not appear and qualifying orders will move to Preparing automatically.
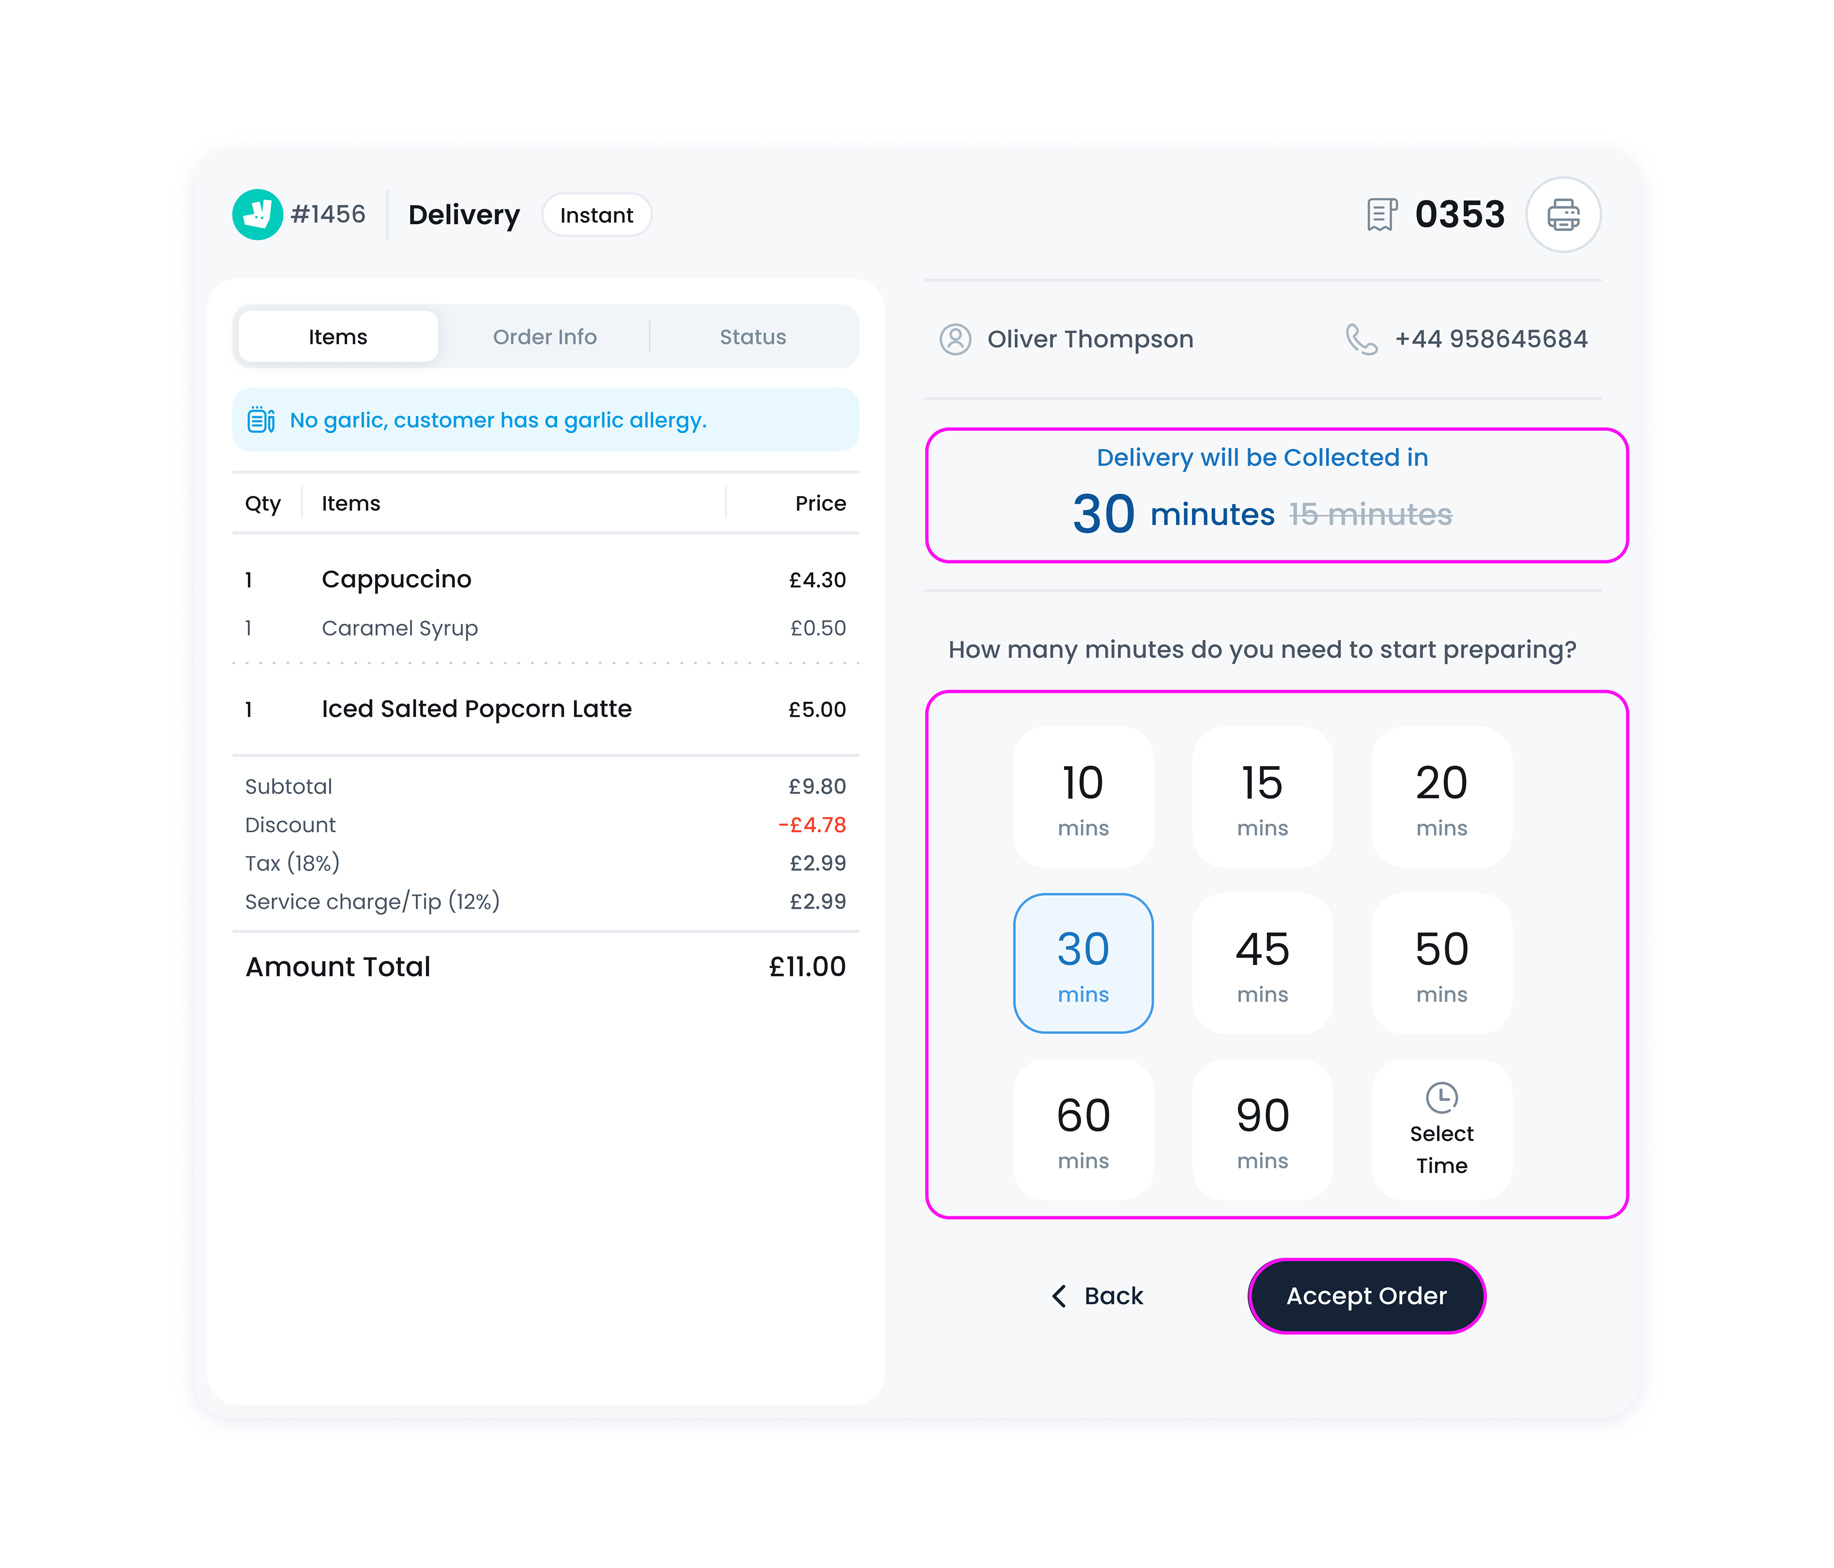
Step 1: Review Order Details on Accept/Reject Pop-up
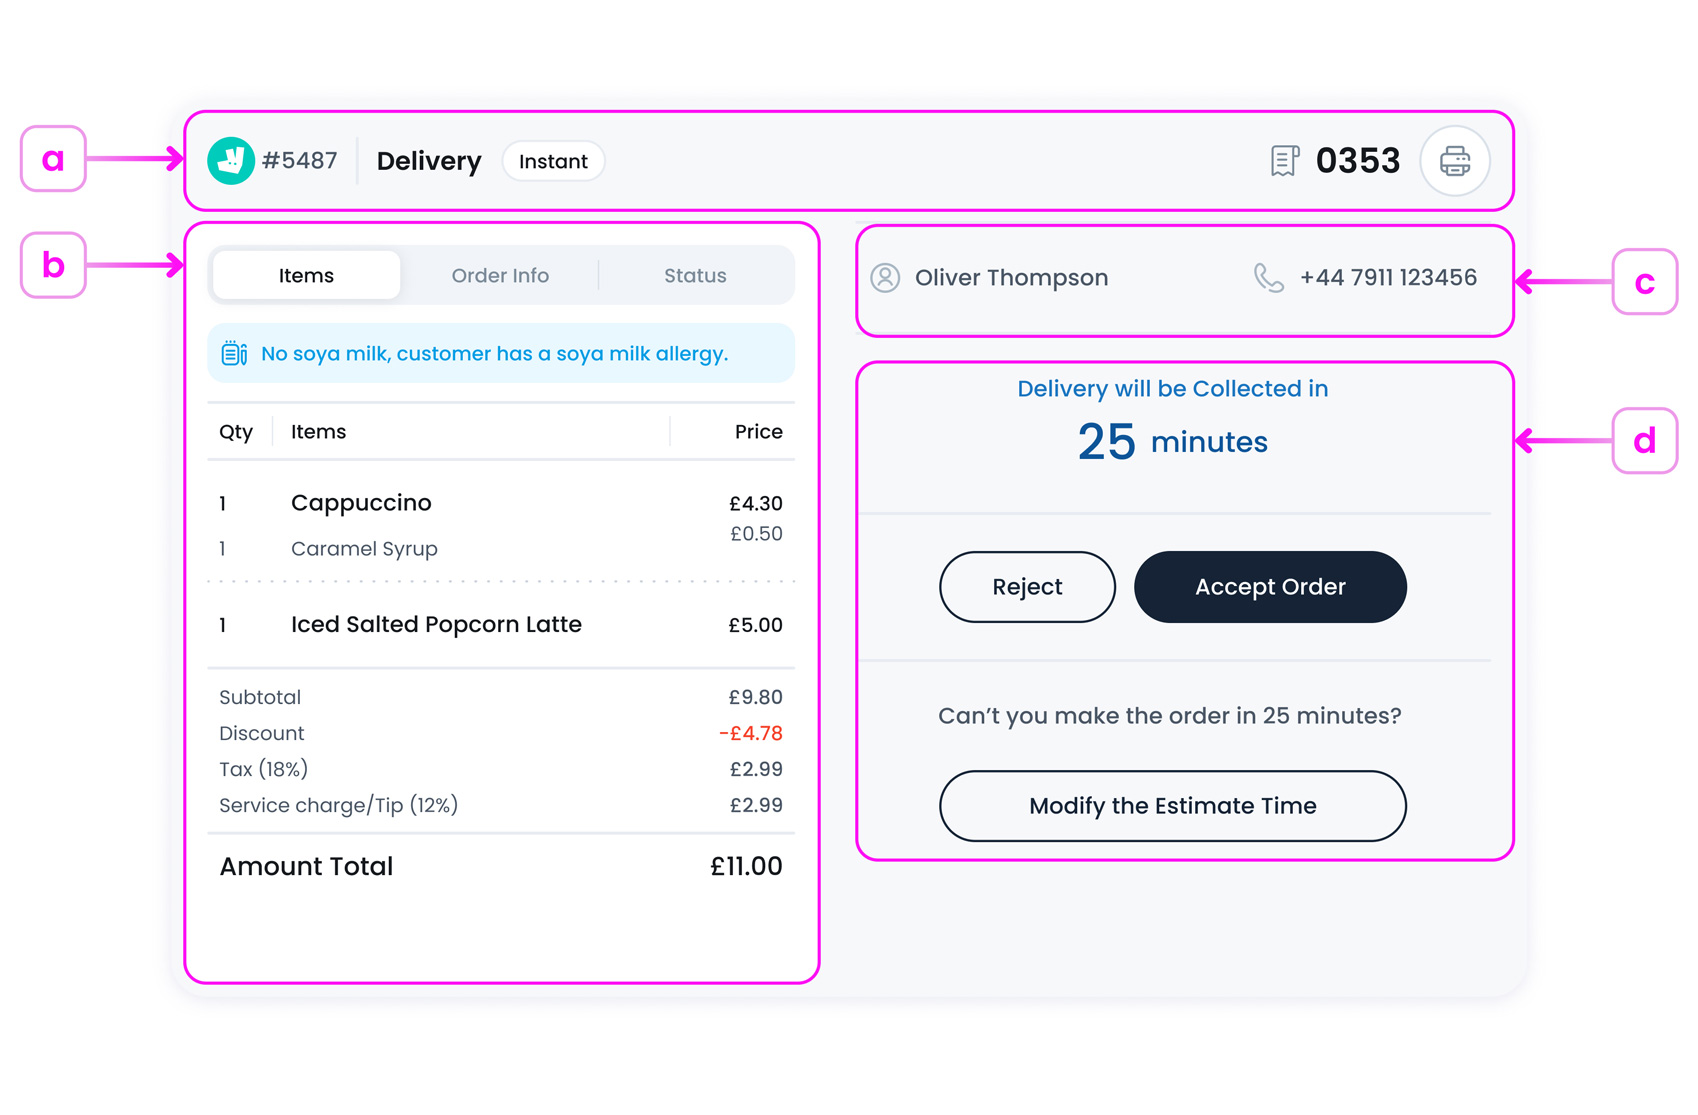
a. Order Summary
The full breakdown of what was ordered and the final price.

a.1. Channel & Channel ID
Shows where the order came from (POS, Kiosk, Online, or a delivery partner) and the partner/order code for quick reference and support.
a.2. Order Type
Indicates Delivery, Takeaway, or Dine-in so the correct hand-off process is followed.
a.3. Timing Mode
Displays whether the order is Instant (make now) or a Pre-order scheduled for later.
a.4. Order ID
The TechSuite ticket number (e.g., 5487) used for tracking and reporting.
a.5. Print Button
Manually print a receipt/kitchen ticket if needed.
b. Order Information
Below the order summary, you’ll find the Order Details panel, which is divided into three tabs: Items, Order Info & Status
Items Tab
This is where you can see what the customer ordered and any special notes. You’ll find:
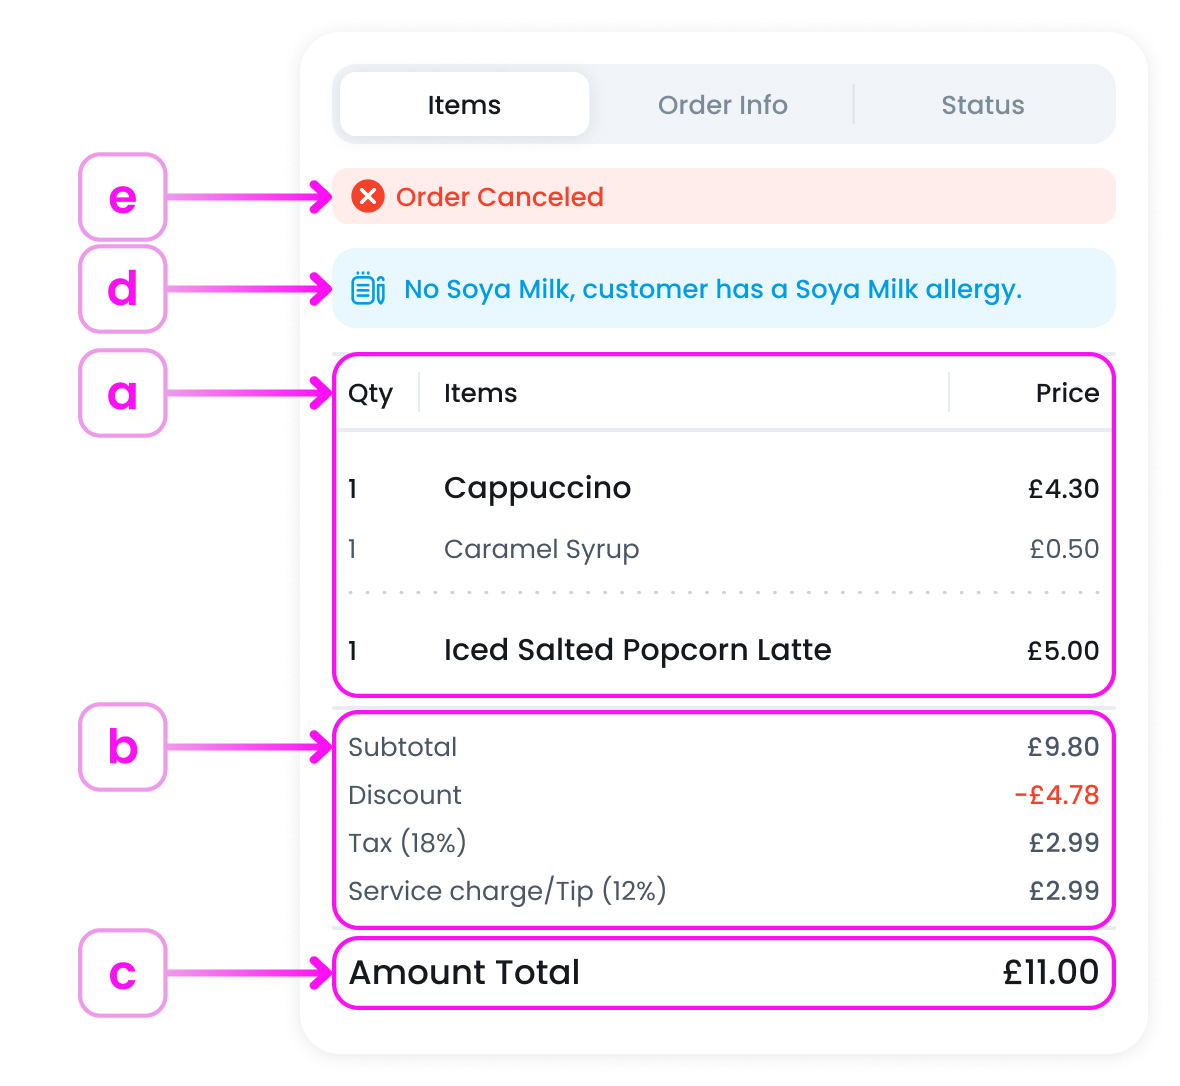
- a. A list of items, including customisations or modifiers (like extra syrup)
- b. Subtotal, discounts, tax, and service charges
- c. The total amount paid by the customer
- d. Allergy alerts or special notes (e.g., “No garlic”)
- e. If the order was cancelled, a red Order Cancelled banner will appear at the top
Order Info Tab
This tab provides all the customer and delivery information, such as:
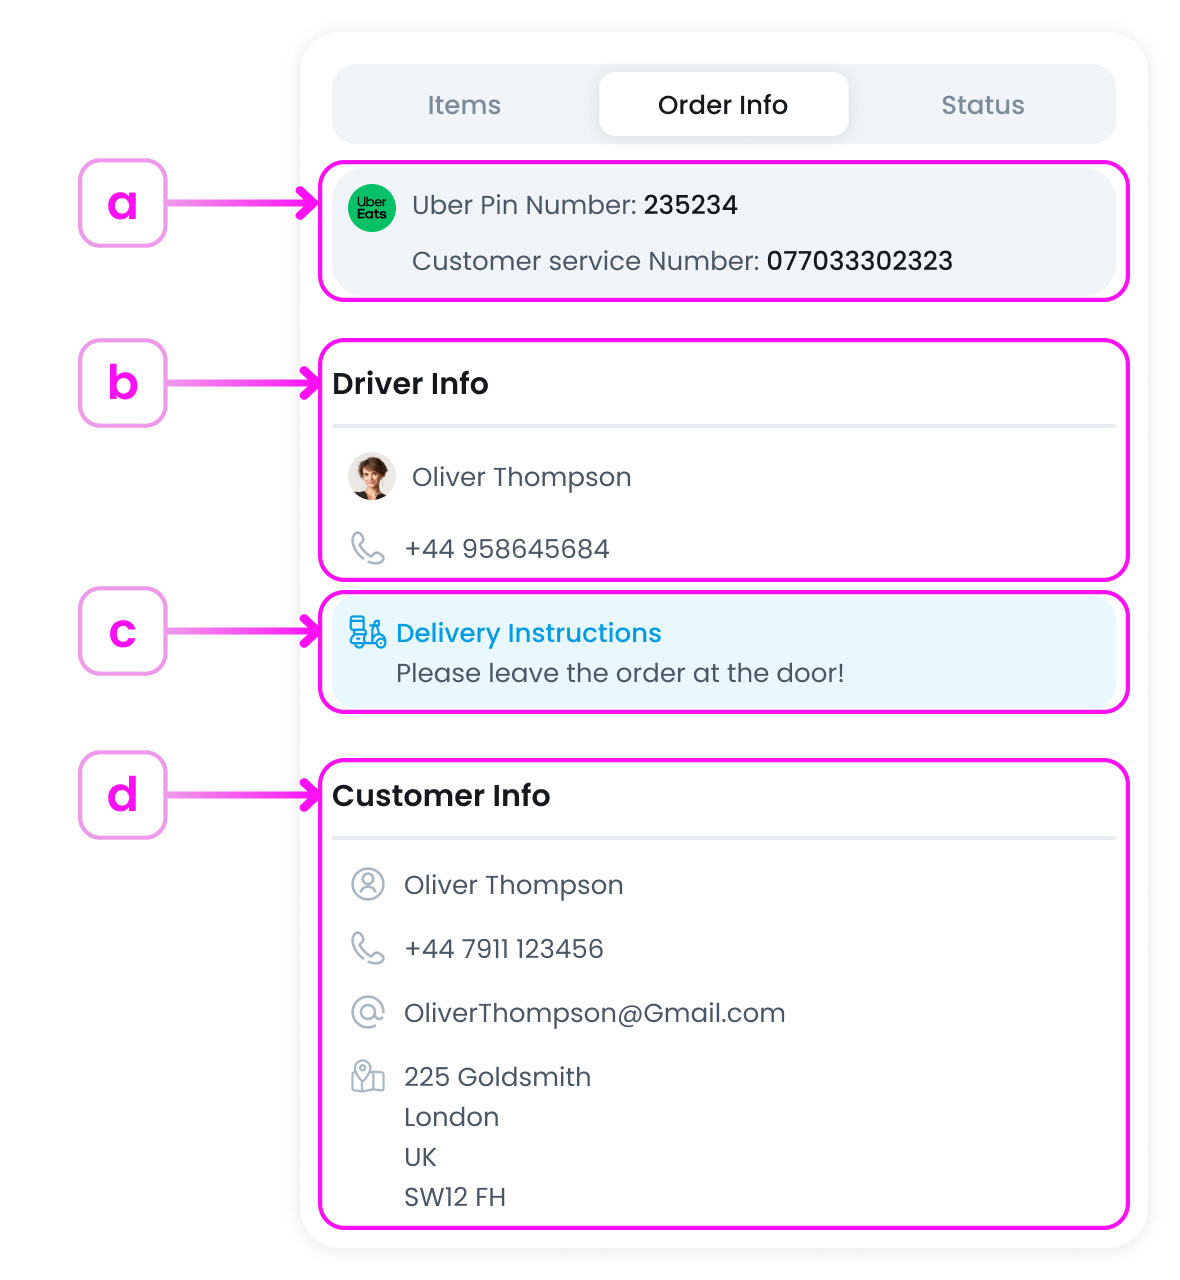
- a. Delivery channel (e.g., Uber Eats) and reference numbers (like Uber PIN)
- b. Driver details: name, phone number, and instructions (if provided)
- c. Any additional delivery instructions (e.g., “Leave at the door”)
- d. Customer name, phone, email, and delivery address
Status Tab
The Status tab tracks the entire order journey in a step-by-step format. You’ll see time-stamped updates such as:
- Registered: The customer has successfully submitted their order through a channel (POS, kiosk, online, etc.). This is the starting point in the order timeline.
c. Customer Information
Customer name and phone number for pickup confirmation or delivery coordination.
d. Order Timing & Actions
Review estimation time and choose how to proceed with the order.

d.1. Default Estimate Time
This shows the time you’re promising to have the order ready. Where it comes from depends on the channel:
- Orders from other channels or platforms (e.g., Uber Eats, Embargo):
We display the prep/ready time that the partner sends with the order. If the partner provides a single time or a time window, we show it as-is.
- Orders from TechSuite channels (e.g., POS, Kiosk):
We calculate the estimate for you:
- First, we find the longest item-level preparation time in the basket.
- Then we compare it to your General Preparation Time (set in Availability Management).
- The estimate shown is the higher of those two values. (This ensures you never promise faster than you can deliver.)
- Pre-orders:
For scheduled orders, the screen shows the scheduled ready/collection time instead of a calculated prep time.
- Latte (5 min) + Pizza (20 min), no General Prep Time → 20 minutes (the longest item wins).
- Latte (5 min) + Pizza (20 min), General Prep Time = 40 minutes → 40 minutes (general time is higher).
- Uber Eats order where the partner sends 25 minutes → we show 25 minutes.
- Pre-order scheduled for 18:30 → we show Ready at 18:30.
d.2. Accept Order
Confirms the order and (if your business is subscribed to KDS) sends it to the kitchen screen, the order status switches to Preparing.
d.3. Reject Order
Cancels the order. For integrated partners, a decline is sent back to the channel.
d.4. Modify Estimate Time
Adjust the ready time before accepting if you need longer than the default and then click on theAccept Order button.
Examples:
What’s Next?
Go to Understanding Order Statuses for the complete guide to status definitions (Waiting, Preparing, Ready/Completed, Out for Delivery).