Add Categories and Items to a Menu
In this article, you’ll learn how to add Categories and Items to your new or existing menus. Categories help group related products (e.g. Starters, Mains, and Desserts), while items are pulled from your inventory item library.
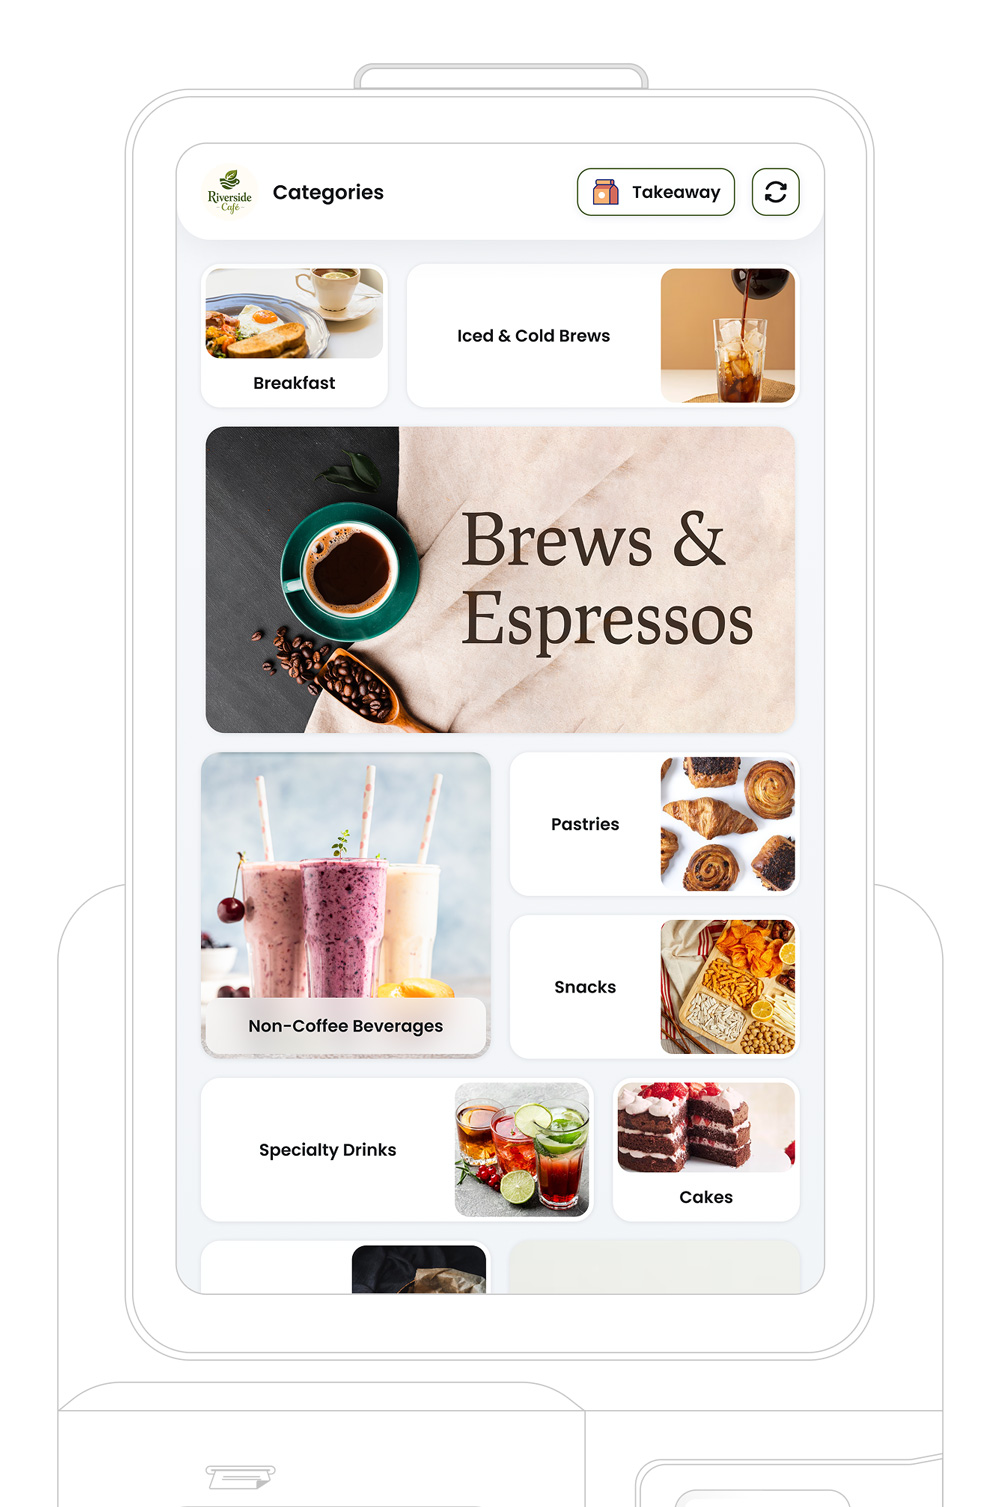
Once organised, your menu will display these categories and items wherever menus appear, (such as on your POS, kiosk, or online ordering channels).
Before You Begin
Once you’ve created your
New Menu, start adding categories and
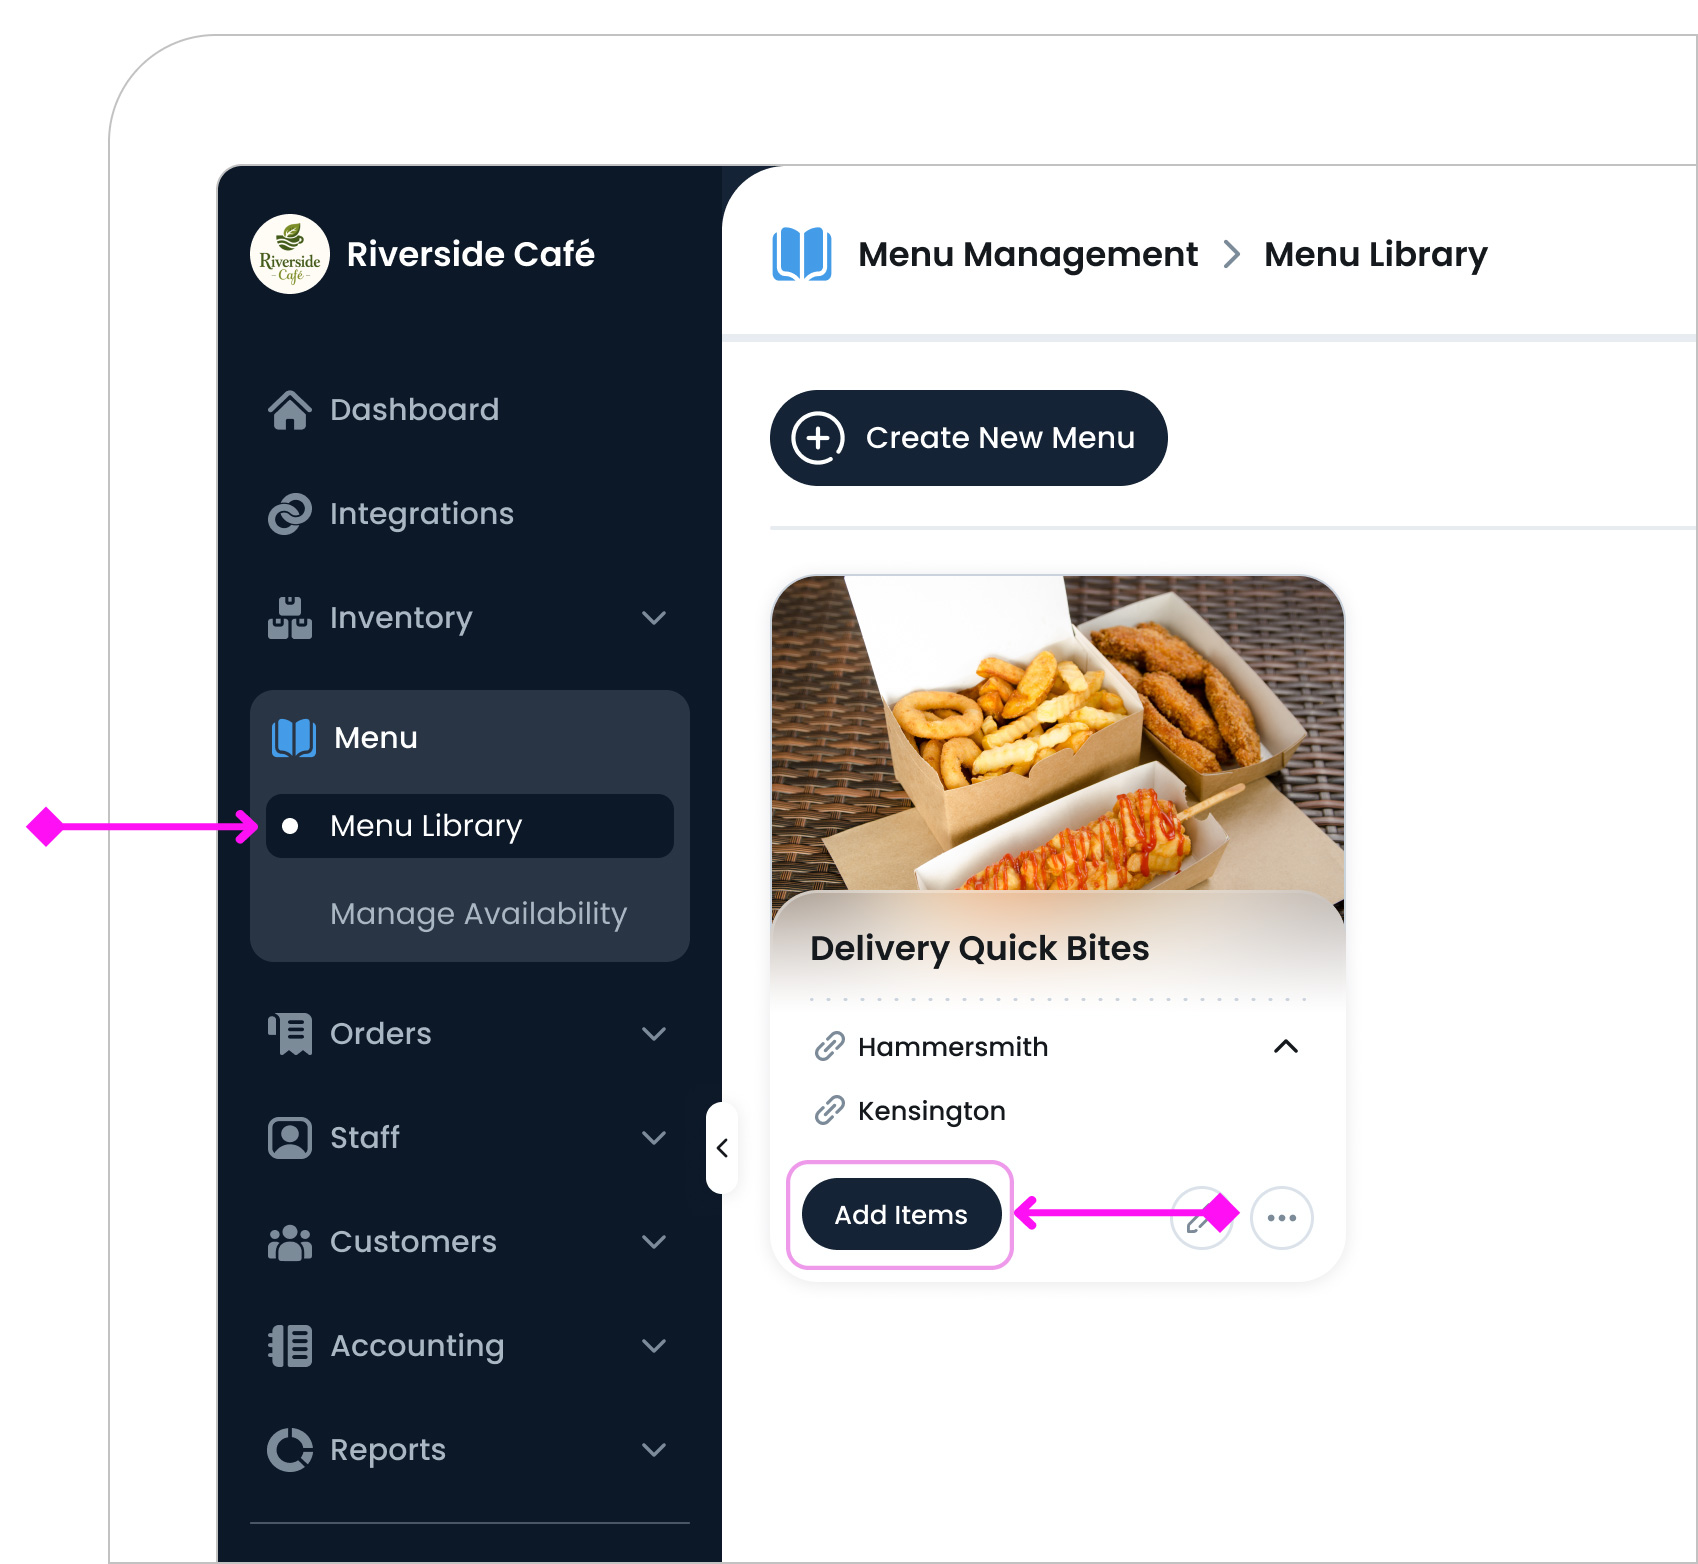
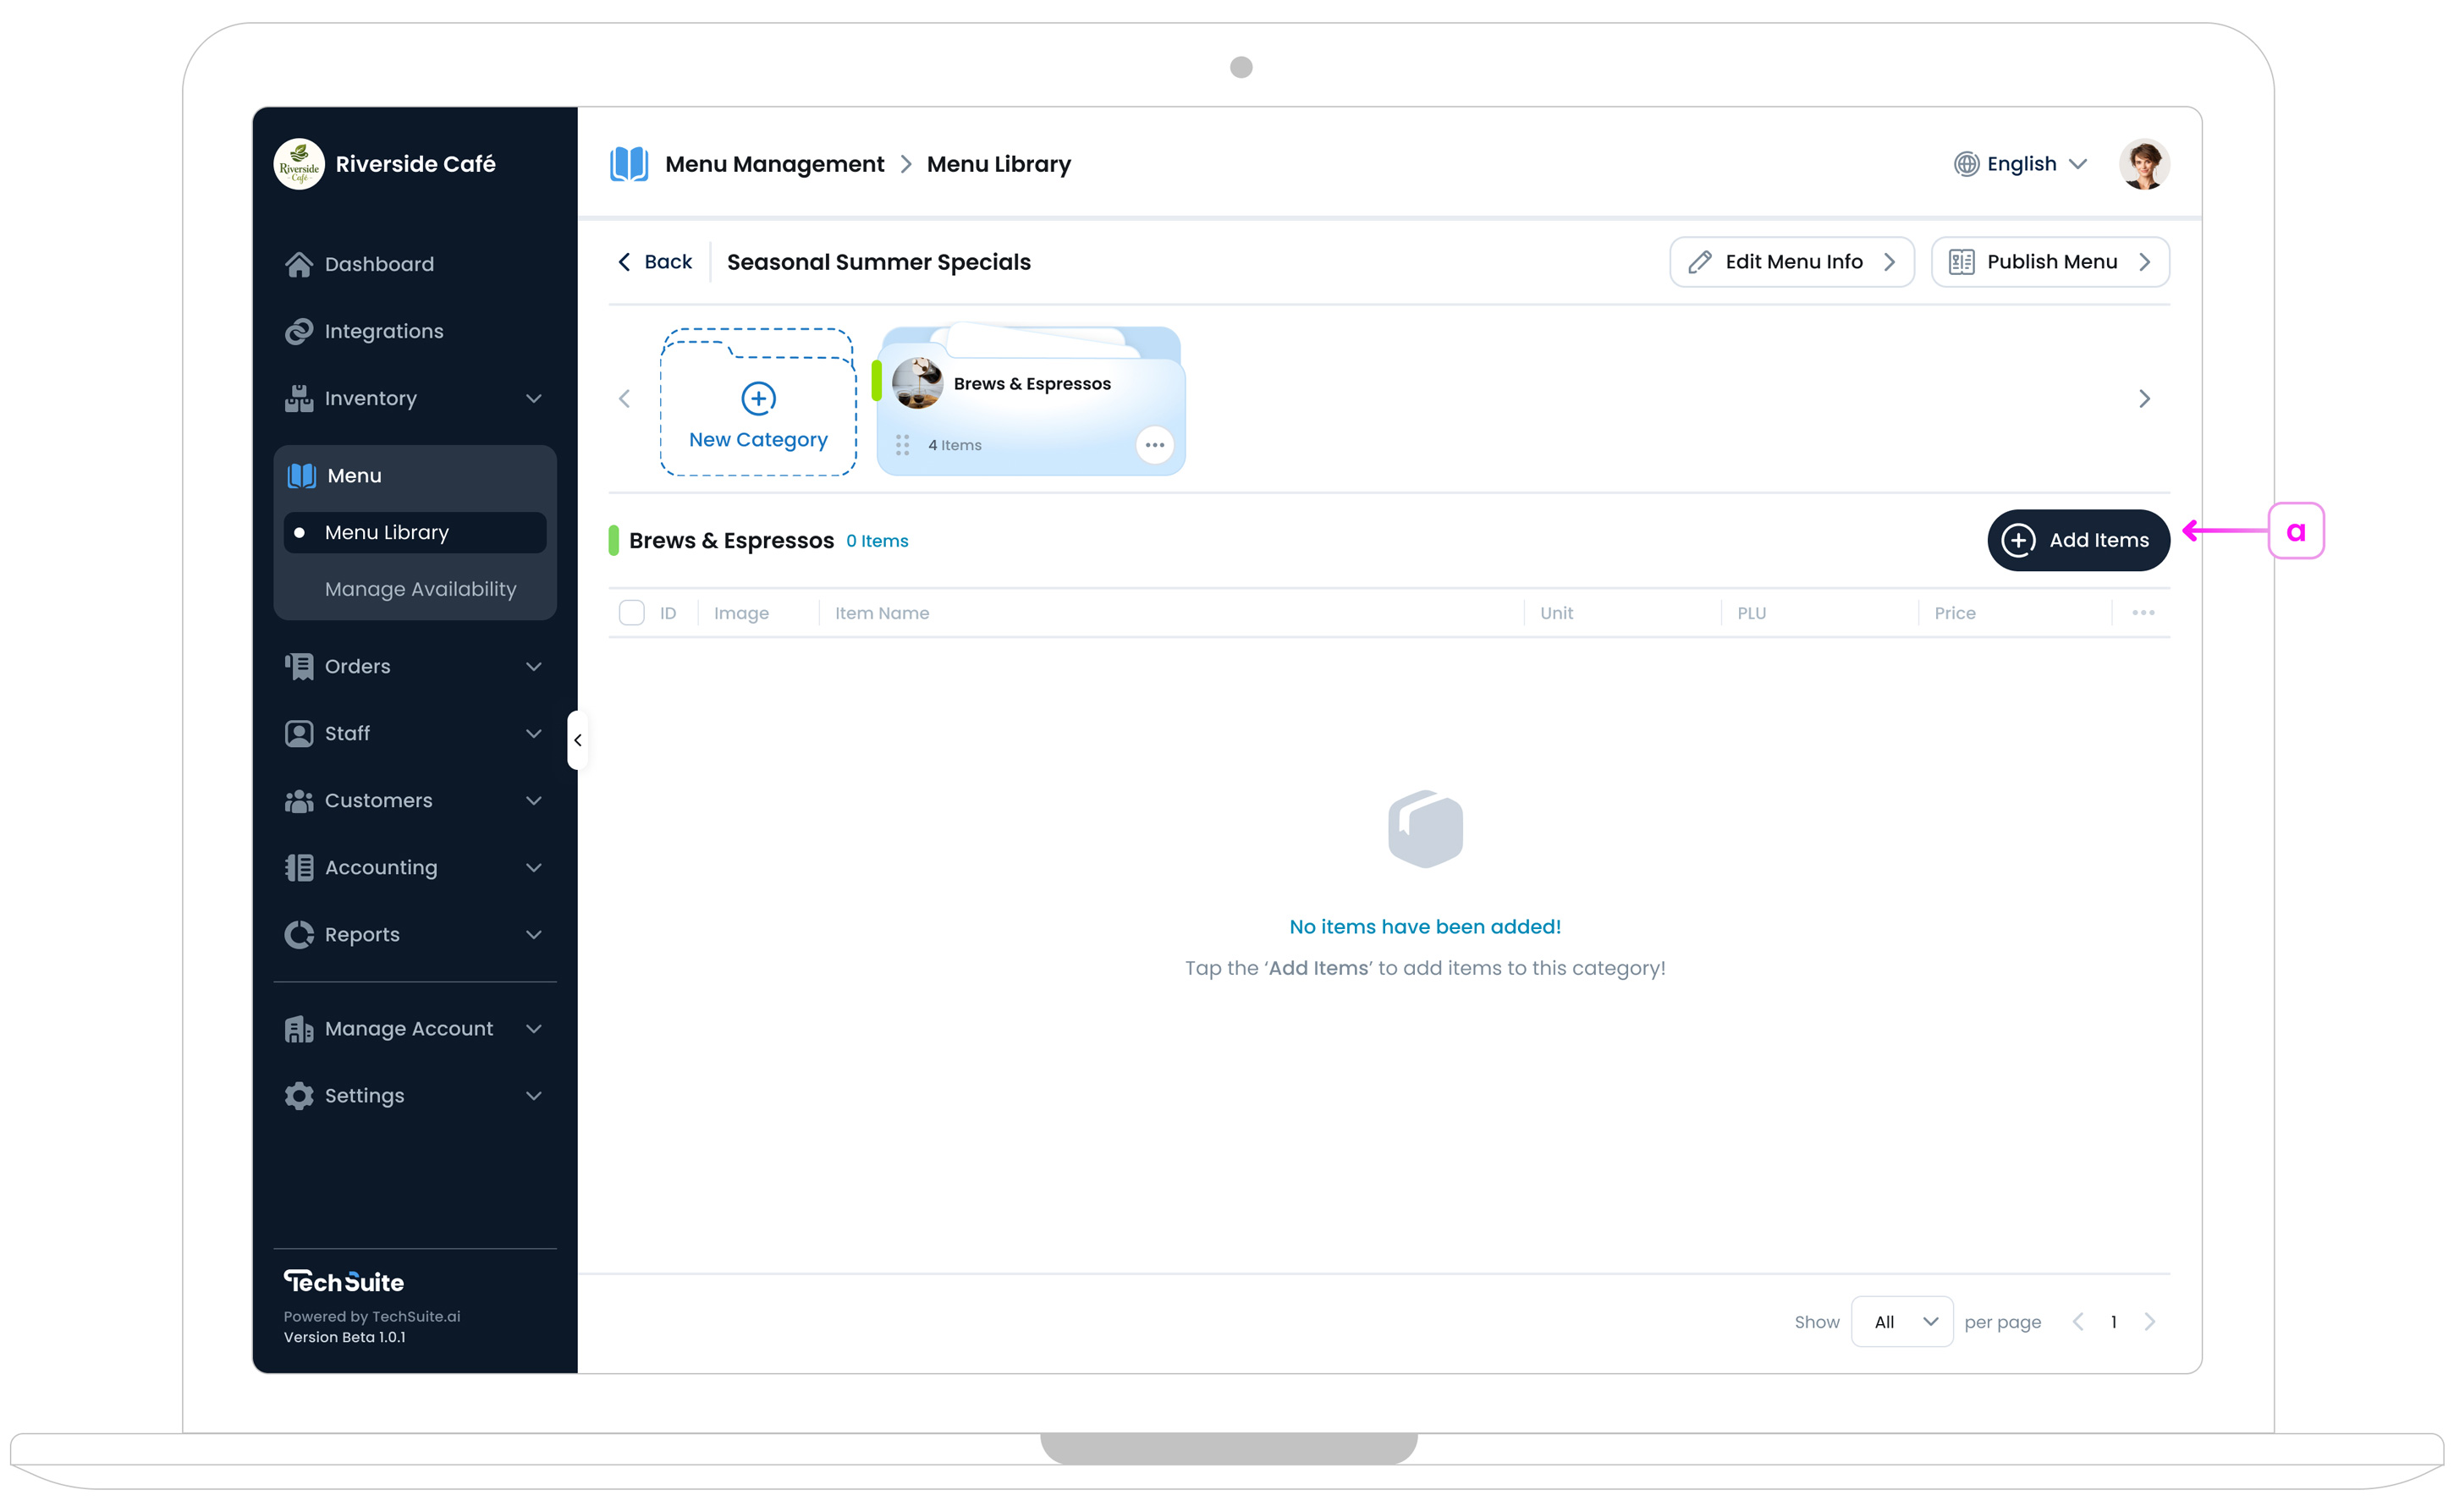
items to it. If you prefer to finish later, go to the TechSuite portal, open
Menu > Menu Library from your sidebar, then click on the Add Items
 button on the menu card. If the menu is new and has no categories yet, you’ll see an empty state
prompting you to create categories and add inventory items.
button on the menu card. If the menu is new and has no categories yet, you’ll see an empty state
prompting you to create categories and add inventory items.
Step 1: Create a New Menu Category
Categories help you group items based on your needs (e.g., Starters, Mains, Drinks). They’ll appear in your menu’s user‐facing views, such as the POS or Kiosk display or online ordering channels.
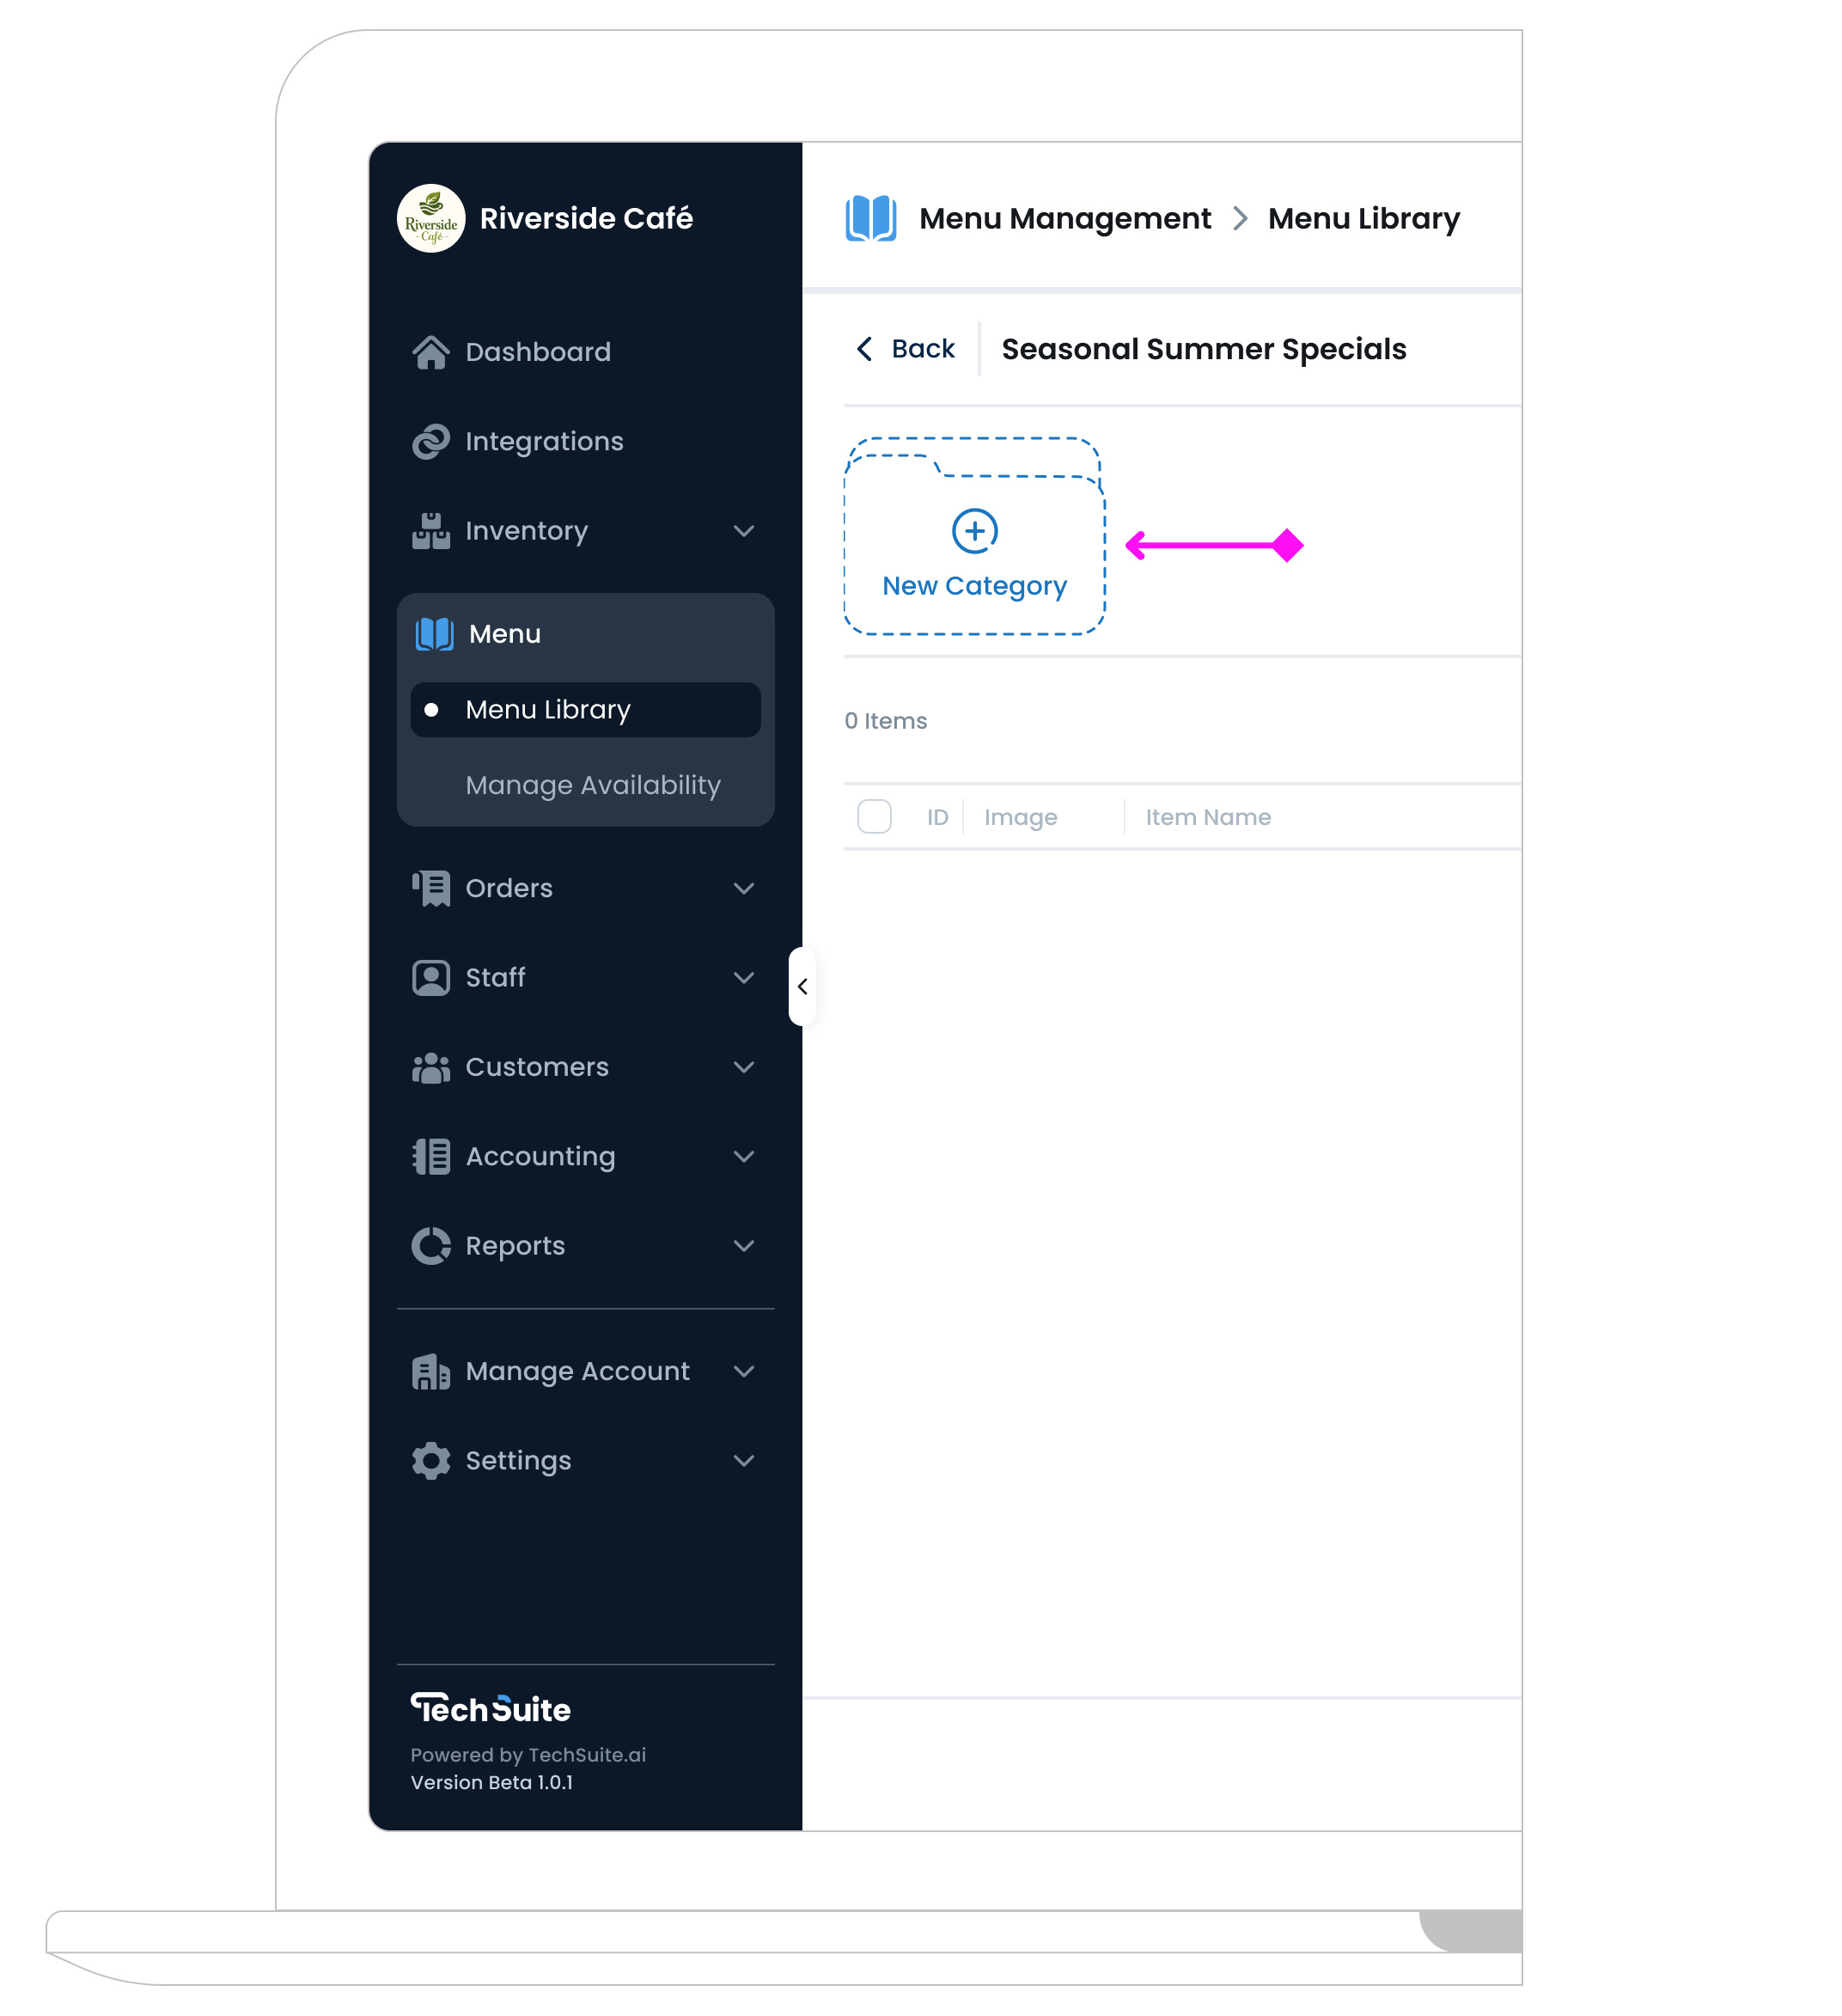
To create a new category, click the New Category button in the top-left corner of the Categories list. This opens a blank category form where you can fill in the details explained below.
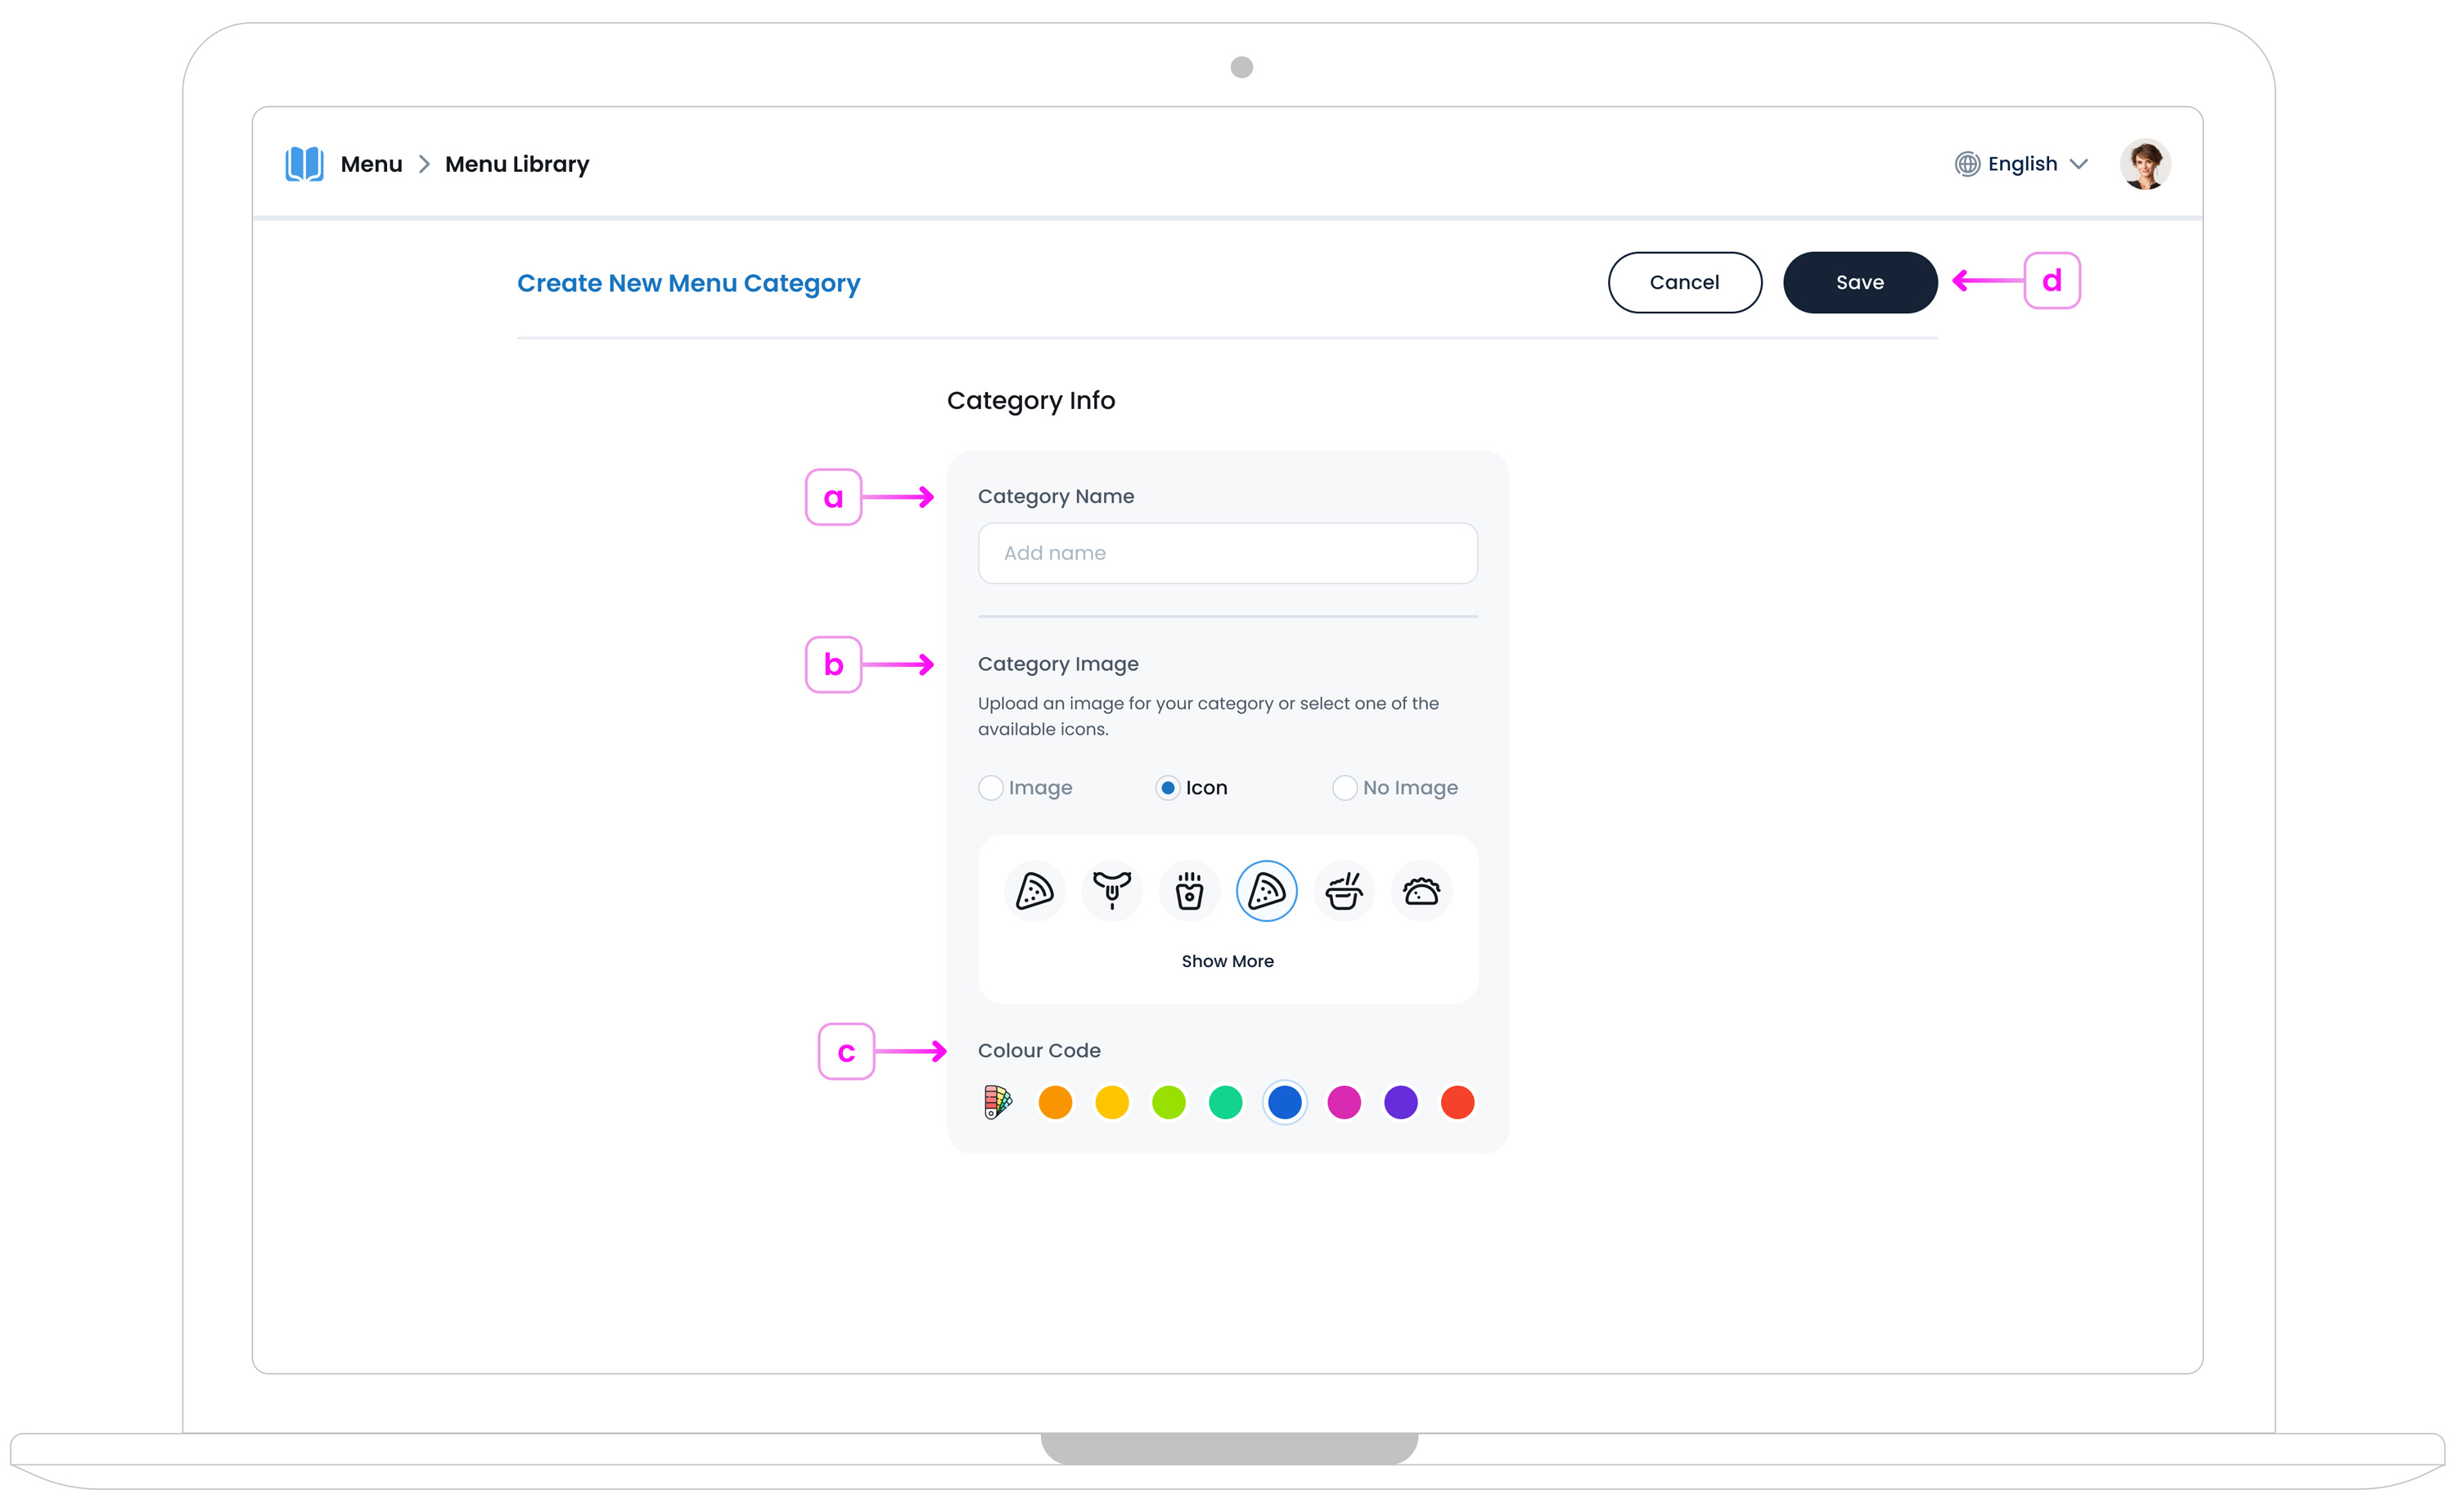
a. Category Name
Enter a brief, descriptive title (e.g., “Salads” or “Hot Beverages”). This name is what both staff and customers will see in the menu layout.
b. Category Image or Icon
You can upload a small JPG (up to 800KB) or select a built‐in icon. If you prefer, choose “No Image” for a simple text‐only display. Images or icons help customers quickly spot the category they want at a glance.
This image will also show on the kiosk main view, so choose them carefully to ensure a visually appealing and user-friendly interface.
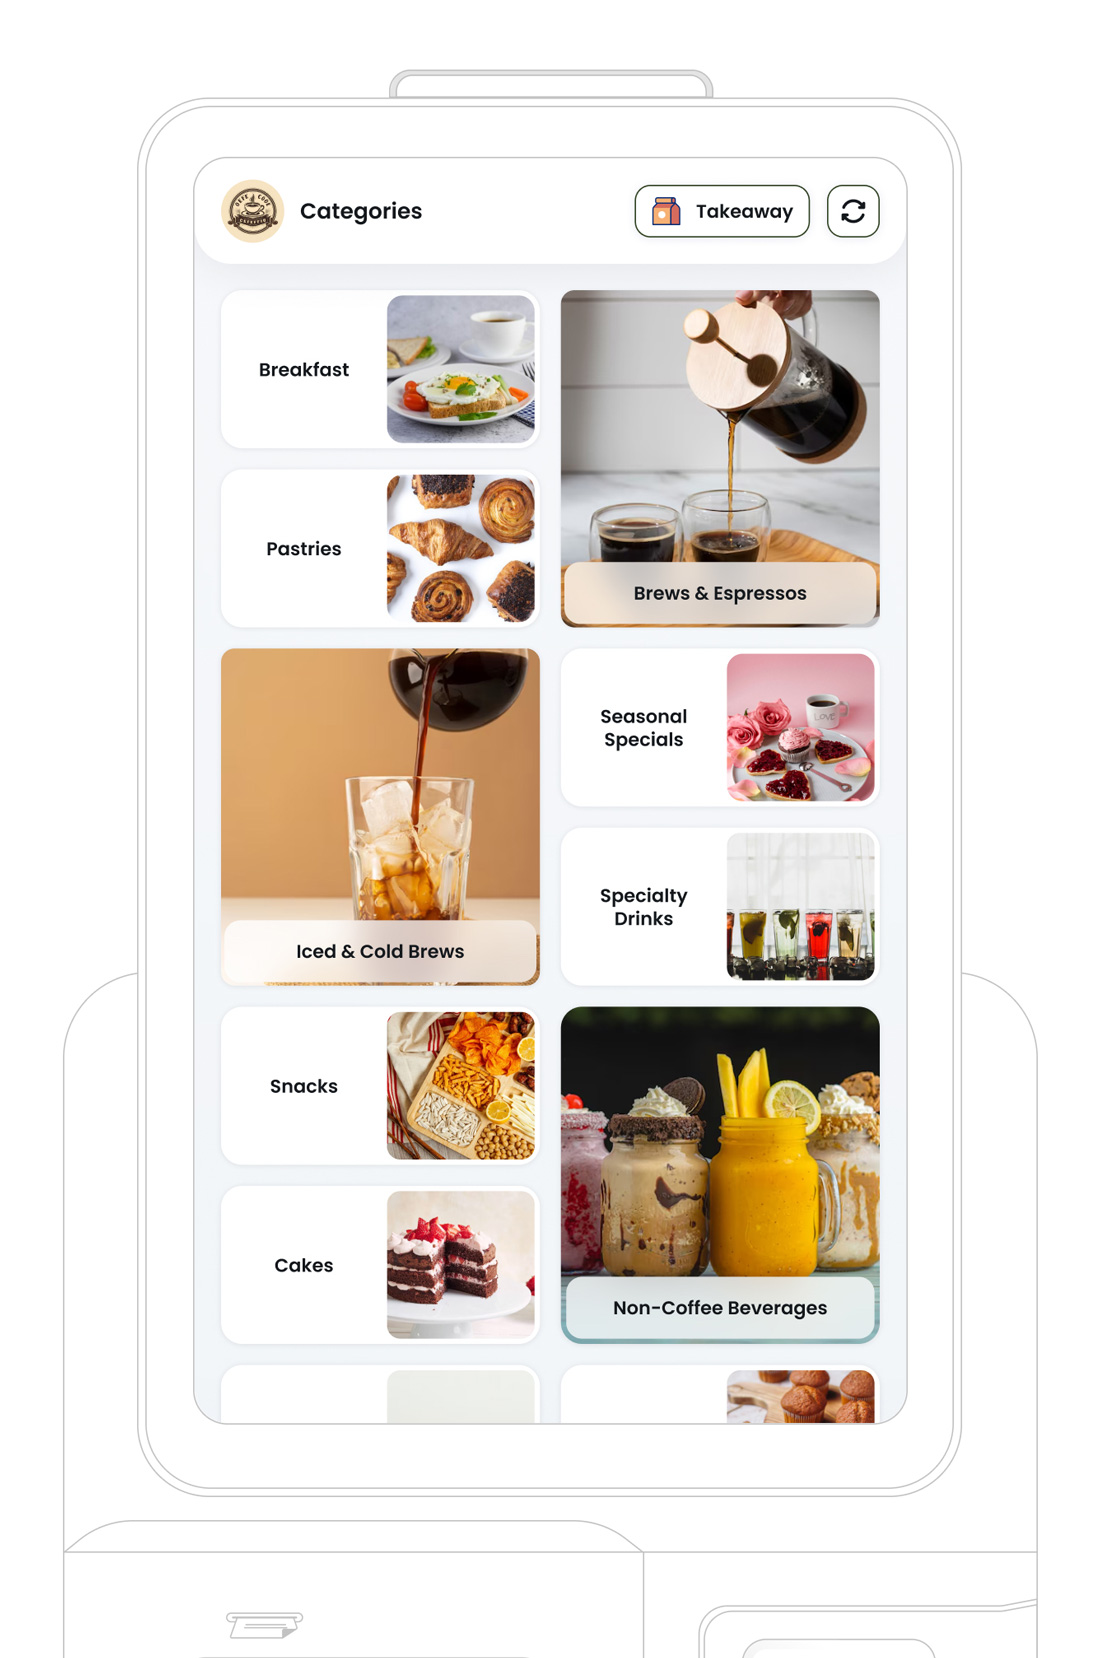
Image Guidelines and Pro Tips
-
Make it visually appealing
Choose an image that clearly shows the item, looks fresh, and sparks interest at a glance.
-
Avoid poor lighting or blur
Low-resolution or unclear photos can negatively affect how your menu is perceived.
-
Keep it consistent:
For a more professional and polished menu, aim to use images with similar lighting, angles, and backgrounds across your items.
-
Upload the Right Image Size
Use rectangle images sized 1200×800 or 1600×1000 pixels (landscape), in JPEG format for best compatibility. Keep file size under 800KB to ensure fast loading. Large images can slow performance, while small ones may appear blurry. Always preview your image to confirm it displays well across POS, kiosk, mobile, and online ordering. For resizing tips, see our Image Resizing Guide.
c. Colour Code
Optionally, you can pick a colour for your category cards, making it stand out in a long menu. For example, you might give “Desserts” a bright purple or green for your “Beverages” category. Colour coding helps staff navigate categories faster on the Take Order page in TechSuite POS App.
After entering these details, save the category. It now appears in your list of categories for this menu. You can create as many categories as you need to reflect your offerings.
Step 2: Add Items to Menu Categories
Now that you have categories, it’s time to populate them with actual products from yourI Inventory. This ensures the menu shows specific items under the correct headings.
a. Start Adding Items
Look for the “Add Items” button in the top-right corner, just below the category list. Clicking it will open a pop-up where you can select items from your inventory library.
b. Select Inventory Categories
In the panel, you’ll see your inventory categories dropdown which by default is set on “All Items“. (e.g., “Baked Goods,” “Soft Drinks,” “Pasta Dishes”). Navigate to the relevant one to filter items. This helps you find the right products quickly, especially if you have a large inventory list.
c. Select Items
Select or deselect each item you want to include in your menu category. You can select multiple items to add at once.
d. Save Selected Items
Finally, confirm by clicking on “Add” button. All selected items appear under this category. If needed, you can move or reorder them later, or override certain item details (like name or price) specifically for this menu. Repeat as necessary for each category, ensuring everything is neatly arranged for staff and customers.
Item List Actions
After adding items to a category, you have the option to edit them or move them to another category. To access these actions, click the “Actions”
![]() button next to each item on the right side. This opens a small panel with three main options:
button next to each item on the right side. This opens a small panel with three main options:
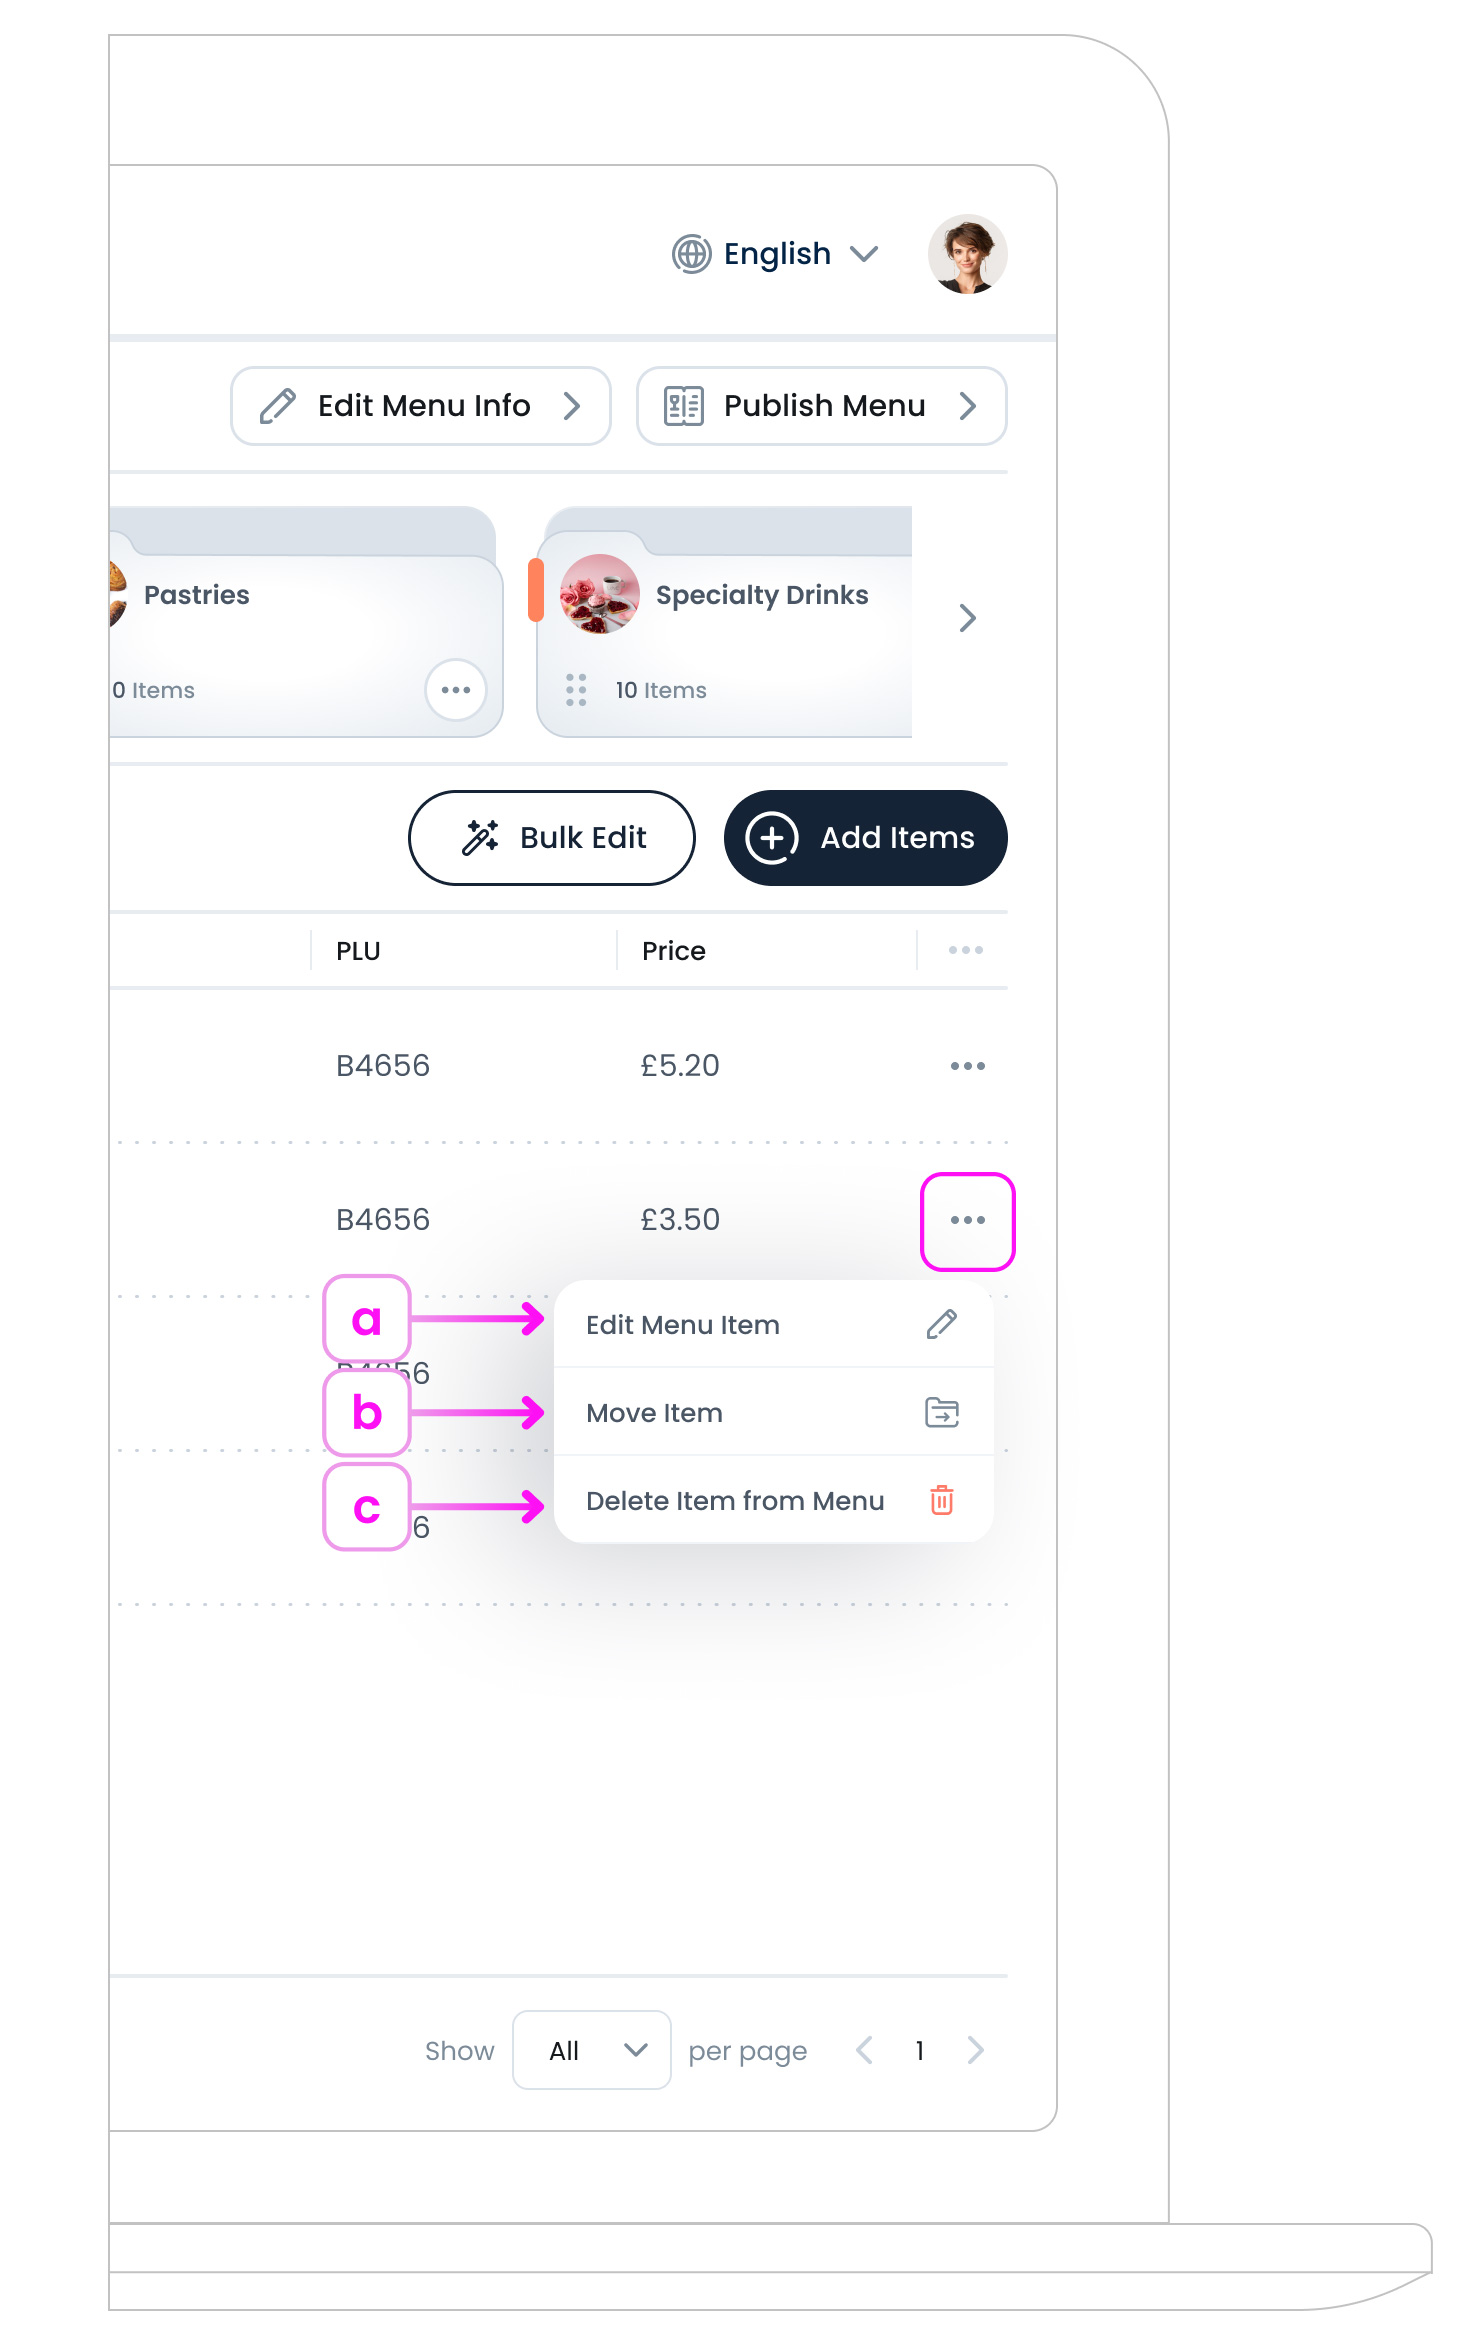
a. Edit Menu Item
Editing an item in Menu Management allows you to change its name and price as they appear in customer-facing views, (such as the POS, kiosk, or online ordering channels). Also, you can adjust the price specifically for this menu. These changes apply only to this menu and do not affect the main inventory item settings.
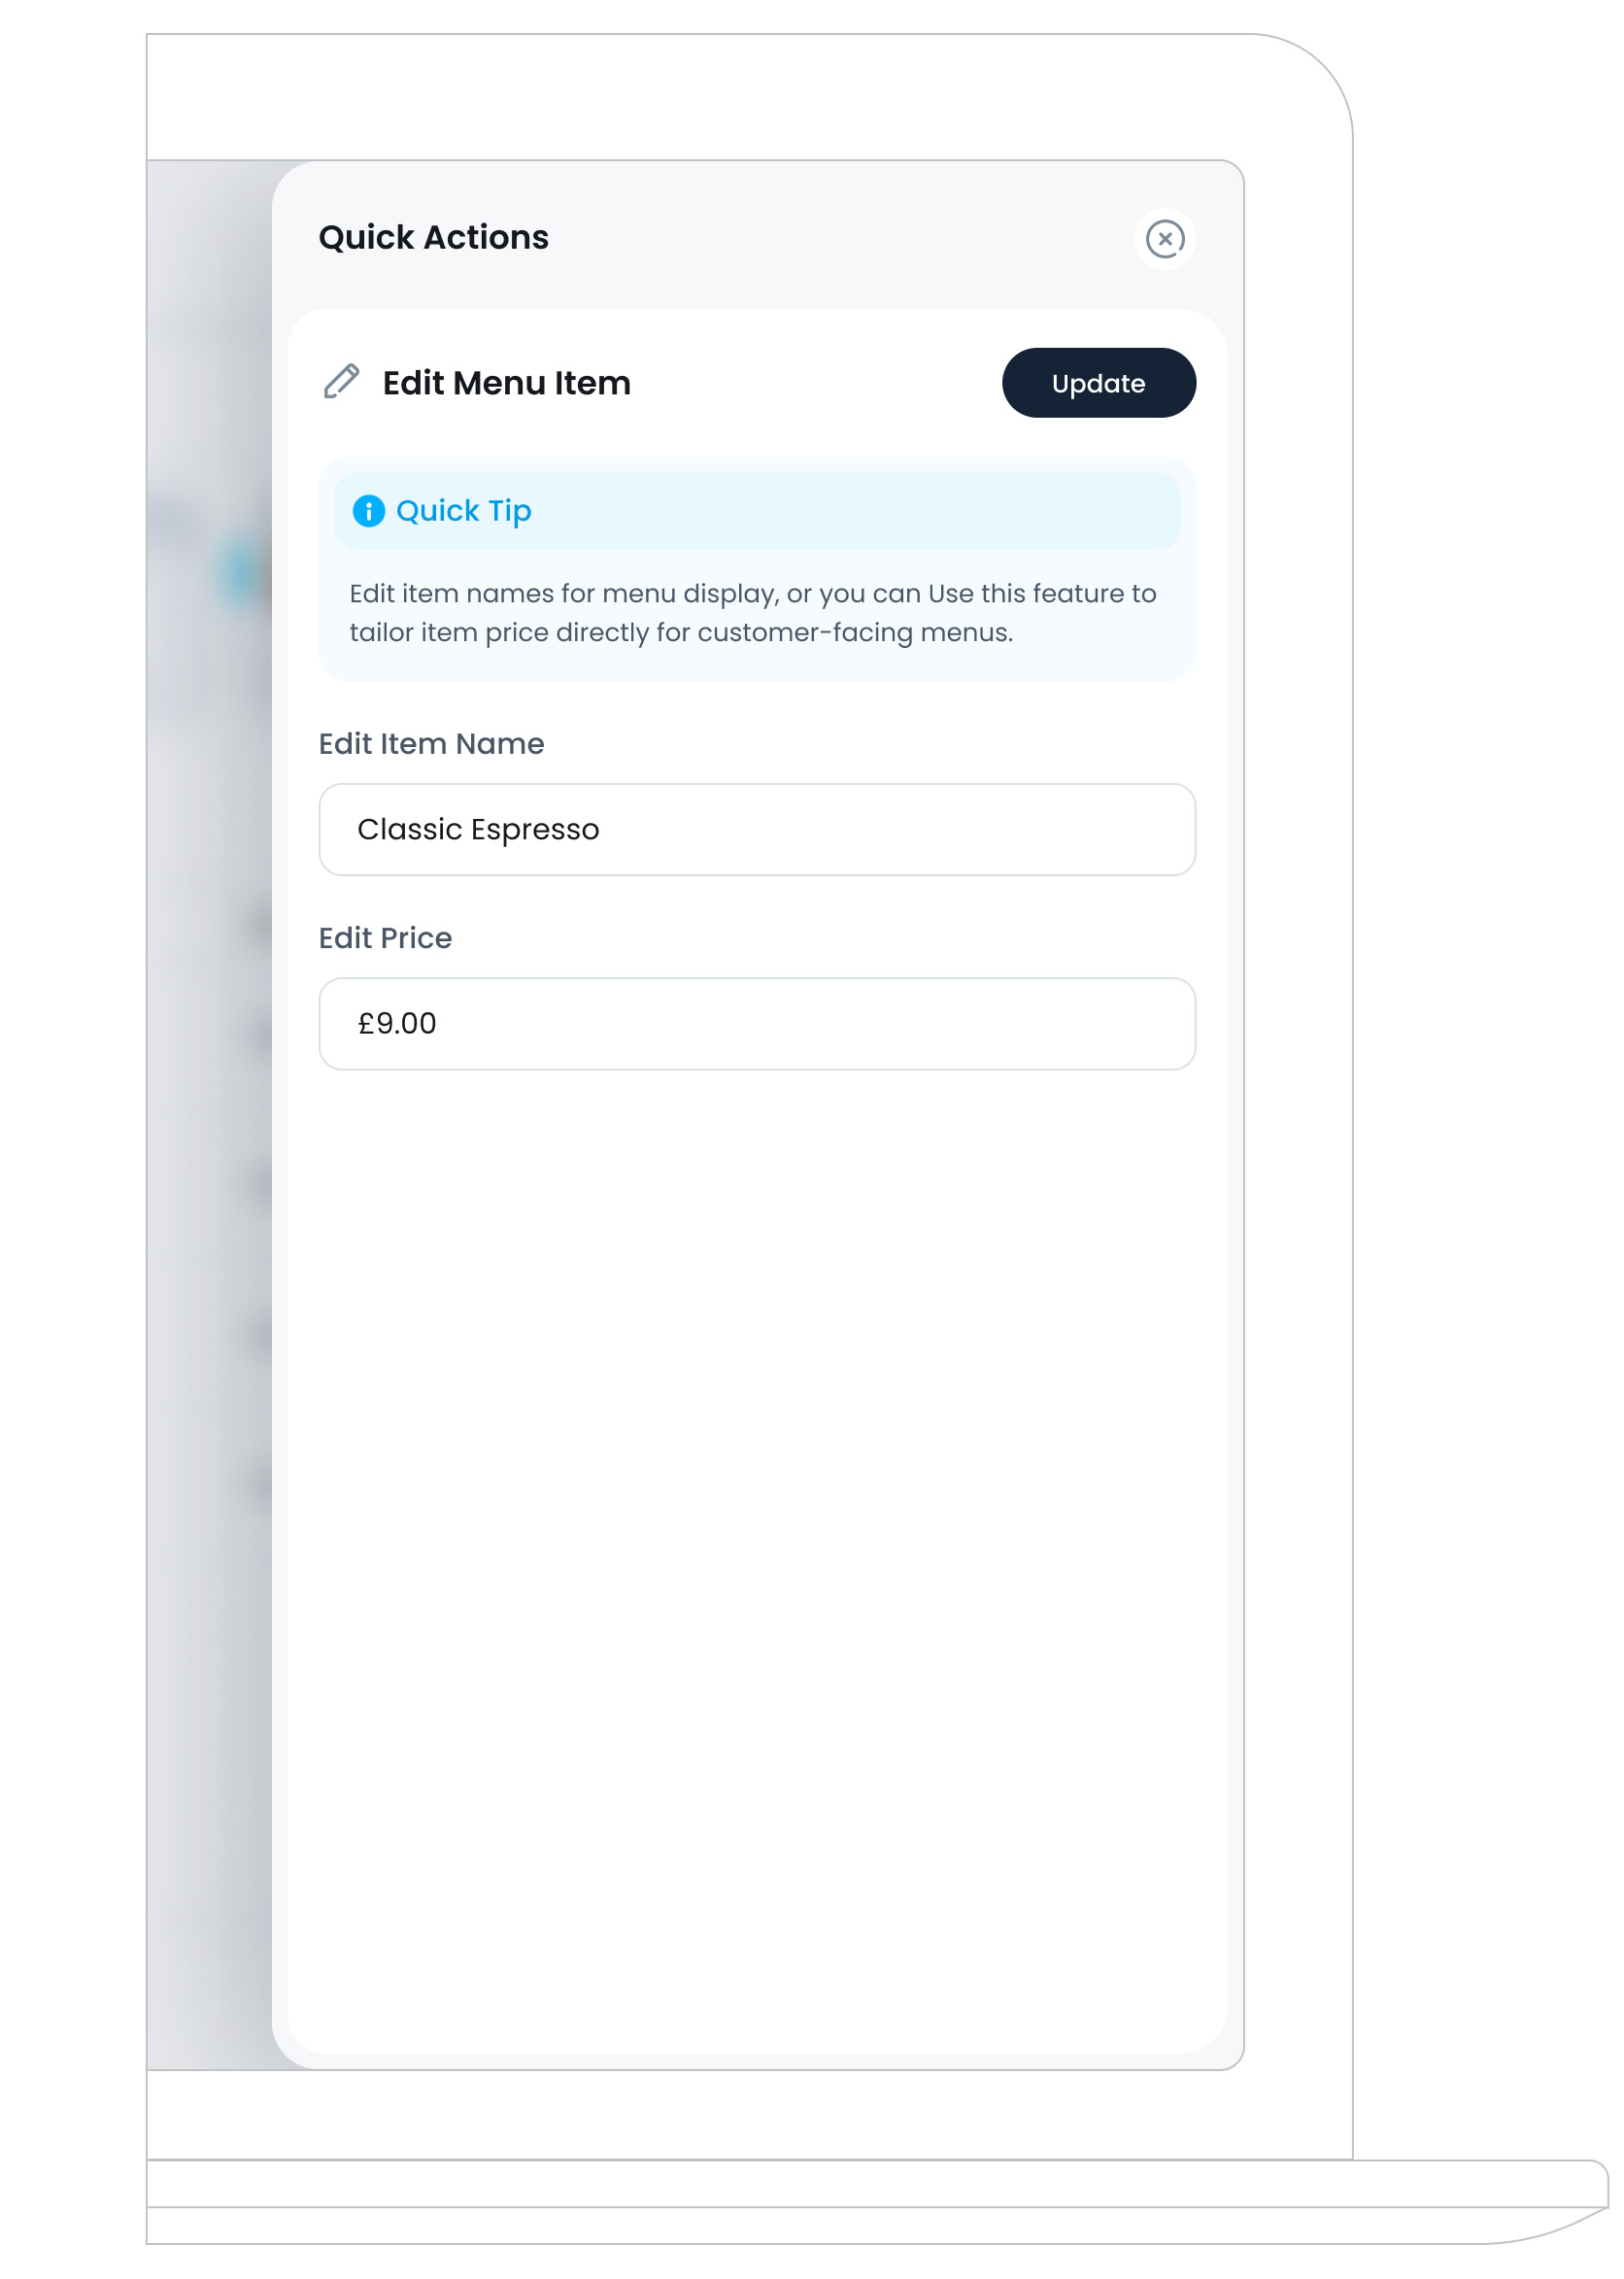
Quick Tip
If you serve the same item across different menus, you can tailor the name or price in each one, ideal for promotions or special events.
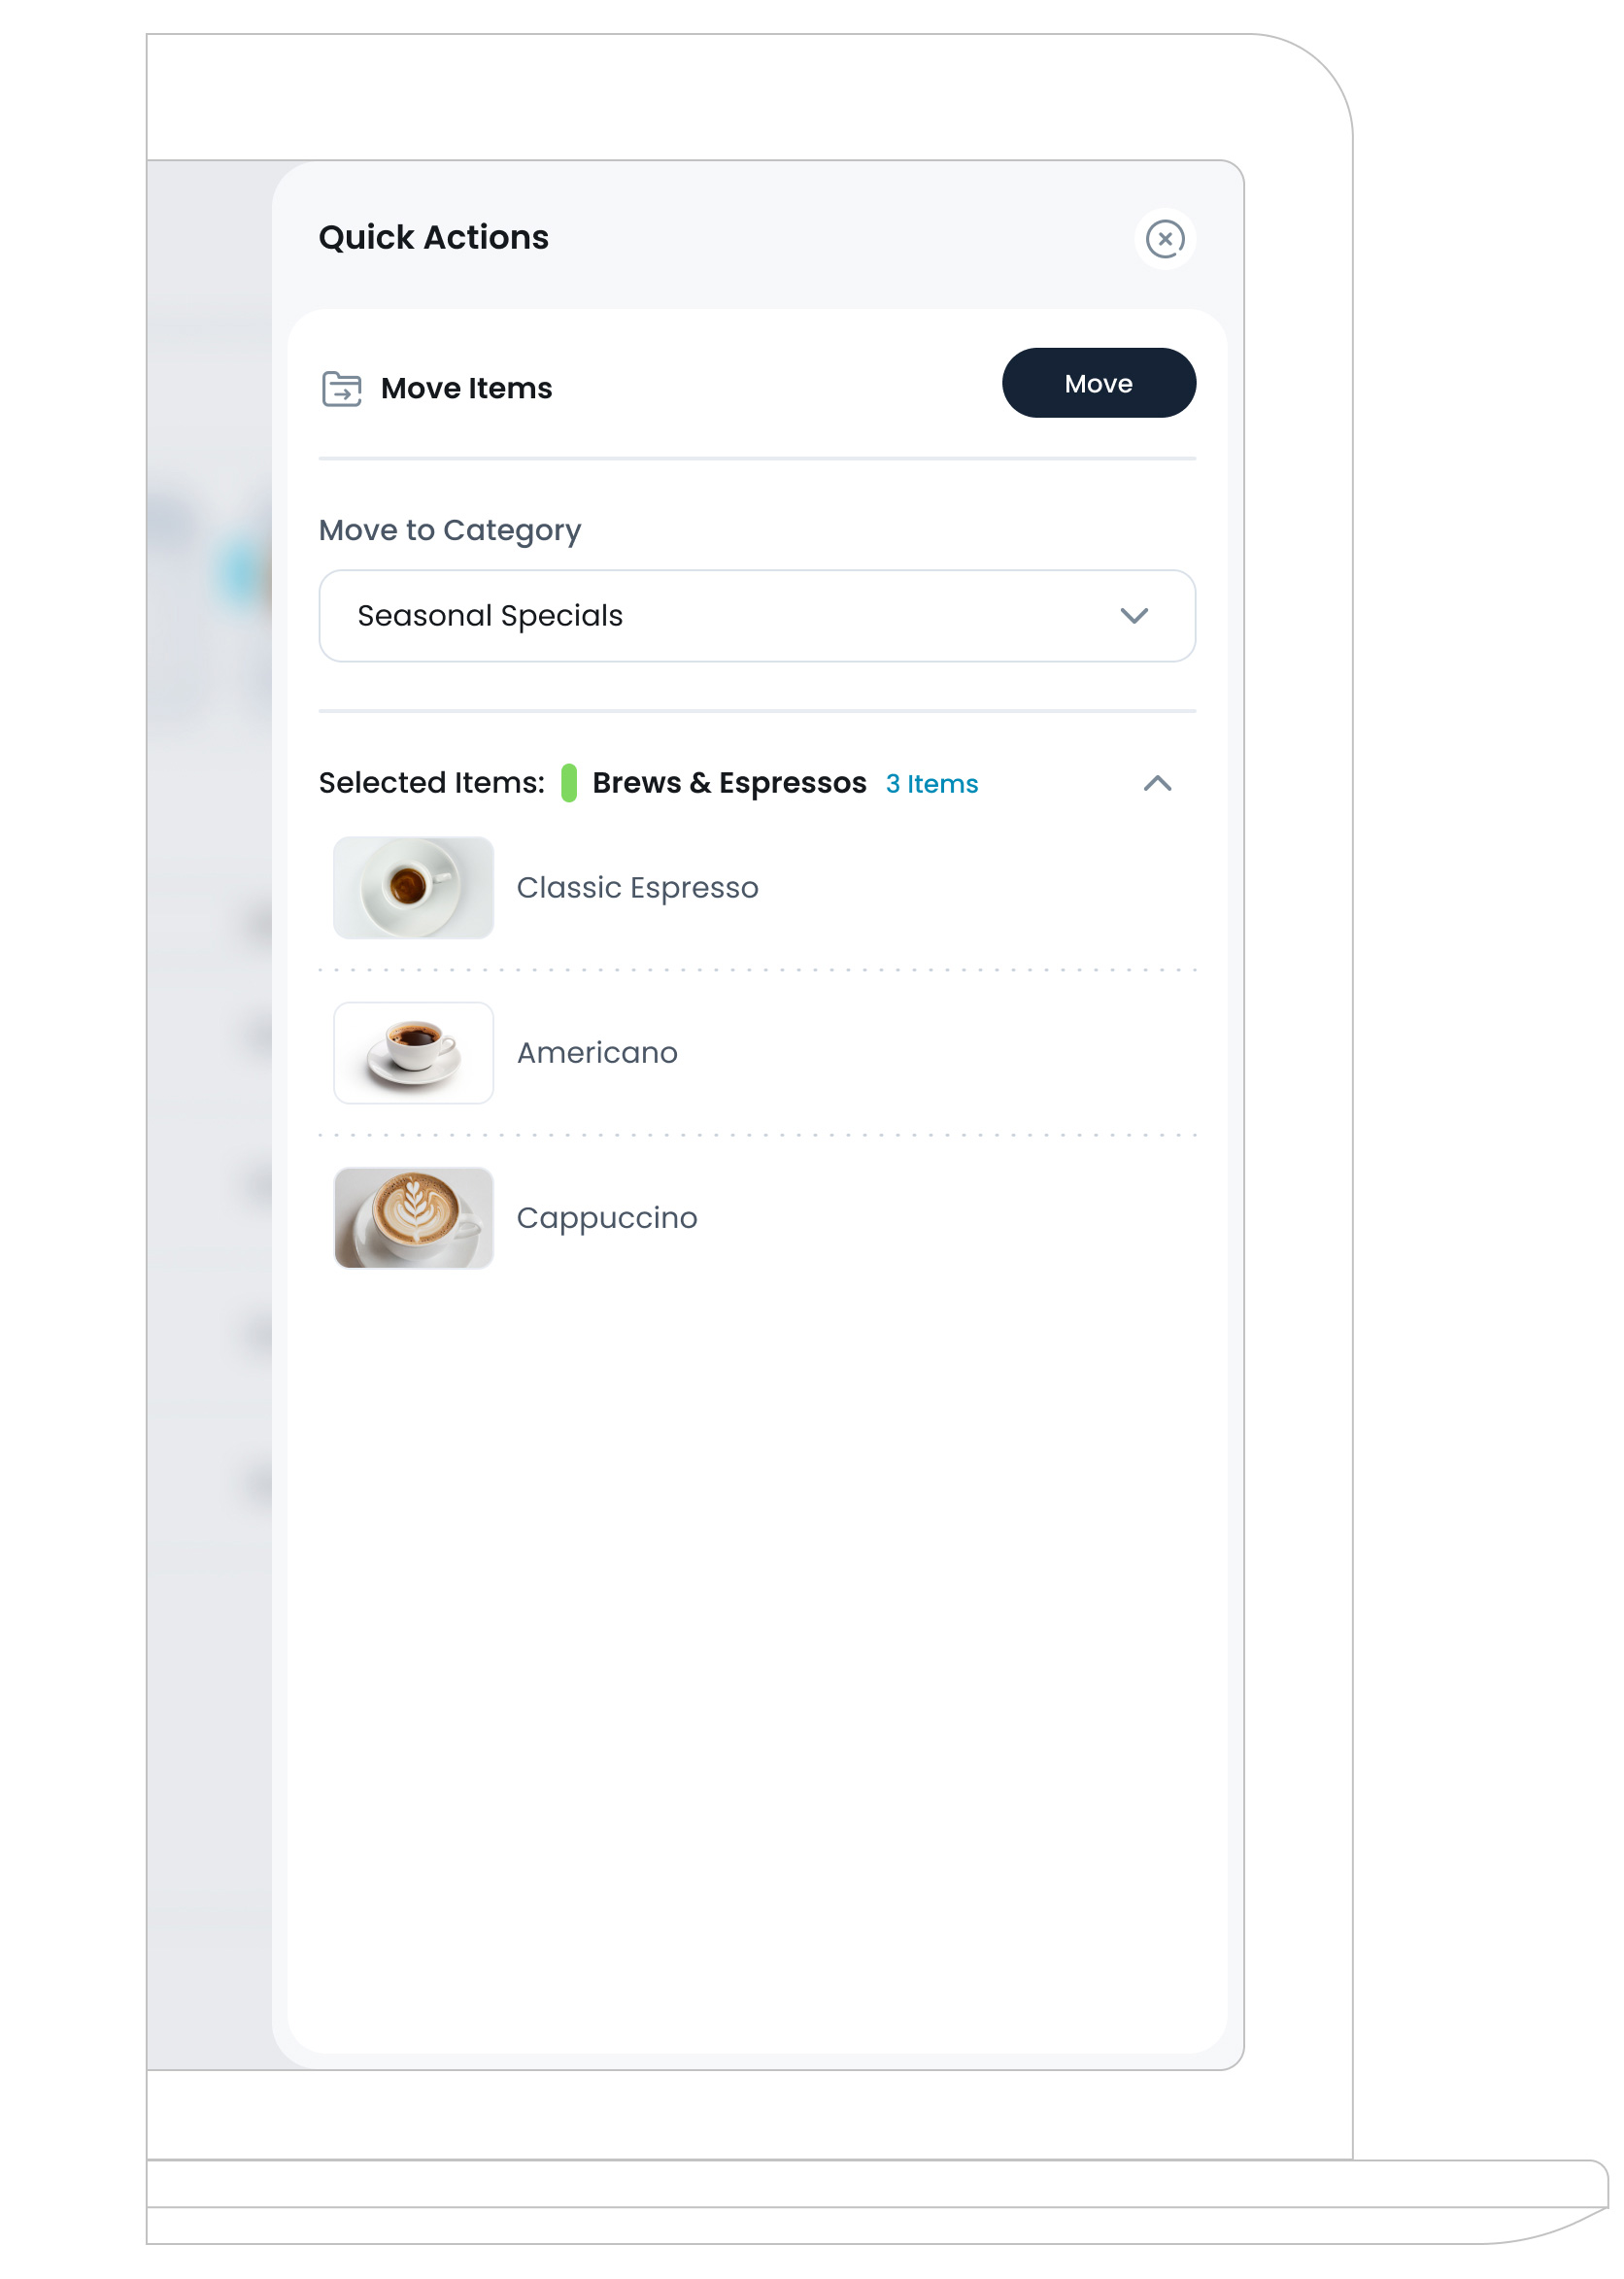
b. Move Item
If you’ve added an item to the wrong category, select Move Item to transfer it to the correct one within the same menu. This helps keep everything neatly organised for both staff and customers. To move multiple items at once, select the items you want to move, then click the “Actions” button ![]() at the top of the item table. Choose “Move Selected Items“ to relocate all selected products in bulk.
at the top of the item table. Choose “Move Selected Items“ to relocate all selected products in bulk.
c. Delete Item from Menu
This option removes the item from the current menu’s category without affecting it in your Inventory . The item remains available for use in other menus or future updates but will no longer appear in this specific menu.
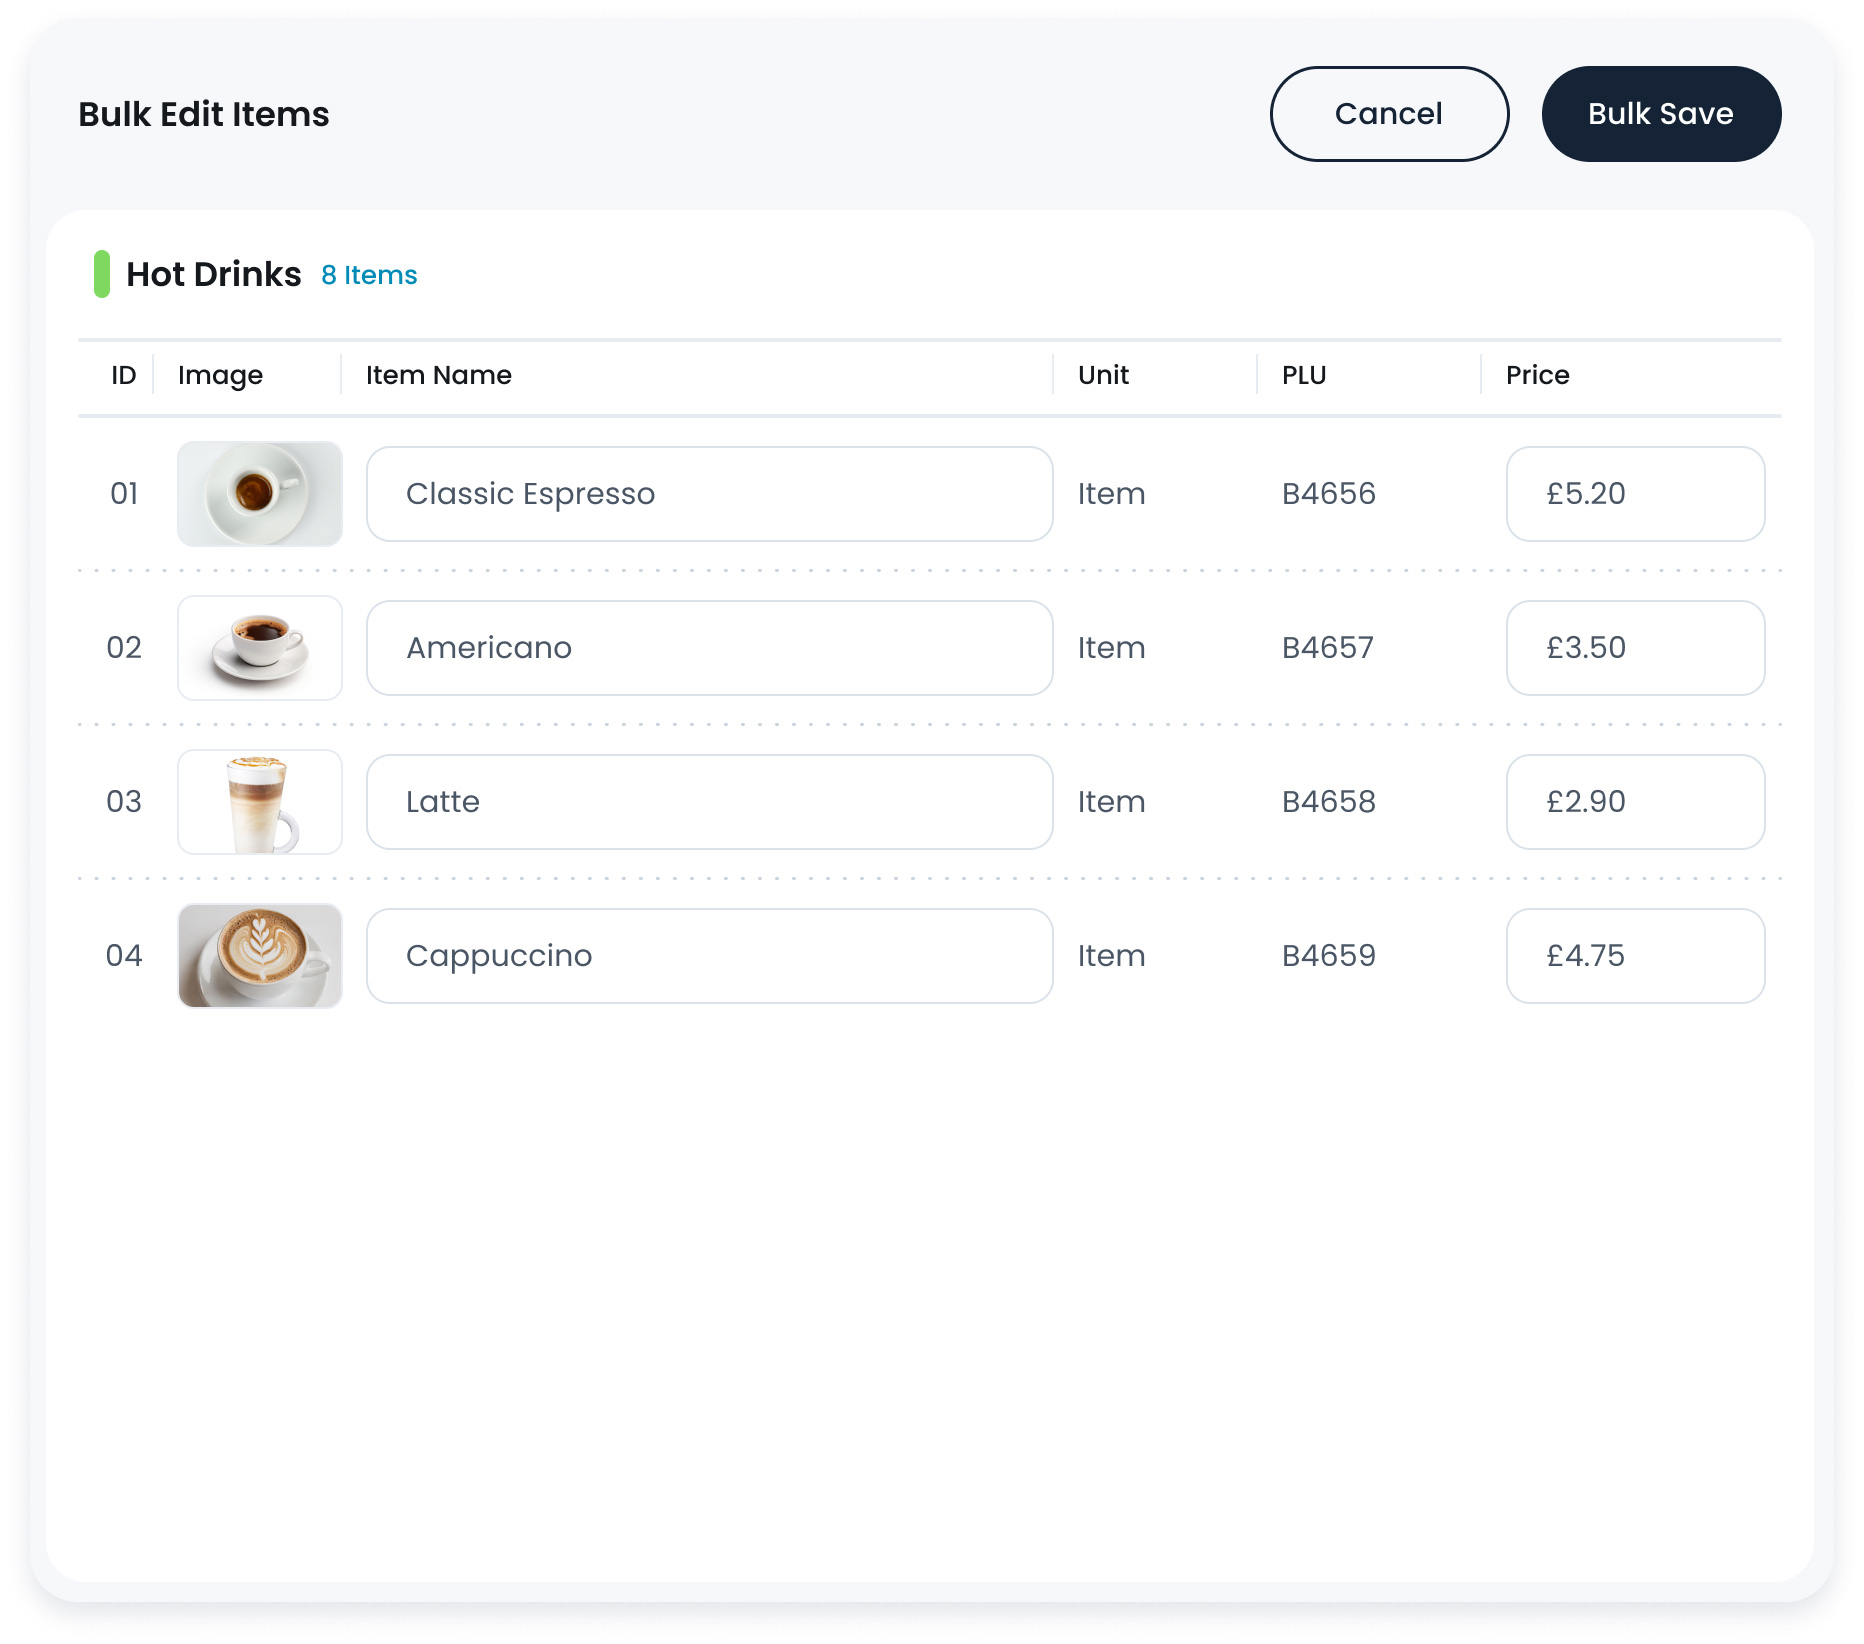
d. Bulk Item Editing
Bulk item editing allows you to quickly update multiple items within a menu at once, saving time and effort. You can adjust prices or modify item names across several products simultaneously by clicking on“Bulk Edit“ button, next to the add item button. This feature is especially useful for running promotions, updating seasonal menus, or standardising pricing across categories. Any changes made in bulk apply only to the current menu and do not affect the original items in your inventory library.
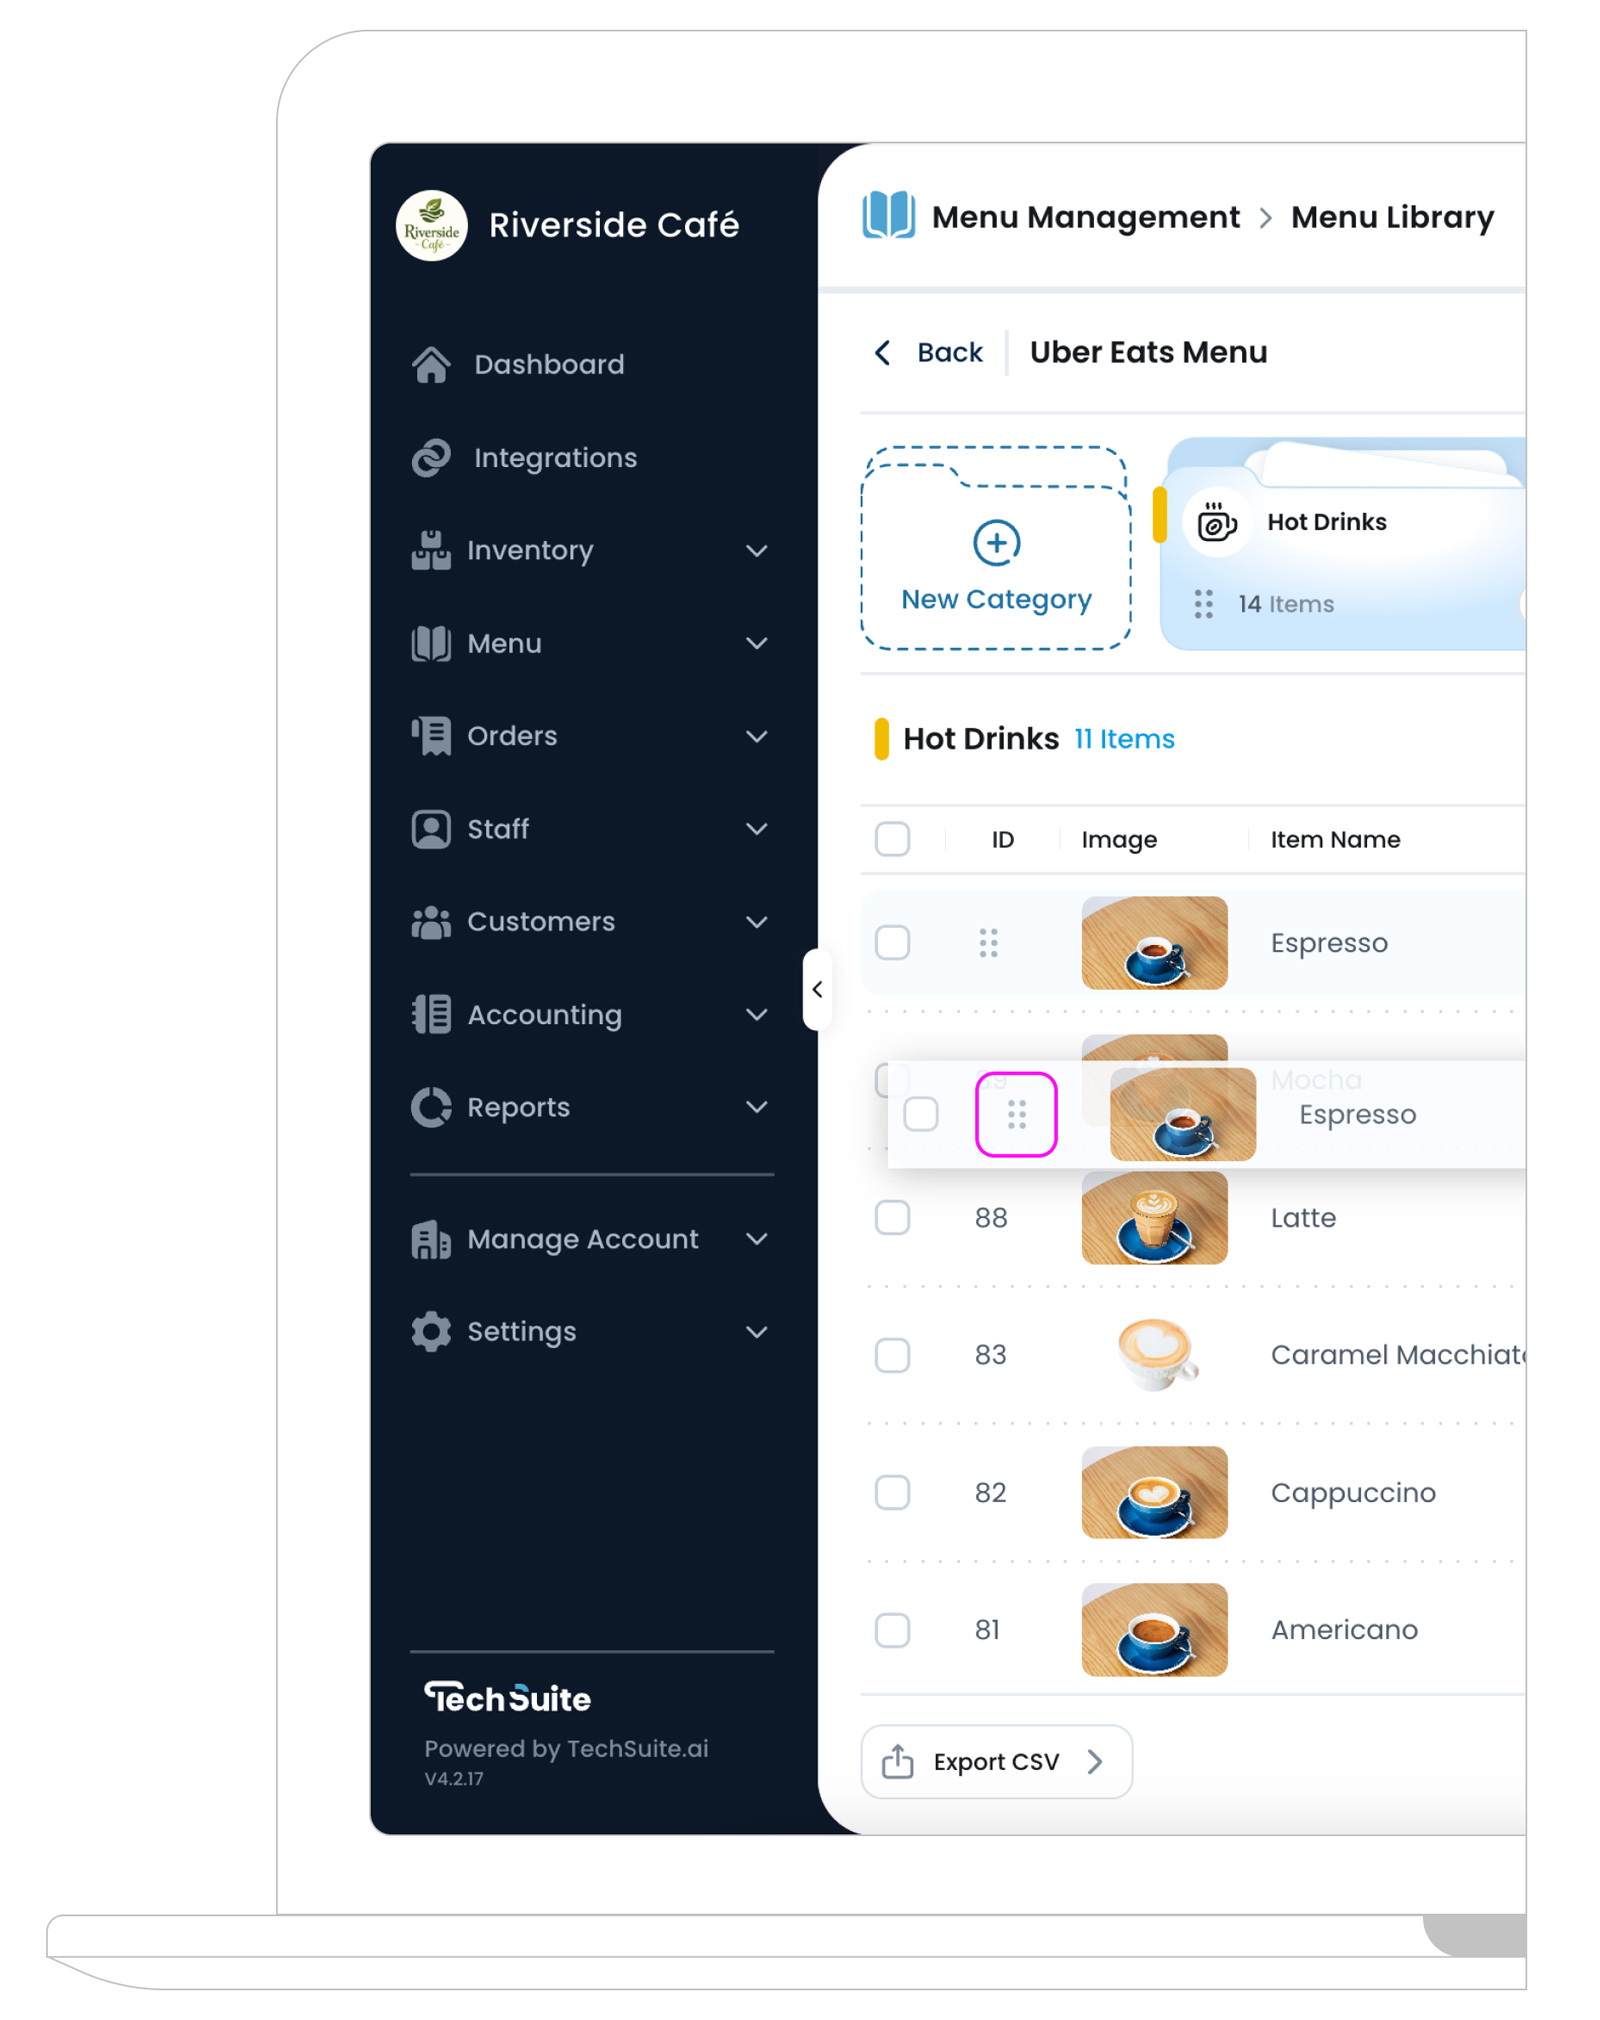
e. Reordering Items in the Menu
To rearrange the order of items in your menu, simply hover over an item in the list. On the left side of the item row, you’ll see a six-dots icon, this is the Reorder button. When you hover over it, the cursor changes to a drag handle, indicating you can drag and drop. Click and hold the icon to move the item up or down, adjusting the order in which items appear in selected menu category. This helps control the visual flow for both staff and customers in all menu views.
What’s Next?
Now that you’ve added categories and items to your menu, it’s almost ready for customers. The final step is to make it live by publishing it to online ordering channels Publish the Menu to share your latest updates with all relevant channels and branches, or start using it in Create New Kiosk Profile.