POS Take Order Page Overview
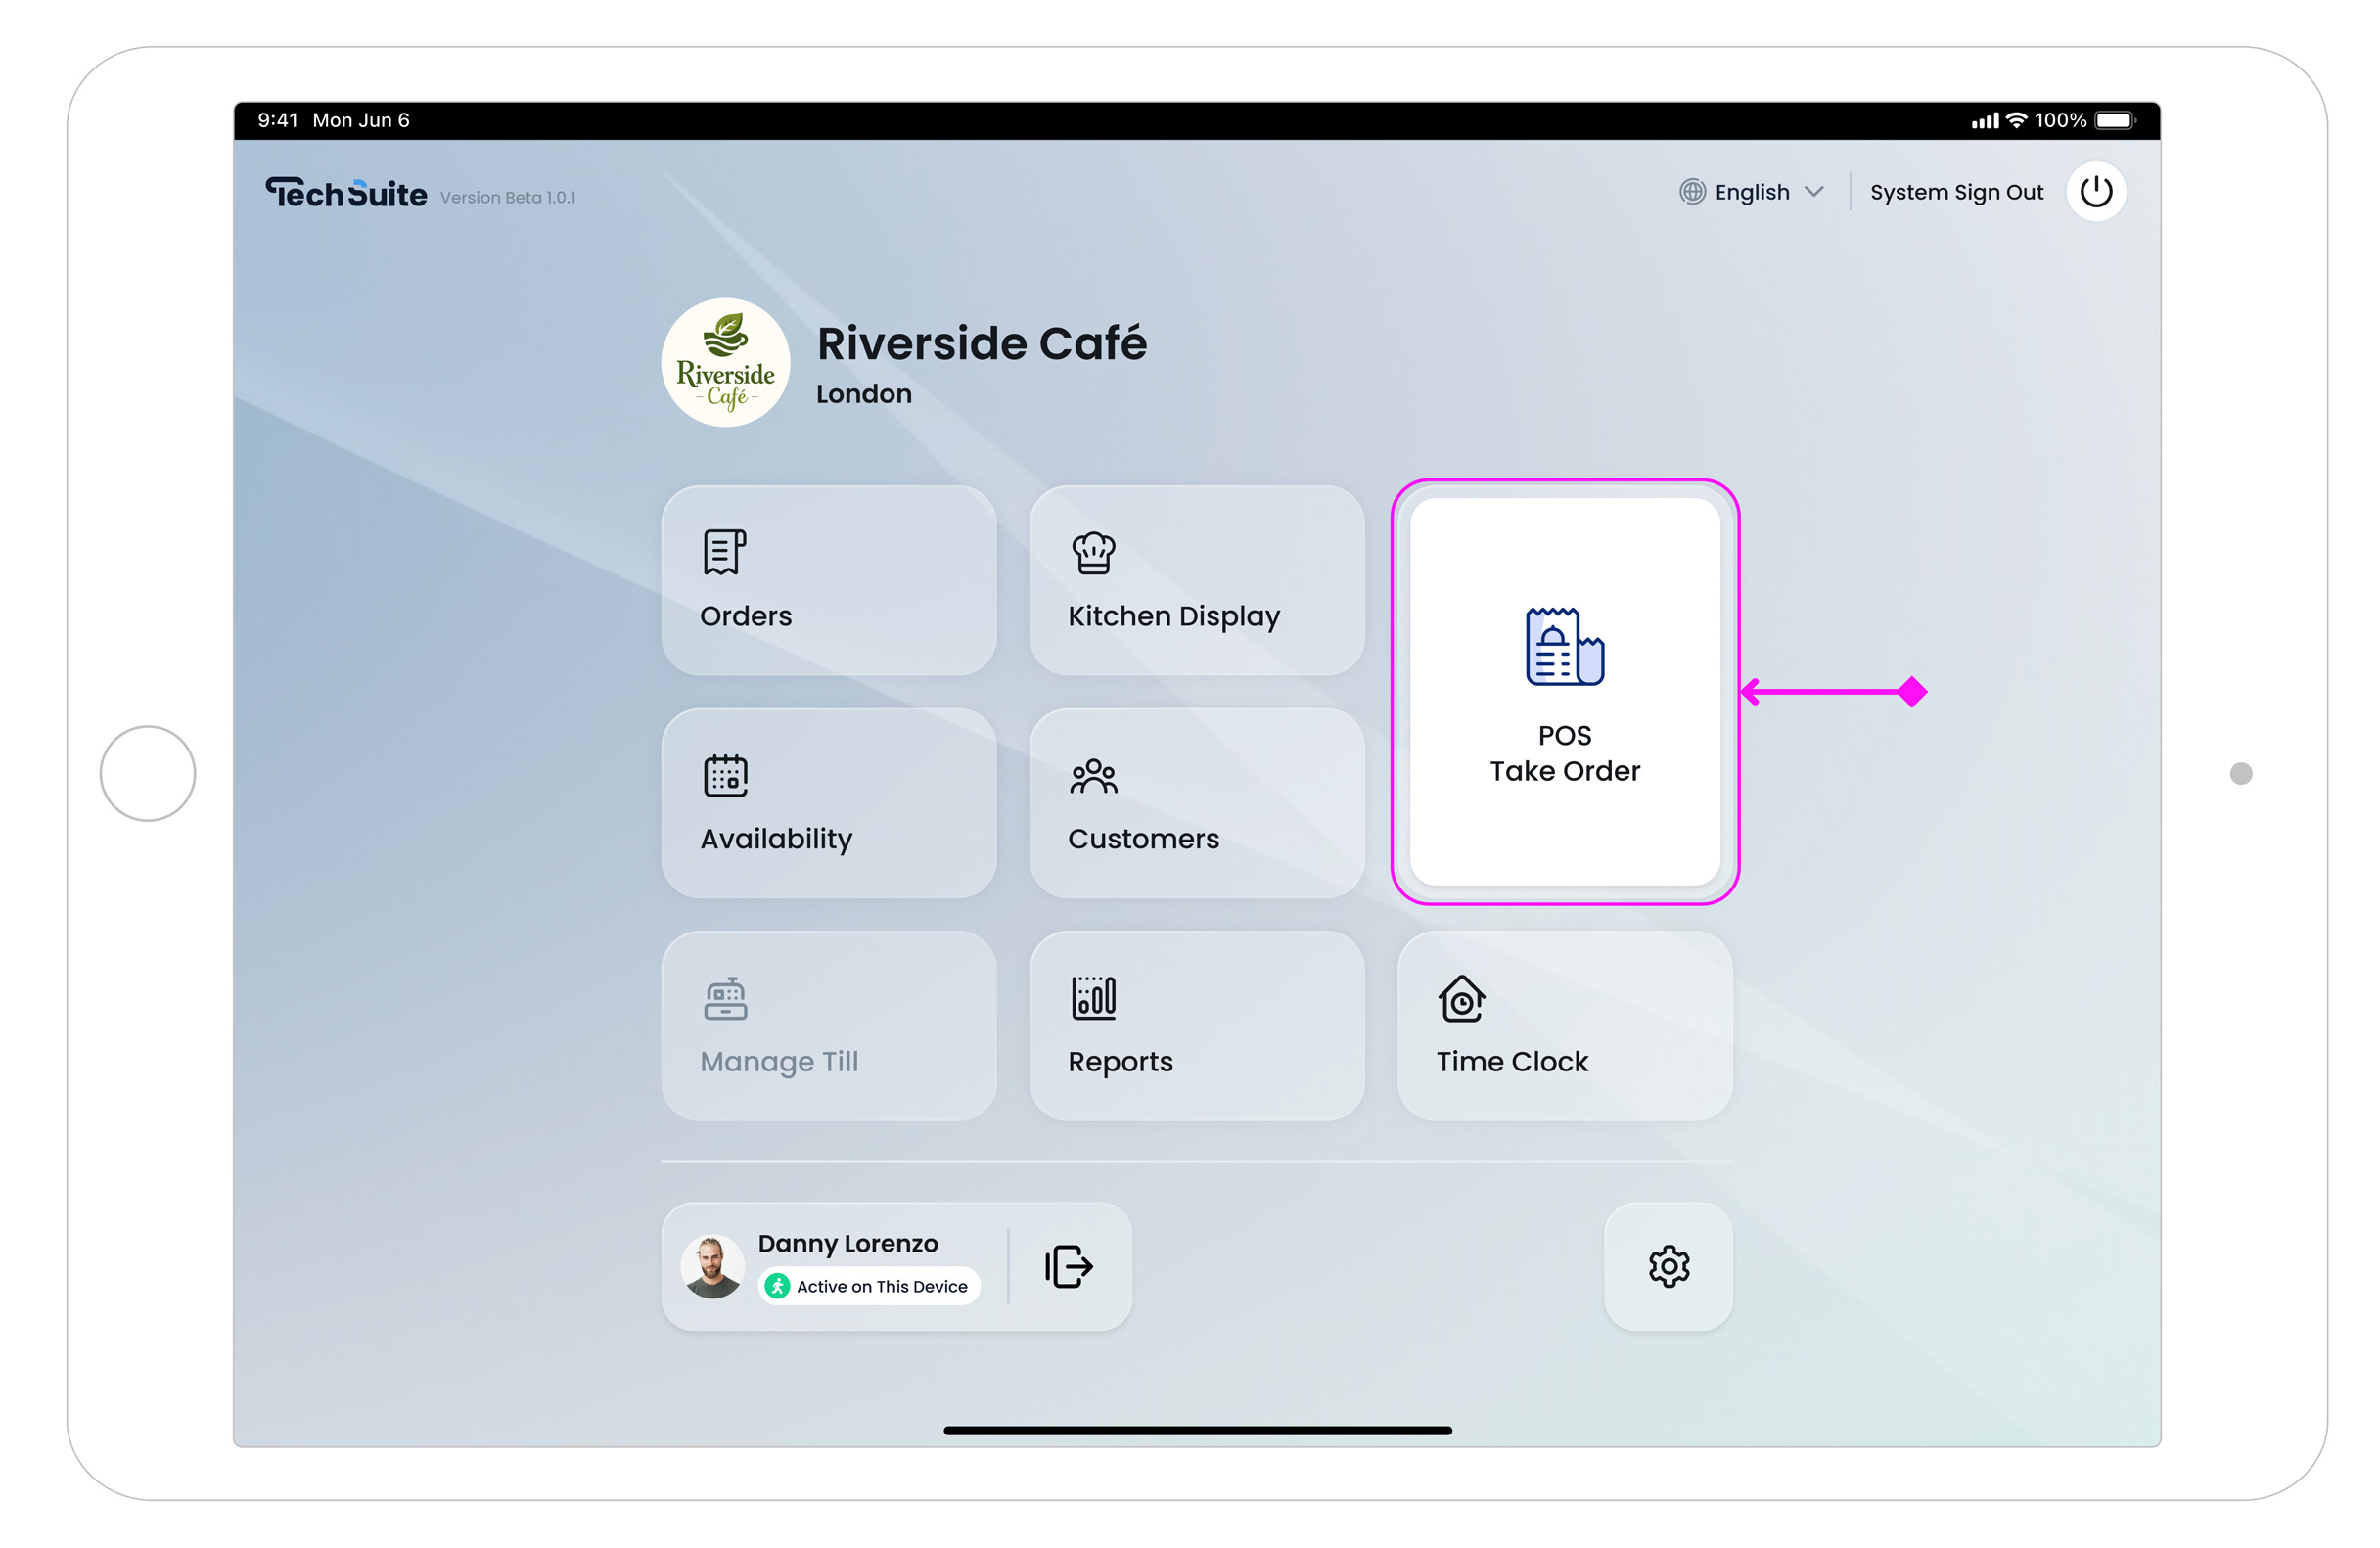
The Take Order page is where staff can create new orders, add items, assign customers and complete payment, all from a single view. This screen works for dine-in, takeaway and delivery workflows.
To Get Started
Open the TechSuite POS App and navigate to the Take Order screen. For a step-by-step walkthrough of starting an order, assigning a customer and taking payment, see How to Take an Order.
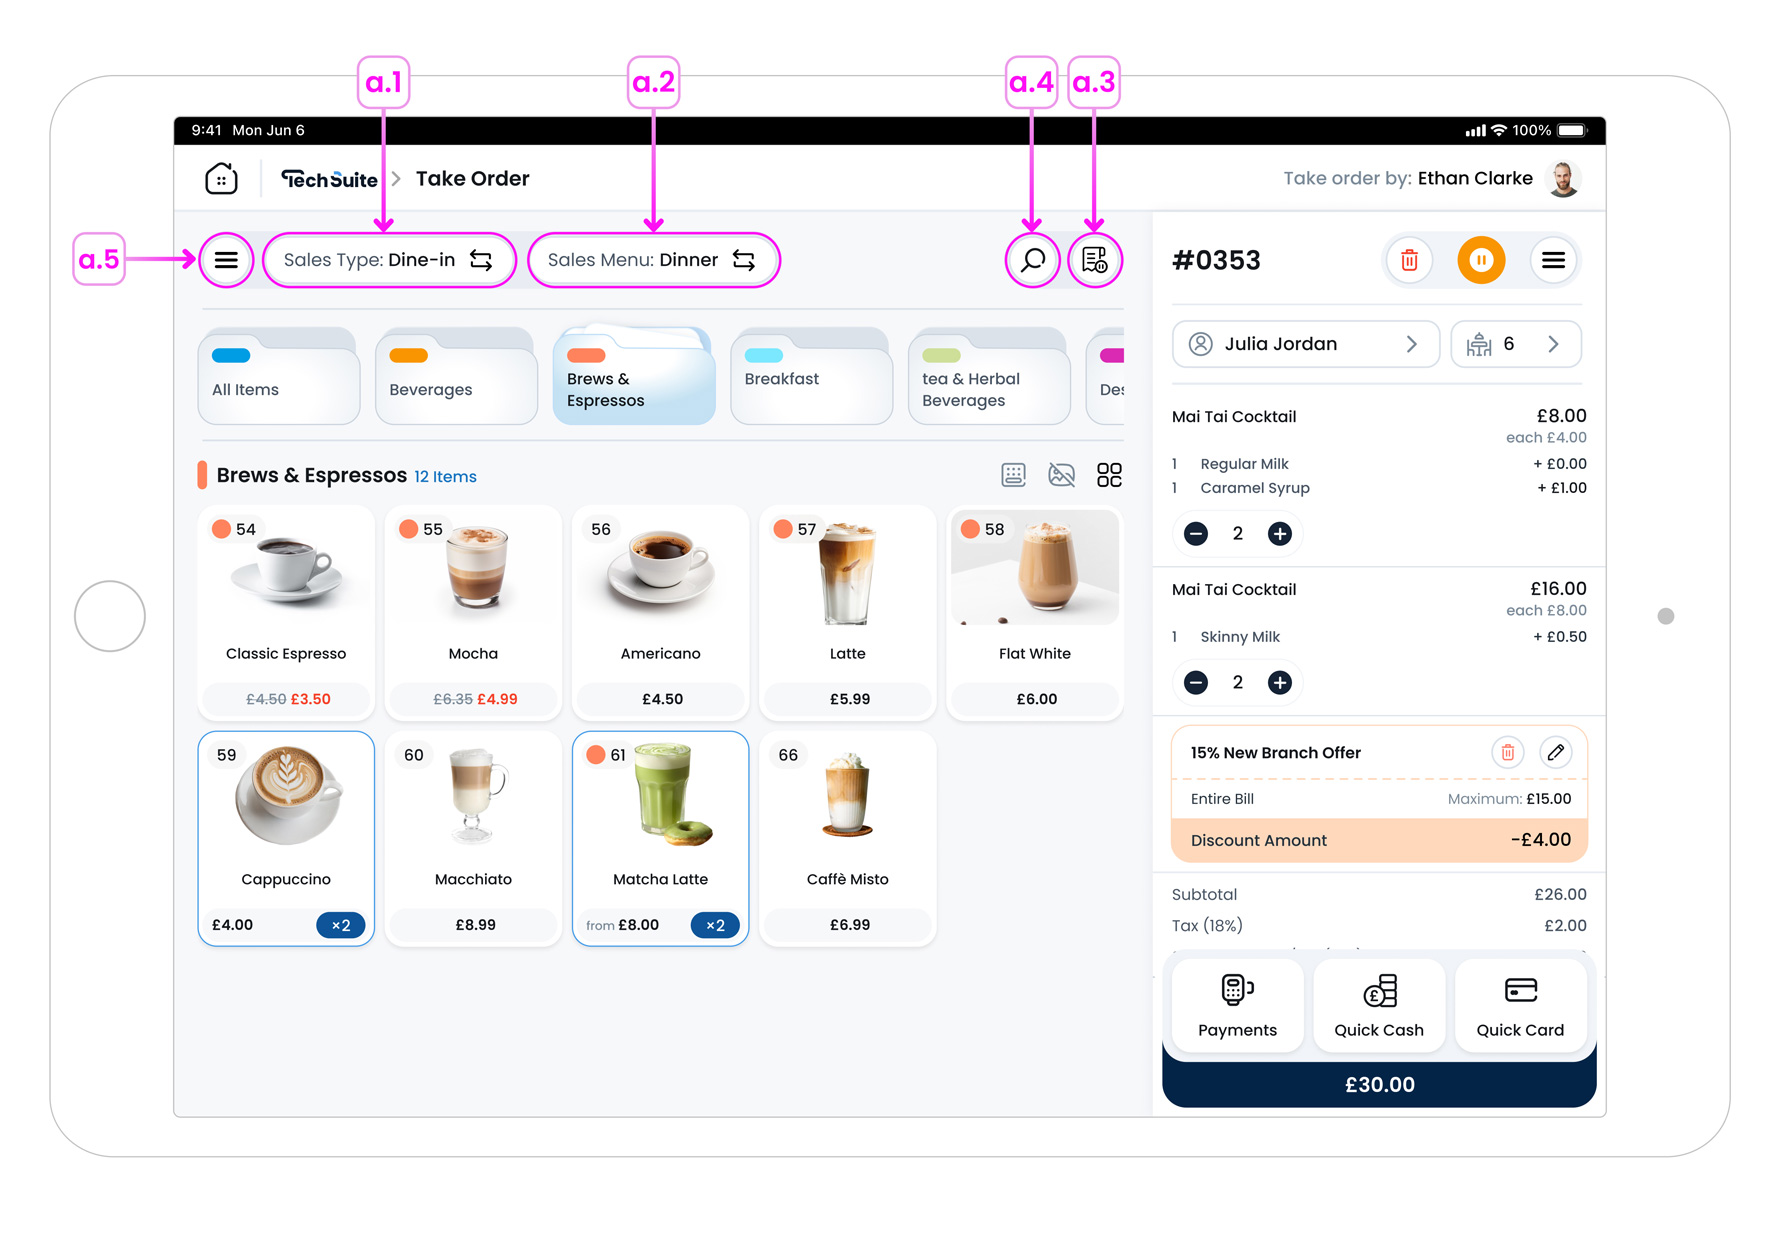
a. Header Bar and Menu Options
At the very top of the screen, you’ll find a set of controls that help guide the flow of the order.
-
a.1. Sales Types Button
On the left-hand side, staff can switch between sales types such as In-store, Takeaway and Delivery. The types shown here are managed in the POS Profile settings from the Portal. To adjust which order types appear on POS, go to: TechSuite Portal → Settings → Devices & Profiles → POS Profiles → Edit POS Profile.
-
a.2. Menu Option Button
Use the dropdown labelled “All Items” to switch between available menus. Menus are created in the Management Portal and can be linked to specific locations. This allows for seasonal or branch-specific offerings.
-
a.3. Held Orders Button
Tapping the Held Orders button takes you to a list of saved orders that have not yet been finalised. This is useful when a customer wants to add more later or needs time to decide.
-
a.4. Search Icon
The magnifying glass allows you to search for items within the currently selected menu.
-
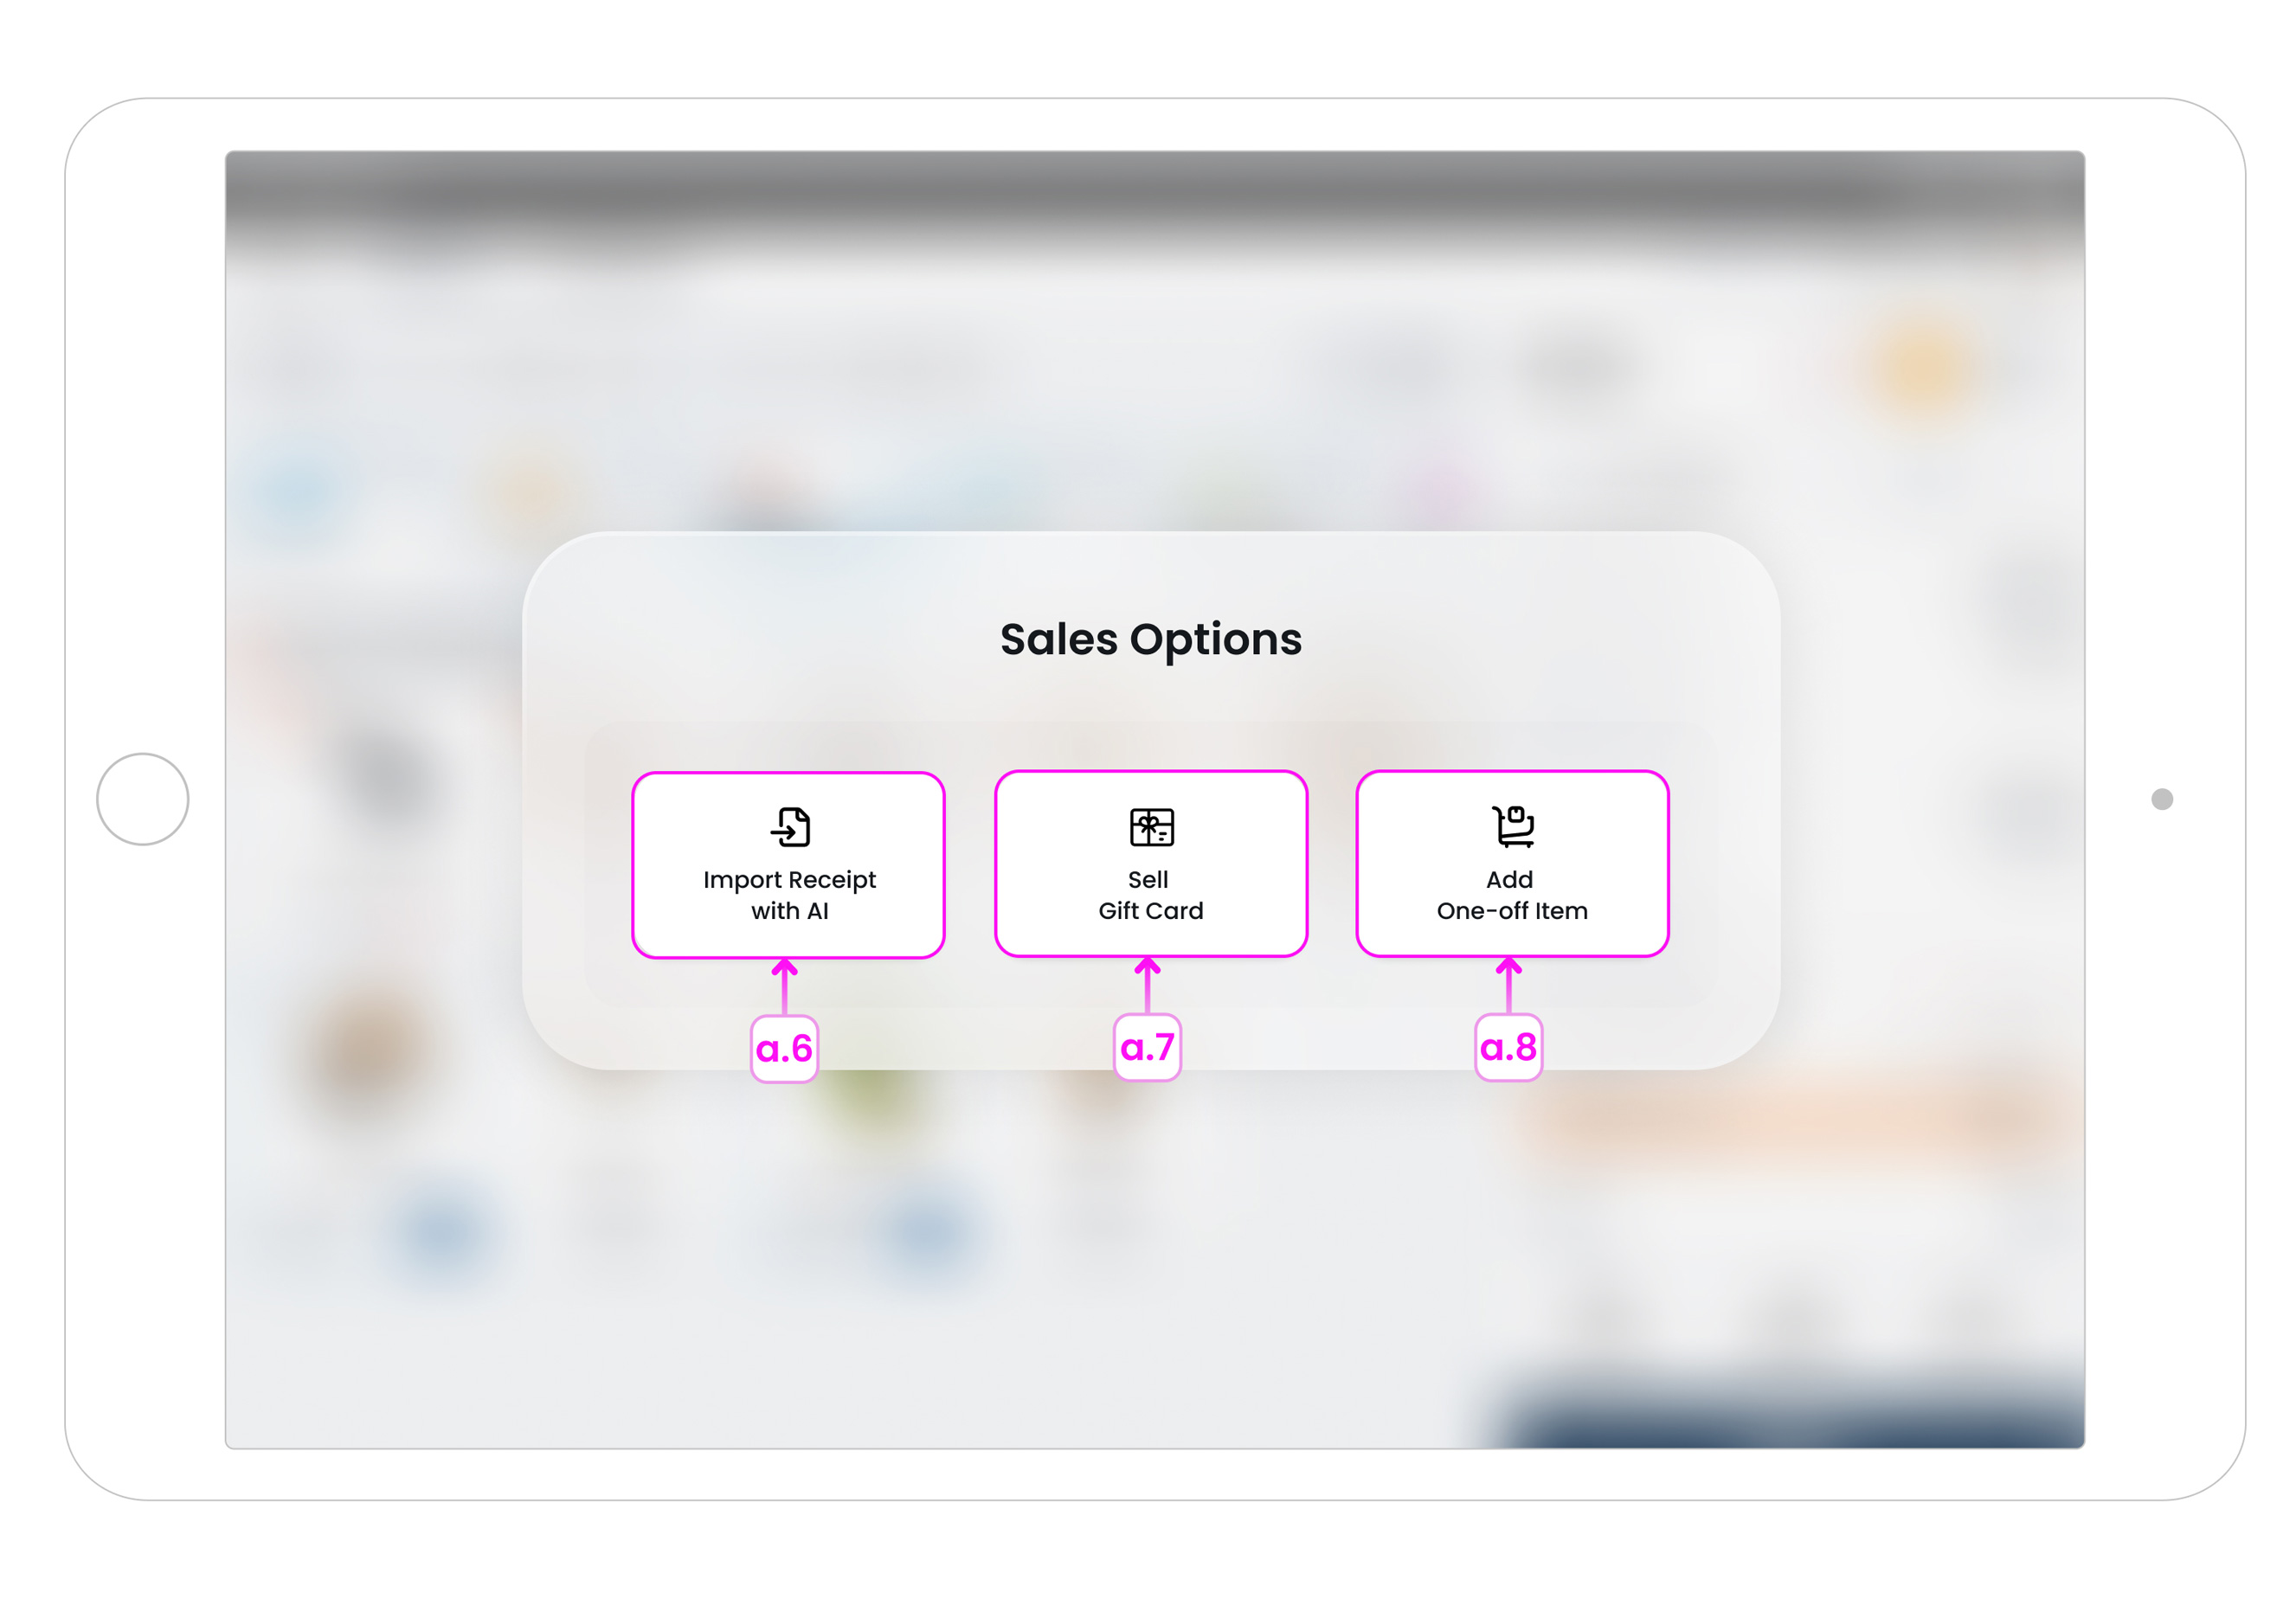
a.5. Sales Options (Hamburger Menu)
Tap the hamburger menu to open the Sales Options popup. This gives you quick access to extra sales tools without leaving the Take Order screen.
-
a.6. Import Receipt with AI
Use this to capture a physical supplier receipt. Take a photo, then AI reads the receipt and identifies the items and quantities. The detected items are added to the order automatically and included in your reports.
-
a.7. Sell Gift Card
Sell gift cards directly from the POS. You can sell a pre-made value gift card, or an open value gift card where the staff member selects the amount before selling.
-
a.8. Add One-off Item
Use this when you need to sell something that isn’t in your inventory. Enter a one-time name and price (optional note), and it’s added straight to the basket and receipt like a normal item. It won’t be saved to the Item Library or tracked for stock.
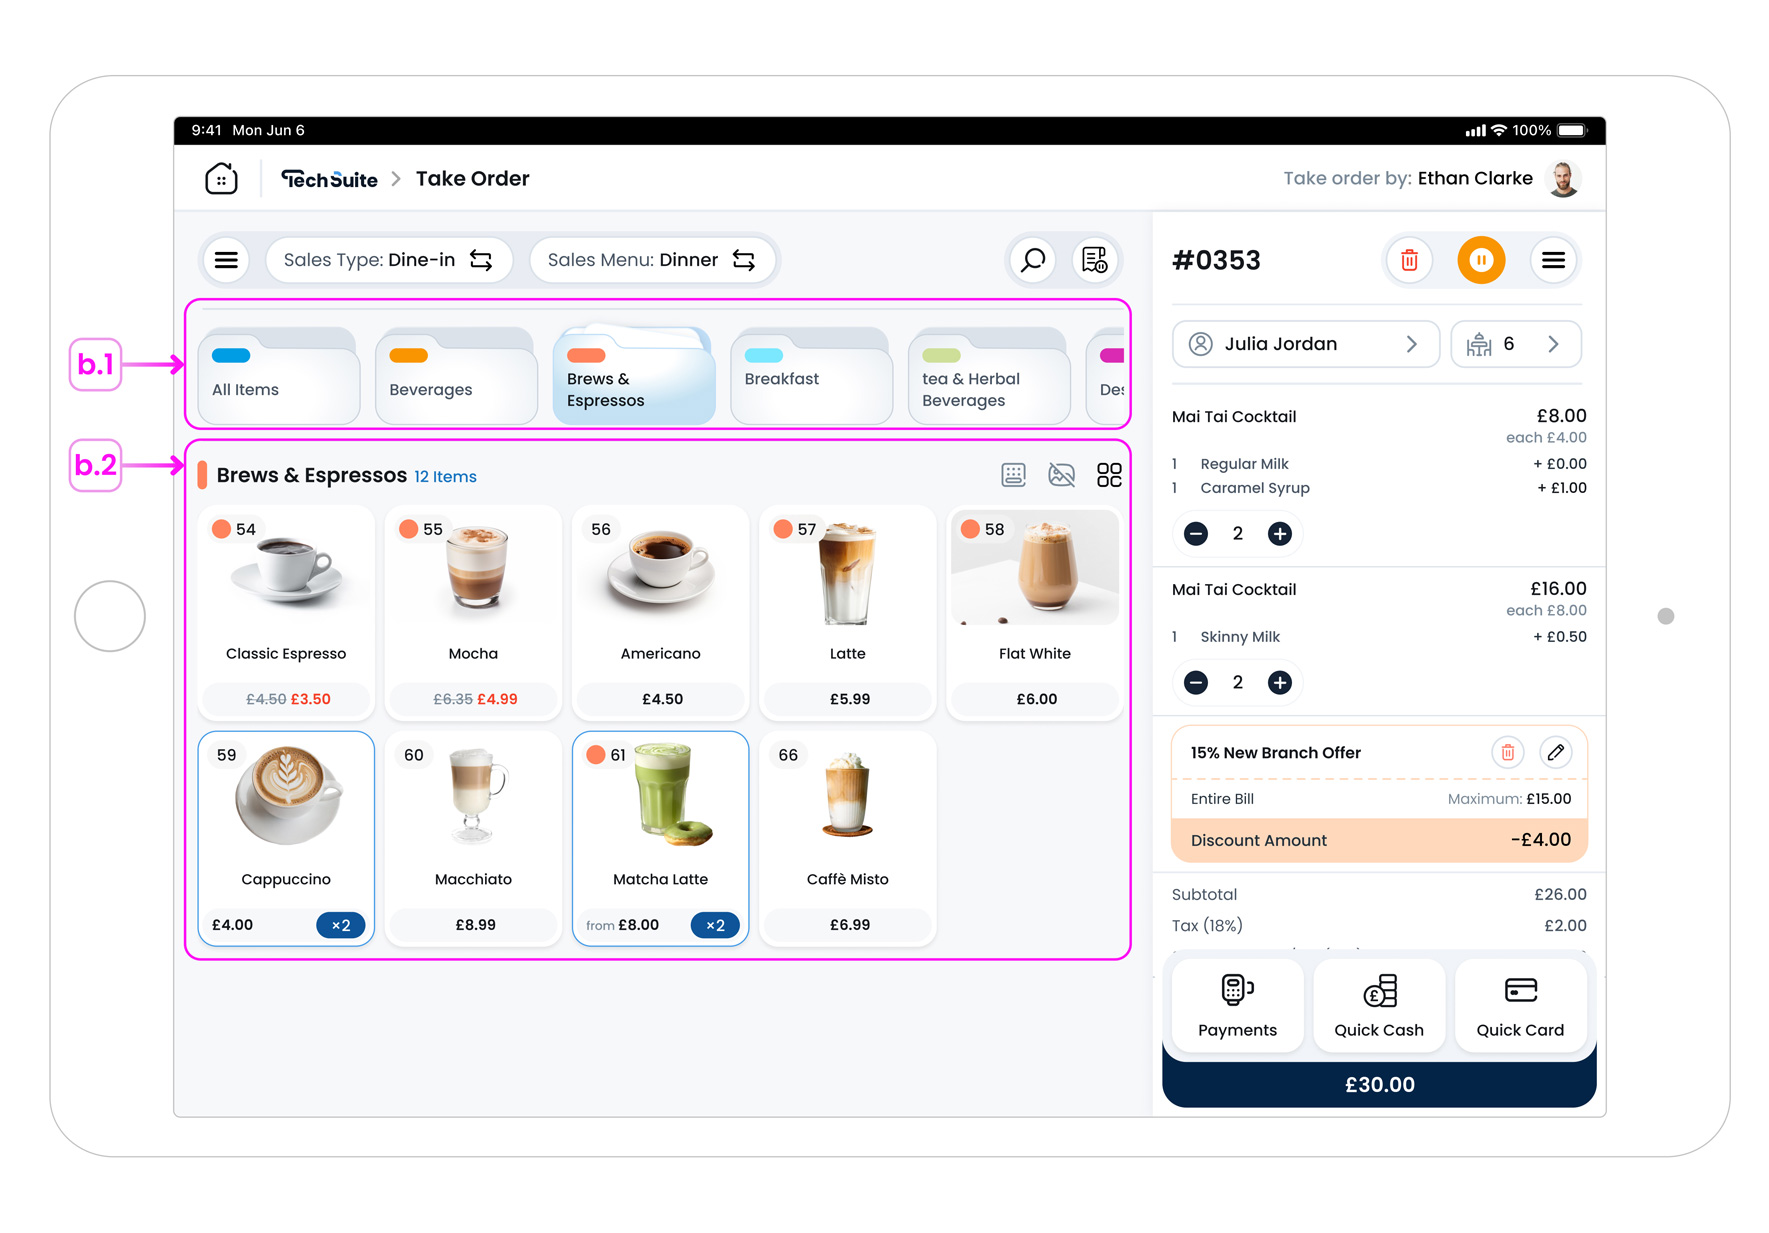
b. Categories and Items
Just beneath the header, you’ll see a row of tabs representing item categories.
-
b.1. Category Tabs
These are pulled from the inventory categories set up in the Portal. When POS Menu is set to “All Items”, all categories will appear here. The order of these categories can be customised in the Portal.
-
b.2. Item Grid
Inside each category, items are displayed in a tile format showing the name, image and price.
-
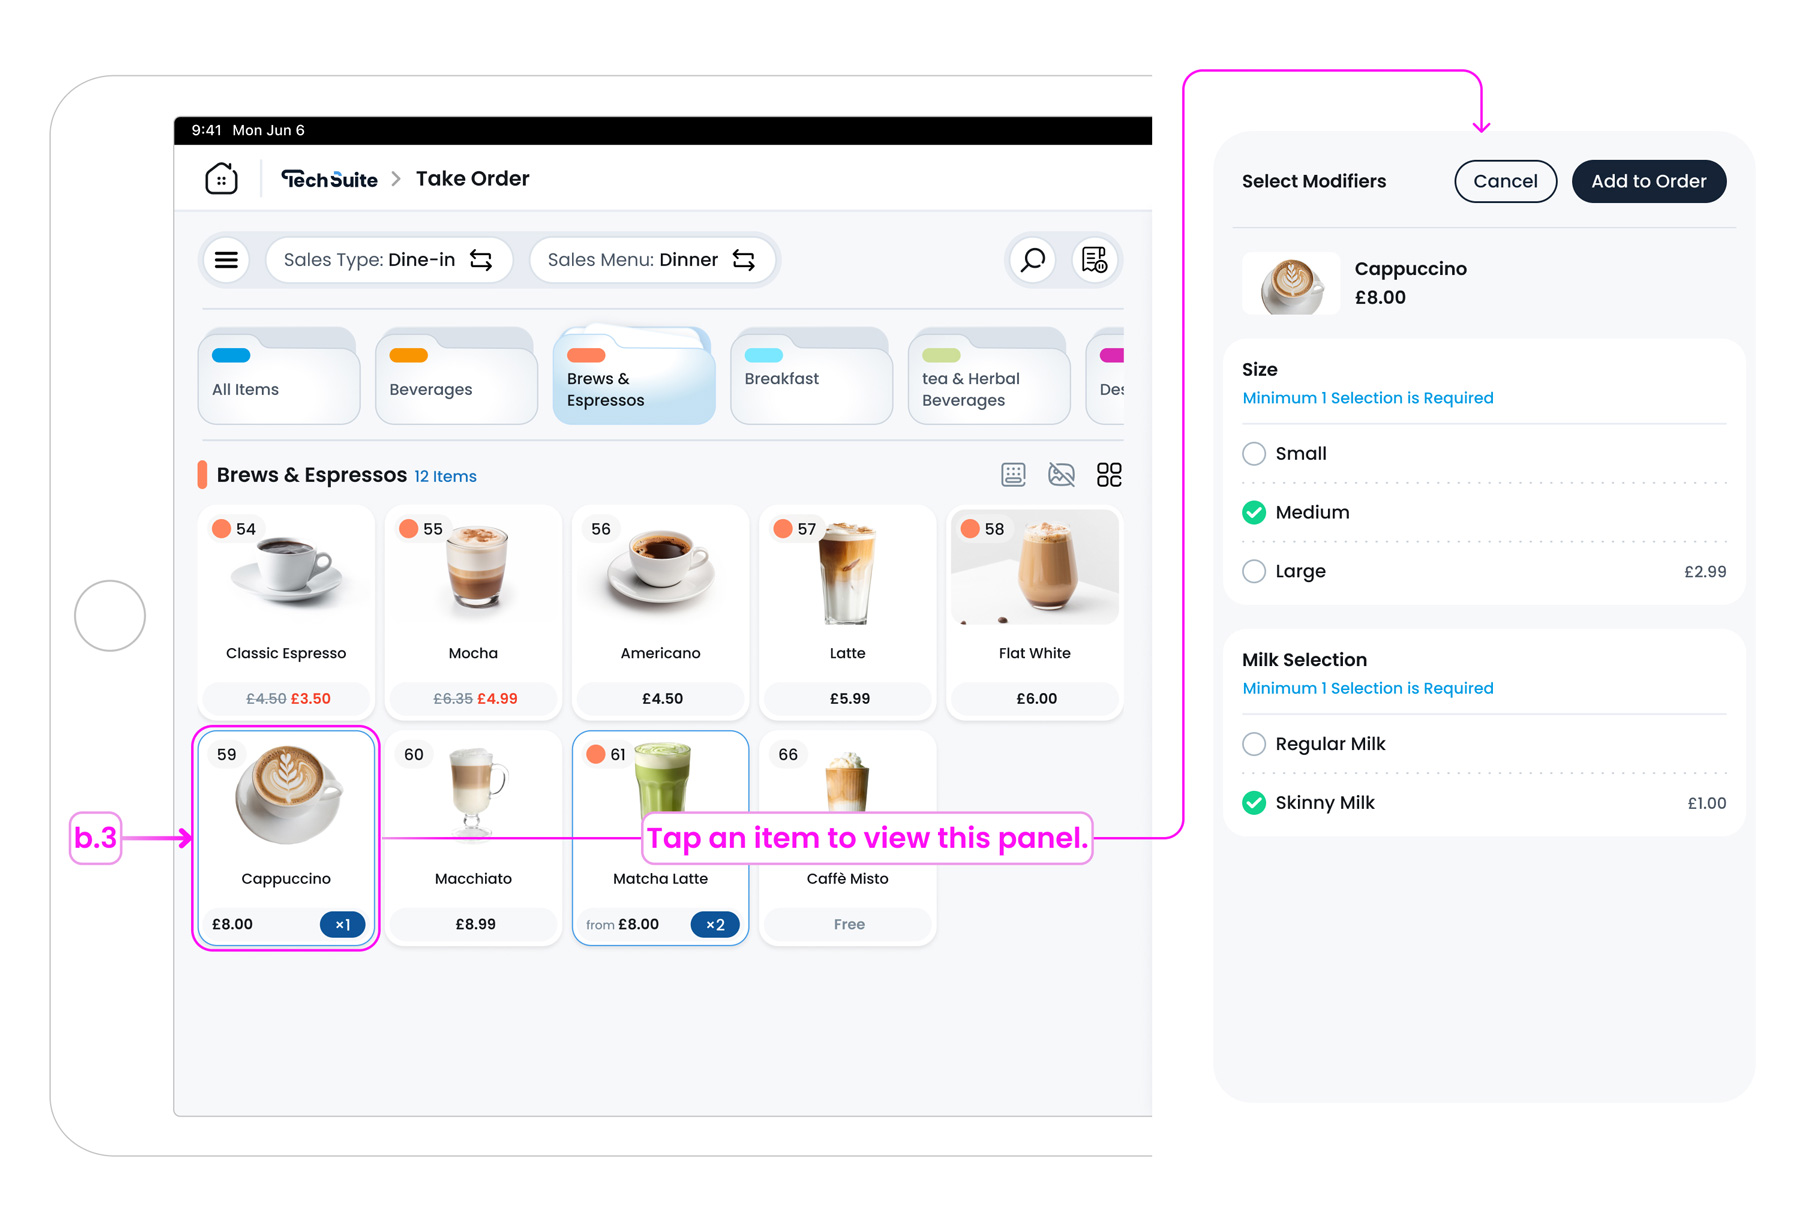
b.3. Item Selection and Modifiers
Tapping an item will add it to the order. If the item has modifiers, you will first be prompted to select the required or optional options before it is added. Modifier behaviour (for example, required, optional, free or charged) depends on the group settings configured in the Portal.
c. Basket Panel
On the right-hand side, you’ll see the active order panel.
-
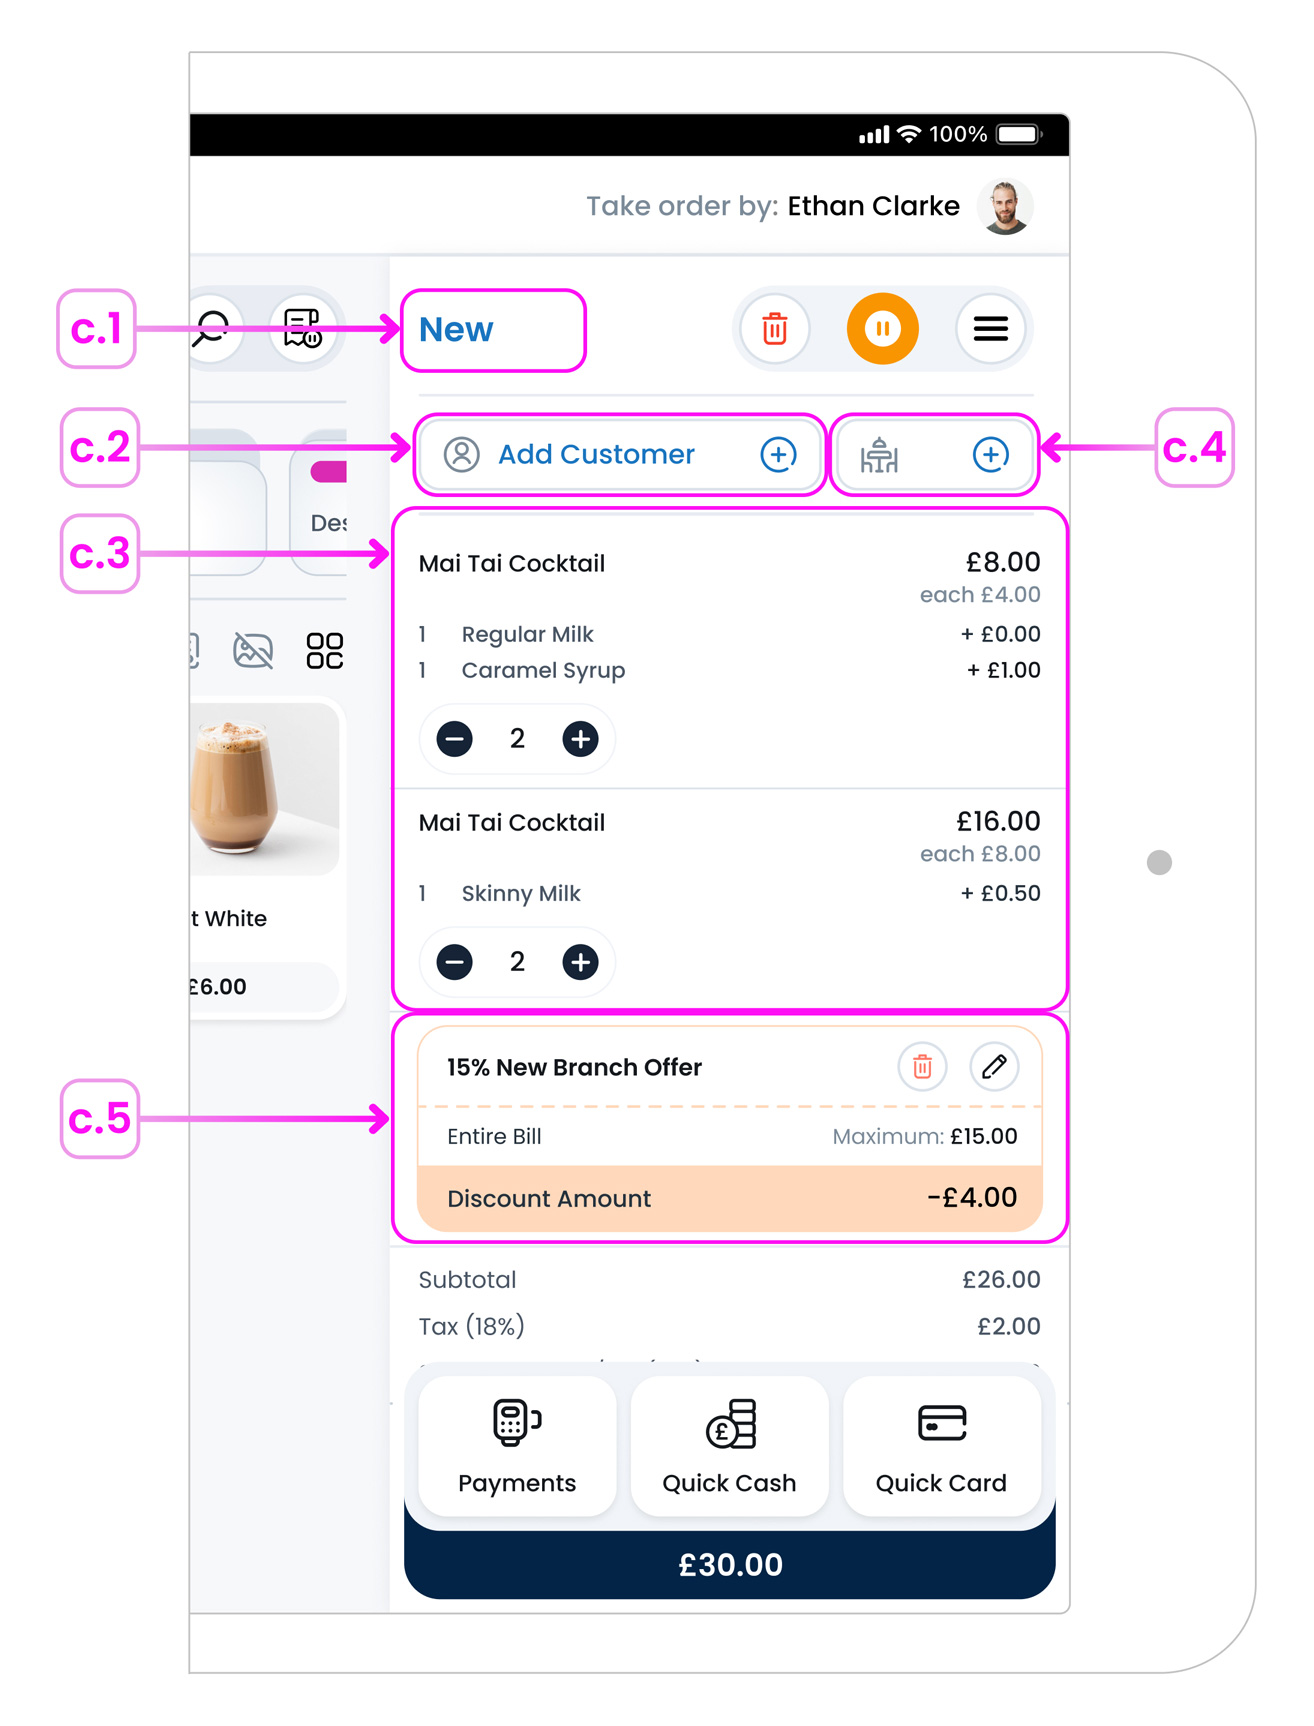
c.1. Order ID
New orders begin with the name “New”, which is automatically replaced with a number once saved or completed.
-
c.2. Customer Assignment
Tap “Add Customer” to attach a customer to the order. You can either add them manually or select from existing records.
-
c.3. Order List
As you add items, they appear in this panel with quantity controls and the ability to remove items. Items with modifiers are grouped under the main product for clarity.
-
c.4. Table Number
Tap the Table button to open a numeric keypad, then enter the customer’s table number. The table is shown on the order header, prints on kitchen tickets/receipts, and appears on the KDS (if connected).
-
c.5. Promotion Banner
When a promotion is applied to the order, a banner appears in the basket panel. This happens whether the promotion is automatically applied based on rules, or manually added by staff. The banner clearly shows that a promotion is active on the current order.
d. Action Buttons Above the Basket
To the right of the order name, you’ll see a set of action icons that help you manage the current bill. These controls allow you to clear, hold, or apply order-level actions quickly.

-
d.1. Clear Order
Clear the current Take Order screen to reset the order and start over. This removes all items and changes from the basket.
-
d.2. Hold Order
Save the current bill to Held Orders to resume it later. This is useful when a customer needs more time or you need to temporarily switch to another order.
-
d.3. More Actions (Hamburger Menu)
Tap the hamburger menu to open additional order-level actions such as adding allergens, order notes, removing service charge, and applying promotions.
-
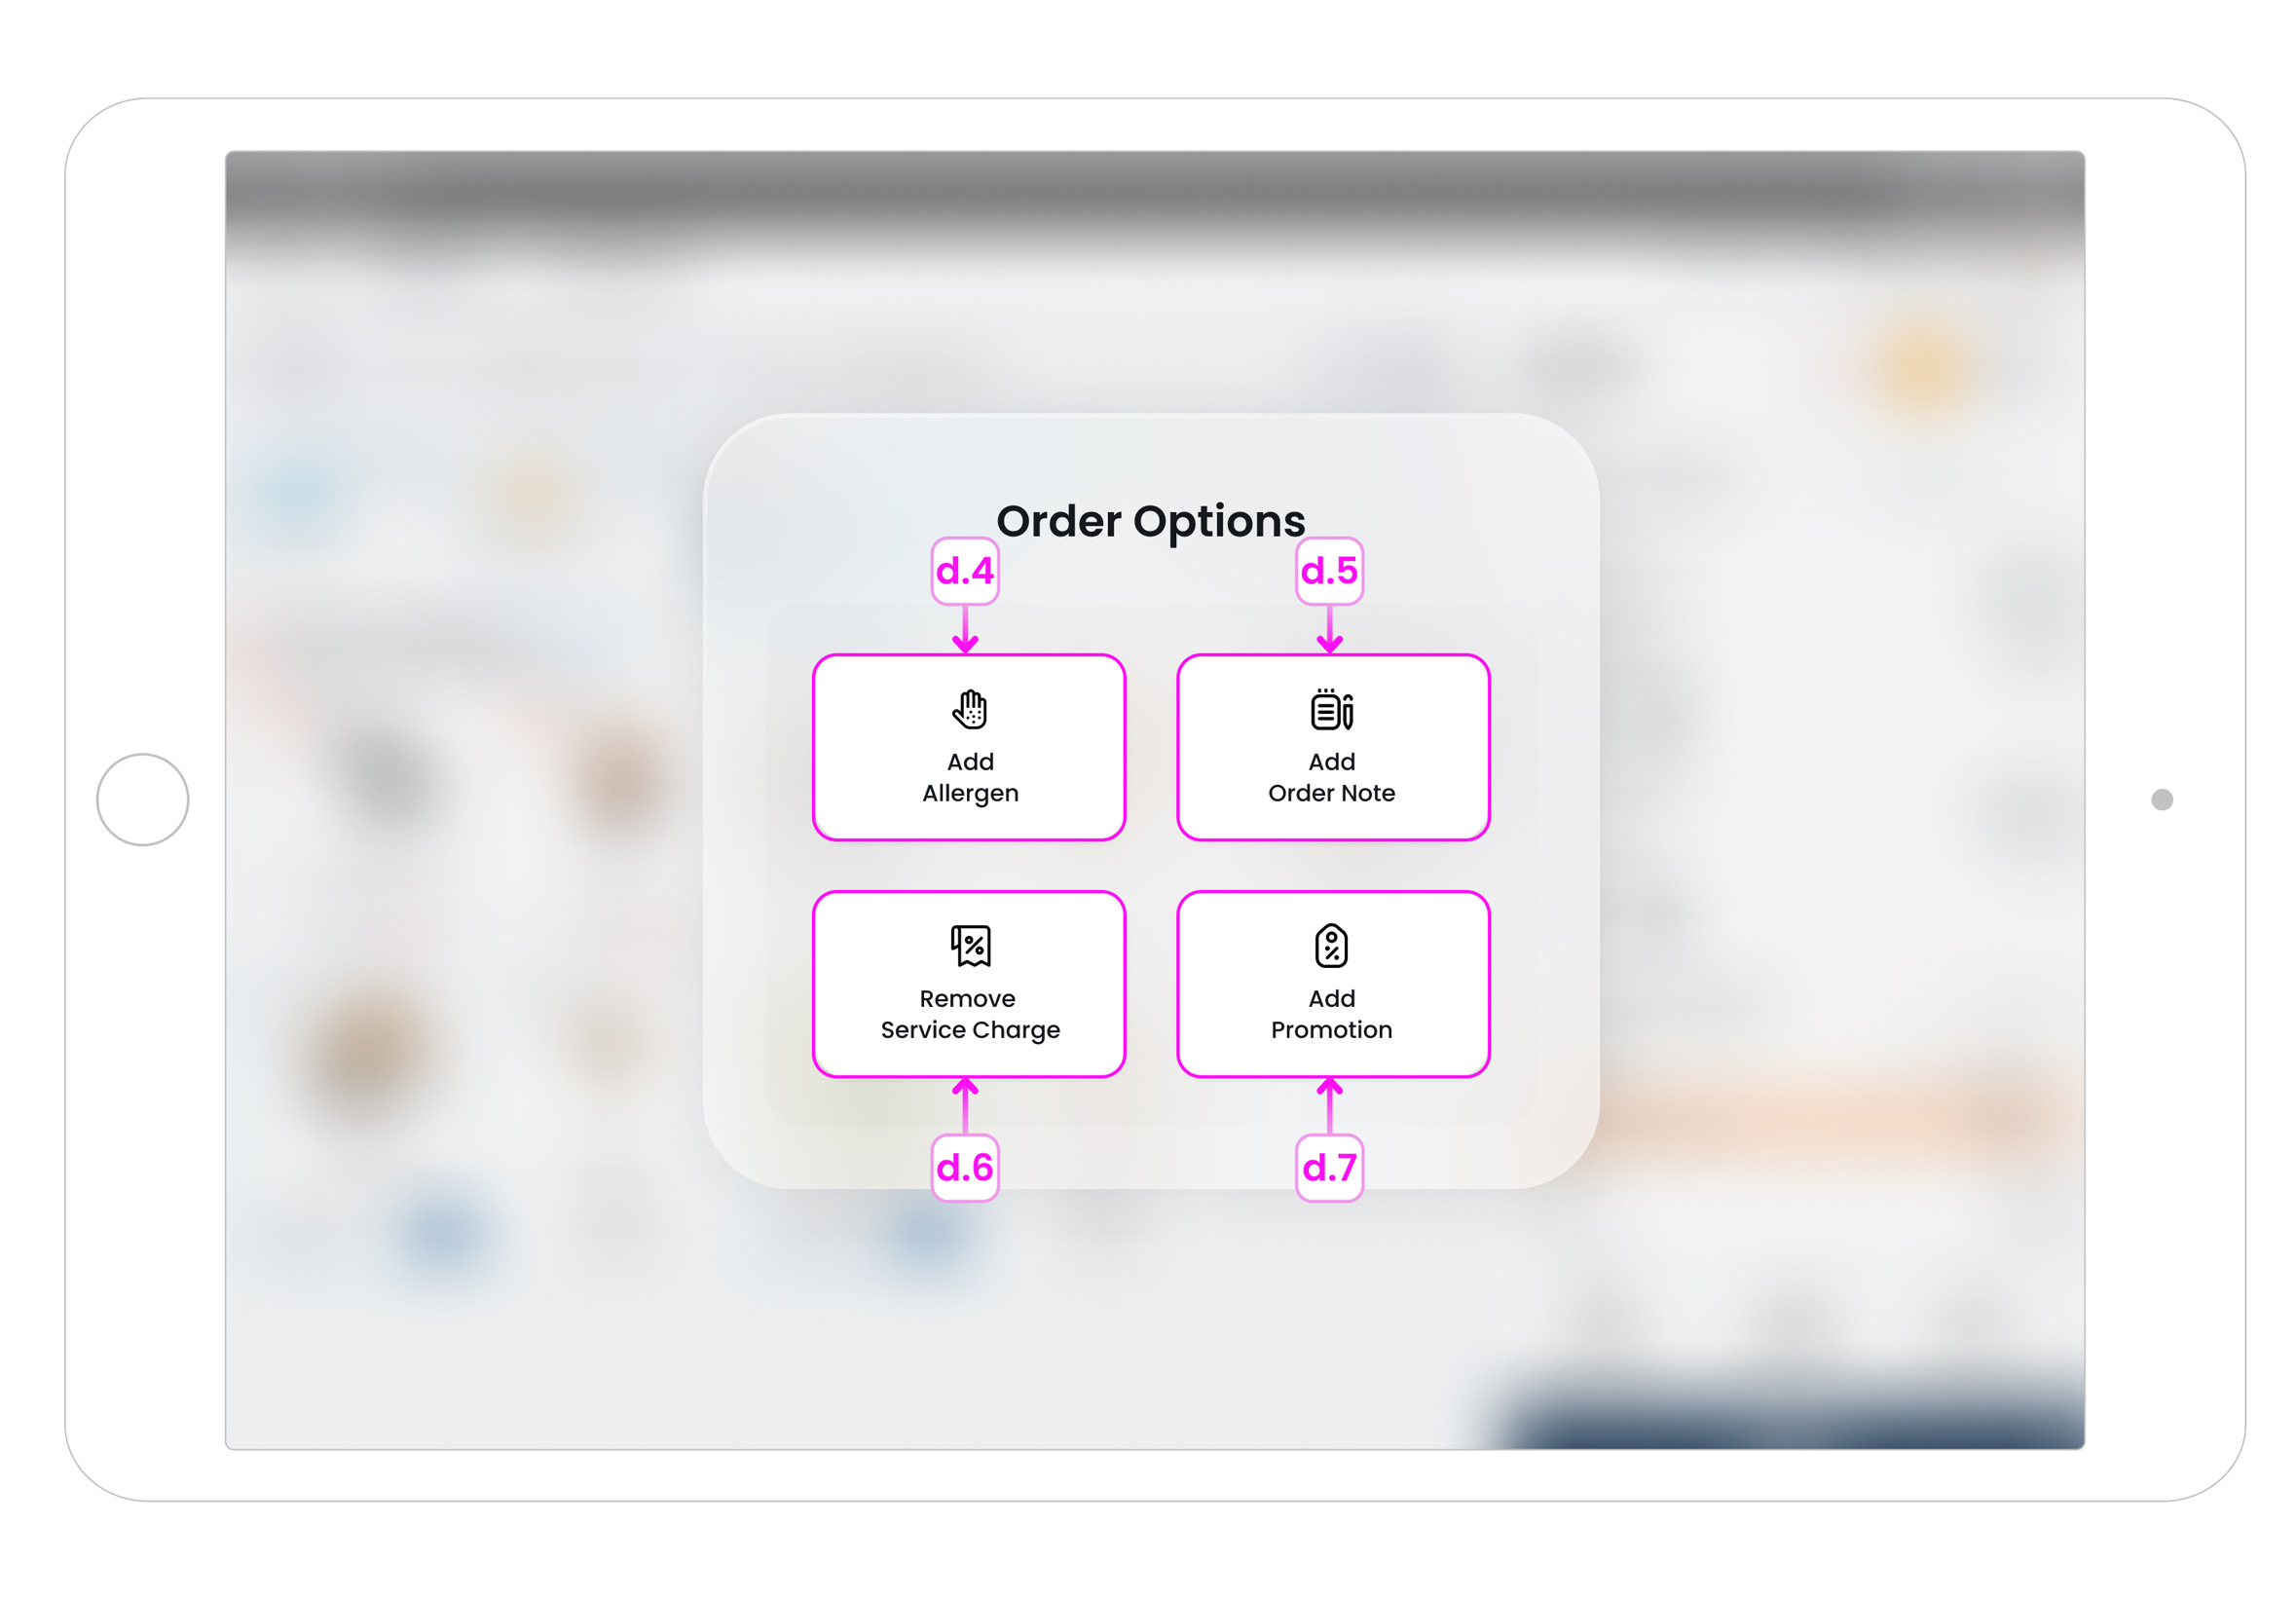
d.4. Add Allergen
Open a popup to record the customer’s allergens for this order, then confirm to save. This helps the kitchen prepare items safely and ensures allergen information is clearly communicated.
-
d.5. Add Order Note
Add a note for the entire order, such as delivery instructions or special preparation requests. This note prints to the kitchen or appears on the KDS if configured.
-
d.6. Remove Service Charge
Remove the automatically applied service charge from the current order when needed. This change only affects this specific order and does not modify your global service charge settings.
-
d.7. Add Promotion
Apply an available order-level promotion to the entire order. This does not affect individual item discounts unless specifically configured.
e. Item Controls in the Basket
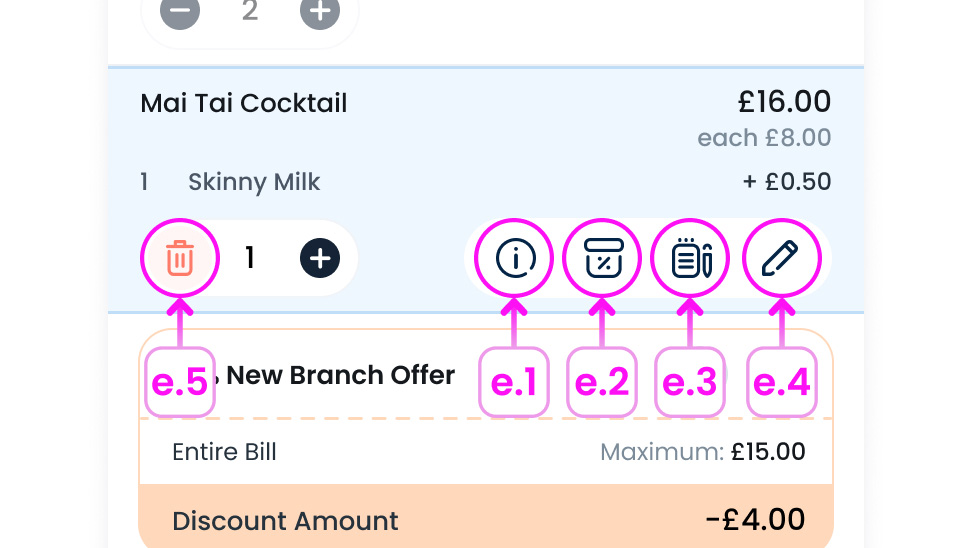
Each item added to the basket includes quick-action buttons that allow staff to make changes before completing the order. Tap an item to reveal these buttons, the selected row highlights in blue, and the controls appear directly beneath the item name.
-
e.1. Item Info
Open item details in a modal to view key information about the item.
-
e.2. Item Discount / Manual Promotion
Apply a promotion or discount to this single item. Other items are not affected.
-
e.3. Item Note
Add a note that only applies to this item (e.g., “no onions”). Prints to kitchen/KDS where configured.
-
e.4. Edit Item
Appears for items with modifiers. Reopen the modifier popup to change options before checkout.
-
e.5. Quantity & Delete
Use +/– to adjust quantity. When quantity is 1, the left control becomes a delete button to remove the item.
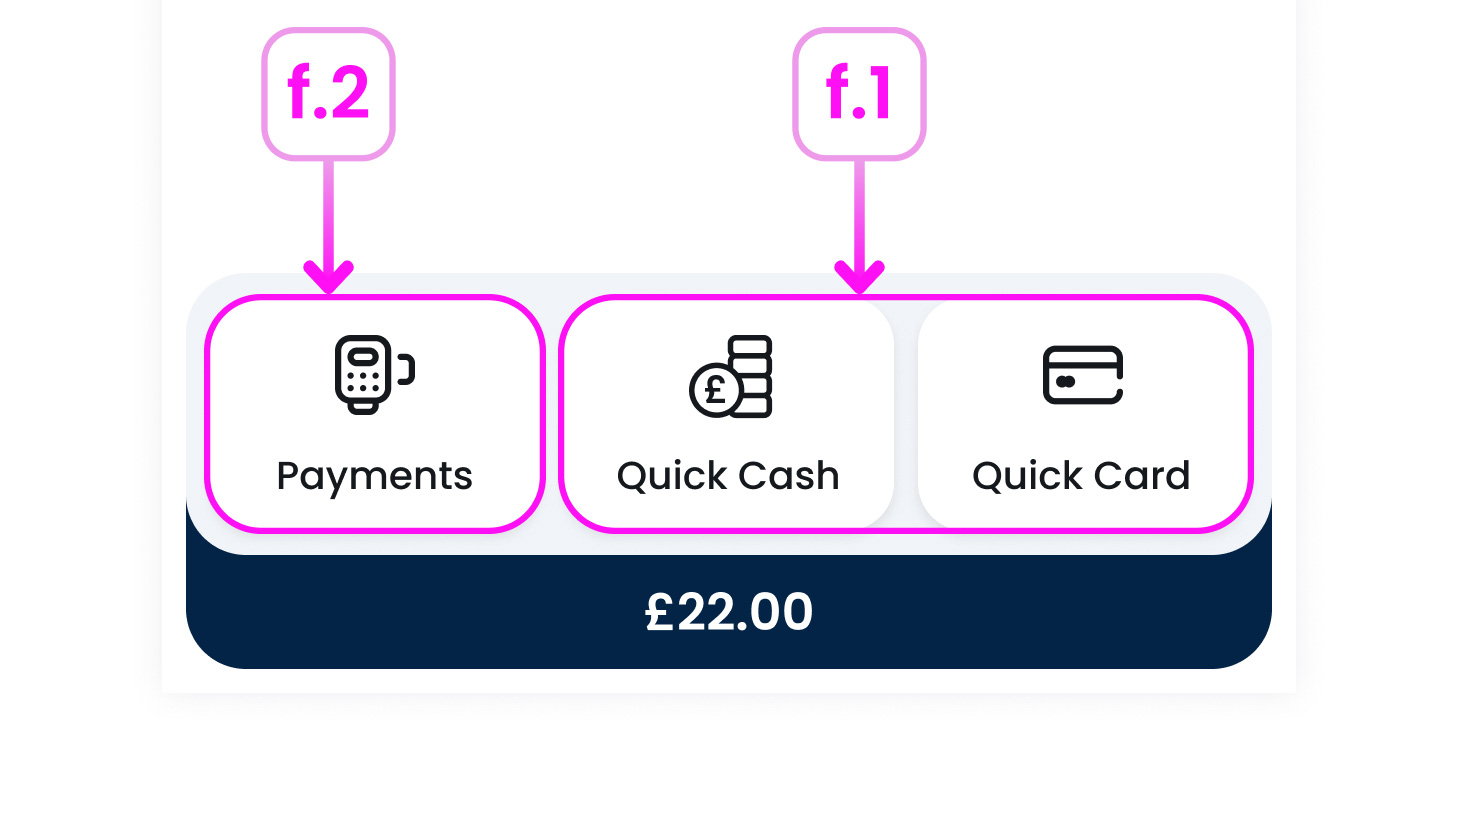
f. Payment Section
At the bottom of the basket panel, you’ll find the payment tools.
-
f.1. Quick Cash & Quick Card
These buttons allow staff to complete the order immediately using cash or card, with no further confirmation screens. This speeds up service during busy times.
-
f.2. Pay Button
Tapping “Pay” opens the full payment screen. From here, you can choose to split the bill, enter custom payment amounts or select alternative methods.
Where to Start?
For a step-by-step walkthrough, see how to take an order in TechSuite POS.