Add a New Staff Member
In the TechSuite portal, you can add new staff members to your account, assign them roles, and set up access in just a few steps. This ensures each team member has the right tools and permissions to match their responsibilities, whether they’re managing the system or working on-site.
To Get Started
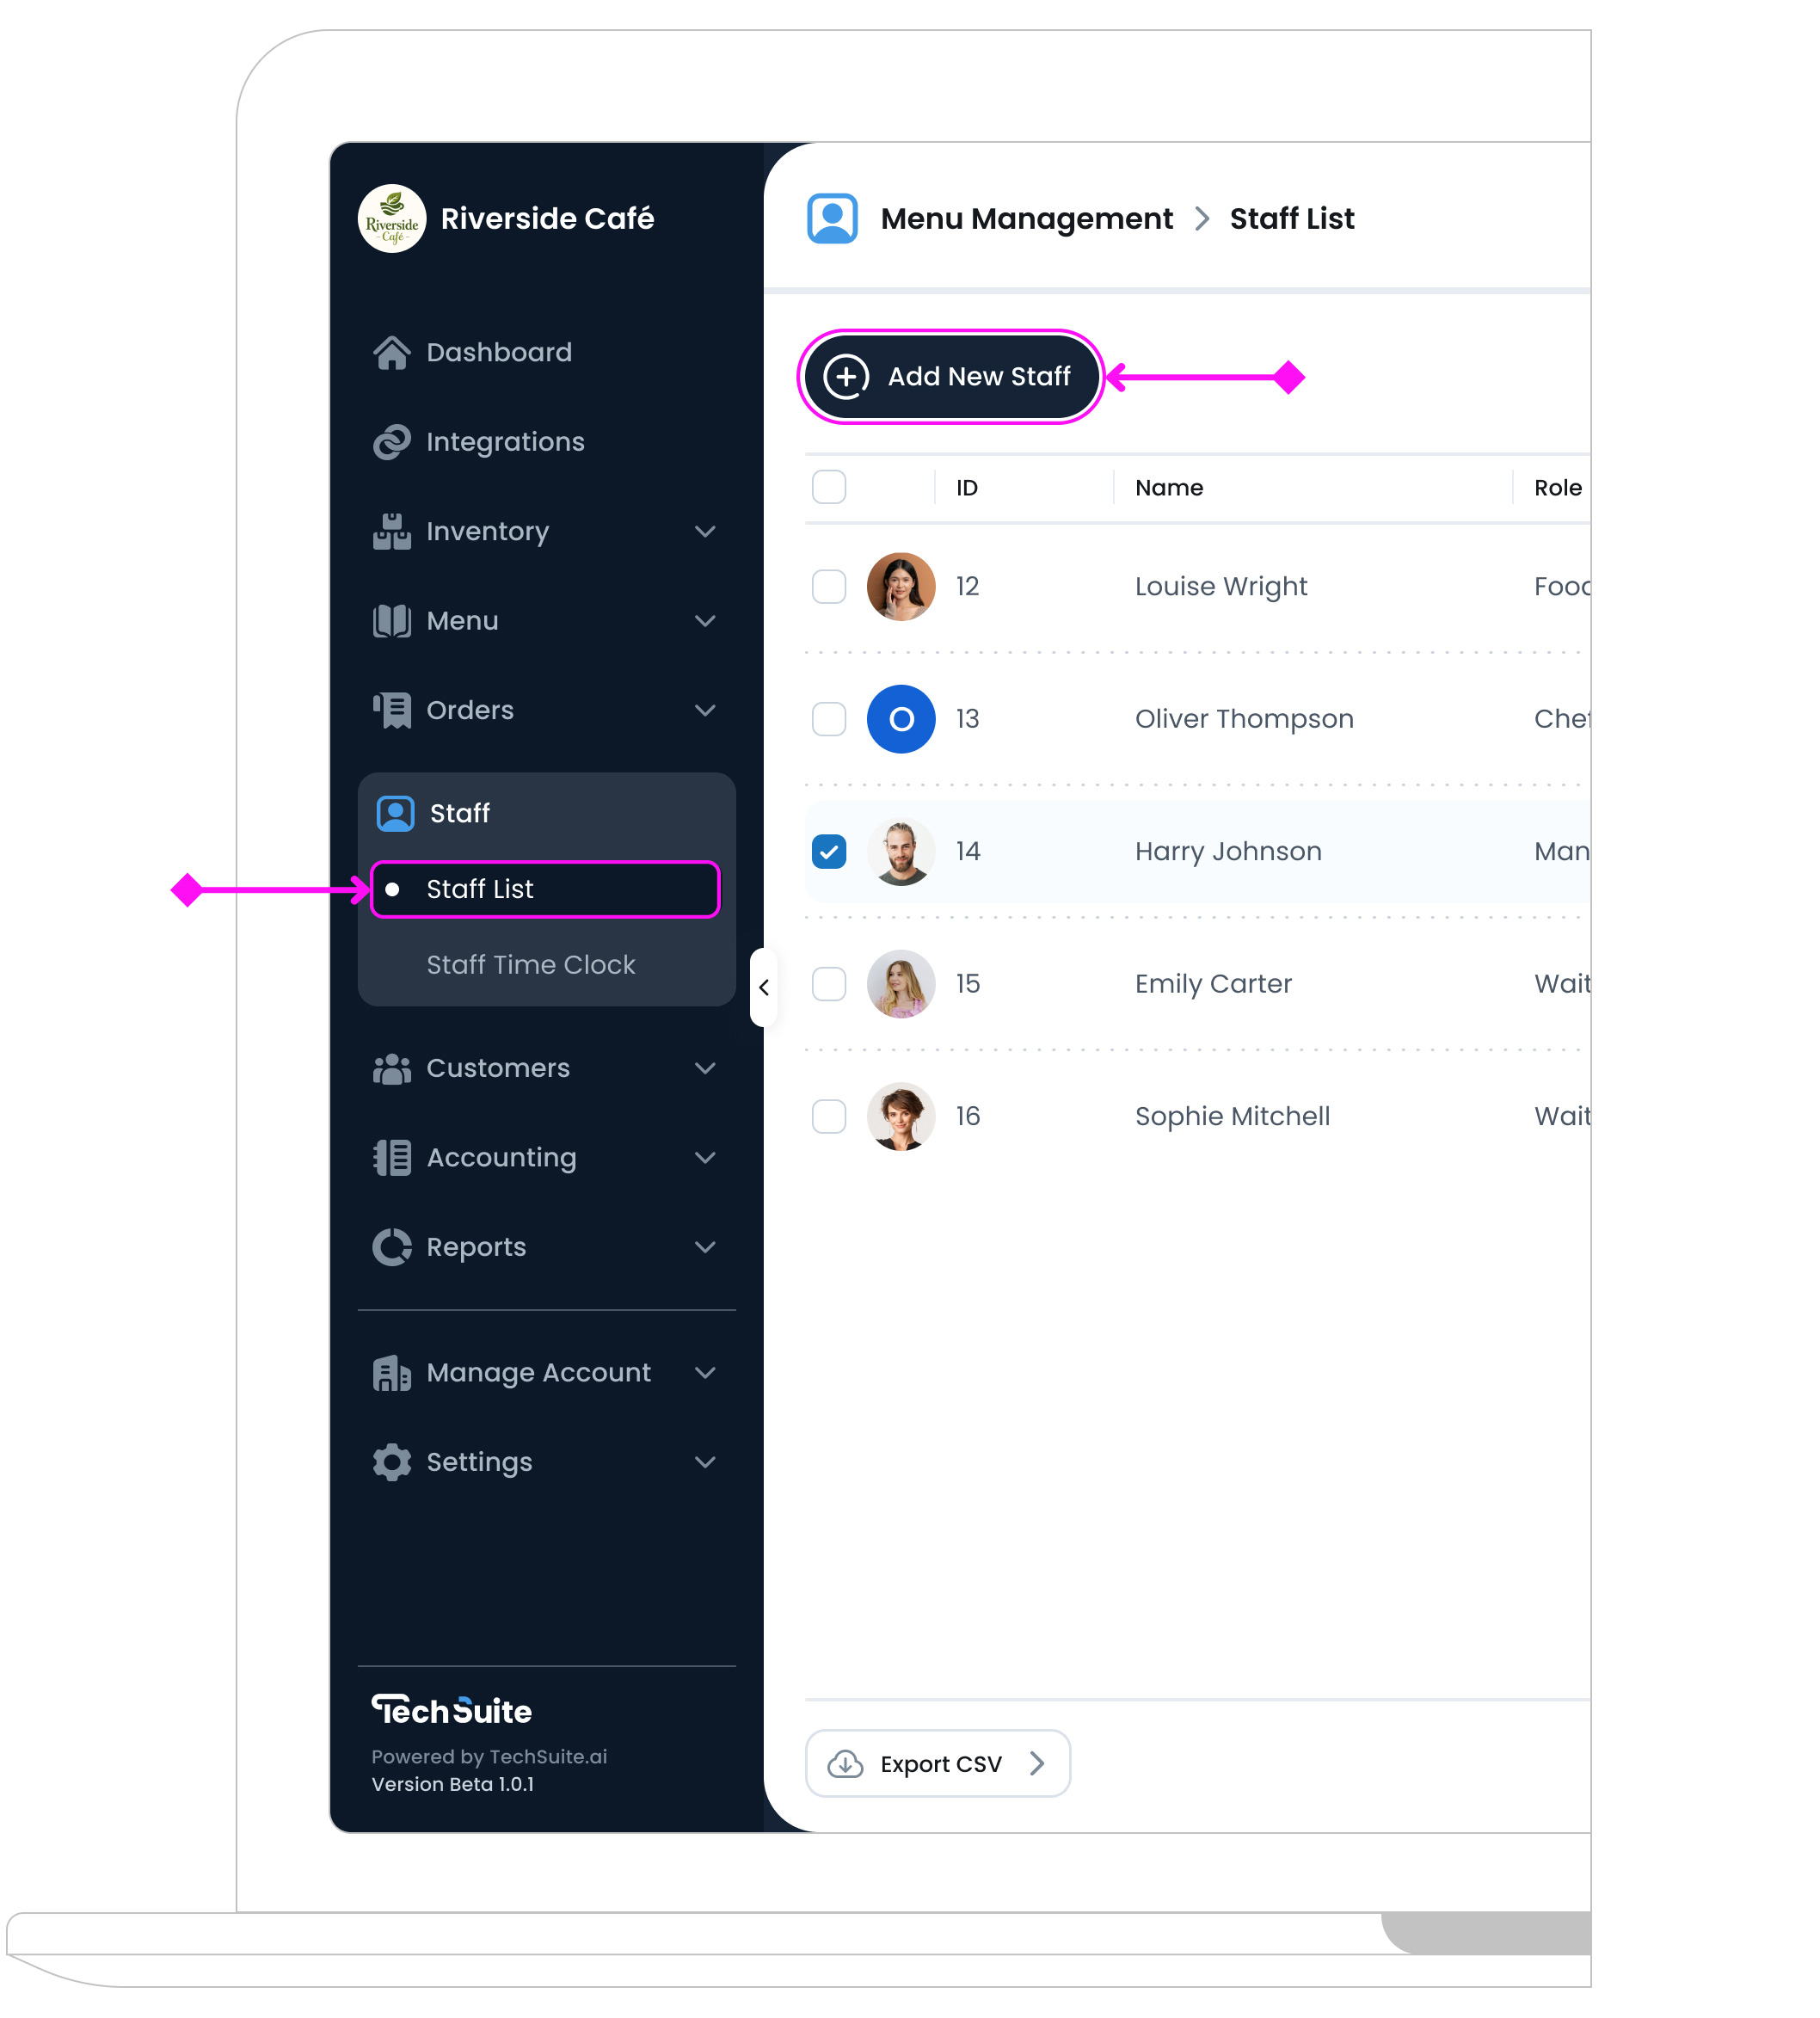
To add a new staff member, log in to the TechSuite portal, and from the sidebar, navigate to Staff Management > Staff List and click the “Add New Staff” button  at the top-left to open the new staff setup page.
Step 1: Complete Staff Info
This section helps identify the staff member and assign their role.
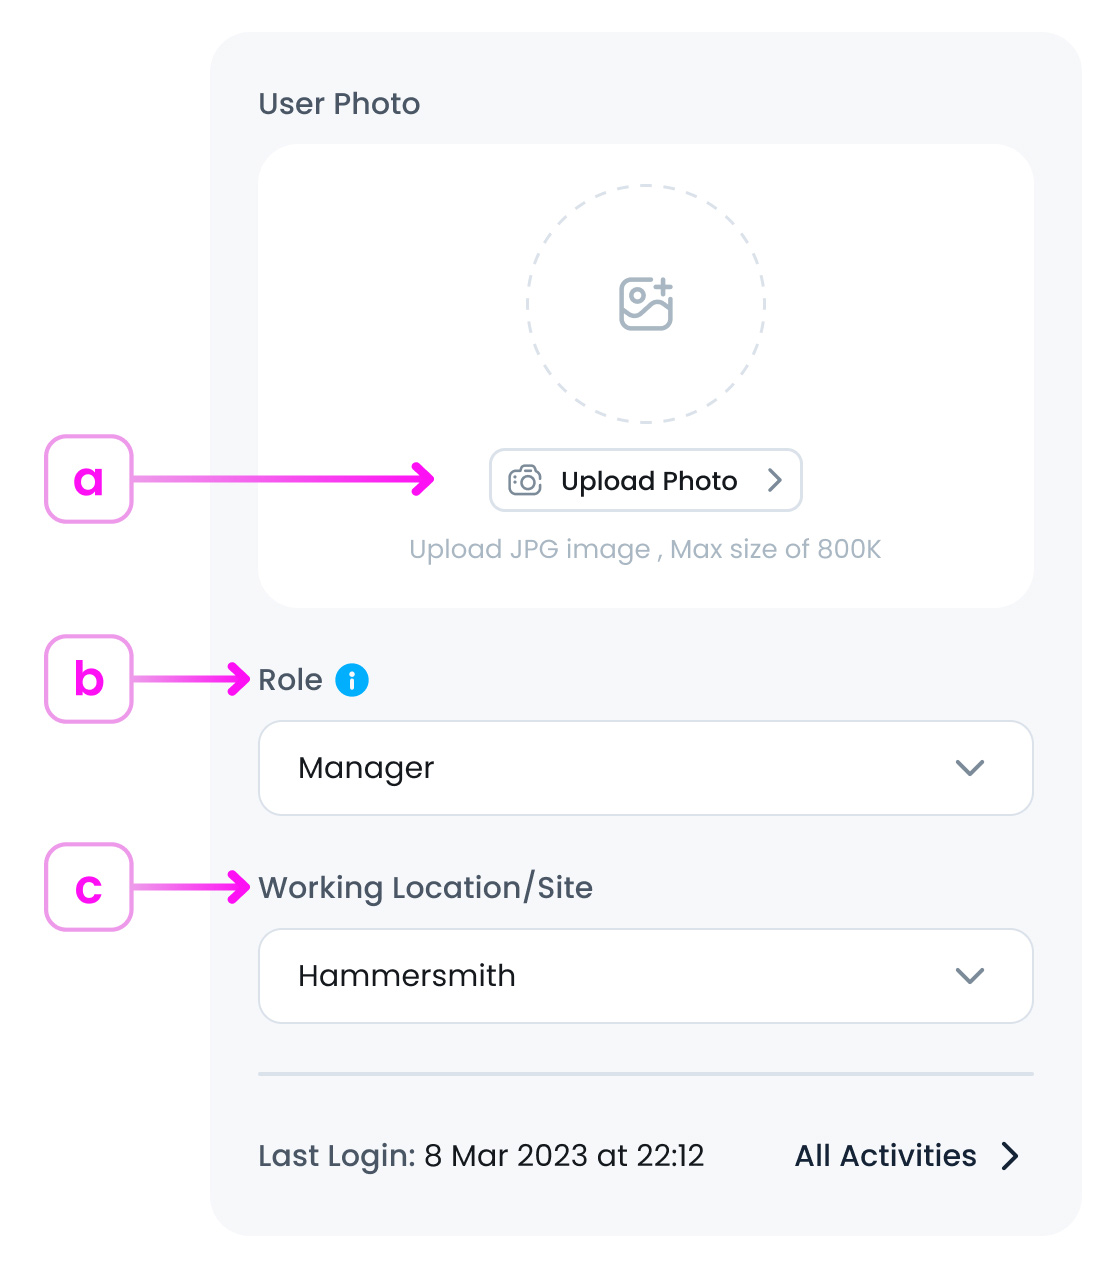
a. Upload Photo (Optional)
Click the “Upload Photo” button  to add a profile image from your computer. Select a clear, high quality image and it must be a JPG file, up to 800 KB. You can resize or compress files if needed.
Adding a photo to a staff profile helps quickly identify team members, especially in roles with similar titles or rotating shifts. It’s useful for managers, improves recognition in POS or kiosk systems, and supports security needs. While optional, it enhances usability, accountability, and personalisation.
b. Staff Role (Required)
Select a role from your pre-configured list (e.g., Admin, Supervisor). Staff roles are essential for clarity, efficiency, and accountability in team management. They help ensure that everyone understands their responsibilities, streamline workflows, and protect sensitive information by controlling access based on role.
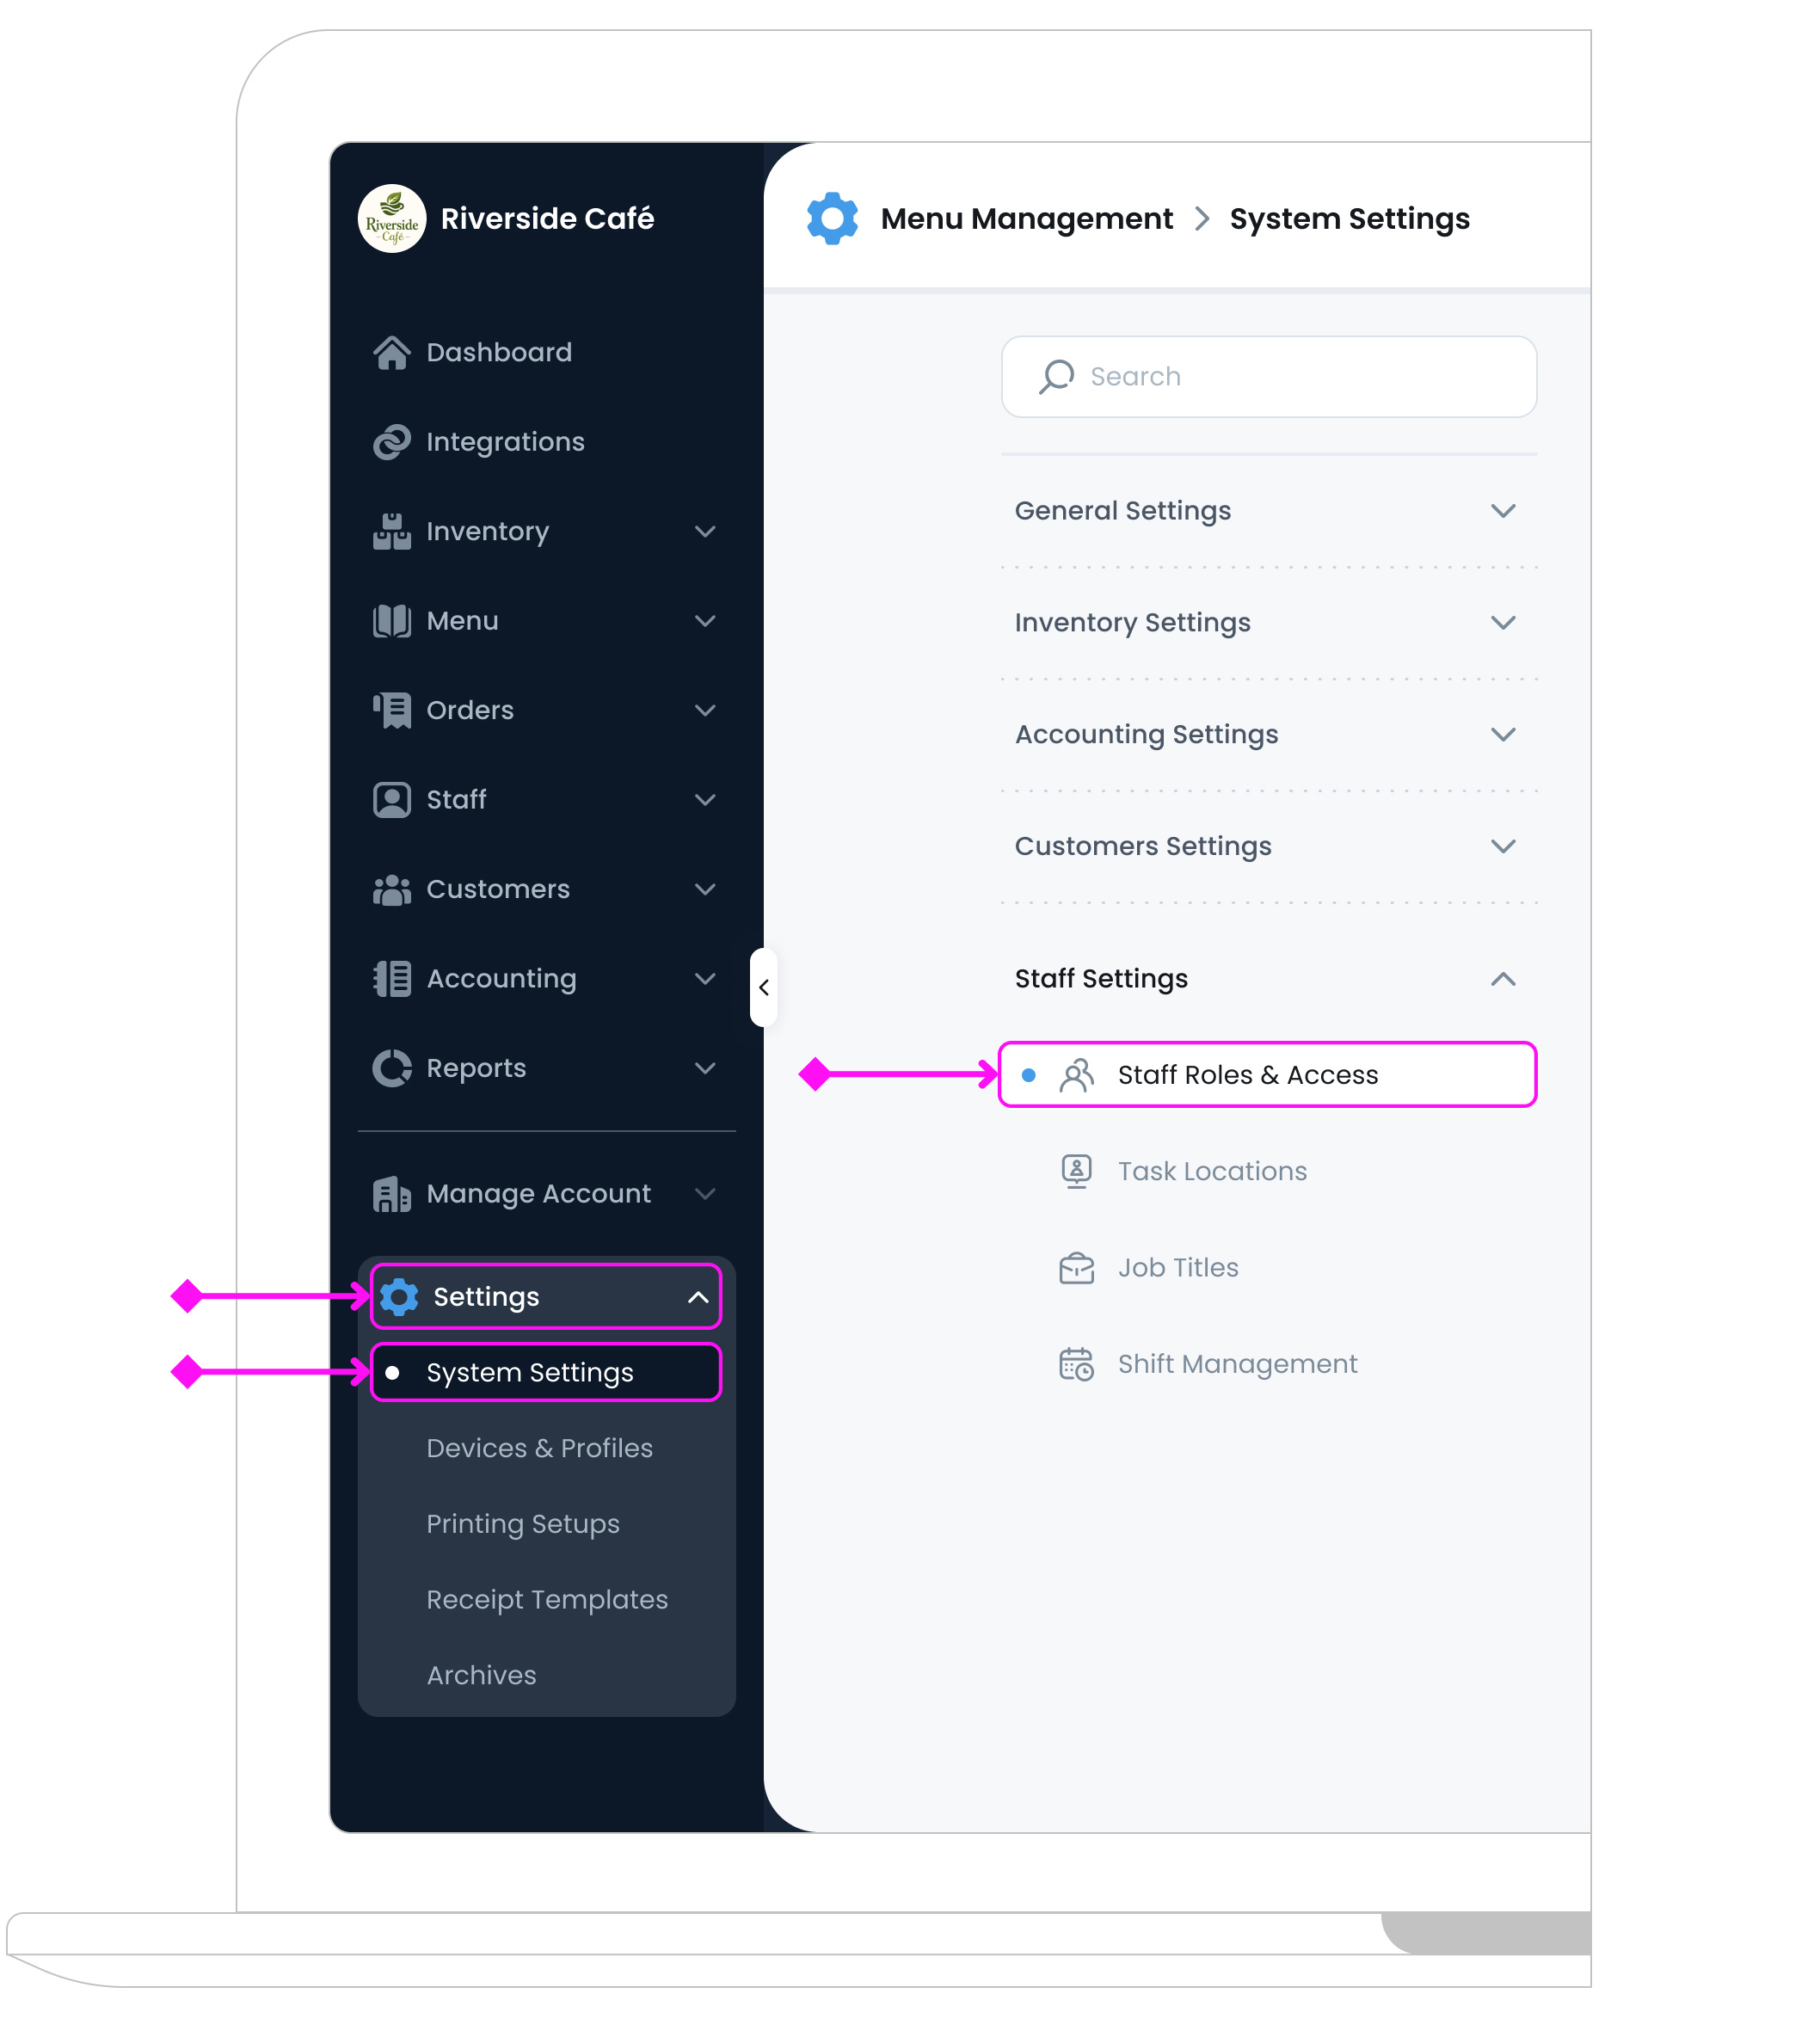
Roles are permission-based and directly impact what the user can view or manage in the system. To create or modify staff roles, go to Settings > System Settings > Staff Settings > Staff Roles & Access.
c. Working Location/Site (Required)
If you are multi branch business,.choose the staff member’s working location or site from the dropdown list. This selection is not limited to their physical place of work. It also defines which branch account or accounts the staff member will have access to within the platform.
Based on this location assignment, the staff member will receive access to one or more branches, with the permissions defined by their assigned role.
Step 2: Enter Profile Details
In this step, you will be prompted to fill out your staff member’s personal details.
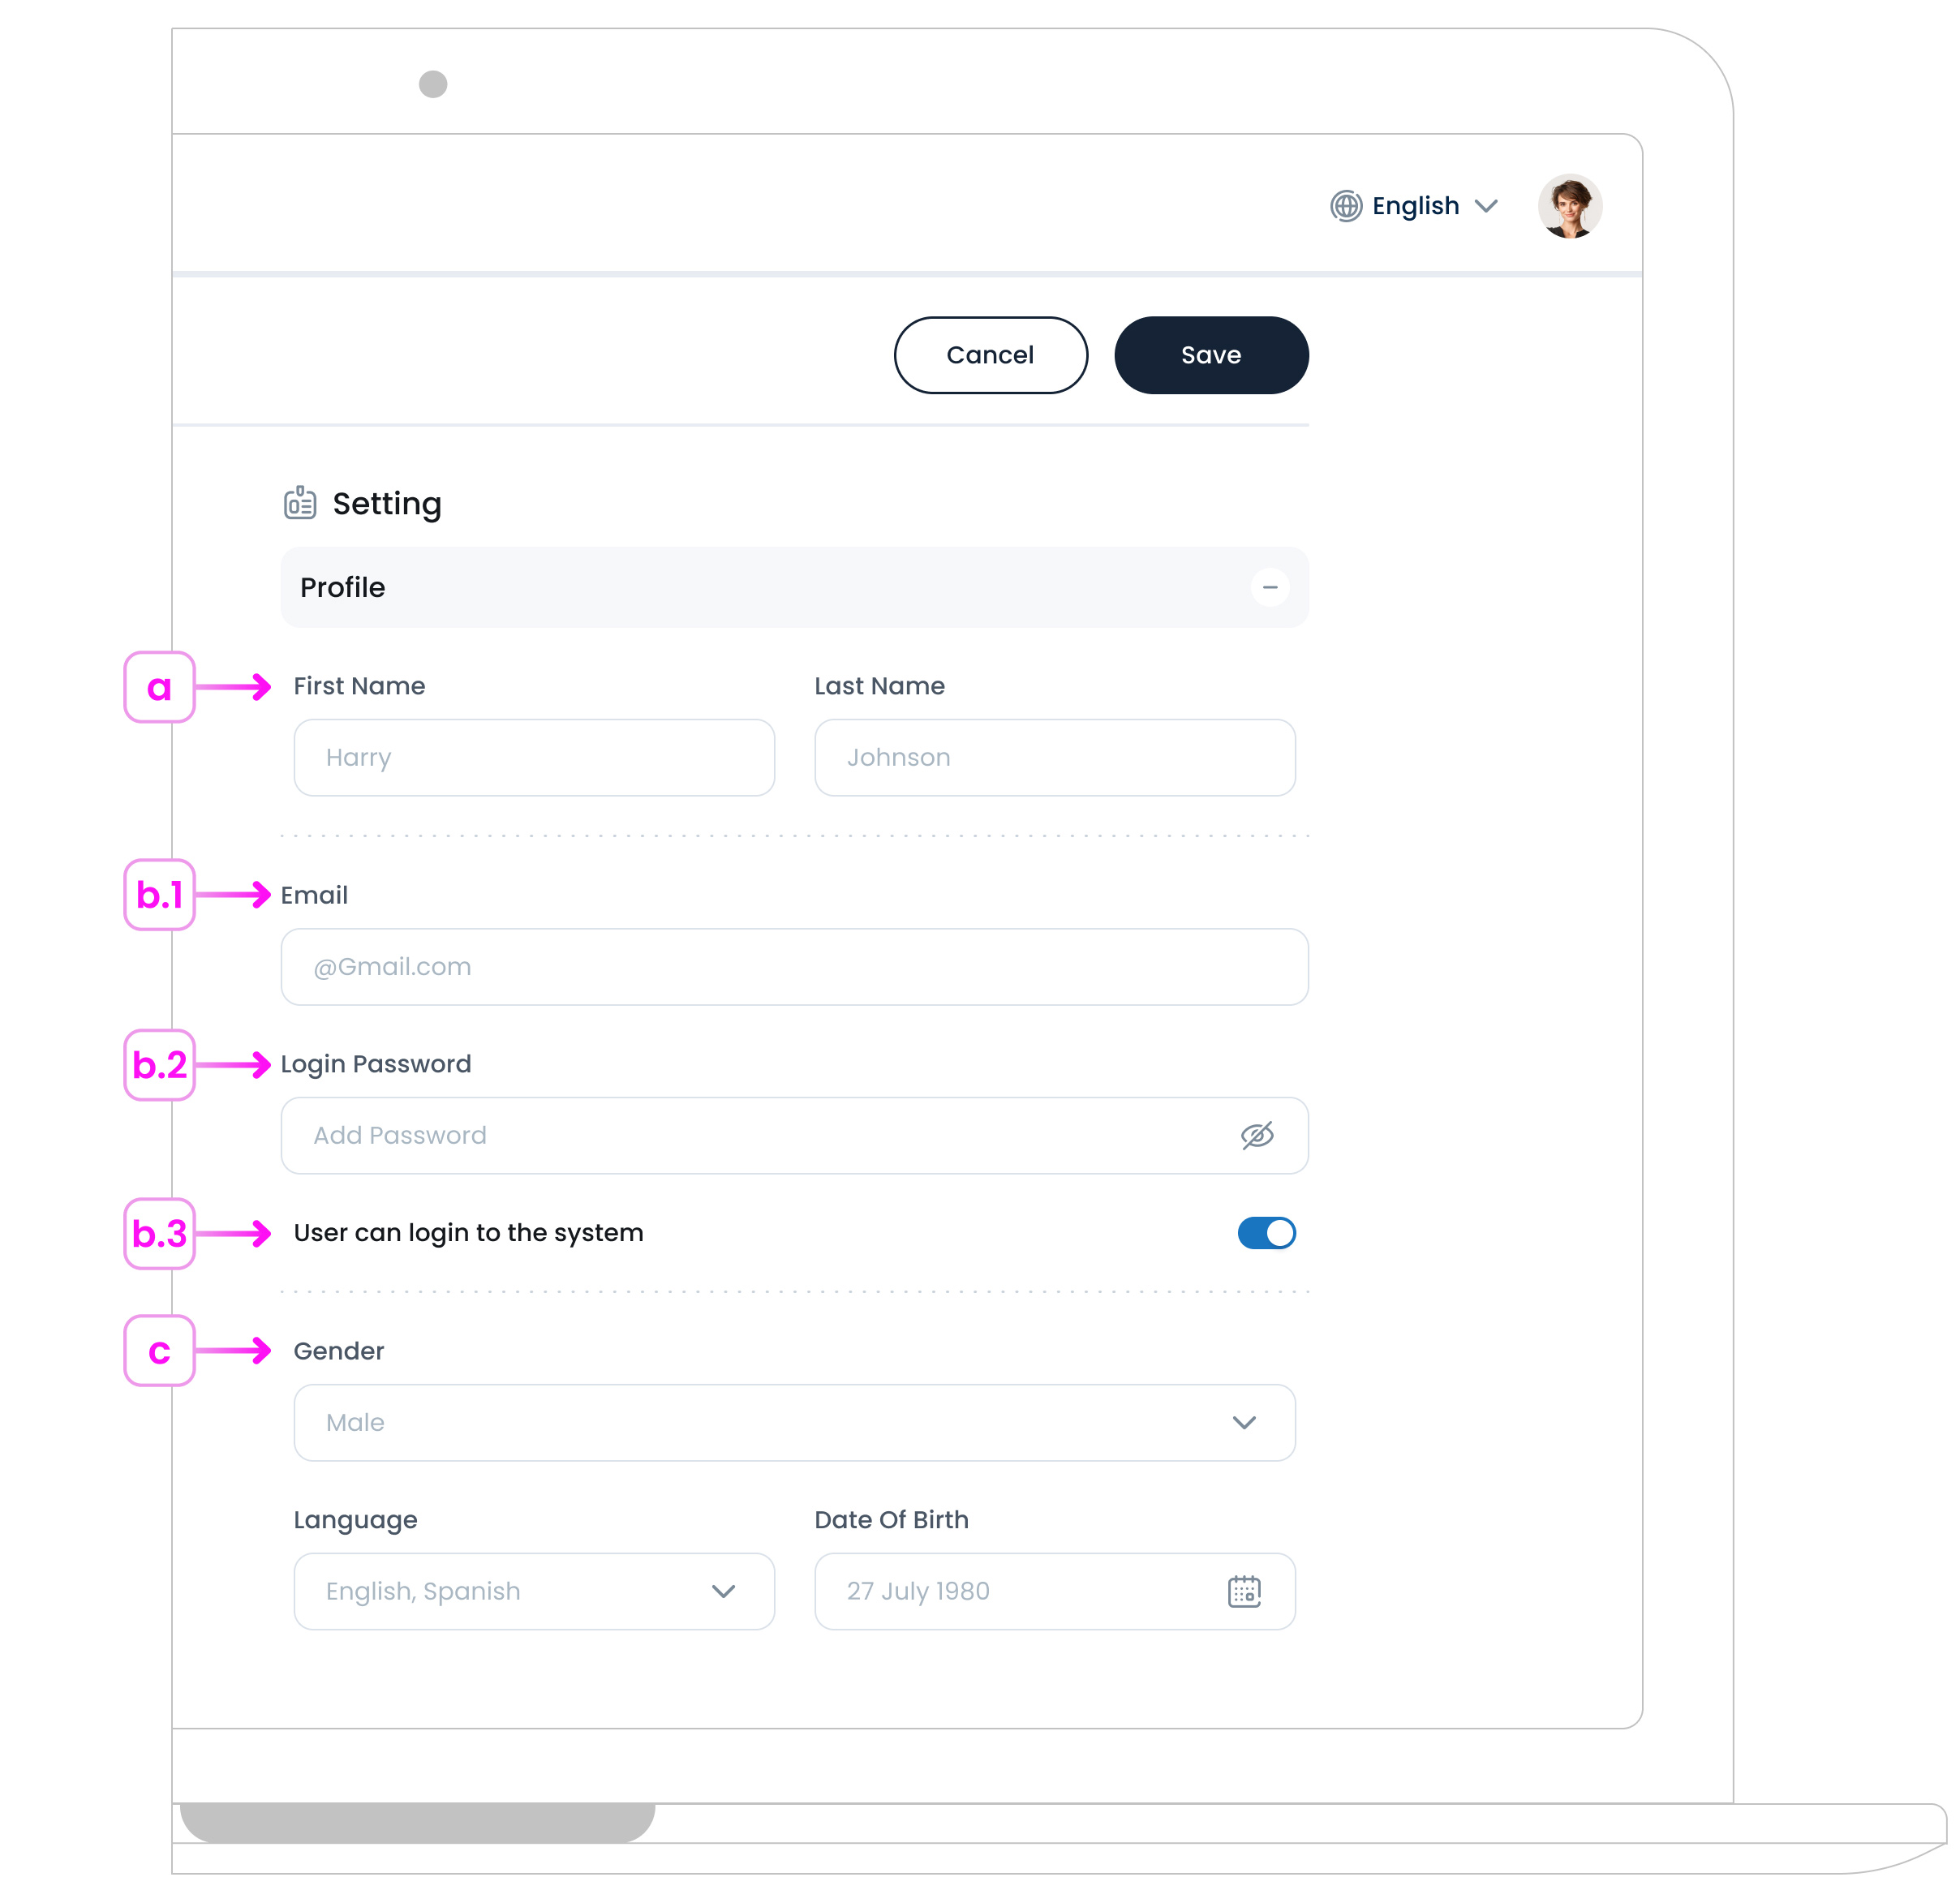
a. First Name / Last Name (Required)
Required for all staff profiles.
b. Email and Login Password
- b.1. Email: The Email field sets the staff member’s login for the TechSuite system. It must be a valid email address they can access, as it’s used for logging in, receiving system notifications, and password resets.
- b.2. Password: The Password field is only required if the staff member needs login access. Make sure it is secure and accurate.
- b.3. Granting Login Access: Use the "User can log into the system" toggle switch to give the staff member access to the TechSuite portal. If disabled, the staff member will not have login permissions.
If you do not want to give this staff member login access but still wish to register them for internal staff management purposes, both the Email and Password fields are not required.
Pro Tips
When setting a password for a staff member, choose one that is at least 8 characters long and includes a mix of uppercase letters, lowercase letters, numbers, and symbols (e.g., Tech@1234). Avoid using easily guessed passwords like names or birthdates. This helps protect staff accounts and keeps your system secure.
c. Gender / Language / Date of Birth (Optional)
Optional fields used for internal records. “Gender” and “Date of Birth” support reporting and workforce insights, while “Language” reflects the staff member’s preferred system language.
Step 3: Set a Device Passcode
This section lets you assign a login specific to a POS, Kiosk, or other terminal.
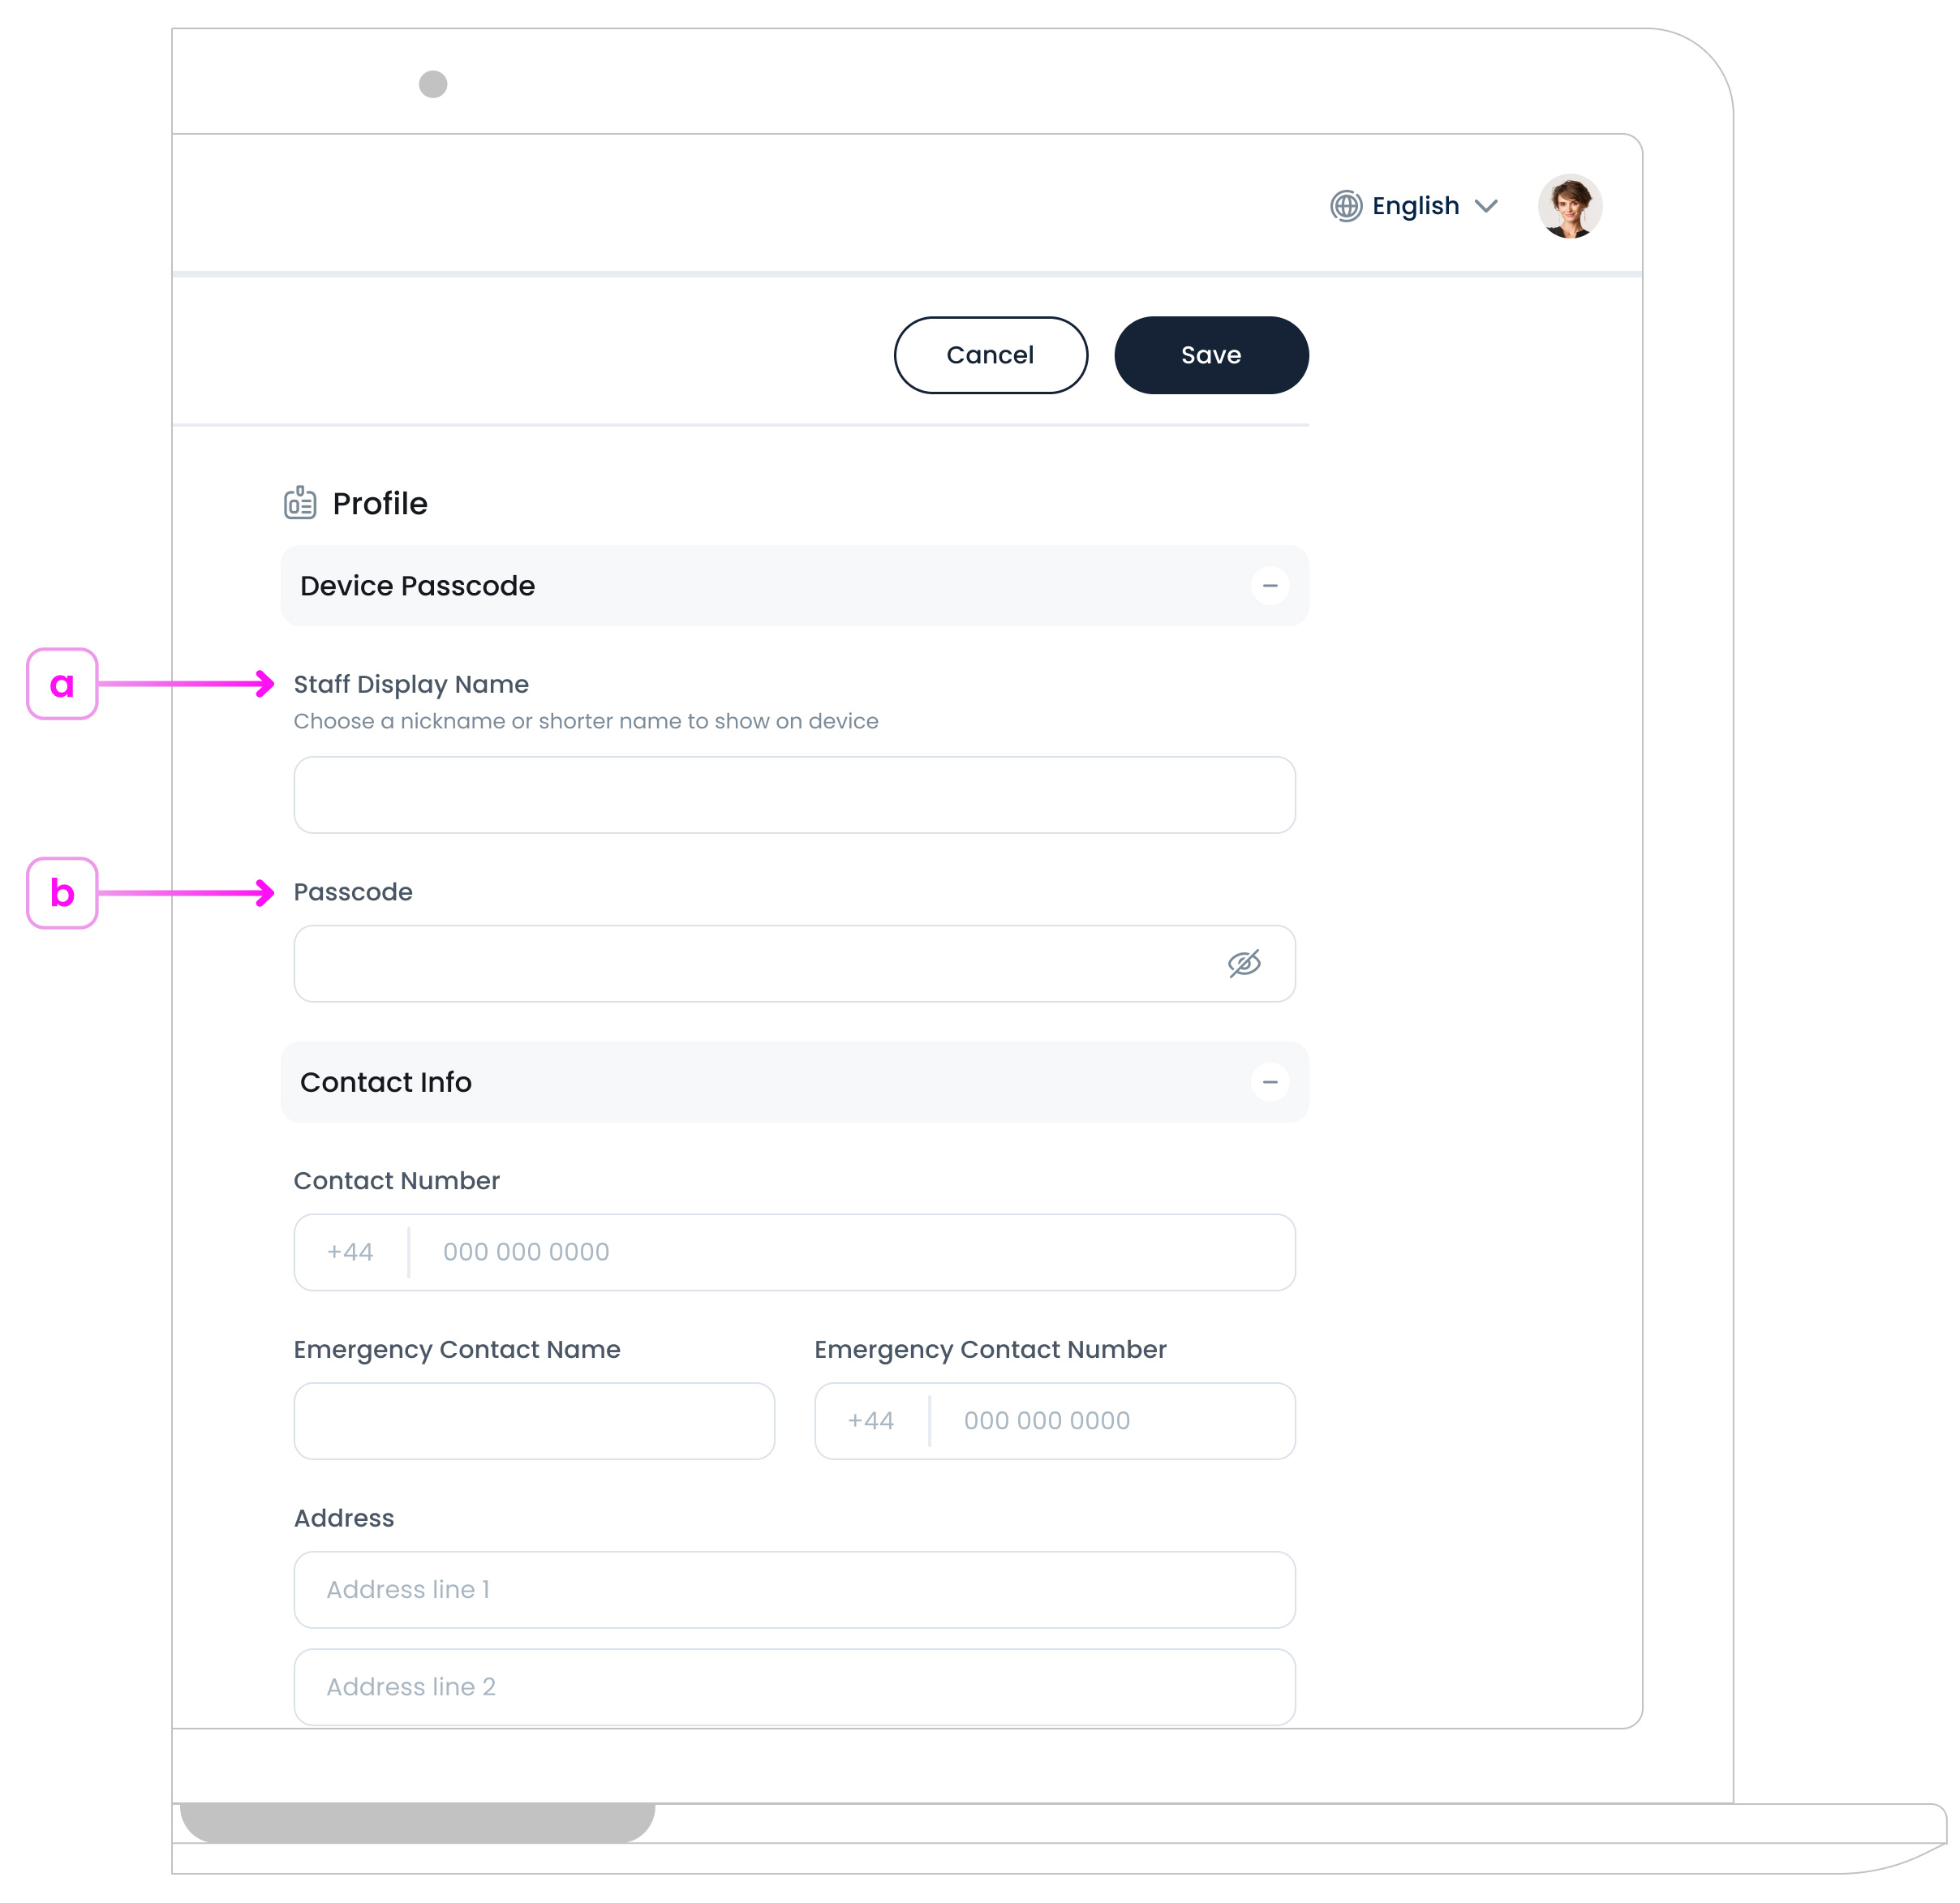
a. Staff Display Name (Required)
Set a display name that will appear on the device interface
b. Passcode (Required)
Create a short numeric passcode that the staff member will use to log in quickly and securely on the assigned device.
Step 4: Add Contact Info
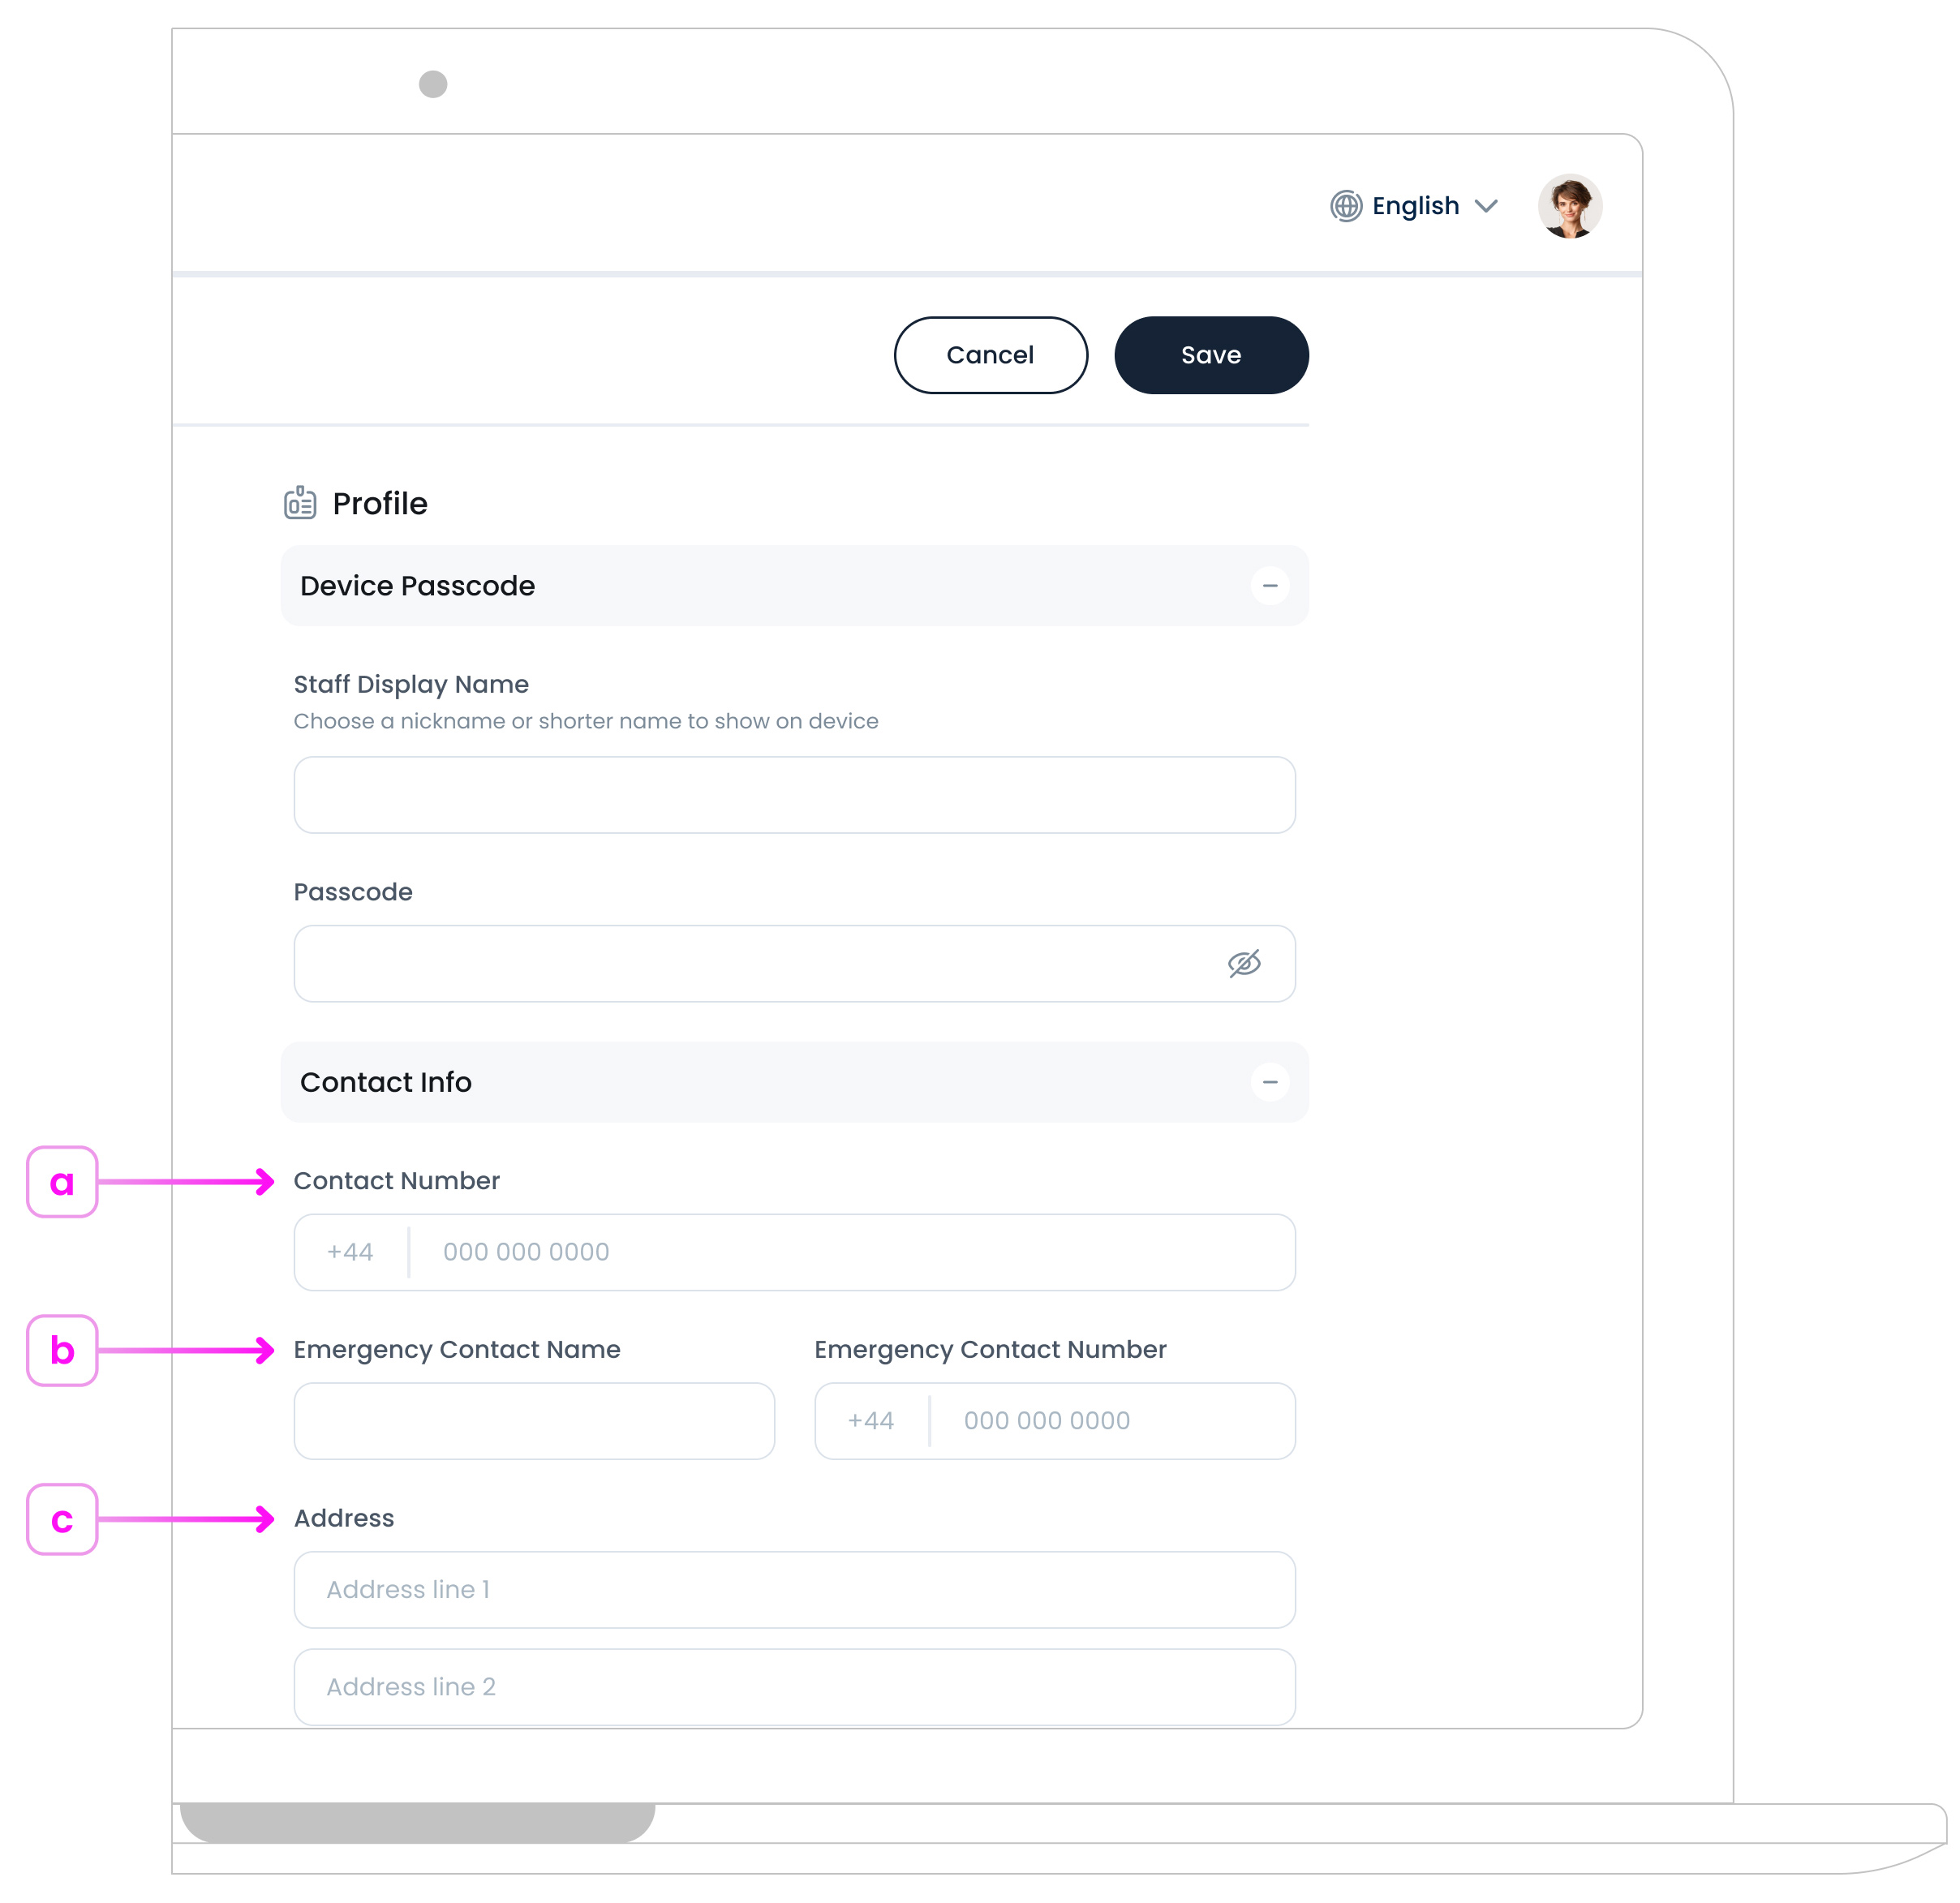
a. Contact Number (Optional)
Direct number to reach the staff member.
b. Emergency Contact Name & Number (Optional)
For emergency purposes only.
c. Address (Optional)
Store full address details for HR or administrative use.
Step 5: Save
Once all fields are complete, click the “Save” button at the top right. You will find your new staff member added to the Staff List.
What’s Next?
After creating a staff profile, you can manage or update it anytime from the Staff List page. Simply click on a staff member’s row to view and edit their details in the panel on the right. In the next article, you’ll learn how to edit or archive a staff member. You can edit their profile if there is an update to their details, or archive them if you no longer want them to appear in the Staff List.