Add a New Customer
In the TechSuite portal, you can easily create and manage customer profiles to build a centralised list that supports personalised service and advanced loyalty programmes. Each profile helps you track individual customer preferences, interactions, and purchase history, enabling you to deliver tailored experiences and targeted rewards.
To Get Started
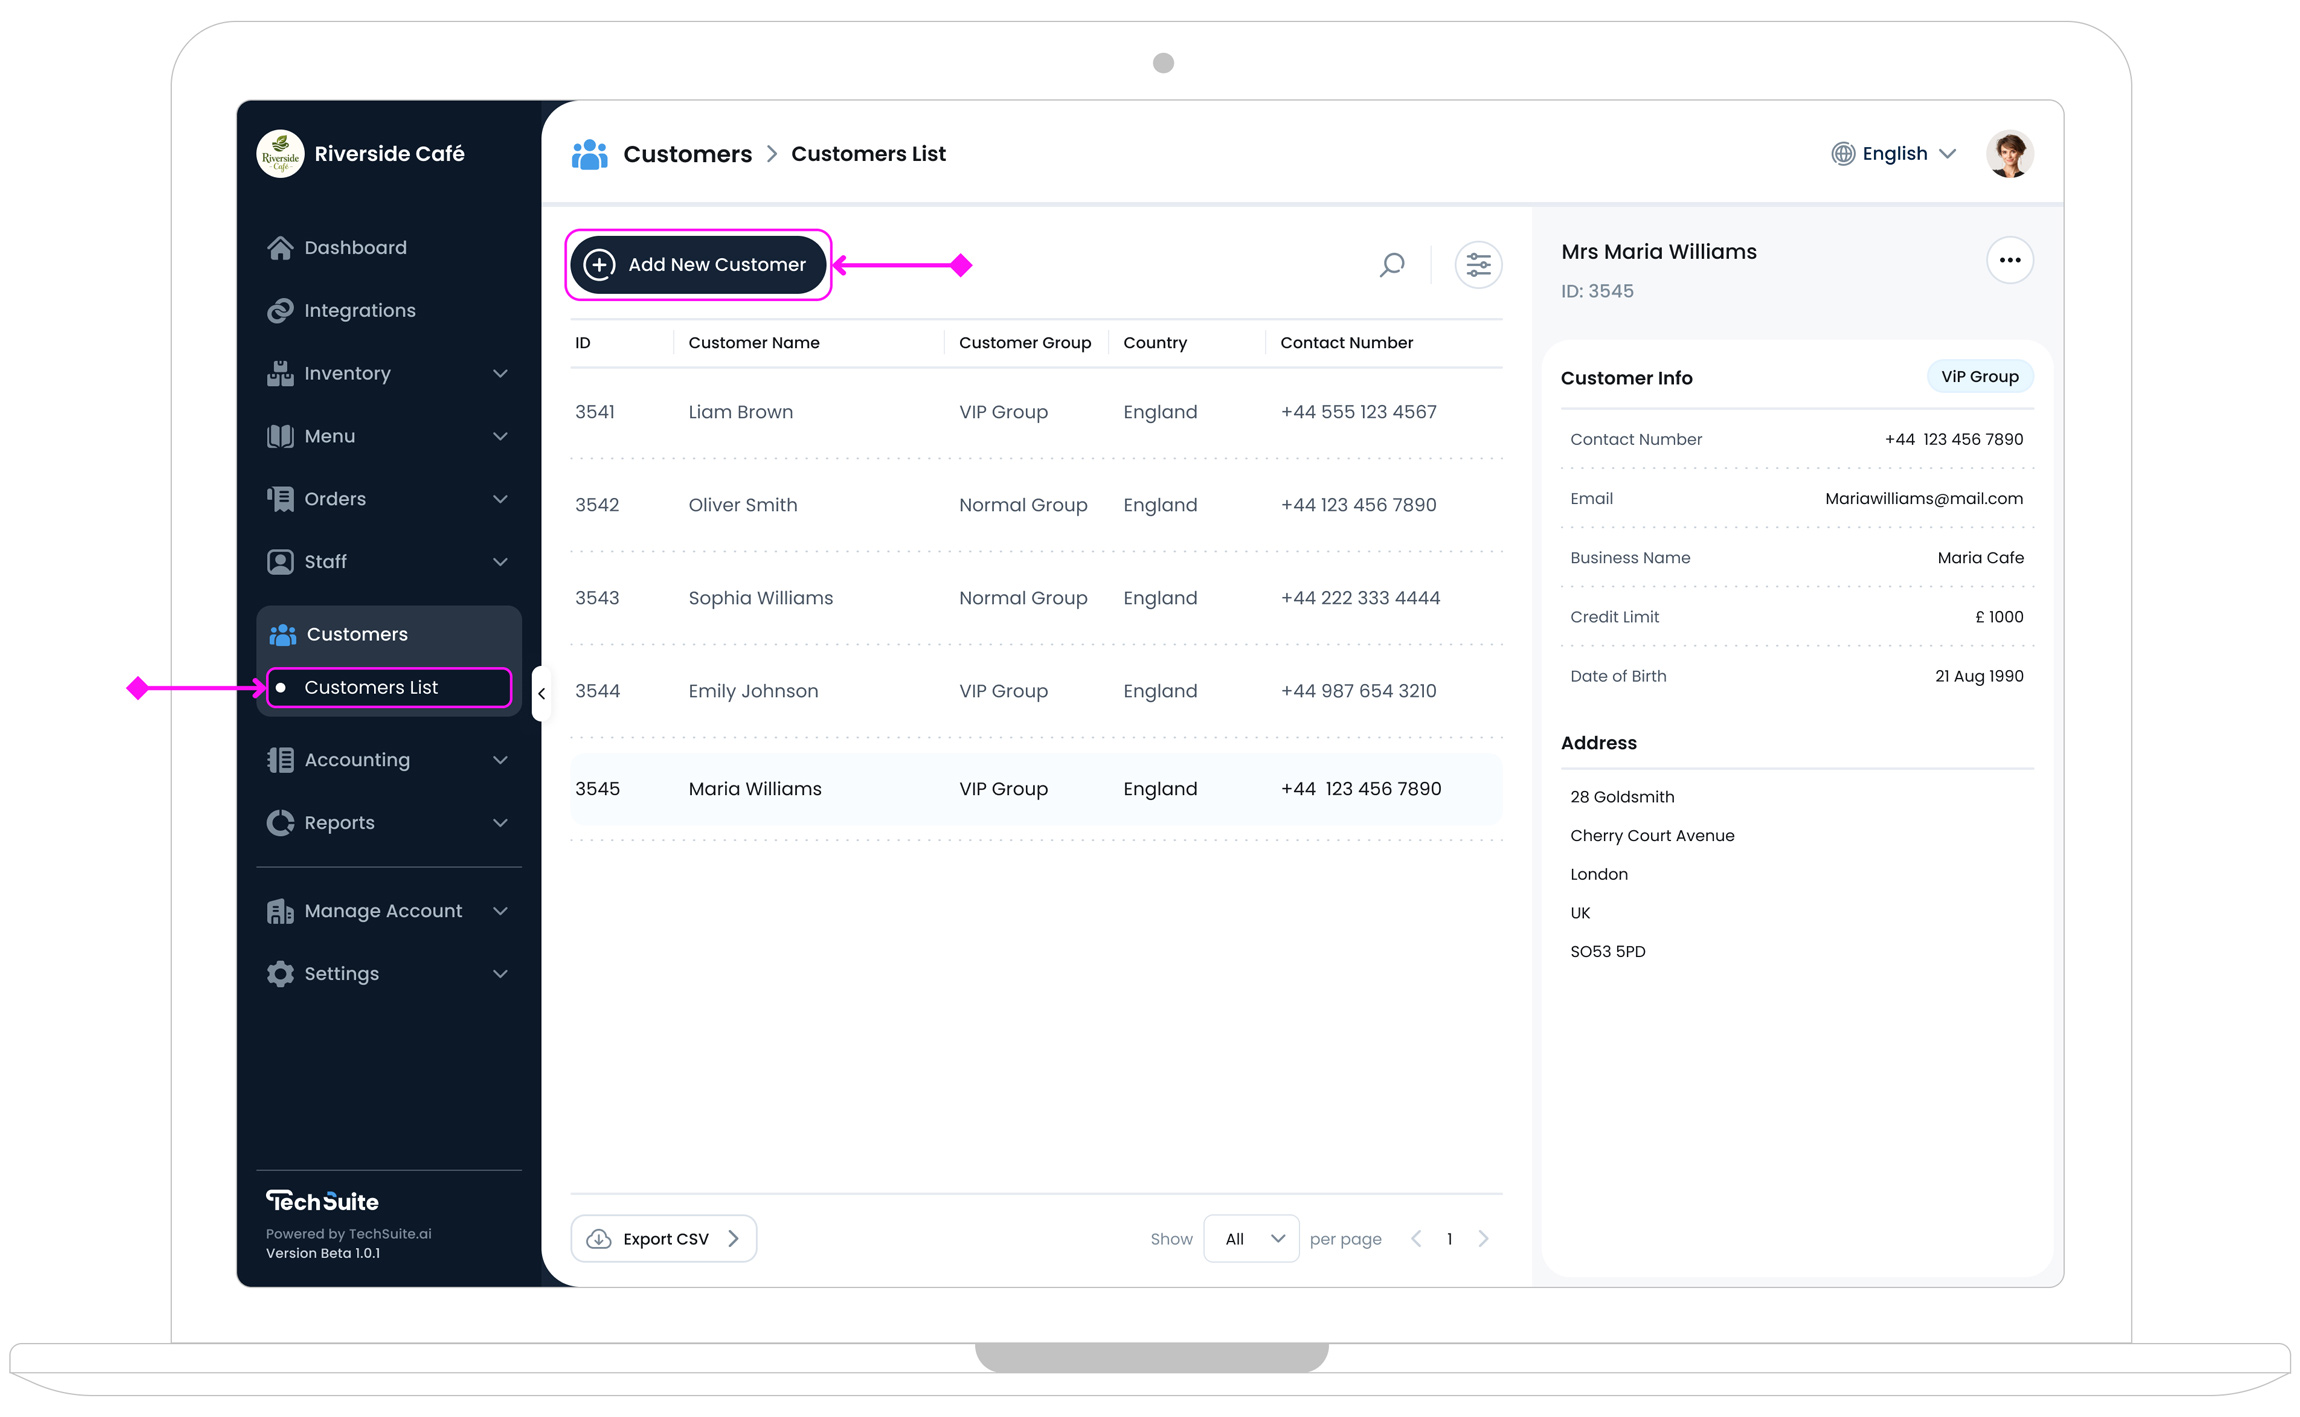
To add a new customer, log in to the TechSuite portal and from the sidebar, navigate to Customer Management > Customer List and click the “Add New Customer” button at the top-left to open the new customer setup page.
Step 1: Complete Customer Info
This section captures the customer’s basic identity and group classification.
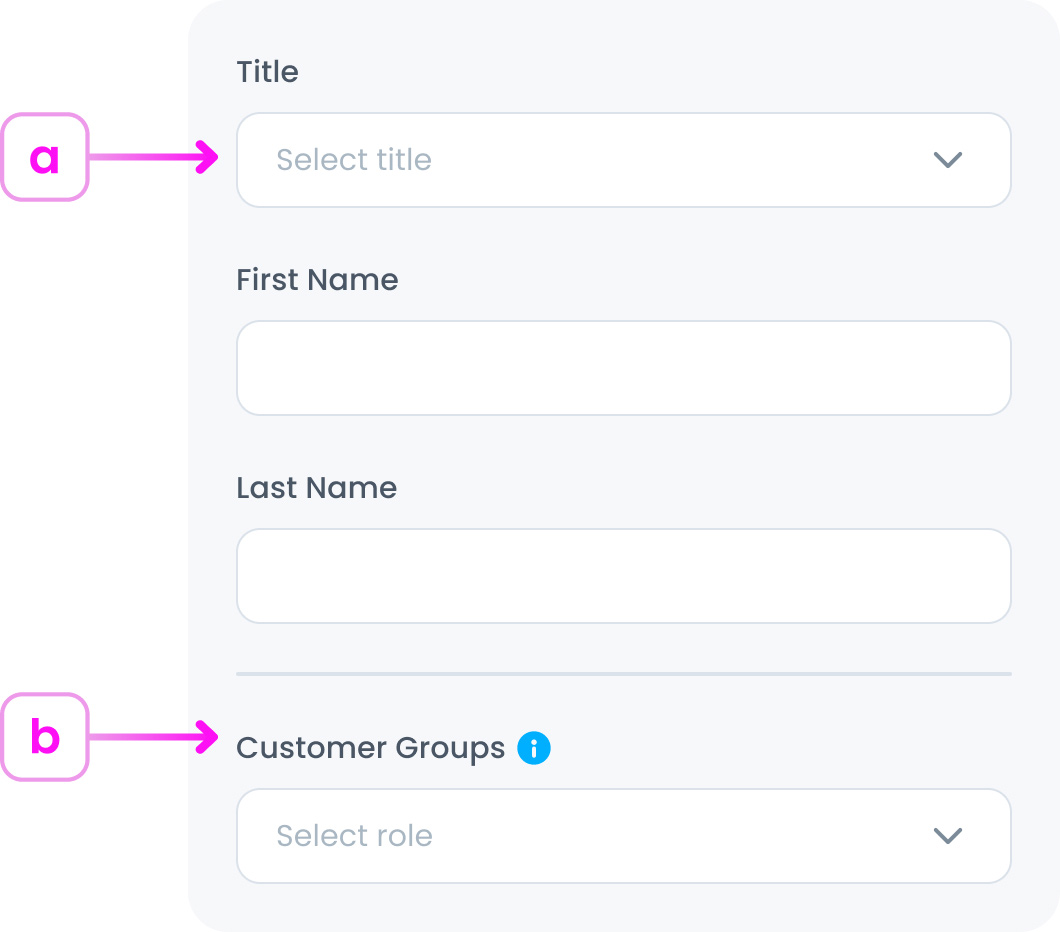
a. Customer Name & Title (Required)
Enter the customer’s personal and business-related details to create a complete profile. Start by selecting a title (e.g., Mr., Ms., Dr.), then enter the customer’s first and last name, these are required fields used for identification and personalised communication.
b. Customer Group (Optional)
Customer groups allow you to organise your customers into meaningful categories (e.g., VIP group, Business group, or Loyalty Members). This makes it easier to tailor your operations (like managing orders, applying special offers, or generating targeted reports) based on the needs of each group.
By segmenting your customers, you can:
- b.1. Offer exclusive deals or pricing to specific groups (e.g., VIP discounts).
- b.2. Quickly filter and manage orders by group type.
- b.3. Generate more focused sales and customer reports.
You can create as many groups as needed in the Settings section to better match your business model.
Step 2: Complete the Profile Section
Enter the customer’s personal and business-related details. These are the key details, but are optional to help tailor your services, improve customer engagement, and support accurate reporting. While most fields are optional, they enable better targeting, personalised offers, and proper tax handling for business accounts.
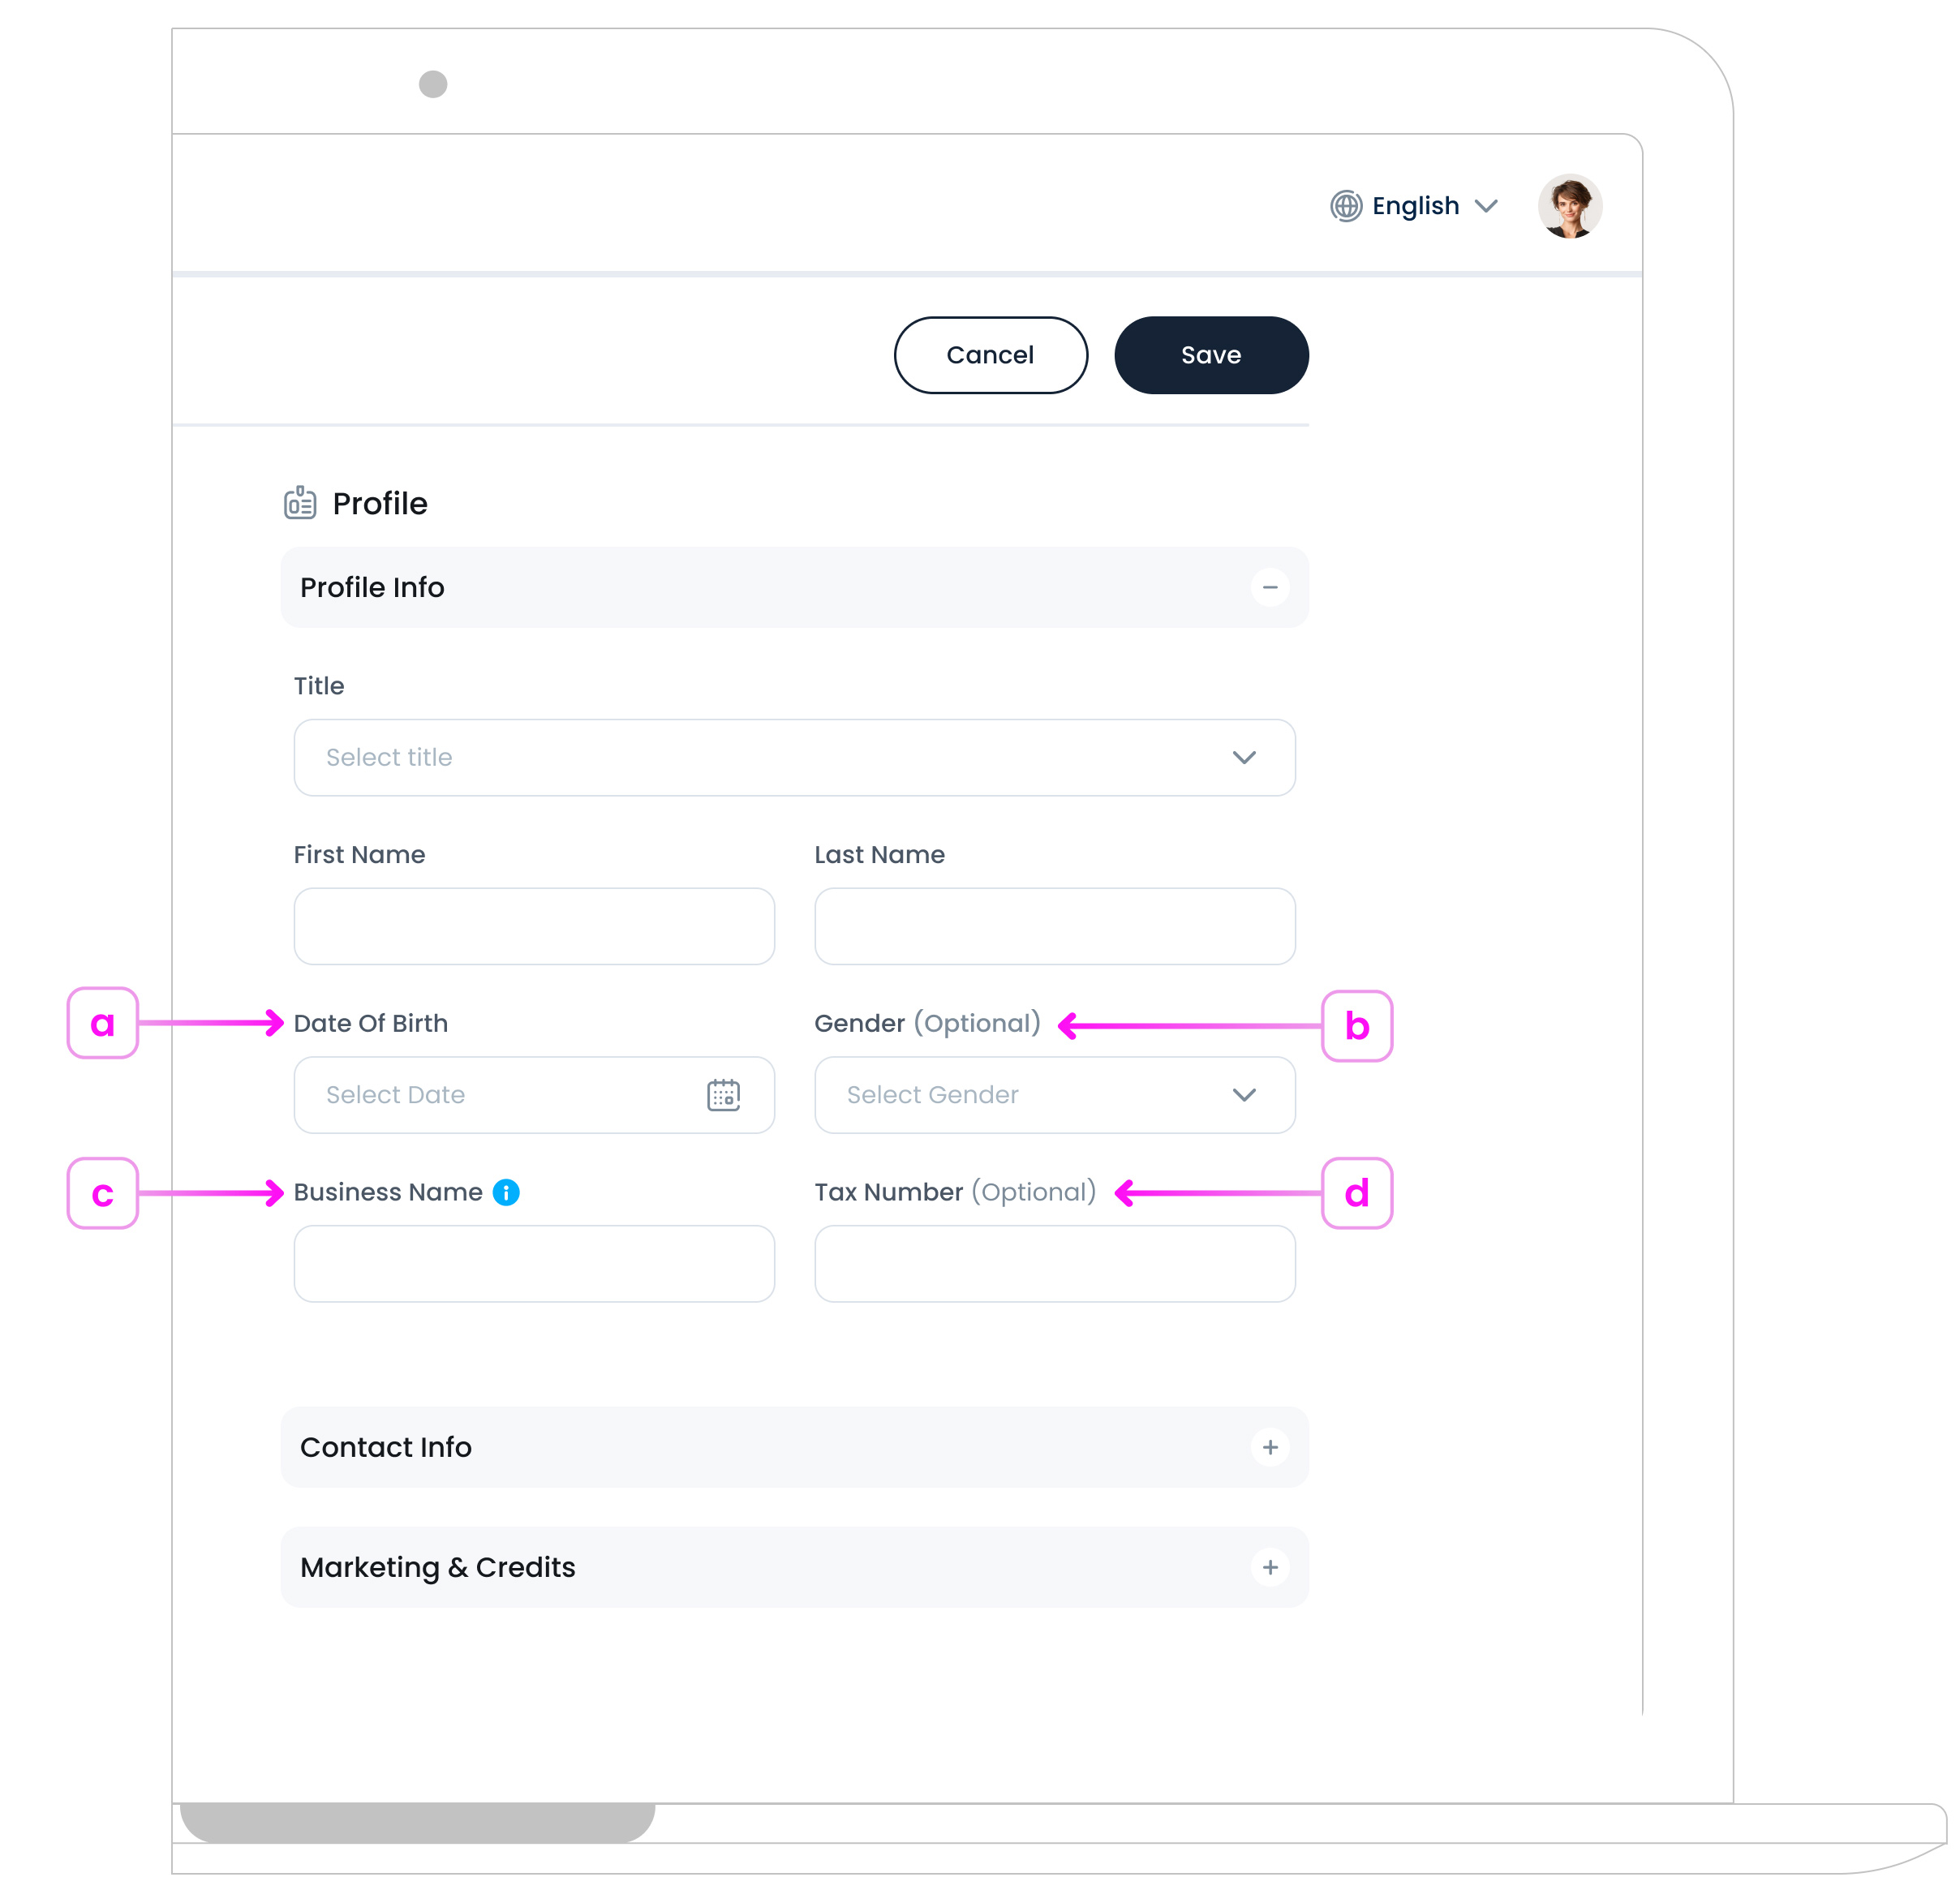
a. Date of Birth (Optional)
Useful for age-related or birthday offers.
b. Gender (Optional)
Helps generate better reports and targeted marketing insights. This field is private and used only to improve customer engagement.
c. Business Name (Optional)
Useful for tagging company or business customers, which helps streamline communication and apply business-group settings or offers when needed.
d. Tax Number (Optional)
Intended for business accounts to support invoicing and tax compliance.
Step 3: Add Contact Info
This information can be used to support future marketing campaigns, streamline order-taking for faster deliveries, and efficiently handle pre-orders. Keeping contact info organised helps improve customer engagement and operational efficiency.
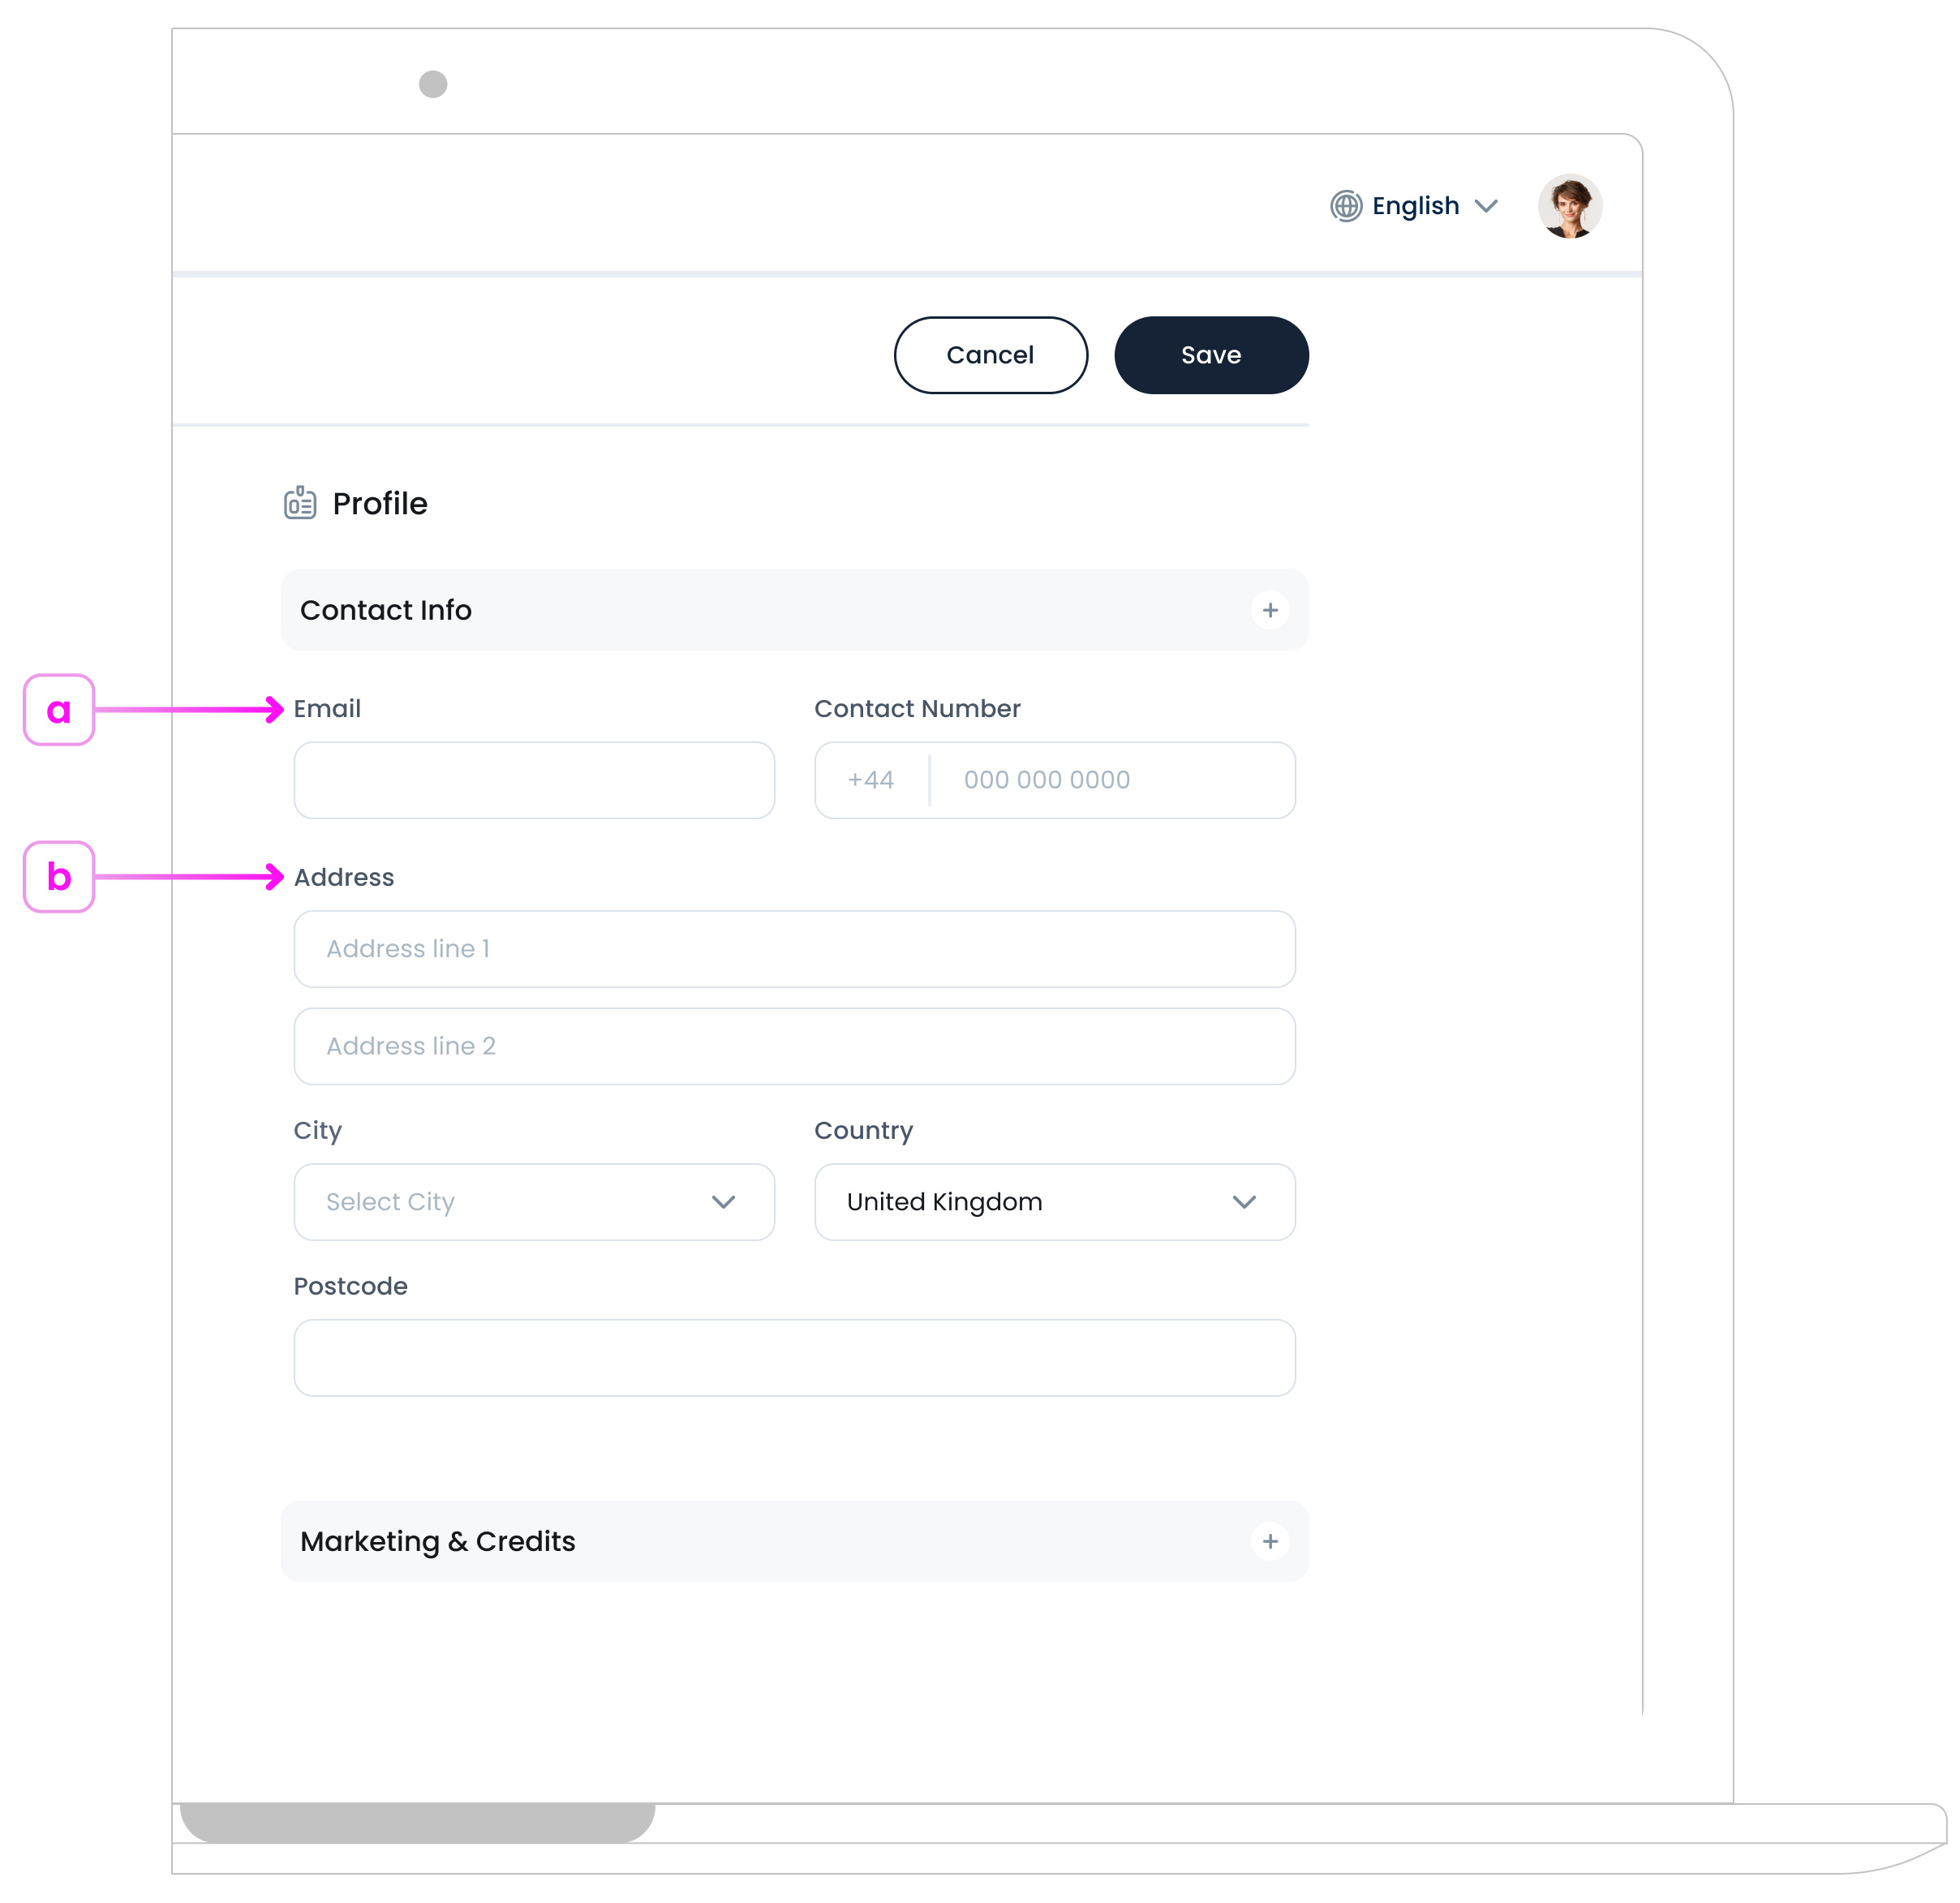
a. Email and Contact Number (Optional)
Required for confirmations and promotional communication.
b. Address (Optional)
Needed for pre-orders, delivery, and marketing purposes. Also helps define whether the customer is inside your service area.
Step 4: Configure Marketing & Credits
Control communication preferences and credit policies.

a. Contact via Email / SMS (Optional)
Enable this option if the customer has agreed to receive marketing communications. This allows you to send promotional messages, special offers, and updates via email or SMS.
b. Credit Limit (Optional)
Set the total amount of credit that this customer is allowed to use. This acts as a financial boundary to help you manage risk and ensure that credit usage stays within manageable limits. It’s particularly useful for customers who are billed periodically or have delayed payment terms.
c. Daily Transaction Limit (Optional)
Define the maximum amount the customer can spend on credit within a single day. This provides an extra layer of control by limiting daily usage, helping prevent misuse, accidental overspending, or fraudulent activity, while still allowing the customer to operate within their approved credit range.
d. Note (Optional)
Add internal notes such as preferences, restrictions, or past issues.
Step 5: Save
Once all fields are complete, click the “Save” button  at the top right. You will find your new customer added to the Customer List.
What’s Next?
After creating a customer profile, you can manage or update it anytime from the customer list page. Simply click on a customer row to view and edit their details in the panel on the right. In the next article, you’ll learn how to edit or archive a customer. You can edit their profile if there is an update to their details, or archive them if you no longer want them to appear in the customer list.