Image Resizing Guide (Mac & Windows)
Need to adjust your item images? This guide covers quick and easy ways to resize images on both Mac and Windows, using built-in tools or free online options, so your uploads meet the recommended dimensions without losing quality.
For Mac Users
Option 1: Using Preview (Built-in App)
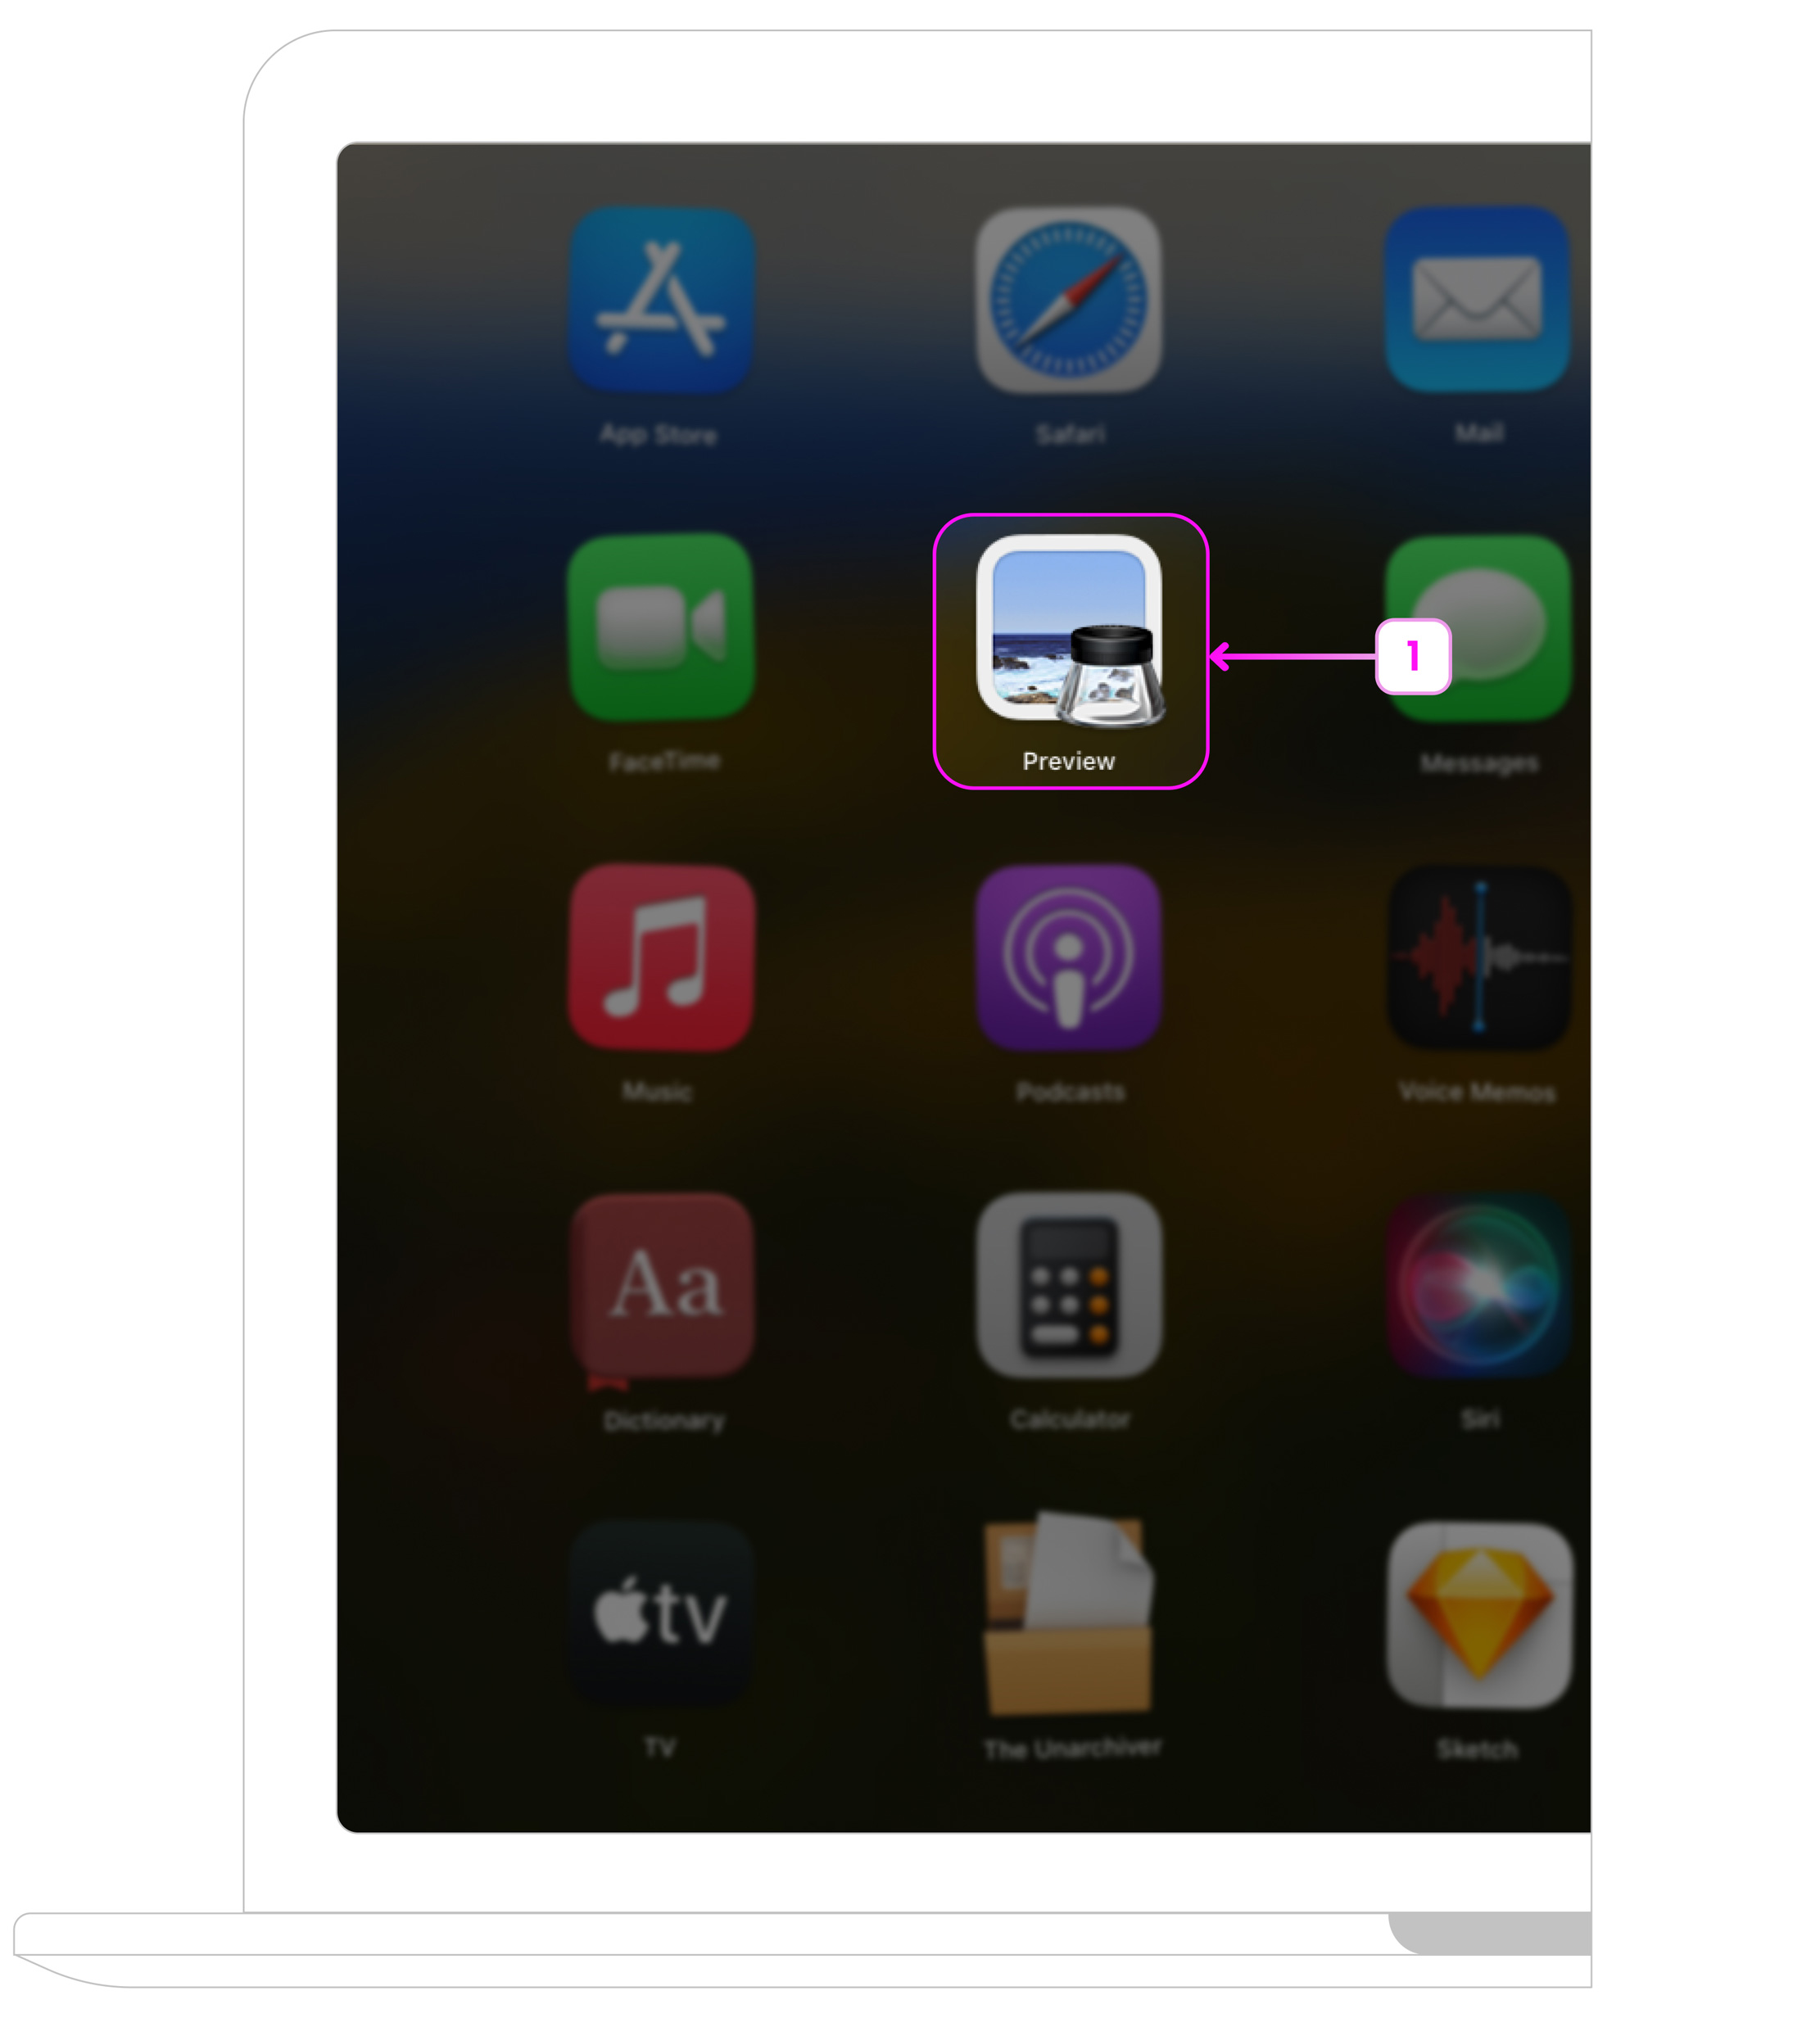
- Step 1: Open the image in Preview.
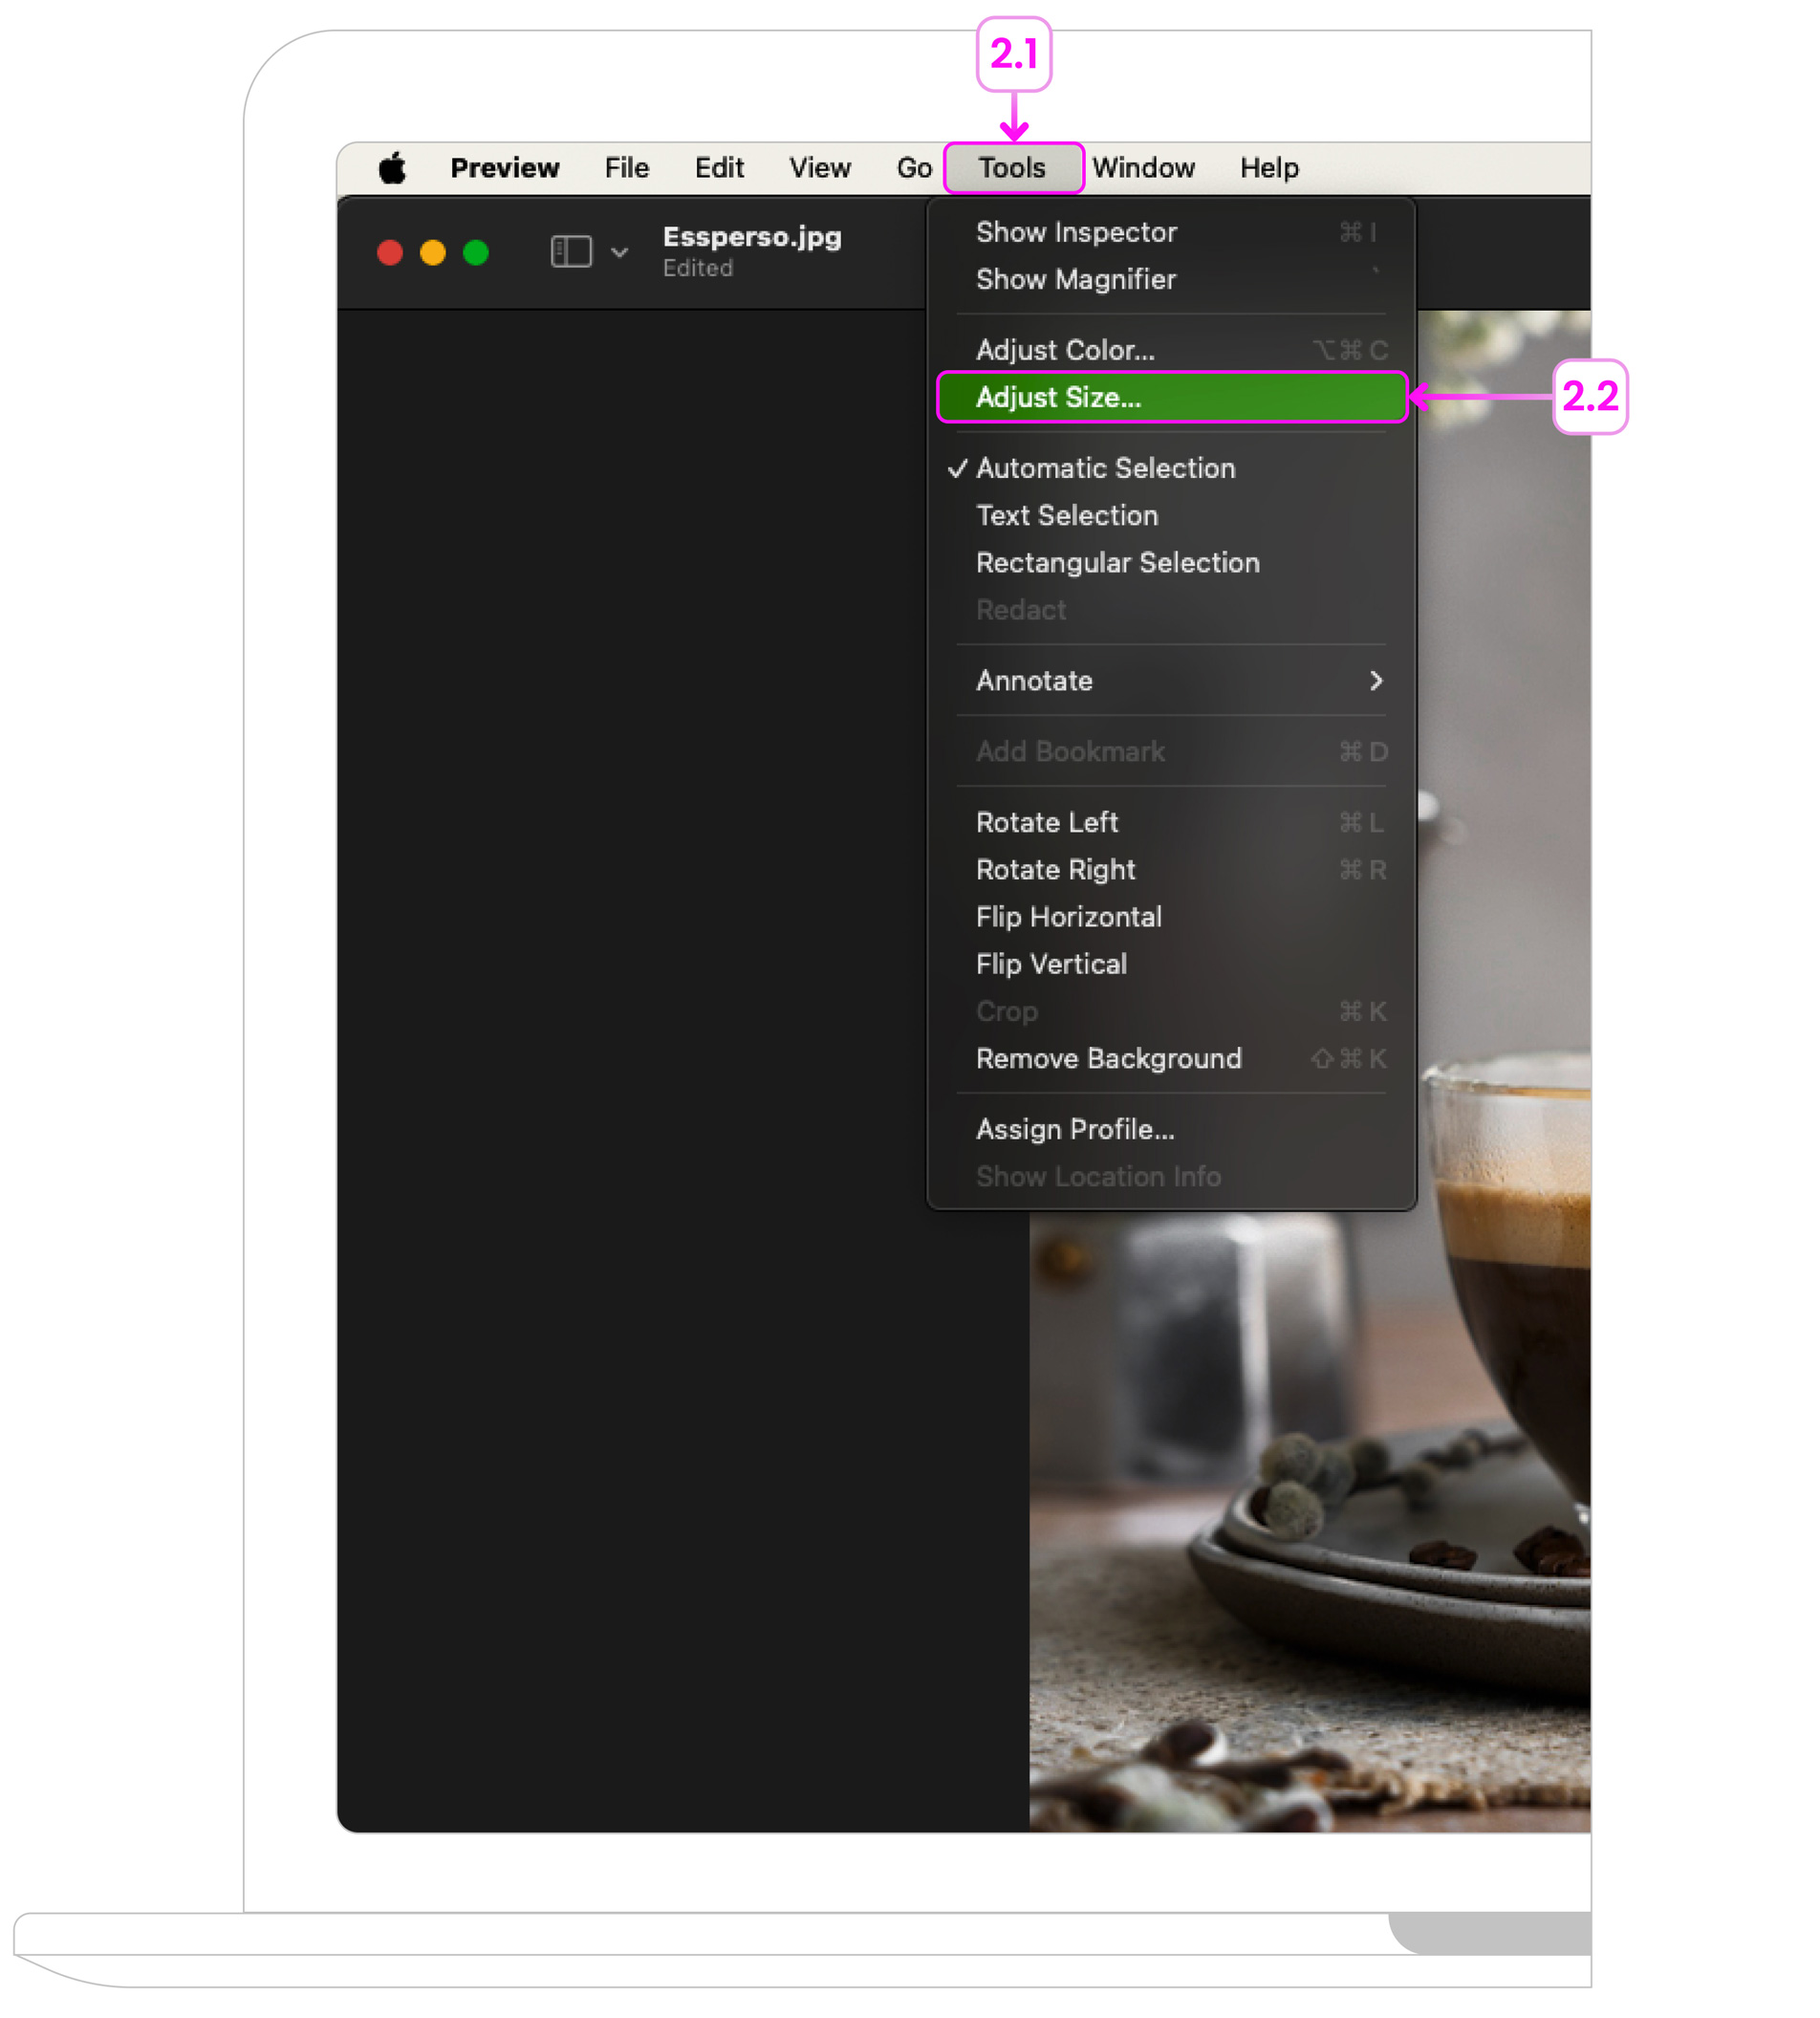
- Step 2: Click on Tools > Adjust Size.
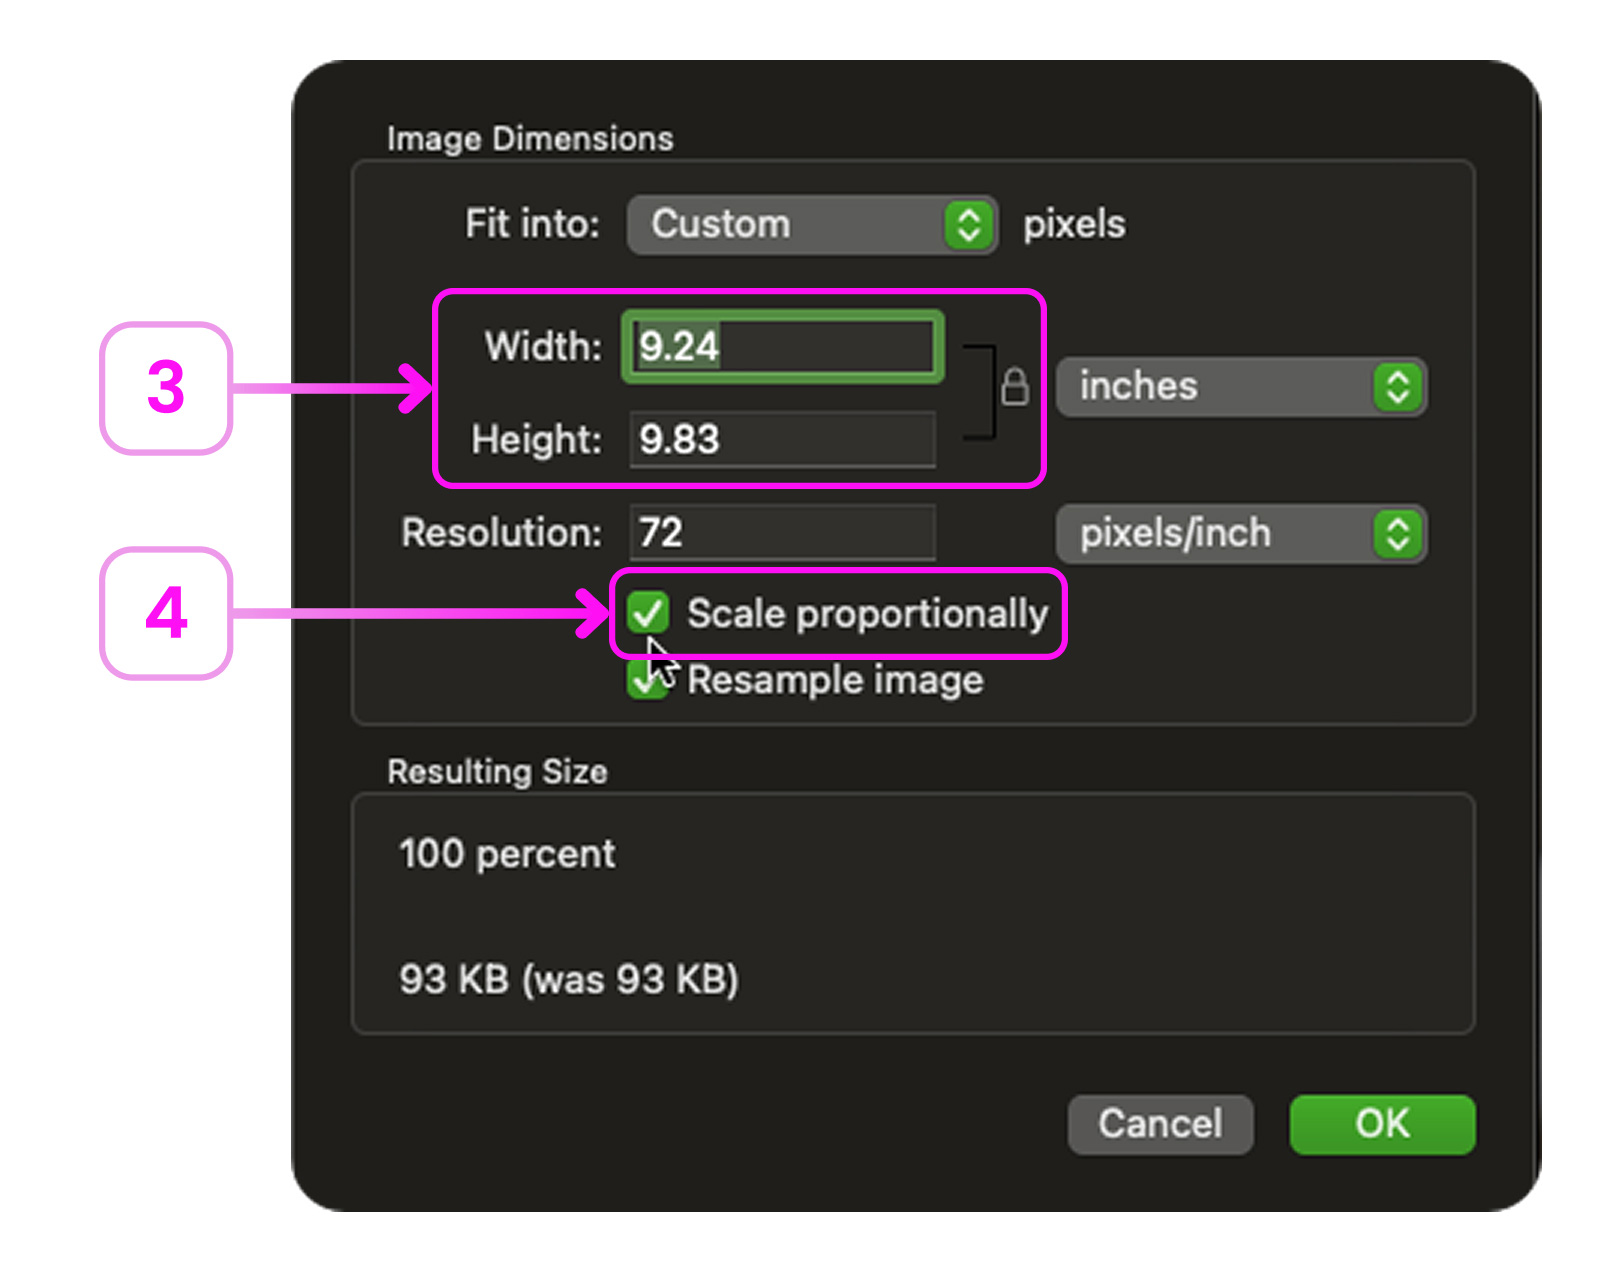
- Step 3: Set the desired width and height (e.g., 800x800 pixels for a square item image).
- Step 4: Make sure "Scale proportionally" is checked to avoid distortion.
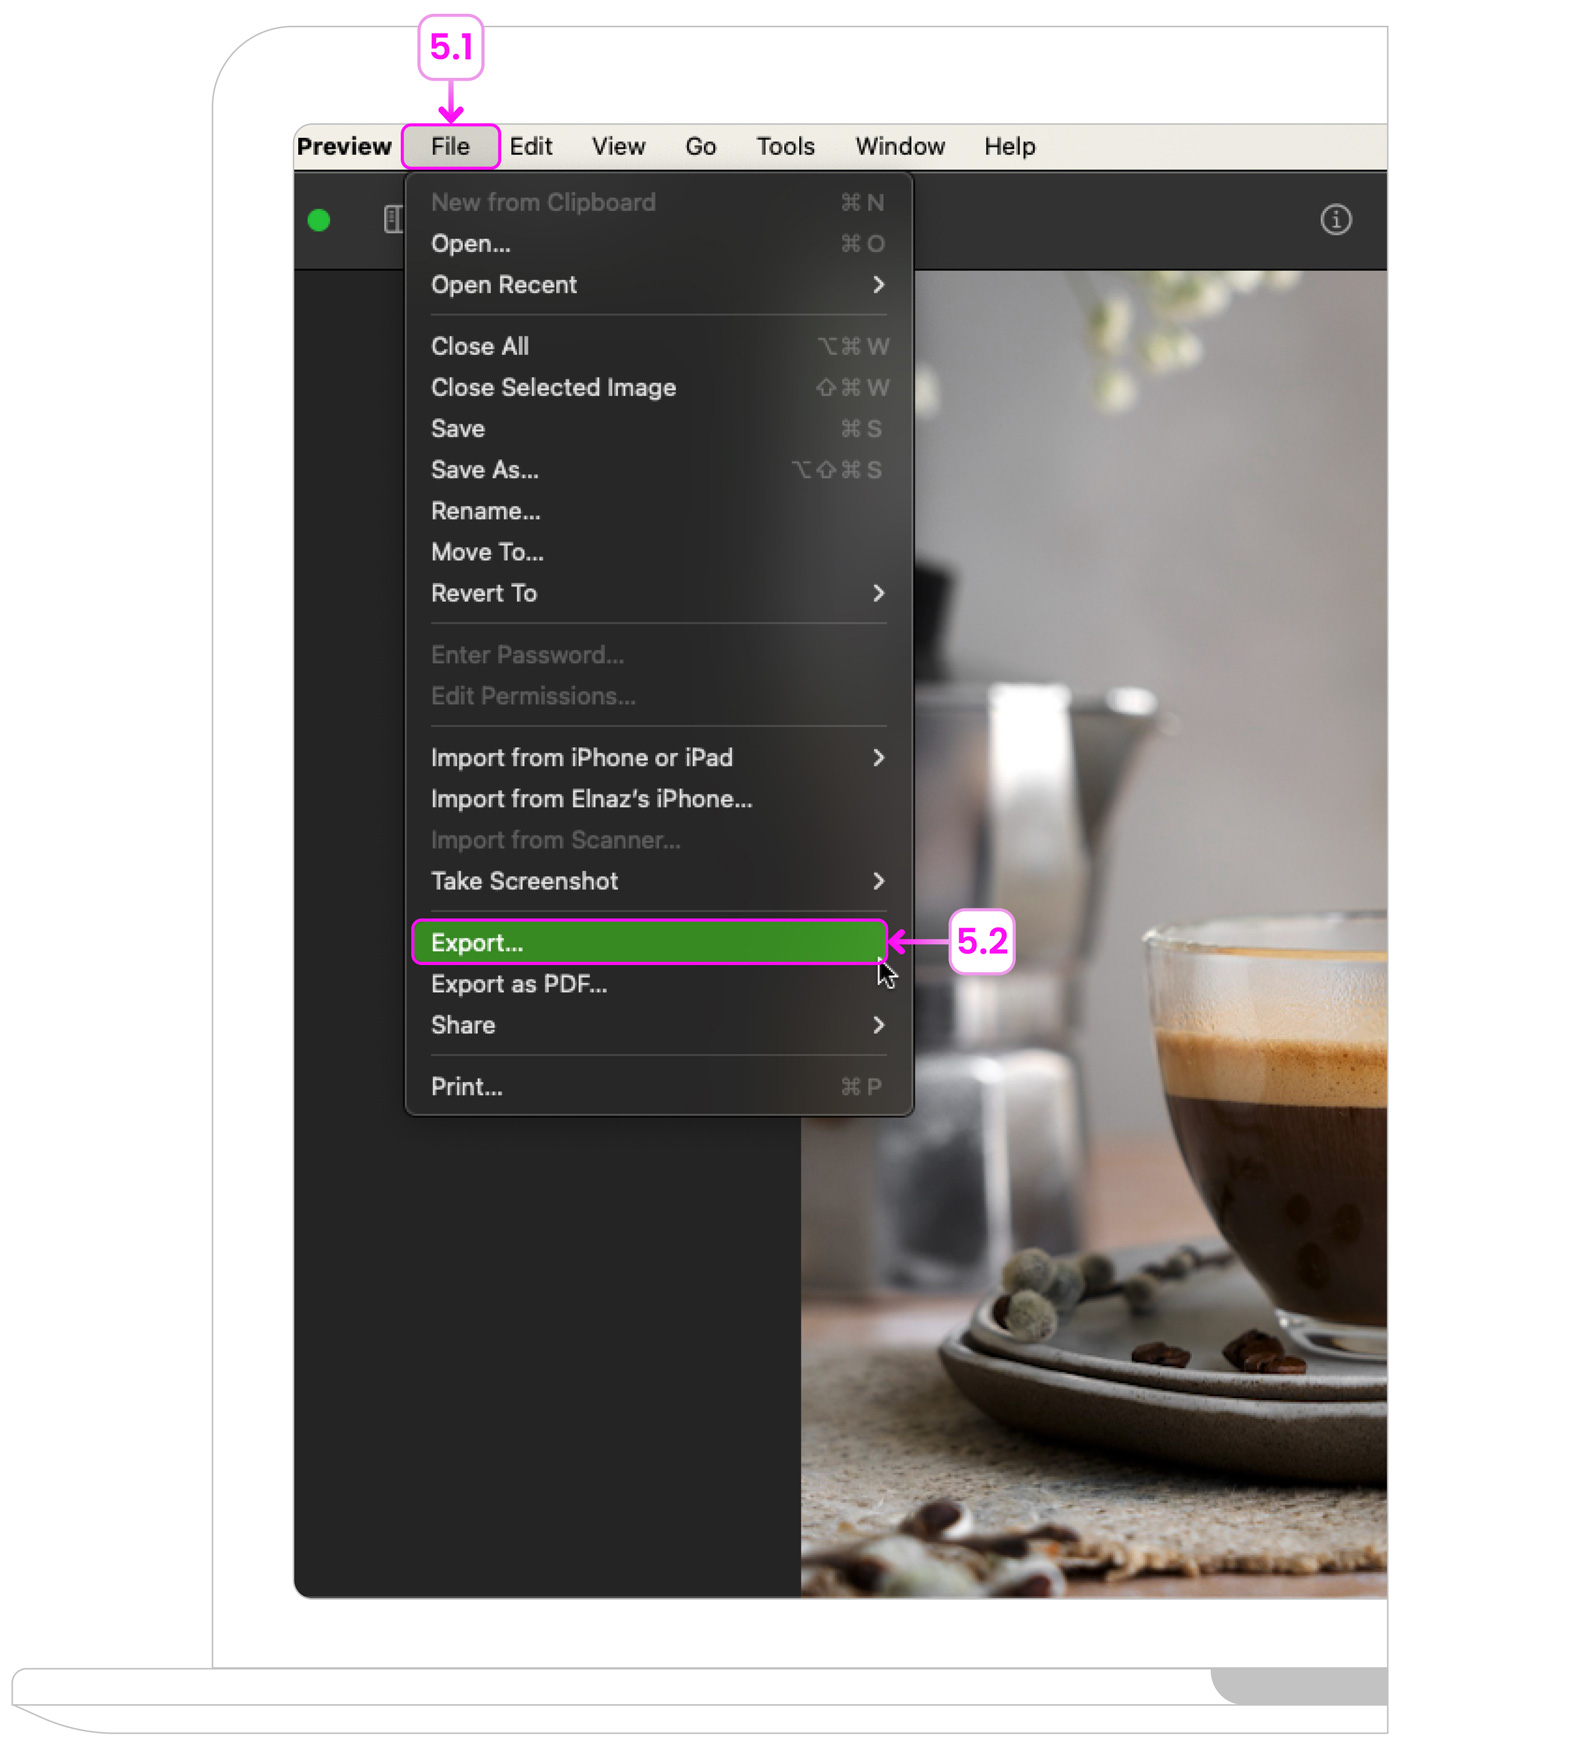
- Step 5: Click OK, then go to File > Save or Export to save a resized copy.
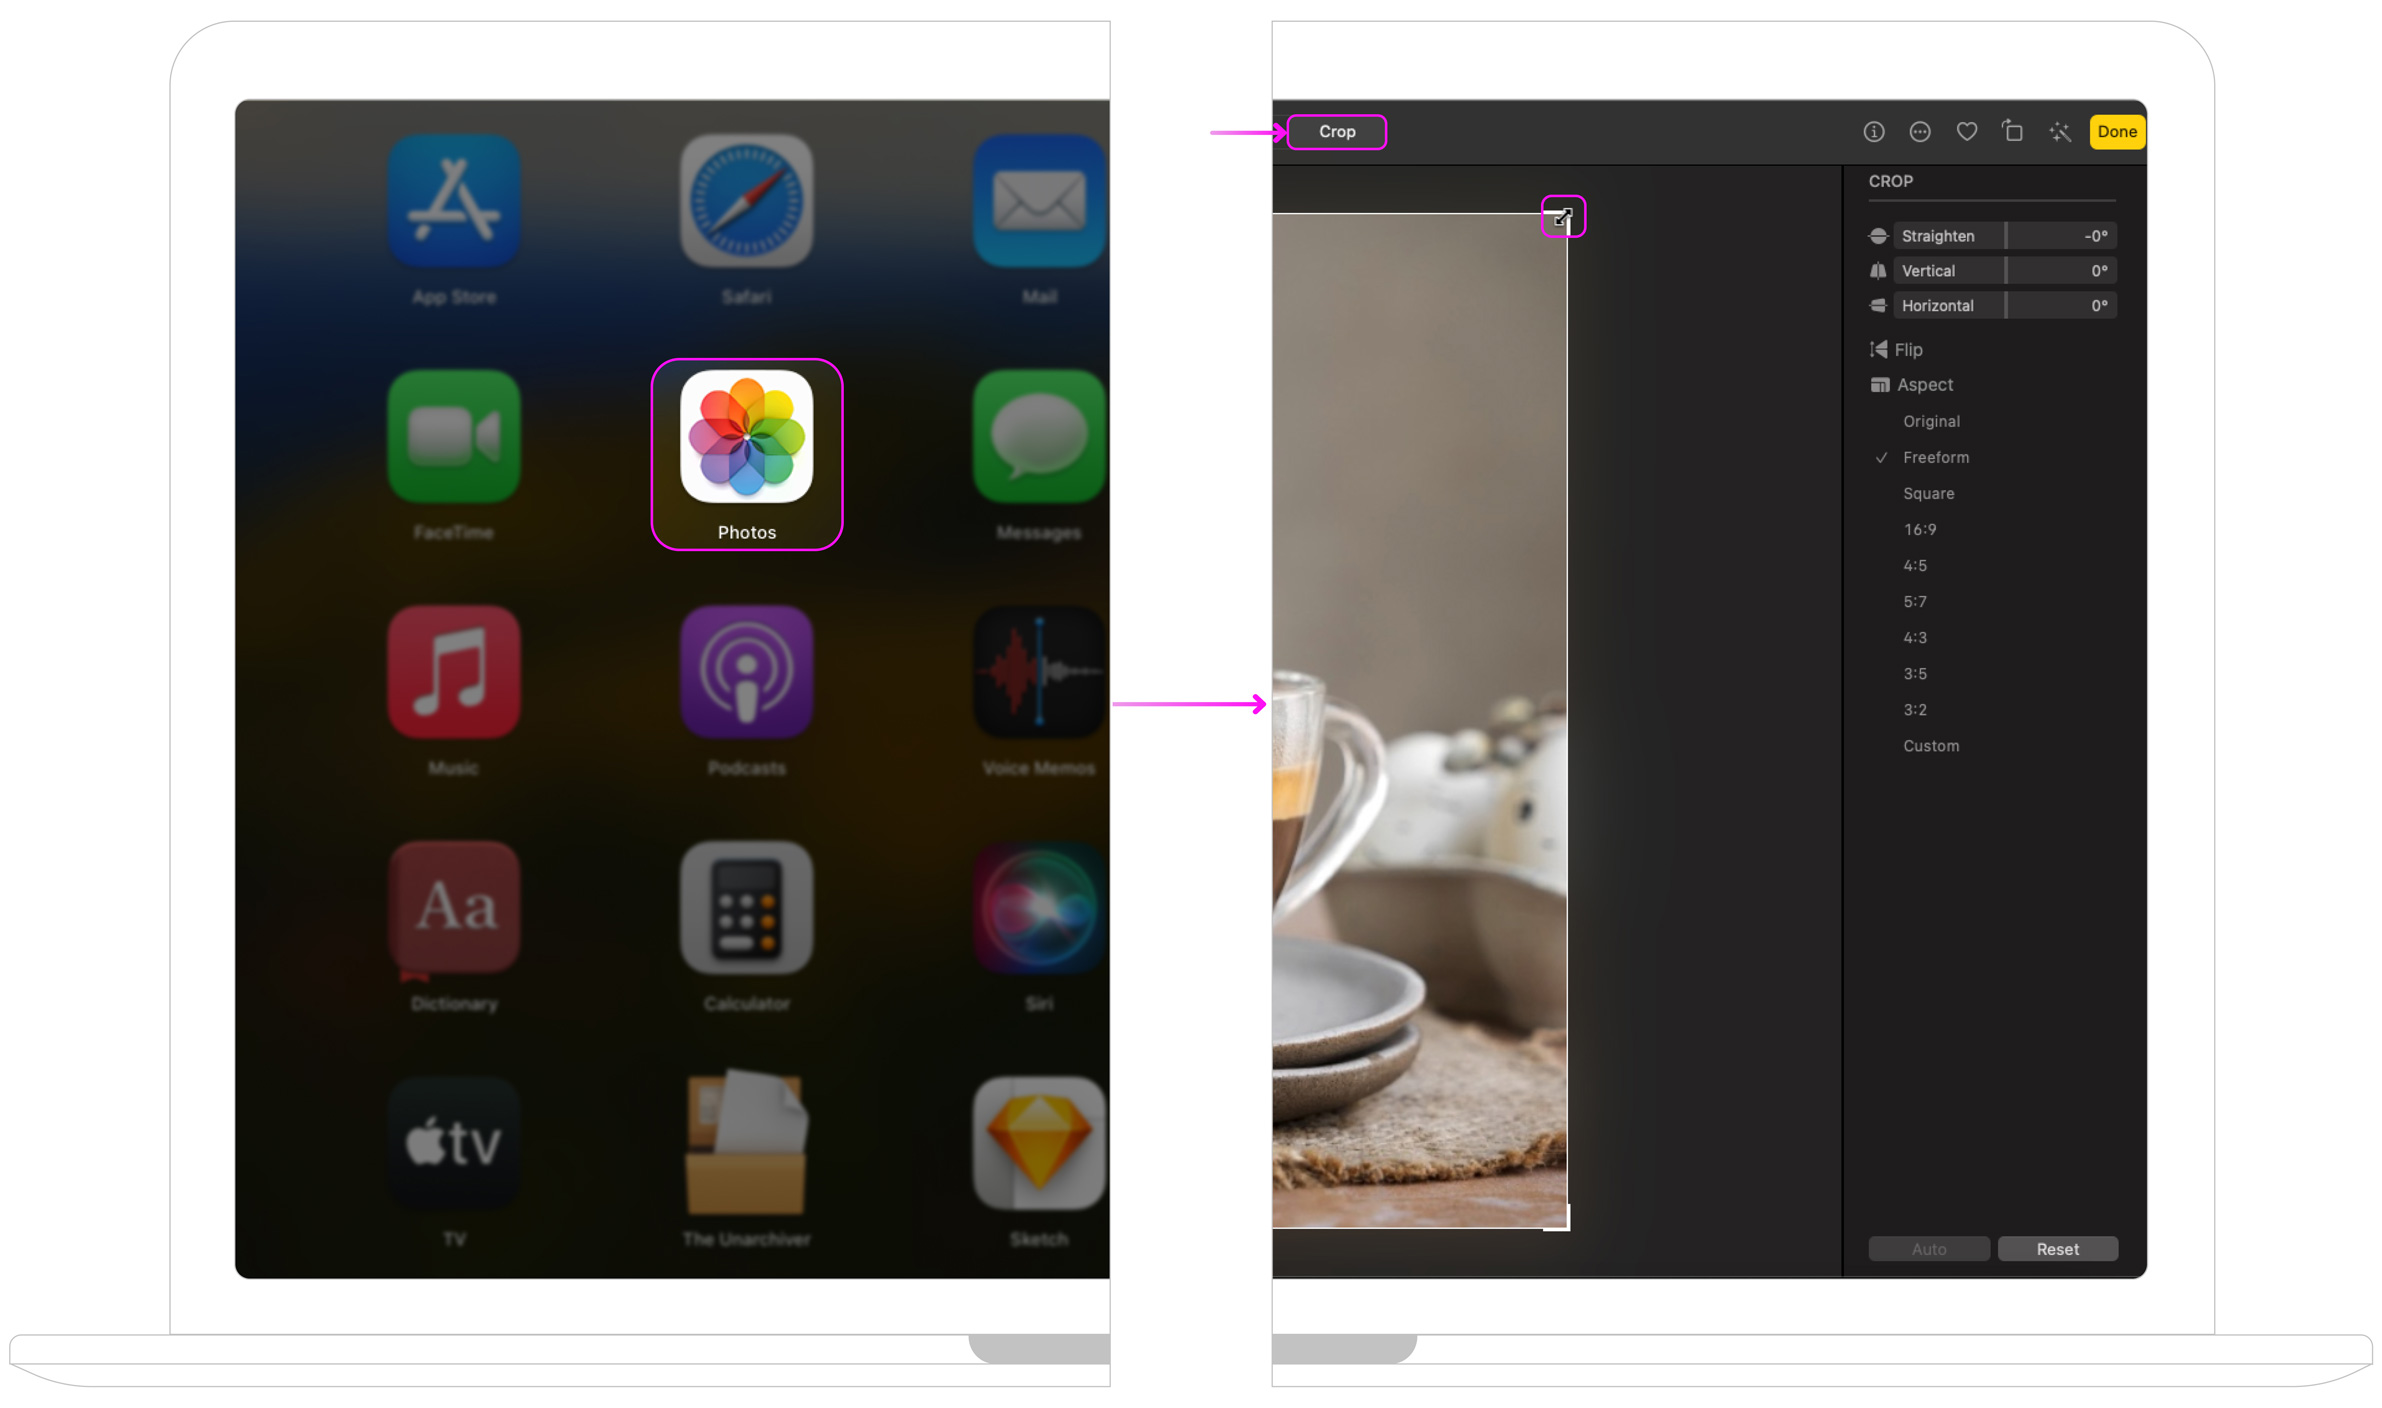
Option 2: Using Photos App (for simple edits)
- You can crop and adjust dimensions slightly in Photos under the Edit menu, though it’s limited for precise resizing.
For Window Users
Option 1: Using Microsoft Photos (Built-in App)
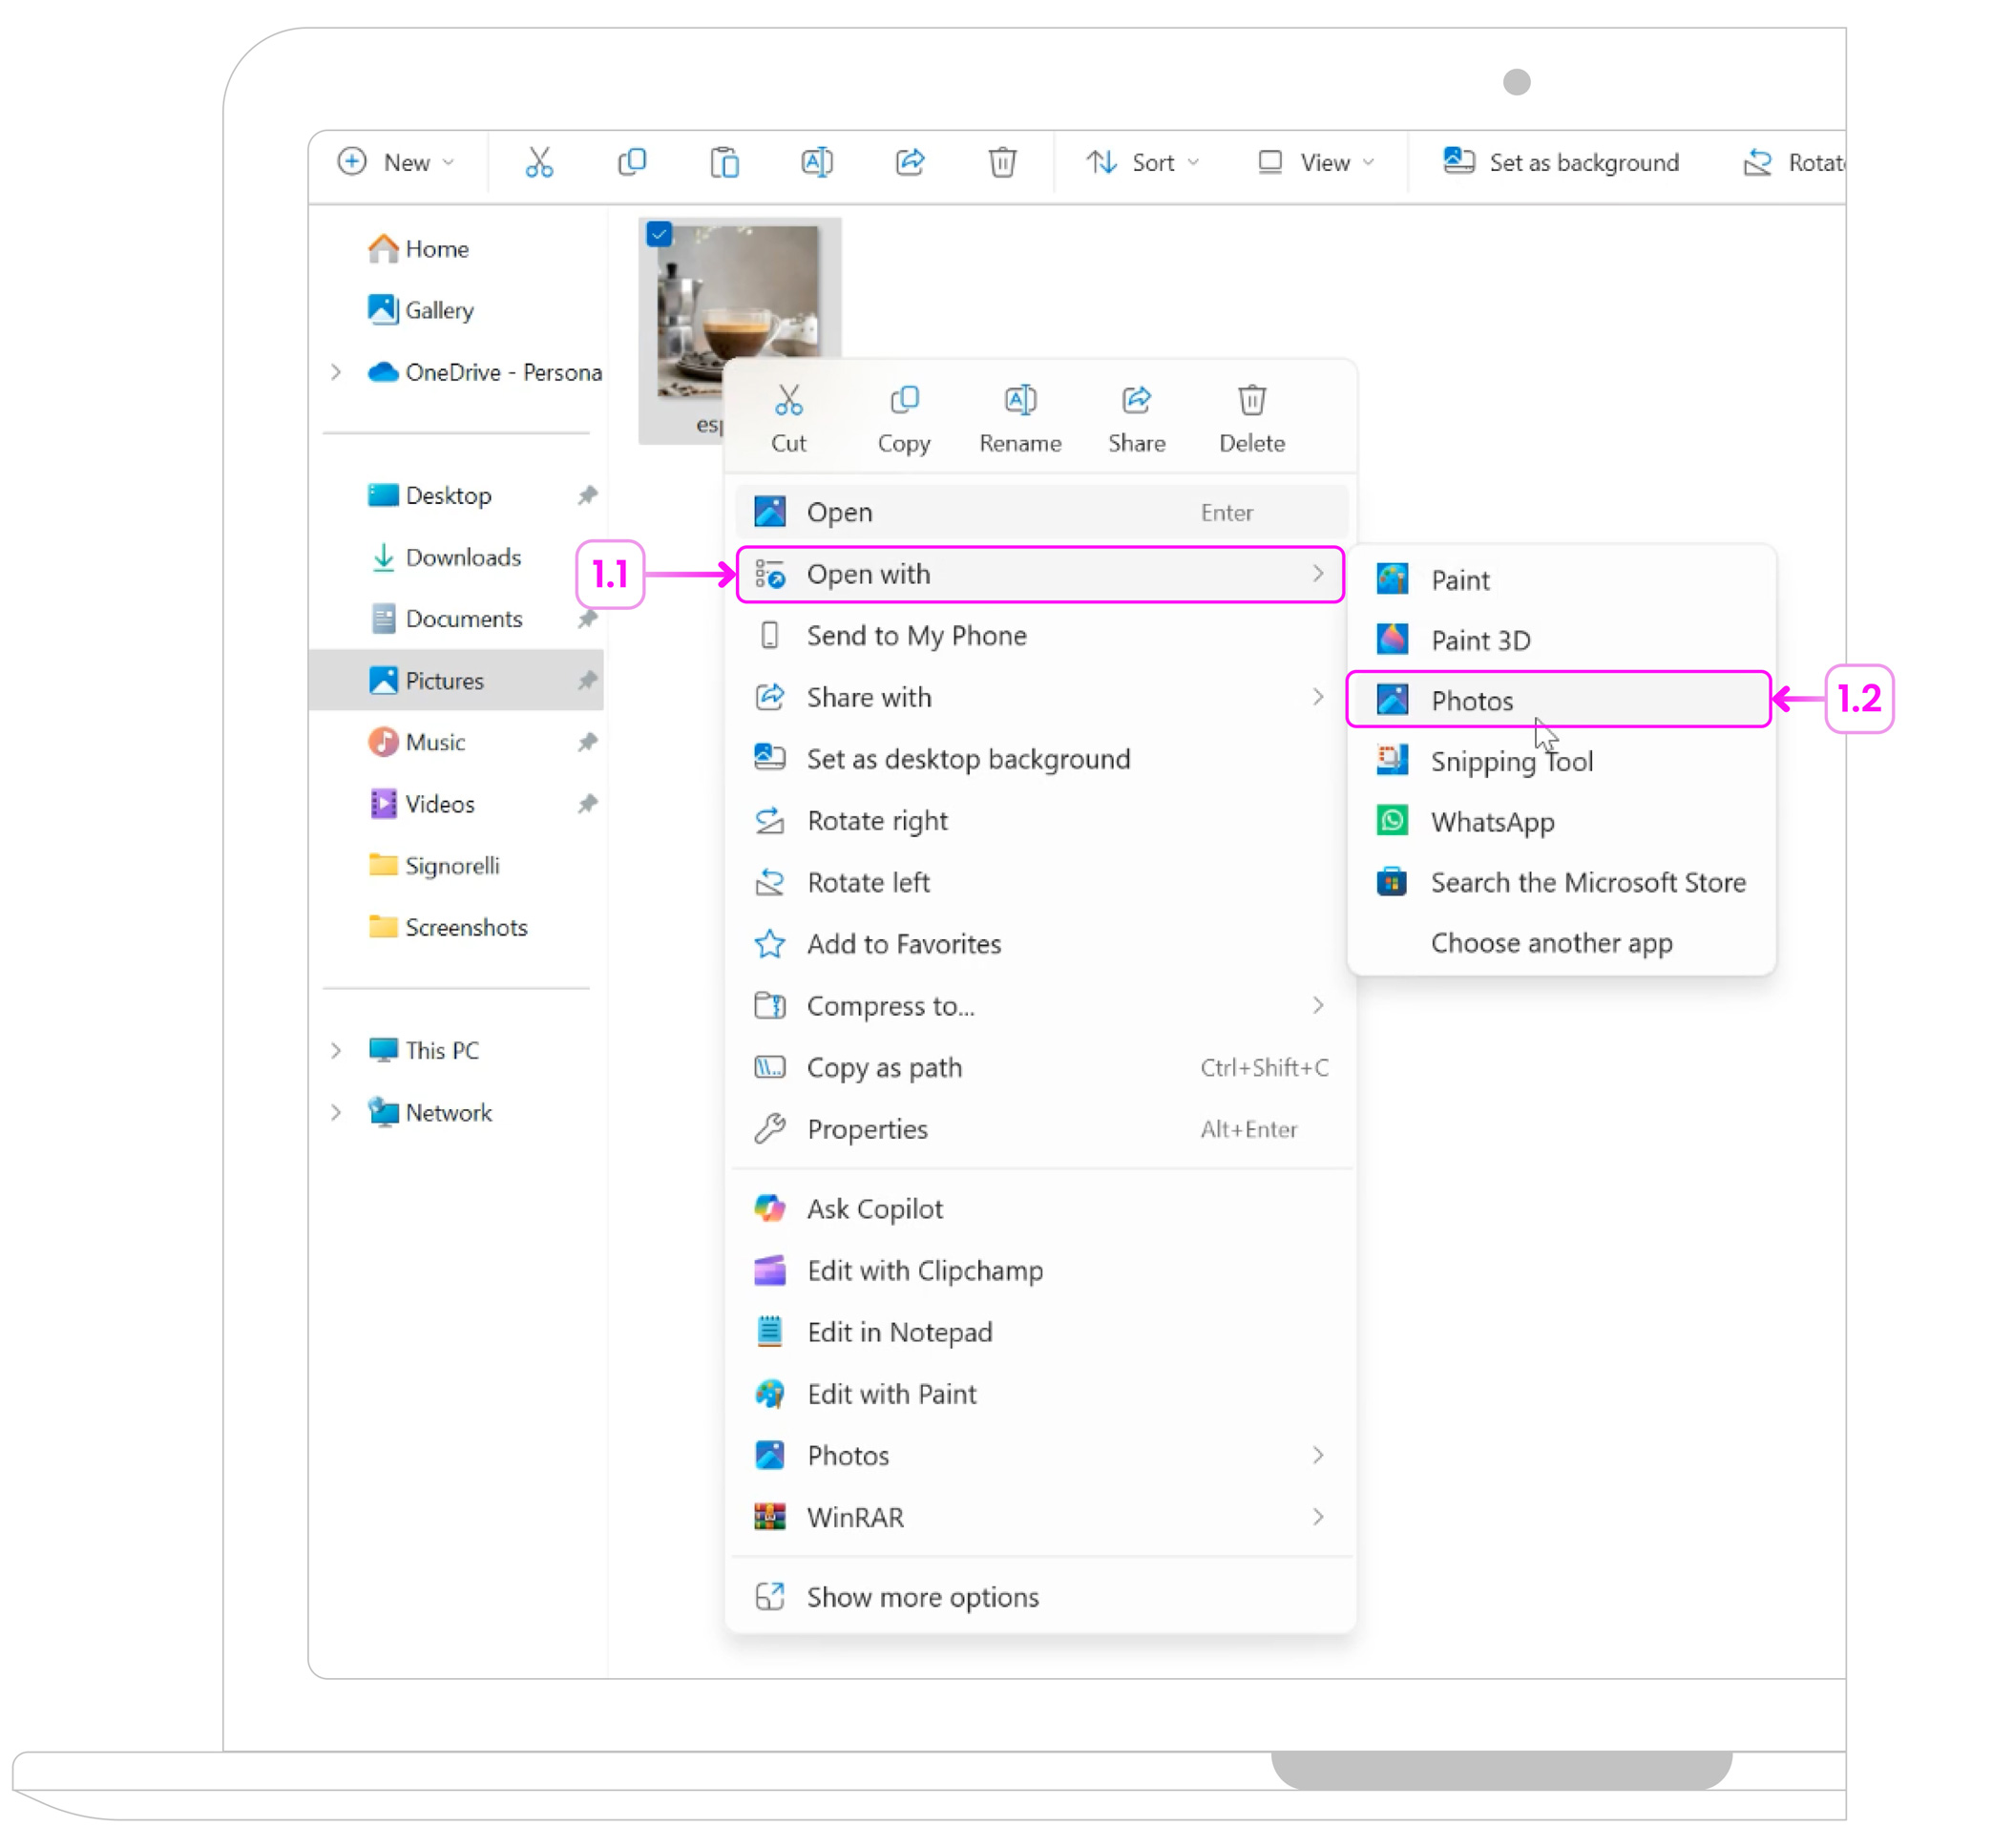
- Step 1: Right-click the image > select Open with > Photos.
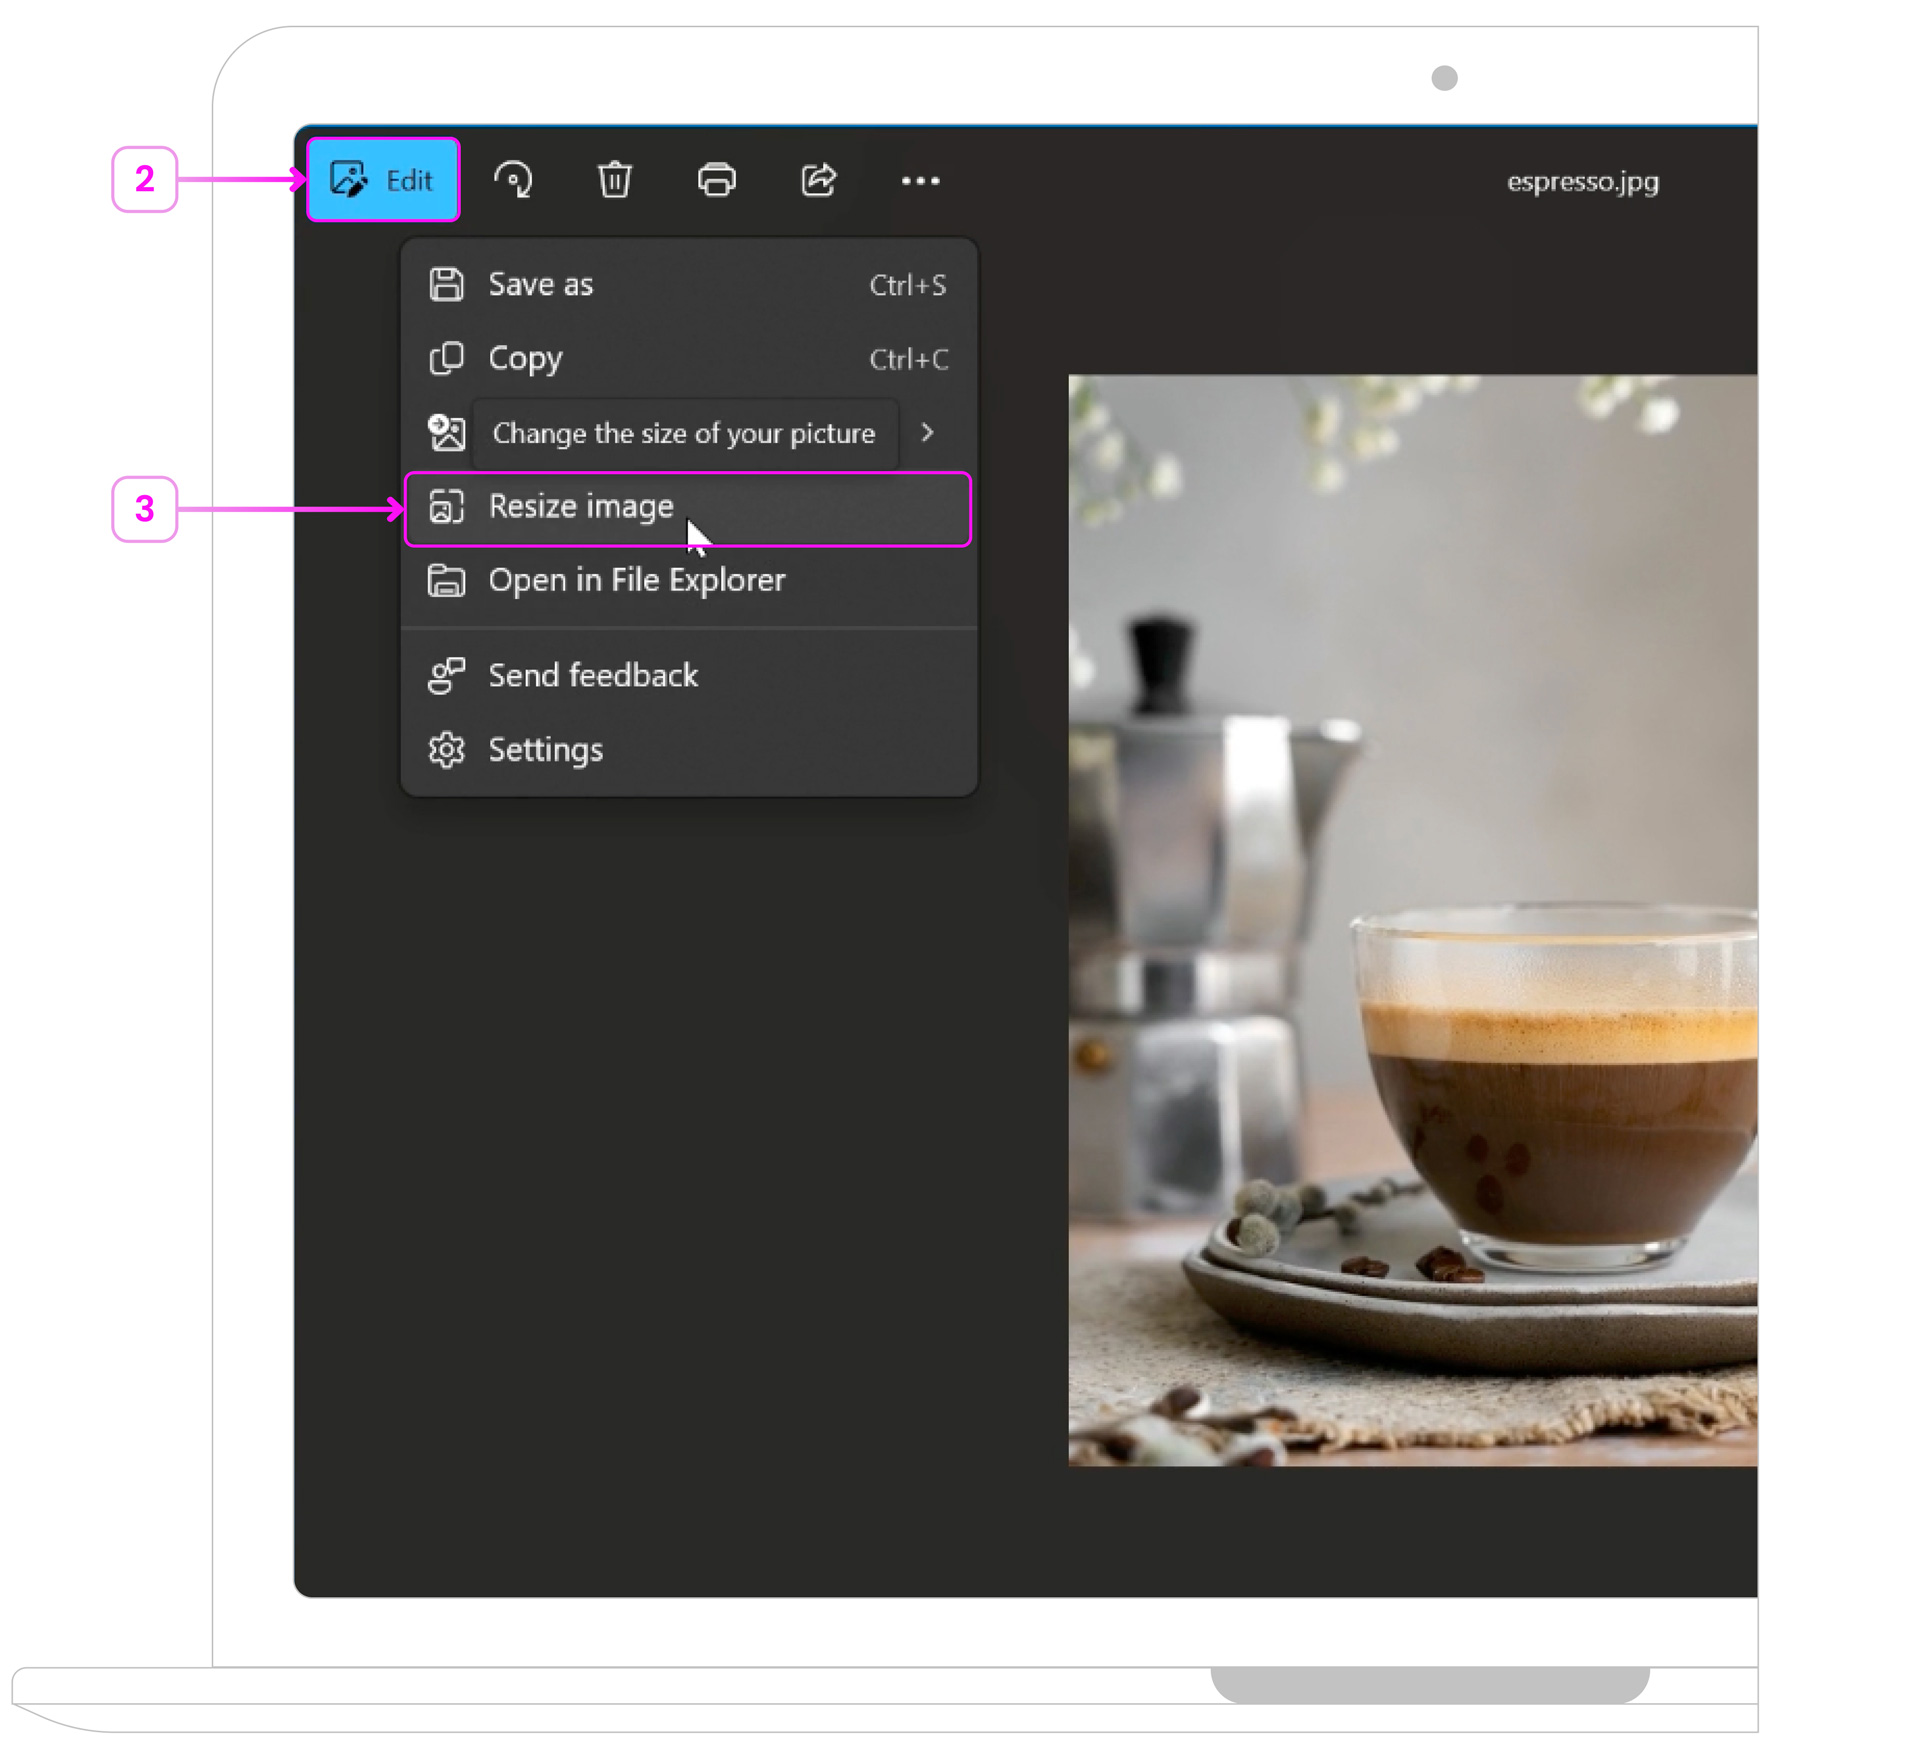
- Step 2: In the Photos app, click the Edit image (pencil icon) button in the top toolbar.
- Step 3: In the editing panel, select Resize image (the icon looks like arrows pointing outward).
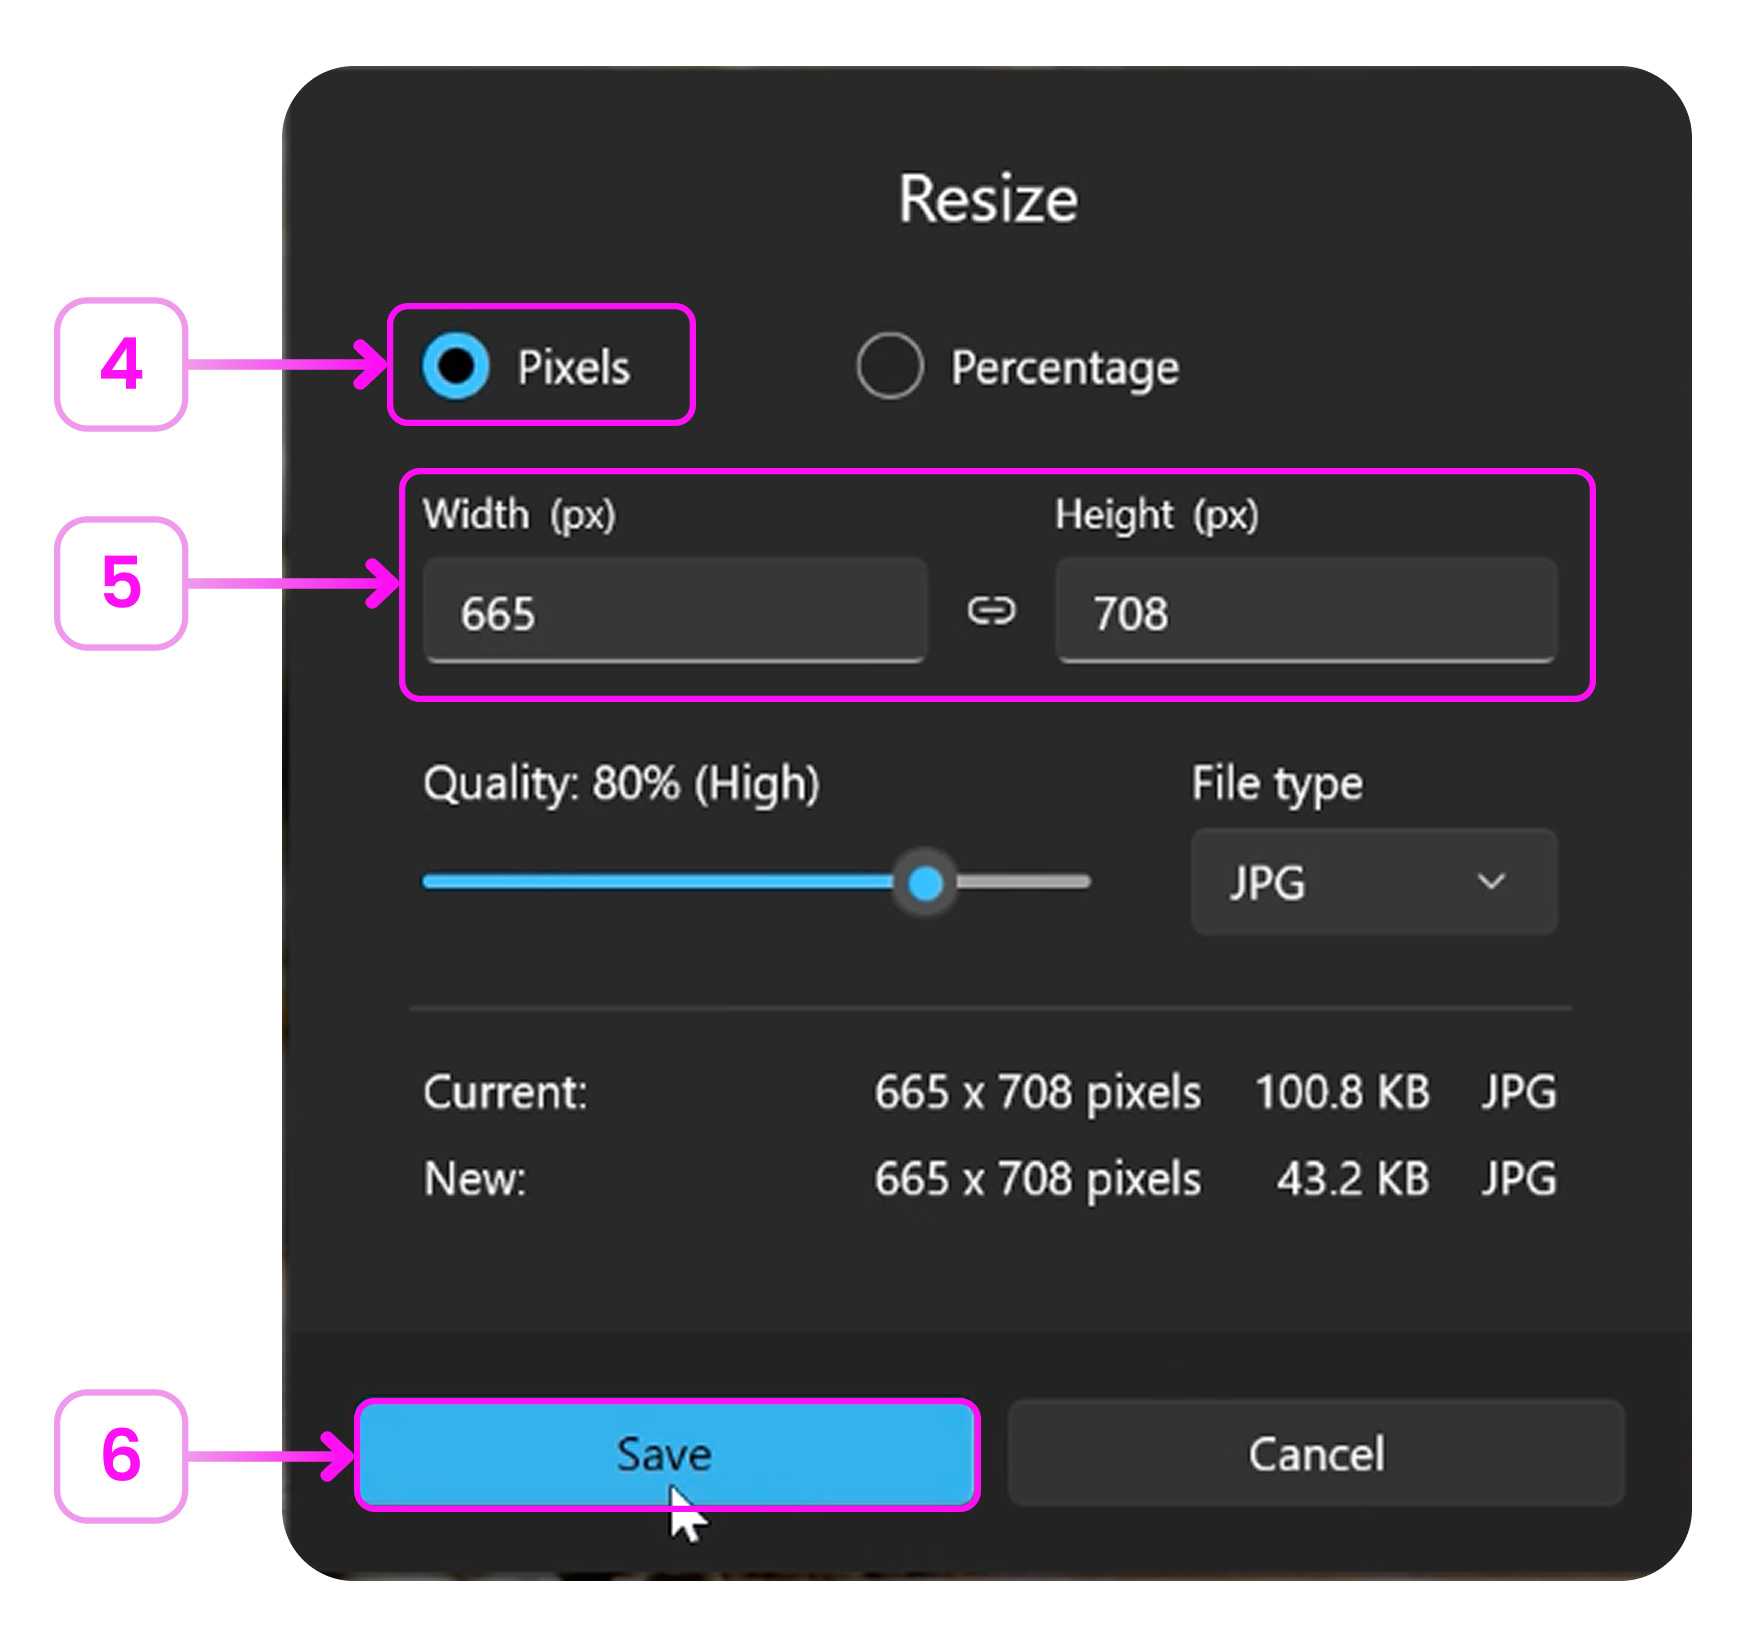
- Step 4: Choose either Define custom dimensions in pixels or percentage.
- Step 5: Enter your desired size (width and height, e.g., 800 x 800 px), then click Save resized copy.
- Step 6: Choose the location and file name, and click Save to export the resized version.
Option 2: Using Paint
- Step 1: Right-click the image > Open with Paint.
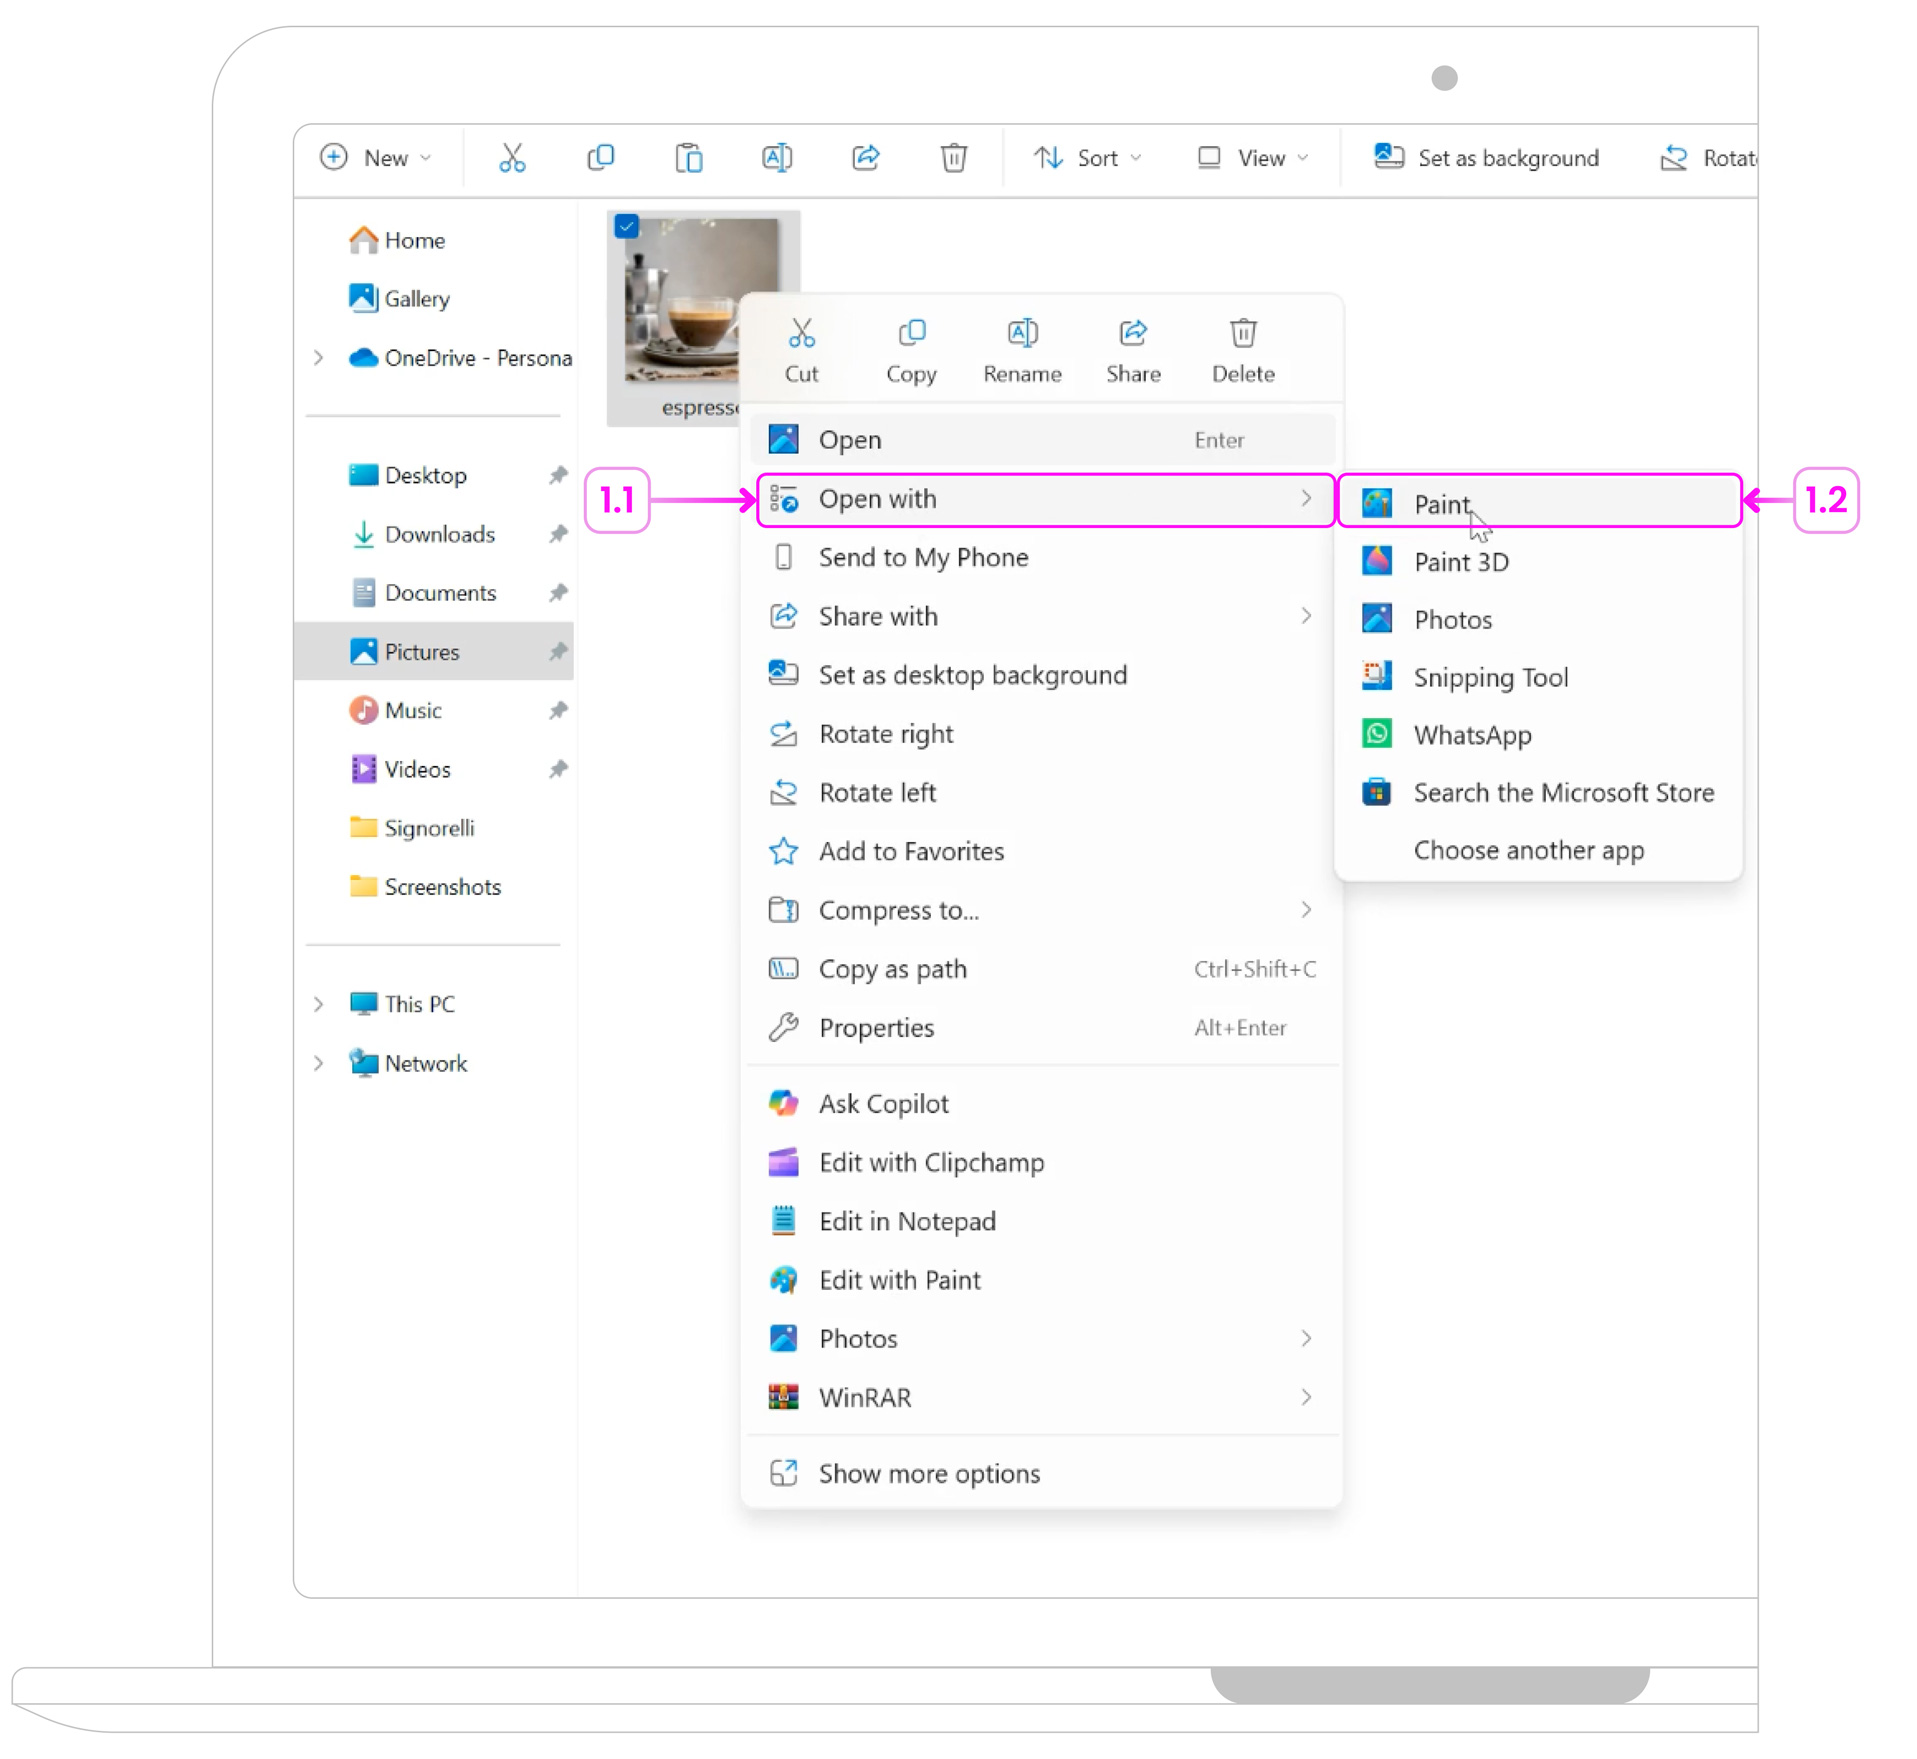
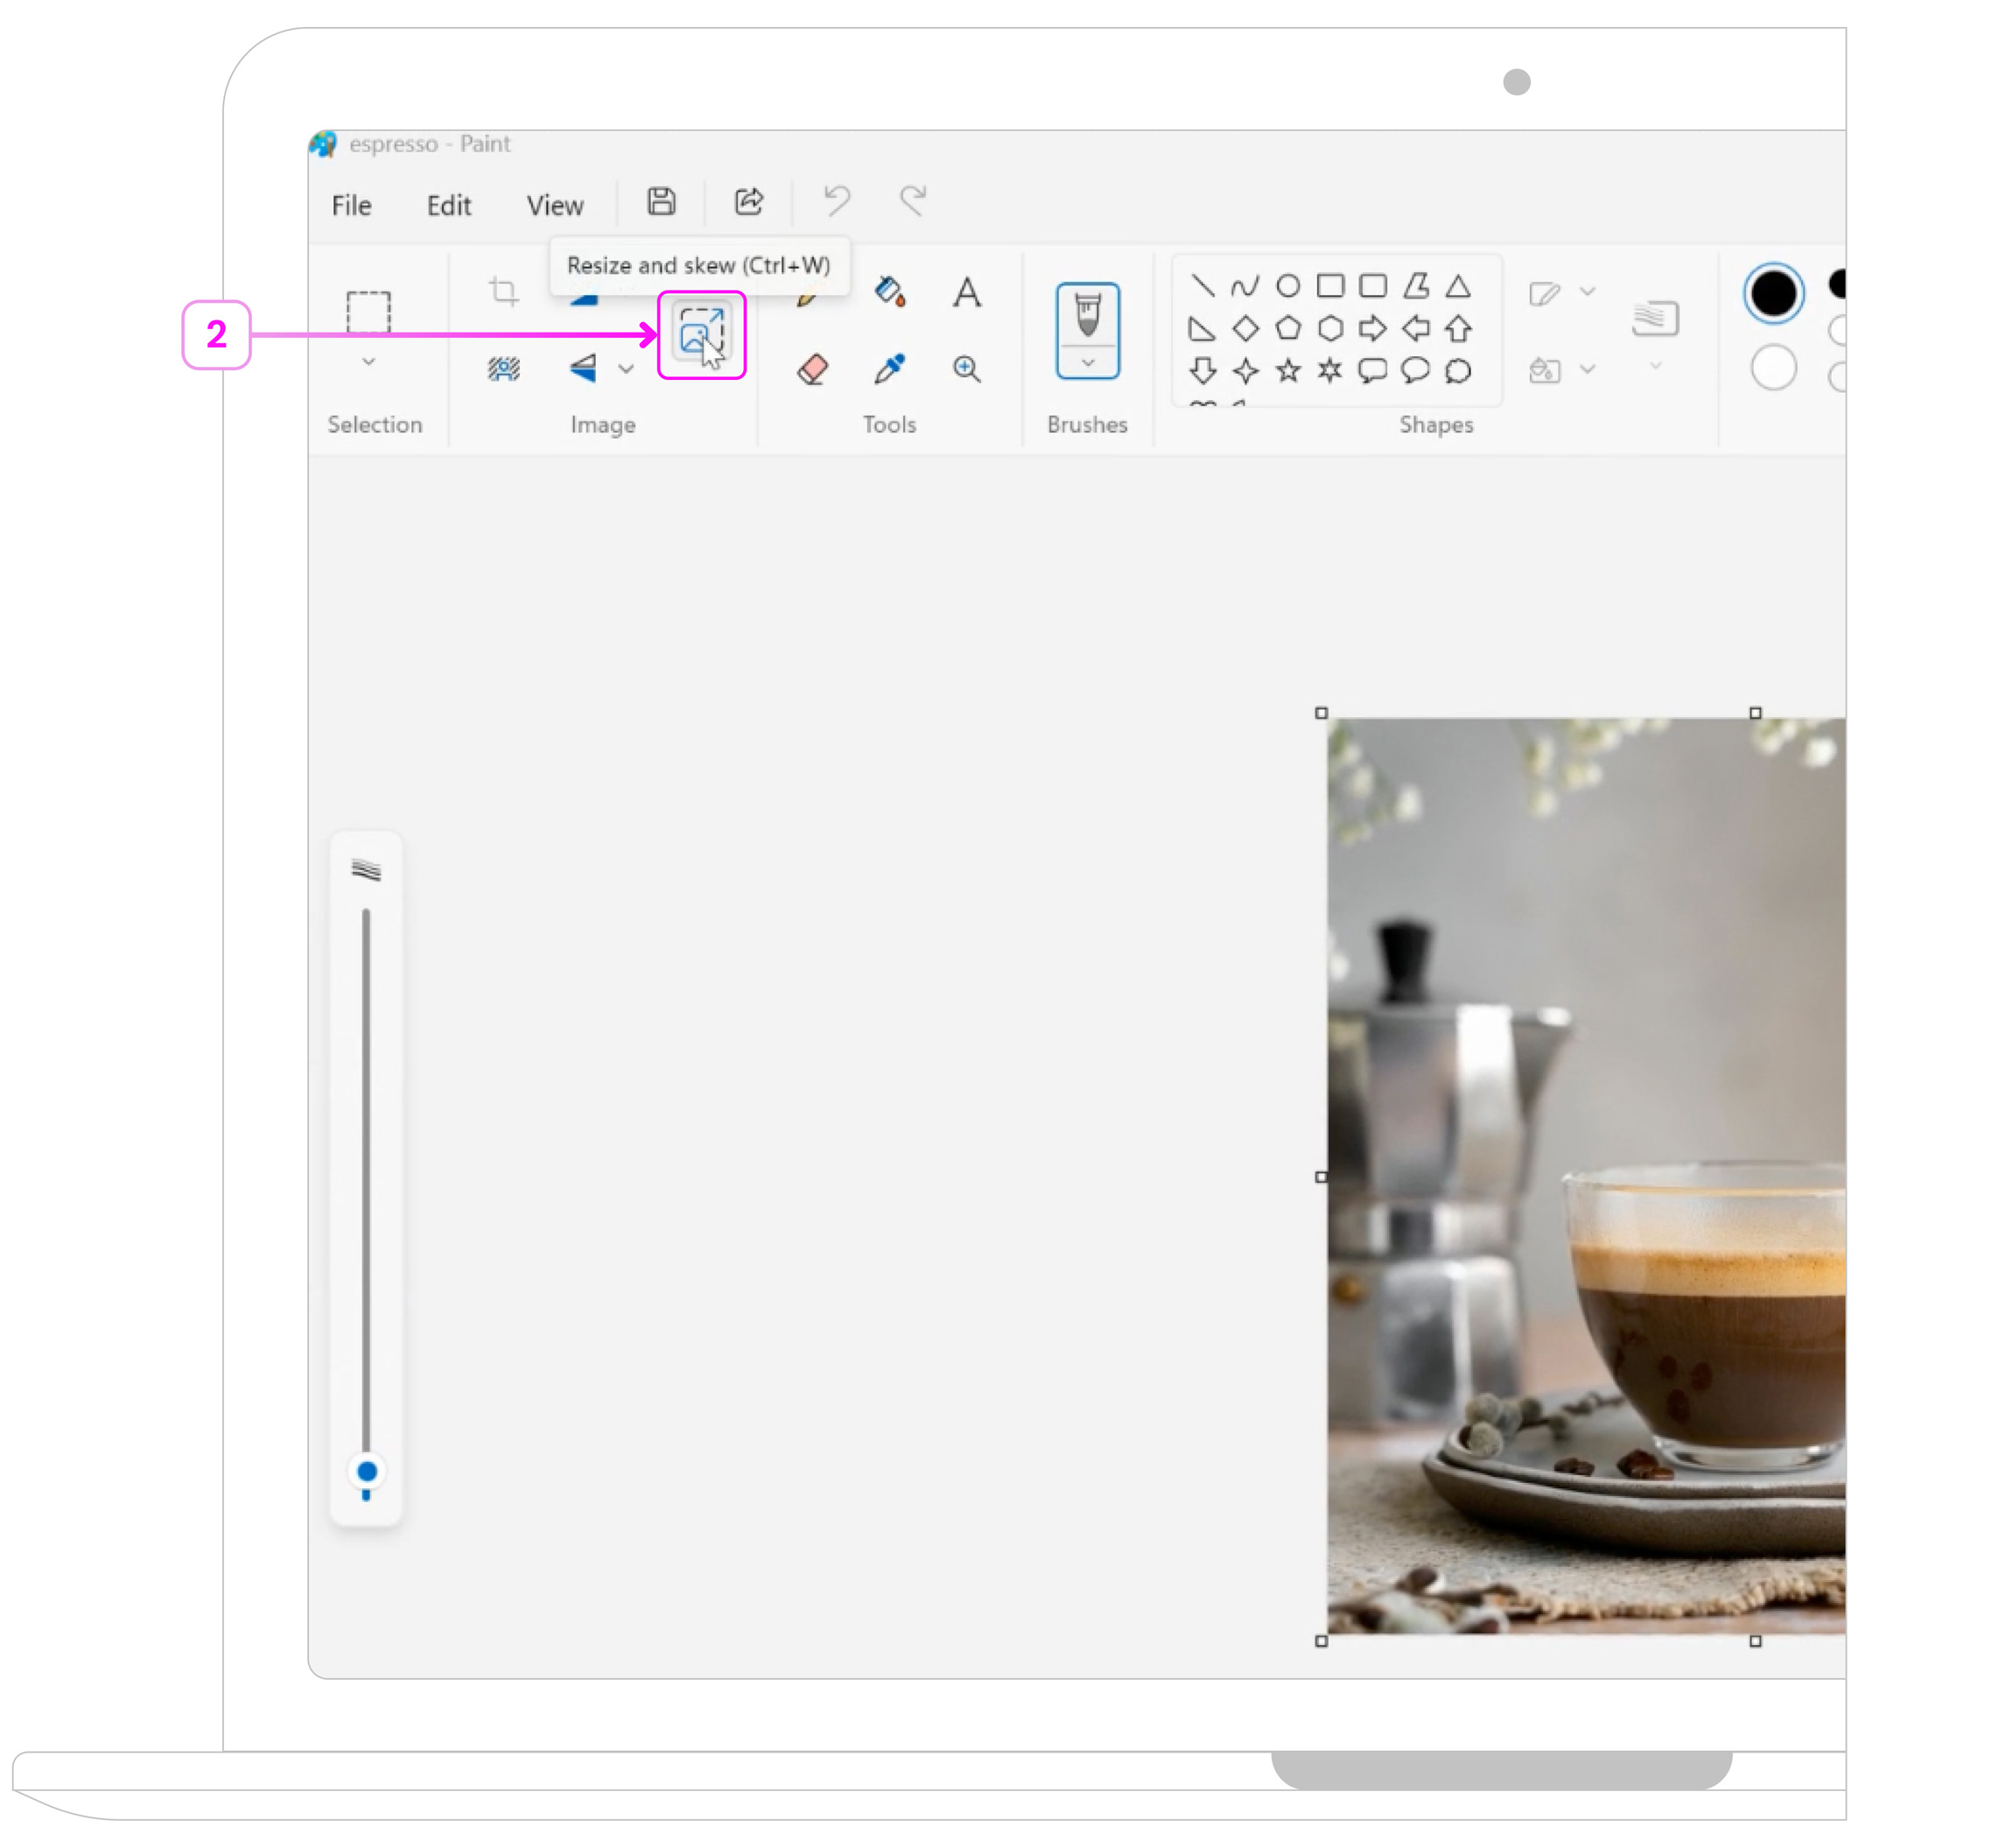
- Step 2: Click Resize in the toolbar.
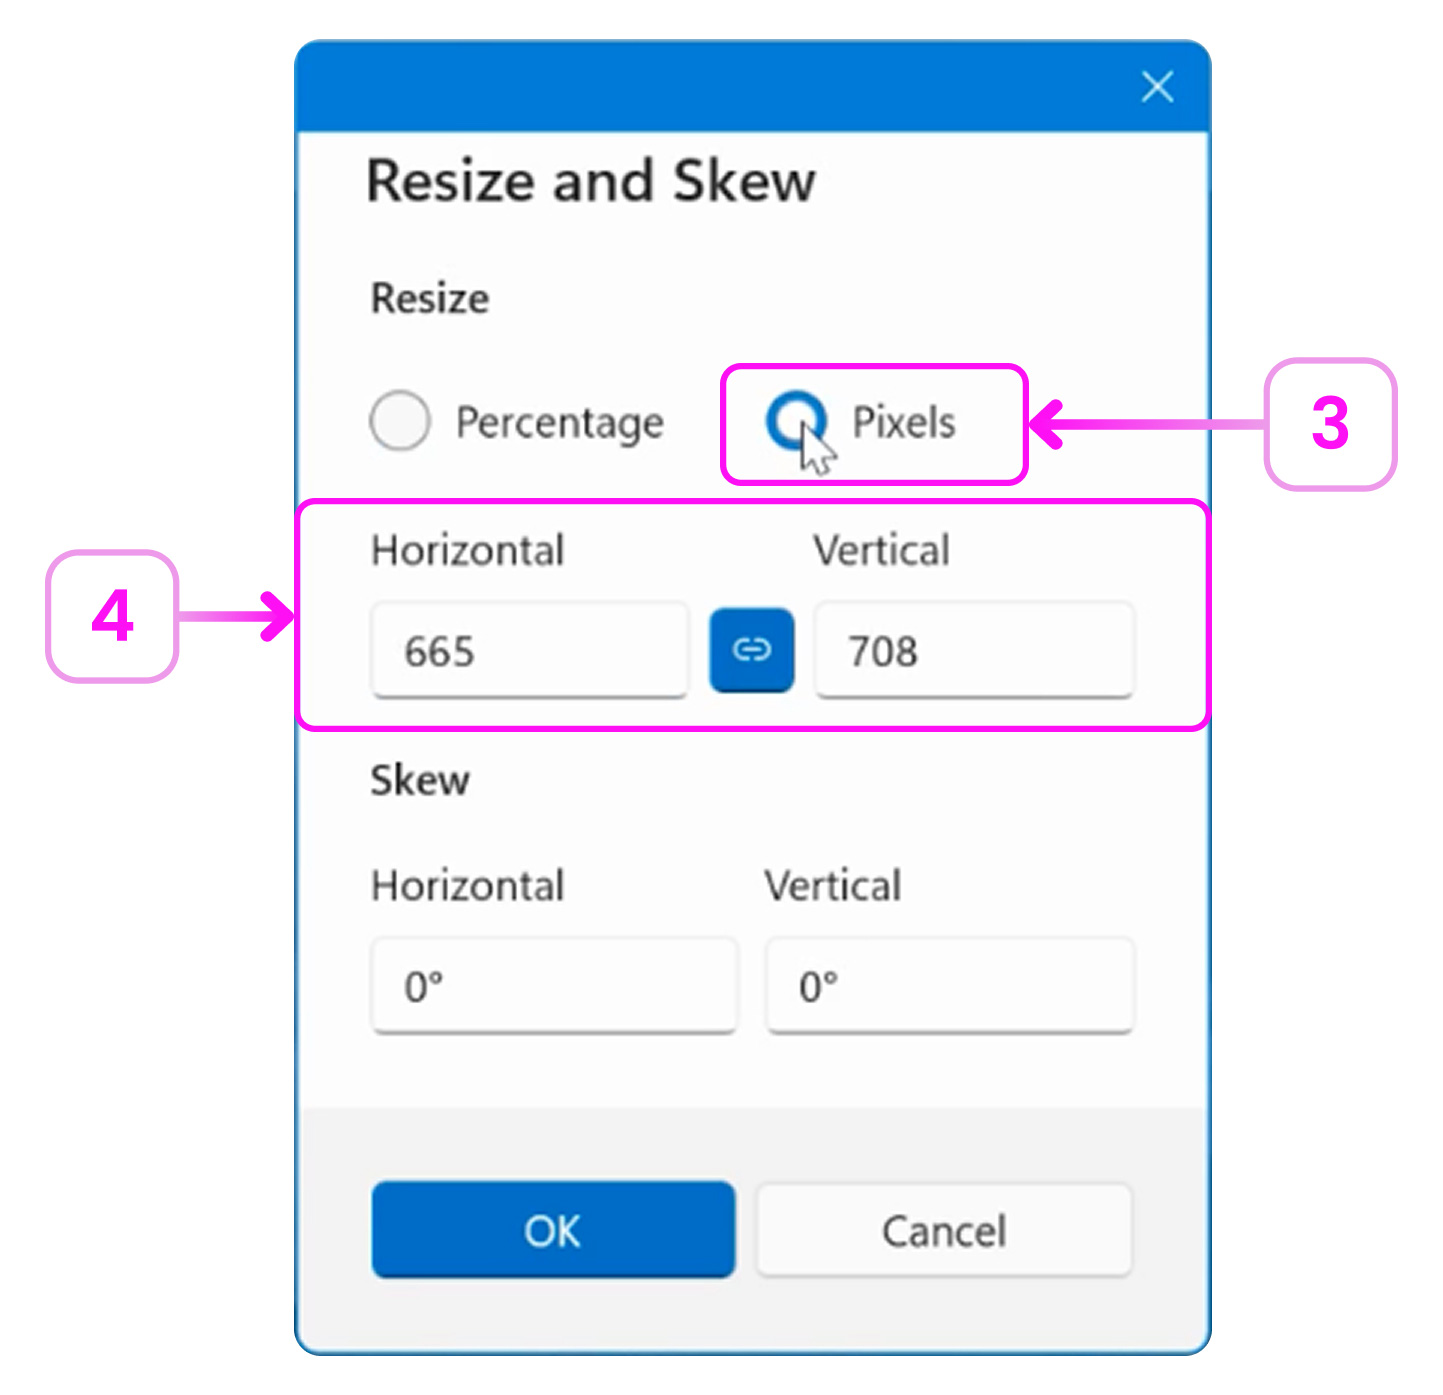
- Step 3: Choose Pixels, uncheck Maintain aspect ratio if needed.
- Step 4: Enter new width and height, then click OK.
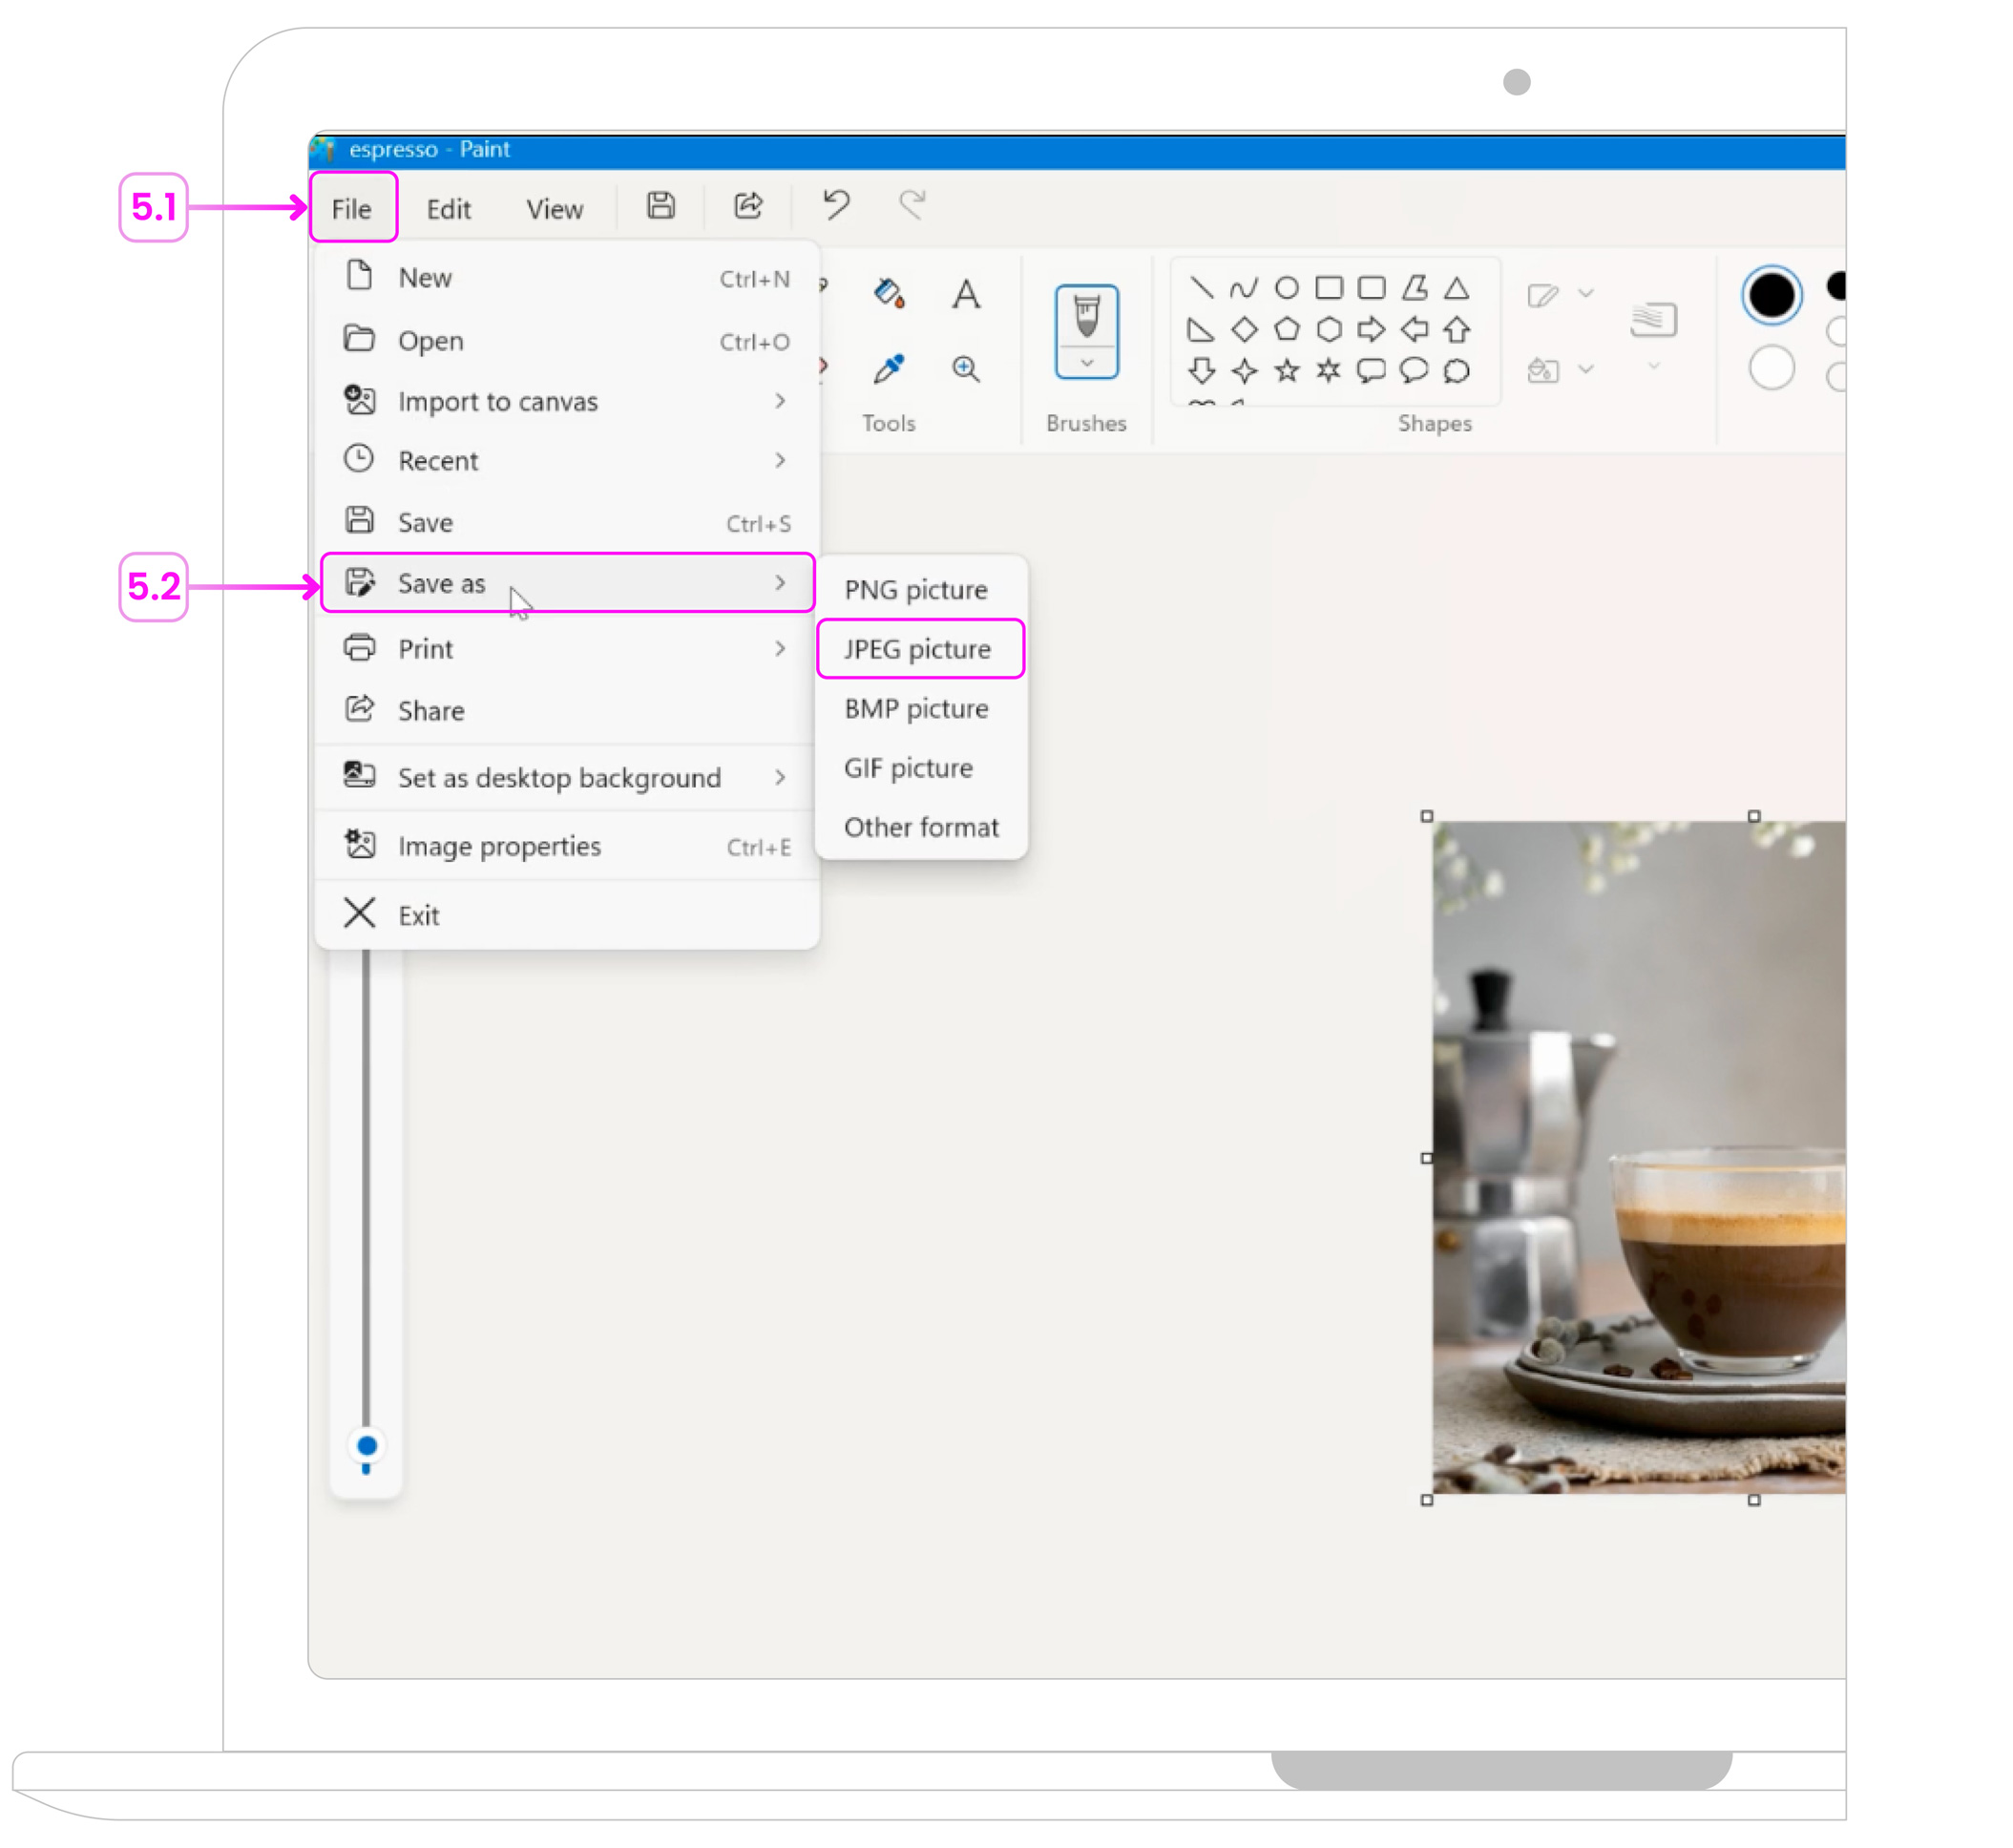
- Step 5: Save the file with File > Save As to avoid overwriting.
Tips for Best Results
-
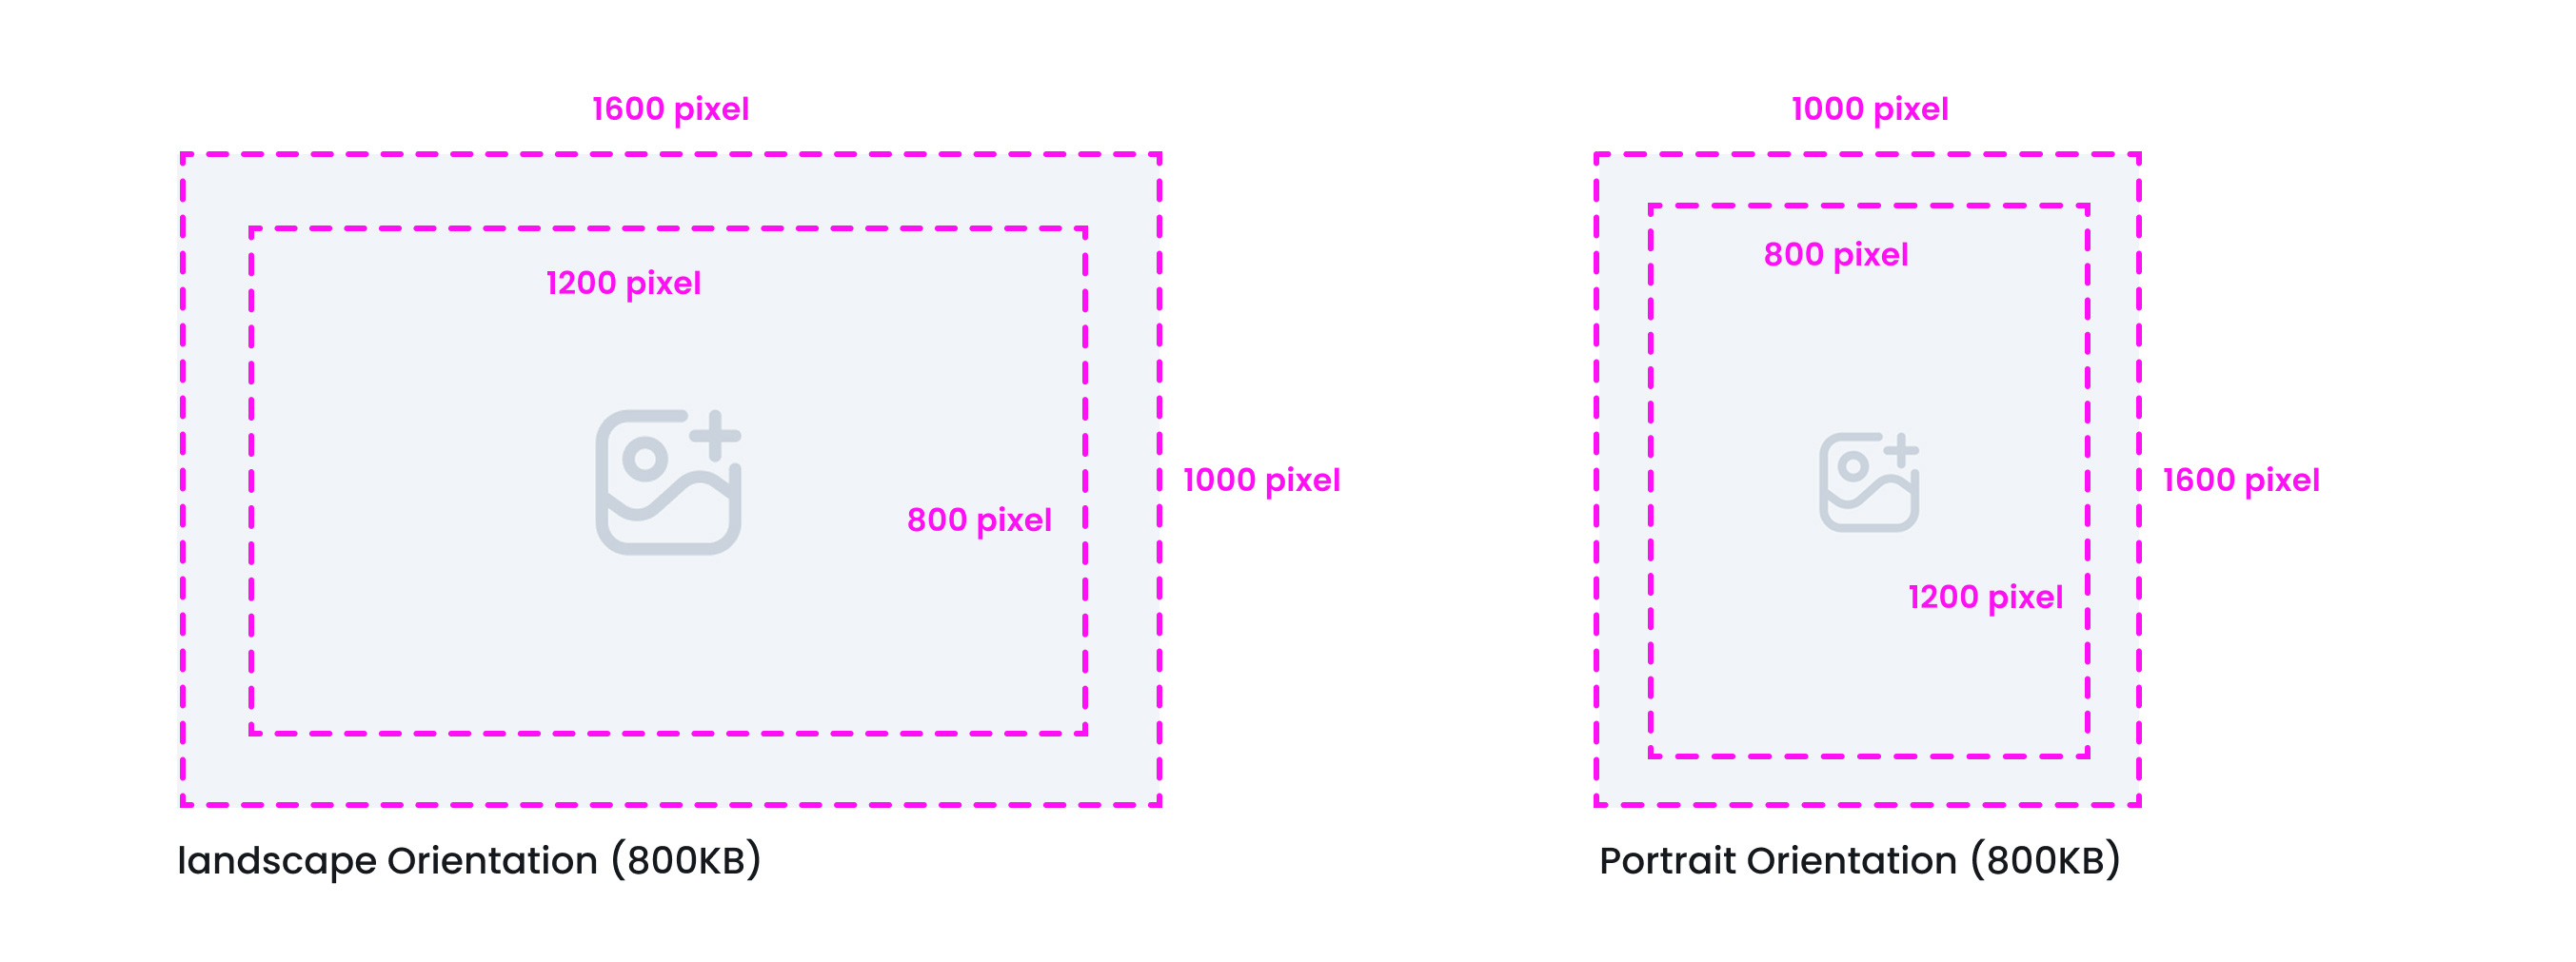
Recommended size
1200×800 or 1600×1000 pixels (Landscape Orientation) and 800×1200 or 1000×1600 pixels (Portrait Orientation). Keep the file size under 800KB for smooth use in the TechSuite portal. Files larger than this cannot be uploaded.
- Format
Use JPEG for best compatibility and good image quality.
-
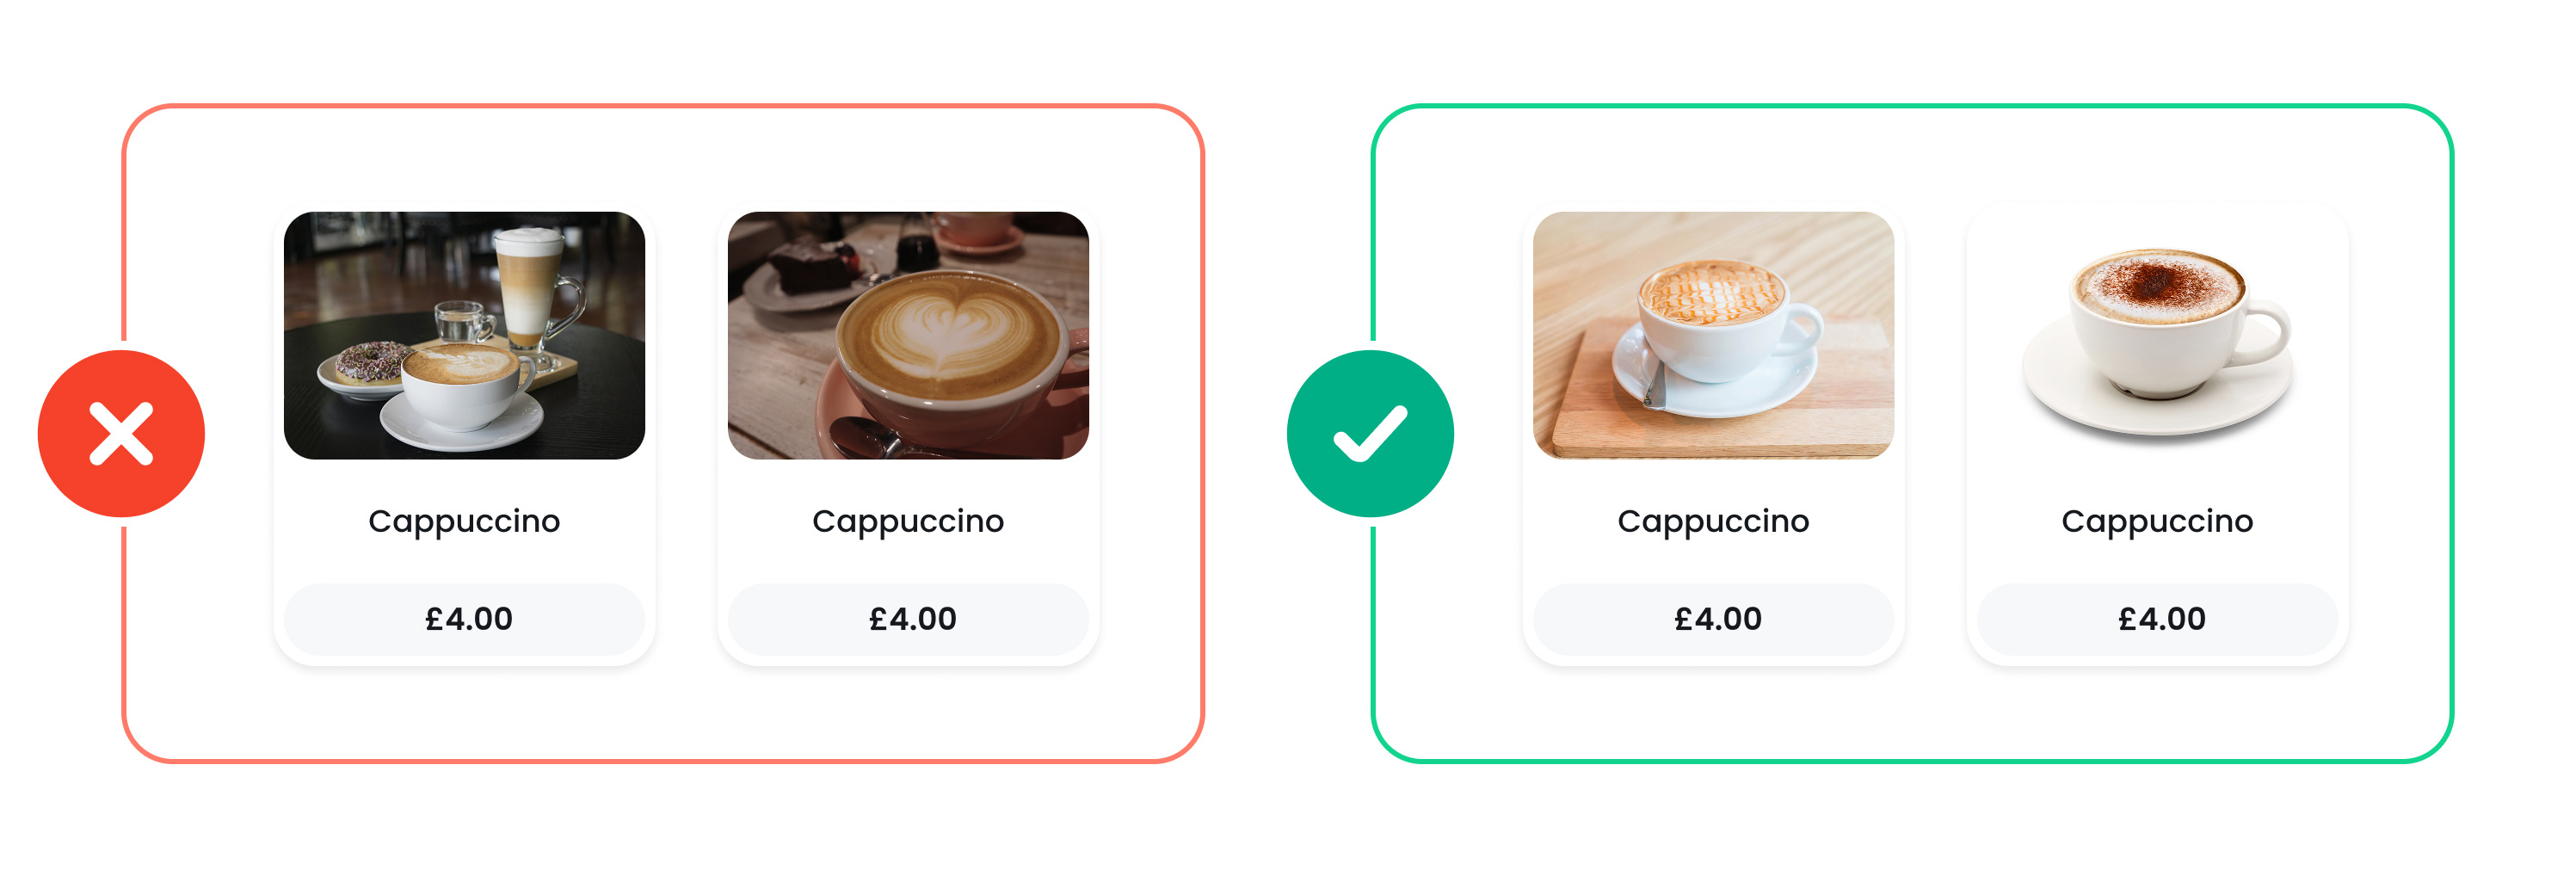
Make it visually appealing
Choose an image that clearly shows the item, looks fresh, and sparks interest at a glance.
-
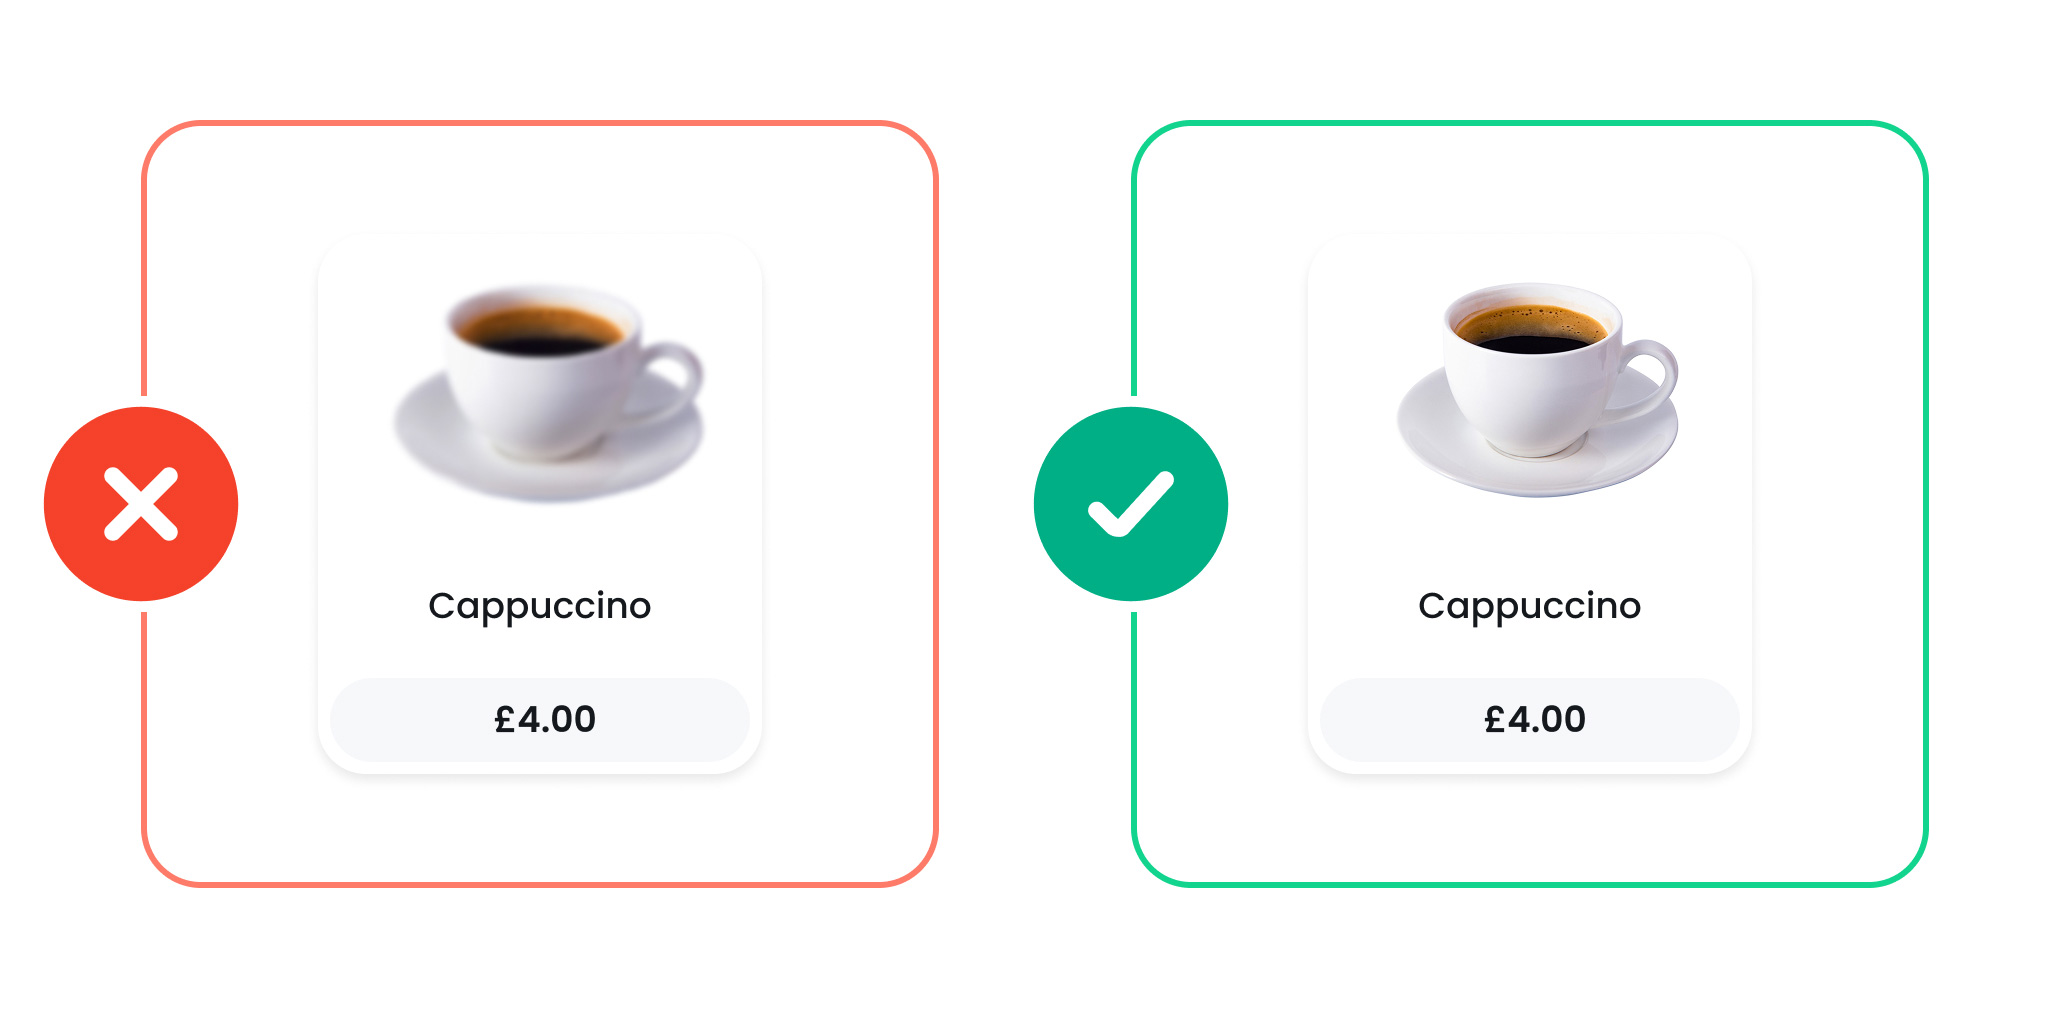
Avoid poor lighting or blur
Low-resolution or unclear photos can negatively affect how your menu is perceived.
-
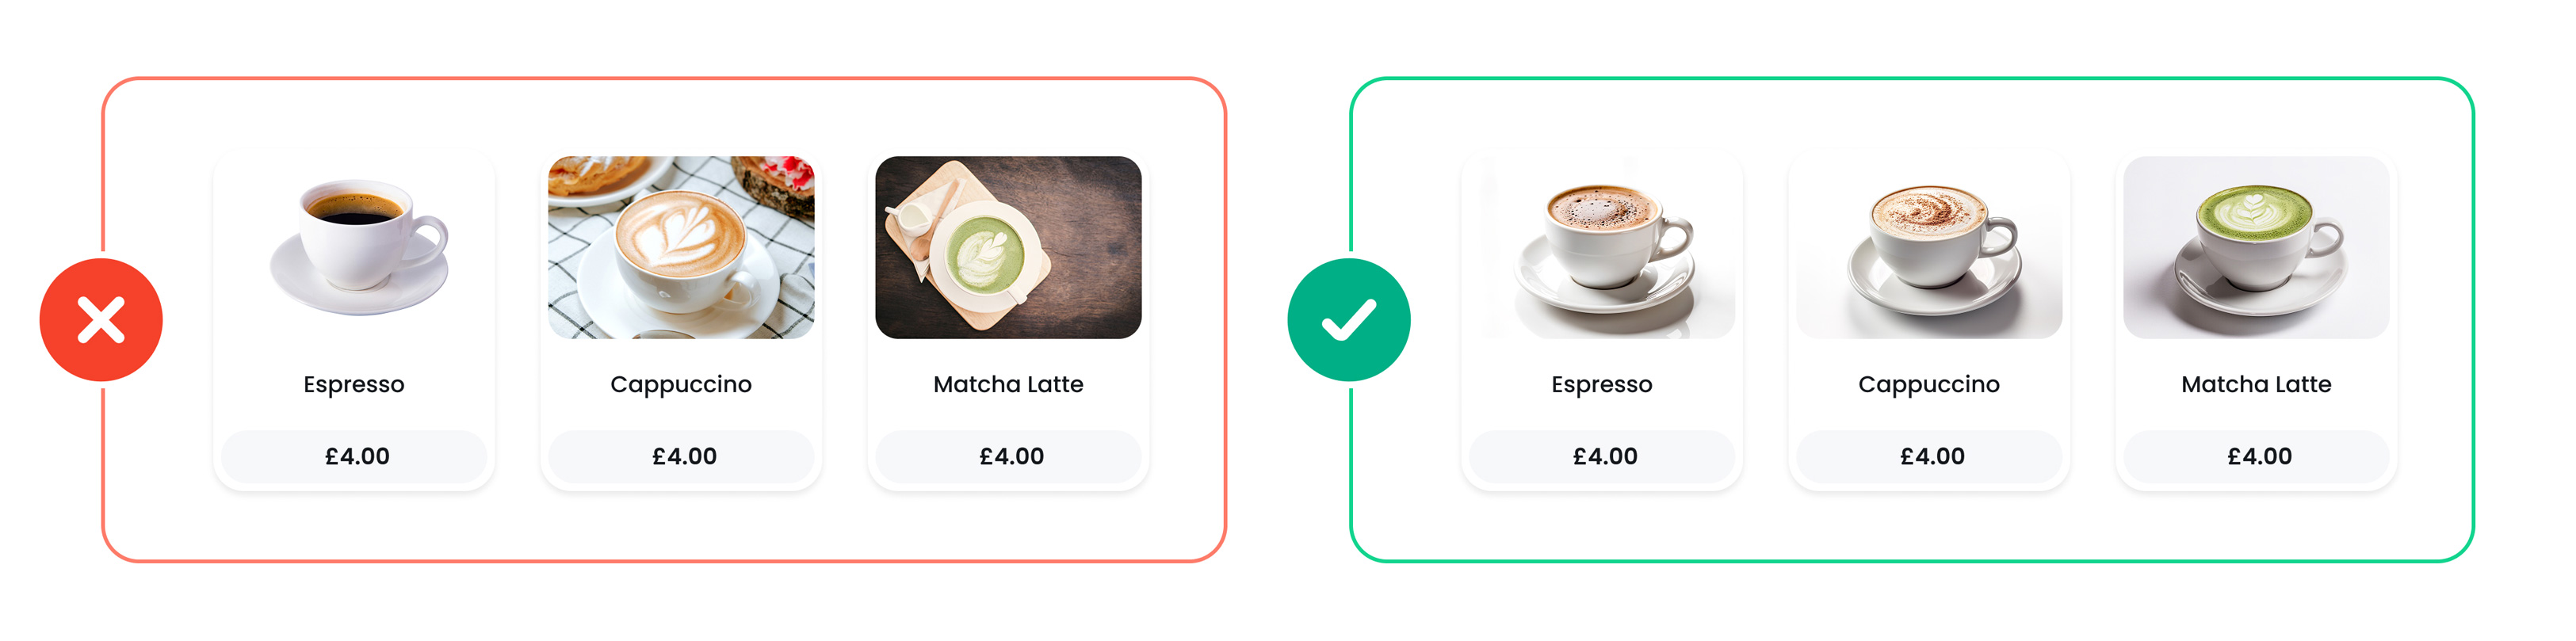
Keep it consistent
For a more professional and polished menu, aim to use images with similar lighting, angles, and backgrounds across your items
- Check the Result
Preview your image before uploading to ensure it displays clearly across all devices (POS, kiosk, mobile, and online ordering).