Create a New Category
Creating categories helps you organise your inventory and makes your items easier to manage and find. You can group similar items (such as ’Snacks’ or ’Drinks’) and add optional subcategories for additional detail.
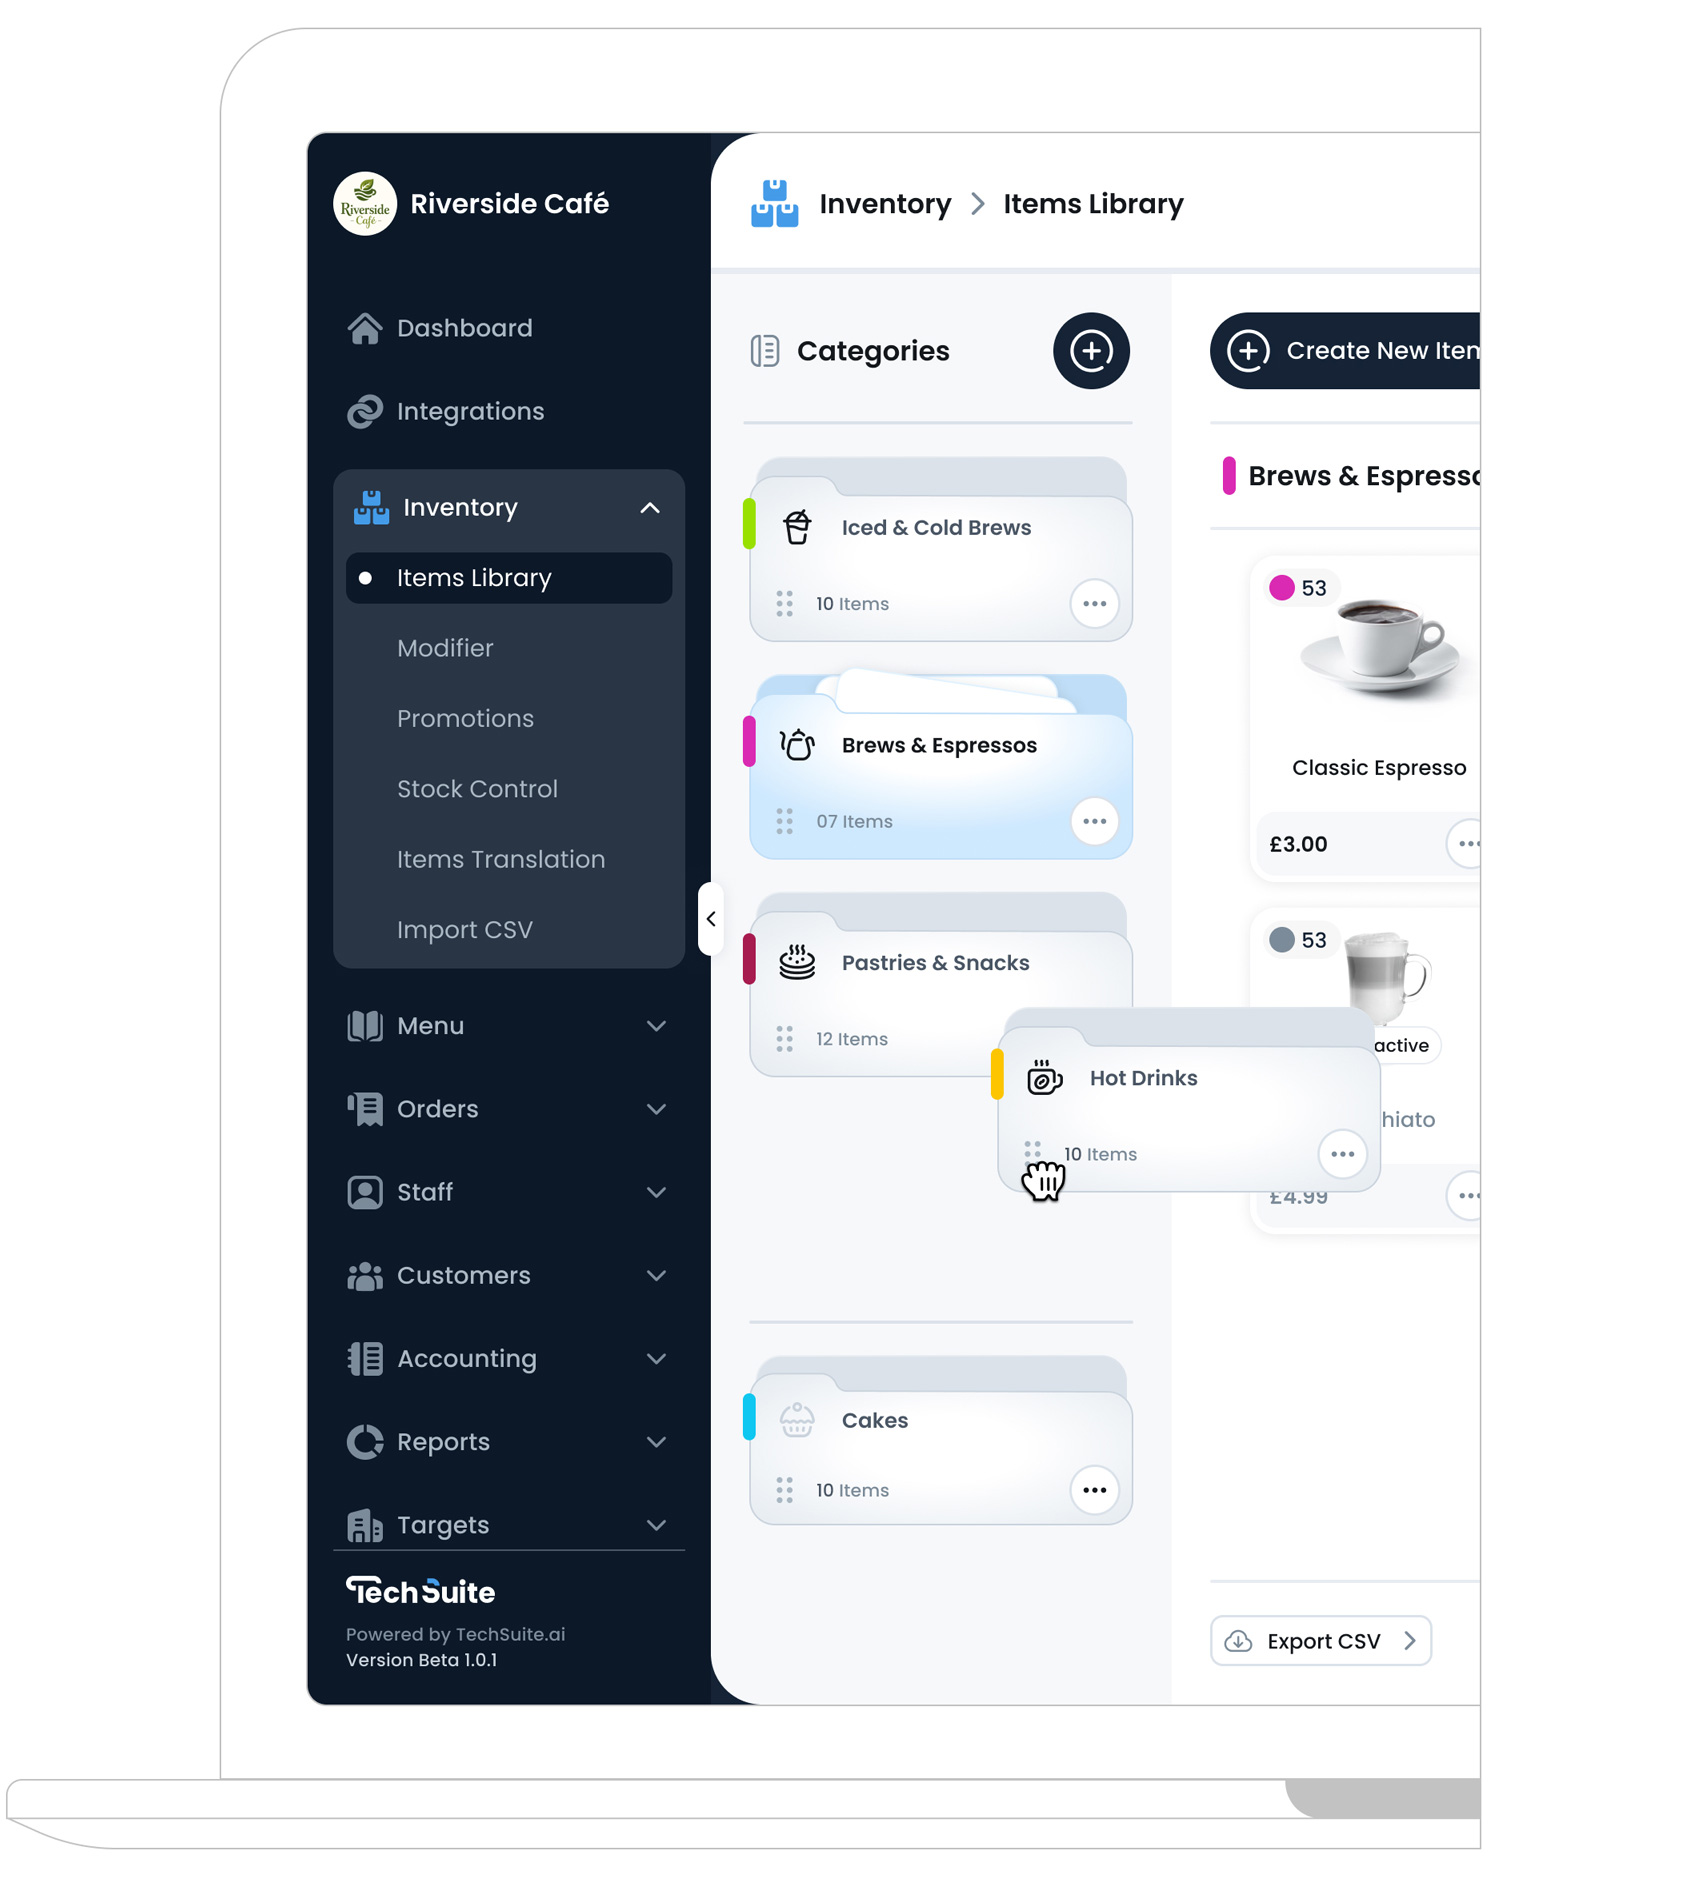
To Get Started
To create a new category, log in to the TechSuite portal and navigate to Inventory > Item Library from the sidebar. Next, click the "Plus" button ![]() on the Categories section. This will open the Create Category page, where you can name your category, choose a colour, and optionally add an icon, image, or subcategories.
on the Categories section. This will open the Create Category page, where you can name your category, choose a colour, and optionally add an icon, image, or subcategories.

Step 1: Set Category Info
On the left side of the page, enter basic information about your new category:
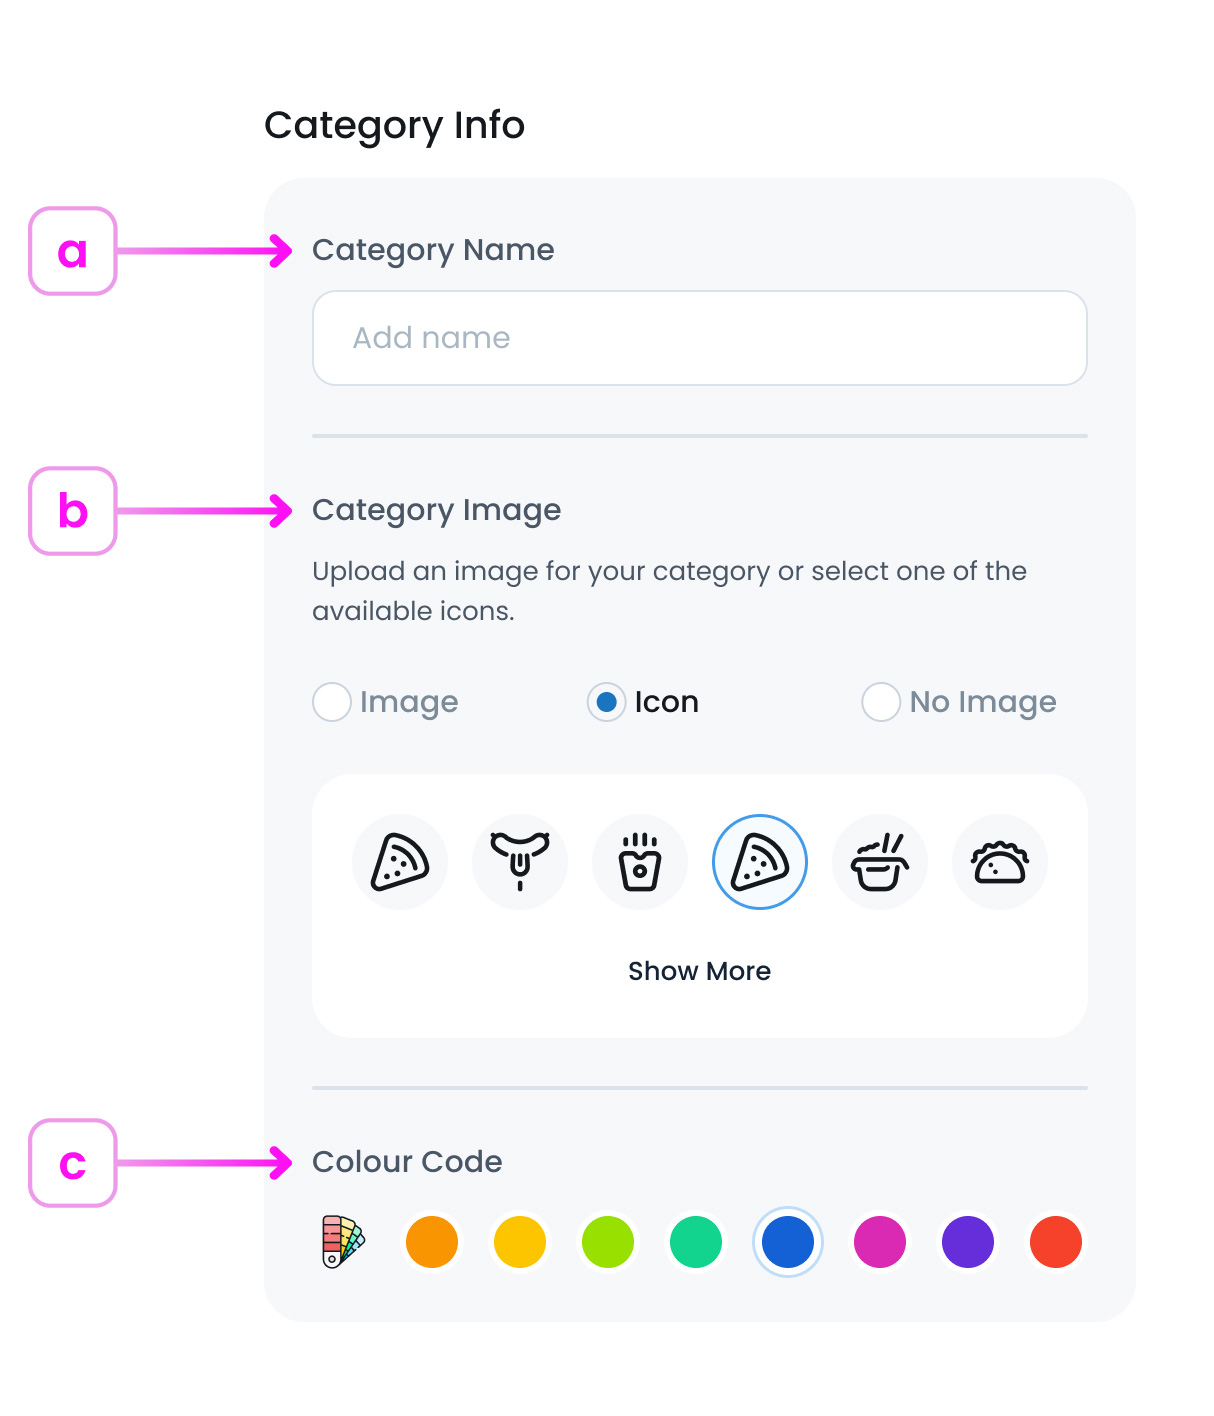
a. Category Name
Type in a name that describes the group of items (e.g., “Main Dishes” or “Hot Drinks”).
b. Category Image (Optional)
Choose to upload an image, select an icon, or leave it blank. If you choose to upload an image, it must be a JPG, 16px in size, and no larger than 800 KB You can resize or compress the file if needed. Once uploaded, a preview will appear in the category’s folder.
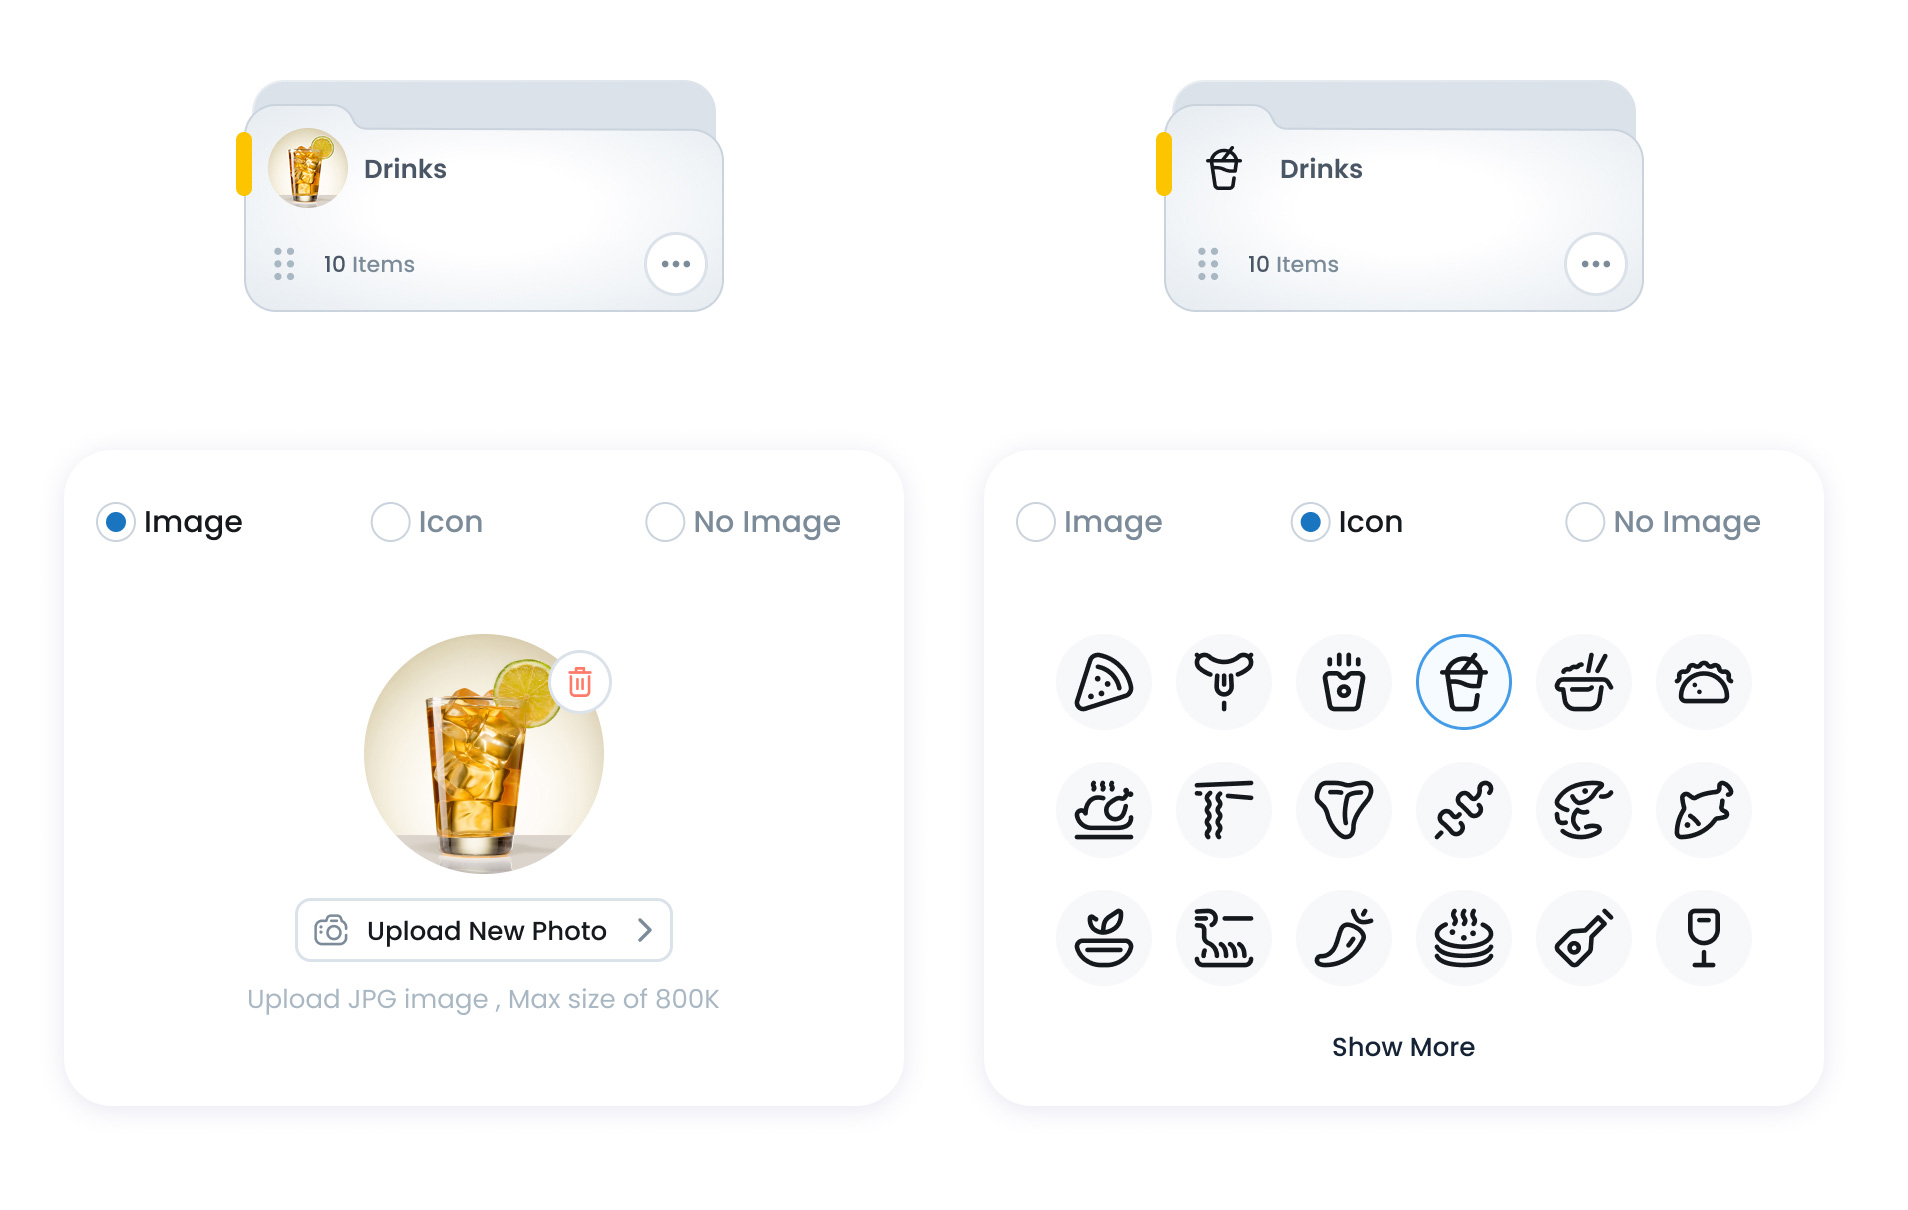
Image Guidelines and Pro Tips
-
Make it visually appealing
Choose an image that clearly shows the item, looks fresh, and sparks interest at a glance.
-
Avoid poor lighting or blur
Low-resolution or unclear photos can negatively affect how your menu is perceived.
-
Keep it consistent:
For a more professional and polished menu, aim to use images with similar lighting, angles, and backgrounds across your items.
-
Upload the Right Image Size
Use rectangle images sized 1200×800 or 1600×1000 pixels (landscape), in JPEG format for best compatibility. Keep file size under 800KB to ensure fast loading. Large images can slow performance, while small ones may appear blurry. Always preview your image to confirm it displays well across POS, kiosk, mobile, and online ordering. For resizing tips, see our Image Resizing Guide.
c. Colour Code
Pick a colour to visually label the category. It will appear on the category card in the Item Library, helping you quickly spot categories at a glance.
Step 2: Add Subcategories (Optional)
Subcategories let you organise items more specifically within a main category, making it easier to find and manage related items. For example, under a category like (Snacks) you might create subcategories such as (Chips, Candy, or Nuts.)
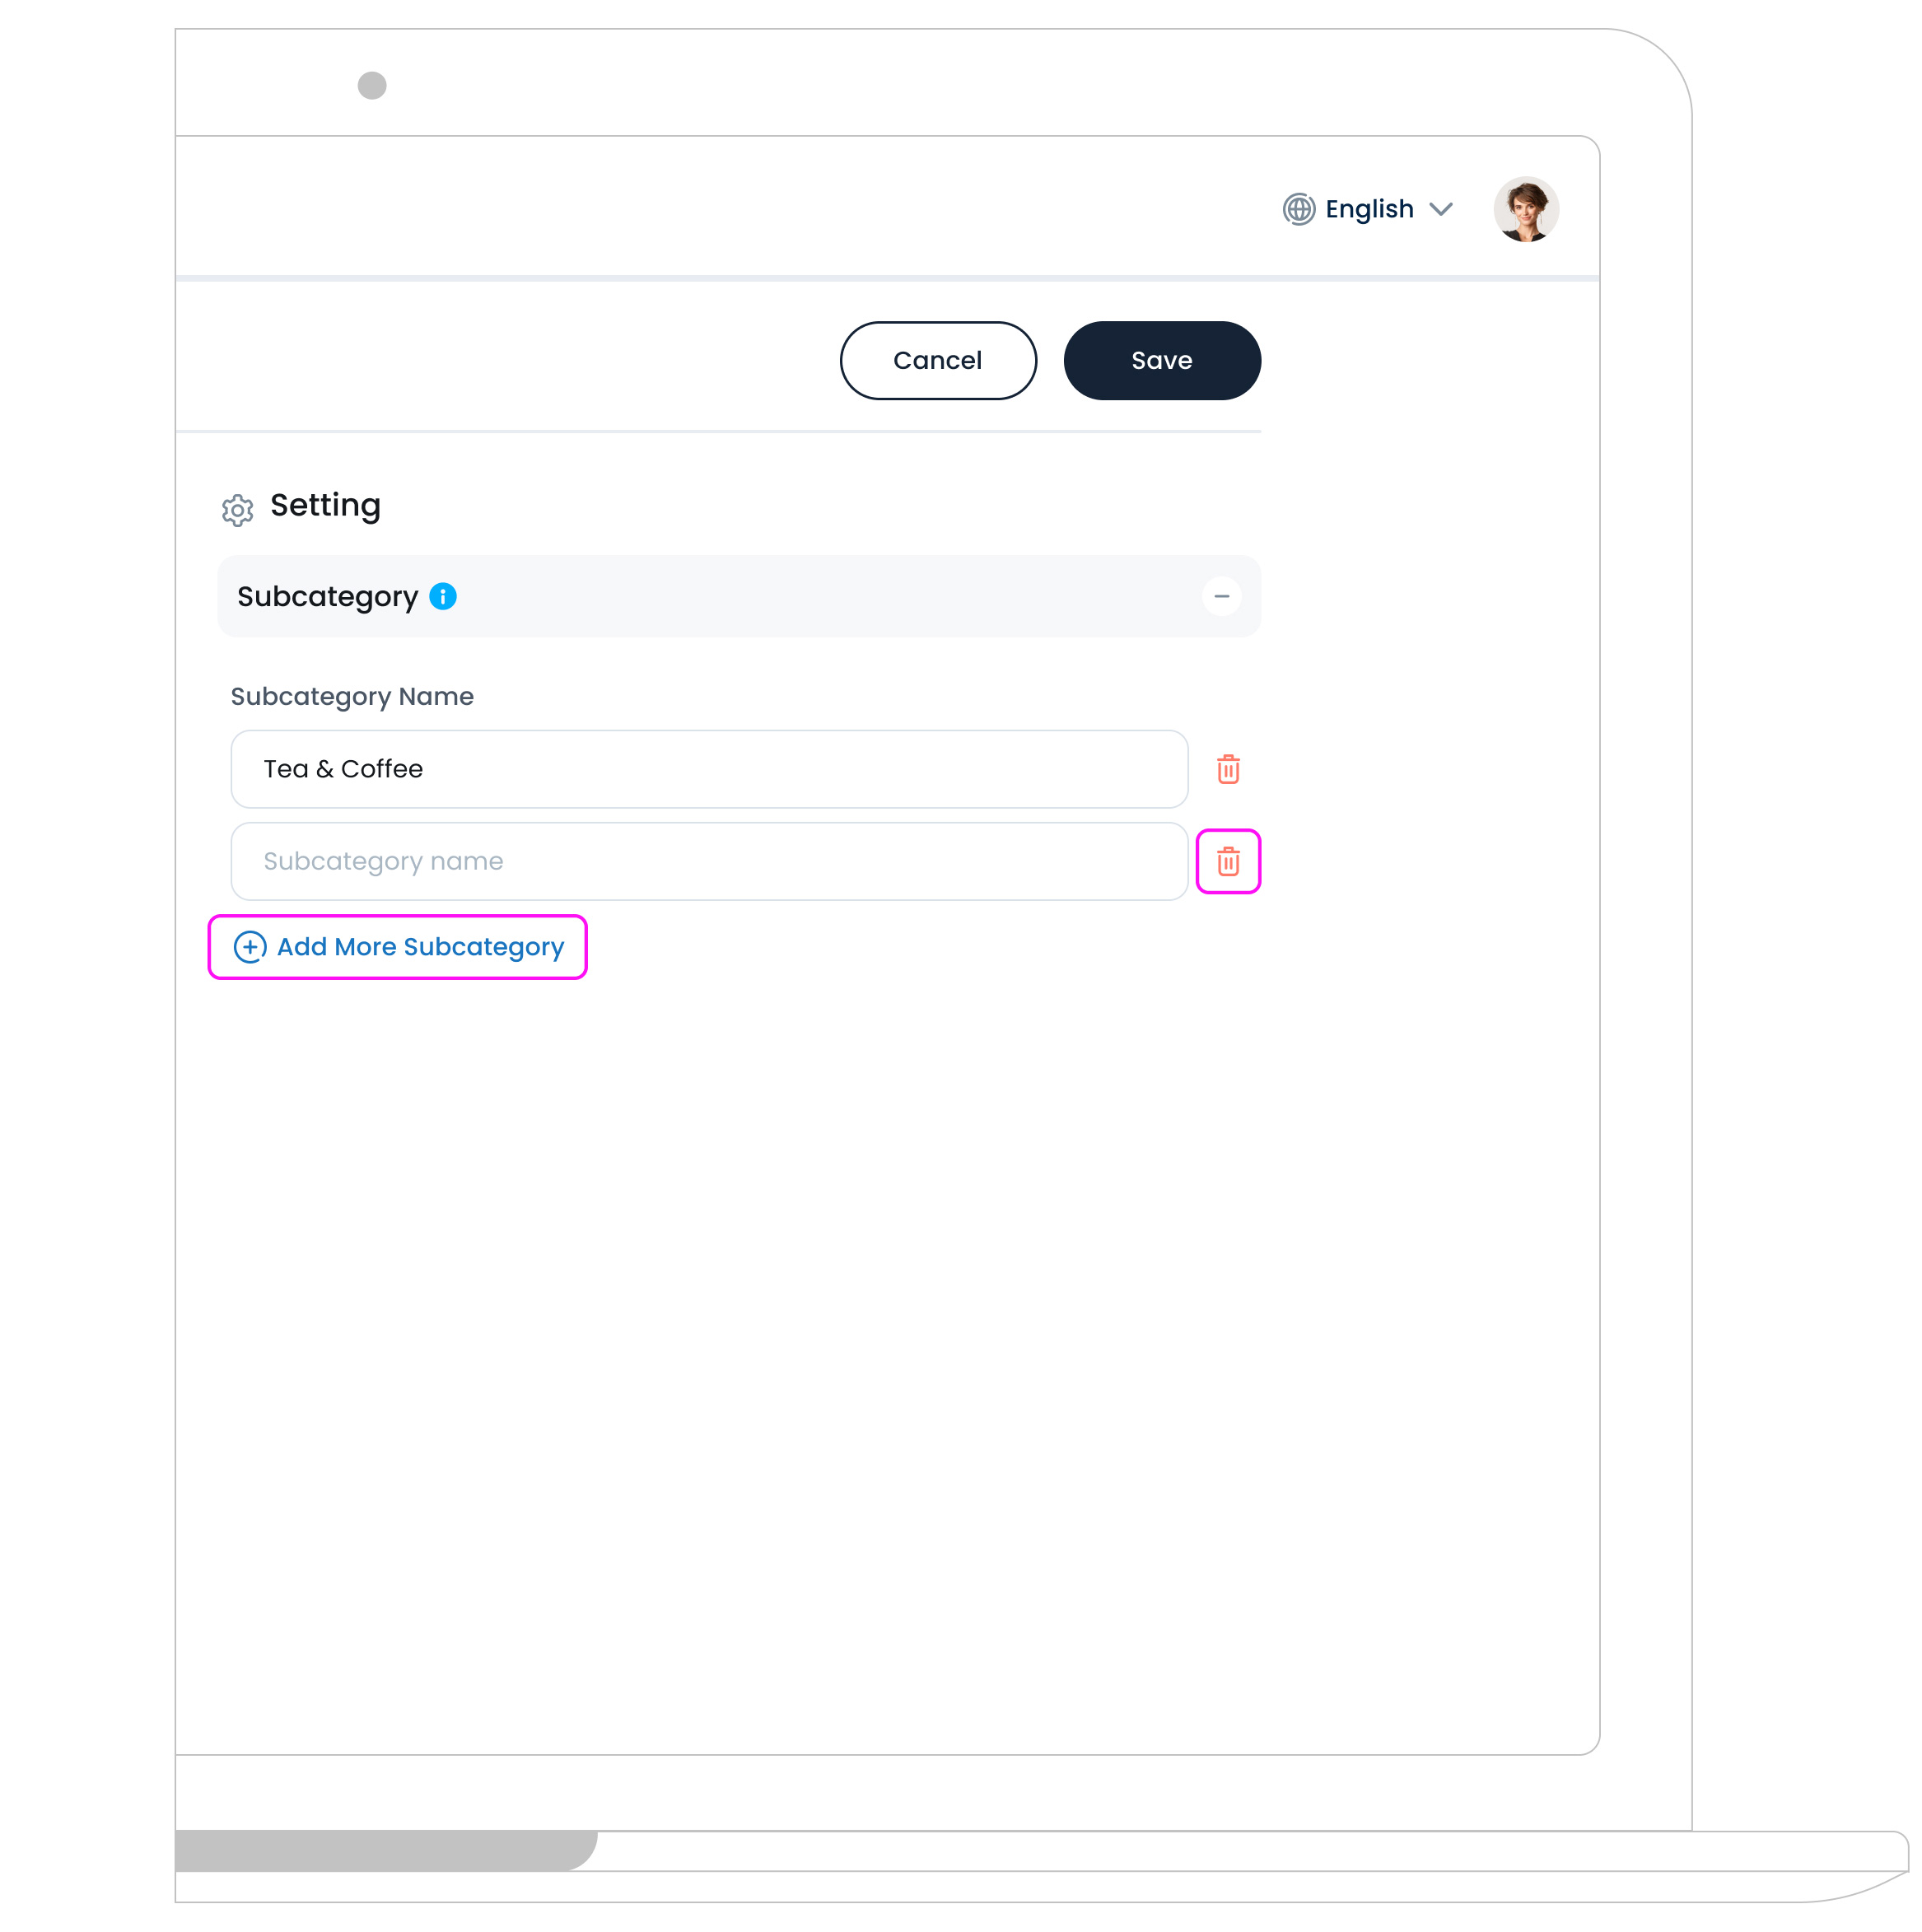
To add more subcategories, click the Add Subcategory button , then type in a name that clearly describes the group of items it will contain. You can add as many subcategories as you need, and you can always edit or delete them later if your inventory changes. Using subcategories is a great way to keep your library clean, structured, and easy to navigate, especially as your item list grows.
Step 3: Save
When you’re done, click the "Save" button at the top-right. Your new category will now appear in the Category panel, ready to use for item organisation.
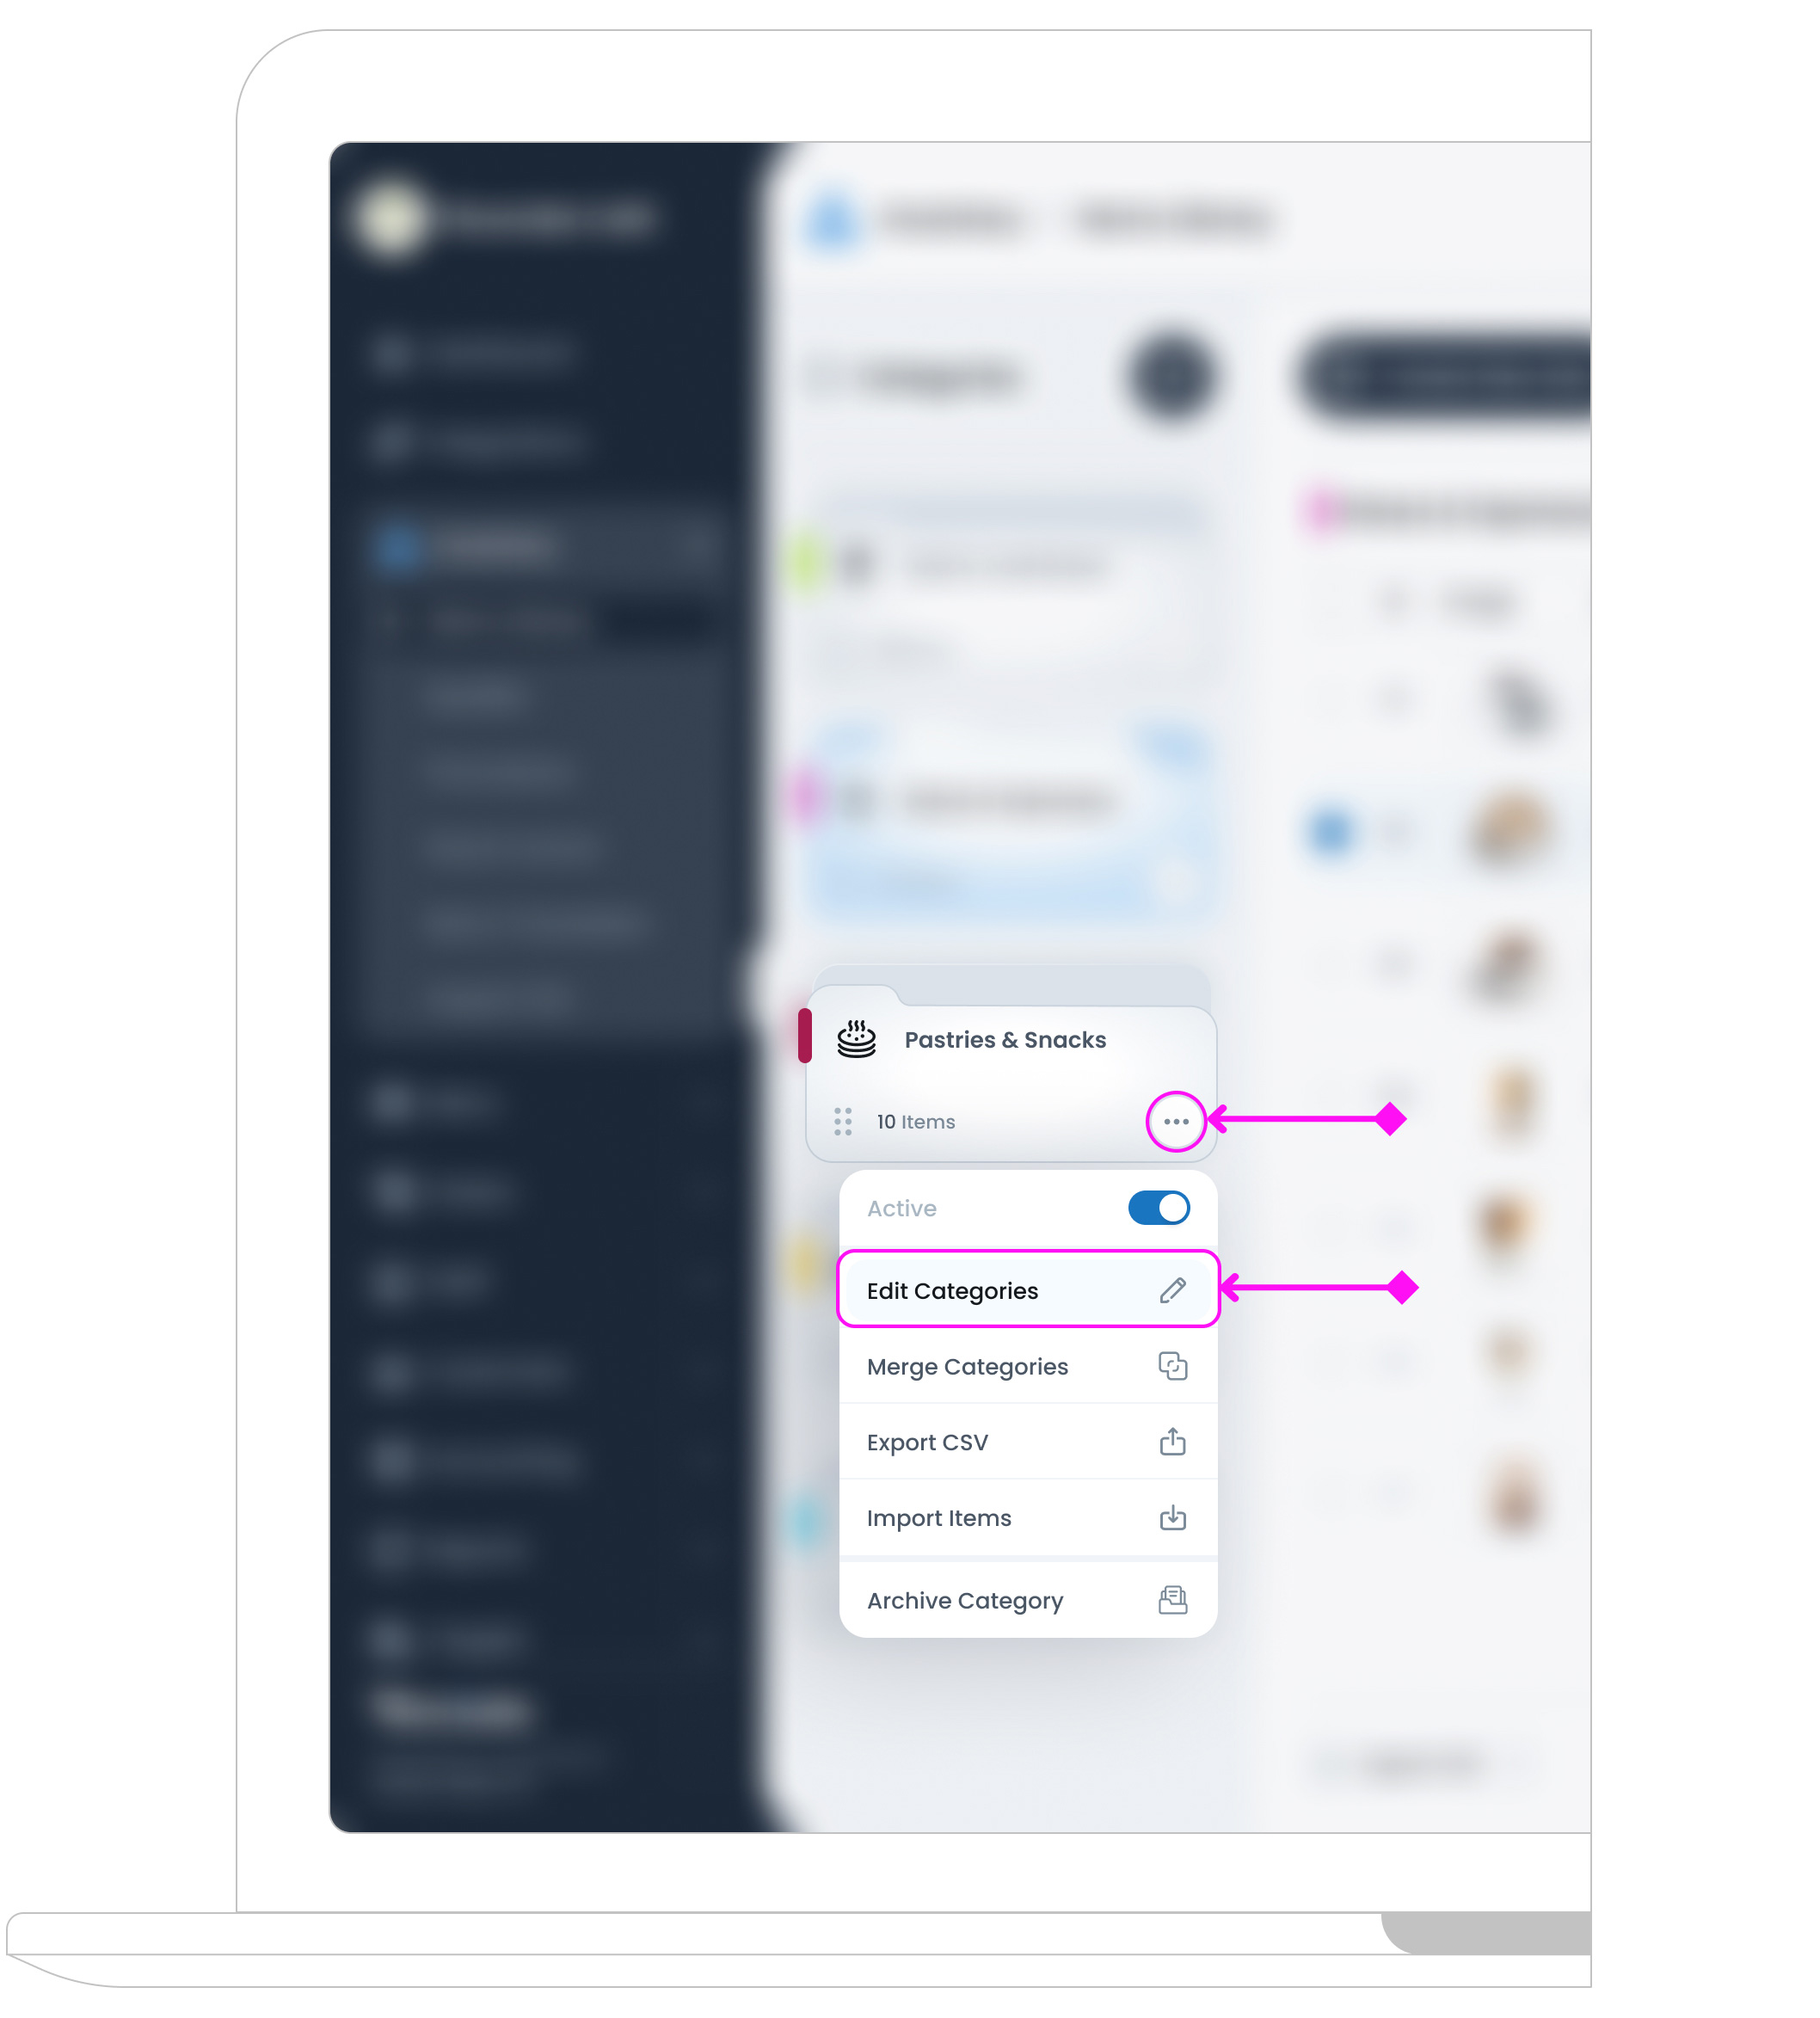
Edit Categories
To update an existing category, click the Three-dot button![]() on the category card and select Edit Category. This will take you to the category setup page, where you can make various changes to better suit your needs.
on the category card and select Edit Category. This will take you to the category setup page, where you can make various changes to better suit your needs.
Additionally, you can add or edit subcategories to further refine how your items are grouped. Once you’ve made your changes, click Save to apply them.
Reorder Categories
To reorder your categories, use the "dotted icon"![]() on the left side of each folder card. Simply drag and drop the folders to arrange them in the order that best reflects your business priorities. This makes it easy to structure your categories in a way that supports your workflow and improves accessibility within the Item Library.
on the left side of each folder card. Simply drag and drop the folders to arrange them in the order that best reflects your business priorities. This makes it easy to structure your categories in a way that supports your workflow and improves accessibility within the Item Library.
What’s Next?
Once your category is created, you can start adding items to it. Continue with the next article to learn how to Create a New Inventory Item.This guide will walk you through the steps to add items, fill in item details, and link them to the right categories.