How to Create a New KDS Profile
KDS (Kitchen Display System) Profiles let you customise how orders appear and are processed in your kitchen. You can set up different profiles for different stations (like Bakery, Coffee, or Hot Kitchen) to help your team stay organised and focused on just the items they need to prepare.
Each KDS Profile is assigned to a Device Licence, meaning you can link one profile per screen or tablet and tailor each one to a specific area of your kitchen.
To Get Started
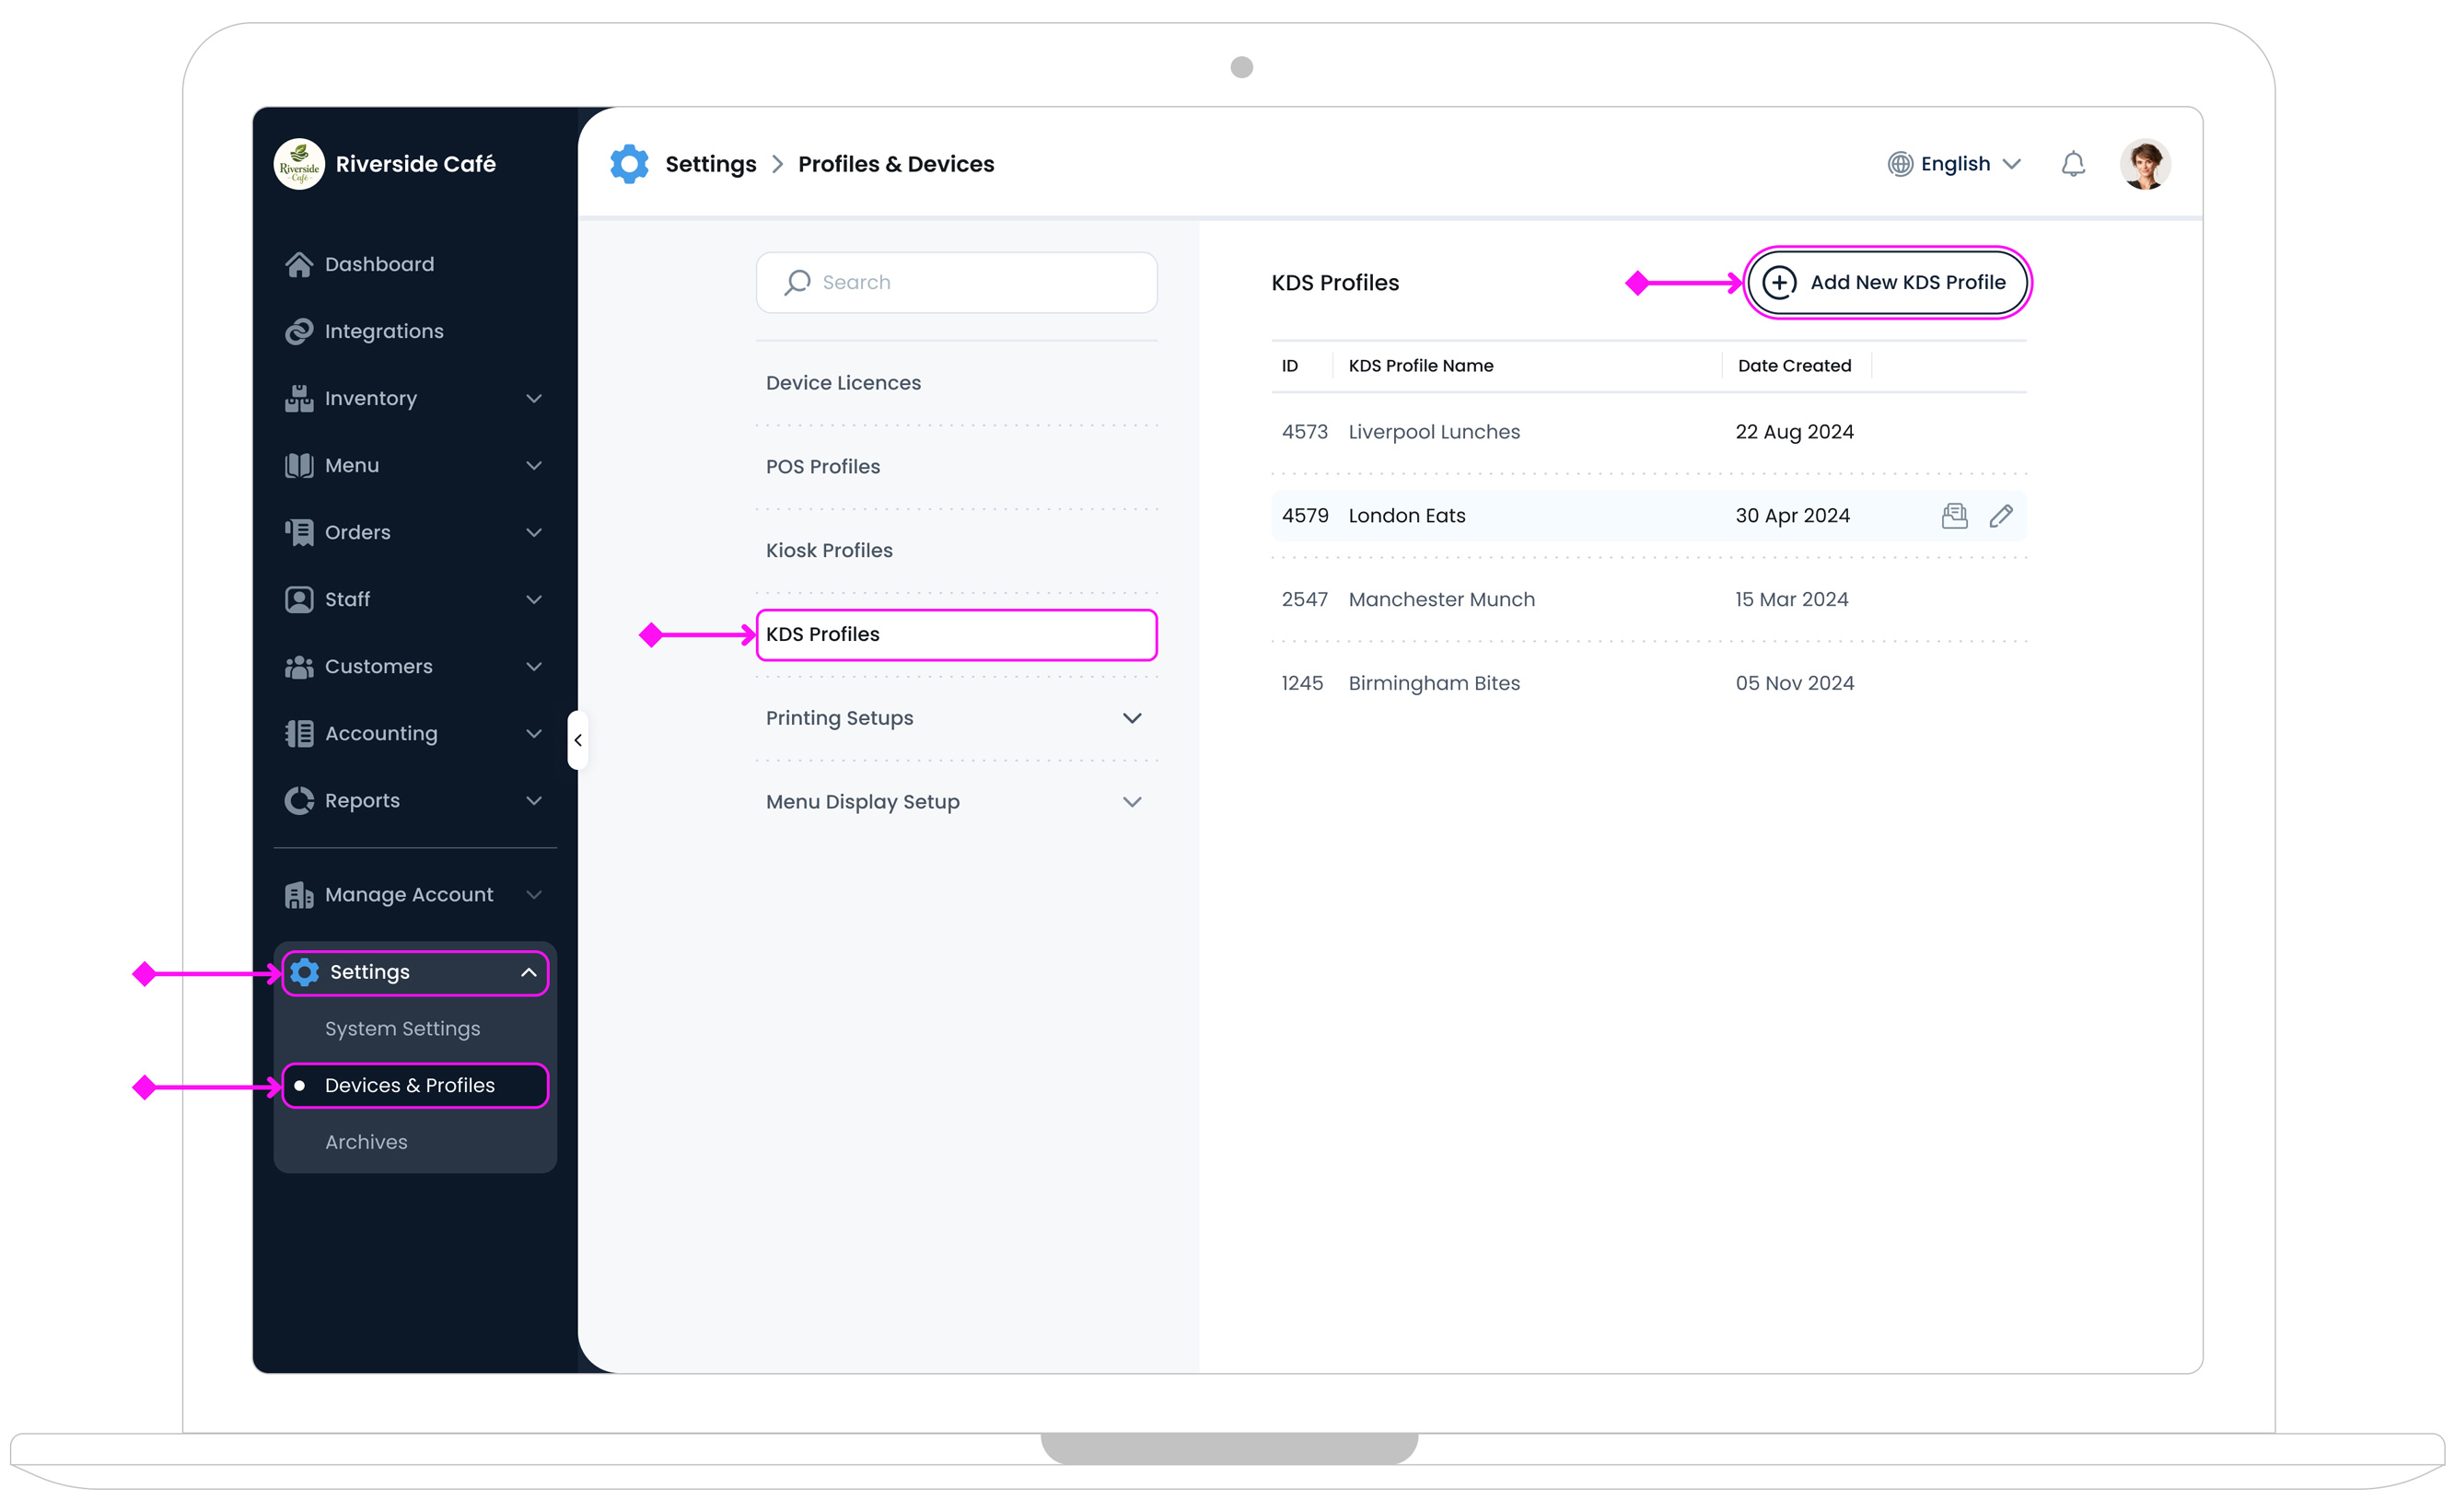
To create a new KDS Profile, go to Settings > Devices & Profiles > KDS Profiles in the TechSuite portal. Click Add New KDS Profile to begin setup. You’ll set a name, choose how orders are processed, and configure what appears on the screen (including the All-Day View options).
Step 1: Profile Info
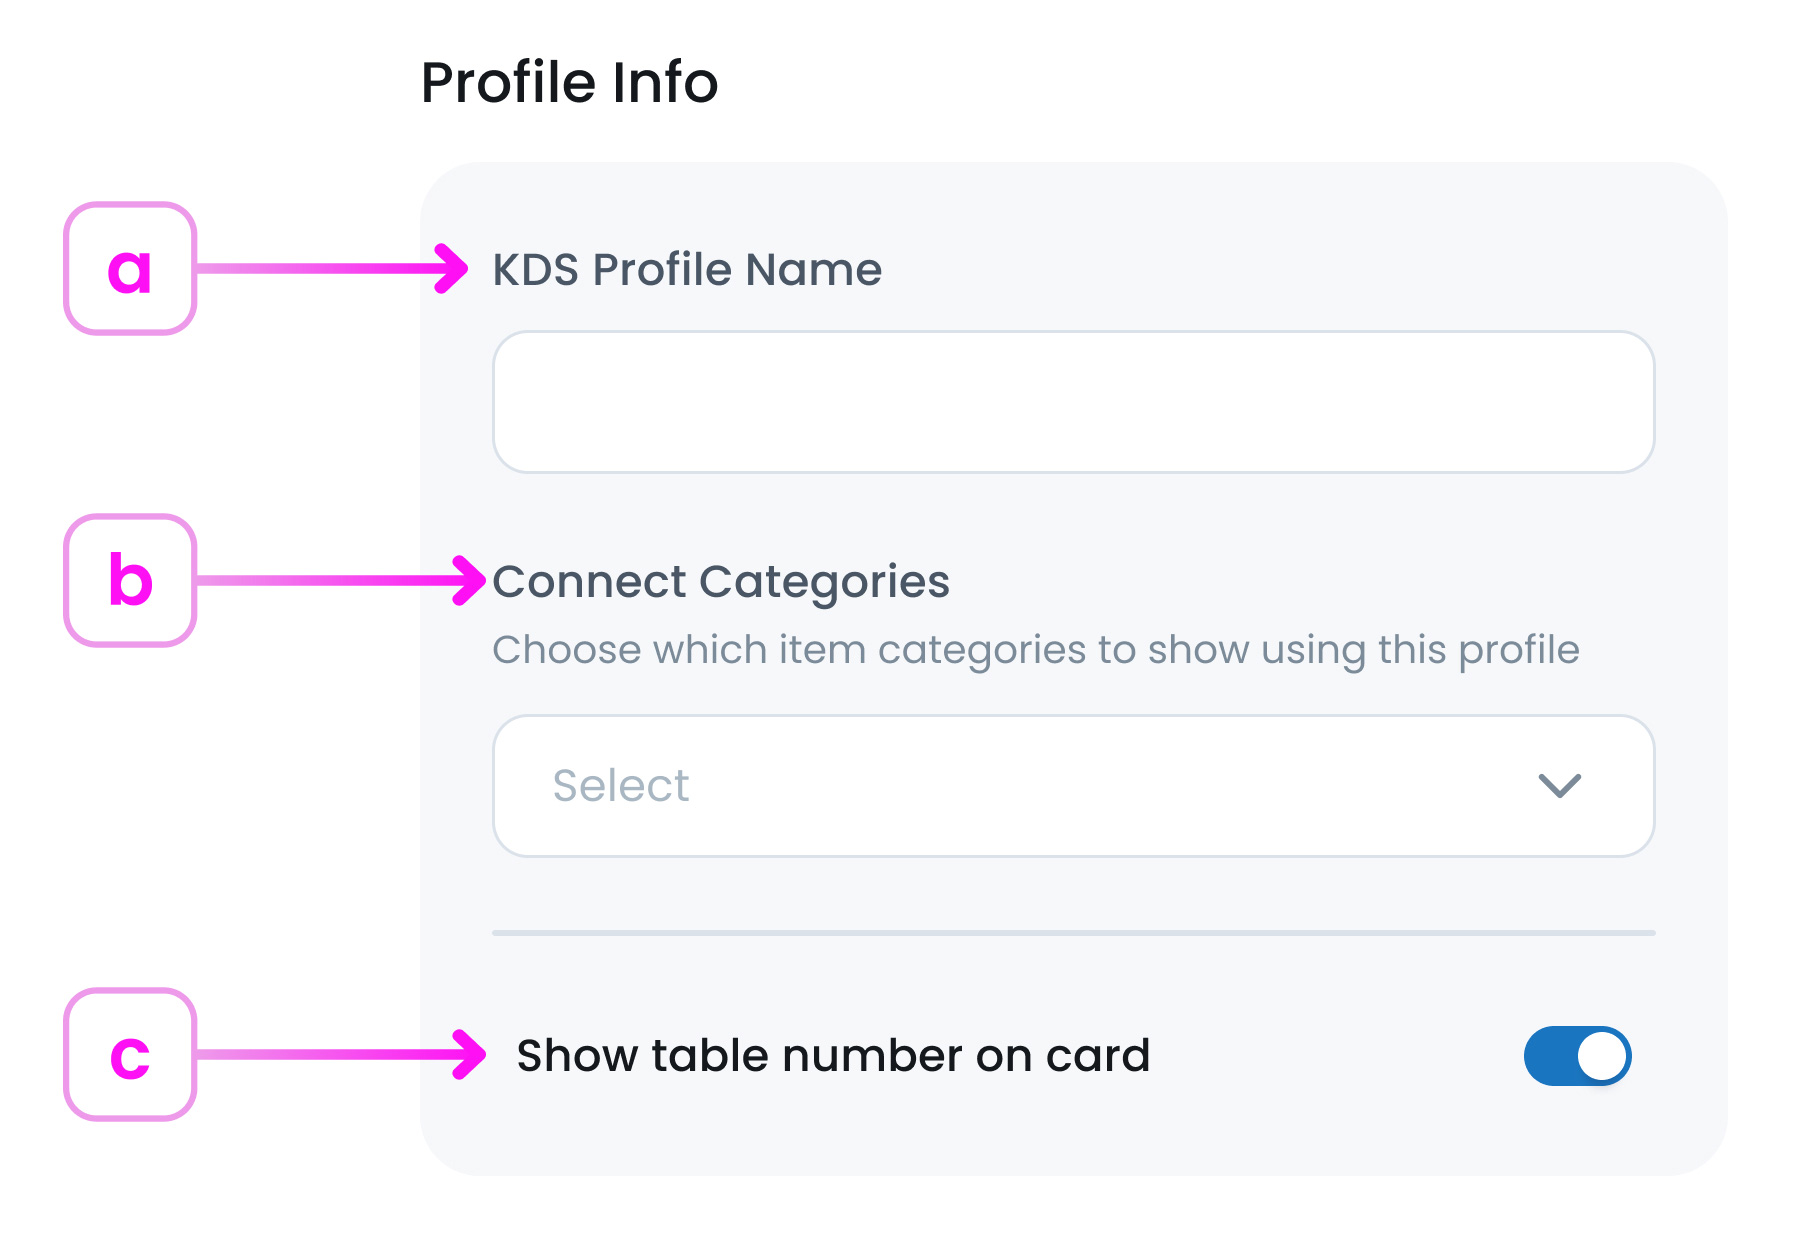
a. KDS Profile Name
Choose a name that reflects where the screen will be used (like Grill Station, Dessert Pass, or Barista Tablet). This helps identify the profile later when managing devices.
b. Connect Categories
Decide which item categories will appear on this screen. For example, if this KDS Profile is for your Pizza Oven Station, you might only include the Pizza category.

This feature is especially useful for businesses with multiple prep areas. One real-world example is a café that uses two iPads, one in the Bakery section and another in the Coffee area. They created two separate KDS Profiles:
- Bakery KDS: Connected to categories like Cakes, Croissants, and Pastries
- Coffee KDS: Connected to categories like Lattes, Espressos, and Teas
When a customer orders both a croissant and a cappuccino, the bakery item shows on the bakery KDS screen, and the coffee item shows on the coffee KDS. This keeps things clear and efficient, each team sees only what they need to prepare.
c. Show table number on card
Toggle this on if you want the customer’s table number to appear on each order card. This is useful for dine-in service when items need to be delivered to the correct table.
Step 2: Settings
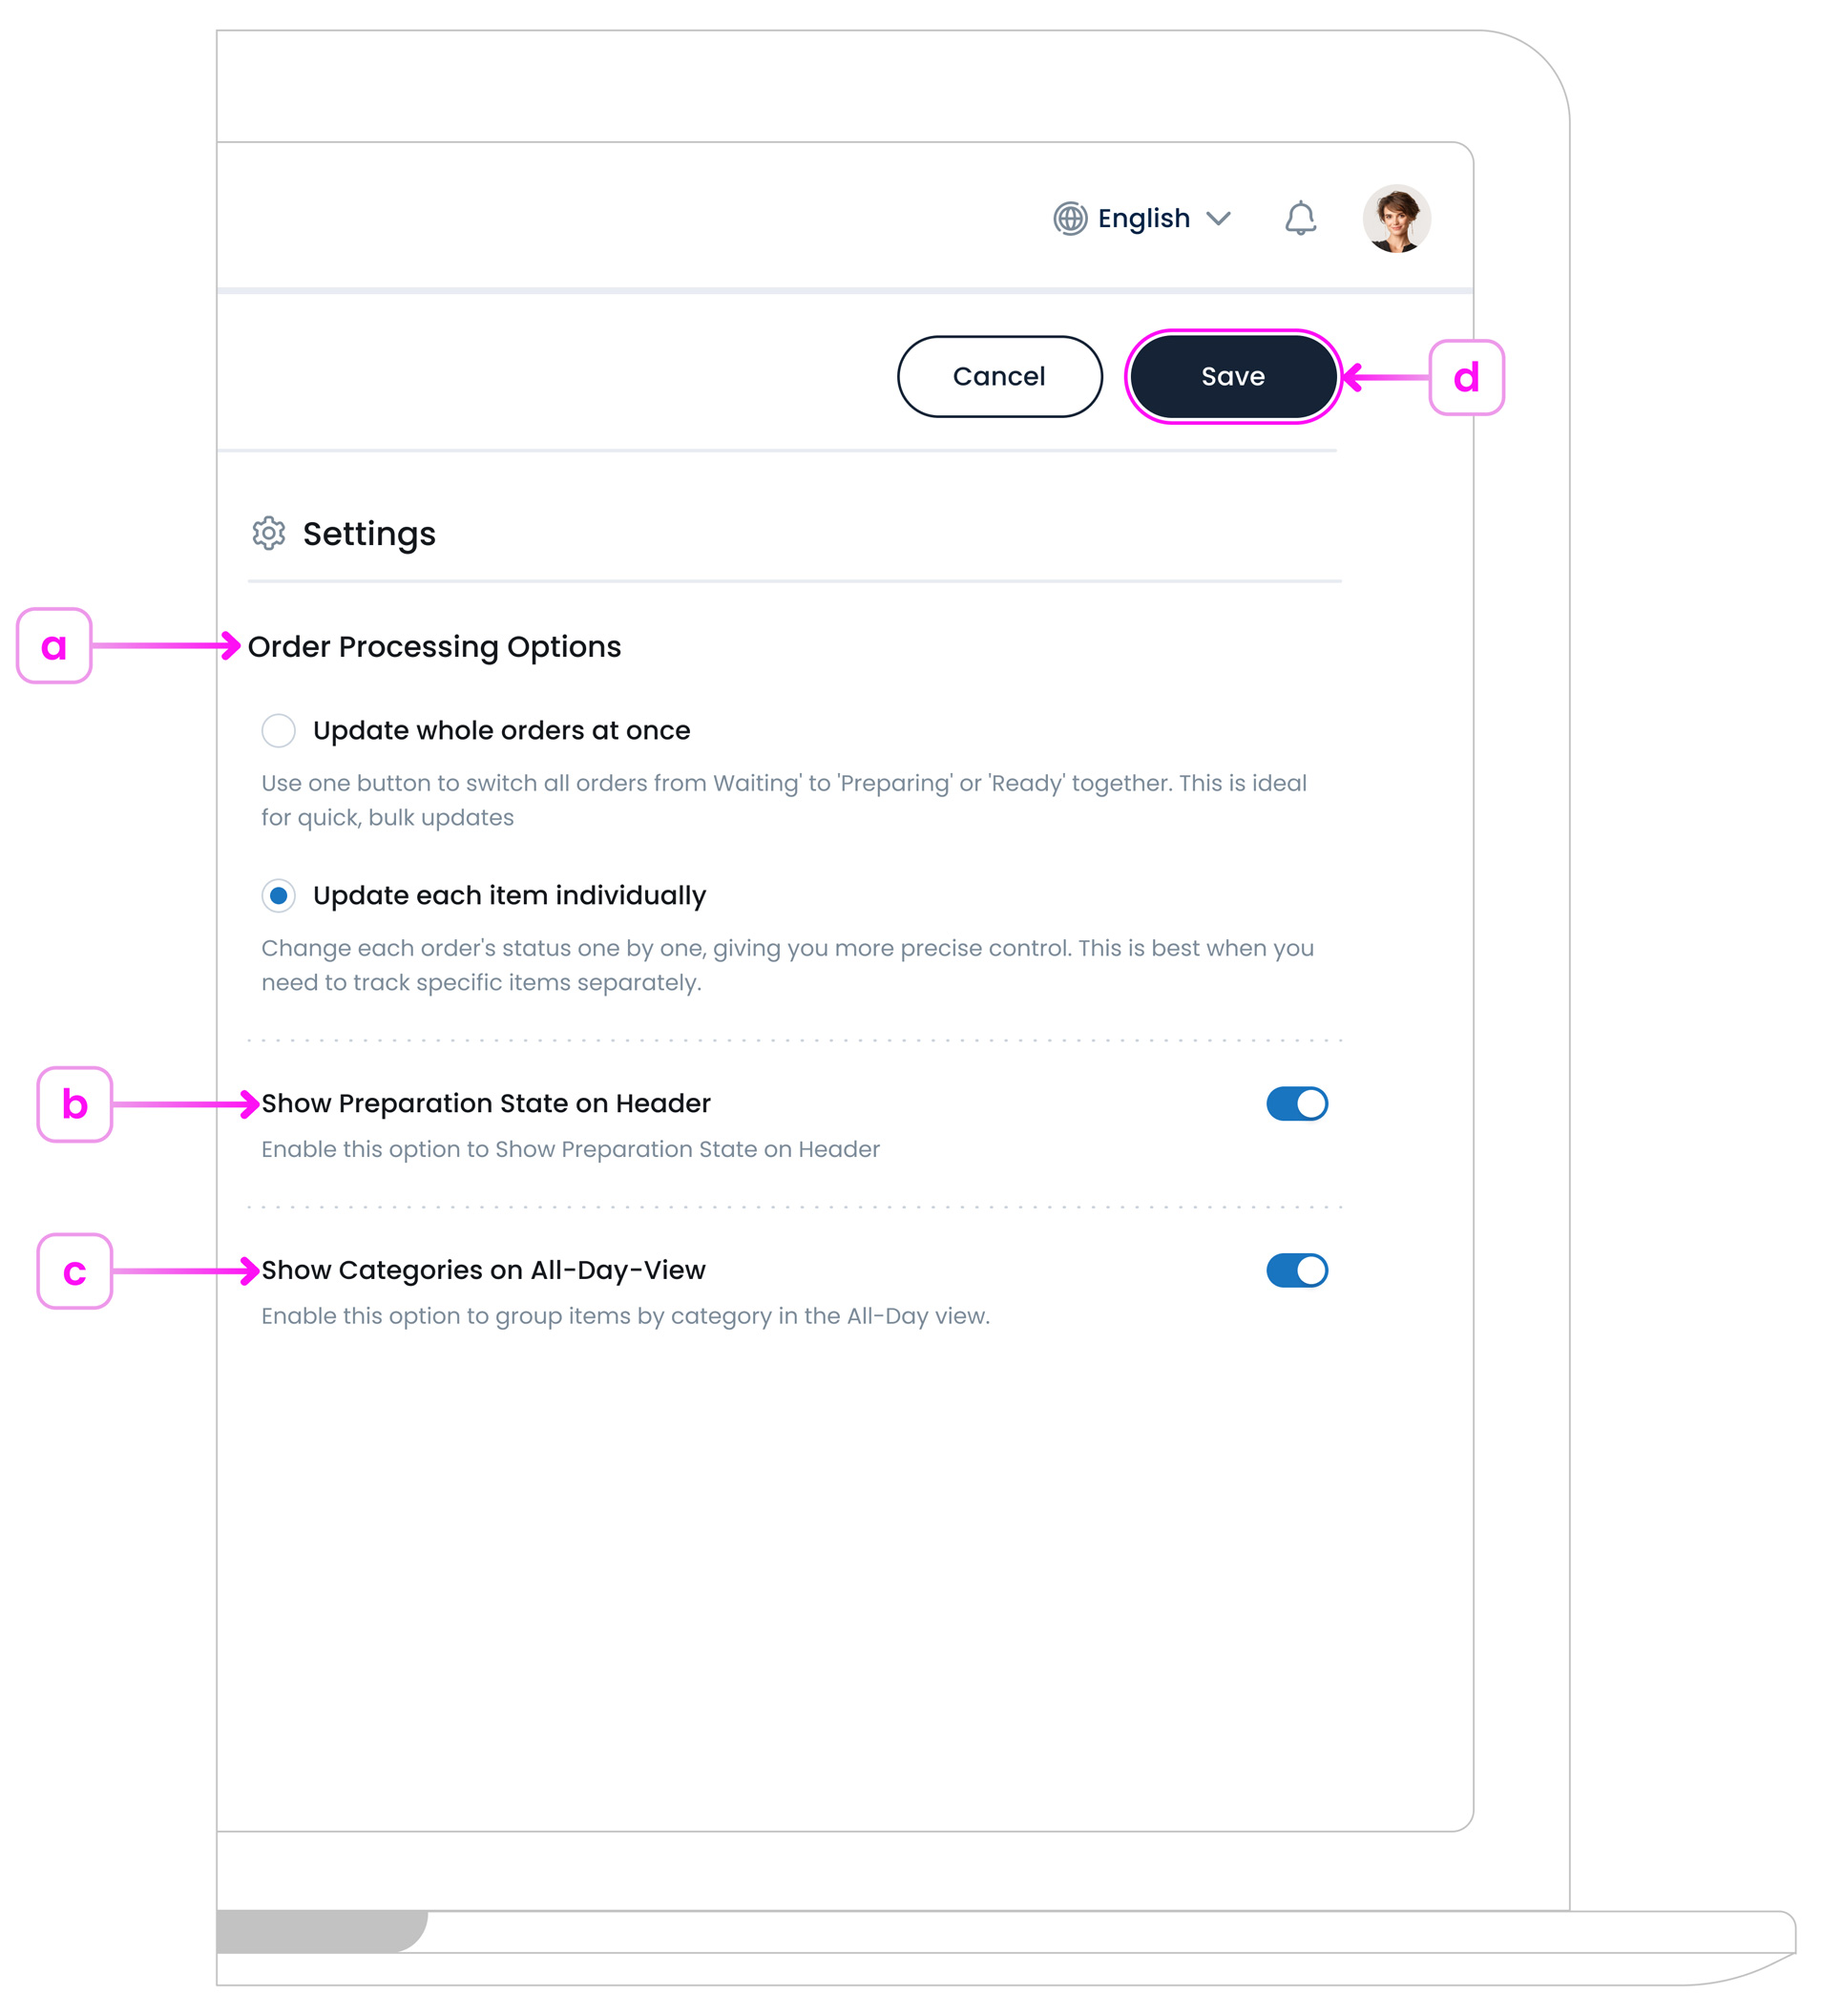
a. Order Processing Options
These settings control how kitchen staff mark items as Waiting, Preparing, or Ready.
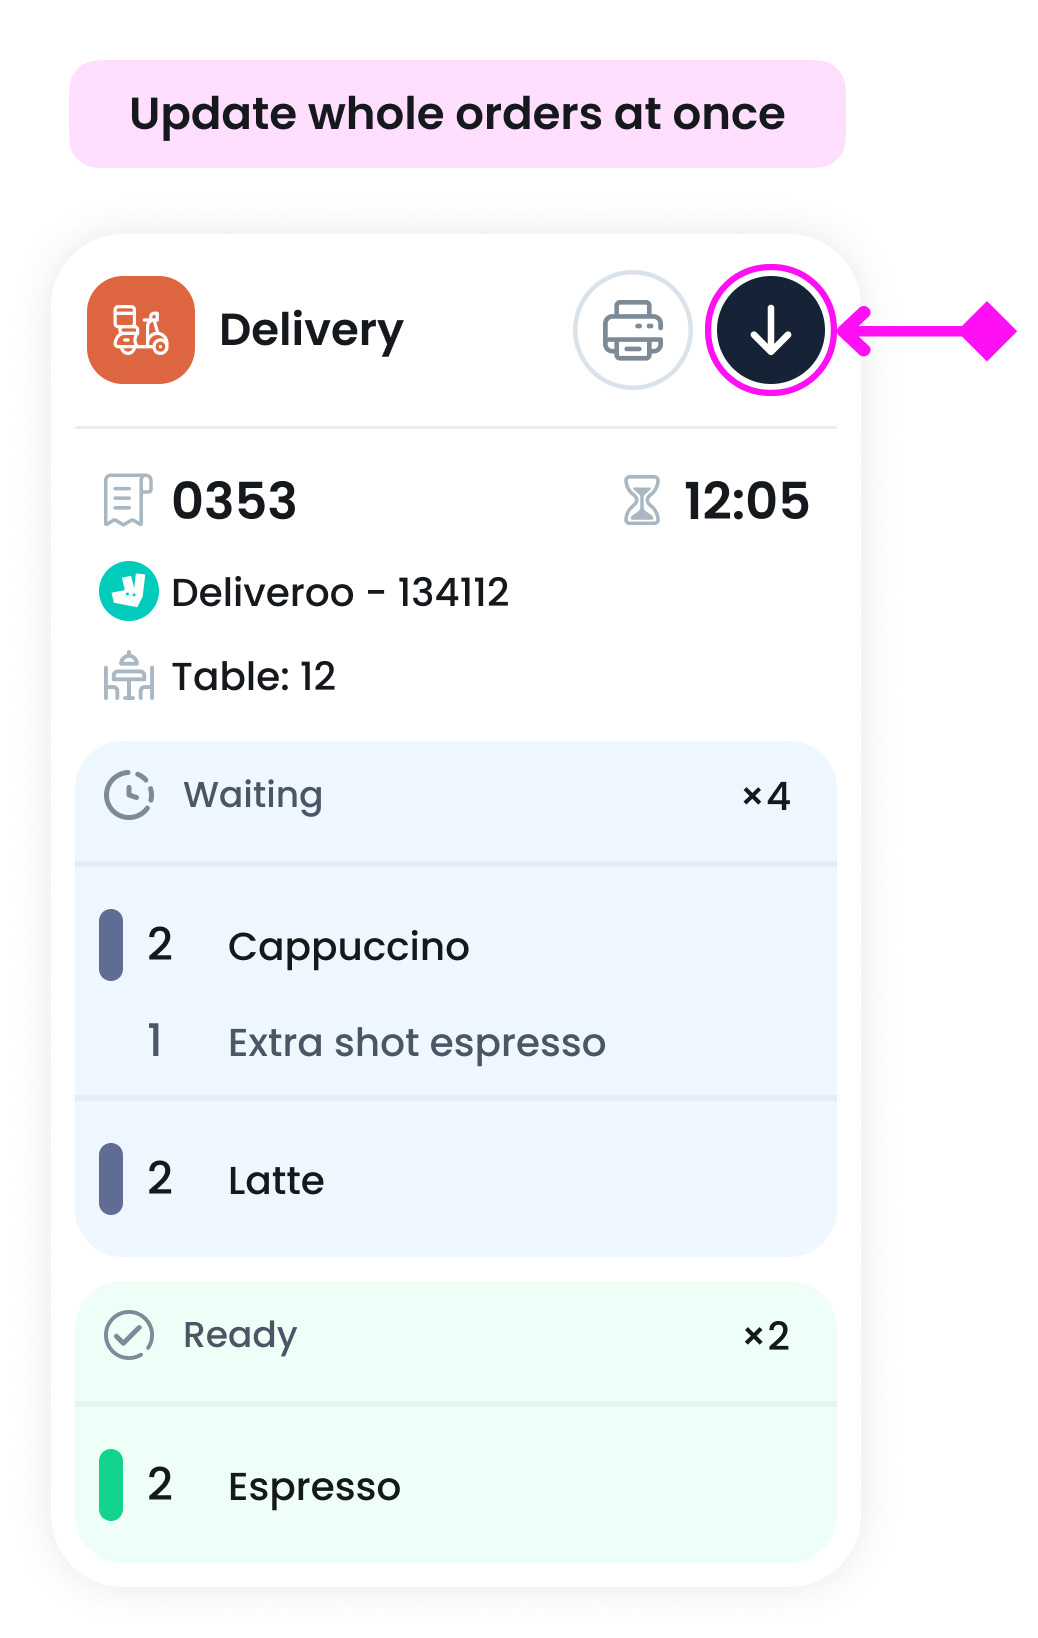
a.1. Update whole orders at once:
Best for smaller teams where one person handles the entire order. This lets staff move the whole order through each stage with a single tap.
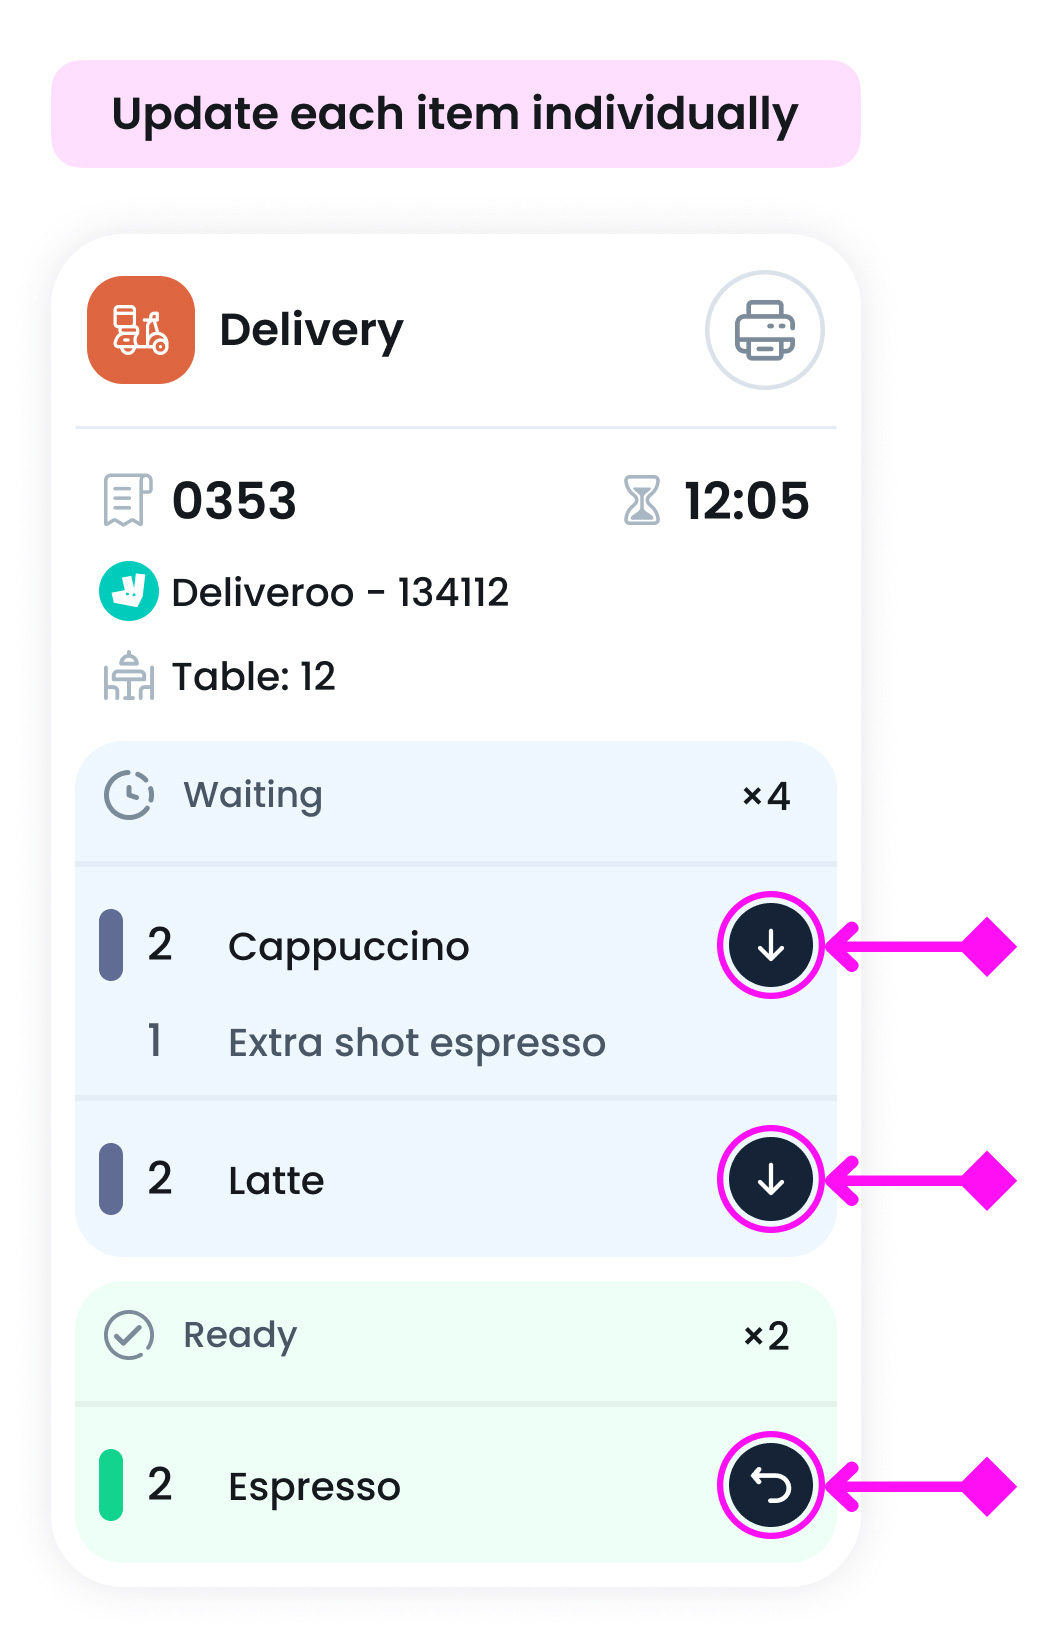
a.2. Update each item individually:
Ideal for larger or shared stations. Each item can be marked separately, so the team knows what’s in progress and what’s still pending.
Example:
Imagine a kitchen where one chef is making burgers and another is prepping fries. If you update items individually, the burger can be marked as “Preparing” even if the fries haven’t started yet. This keeps communication clear without needing staff to shout updates across the kitchen.
b. Show Preparation State on Header
Toggle this ON to include the Preparing state in the header and views. Turn OFF if you prefer a simpler two-state flow (for example, just Waiting and Ready/Completed).
c. Show Categories on All-Day-View
Turn this ON to group items by category on the All-Day View (e.g., Salads, Drinks). Turn OFF for one continuous list of all items.
What is All Day View?
The All-Day View shows a combined list of everything that needs to be prepared, item names and total quantities across all orders at once. It does not matter which order an item came from, the screen focuses on what and how many you need to prepare.
What’s Next?
Once your profile is saved, go to Device Licences and assign it to the correct screen or tablet. Each KDS Profile is linked to one device, allowing you to split up workflows, reduce clutter, and streamline kitchen operations.
Use multiple KDS Profiles to improve efficiency, keep your team focused, and ensure each order reaches the right hands, fast and accurately.