Create an Entire Bill Discount
An Entire Bill Discount applies a fixed amount or a percentage off the total order value. For example, you might give 20% off the whole bill during happy hours or £10 off the total when spending over £50. You can also choose to exclude certain items (like alcohol) from the discount.
To Get Started
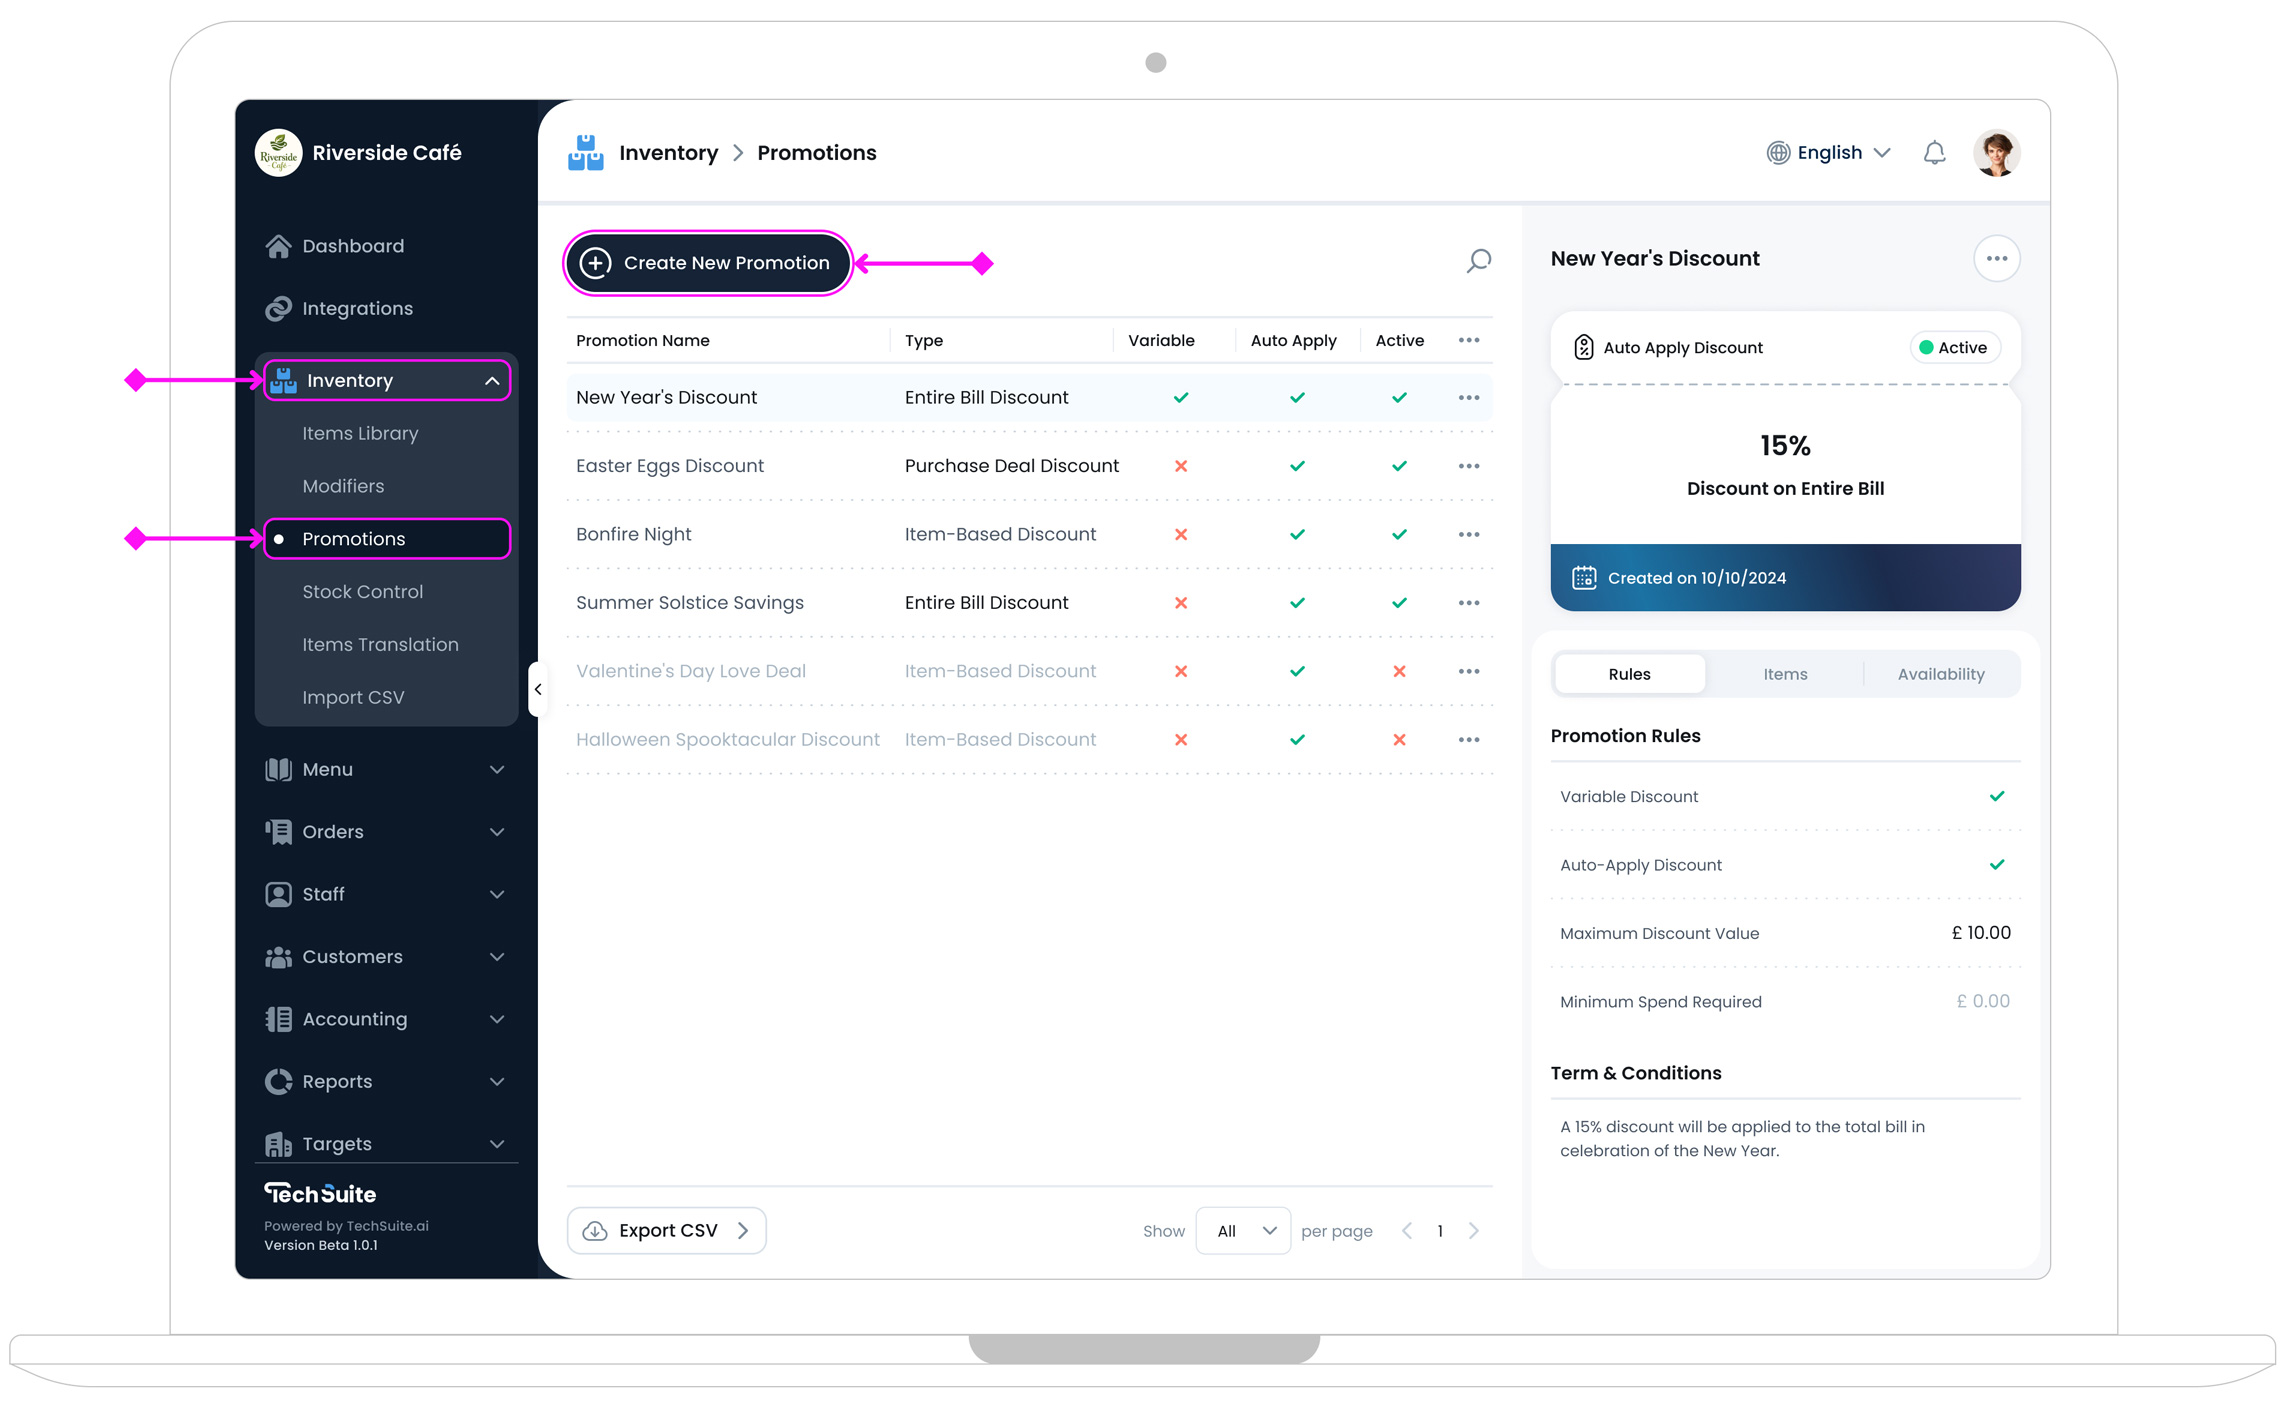
To create this type of promotion, log in to the TechSuite portal, go to Inventory › Promotions, and click Create New Promotion.
Step 1: Enter Promotion Info
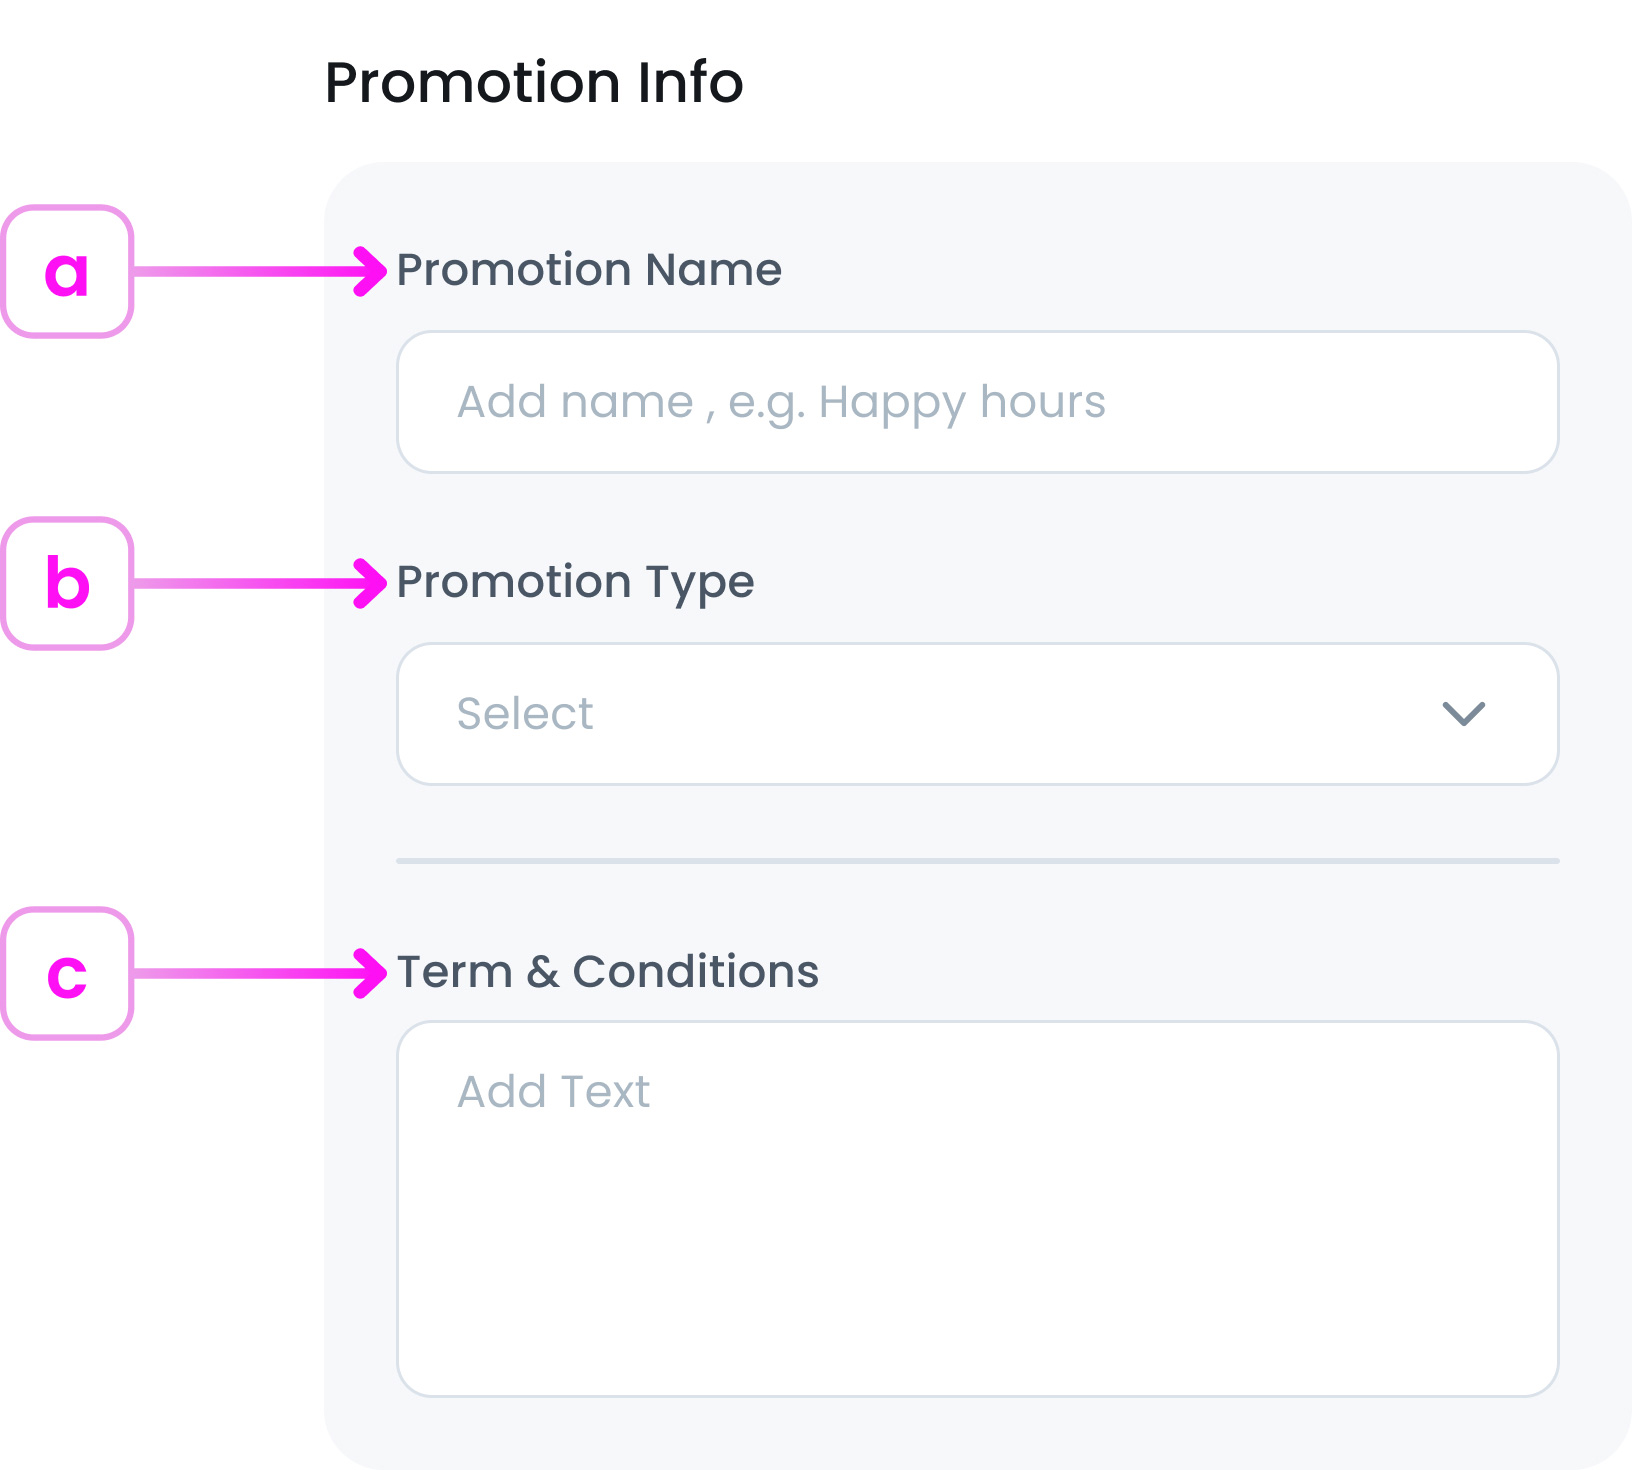
a. Promotion Name
Enter a clear, descriptive name for your promotion.
Examples:
- “Happy Hour 20% Off”
- “£10 Off Orders Over £50”
b. Select Promotion Type
From the Promotion Type dropdown, choose Entire Bill Discount.
c. Terms & Conditions (Optional)
Add any rules or restrictions for this promotion.
Examples:
- “Valid for takeaway only”
- “Not valid with other discounts”
- “Lowest-priced item is discounted”
Step 2: Set Promotion Rules
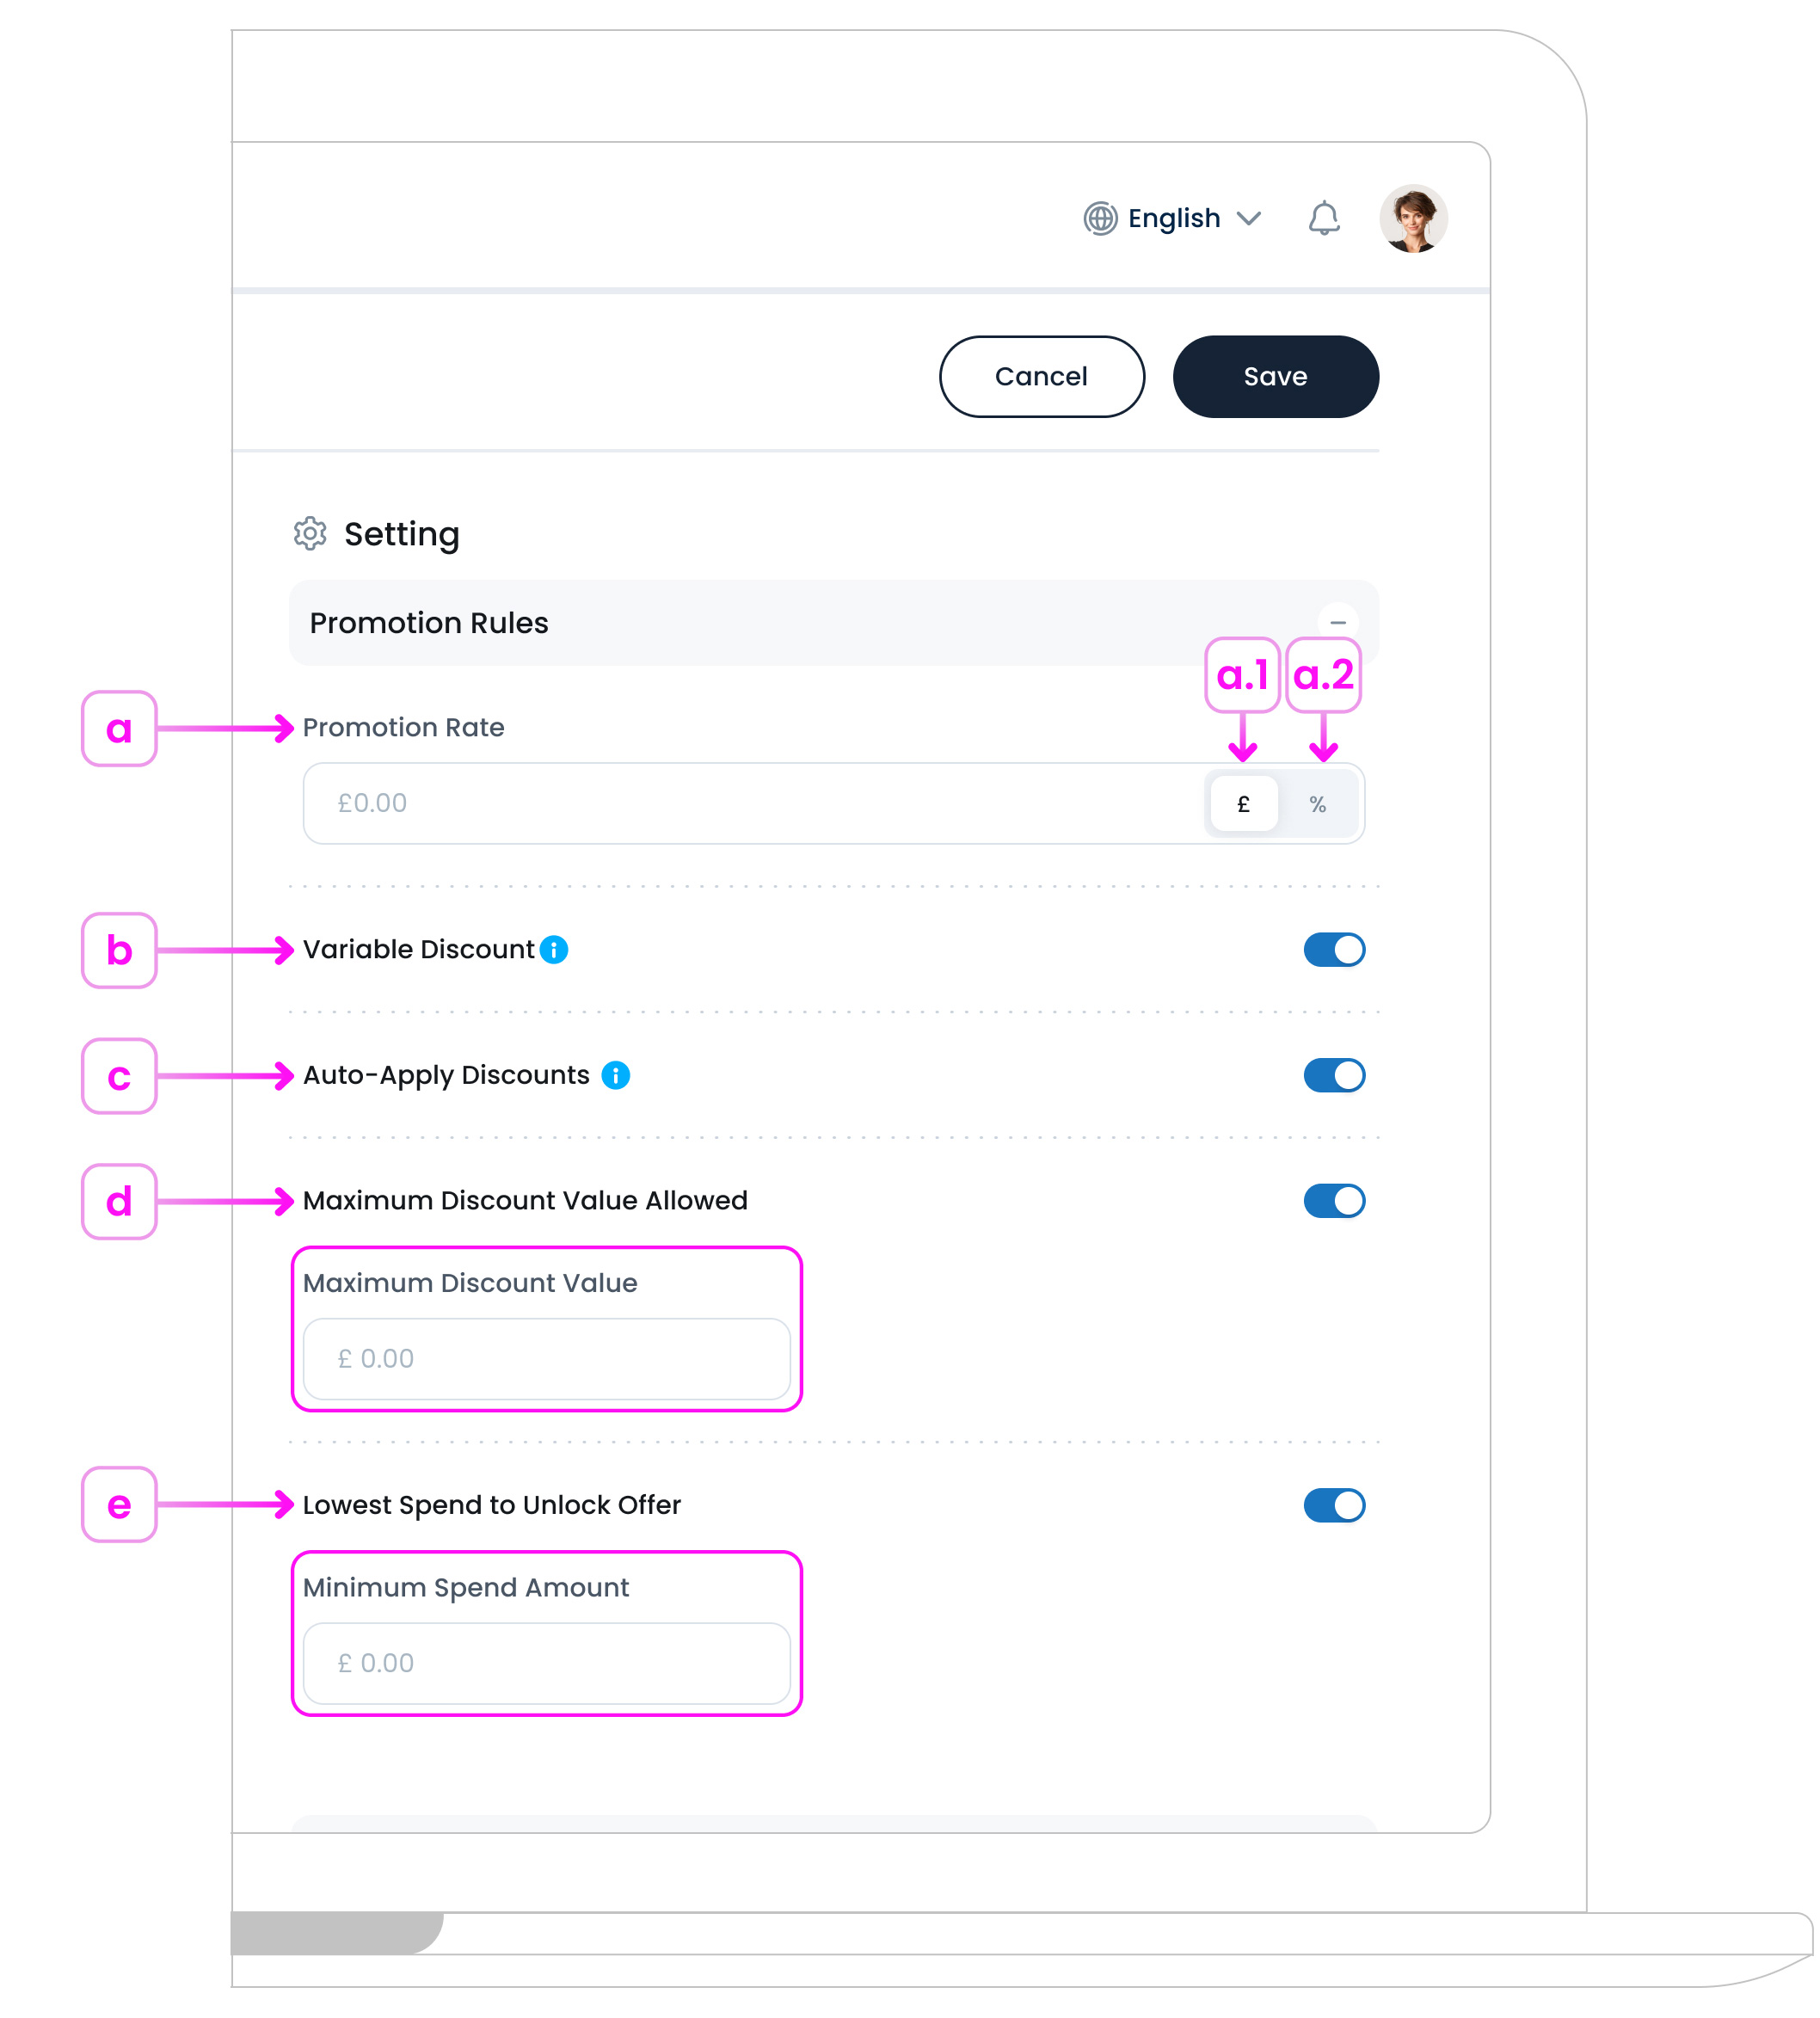
a. Discount Rate
Enter how much discount you want to give. You can choose:
- a.1. Fixed Amount (e.g. £12.00 off the total bill’)
- a.2. Percentage (e.g. 20% off the total bill)
Choose the option that works best for your promotion.
b. Variable Discount
A Variable Discount is a discount amount that can change depending on specific conditions. For example, the discount could be different based on:
- The quantity purchased
- The customer’s membership level
- The time of day the purchase is made
- Any other rules set by your business
This gives you more flexibility compared to a fixed discount.
c. Auto-Apply Discount
When this option is turned on, the system will automatically apply the discount if the customer meets certain conditions.
Examples of these conditions:
- Having a specific item in the basket
- Reaching a certain minimum order value
- Buying during a specific time period (like happy hour)
This makes the checkout process easier, avoids manual errors, and can encourage customers to qualify for the discount, helping increase your sales.
d. Maximum Discount Limit
This is the highest amount you are willing to discount on a single item within the bill.
Why it’s useful:
- Prevents giving away too much when multiple offers are active
- Keeps control over your promotion costs
When you turn this on, a text field appears where you can type in the maximum amount you want to allow.
e. Lowest Spend to Unlock Offer
Set the minimum amount a customer must spend before they can get the discount.
Why it’s useful:
- Encourages customers to buy more to qualify
- Helps boost your average order size
When you turn this on, a text field appears where you can type in the minimum spend amount.
Step 3: Set Discount Availability
Promotion Availability controls when the promotion is available for use (like specific days, seasons, or time periods). This applies to:
- In-store
- Delivery
- Takeaway
- Or any other sales types you’ve added in the system settings
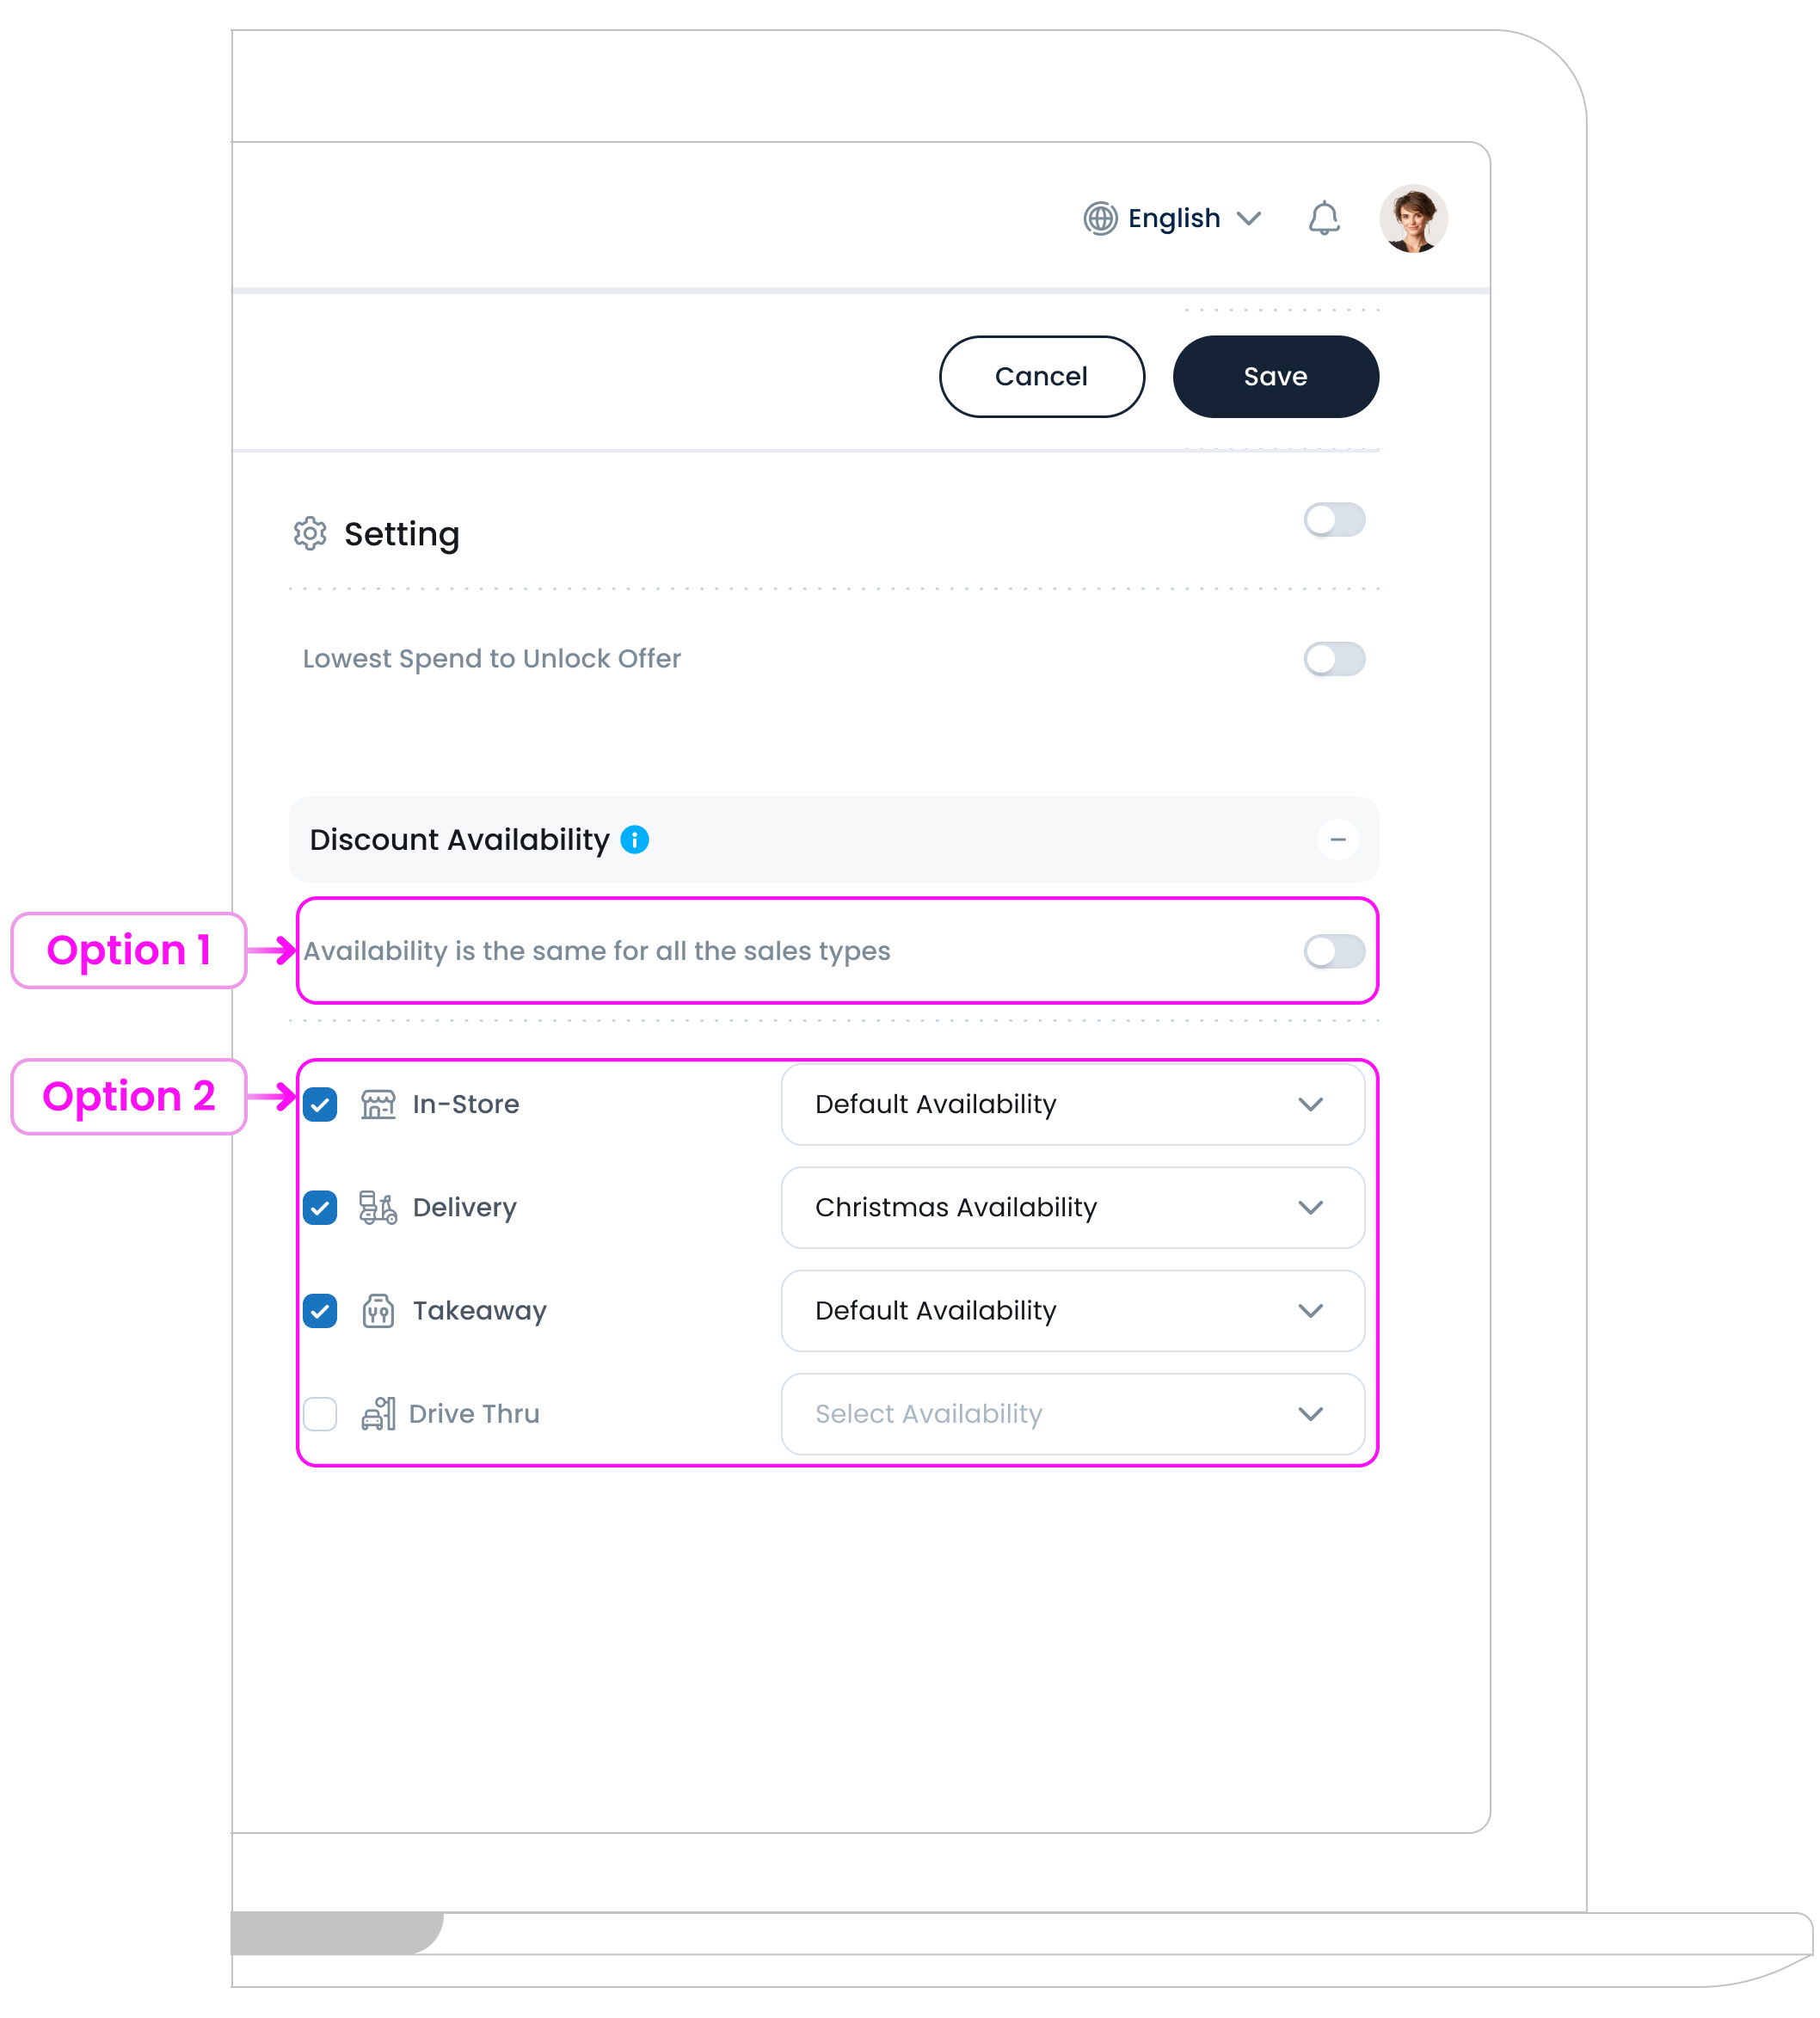
Option 1: Same for All
Toggle ON the “Availability is the same for all the sales types” option to apply a single availability setting across all sales type.
Option 2: Custom Per Sales Type
Leave the toggle OFF to set different availability per sales type (e.g., Morning Offer Promotion available in-store but not for delivery).
You’ll see a dropdown for each sales type where you can choose a predefined availability set, like General Availability or other pre-set availability.
Click the eye icon ![]() next to a set to preview the detailed hours (e.g., Monday to Sunday, 07:00–23:00).
next to a set to preview the detailed hours (e.g., Monday to Sunday, 07:00–23:00).
Step 4: Add Non-Discountable Items
If you don’t want the discount to apply to certain products, you can exclude them here.
Example:
You might exclude alcohol due to licensing restrictions, high-cost premium items like specialty wines or imported coffee beans, seasonal products such as Christmas gift hampers, or non-food items like merchandise and gift cards. These exclusions help maintain profit margins and ensure promotions target the right products.
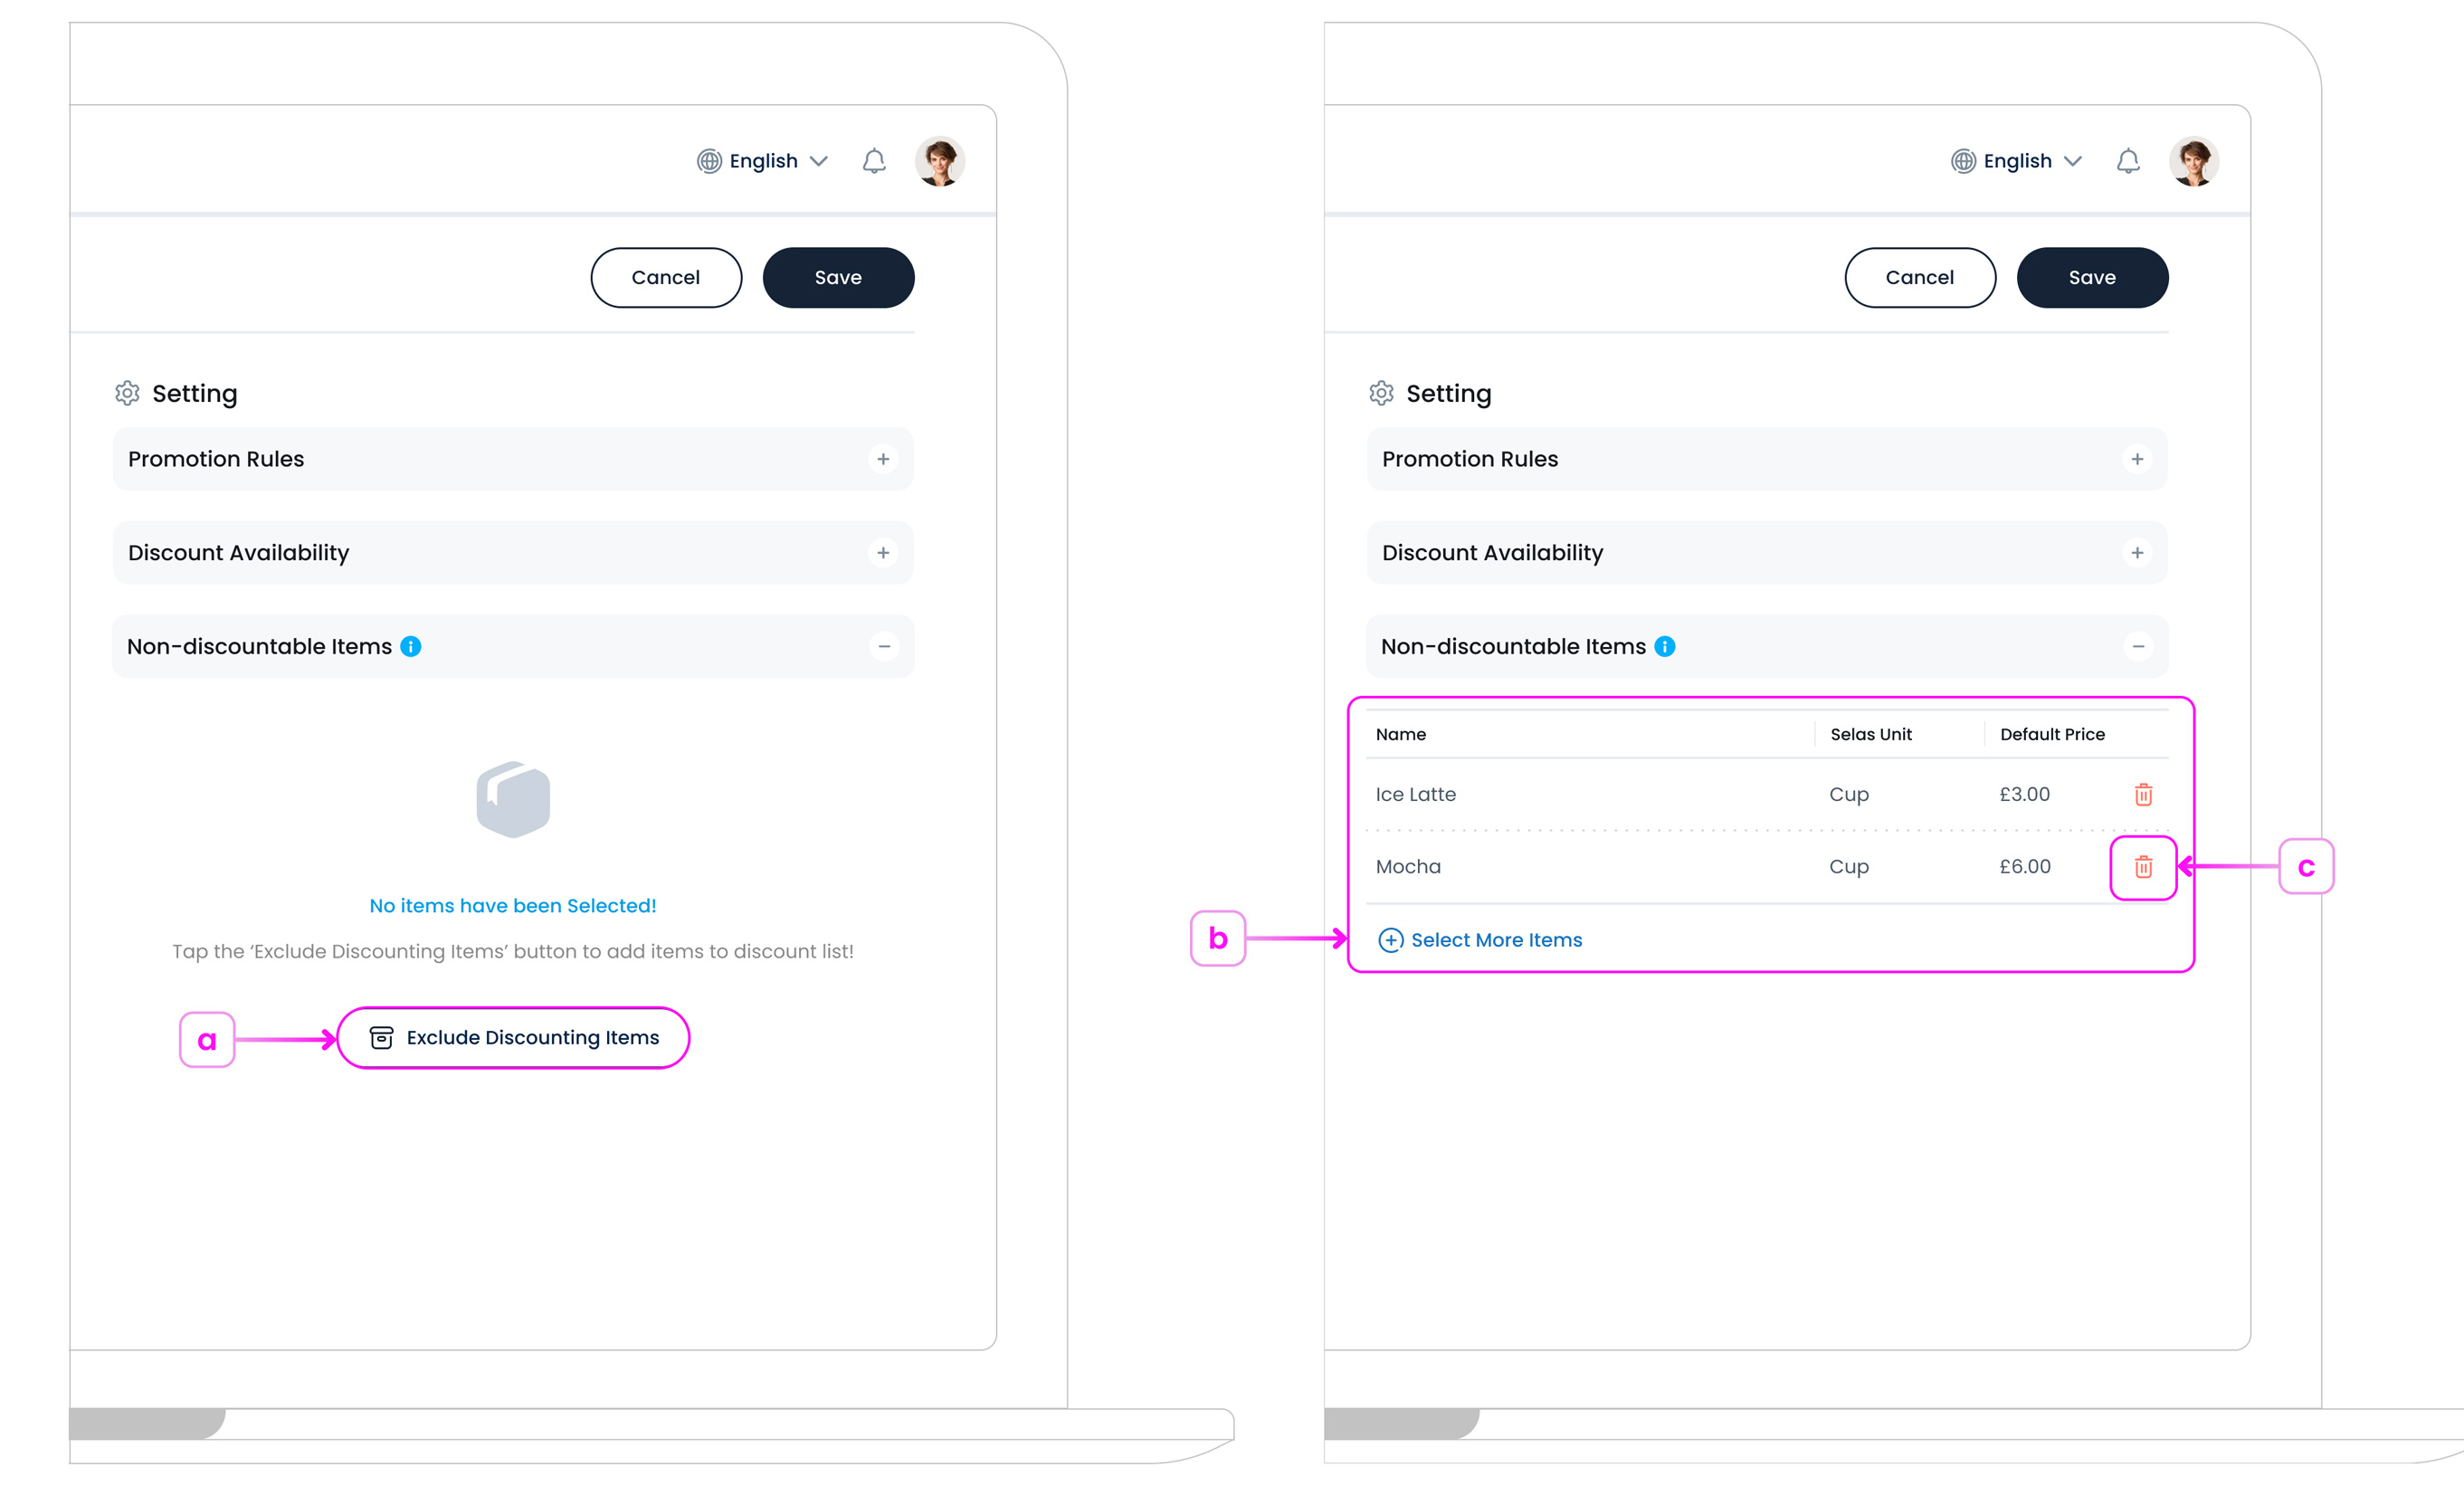
a. Select Items to Exclude
Click Exclude Discountable Items, then select the products or categories you want to leave out.
b. Add More Exclusions
Click Select More Items to add additional products to the exclusion list.
c. Remove Items from Exclusions
Use the trash icon to remove an item from the exclusion list if you change your mind.
Step 5: Save
When everything looks right, click Save at the top-right.
Your new Entire Bill Discount will now appear in your promotions list and will work exactly as you set it up.
What’s Next?
Now that you’ve created an Entire Bill Discount, you can explore other promotion types to suit different sales strategies. A great next step is learning how to set up an Item-Based Discount, which applies a discount only to specific products or categories rather than the entire order.
For a step-by-step guide, see Create a New Promotion – Item-Based Discount.