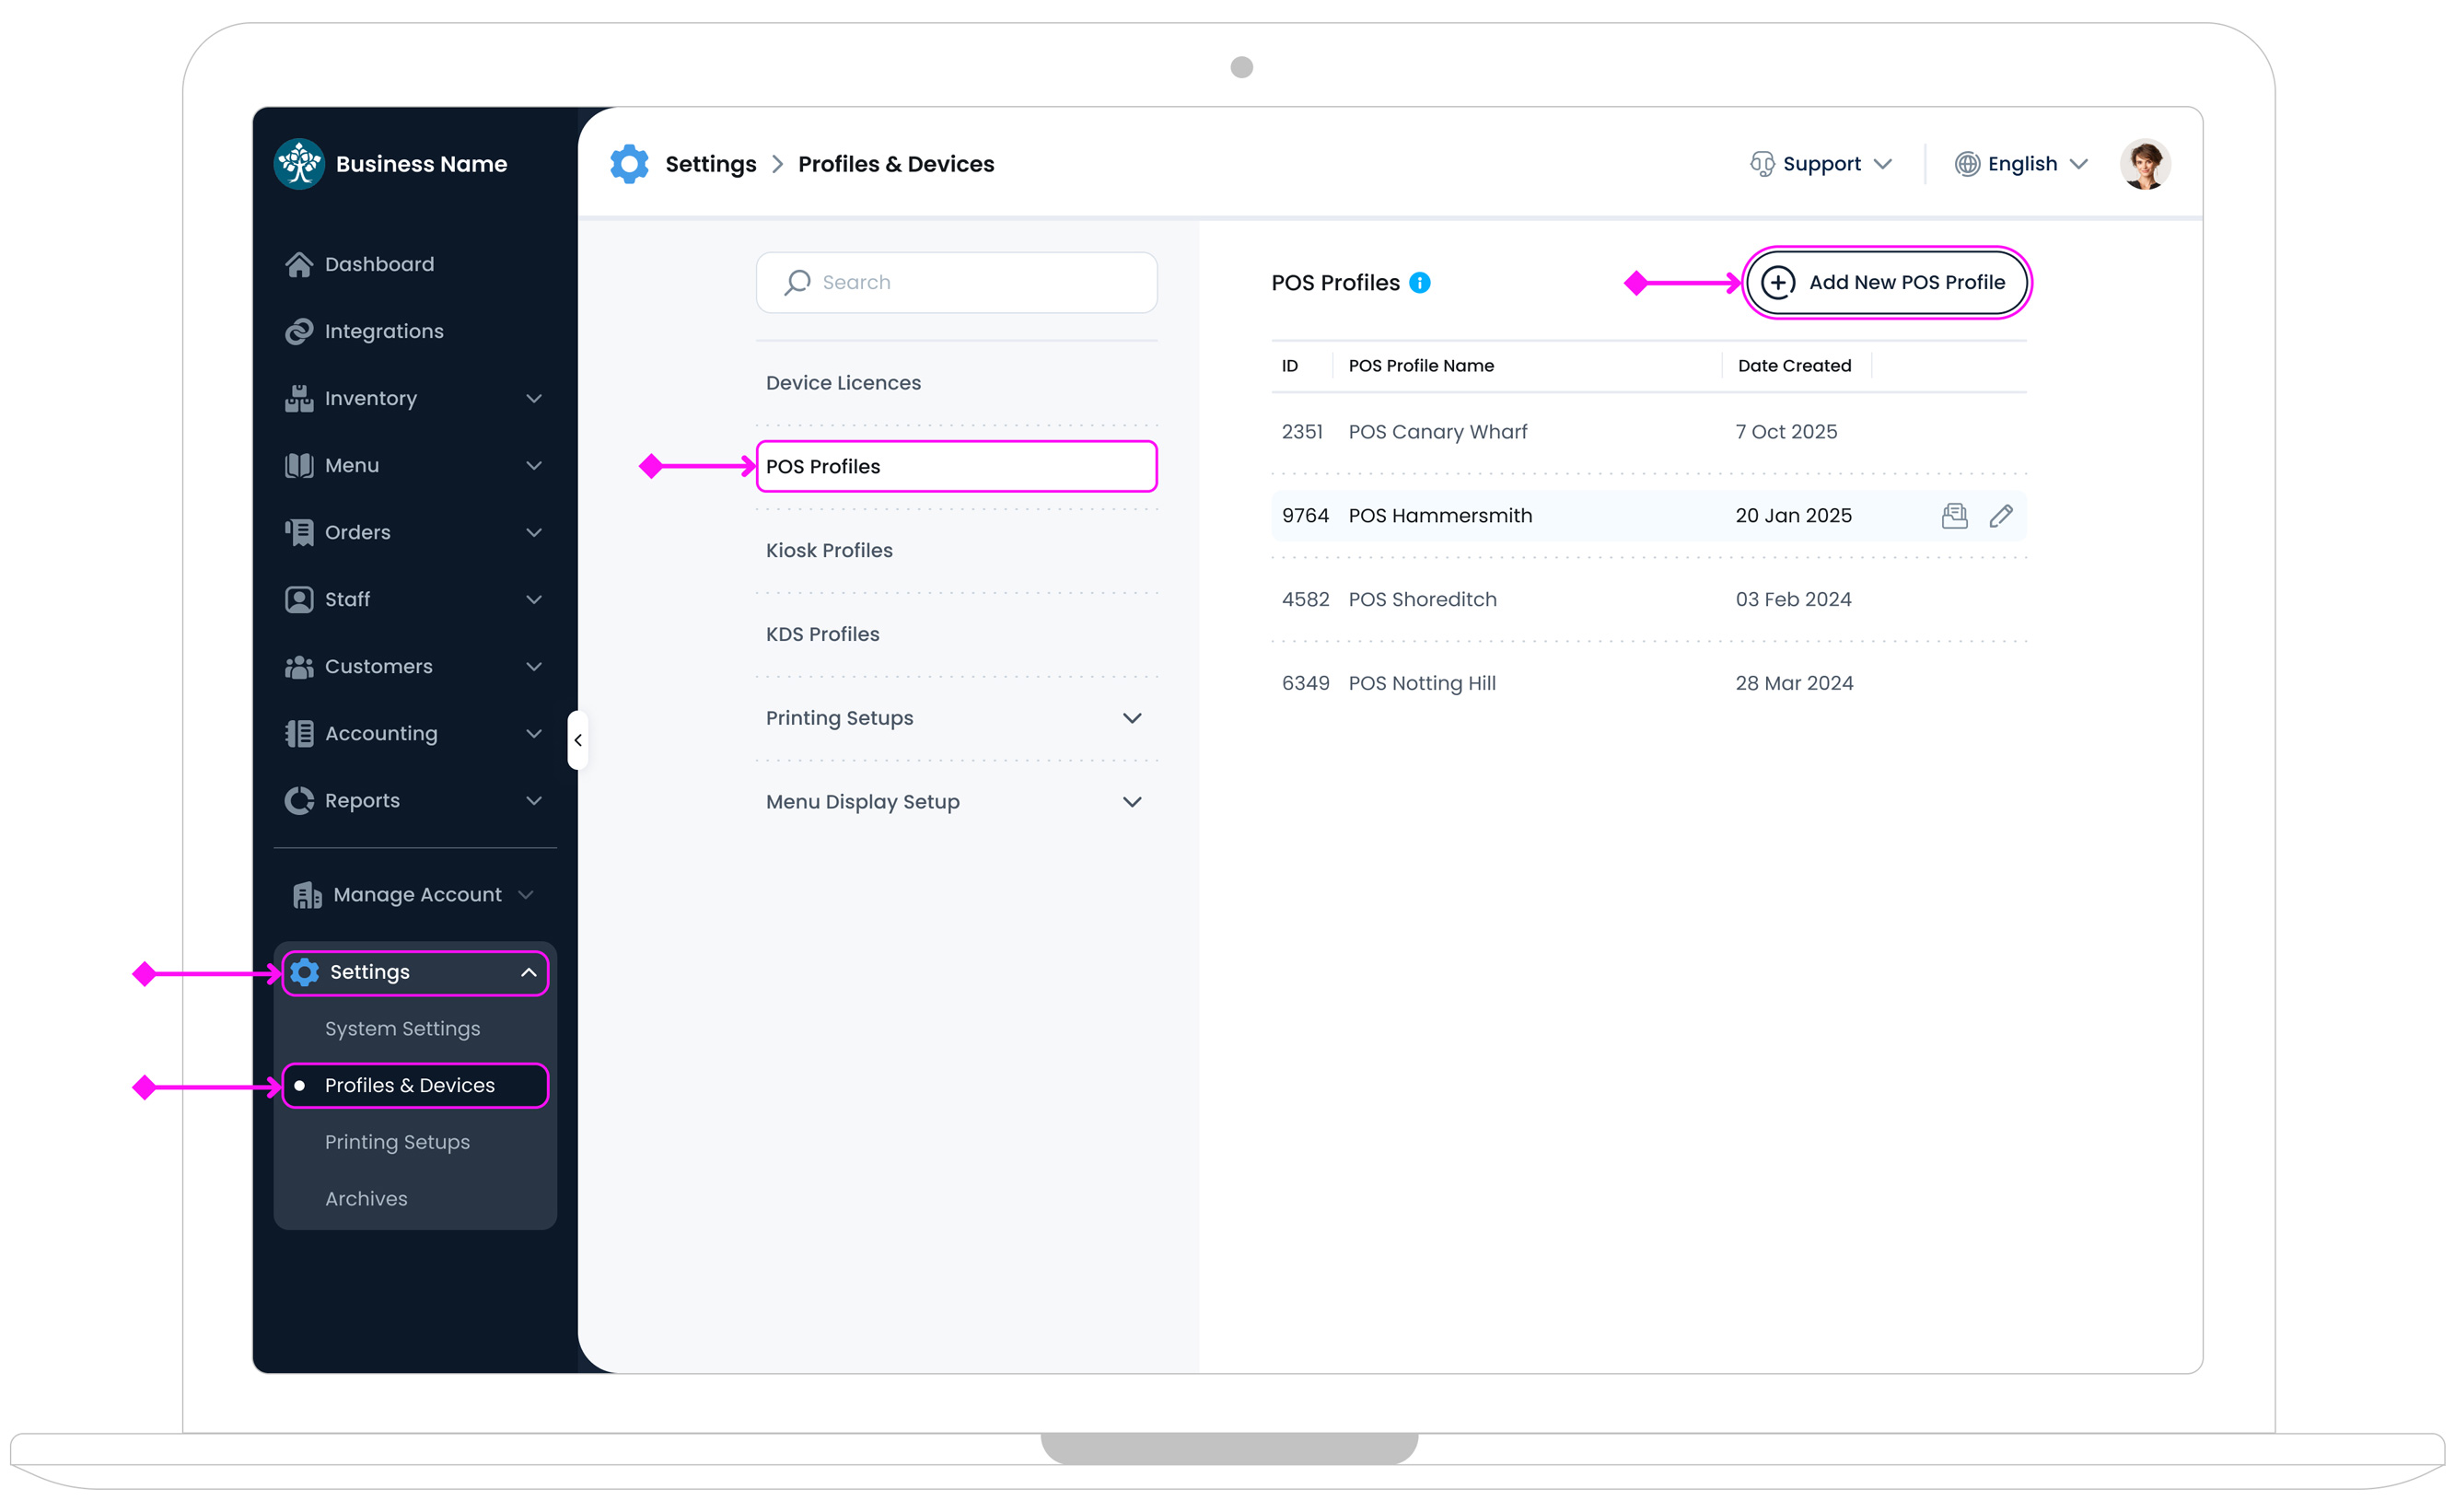
How to Create a New POS Profile
POS Profiles control how your Point of Sale (POS) devices work during service. You can set which sales types a terminal can take, what details staff must enter, and how receipts are provided. Create different profiles for different counters or locations, then assign each one to a device licence.
To Get Started
In the TechSuite portal, go to Settings > Devices & Profiles > POS Profiles and click Add New POS Profile. This opens the POS Profile setup page.
Step 1: POS Profile Info

a. POS Profile Name
Choose a clear, specific name so you can recognise it later when assigning licences. (e.g., Front Counter POS , Bar POS, Outdoor Terminal).
b. Accepting Order Types on POS
Select which sales types this POS can use. Turn on In-Store, Delivery, Takeaway, or All Types.
b.1. Service Charge per type
When you enable a sales type, a Service Charge field appears beneath it. Enter a percentage (e.g., 10%) to auto-apply a service charge whenever that sales type is used.
- Leave it 0% to disable the charge for that type.
- The charge is added as an order-level line on the bill and prints on the receipt.
- Staff with permission can remove it from the Order Discounts/Charges pop-up if needed.
- You can set different percentages per type (e.g., 12.5% for Dine-in, 0% for Takeaway).
Tip
Only the enabled types will appear when staff start a new order.
Step 2: Take Orders Requirements
These settings control which pop-ups staff must complete during the order flow in POS.
- If a toggle is ON, a pop-up appears and must be completed (staff can’t skip it).
- If a toggle is OFF, the pop-up doesn’t appear, but staff can still add or change the info manually on the POS at any time.
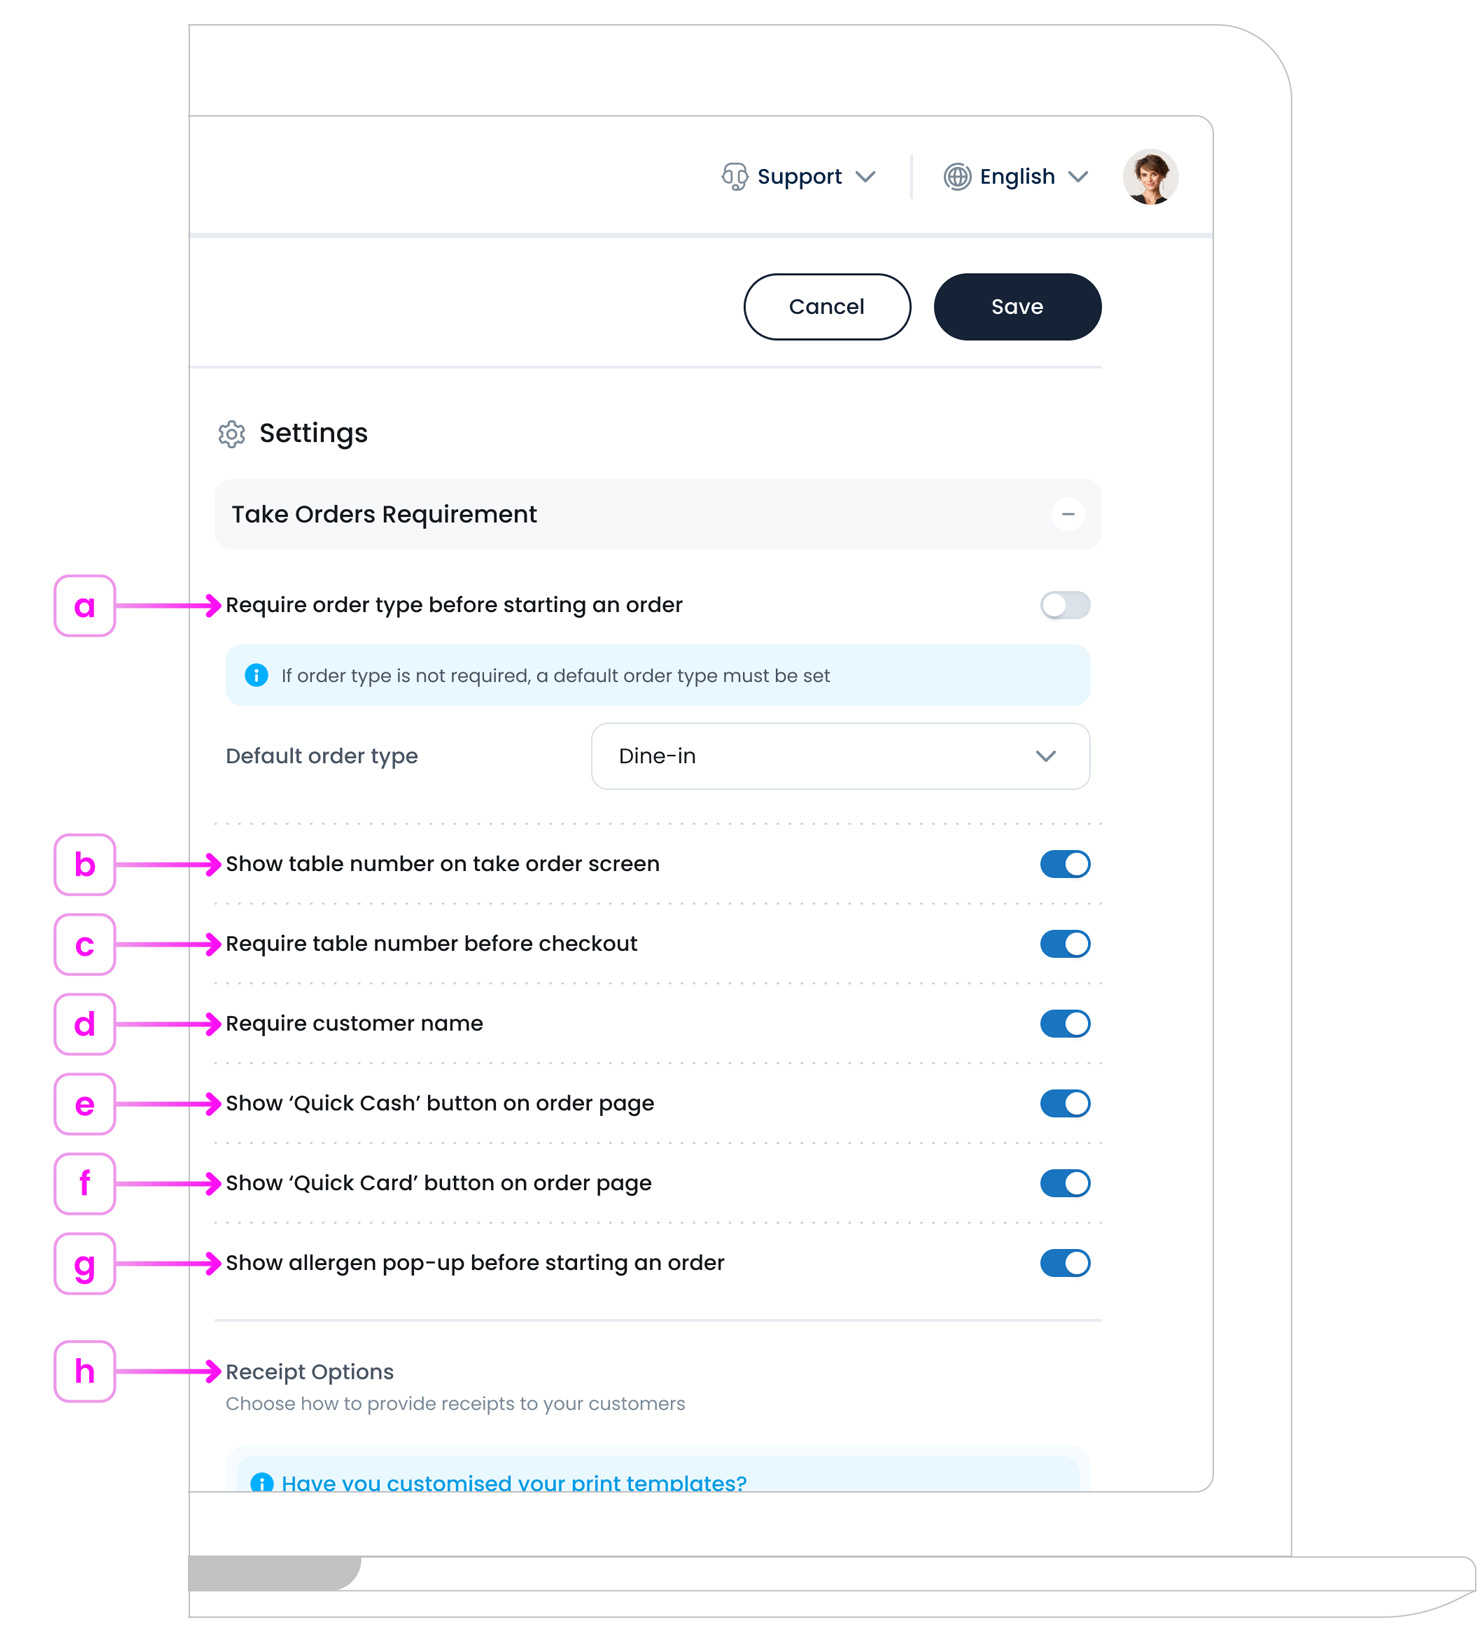
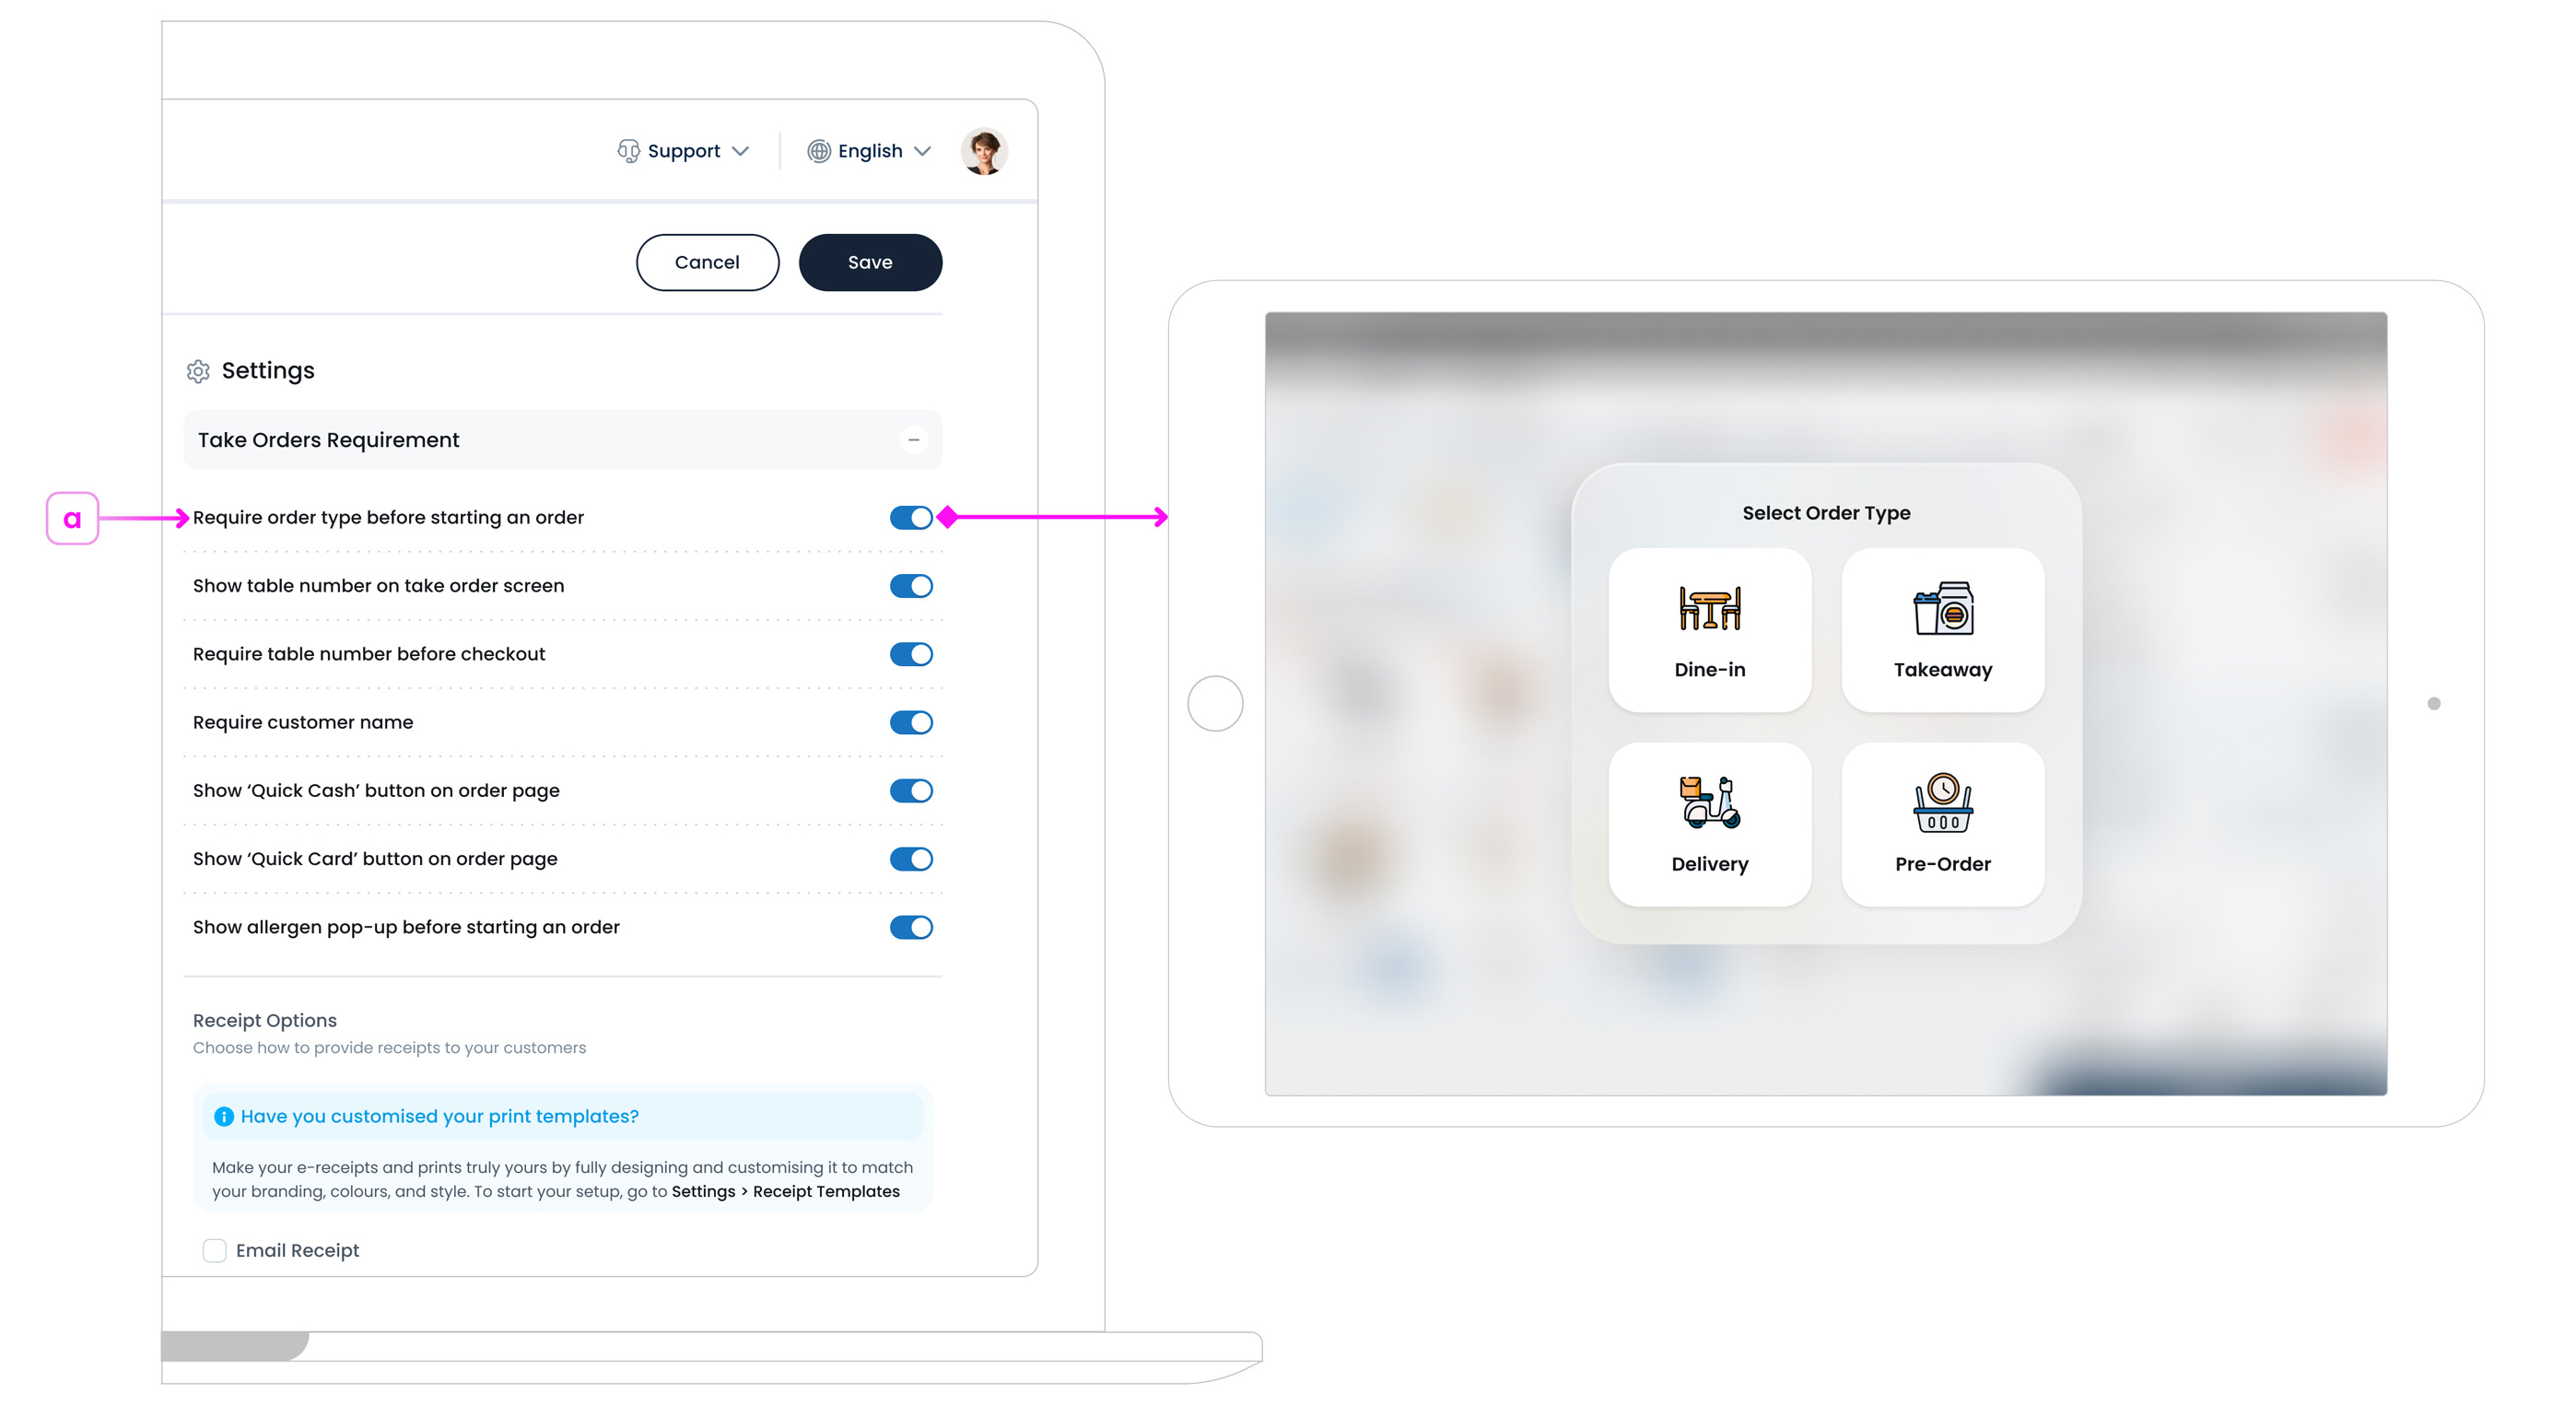
a. Require order type before starting an order
- Turn ON to show a Sales Type pop-up before staff can start an order. In that case, staff must choose a Sales type. (e.g., In-Store, Delivery, Takeaway or All Types)
- Turn OFF to skip the pop-up. When OFF, set a default in Select Default Take Order. The POS uses that type automatically when the order starts. Staff can still change the sales type later in POS.
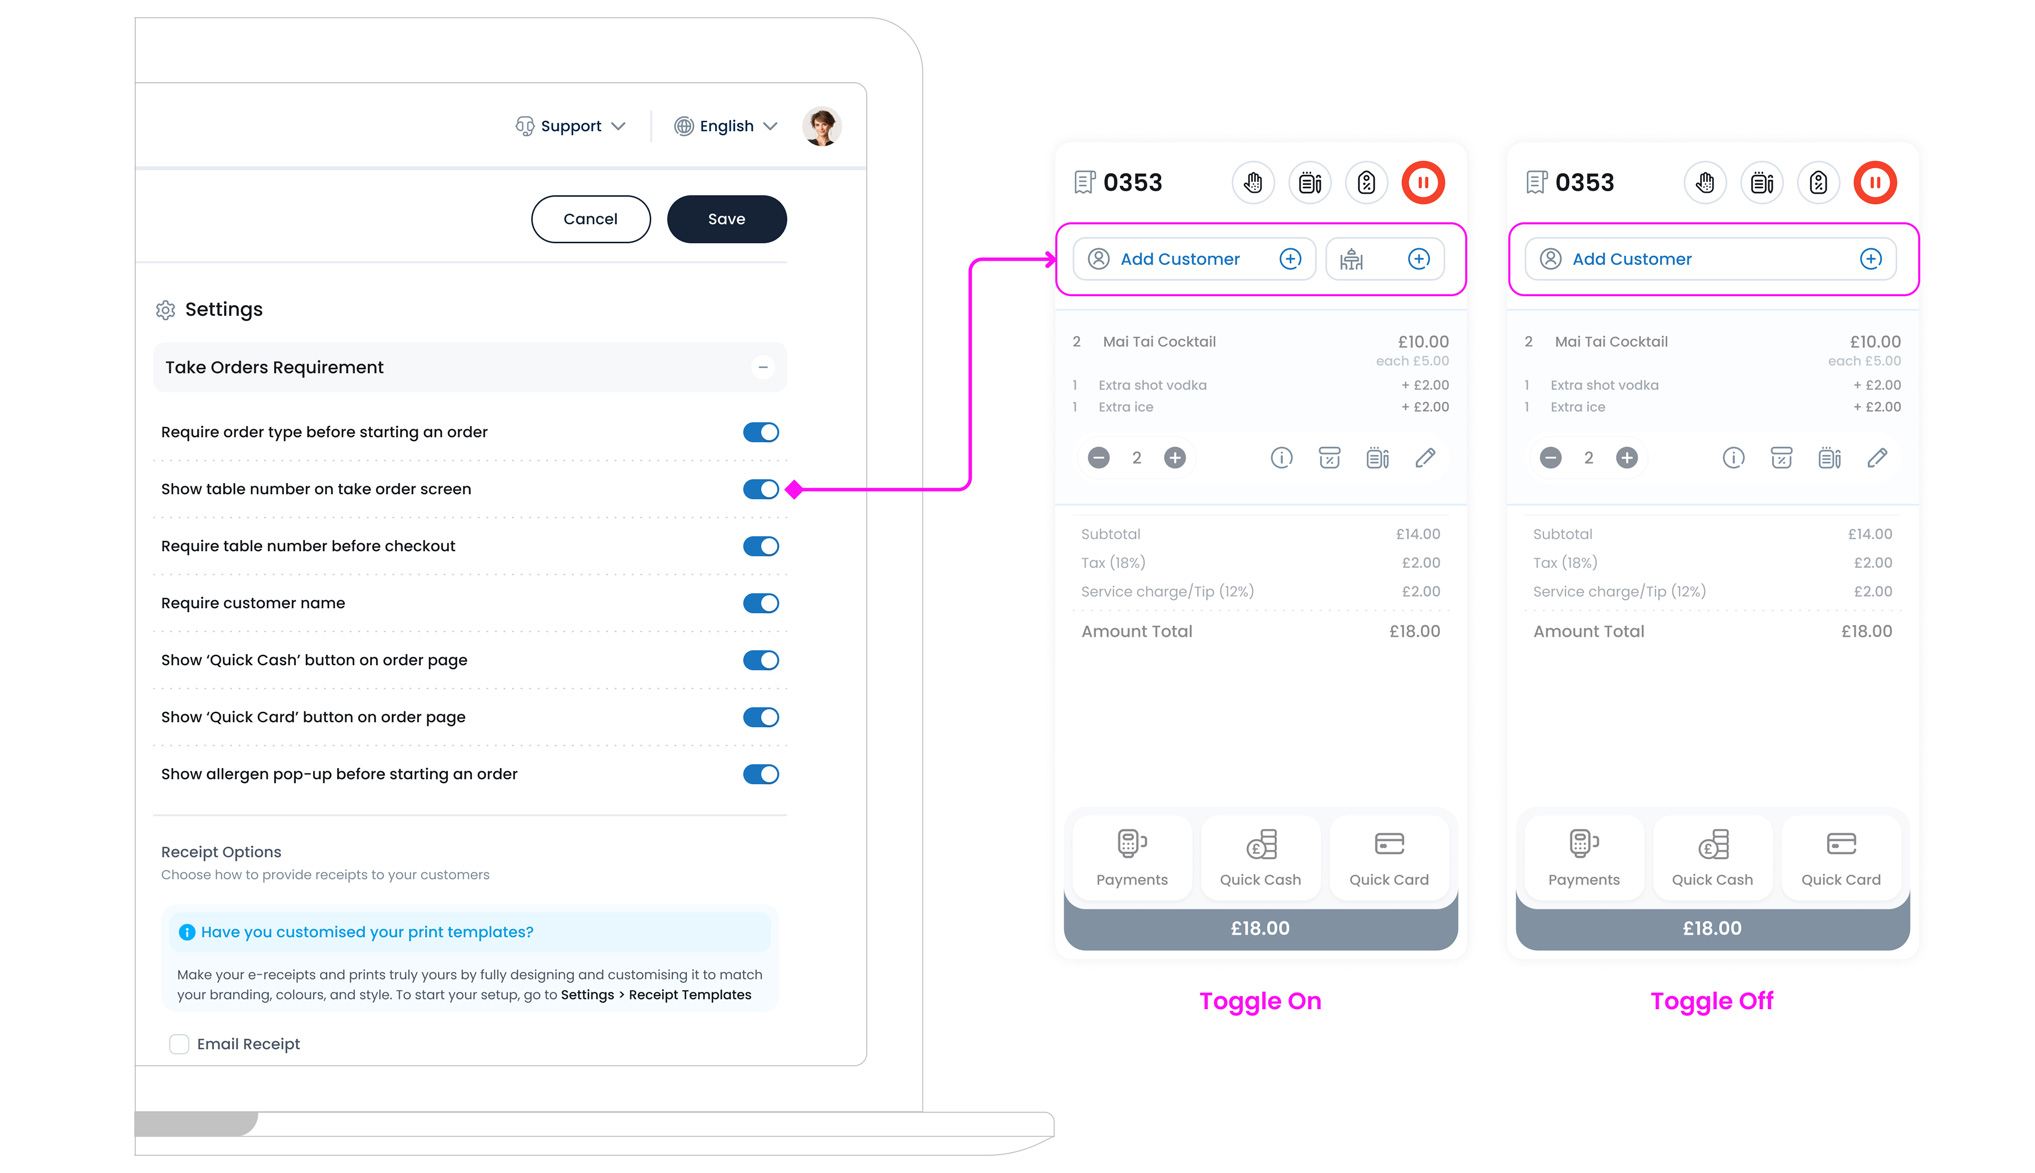
b. Show table number on take order screen
- Turn ON to show a Table field at the top of the basket on the Take Order page so staff can add or edit a table number at any time.
- Turn OFF to hide the field. If you still need to capture a table, use Require table number before checkout or the order action.
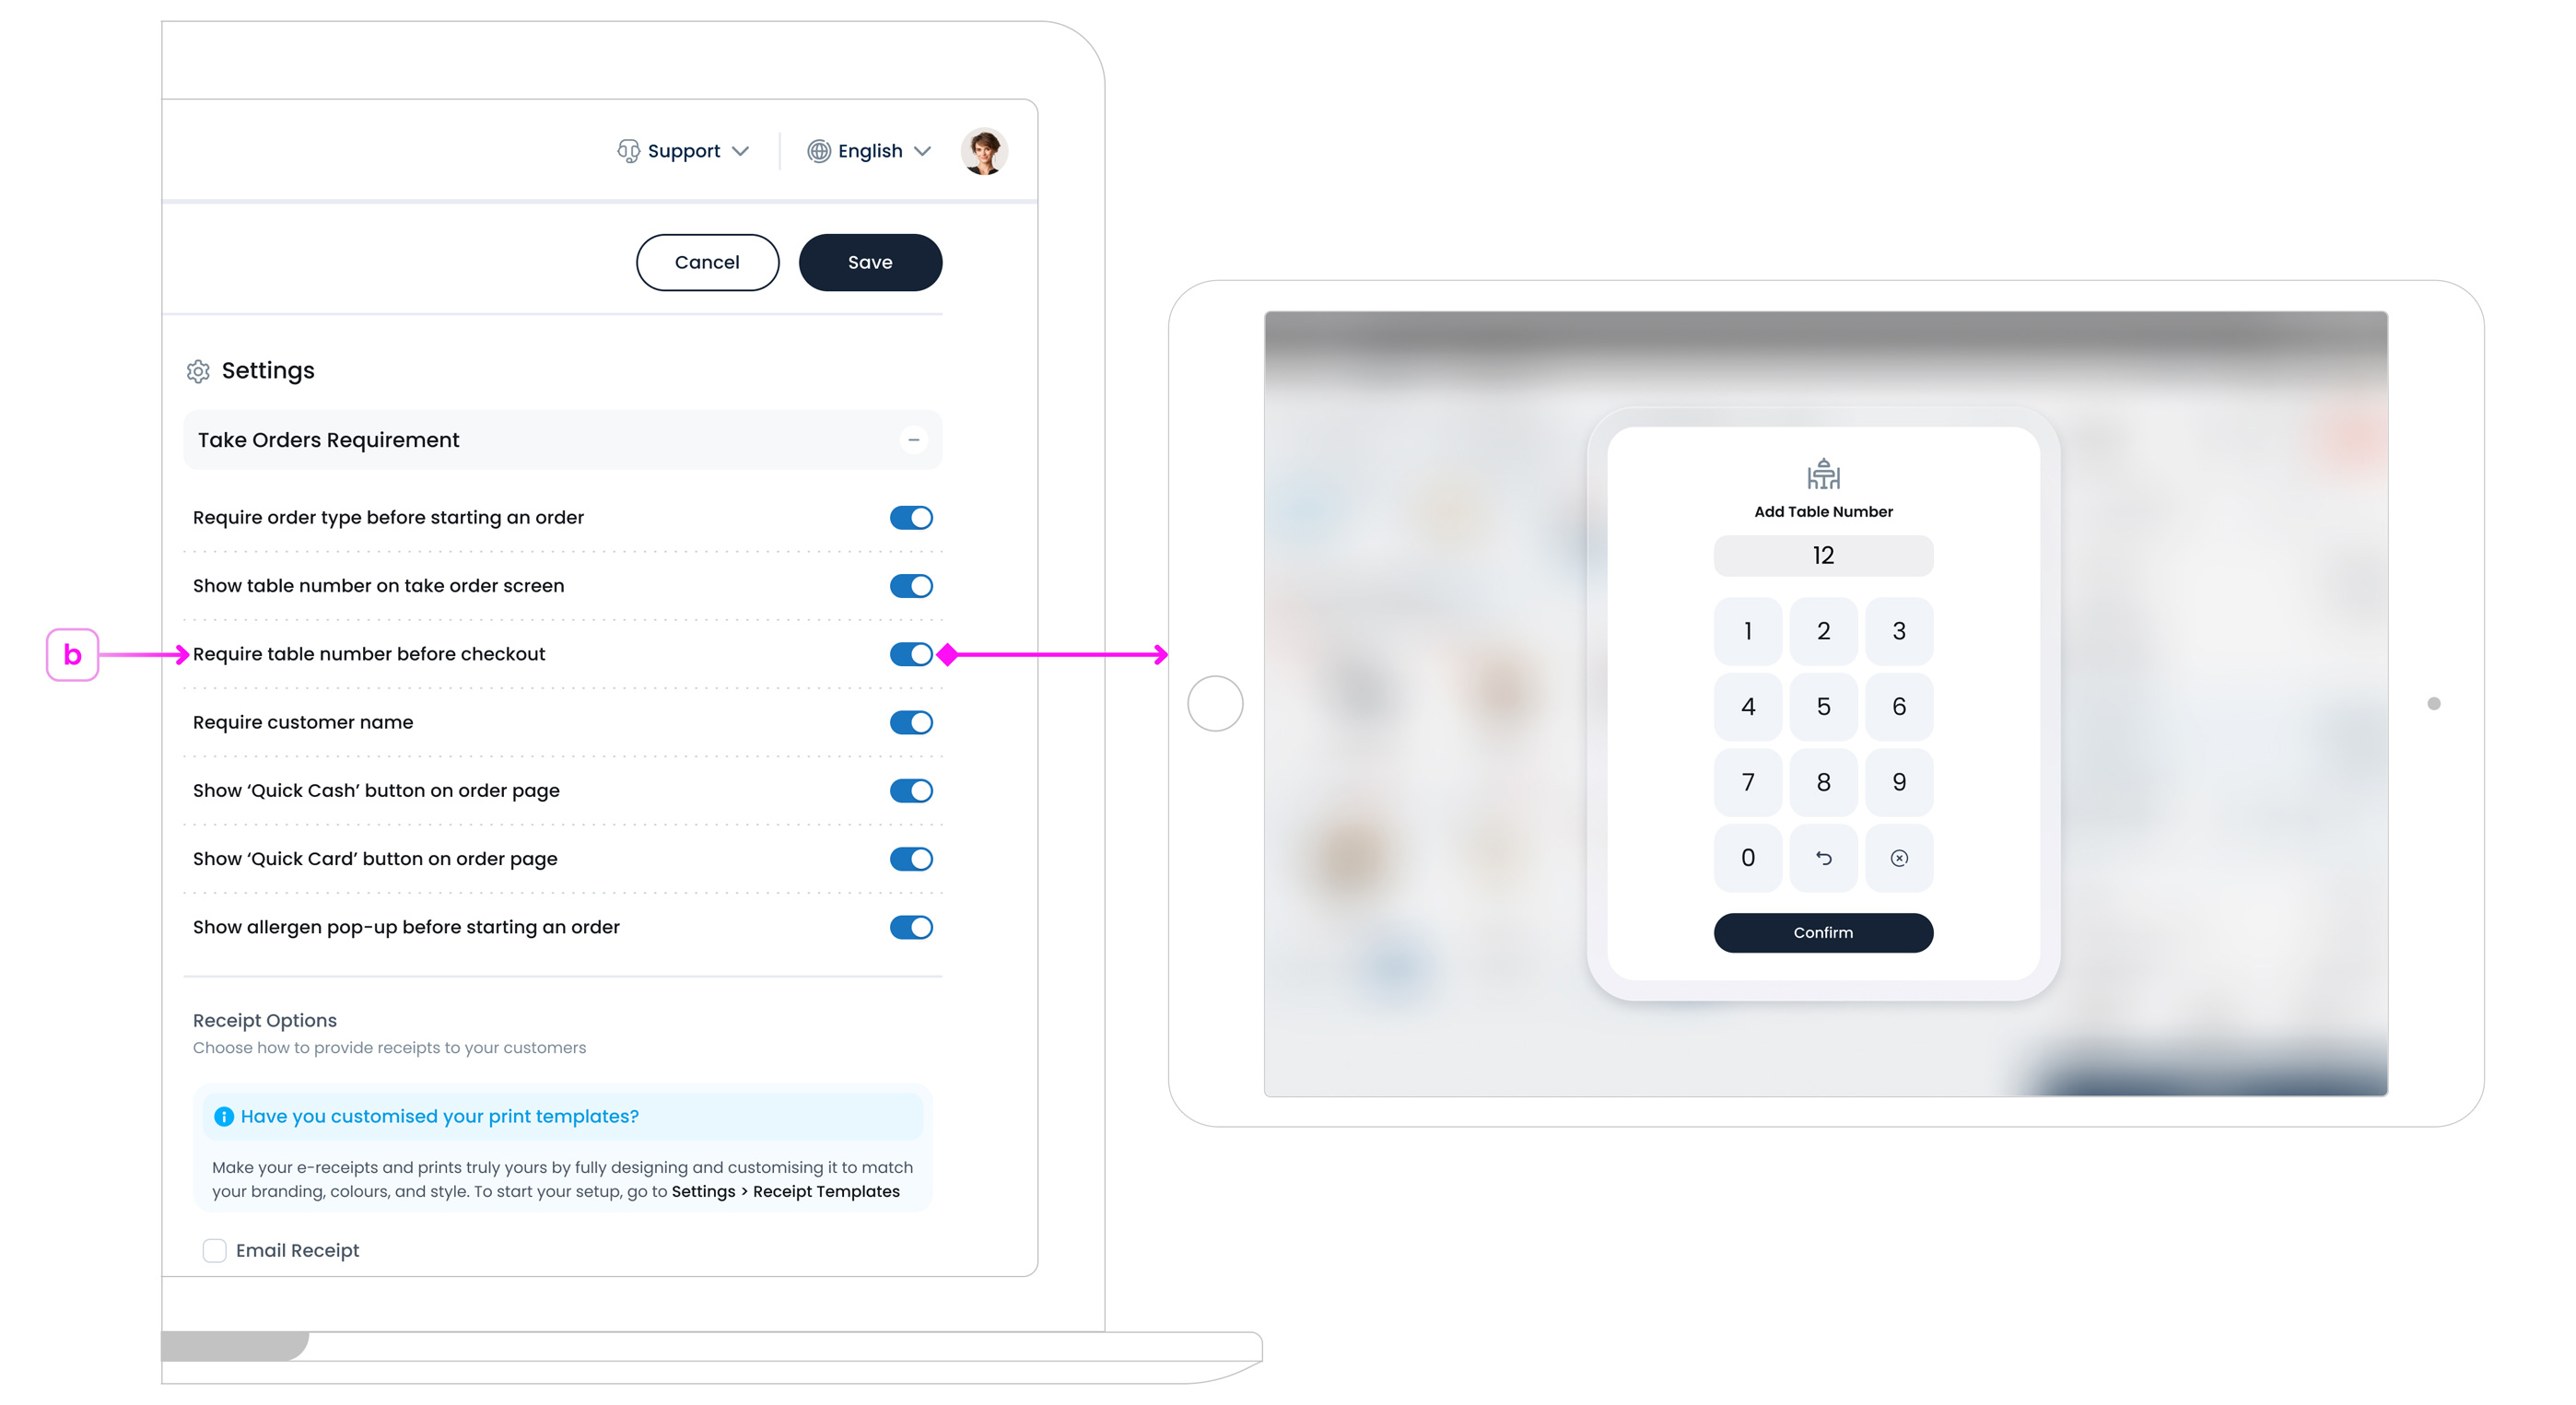
c. Require table number before checkout
- Turn ON to show a Table Number pop-up at checkout (ideal for dine-in). Staff must enter a table number to proceed.
- Turn OFF to skip the pop-up. Staff can still add or edit a table number in POS if needed.
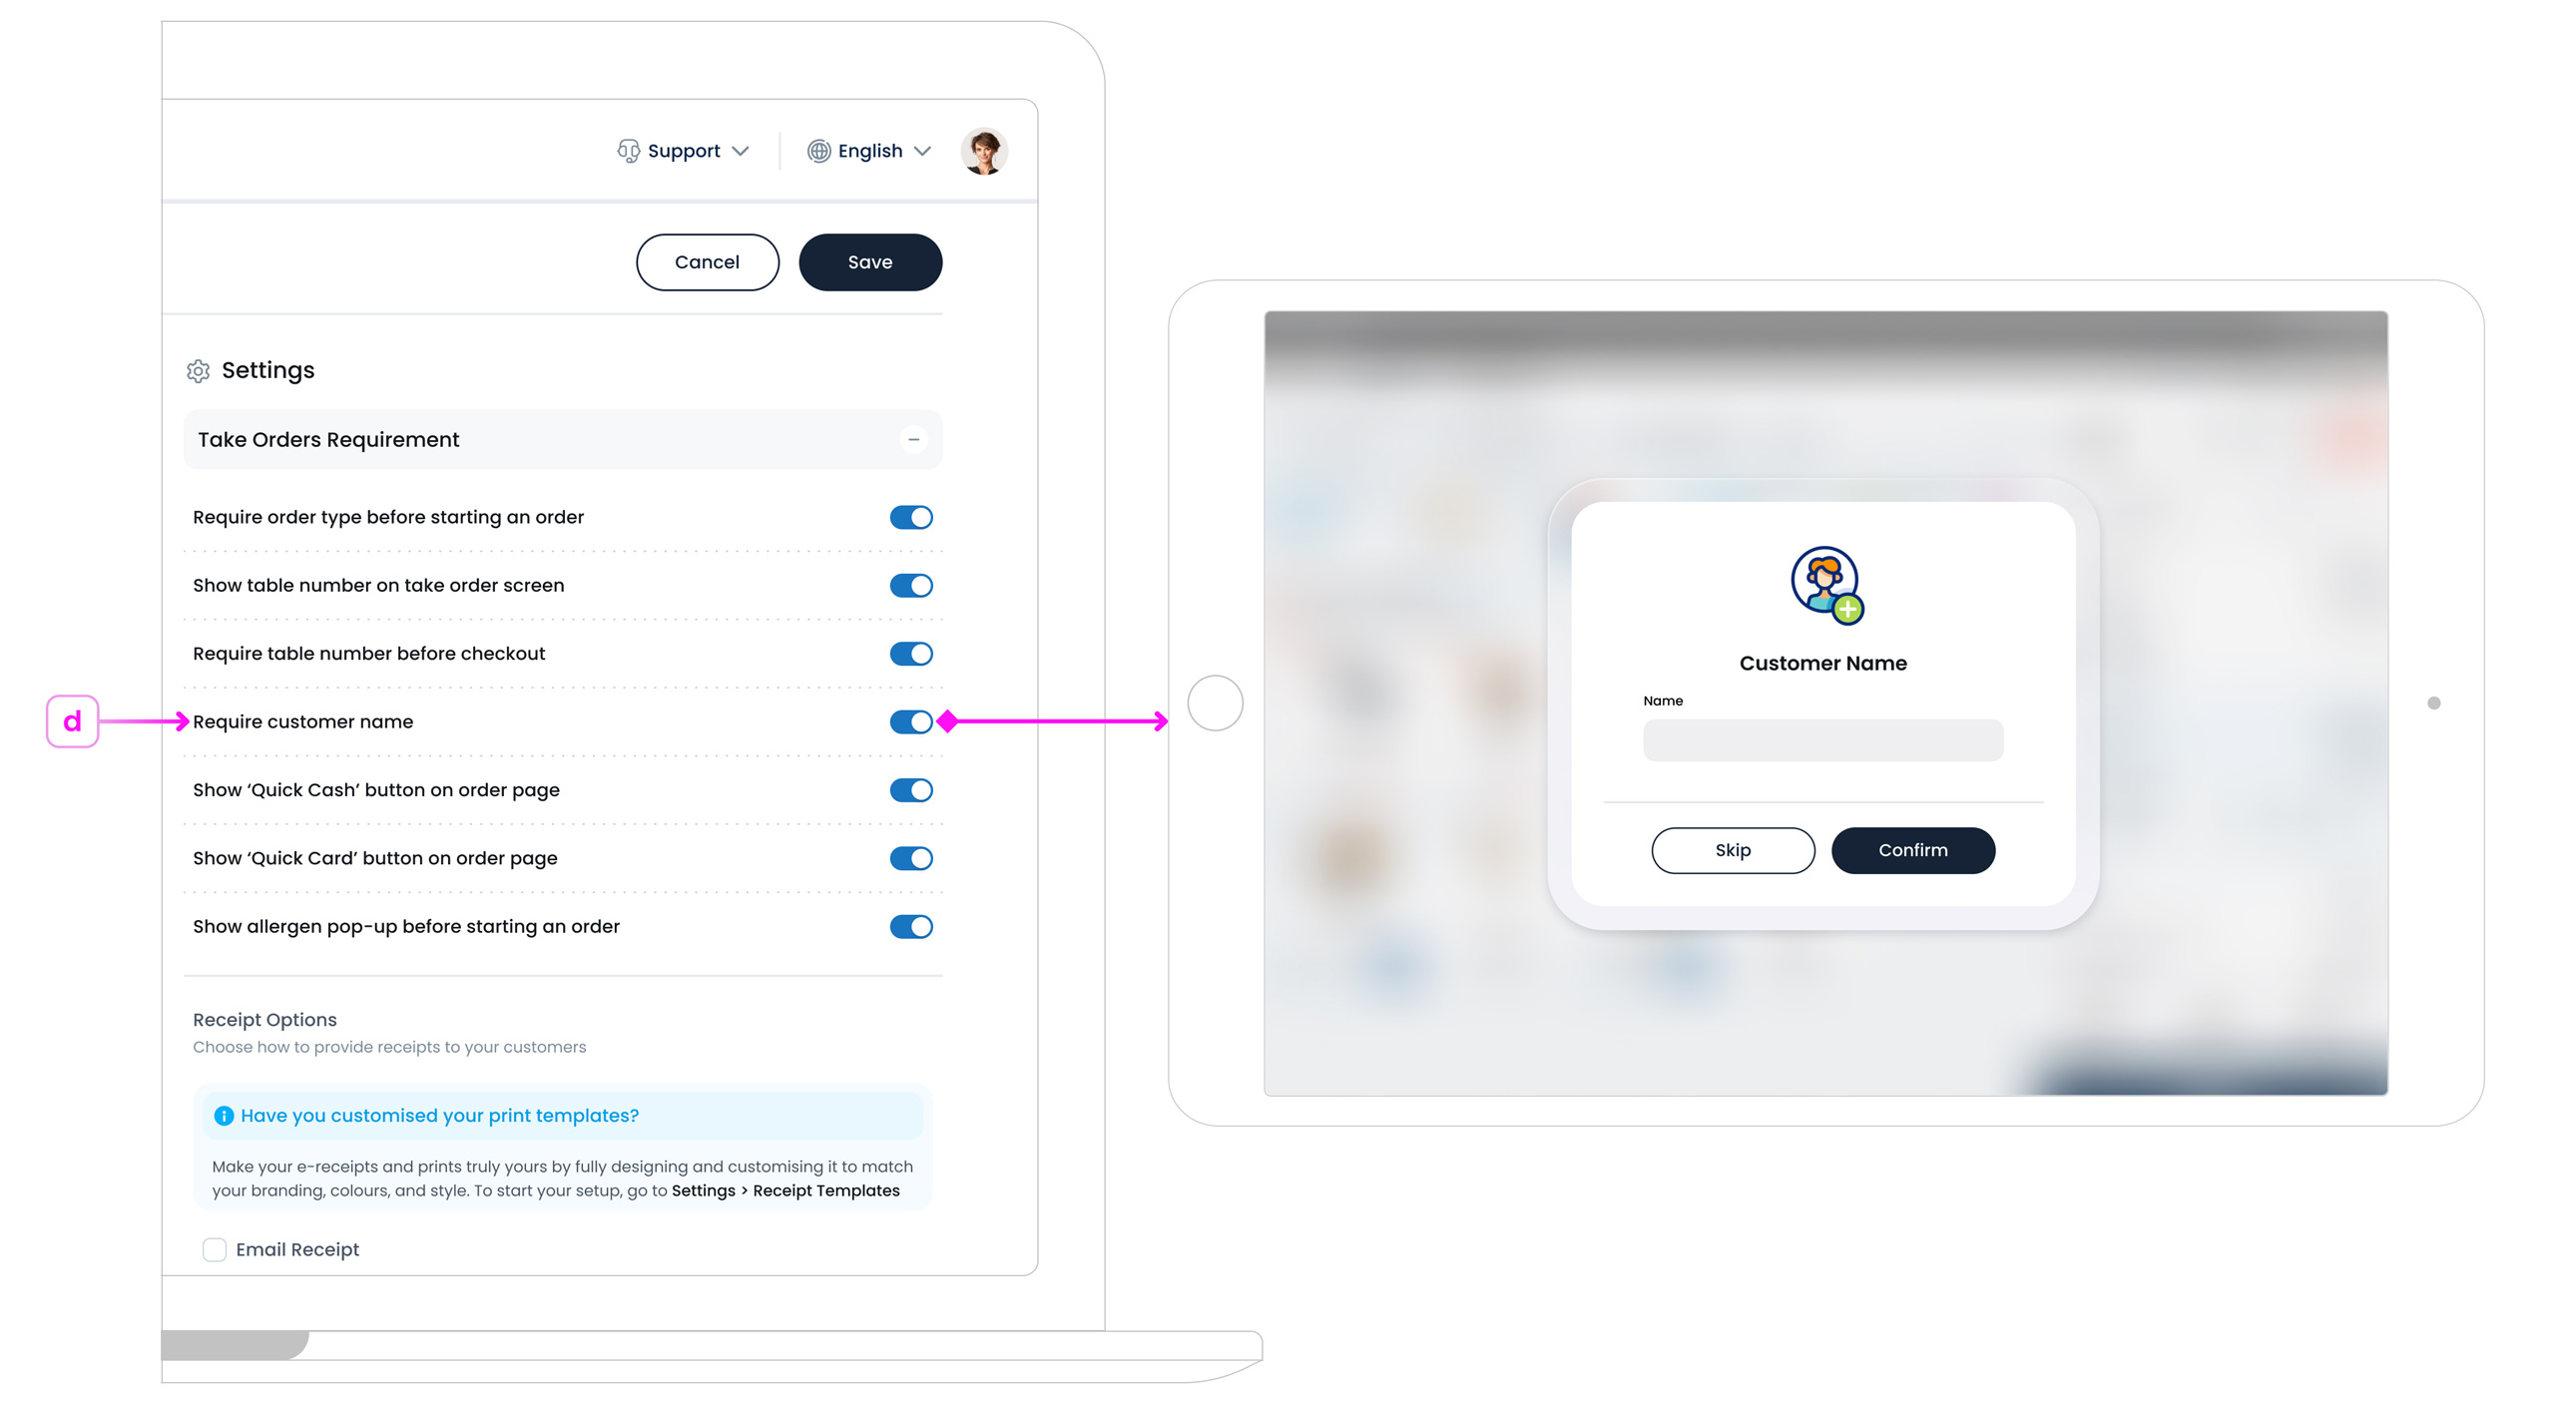
d. Require customer name
- Turn ON to show a Customer Name popup at checkout (before payment). Staff must enter a name to complete the sale, this step cannot be skipped when enabled.
- Turn OFF to skip the pop-up. Staff can still add or edit the customer name in POS if they want.
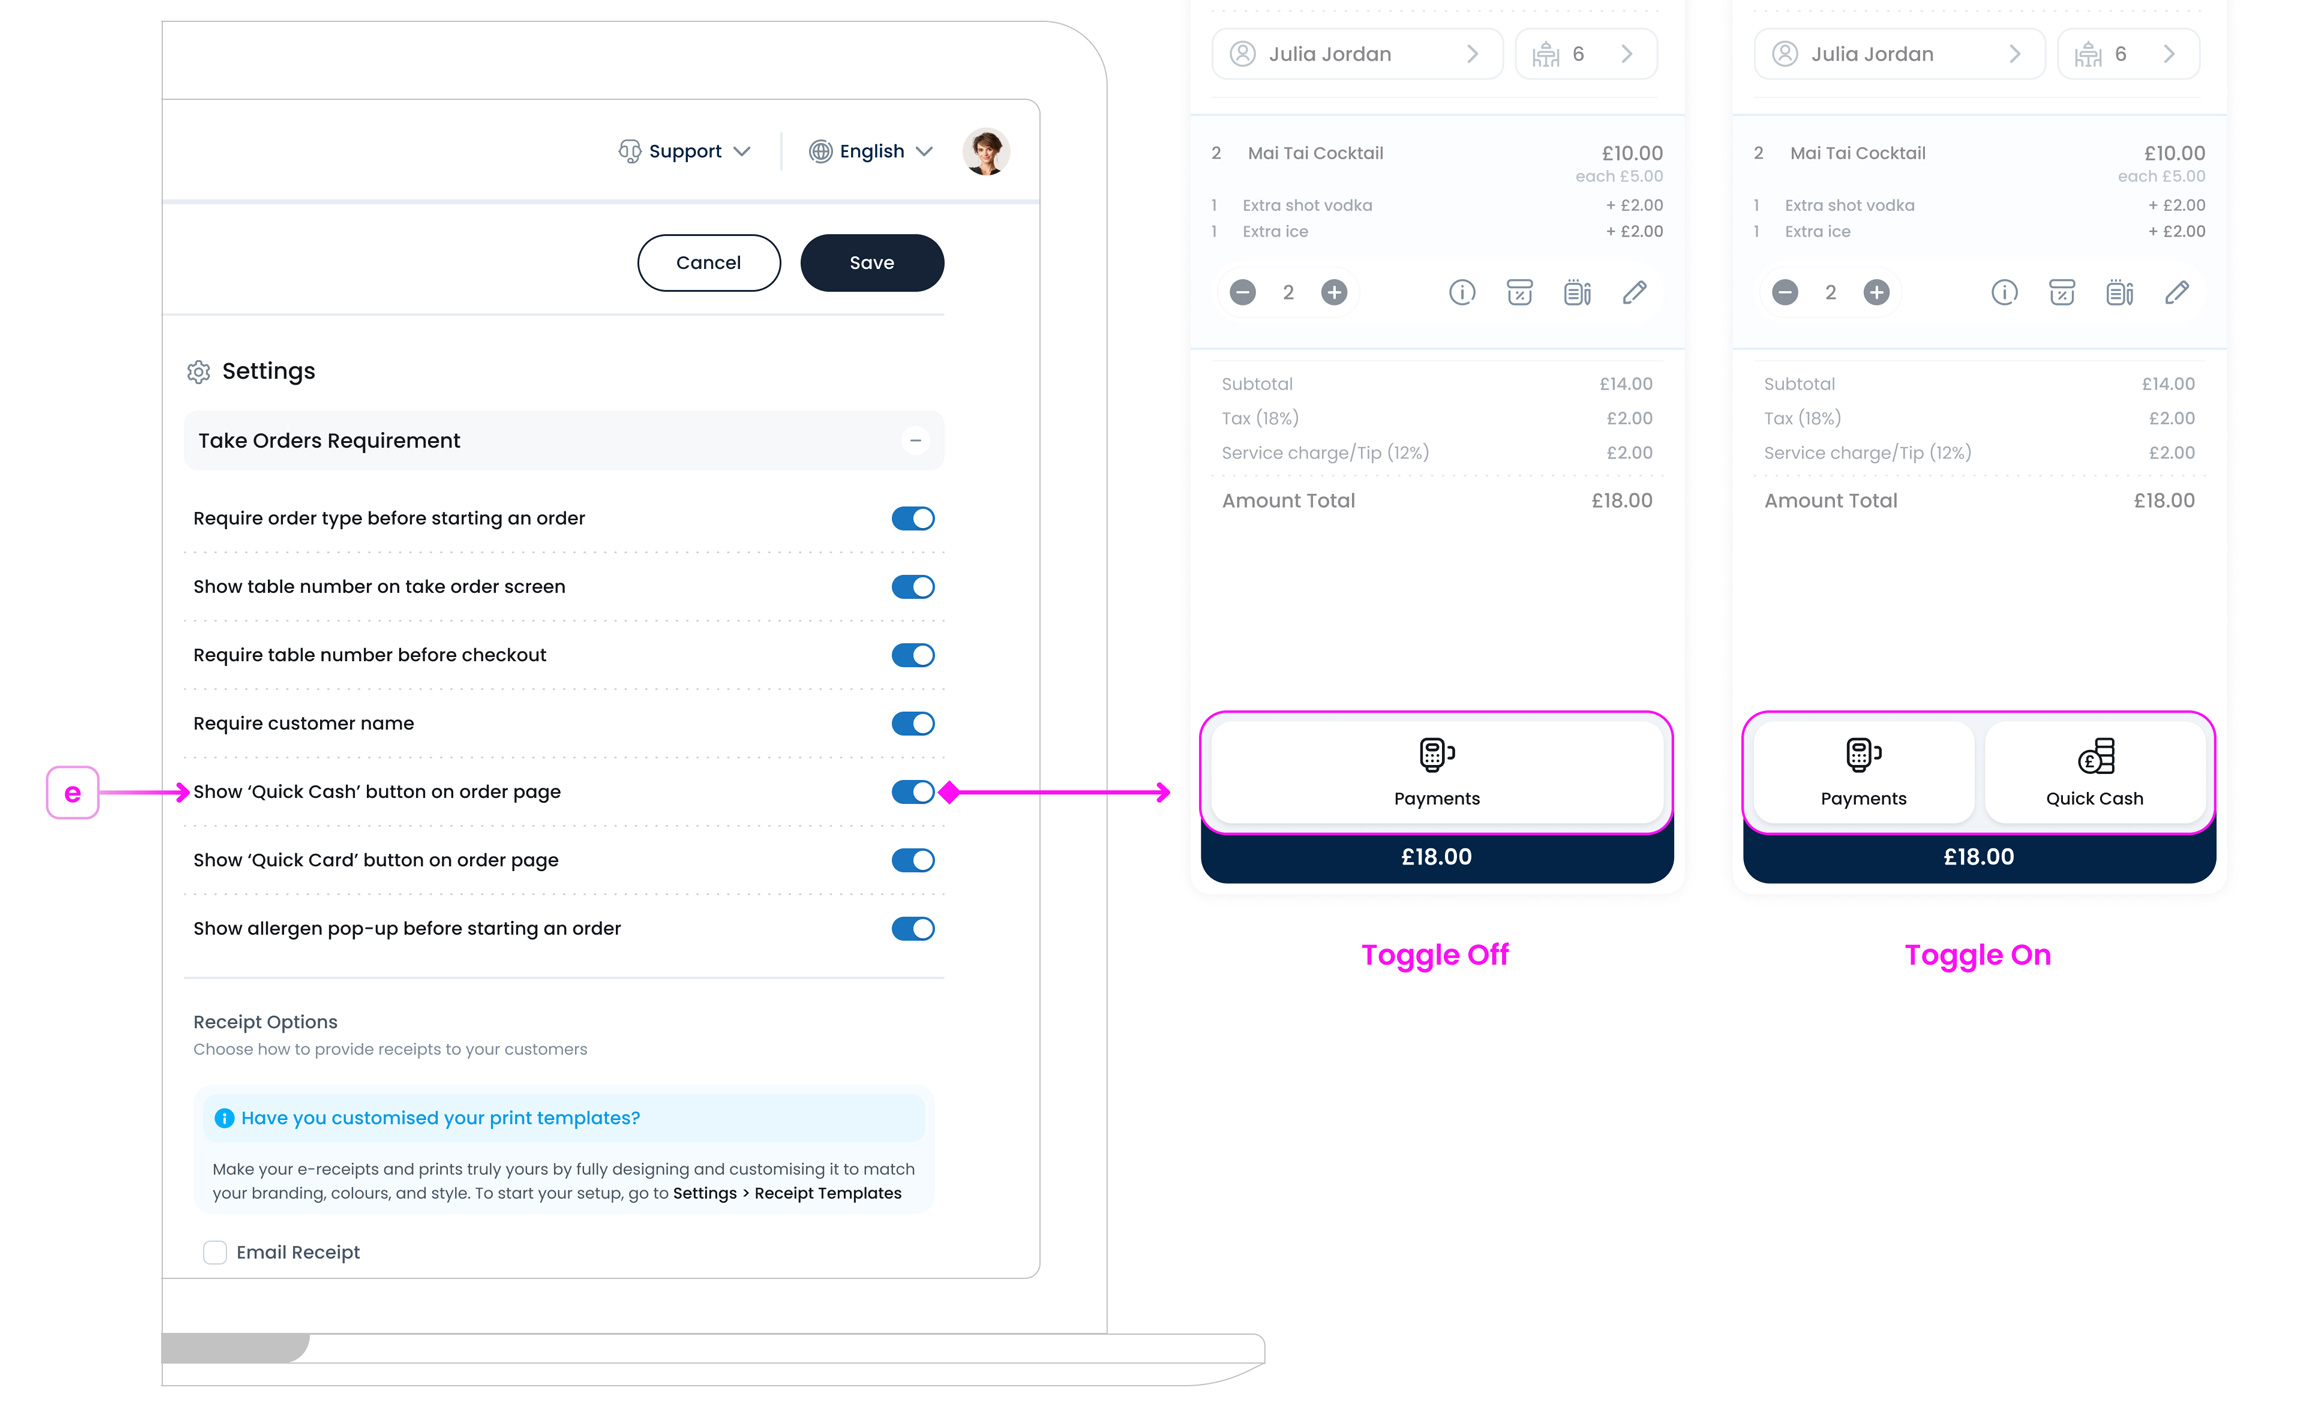
e. Show Quick Cash button on order page
- Turn ON to show a Quick Cash button under the basket that completes the order instantly as a full cash payment. It assumes the customer pays the exact amount due and skips the change entry step. The receipt options popup opens immediately after payment.
- Turn OFF to remove this shortcut. If your team often handles cash payments requiring change, use Payments > Cash instead this option lets staff enter the amount received and automatically calculates the change due.
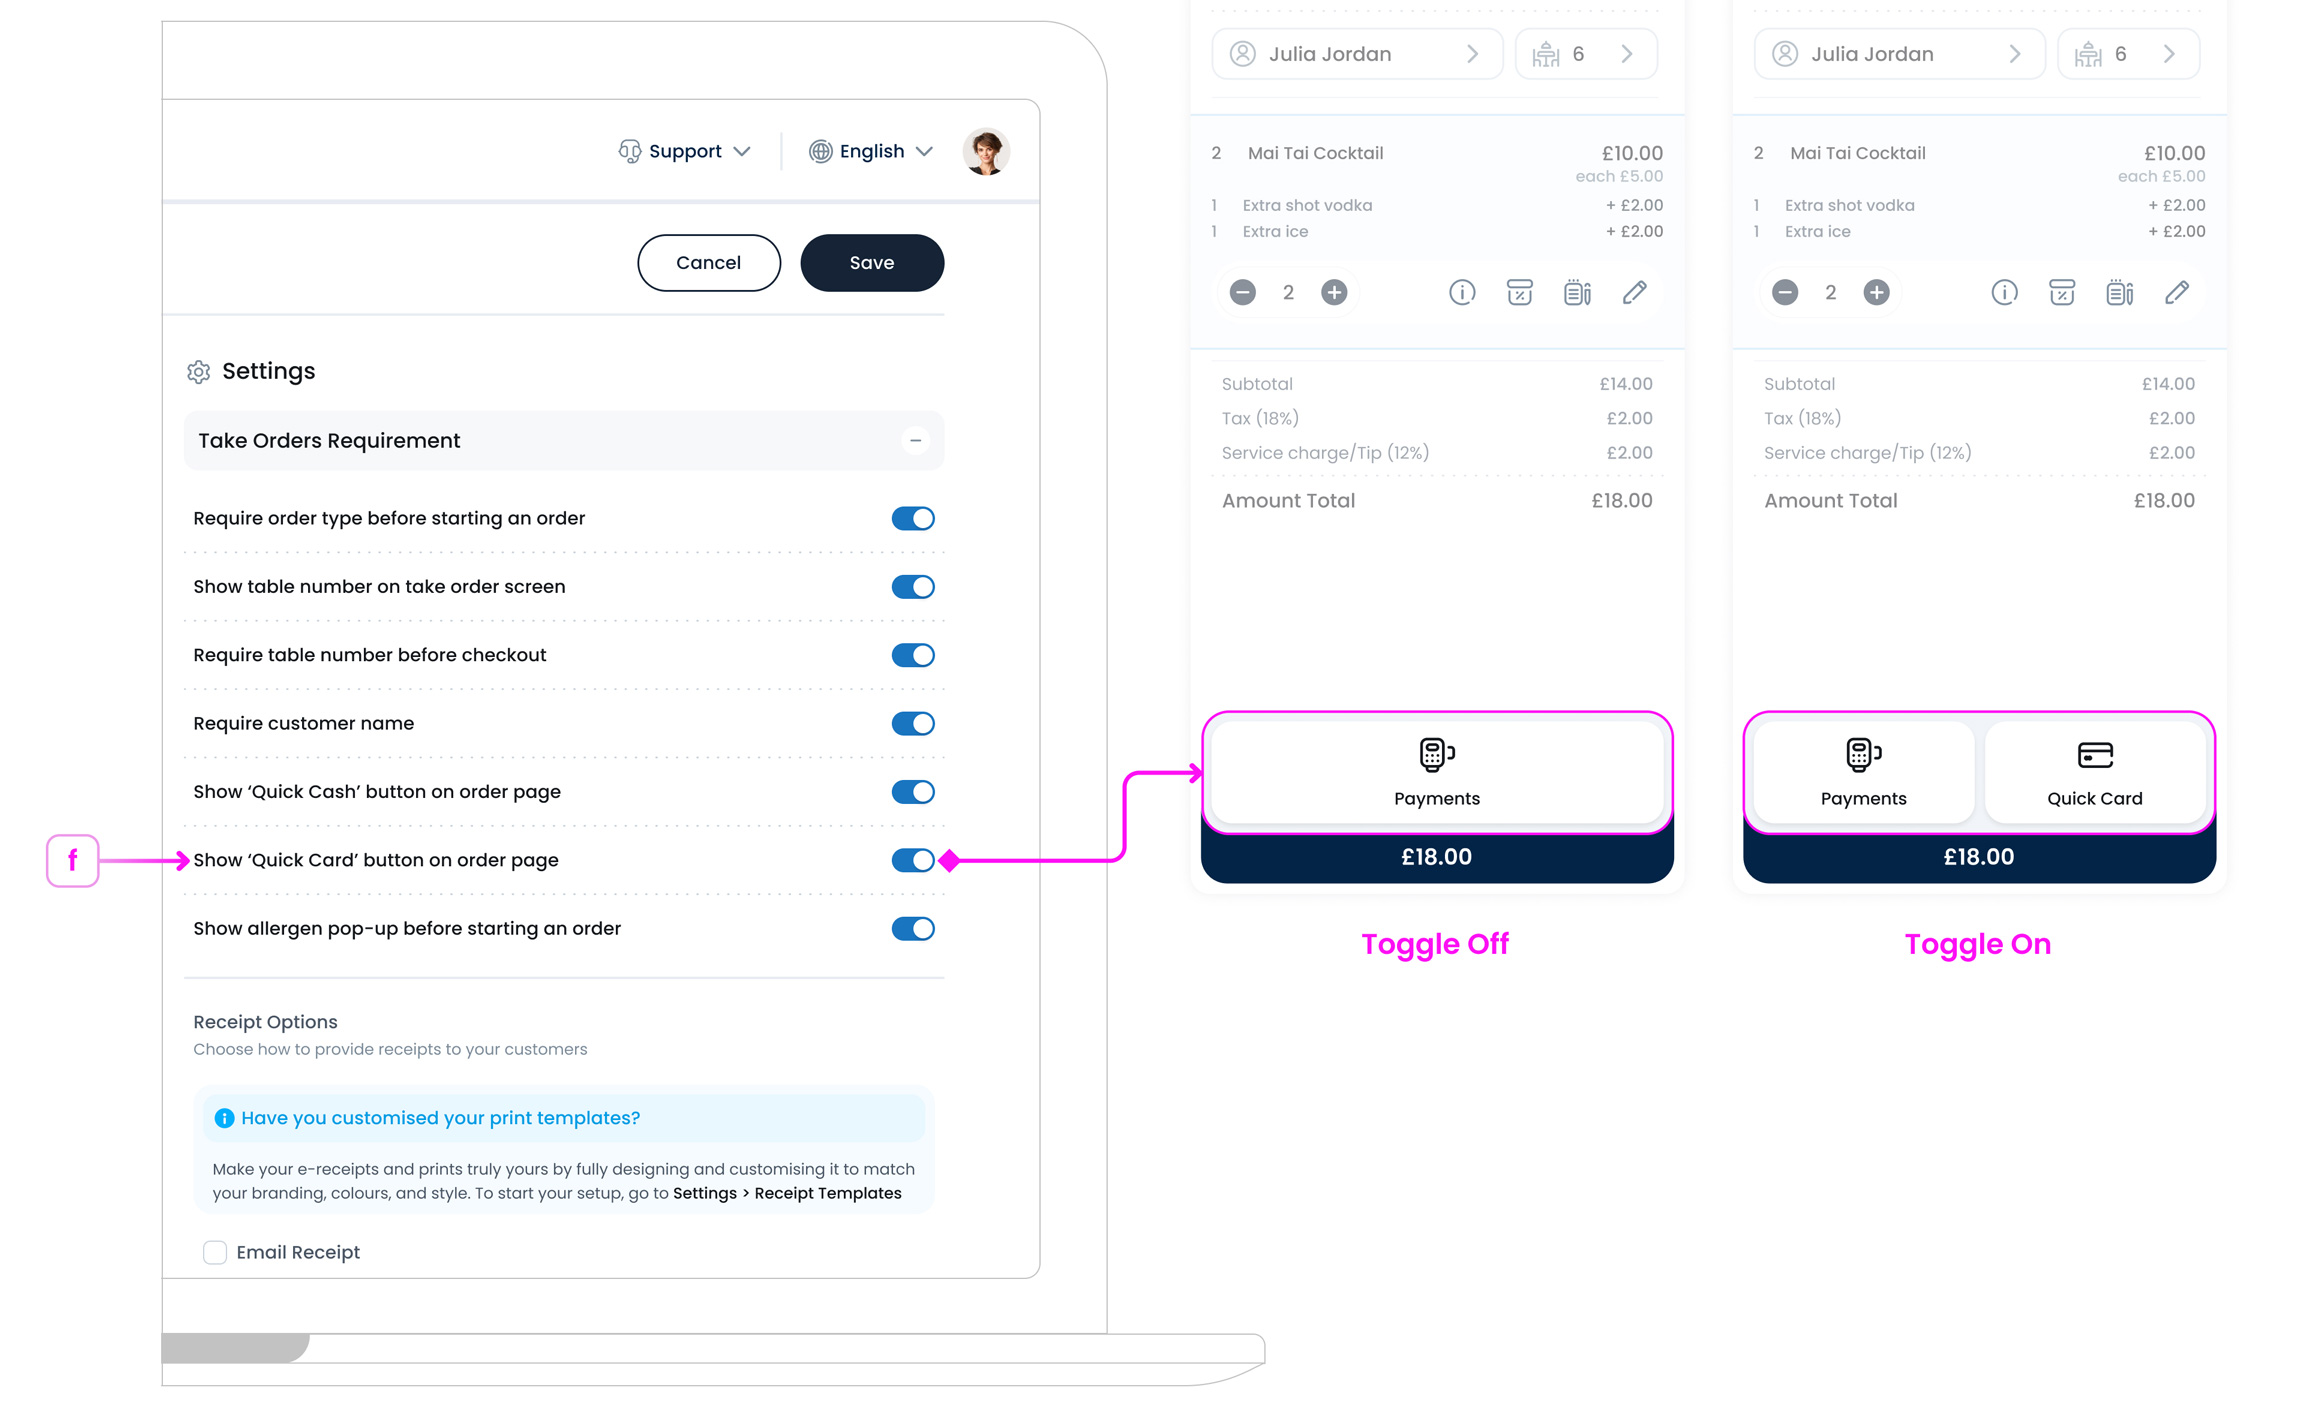
f. Show ‘Quick Card’ button on order page
- Turn ON to show a Quick Card button that sends the full Amount Due to the paired terminal immediately and, on approval, opens Receipt Options.
- Turn OFF to remove the shortcut. Staff can take card payments via Payments > Card using the full payment pop-up.
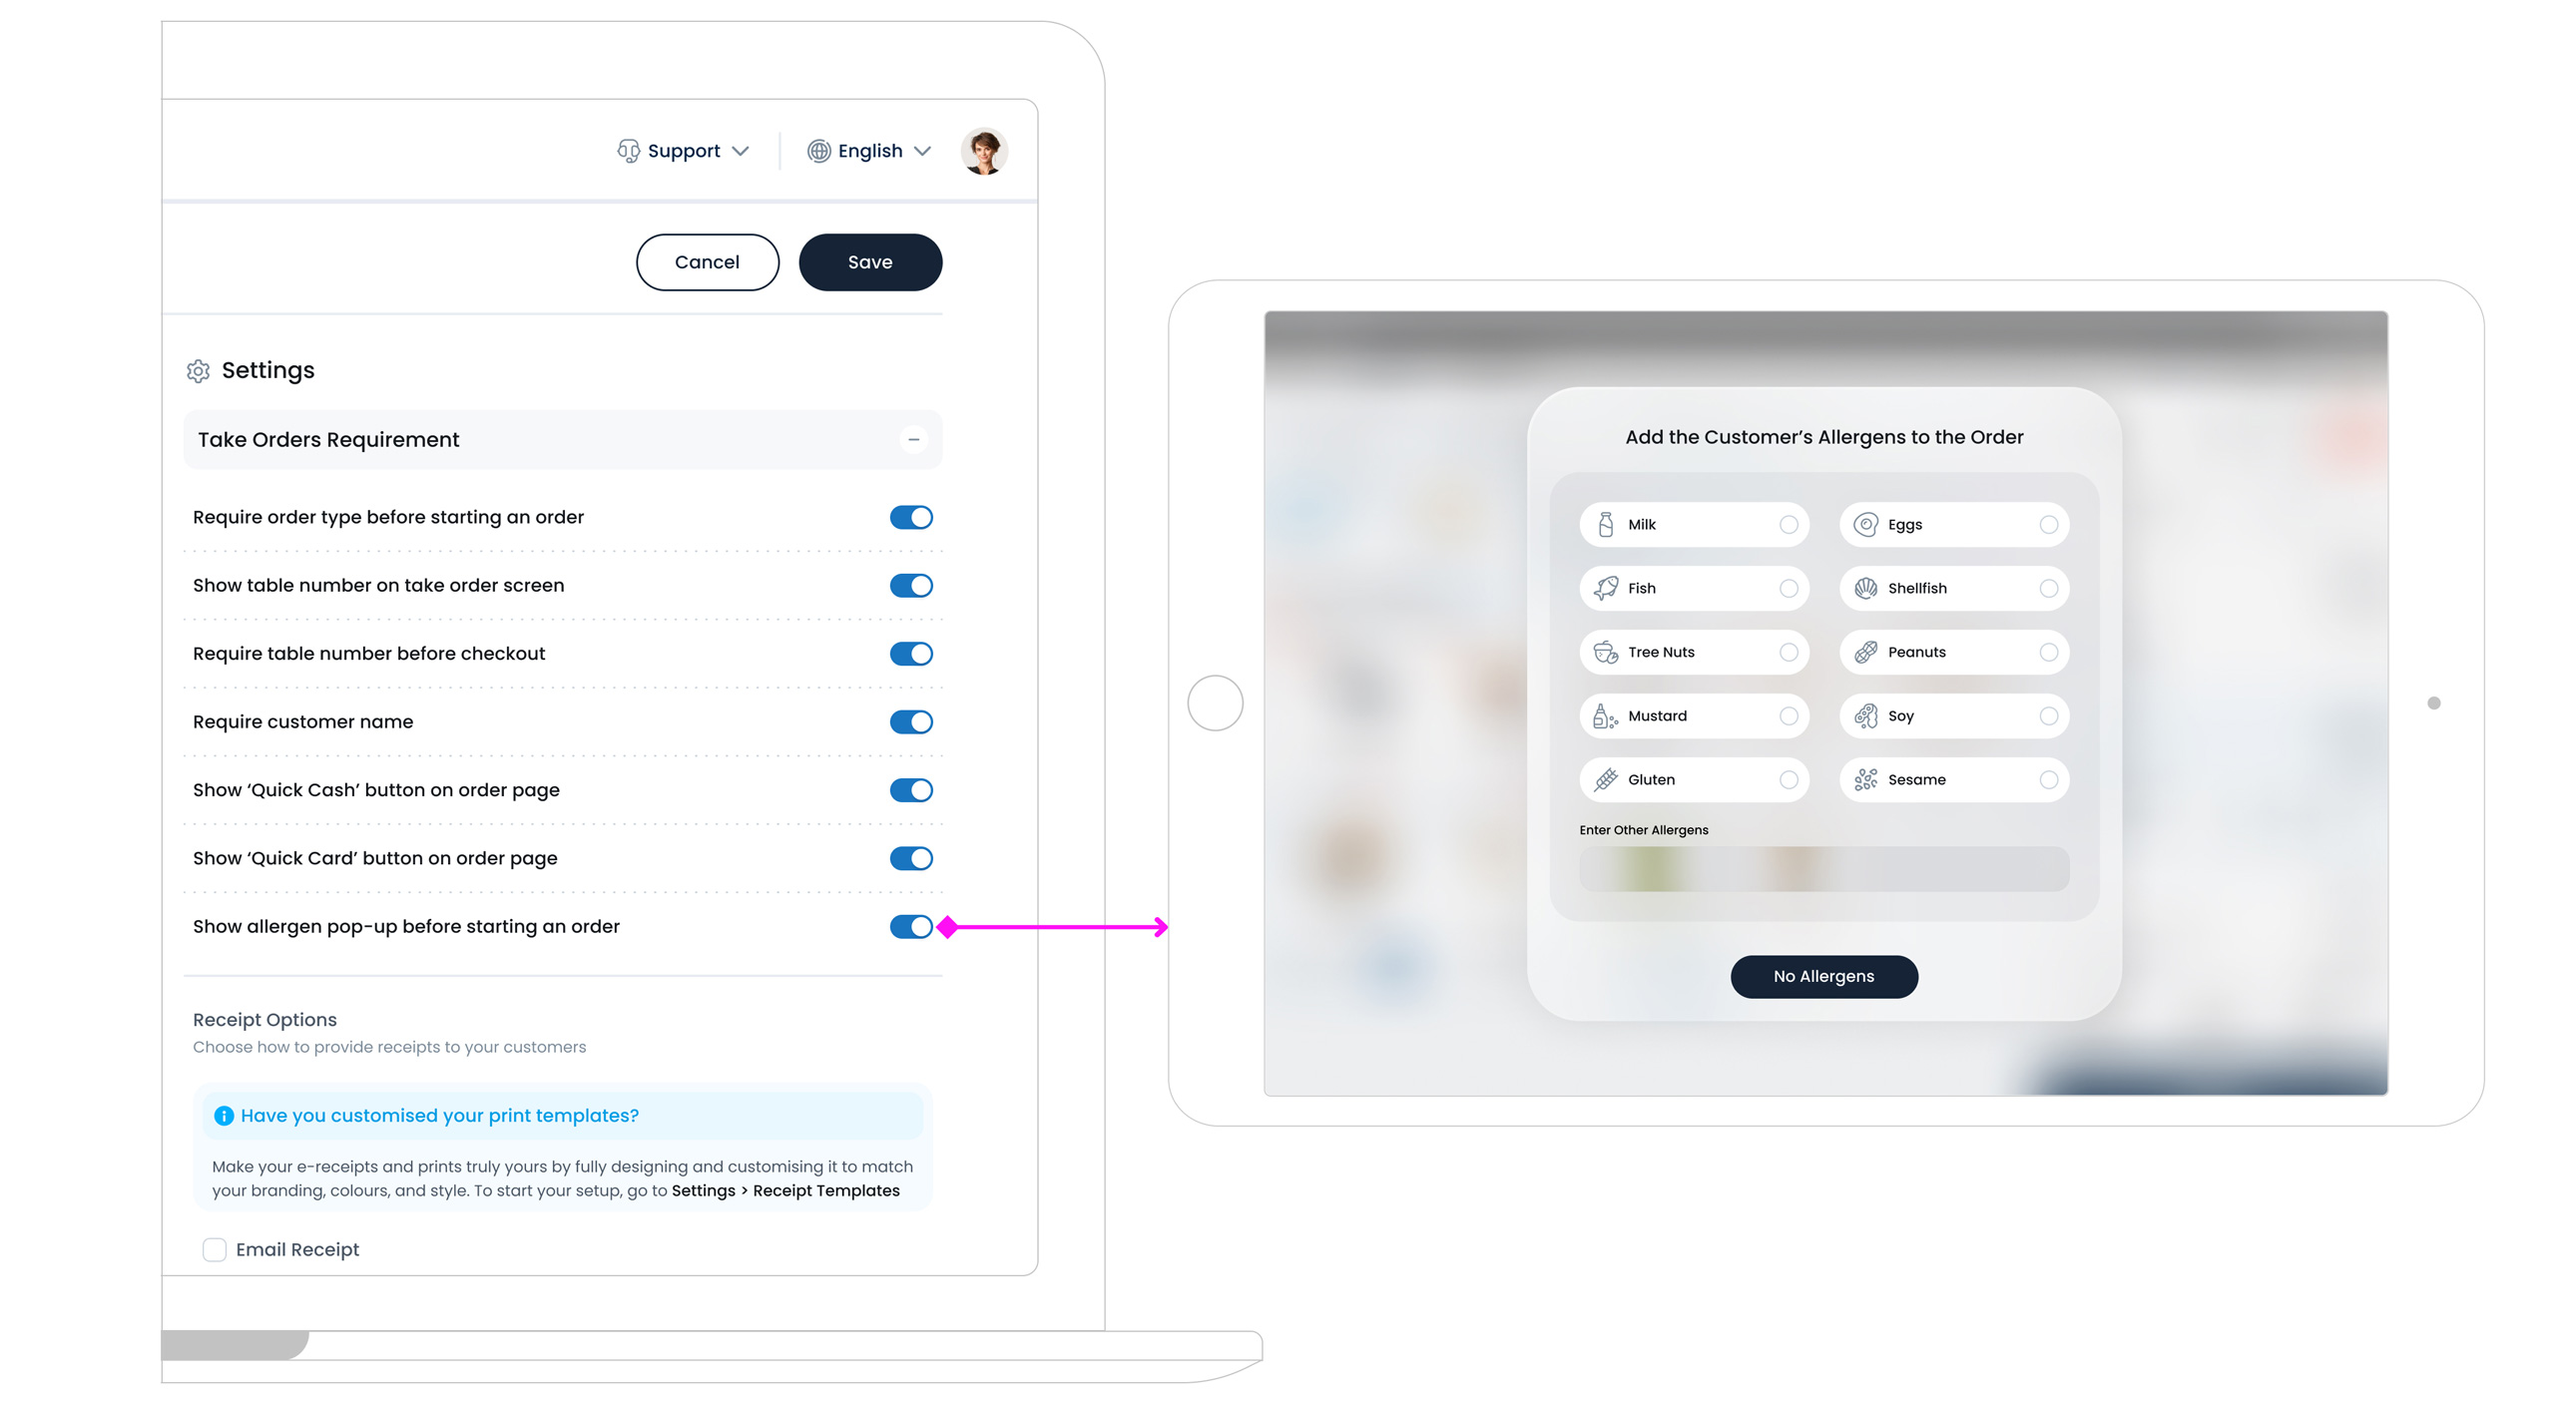
g. Show allergen pop-up before starting an order
- Turn ON to show a mandatory Allergen pop-up at the start of every order. Staff add the customer’s allergens in the pop-up and click Confirm to proceed.
- Turn OFF to start orders without a forced pop-up. The Allergens button above the basket remains available to add notes when needed.
h. Receipt Options
Choose how customers receive receipts at this POS. You can enable one or both options.
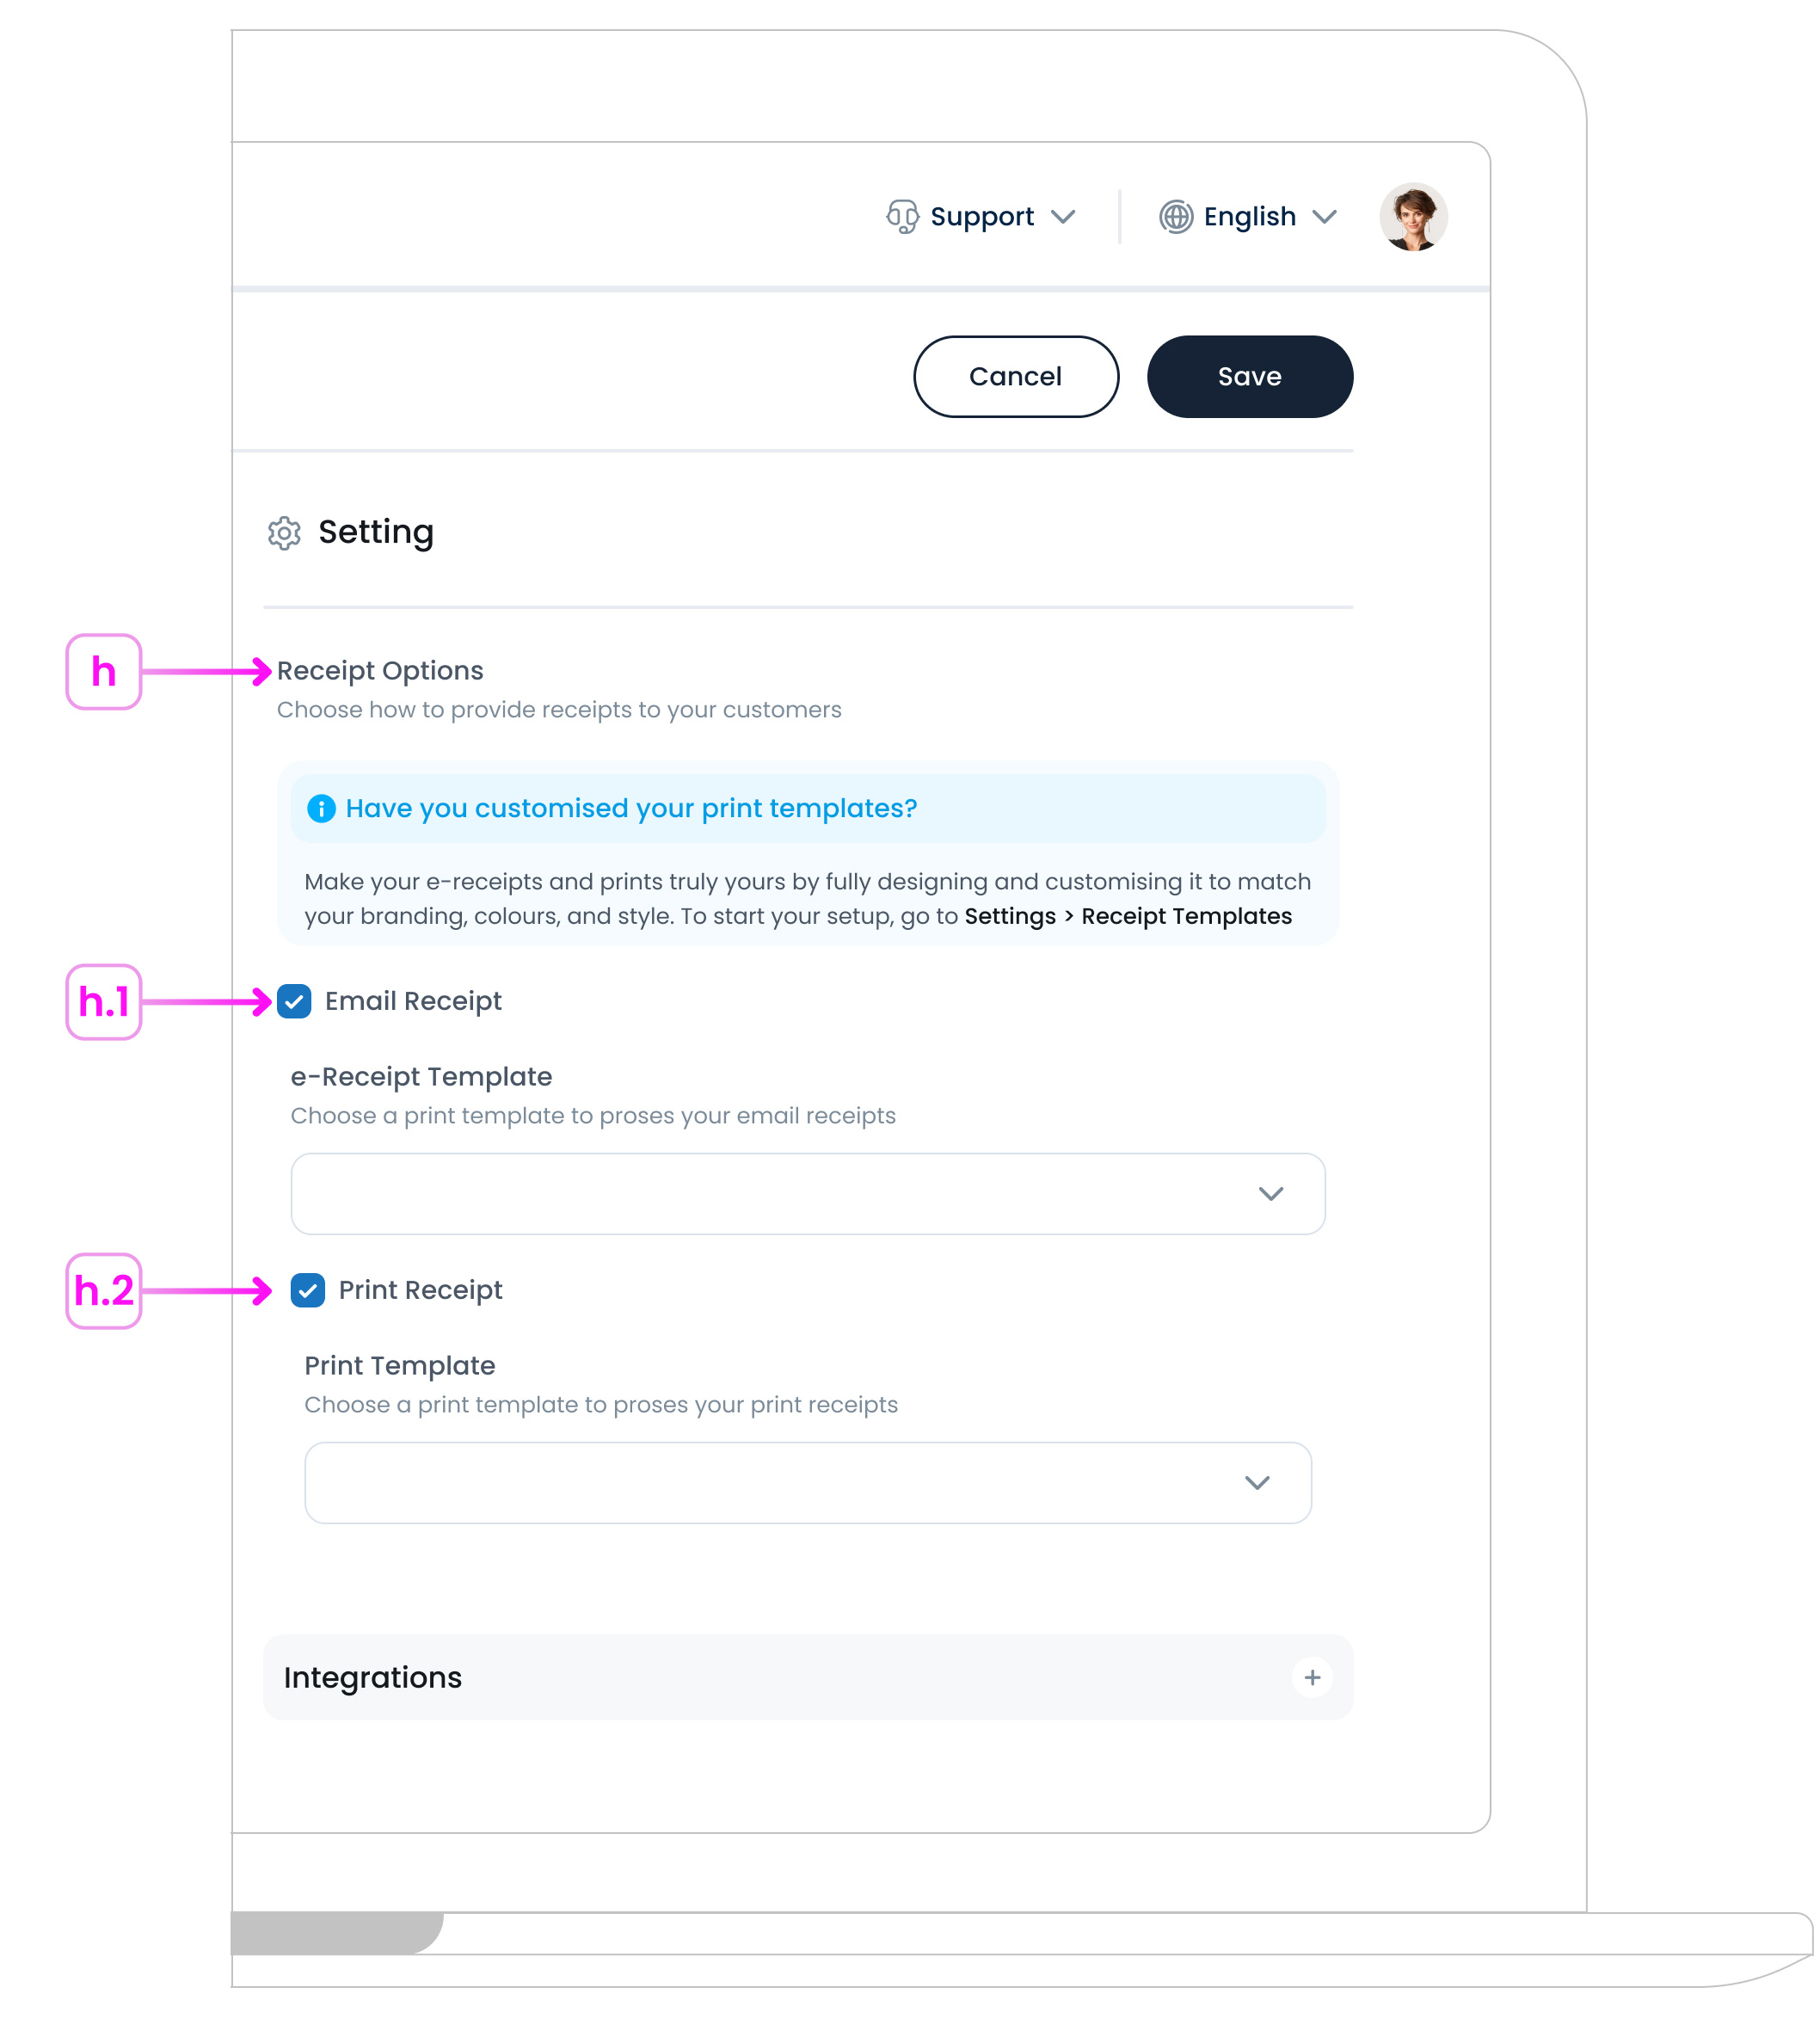
h.1. Email Receipt
Sends a digital receipt to the customer’s email using your configured email receipt template. Customise branding, footer text, and legal notes in Receipt Templates.
h.2. Print Receipt
Prints a paper receipt on your connected printer using the assigned print template. Ensure the printer is paired to this device/licence and mapped to the POS profile.
Step 3: Integrations
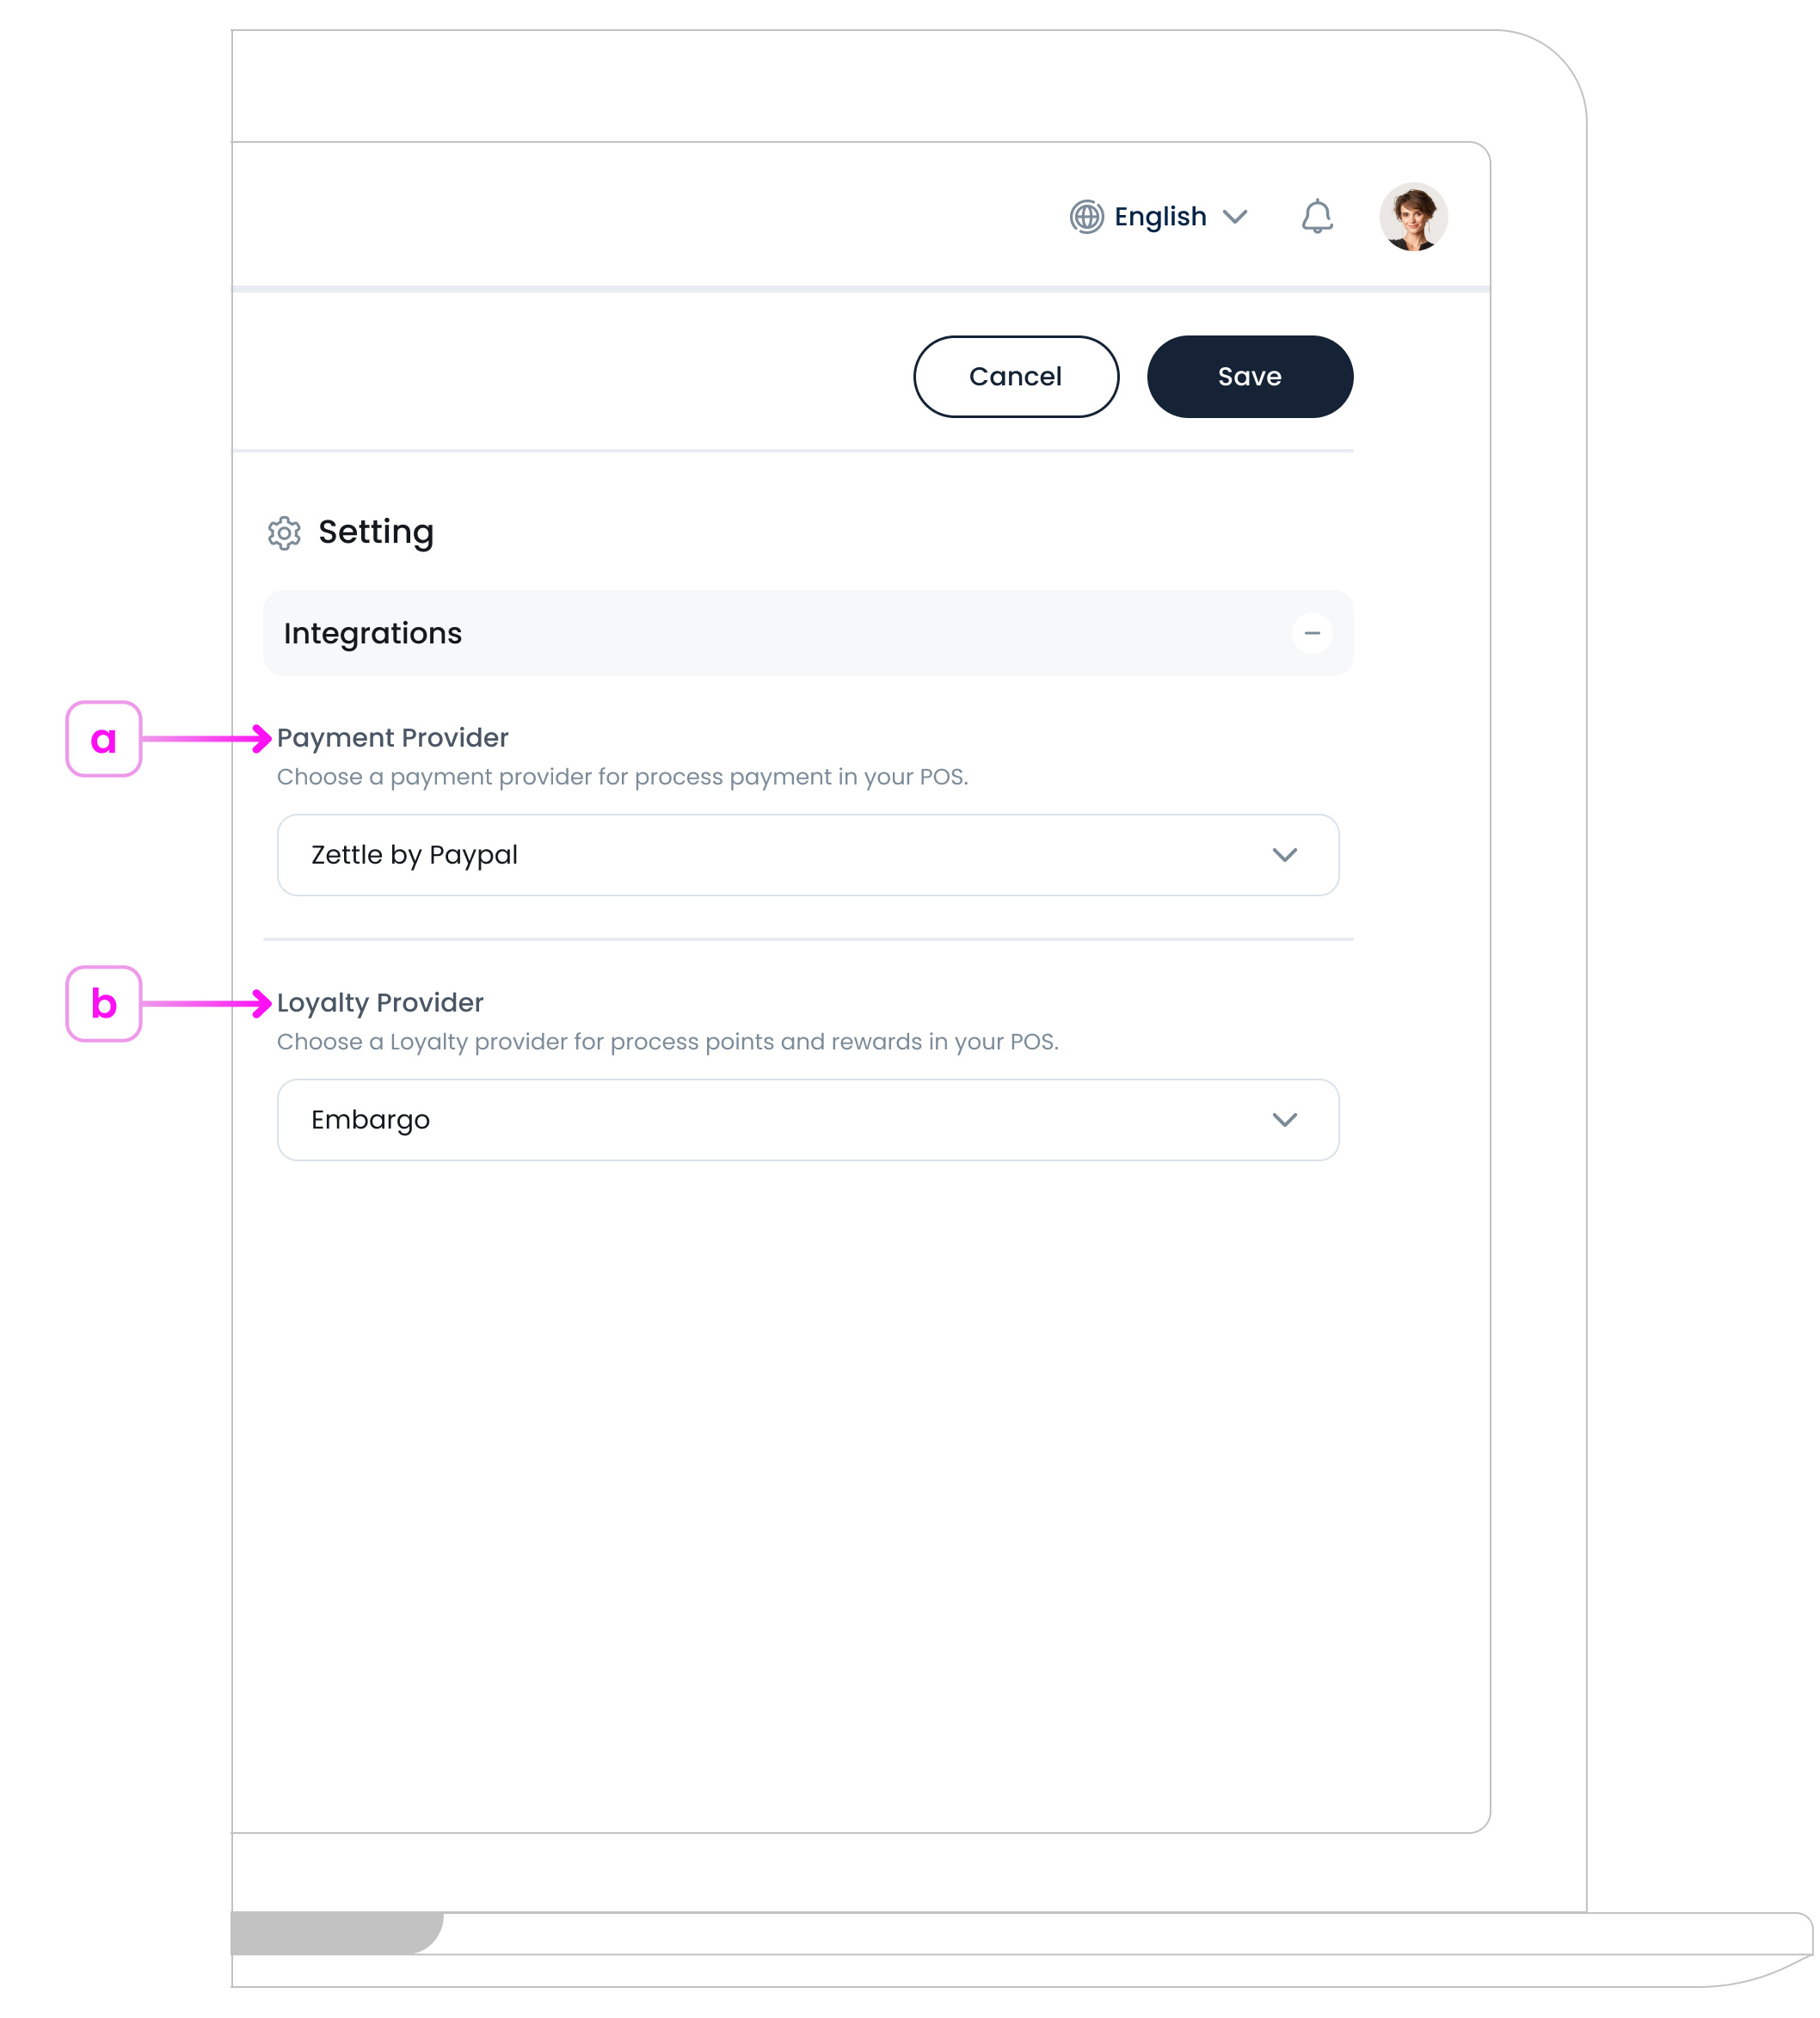
a. Payment Provider
Choose the payment service this POS will use at checkout. Options include Zettle, Worldpay, or SumUp.
Tip
Make sure the provider has been connected in your Integrations before selecting it here.
b. Loyalty Provider
Pick a loyalty service if you offer points and rewards at the till.
This is optional. Leave blank if you do not use loyalty.
Step 4: Save
When you are happy with your settings, click Save  at the top right.
What’s Next?
Assign this POS profile to a device in Settings > Devices & Profiles > Device Licences so the terminal uses your rules. If you plan to email or print receipts, review your Receipt Templates. You can also revisit Sales Types and Availability in System Settings to ensure your POS shows the right options during service.