Edit and Archive a POS Profile.
In the TechSuite portal, you can manage your POS Profiles by editing existing profiles or archiving ones you no longer need. Archiving safely removes a profile from active use while keeping its record intact, useful for seasonal setups, retired counters, or testing profiles.
Edit a POS Profile
You can update a POS Profile’s name, sales types, order-taking requirements (popups), receipt options, and integrations (payment and loyalty). This is helpful when refining your front-of-house flow or aligning settings across devices.

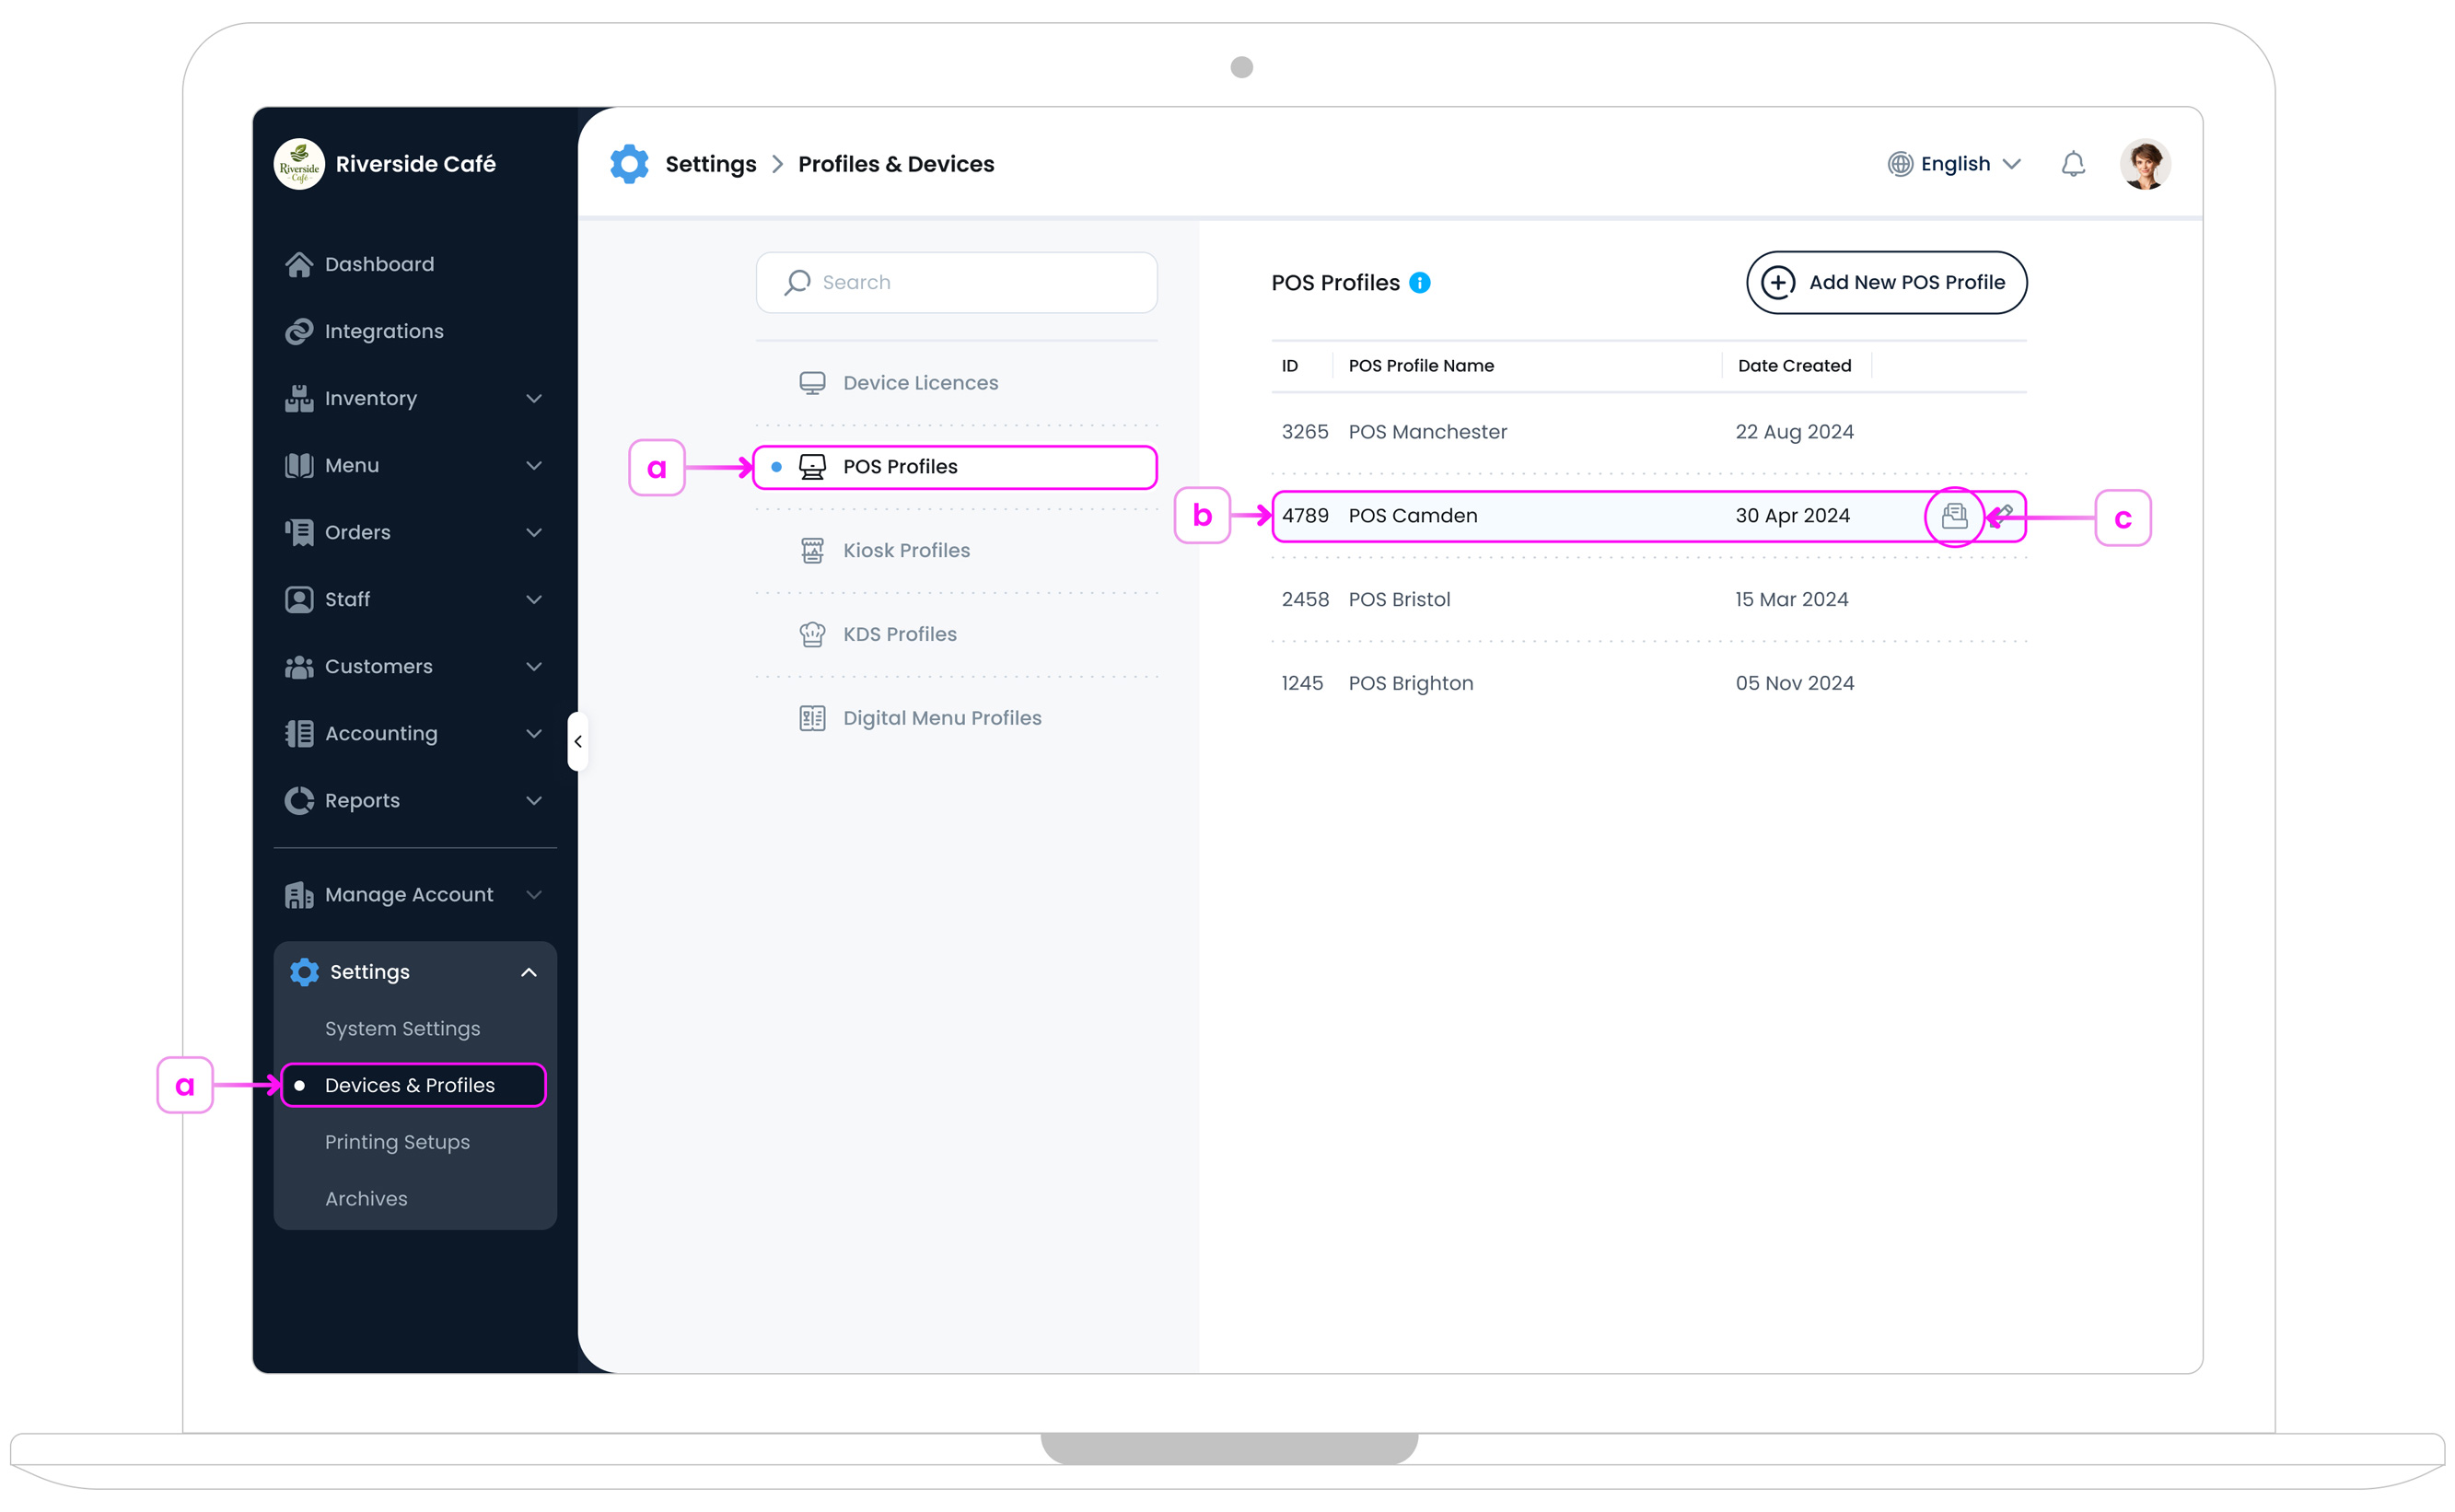
a. Open POS Profiles
Go to Settings > Devices & Profiles > POS Profiles.
b. Find the Profile
Find the POS Profile you want to edit from the list.
c. Click the Edit button
Hover on the row and click the Edit button ![]()
Update POS and Save Changes
Update the profile info (name), accepting order types, order-taking requirement popups (sales type, table, guest count, customer name), receipt options (email/print), and integrations (payment provider and loyalty). Then click Save  when you’re done. Updates apply to any device licences currently linked to this POS Profile.
Archive a POS Profile
Archiving removes a POS Profile from active selection while keeping it stored for later use. This is ideal for retiring a counter setup or pausing a seasonal flow without deleting it.
a. Open POS Profiles
Go to Settings > Devices & Profiles > POS Profiles.
b. Find the Profile
Choose the POS Profile you want to remove from active use.
c. Click the Archive Button
Hover on the row and click the Archive Button button.
d. Confirm Archive
A confirmation popup will explain that this action is reversible and the profile will no longer be available for device assignment. Click Archive to confirm. The profile stops being selectable, but remains stored for future restore.

Restore an Archived POS Profile
Restore a previously archived POS Profile to make it active again.

a. Open Archives
Go to Settings > Archives.
b. Choose POS Profiles
Select the POS Profiles section.
c. Find the Profile
Search or browse to locate the POS Profile you want to restore.
d. Restore
Click the Unarchive button ![]() . The profile returns to your active list with its settings intact.
. The profile returns to your active list with its settings intact.
What’s Next?
Assign this POS Profile to a device under Settings > Devices & Profiles > Device Licences. If needed, review printing templates and payment/loyalty integrations so each terminal behaves exactly as intended.