Inventory Locations
Inventory Locations help you manage and label where your stock is physically stored across your business. These can be assigned to items to support more accurate tracking, better organisation, and multi-site stock control.
Understanding Inventory Locations
Inventory Locations are used to define where each item is physically stored, whether it’s in a warehouse, a fridge, a kitchen prep area, or a branch-specific storeroom.
They help you:
- Track stock levels by storage location
- Support multiple kitchens or sites within one system
- Assign different stock to different branches or storage zones
- Improve clarity when restocking or performing audits
Each location you create becomes selectable when adding or updating inventory items.
To Get Started
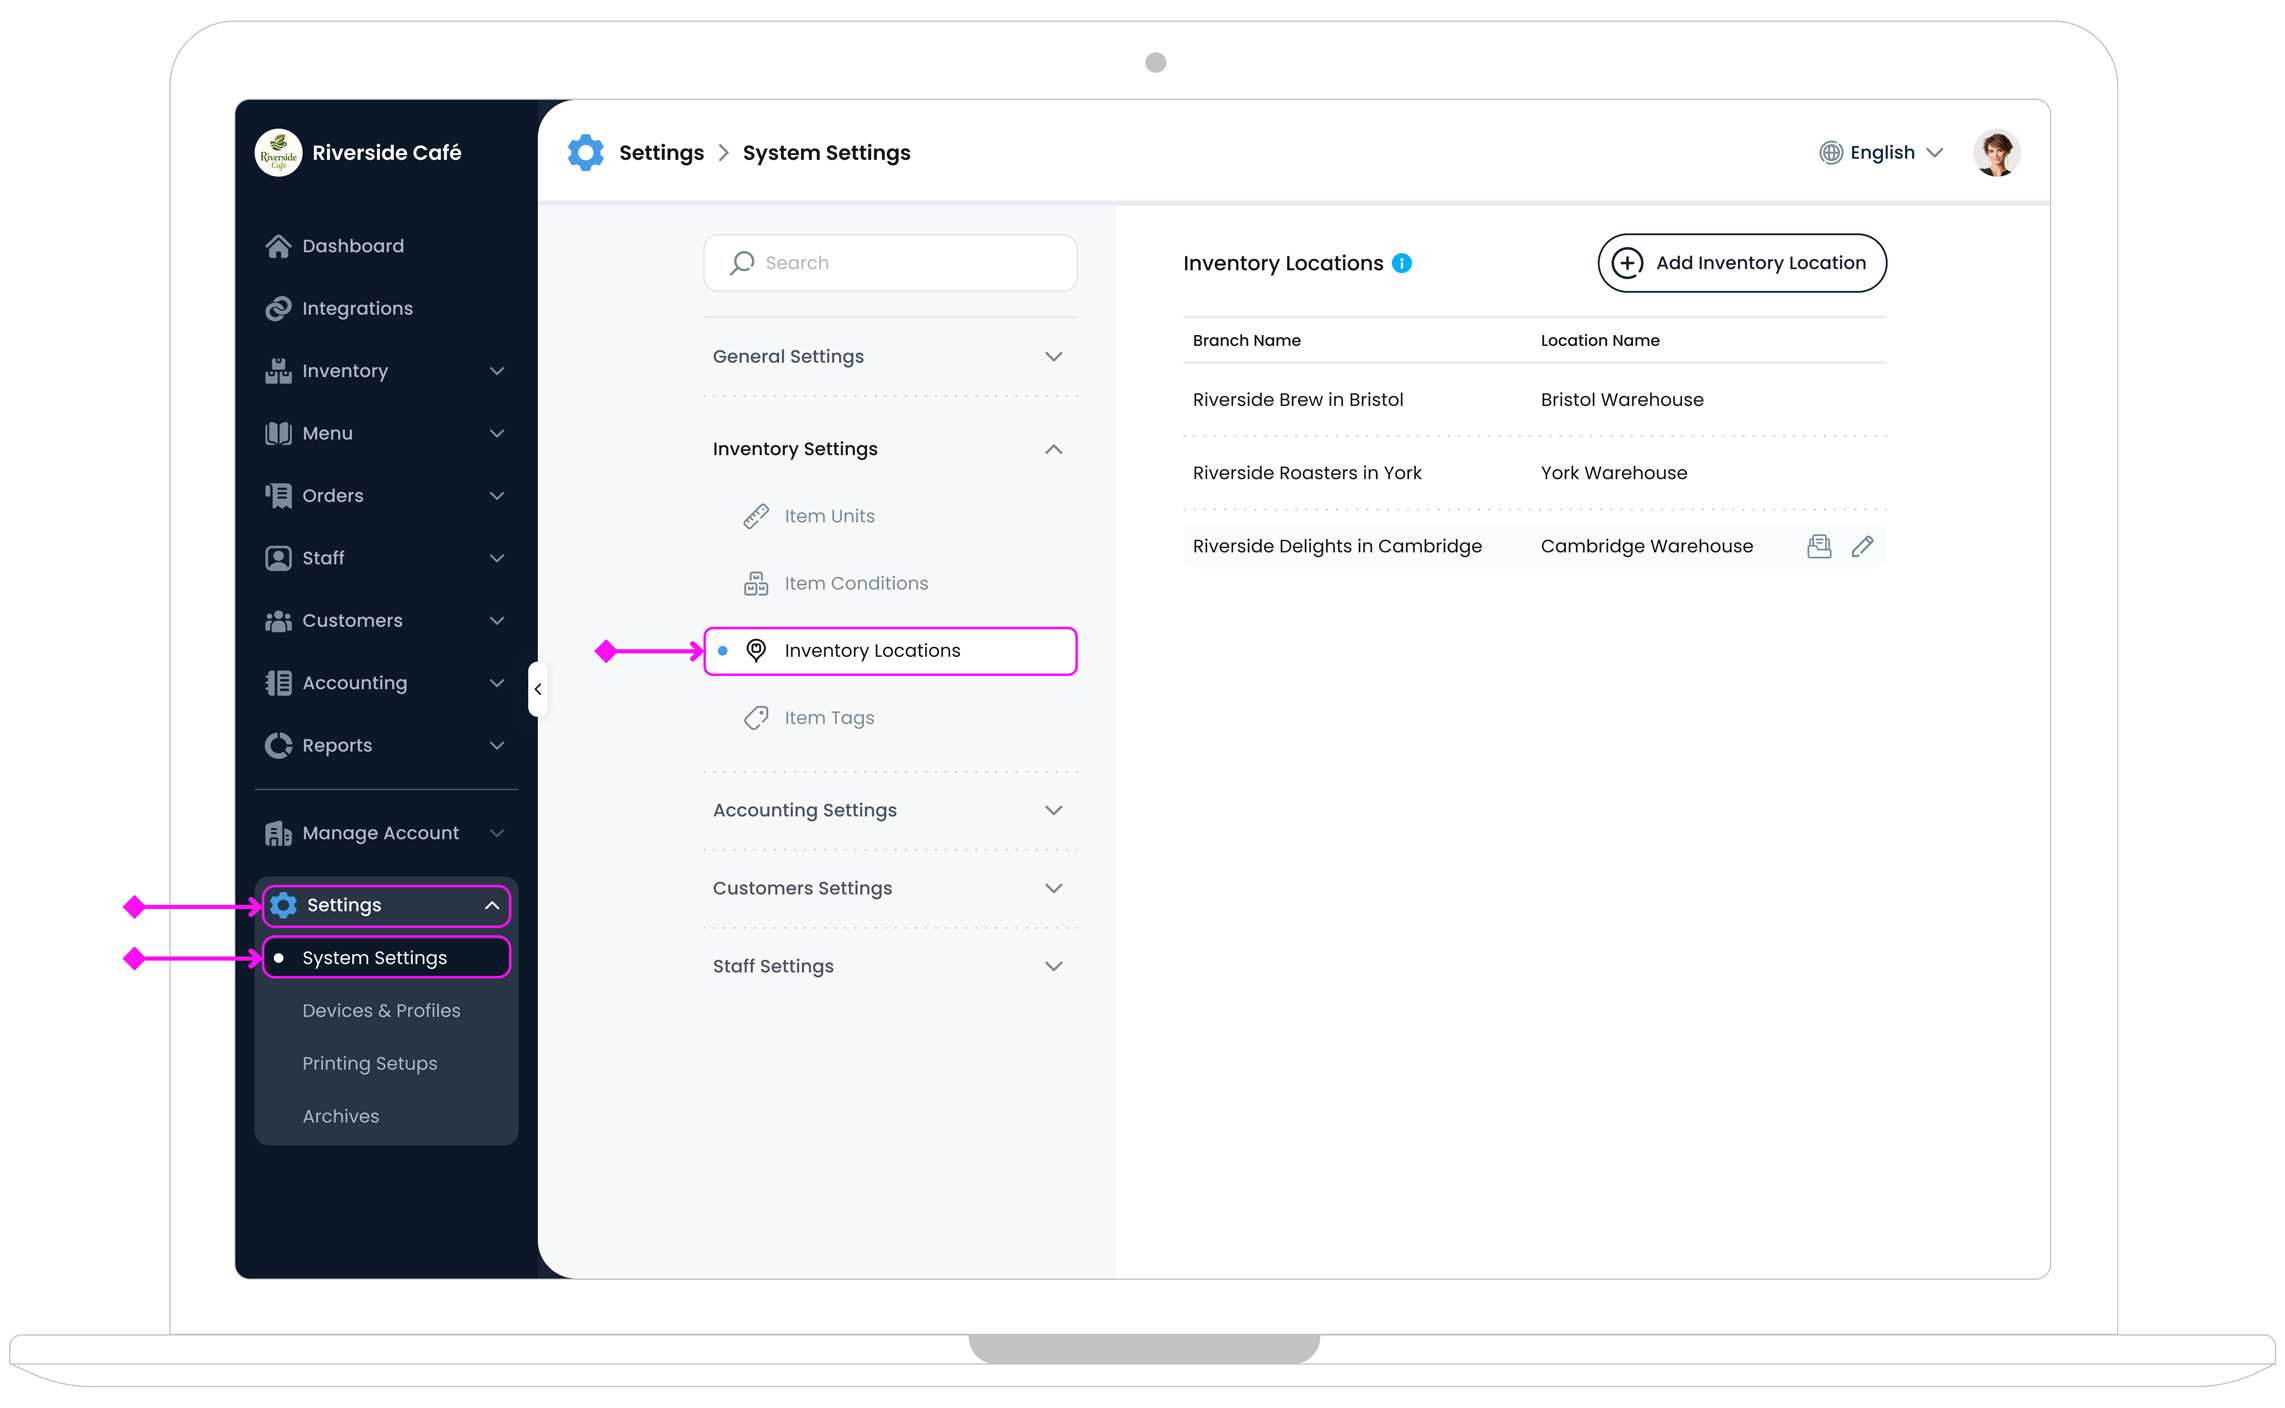
To access Inventory Locations settings, log in to the TechSuite portal and go to Settings > System Settings from the sidebar. Next, under the Inventory Settings section, click Inventory Locations. On this page, you’ll see your main branch name listed as the default location. You can always add more locations to reflect specific storage areas, kitchens, or zones within your operation.
Adding a New Inventory Location
To add a new inventory location, click the Add Inventory Location button  in the top-right corner of the page. Then fill in the following fields:
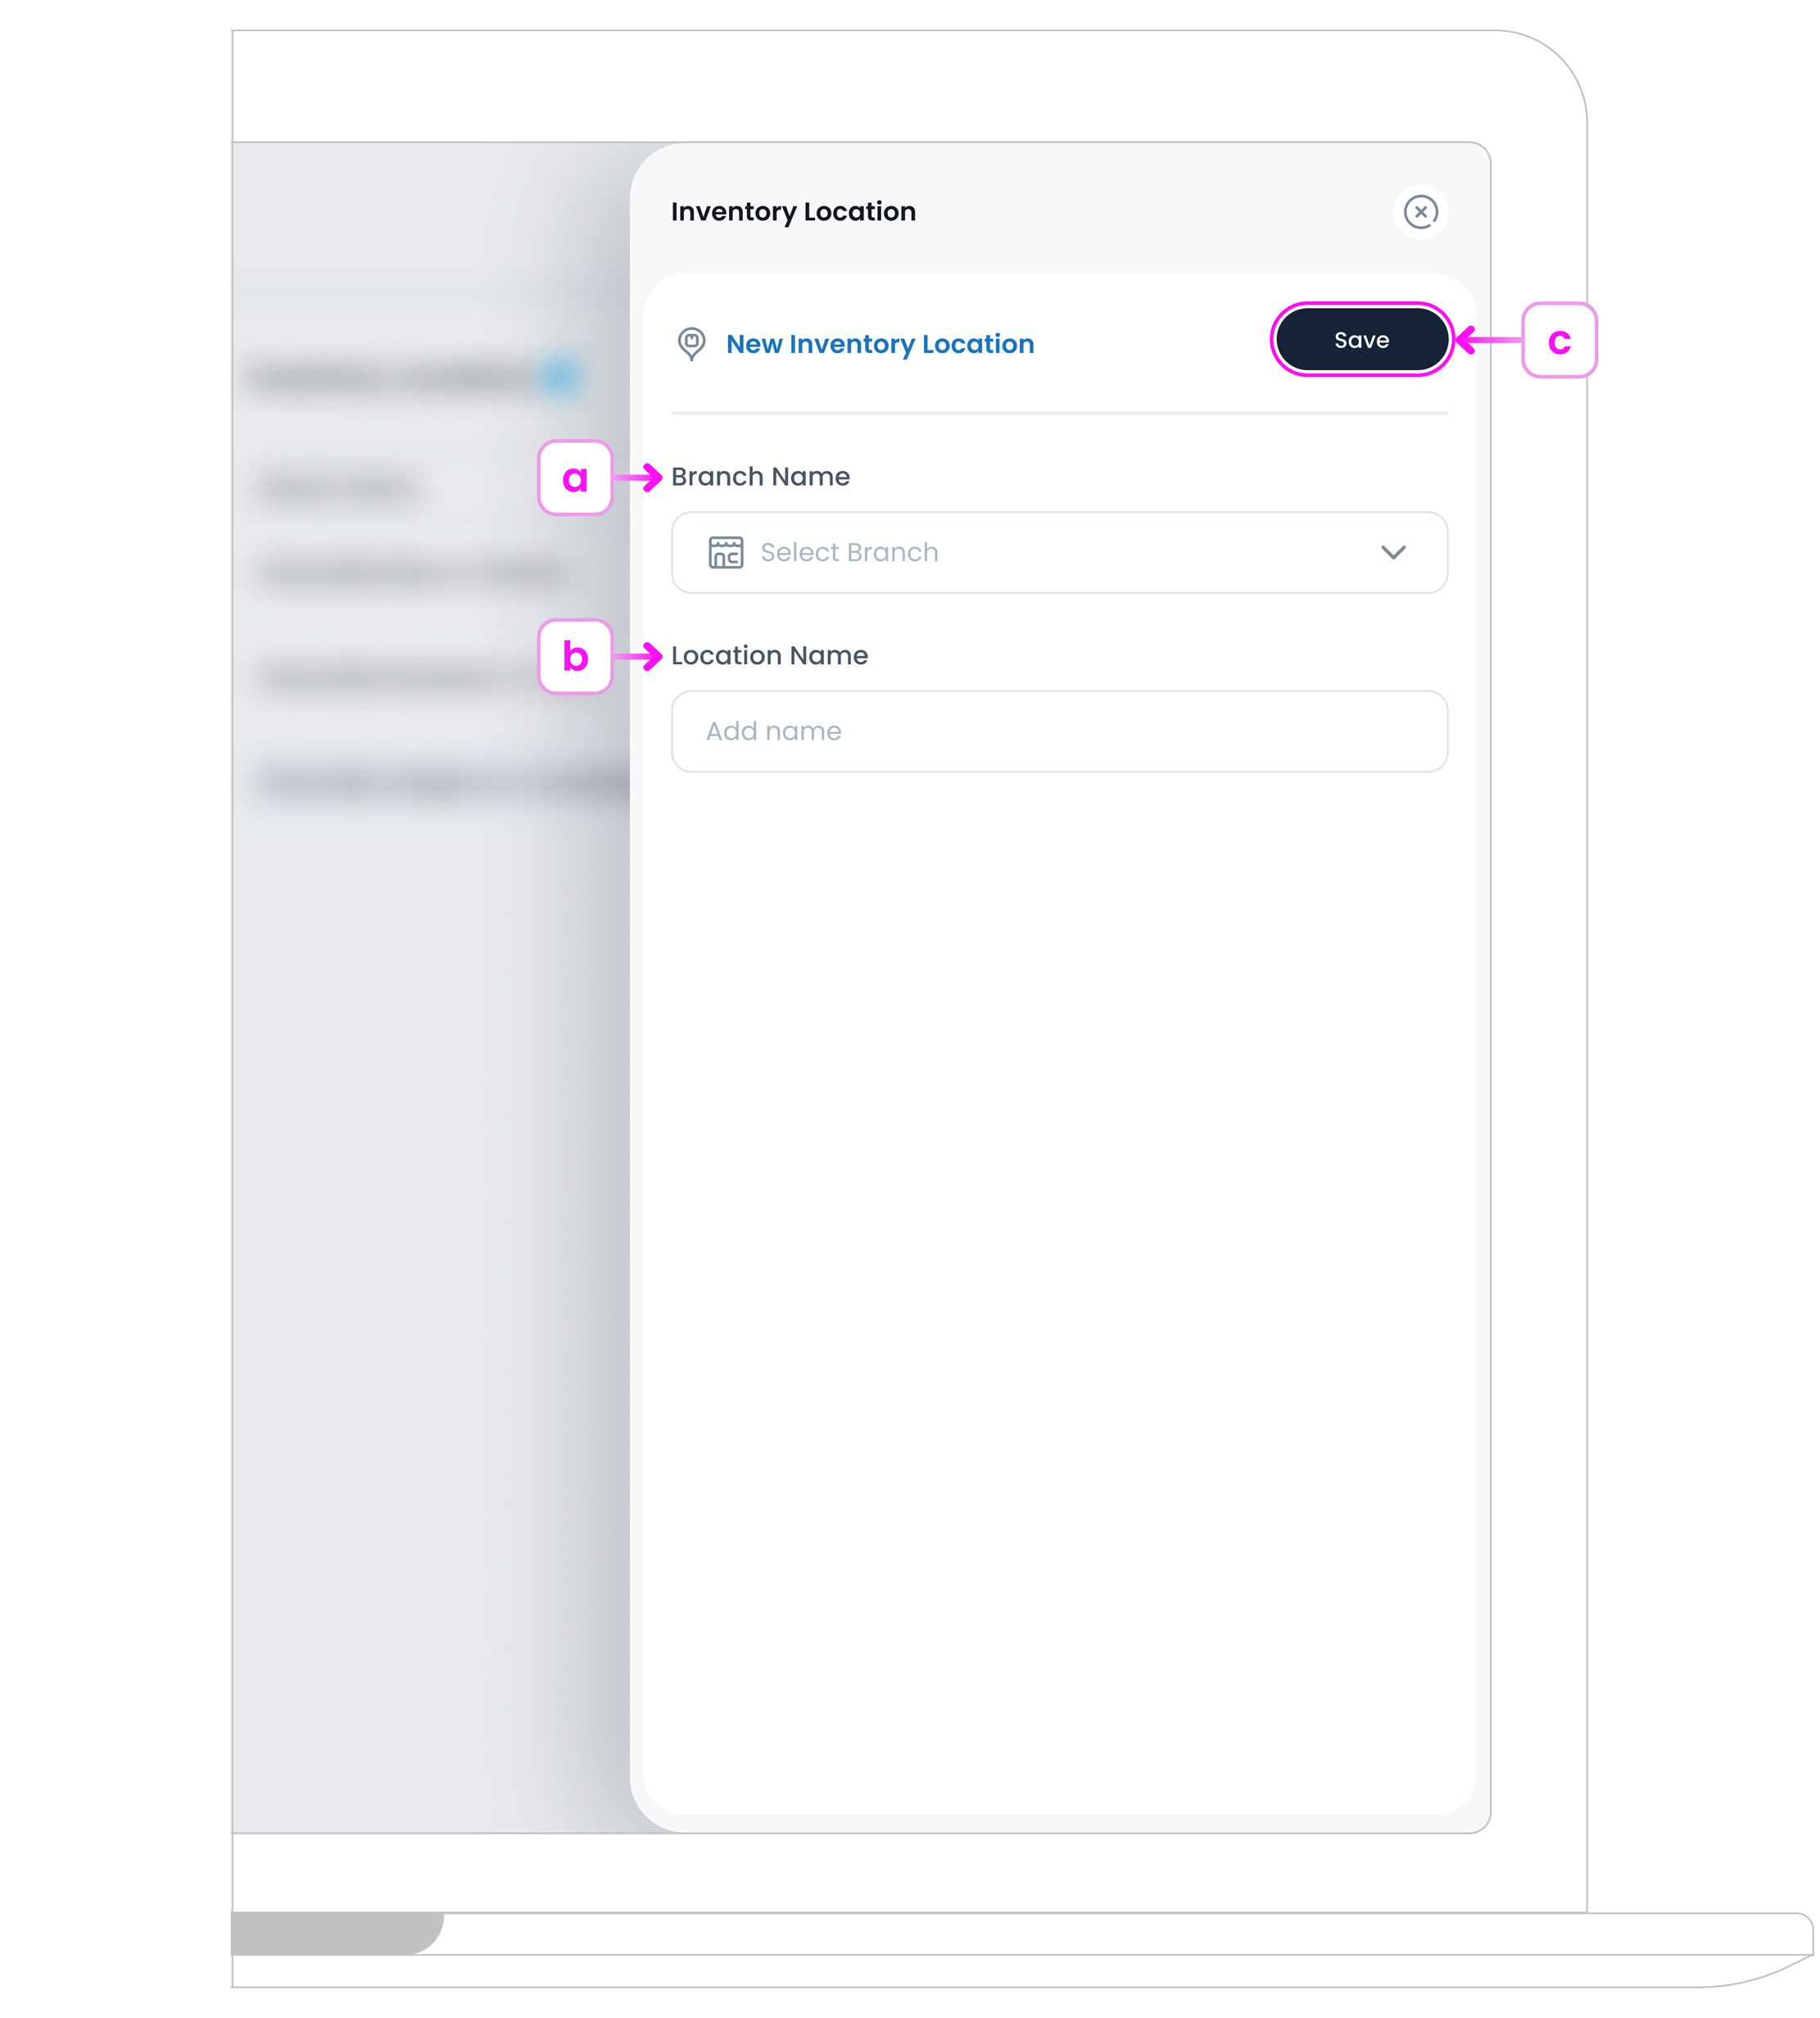
a. Branch Name
Select which branch this location belongs to.
Single Branches
If your business operates across multiple branches, you’ll see a dropdown to select the correct one. For single-branch businesses, the dropdown is hidden and the location is automatically linked to your main branch..
b. Location Name
Enter a short and descriptive name for the storage area (like Main Warehouse, Fridge 1, Back Room).
c. Save the Location
Click the Save button  to add it to your system. The new location will now appear in your list and can be assigned to any item you create or edit.
Inventory Locations Page Overview
Inventory Locations allow you to manage where stock is stored or used within each of your business branches. You can use them to represent kitchens, storage rooms, bars, or any other physical or logical area within your operation.
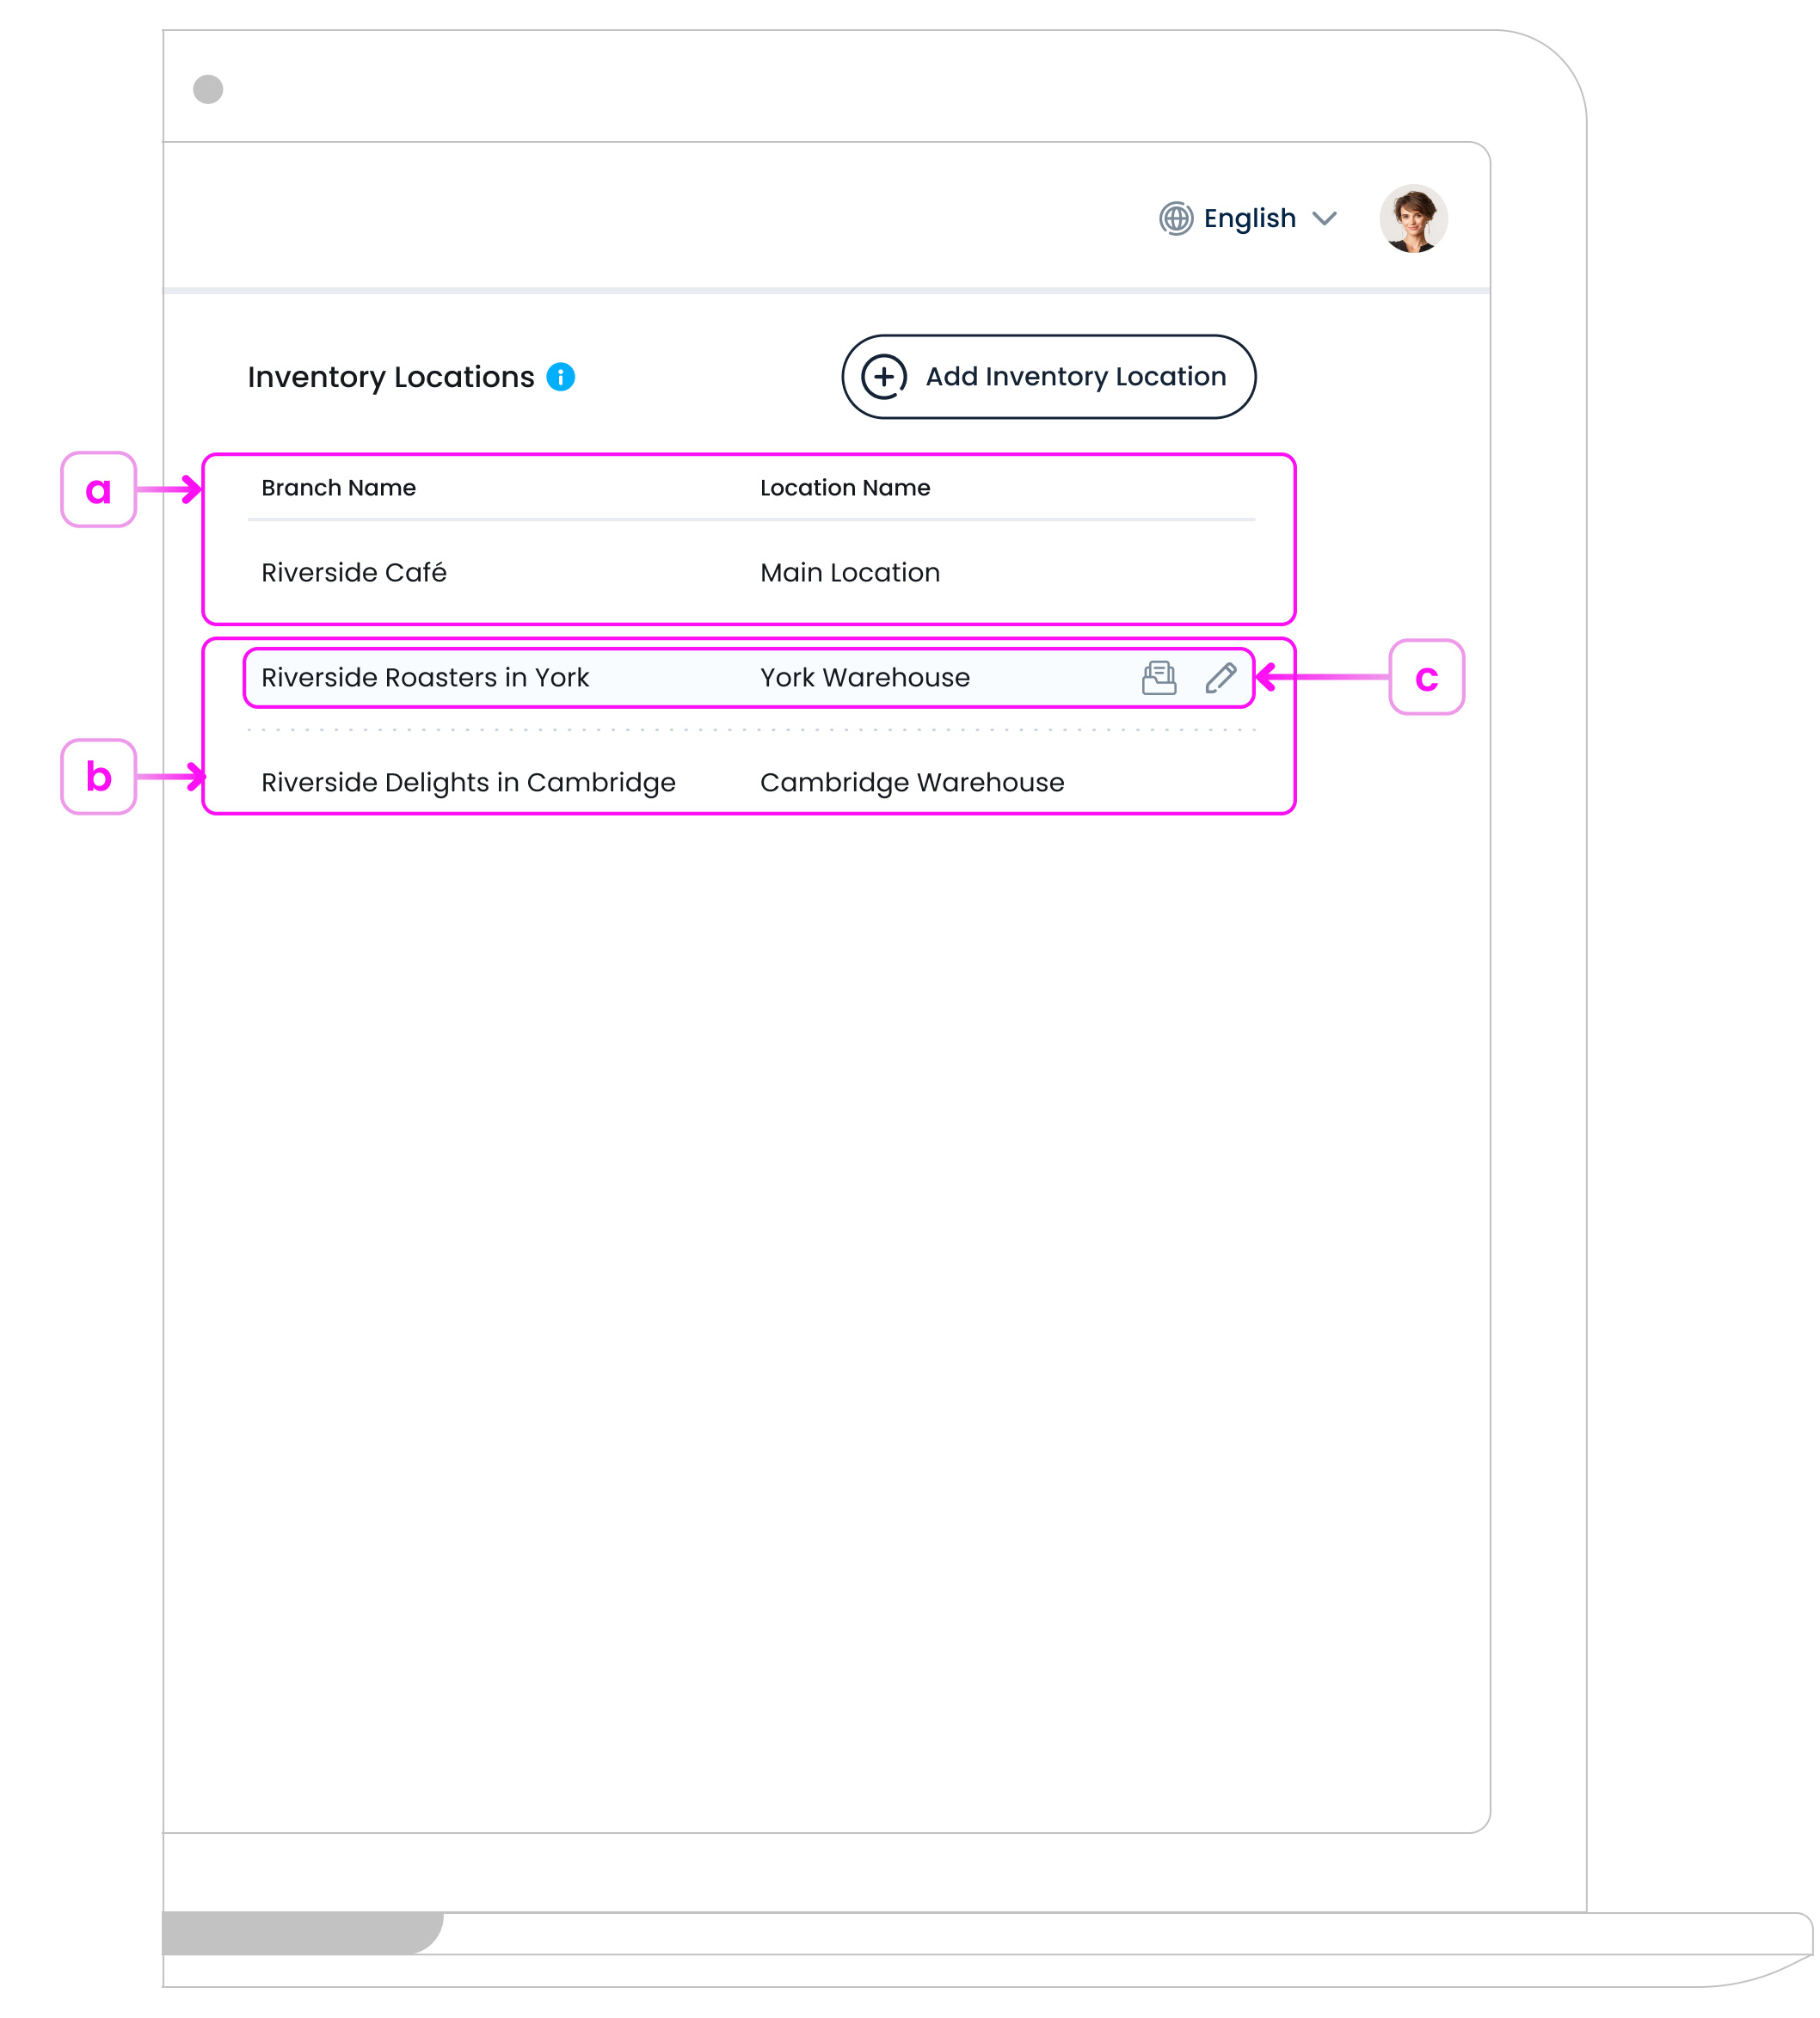
a. First Default Location
When you create your first branch in TechSuite, a default inventory location is automatically created for it. This location is named Main Location and serves as the base stock area for your initial branch.
You can rename this location if needed, but it cannot be deleted.
b. Custom Locations
You can add as many custom Inventory Locations as you need within each branch. These locations help you organise stock and track movement more accurately.
Examples include:
- Storage Room
- Bar Fridge
- Outdoor Bar
- Prep Kitchen
Each custom location is tied to a specific branch, and users must select which branch the location belongs to when creating it. If your business has only one branch, this selection step is hidden.
c. Understanding Inventory Location Rows
Each row in the Inventory Locations list shows the following details and actions:

Here’s what each part of the row represents:
- Branch Name: Displays the name of the branch that the location belongs to.
- Location Name: Shows the name of the storage area (e.g. Main Warehouse, Cold Room).
- Edit Location Button: An edit icon appears when you hover over a row. Click it to open and update the location’s name.
- Archive Location Button: An archive icon appears when you hover over a row. Use this to delete the location from the list while keeping a record of it in your system.