Custom Reasons
Custom Reasons let you provide quick, predefined explanations for staff actions such as cancelling orders, applying refunds, removing service charges, or voiding items.
These reasons help maintain clear communication within your team and improve reporting accuracy across the system.
To Get Started
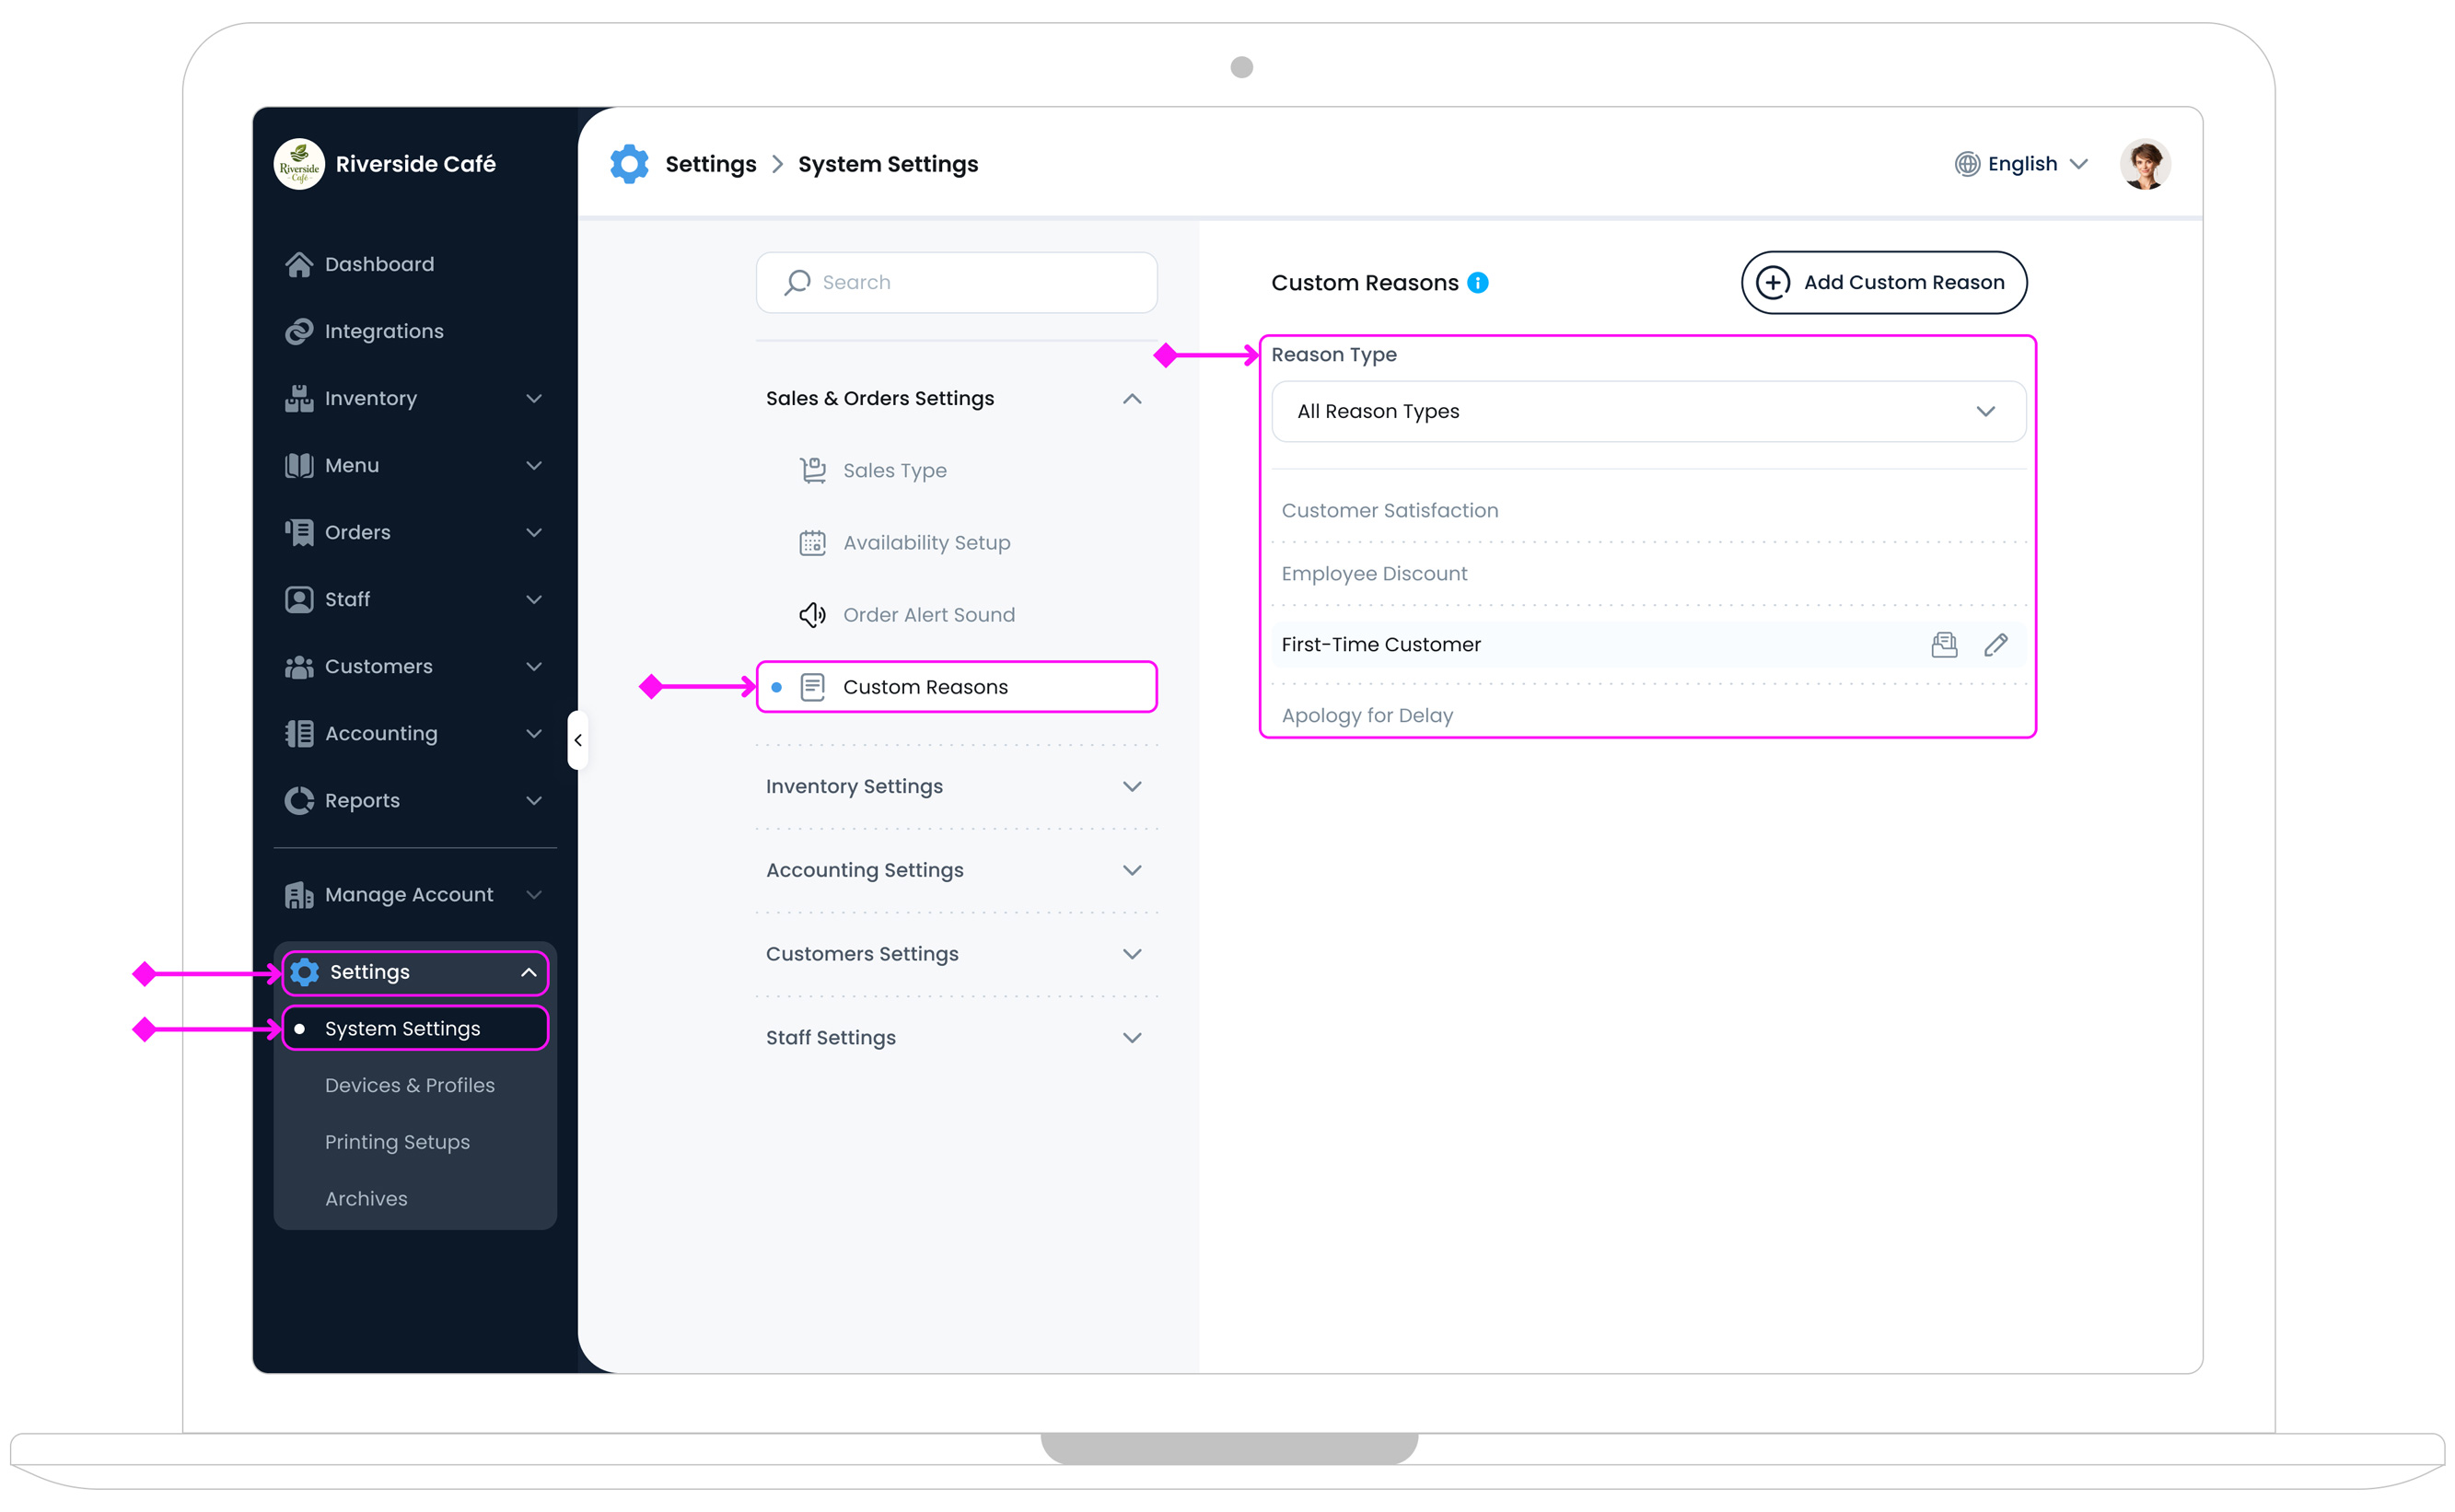
To access Custom Reasons settings, log in to the TechSuite portal and go to Settings > System Settings from the sidebar. Next, under the Sales & Orders Settings section, click Custom Reasons. This page will show any existing reasons in your system and give you the option to add new ones.
Adding a New Custom Reason
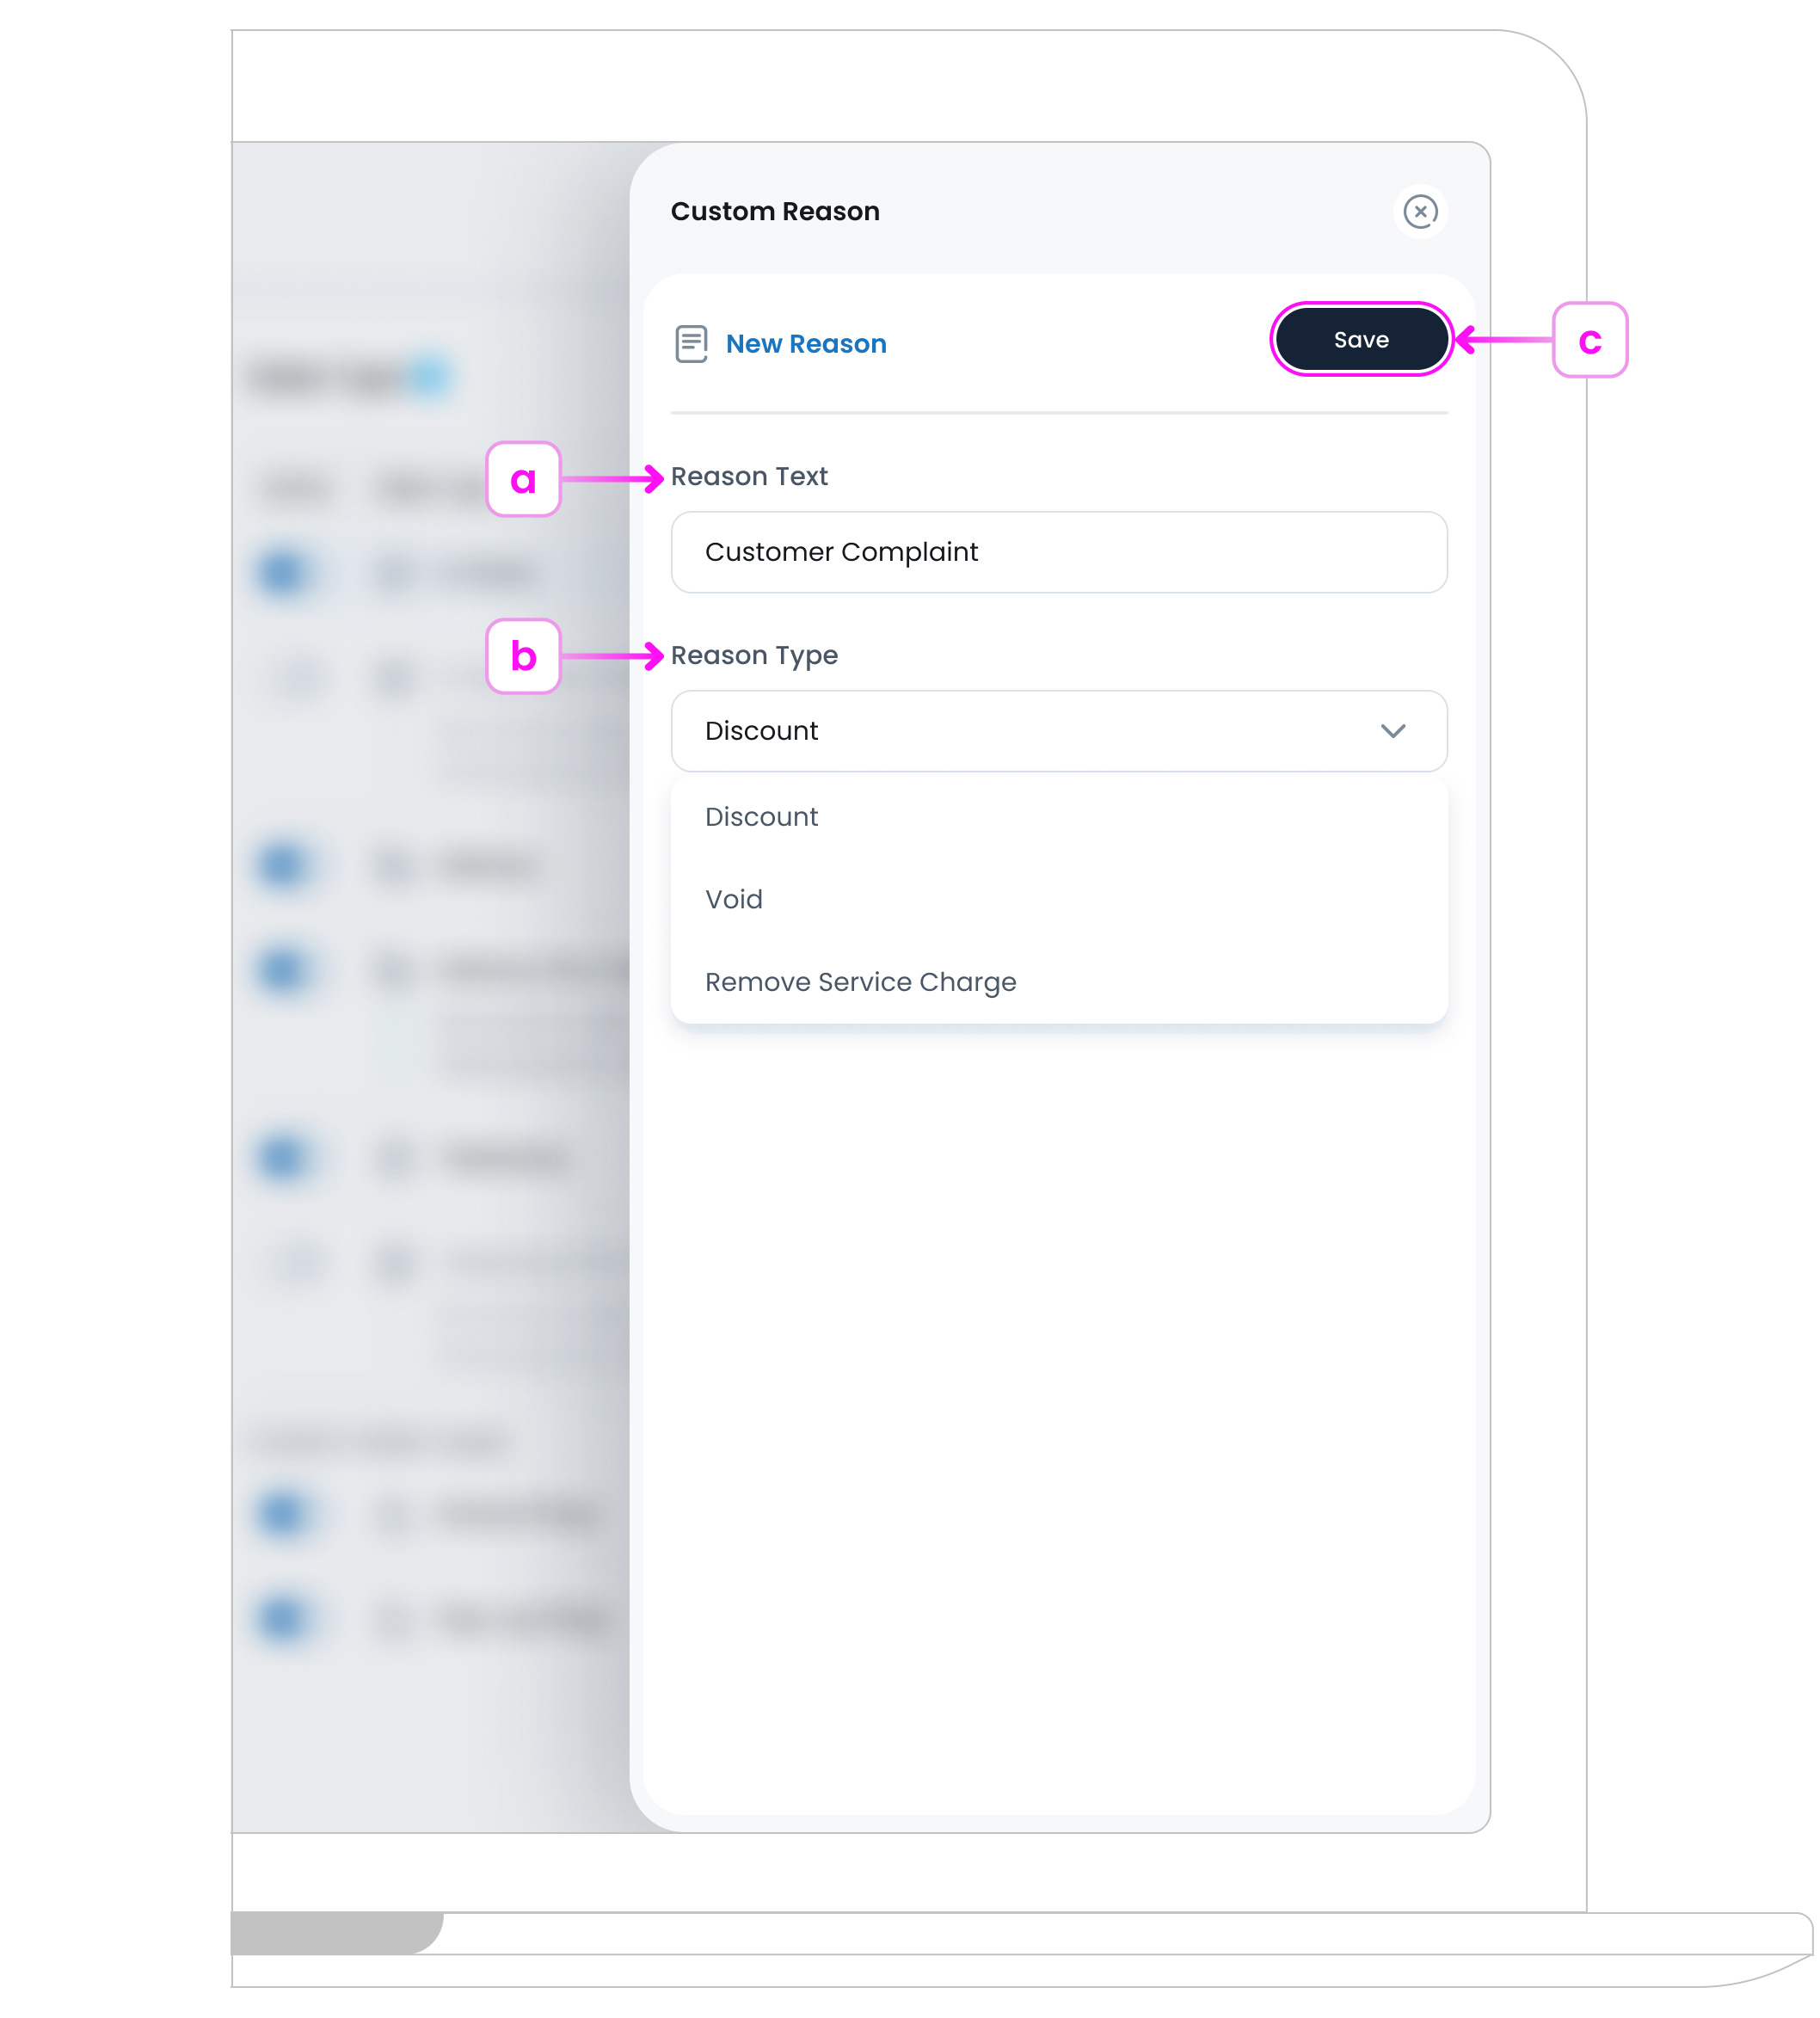
To add a new custom reason, go to the top-right corner of the Custom Reasons settings page and click the Add Custom Reason button  . This will open the setup form where you can configure all the key details.
Here’s how to create and configure a new custom reason:
a. Reason Text
Enter a short, clear explanation that staff can quickly select.
Examples:
Customer Complaint, Incorrect Order, Remove Service Charge
b. Reason Type
Choose the action this reason applies to, such as:
- Discount: For manual price reductions
- Void: For removing items from an order
- Remove Service Charge: When a service fee is waived
c. Save the Reason
Once all fields are filled in, click Save . Your reason will now be available as a selectable option when staff perform related actions in the POS.
Pro Tip
Keep reason texts short and specific. This makes them easier to select during busy service and improves clarity in reports and action logs.
Custom Reason Page Overview
This page helps you manage the Custom Reasons your staff can select when applying actions like discounts, voids, or removing service charges during order processing. These reasons improve transparency and reporting across your business.
All reasons must be created manually there are no default entries. You can create as many as needed and assign them to specific action types.
a. Reason Type Filter
Located at the top of the table, this dropdown lets you filter the list by reason type (e.g. Discount, Void, Remove Service Charge) to help you quickly find specific entries.
b. List of Custom Reasons
Below the filter, you’ll see all the reasons you’ve added. Each one shows its name and associated reason type, helping you easily find and manage entries.
c. Understanding Custom Reason Rows
Each row contains:

- Custom Reason Name: Displays the name of each custom reason you’ve created (e.g. Customer Complaint, Incorrect Item).
- Edit Custom Reason Button: An edit icon appears when you hover over a row. Click it to open and update the reason’s name or type.
- Archive Custom Reason Button: An archive icon appears when you hover over a row. Use this to delete the reason from the list while keeping a record of it in your system.
What’s Next?
After adding Custom Reasons, staff will be able to select them when removing service charges or applying refunds. This keeps your order history clean and helps explain actions in reports and audits.