Customers on the POS App
The Customers section on the TechSuite POS app lets you keep track of your entire customer base directly at the till. From here, you can add new customer profiles, view existing records, and update details when needed.
Quick Customers Summary (Full article in Customer Management)
This page covers customer lookups and edits in the POS app on this terminal. For segments, imports, and merge tools, see Customer Management.
To Get Started
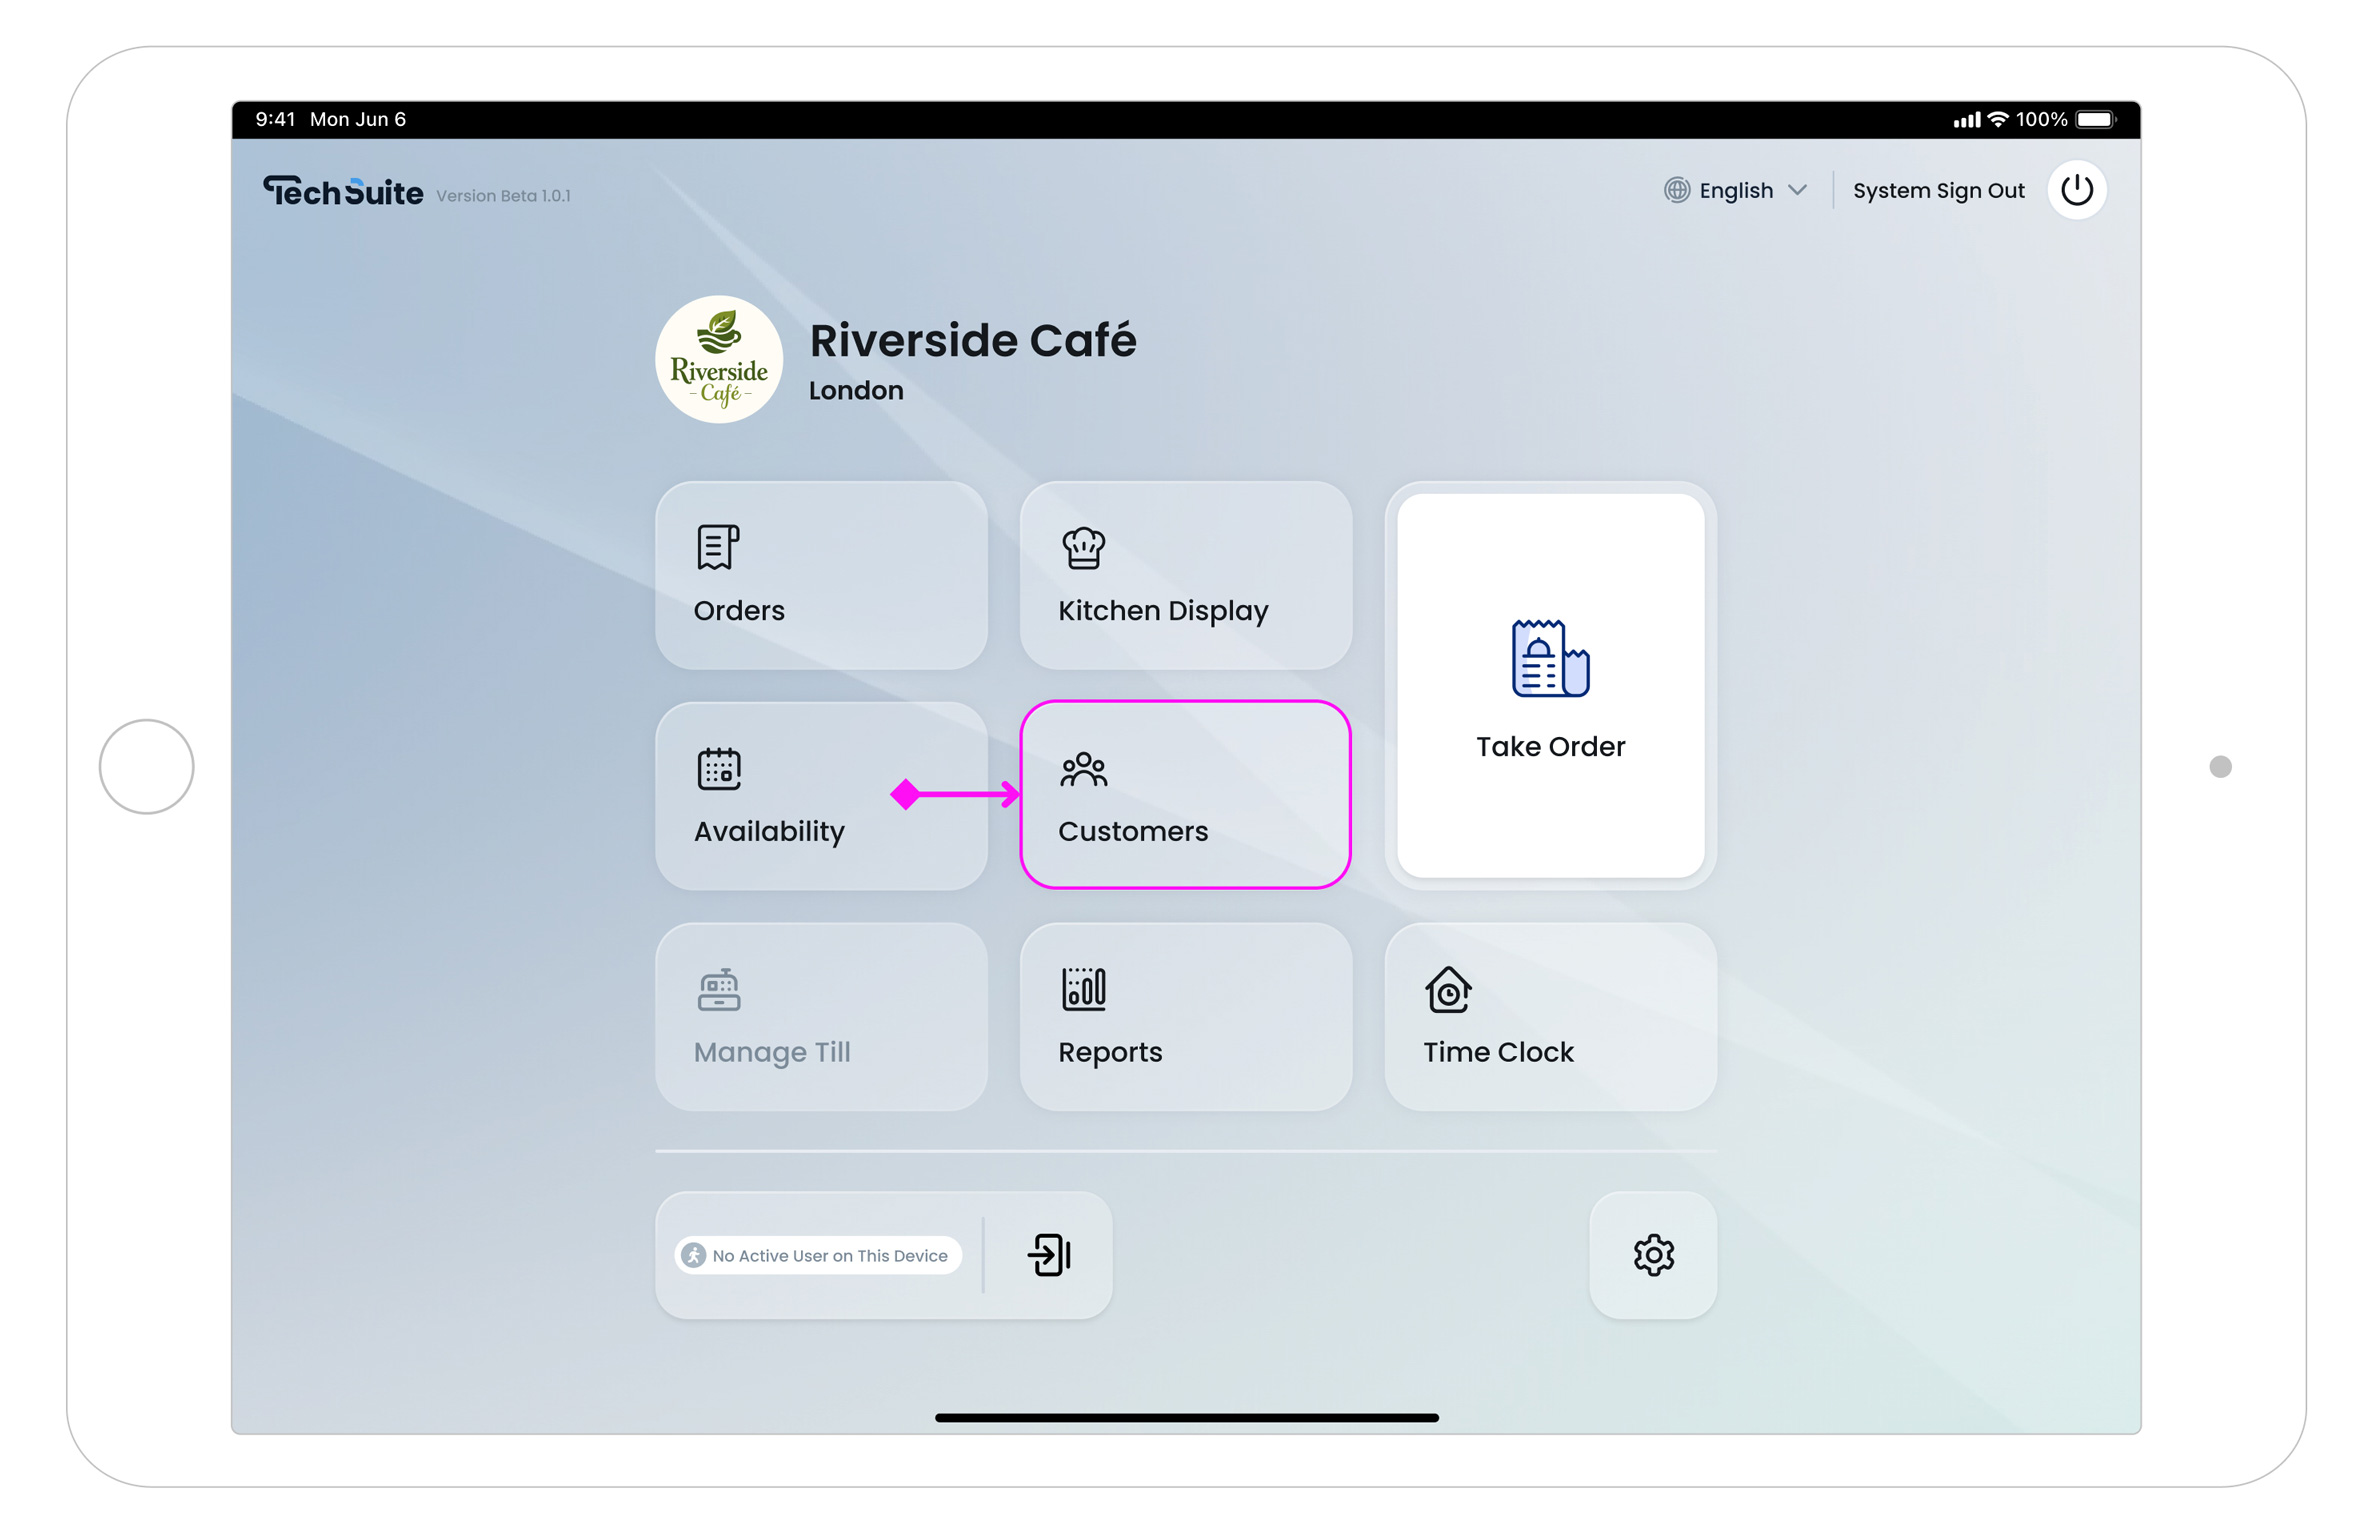
Open the TechSuite POS app, sign in, and tap the Customers tile on the Home screen.
Main Features
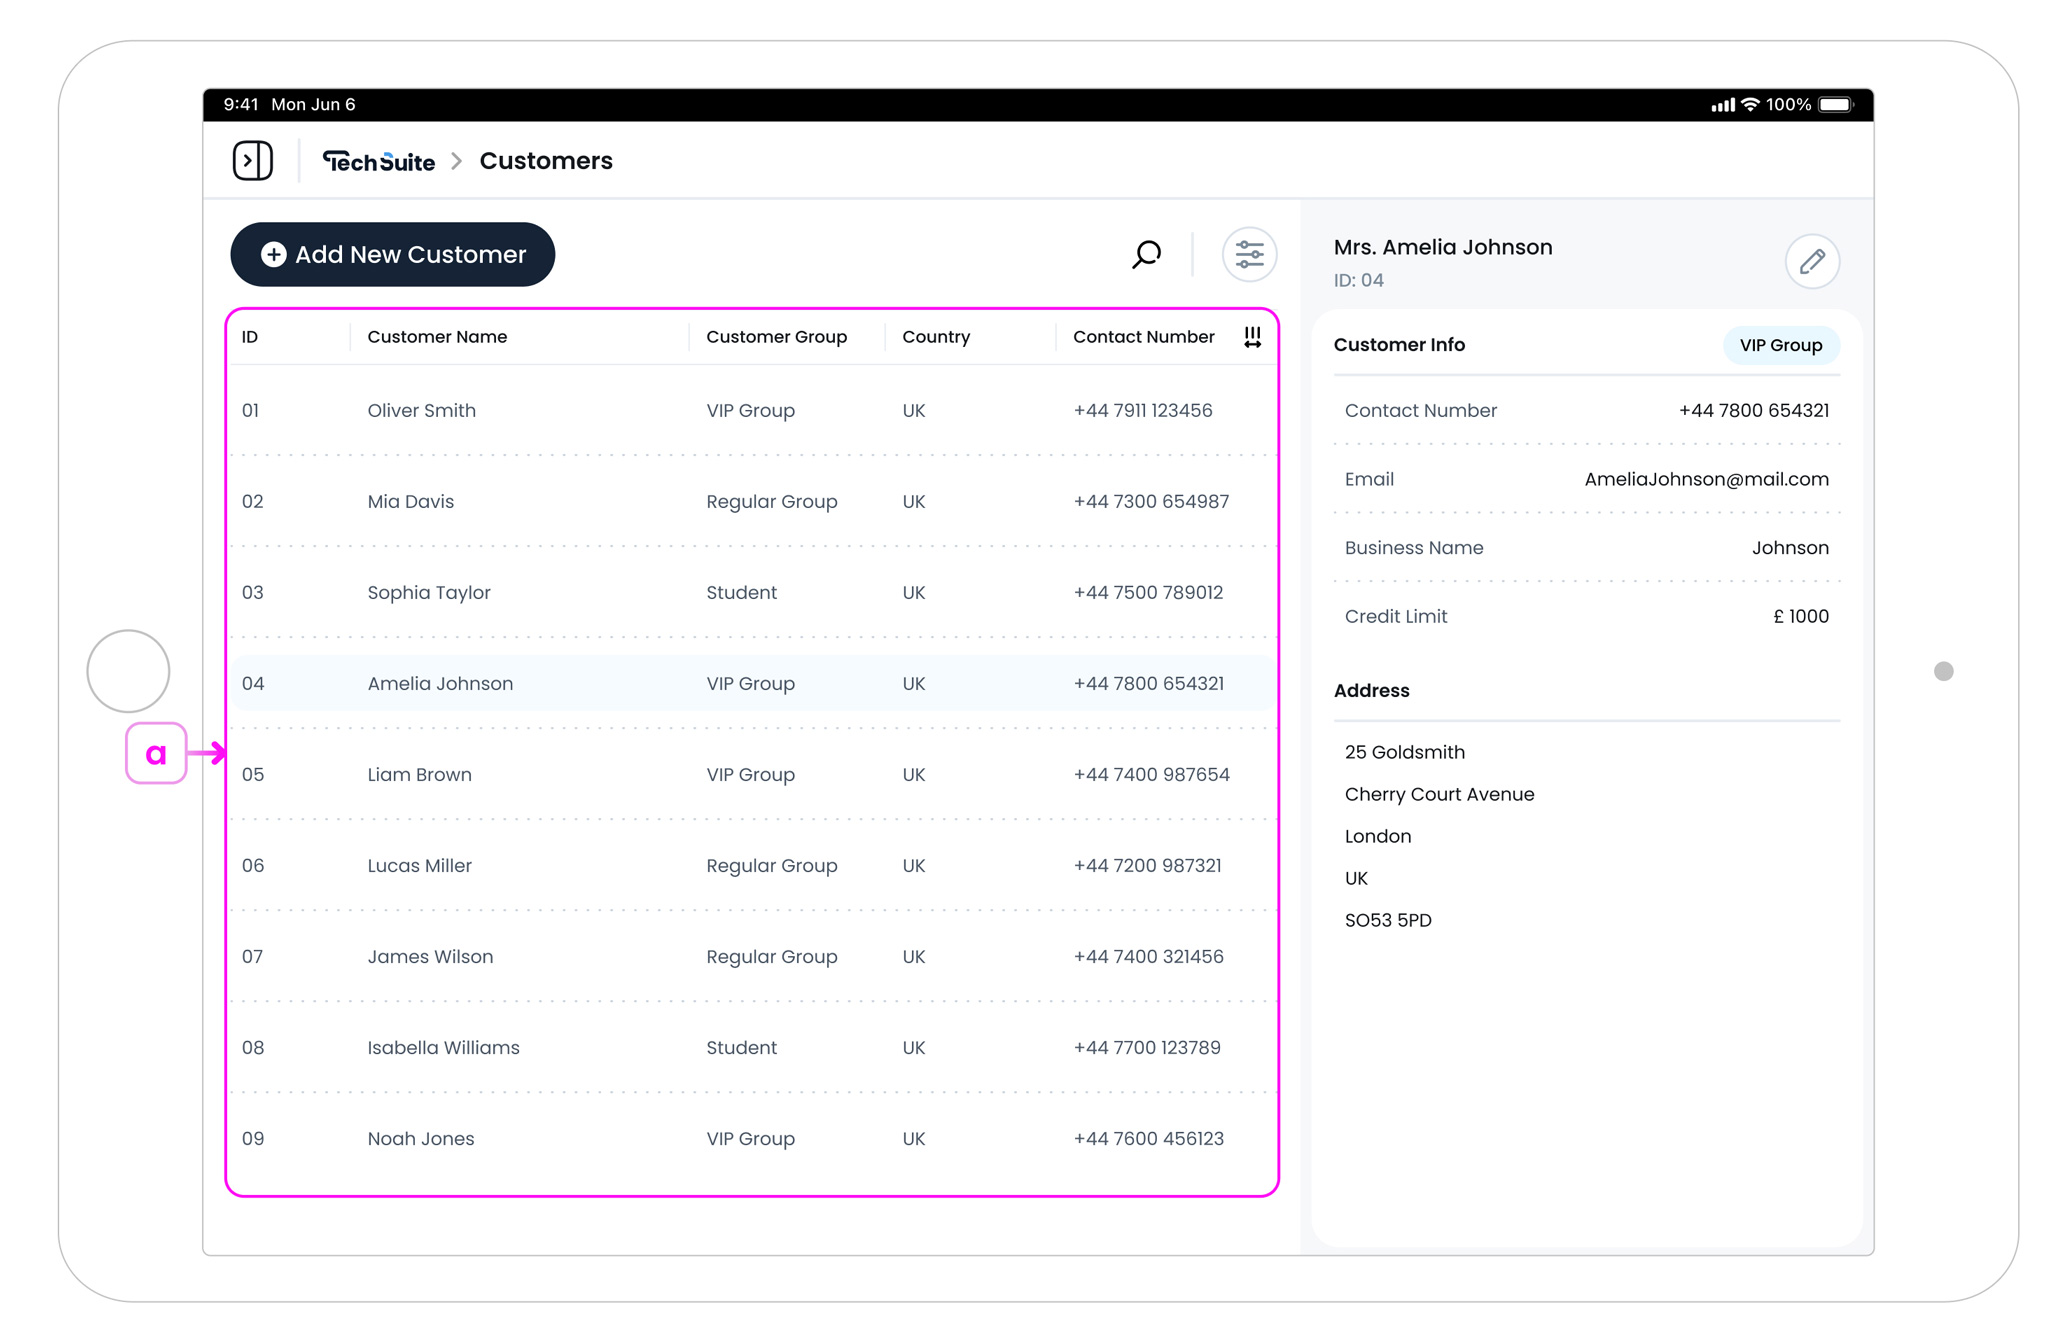
a. Customer List
The customer list shows all saved profiles in one centralised table. Each entry displays key information such as customer name, email, and group type (for example, General, VIP, Student). For more details see Customer List Page Overview.
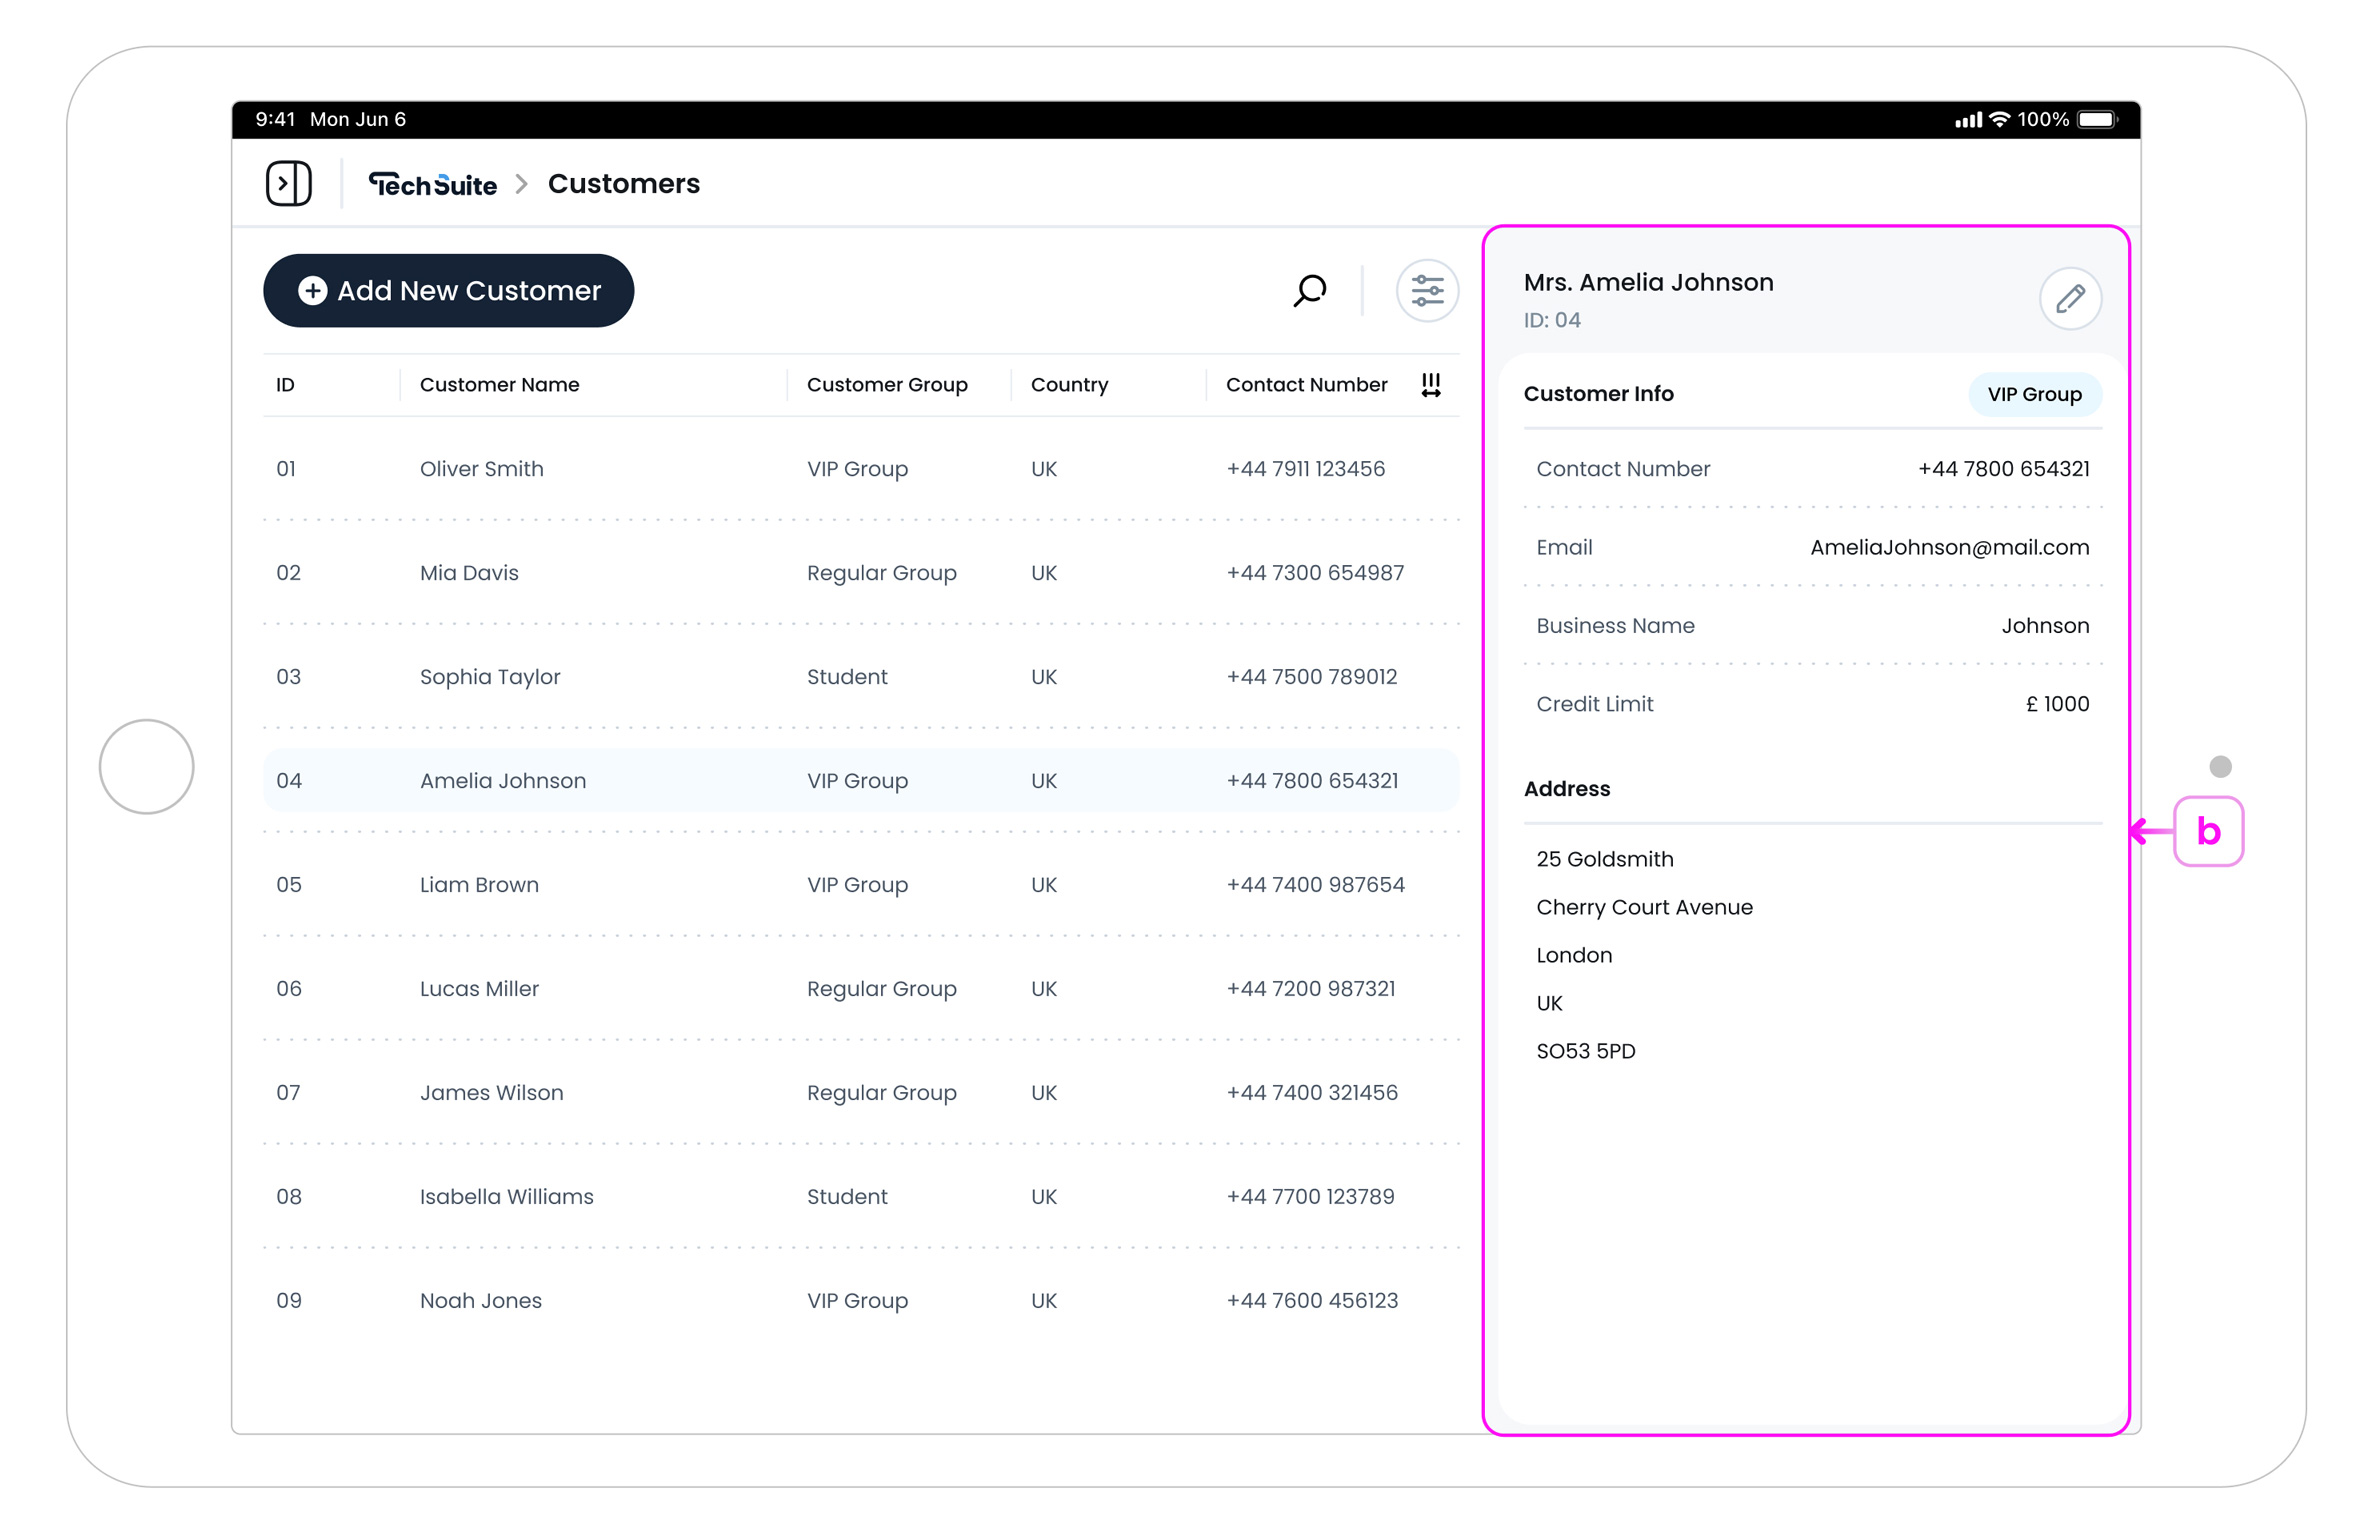
b. Customer Info Panel
When you select a customer, a panel opens on the right side of the screen with detailed information. This includes their email, contact number, business name (if applicable), customer group badge, credit limit, and ID. Use this panel to quickly check details before processing an order.
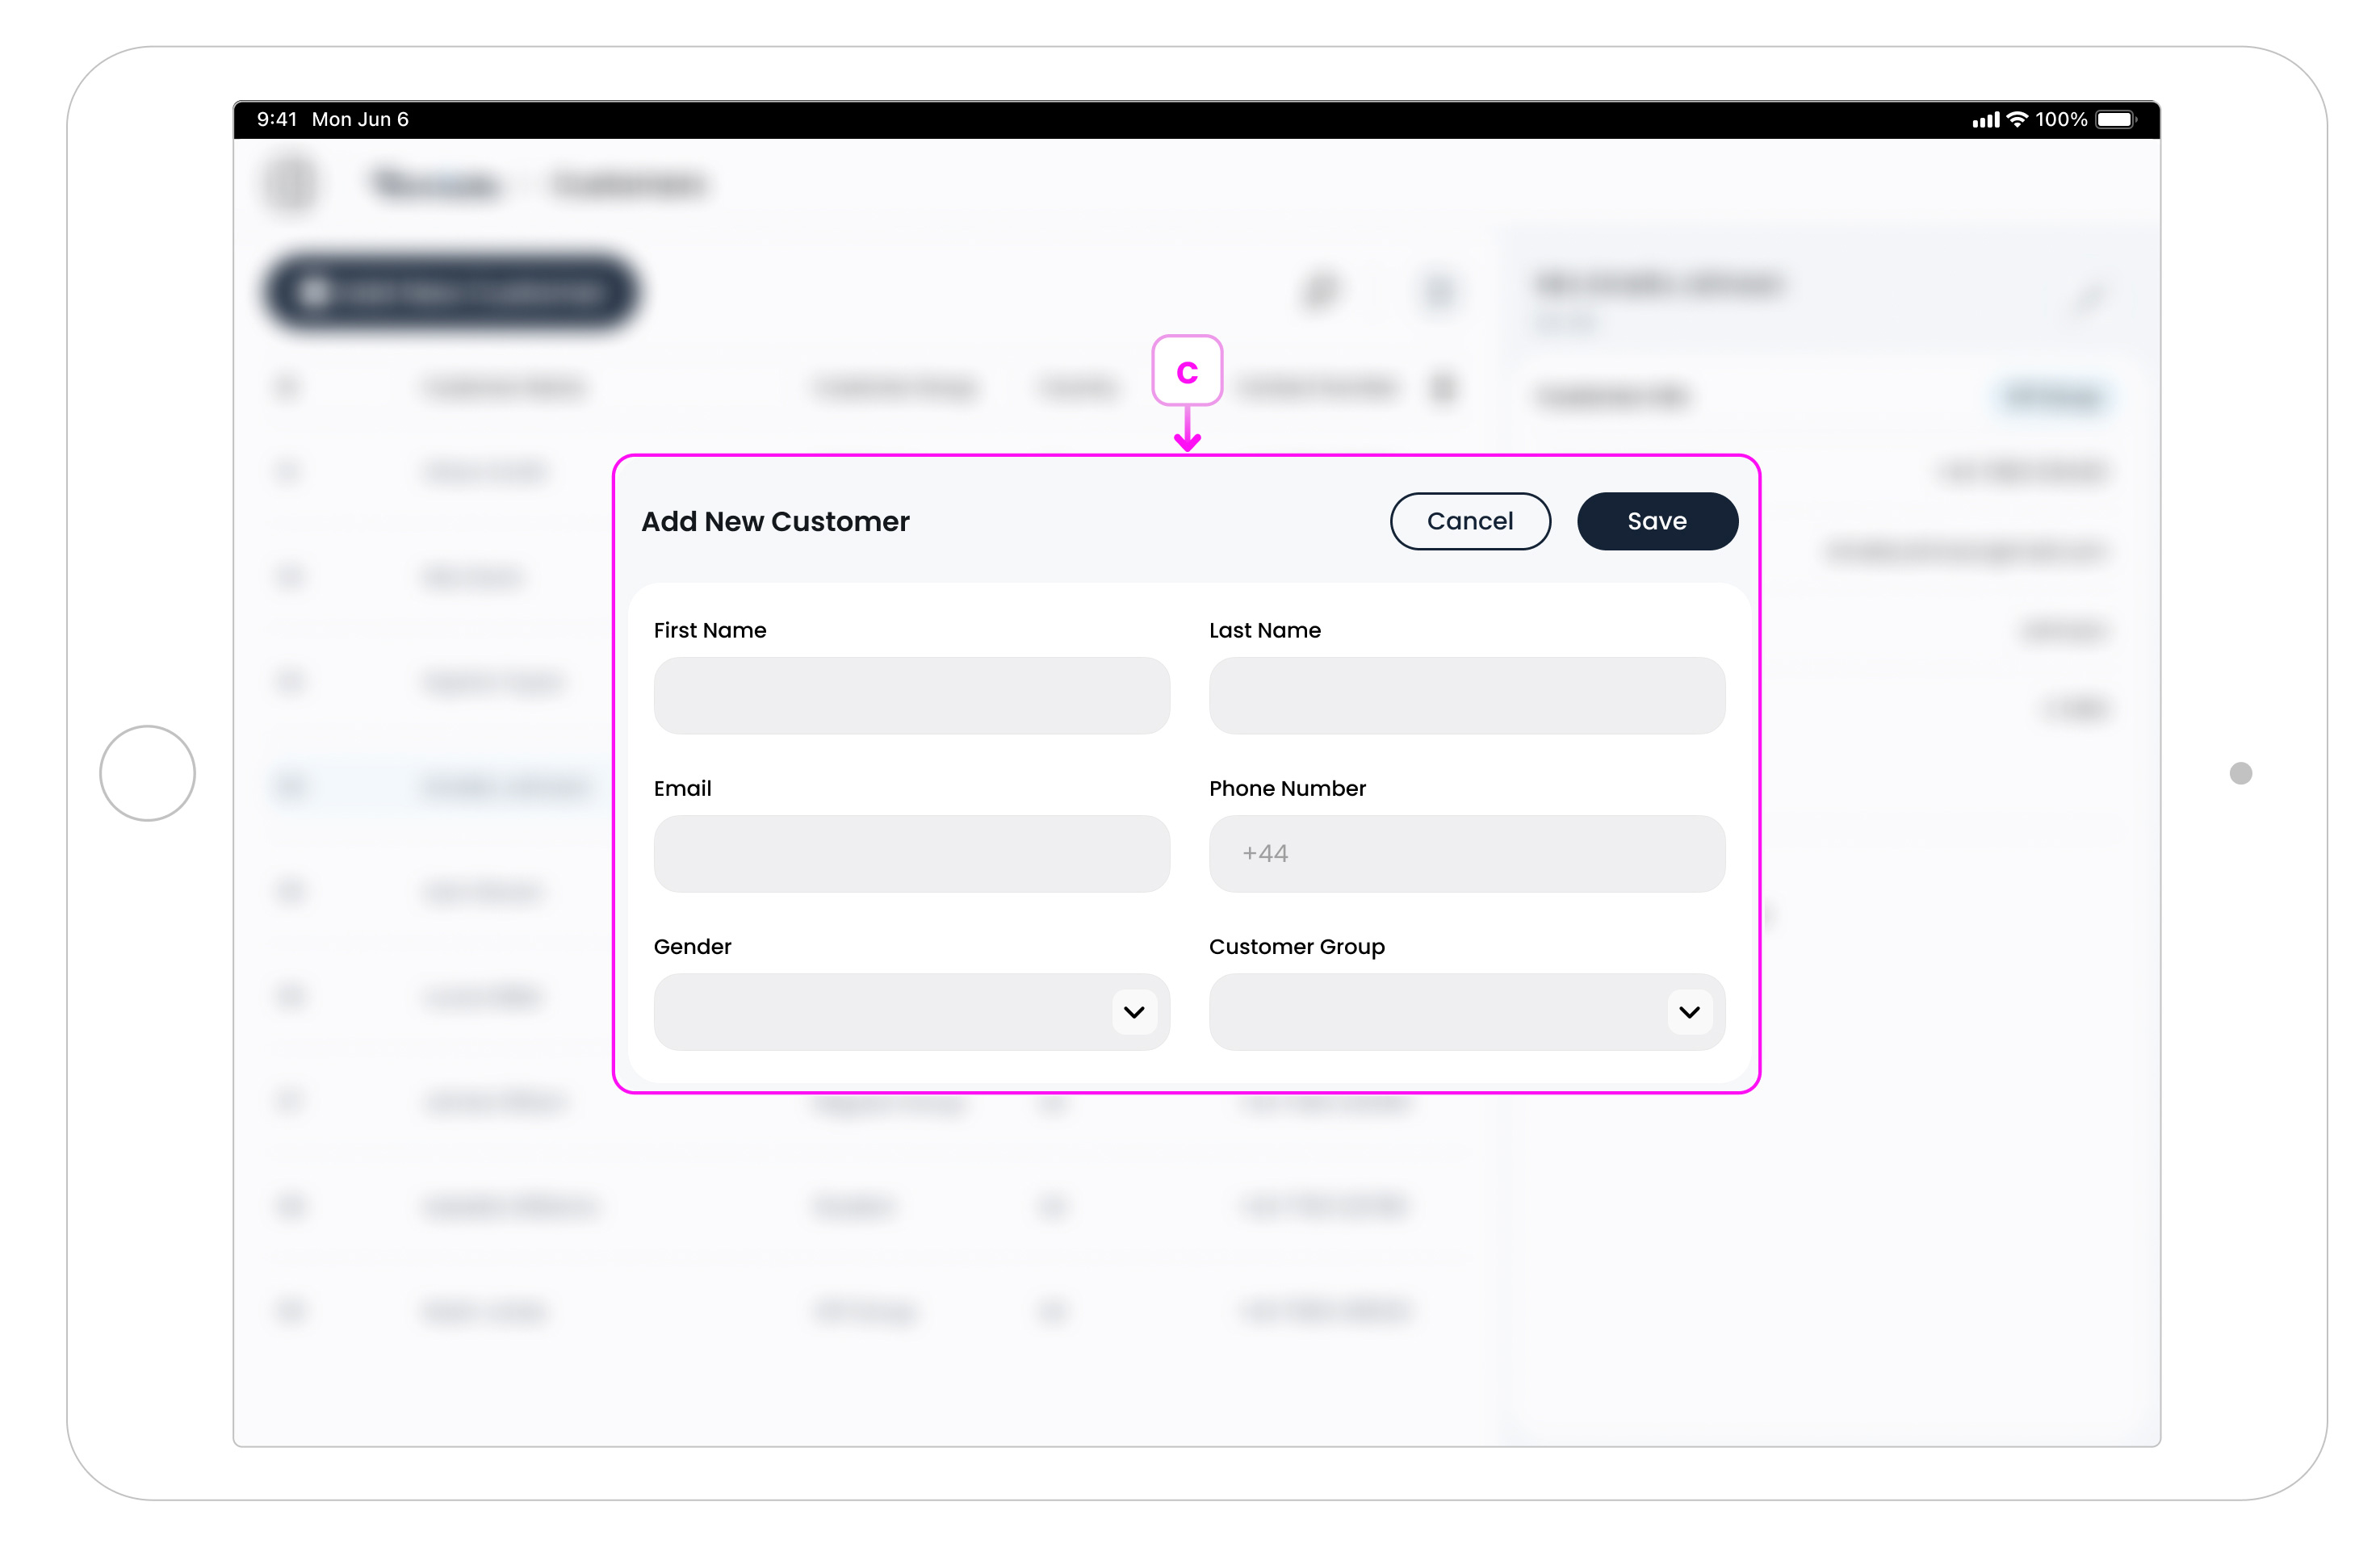
c. Add New Customer
Tap Add New Customer to create a new profile. A form appears where you can enter essential details such as first name, last name, email, phone number, gender, and assign them to a customer group. For more details, visit: Add a New Customer.
What’s Next?
To add a profile now, see Add a New Customer. To organise customers, see Customer Groups. To attach customers while selling, see POS Take Order Page Overview. For bulk tools and deeper management, open Customers on the Management Portal.